
Six months later, the final installment of our MAXIMUM ATTACK Scion Tuner Challenge FR-S is finally here. As I sift through the photos I almost can’t believe it’s already been so long, but we’ve had so much fun with the car since completion it’s no surprise that time has flown by.

When we last left off, I was racing home on my lunch break to meet a delivery truck. The precious cargo? Literally a pallet full of Cosworth supercharger goodness.

The parts were very early production parts, bordering on prototype in fact. This is all part of Cosworth’s Stage 2.0 Power Package, which includes a unique cast aluminum intake manifold housing twin intercooler cores. The cores feed water to a front-mounted heat exchanger to stabilize air intake temperatures and provide the coolest air charge possible.

Cosworth really did some trick packaging on this unit, hanging the positive displacement supercharger under the manifold. For me, the coolest thing about this partnership was getting to know the engineers at Cosworth and learning the intricacies of their kit directly from the guys who designed it.

With the supercharger installed, I could finally get on to mounting the accessories like a one-off Raceseng AC delete pulley.

Of course, I also had to install my own Airaid intake system. I designed it anticipating that forced induction kits might route the intake piping to the factory airbox, which meant that it would work with the Cosworth supercharger too.

The Stage 2.0 Power Package also included a Cosworth-engineered ECU tune, plus an EcuTek license and cable. Also pictured is the Delicious Tuning Flex Fuel module which allows the engine to run on any blend of E85.

Since this was so early in development, I also asked my friend Bill from Delicious Tuning to play with the tune, then we shared the data with Cosworth. Bill was eager to get his hands on the first Cosworth-supercharged FR-S in the States, and Cosworth was interested to see what he thought about tuning their system.
A No-Excuse Interior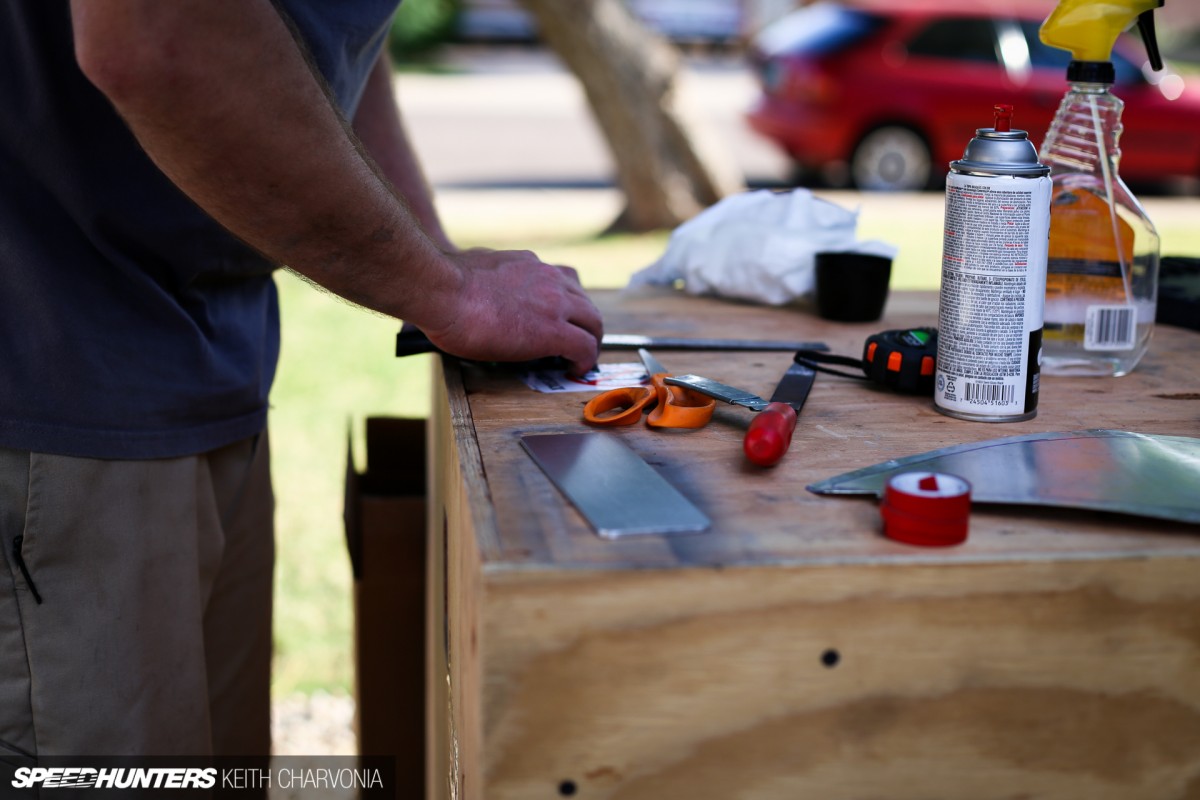
With a project like this, any horizontal surface quickly becomes a work surface. In this case, my friend is working on the crate we built specifically to ship the interior panels across the country to EIS Fibercoating in Logansport, Indiana.

It would have been too easy to gut the interior on the premise that this was a ‘race car’, so I went all-out on the interior. A month prior to this photo, we had to assess in the interior and determine which parts would need to be shipped to EIS for flocking. I was giddy the day the crate returned, and stayed up late to see how the flocked dash was going to look.

To be honest, it made me sick to my stomach to send major parts of the car across the country during such a short build, but the owner of EIS reassured me that the interior panels were in good hands. I put my trust in them, and they delivered!

You guys know I’m obsessive over hardware, so I sourced some black aluminum rivets to install the formed aluminum interior panels to the freshly-flocked plastics.

I felt that if silver rivets were used it would take on too much of a steampunk look. The black rivets blended in and looked more purposeful to my eye.

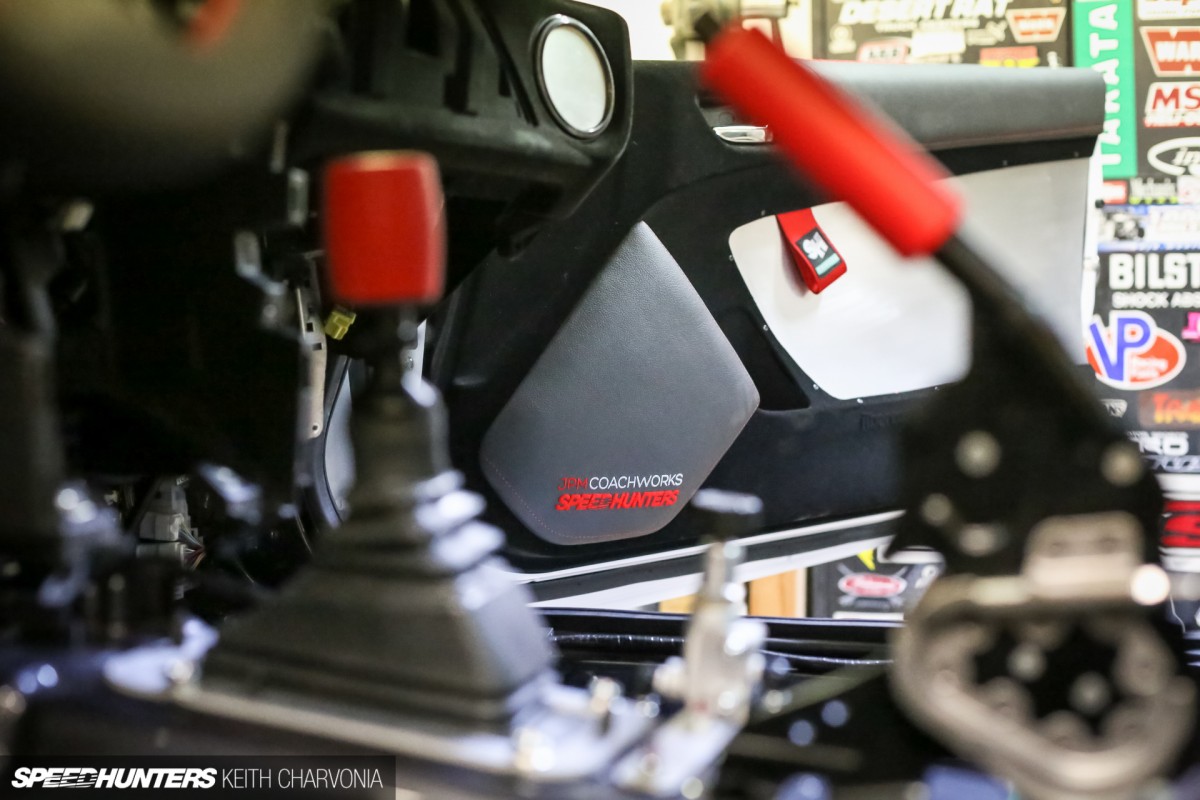
This is definitely the fun stage of any build, when you get to put the final touches on each area of the car. JPM Coachworks upholstered some key parts specifically for our car.

It felt great to snap in the leather-wrapped instrument cluster hood for the last time. Also notice the shaved vents and speakers which blend in with the rest of the flocked dash.
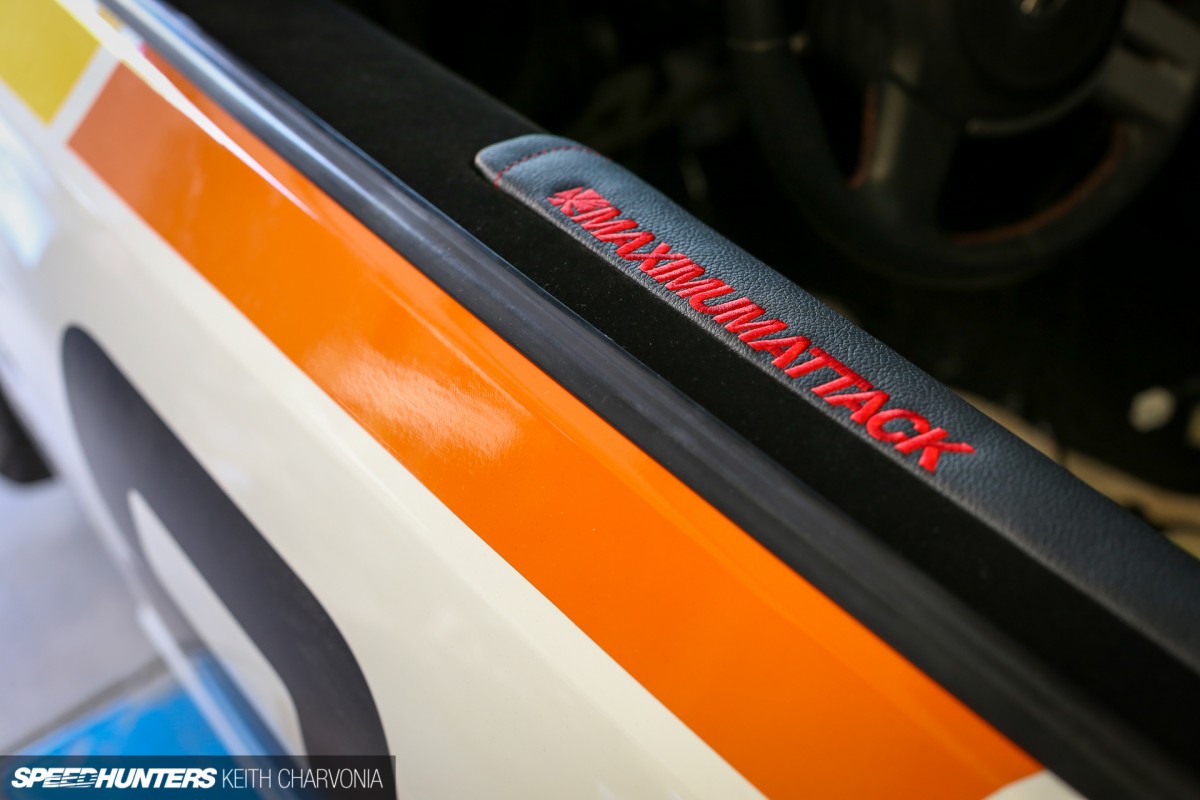
JPM also came through with custom-embroidered pads for the tops of the door panels, of course facing outward since there aren’t any windows!

Colin at Elite Auto Creations thought he was done once the shell was painted straight-out-of-the-tin white, but I then proceeded to send him part after part to be sprayed gunmetal grey.
Another friend helped with the vent block-off plates by water-jetting them from aluminum. Finally, we could glue them into the painted vent bezels and install them for the last time like everything else.
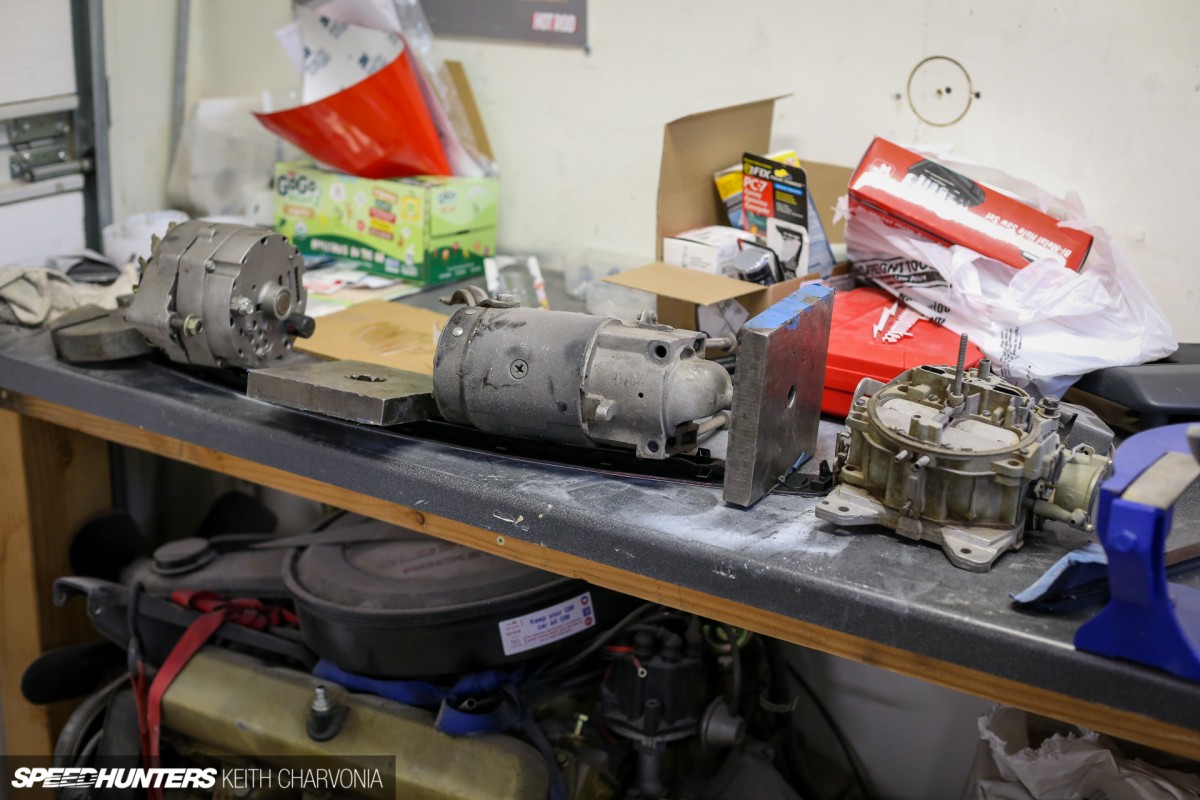
We made an aluminum plate to cover the defrost vent in the dash too. To weight the part down while the glue dried we used engine accessories from the Olds 350 sitting under my bench.

With the additional power coming from the 4U-GSE (FA20), I thought it would be a good idea to install some Stack Pro-Control instruments to keep tabs. We installed boost, oil temperature and oil pressure gauges in the stripped-down center stack of the dash.

Remember the IndyCar warehouse I got to explore for parts? This footrest was one of the treasures I found that day. A little 3M Scotch-Brite brought it back to life.

The fender mirrors got the paint and Scotch-Brite treatment as well. Everything had to tie together, so chrome mirrors just wouldn’t cut it.

In the final hours of the build, Colin was kind enough to come and buff some parts in my garage.

Much like Colin, Andy Blackmore probably thought he was off the hook once the livery design was done. But he would go on to sketch-out the interior and even the seats. Cobra came through with a one-off, low-back bucket just for this build!

To finish off the interior, Grip Royal sent over a perforated leather steering wheel and an extra horn delete plate so I could anodize the SH logo right in the middle. I got a quick-release and hub from NRG to mount the steering wheel. The interior was nearly complete, and I was feeling better seeing it all come together. We had a race-inspired interior, and it was anything but a stripped-out excuse. It was a proper show car interior that fit the race theme perfectly!
Rollers
A huge point of internal discussion during this build centered around the wheels and tires. How would we adhere to a vintage race theme while fitting wheels on a modern car with modern components? Ideas were offered such as running actual vintage wheels, sourcing historic racing tires, and how they should be sized and spaced to pull off the look.

Even with my own similar FR-S to use as a reference, I was still scratching my head. After consulting with Rod, Andy, Nitto and Rotiform, we ended up running customized 17×9-inch and 17×11-inch Rotiform BLQ wheels with brushed step lips and matte gold centers.

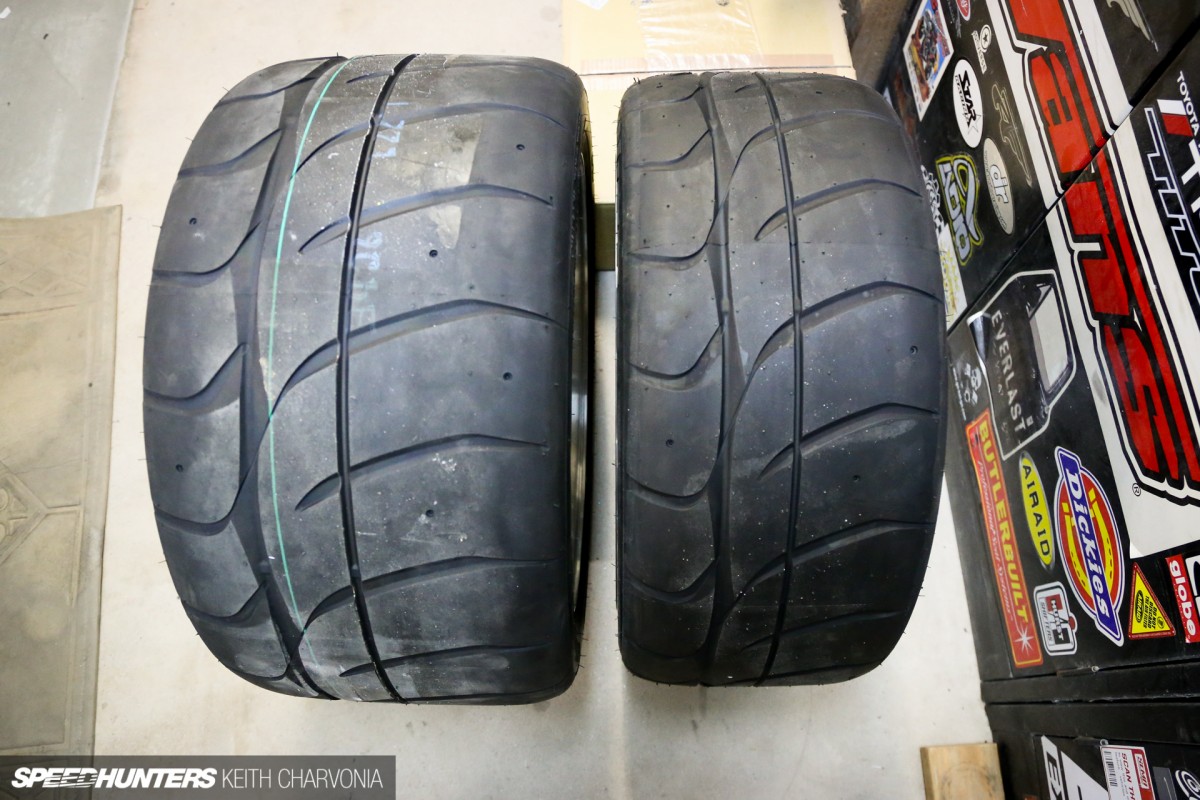
The 11-inch wide rears looked like barrels, and the sticky 315-section tires that were about to be mounted seemed equally nuts for a little car like the FR-S.

We wanted a big and little look though – just like the IMSA cars used to run – so we had to go with the widest Nitto NT01 available!
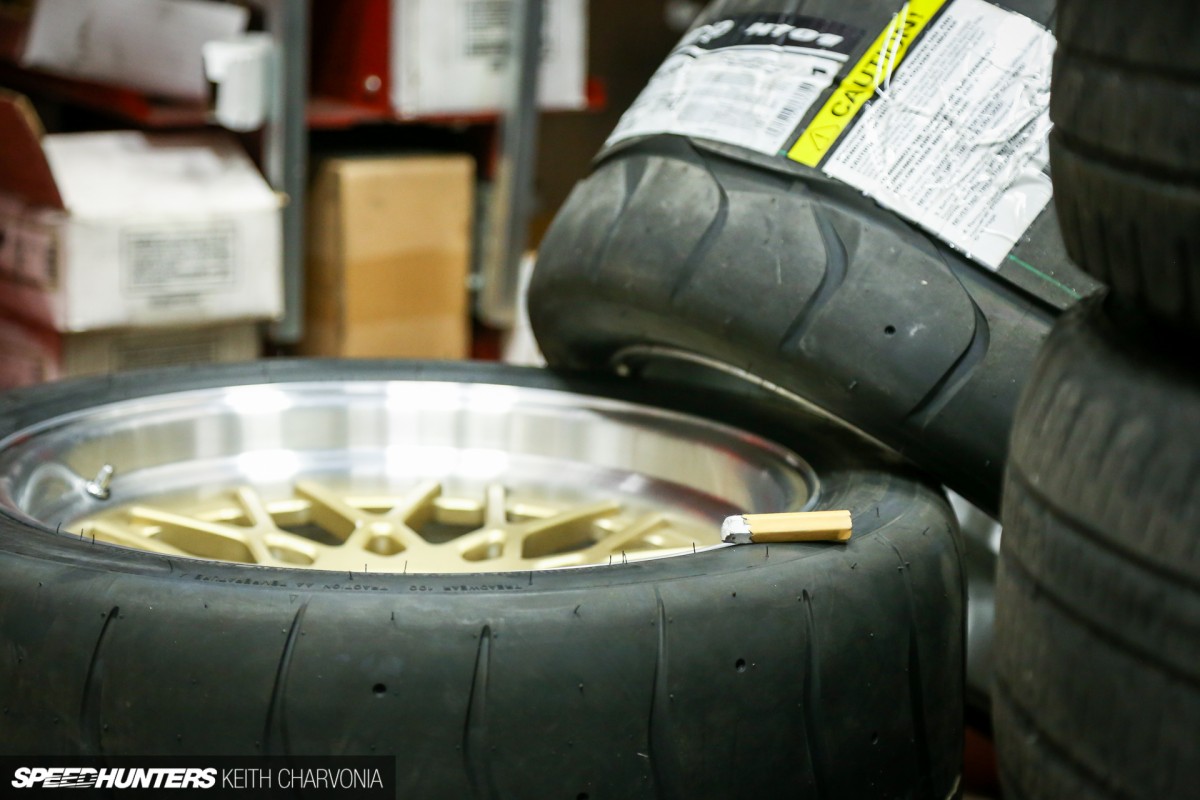
At this point, I have to stop and thank my friend Craig at Discount Tire. If you recall, my wife and I were approaching the due date for our second son around this time, so Craig stayed extra late the night the Rotiforms arrived to mount and balance them for me. I brought my wife in case she went into labor. Obviously.

We didn’t have the baby that night, so I went home and mounted the new rolling stock.

I’ve preached before about choosing your parts combination wisely, and here’s why. I knew the massive NT01s would crowd the KM4SH flares, which meant I needed a coilover that could be run in a short configuration. The answer was a set of RS*R Black-i coilovers that could be threaded down to the exact extended length needed for this application.
Down To The Wire
As we neared the 90-day mark, there were still plenty of tasks to complete. The rear diffuser was a time-consuming project, but it was key to building the car that Andy had sketched. I mocked it up in cardboard, then took it into Solidworks, and finally reviewed the design with a sheetmetal shop to make sure I got the exact part I was after. We also had to remove the muffler and route the JDL single-tip exhaust so it would land precisely where we wanted it.

Because I’m unable to touch anything without customizing it, I asked the sheetmetal shop to engrave ‘SH’ and ‘MAXIMUM ATTACK’ logos on the rear diffuser. I wonder if anyone has ever noticed?

In keeping with the theme of customizing already custom parts, previous Scion Tuner Challenge winner Young Tea connected me with Lexon Exclusive for a tail light sponsorship. Once the chrome lights arrived at his shop Auto Tuned, he then tinted them red and shipped them out to me. Since then, Lexon has decided to offer a limited edition run of the lights in red too.

One task still left on the list at this point was to paint Speedhunters and Nitto logos on the sidewalls of the tires. My friend Travis handled this one afternoon. You’ve seen him in a lot of these photos because he was the guy who was there 90 per cent of the time during this build.

We were never really happy with how the wrap turned out around the emblems on the fender vents, so we peeled the vinyl off and handled it.

This was one of those last minute decisions that just had to get knocked out quickly.

I stubbornly insisted that the vents be functional, so off came the painted fenders for some very careful surgery.

Once it as wall back together though, it was worth it.

To keep the retro look, we decided on a floating headrest above the low-back seat.

Cobra made a matching headrest pad, but it was on me to figure out how to mount it. While I would have liked to TIG weld a vertical support between the harness bar and rollcage, they were already painted and the clock was ticking. I had to think of a solution that could be bolted on and easily fabbed with the tools and materials on hand.

Once again, I got to put my new Light Racing dimple dies into service.

I ended up with a clamp-on, adjustable headrest that tied in with the rest of the interior.

While I fiddled with the headrest, Travis worked on routing the fuel filler. We had already determined the mounting location of the dry break on the rear of the trunk lid.

A box full of HPS silicone reducers and bends allowed us to route the filler neck to its new location.

We bent up an aluminum bracket and Travis carefully TIG welded the IndyCar dry break from the back side.

It was a tricky operation, and it ended up being the last task we completed because it was so daunting. We pulled it off though, with a functional fuel filler that pops through the trunk and looks the part.
Until Next Time
With only a few hours left until the pick-up, I test drove the car around my neighborhood and took a few photos in front of my house.

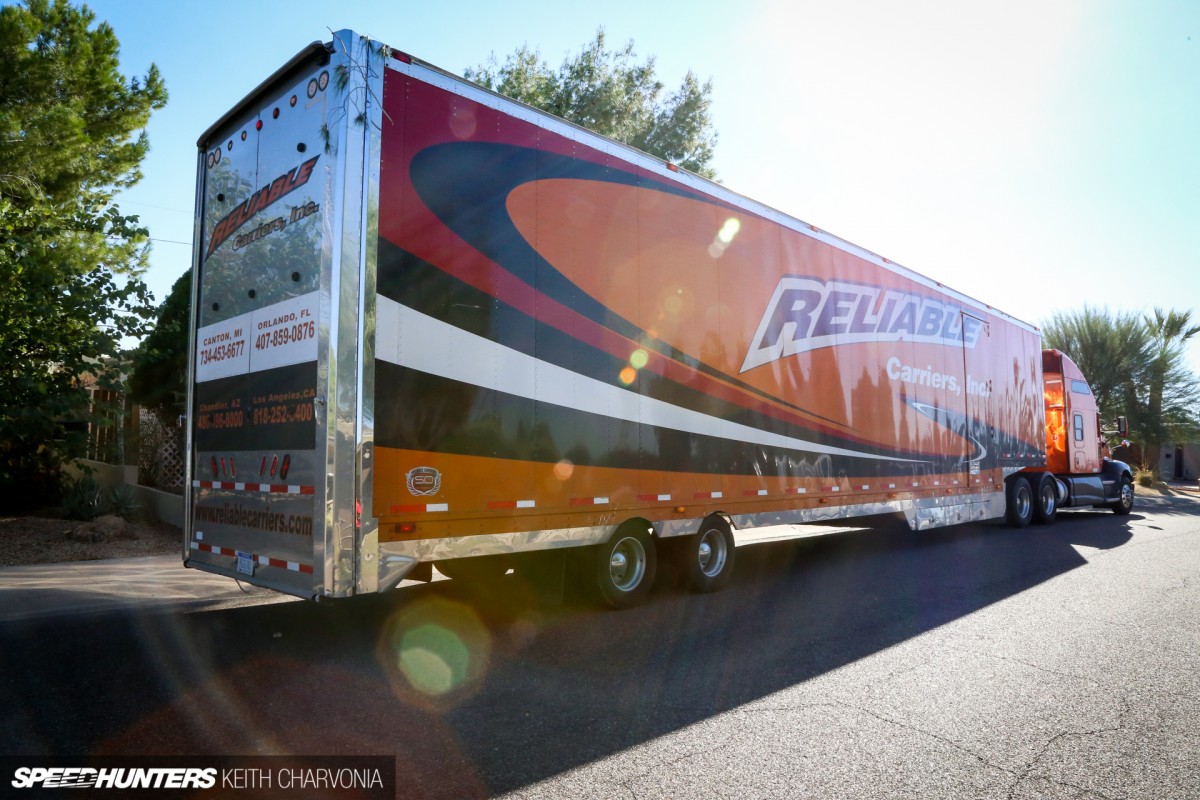
Before long an enclosed transporter arrived and it was time to say goodbye.

Due to logistics, our car was picked up while the other teams were still thrashing. I wasn’t sure how to feel about this – having my car locked inside a trailer while the other teams continued to work – but I had to tell myself that I did my best and built the nicest car I possibly could. I only hoped the judges saw it that way too.
It was time to take a breath and turn my attention to more important things, like having a baby! Mother Nature cooperated and we had the baby the very next day as our Scion Tuner Challenge build was being unveiled in LA. Talk about an unforgettable time in our lives!
Epilogue: Preparations For Leno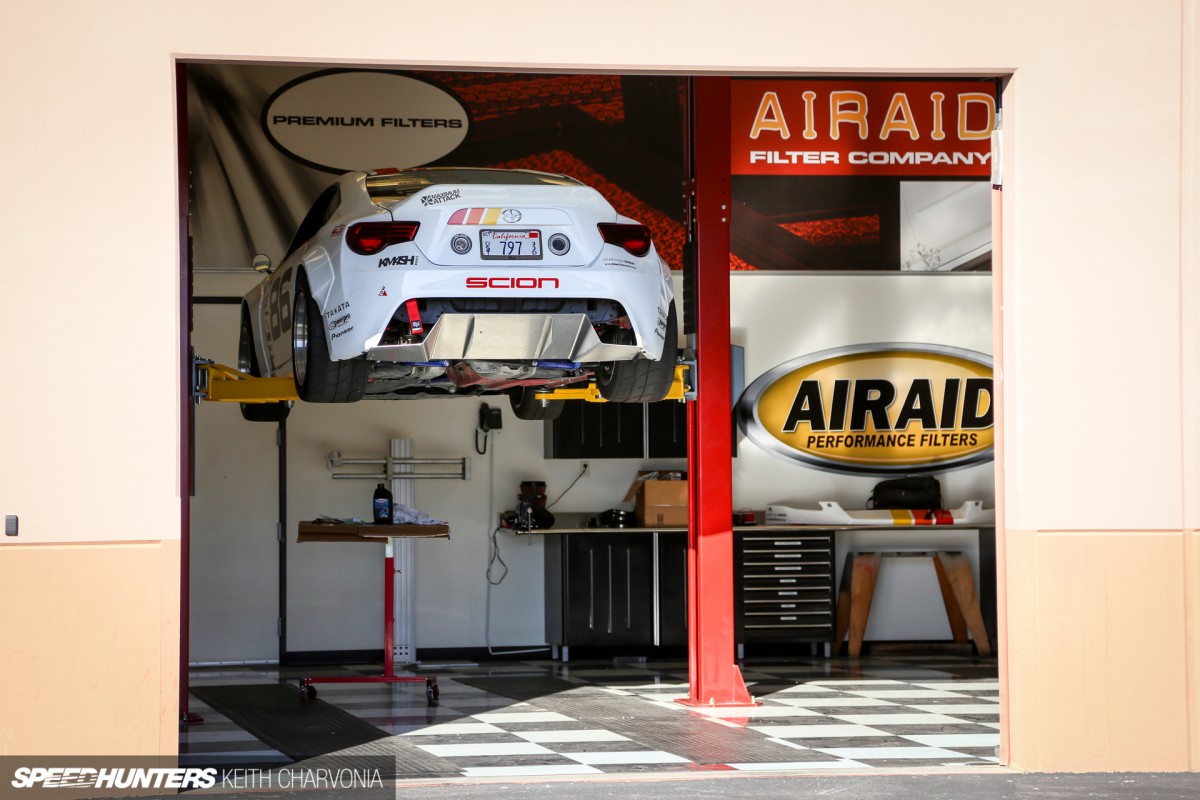
I saw the car again at the SEMA Show while I was in an emotionally and physically drained stupor. It was a 48-hour blur of events, and I think we won the competition somewhere in there. Once I walked away from SEMA, I didn’t think I would get to lay a finger on the build I had poured my heart into again. Then Jay Leno called.
The producers of Jay Leno’s Garage wanted to do an episode with our FR-S, and plans immediately formed to get the car into fighting shape. You have to remember, there’s a big difference between looking pretty on the SEMA Show floor and having a millionaire celebrity thrash a car you built. That’s not to say the car wasn’t functional – in fact I’m proud to say that it was more complete than a lot of things I’ve seen at SEMA – but I couldn’t let Leno drive a car that was 99 per cent. It needed to be all there.

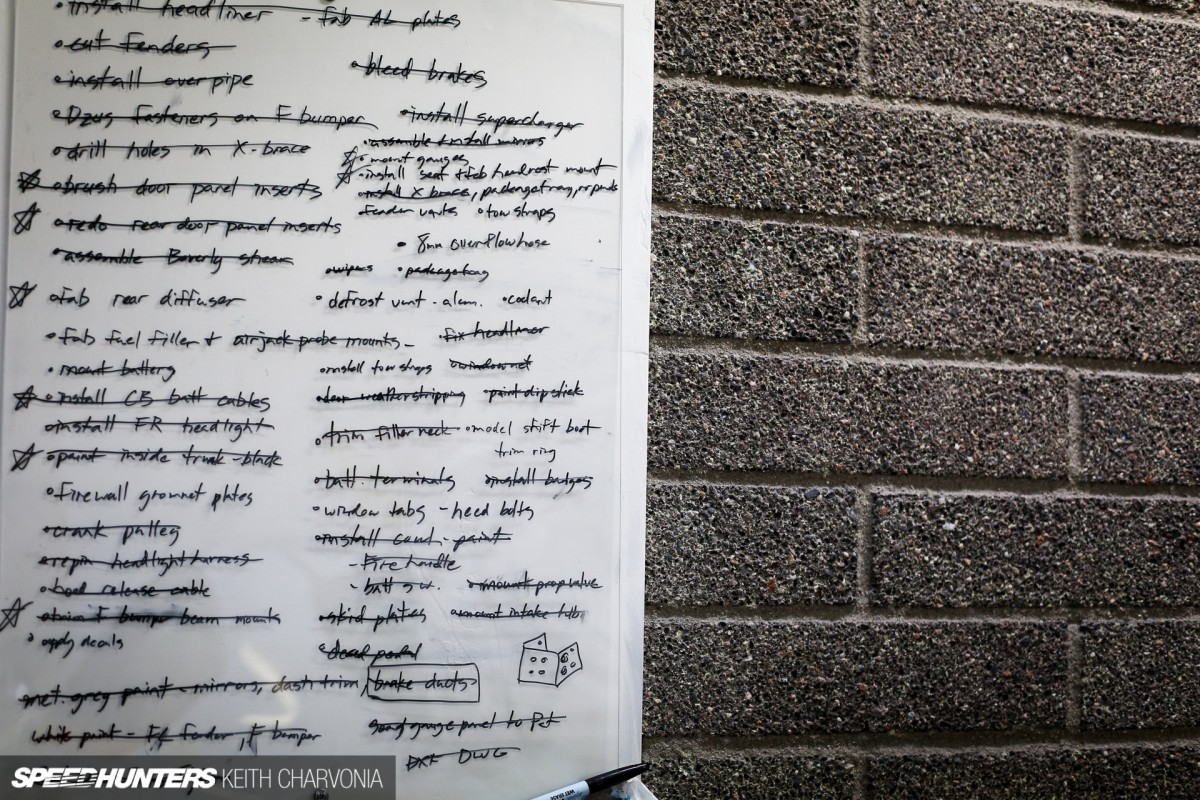
Yet another list was made, and Scion kindly delivered the car to me a week before the filming so I could get it ready.

This is where I’m once again thrilled to be working in the aftermarket, for and with car guys. We essentially spent the week at Airaid working on the project so it would be ready. One of the areas we had skipped over during the build was mounting the intercooler pump and reservoir, so we figure out the cleanest place to stash those items.

I don’t think they look too intrusive hiding back in the corner where the battery used to reside.

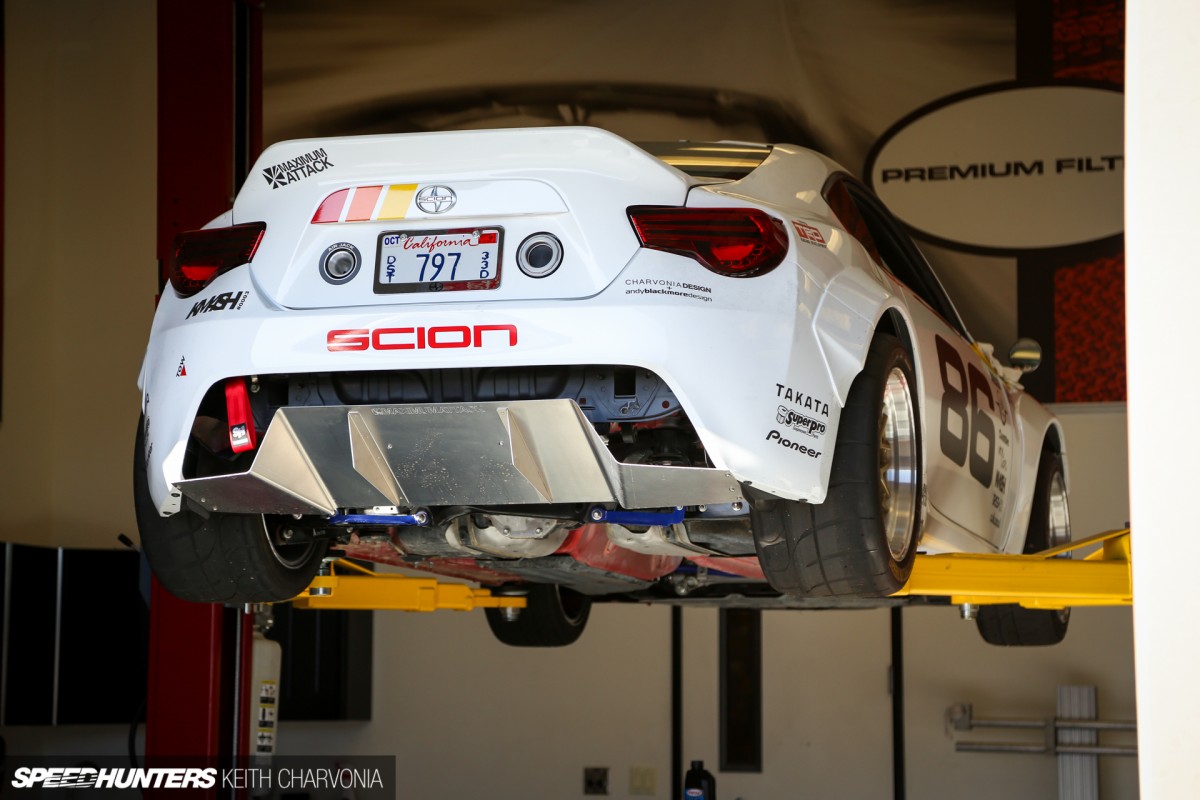
With the intercooler plumbing complete, it was time to rack the car. It’s extremely low though, and a real chore to get on a two-post lift.

I discovered a side benefit of my aluminum diffuser – the ability to see the rear control arms and position a jack with ease.

The JDL exhaust was extremely loud without any cats or mufflers, which was fine for positioning the car at a show, but not so fine when trying to film two guys talking while driving.
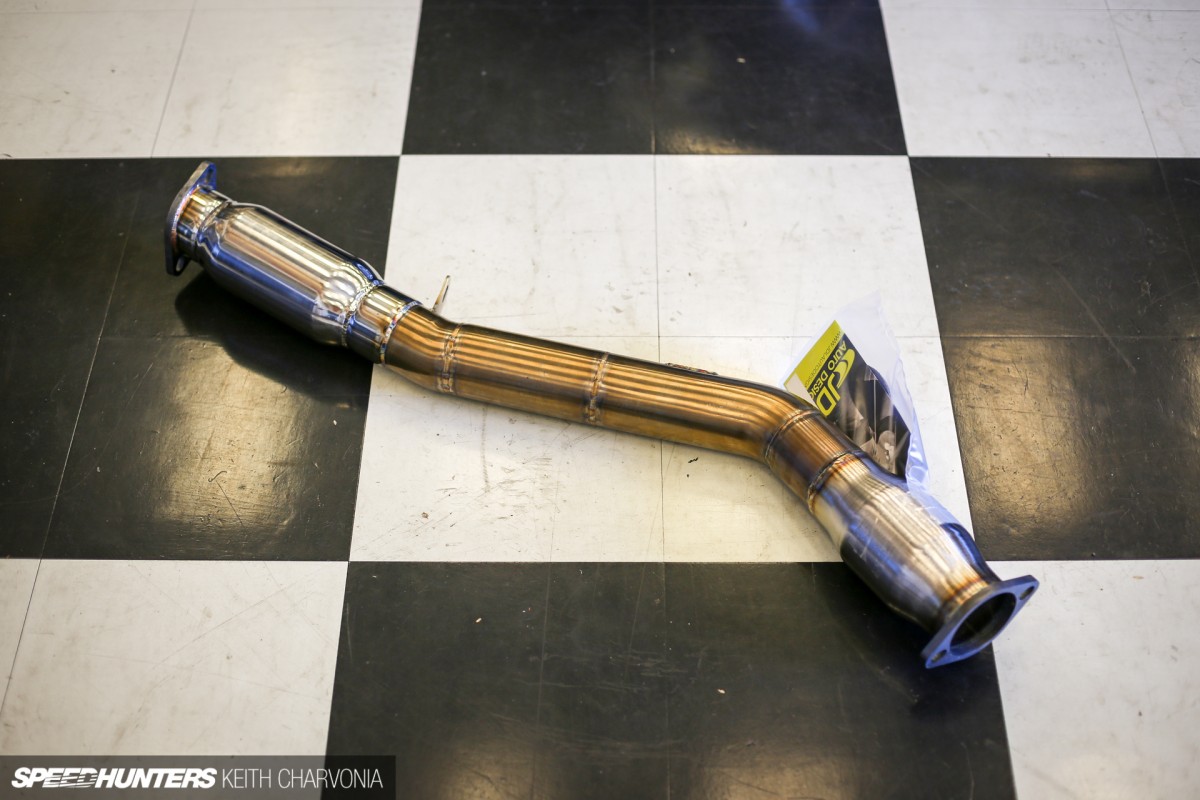
JDL modified the front pipe by adding a high-flow cat and a resonator.

While the FR-S was in the air I also topped off the transmission with some Torco Synthetic Gear Oil that was leftover from the ACT clutch installation on my personal FR-S. We lost a little when hoisting the transmission back into place, so I figured I had better make sure it was full while I had the chance.

The next step was to put the car on the dyno and dial in the tune now that the intercooler was hooked up and the intake air temperatures were stabilized. Click here to hear the dyno pull!

Since Scion let me borrow a manufacturer license plate I was able to drive the car for an alignment. That’s when I quickly realized the gas pedal was too close to the brake pedal and difficult to manipulate.

My favorite sheetmetal shop fixed the issue by welding in a new section which moved the toe loop toward the transmission tunnel and made room for your foot.

A couple of emails later I had a matching second seat to bolt in the car too. I still can’t believe how quickly Cobra could make a seat from scratch and get it shipped from the UK to Arizona!

I went ahead and put a seat slider on the driver’s seat so Jay could find a comfortable driving position, then got to work mounting an additional Takata RACE 4 ASM harness. I had to chase all the threads since the paint had clogged them up.

After the seat and harness install the car was complete and ready for Leno to drive it!
It’s been a fun and unforgettable journey with this little car, and I’m glad to say that it’s not over yet because the car is constantly showing up at events all over the country. You can read about my latest adventure with the MAXIMUM ATTACK FR-S here. Thanks for following the build!
Keith Charvonia
Instagram: SpeedhuntersKeith
keith@speedhunters.com
Feature Image by Otis Blank


OFFICIAL SPEEDHUNTERS SUPPLIERS


It is amazing to see all the small details pointed out. Definitely builds appreciation for the final assembly.
One of the difficulties I faced was the rubbing at lock on the frame behind the front wheels. Nothing the angle grinder couldn't fix. Looks great Keith!
I don't get it are you building this for jay leno ? You keep talking about him
wow, just WOW!!!
Jay wanted to drive the car for his YouTube channel. Its not everyday someone of his status asks to drive and film a car you built. Its kind of a big deal.
you can watch it here:
https://youtu.be/6EIX0muT75s
The proportions of that rolling stock really work. And you even threw in proprietary white lettering.
Well done.
I need to read the previous installments but immediately I have to know....what's the intent with the mis-matched wheel faces. The fronts have a weird faux-disk? Historical detail I missed?
I seen the video but he's buying it ? Or driving it again ? Your customizing a seat for him
@SW1 Toyota racers had them back in the day, we to be honest all the best racers had them =D
You are my favorite
@SW1 They're called turbofans usually, and on the original race cars they were vented in a way that they pulled air in to the brakes, or off the brakes.
What's the purpose of the tow loop?
is it a bird? is it a plane? no it's product placement ...
SubieNate For if it breaks down and needs to be towed.
It was so the two could sit in the car together, initially the car only had one seat
@SW1 D1RGE has it, Rotiform custom machined these BLQ wheels with blocked-off front spokes to emulate the look of the turbo fans on vintage IMSA racecars
Nico Leone This car was built for the Scion Tuner Challenge last year - and it won! Not so long ago, Jay Leno expressed interest in it and it was featured on his Youtube channel. You can watch the full episode here: http://www.speedhunters.com/2015/04/jay-leno-goes-maximum-attack
By far the best customized ToyoBaru ever. Don't think there's any others better than this. The IMSA theme is just perfect!
Too bad most of the parts on this car are one-offs or can't be easily obtained.
I see what's going on now, this build thread is old and the car was built awhile ago... That's why he's still talking about jay leno... All makes sense now.
Yes, quite a bit of prod placement but having owned a couple of EJ engines similar to the FA layout, I love that supercharger setup. Cosworth continues to amaze but what wouldya think from a company that used to be the pinnacle of f1 engine suppliers.
Hi just curious what spray paint did u use on the tire? Do they last? Thank you in advance.
SubieNate They are for cars without a spring on the accelerator pedal, so the driver can return it to the neutral position. I'd guess it is purely cosmetic in this application, still kinda cool.
The amount of details and custom fab work on this is nuts. So much there that you would never know unless you were told. Awesome work, Keith. Really and truly awesome.
I love this car even more every time I see it! I can't believe it runs a 315 tyre!
I think the best thing to take from this build other than Keith and his friends amazing skills and hard work, is that finding a good theme that is right for the car and staying to true to it really pays off in the end.
Well done everyone involved, loved the whole process and can't wait to see what's further along the road.
How is brake feel and effort with that brake booster delete?
absolutely love all the small details that aren't that obvious at first but give the car a lot more character once you know about it.
hmmmm...why not get in touch with Naoto-san (Naoto Sakakibara of Aoshima, he's the export sales manager IIRC) and have this car done in 1/24 form? pretty please? ^_^
Love that car! Time to make a model car version.
You guys should implement an instant share button.. Ive wanted to share stories with my dad through the viewer app more times than I can count on both hands. This is an awesome build im glad ive followeed it, I love seeing so much attention to detail.
nugundam93 That would be awesome! I'll take one.
ErikWilson Effort is higher obviously, but pedal feel is much improved. It's one of the changes that makes this feel way more like an old race car than a brand new Scion.
Jay Leno really liked it. I started to warn him and he was like "yeah, yeah, I've driven plenty of cars without brake boosters."
Wires You're spot on with that. A tight theme from the beginning is extremely important.
LukeEVOVIII And then people want to know why there aren't burnout videos.....
Paddy McGrath Many thanks Paddy. And this was after I had to prune some photos out to keep the stories at a manageable length.
DL119 Just plain white spray paint. I haven't found anything that lasts better than another. If you want them to stay white you have to repaint every so often.
@kek This car probably has $40-50k retail value in FREE product. Of course I'm going to show an image and give the sponsor a link. I did work very hard to make sure the sponsors were relevant and fit within the theme. Scion gives you $15k to build the car. That will barely cover labor and a color change.
@kek This car probably has $40-50k retail value in FREE product. Of course I'm going to show an image and give the sponsor a link. I did work very hard to make sure the sponsors were relevant and fit within the theme. Scion gives you $15k to build the car. That will barely cover labor and a color change.
Every post I feel like I lost an epic game of spot the differences when I saw this car at SEMA. So many small details.
Well done Keith!
jay8393 Wow, thanks! Most of the parts have been customized in some way, but are based on available aftermarket parts you can buy.
We're working on offering the truly one-off stuff under the Charvonia Design brand in the Speedhunters store. This would include the rear diffuser, rear seat delete X-brace, aluminum front bumper beam, aluminum radiator filler neck and performance intake system.
No5ki I had issues on my car with the KM4SH kit rubbing at full lock too, but when I changed the ride height and got an alignment it went away. I wonder if slightly different alignment specs would change it?
DaveT Hopefully you'll see it again. There are two seats now, lets go for a drive.
KeithCharvonia DaveT meet and greet sh fans and get to drive us around too what where and when sign me up!!!!!
It was awesome meeting you Keith at the Peterson Museum meet. I was introduced to you by Young. I was the guy with the R32. The build is so awesome!!
@Jack I remember, great meeting you too! That was the perfect show for this car, so many people appreciated what they were looking at.
KeithCharvonia Your builds are mighty impressive! The attention to detail you have is sublime. Thanks for sharing and I look forward to more of your builds!
KeithCharvonia DL119
Can u tell me the brand and which particular paint? like rubber or metal kinda paint?
DL119 KeithCharvonia I tried Krylon Fusion (for plastic and rubber) and it acted exactly the same as four other kinds of white spray paint. I don't think it matters what you use. They will look great at first but the petroleum in the rubber will turn the lettering brown after awhile.
I f*cking love it! The details and everything, looks awesome. although, imo, id go for different colour combo as this looks so 80s rally, doesnt really stand out from far, the white blends in, only my opinion that desnt matter but i felt like sharing it haha. good job!
#HOLYSHIT
KeithCharvonia DL119
Ok thank you, i was thiking about paint for plastic and rubber too. Do they crack easily?
Sweet! Whens it going to hit the track? And I dont mean drifting.
KeithCharvonia ErikWilson Very cool. I love the way it cleans up the firewall.
I'd imagine there isn't much Leno hasn't experienced from an automotive standpoint at this point. I watched he video on his Youtube channel and you could tell how impressed he was.
UberR34 We already have one at the top of the screen.
KeithCharvonia No keith I expect you to come out of pocket. Sell your house if you have to, but don't you dare try to sell out.
d_rav KeithCharvonia DaveT plane ticket group buy?
KeithCharvonia jay8393 I'm still of the opinion that those fender mirrors are the best touch. Really brings out the vintage feel.
DL119 KeithCharvonia Not that I have observed, the only real issue is that they lose the white color after some time.
carmaniac KeithCharvonia Wow, thanks for the kind words!
This is my absolute favourite ZN6. Please, please, please bring it to the UK so I can see it in person
KeithCharvonia No5ki Got new tires with a less square sidewall and rubbing is gone. Went from BFG Comp Sport 2 to Michelin PSS. Any idea when you're going to start mfg/selling that diffuser? I've been looking at the Driveway labs ones, but I like how yours works with the "Diffuser" delete.
I want this
No5ki KeithCharvonia Yeah it only takes a small change to make it rub or not rub,
Hold out for the Charvonia Designs diffuser. We are actively working on getting it released for the Speedhunters store. Shoot me an email and I'll add you to the list for the first batch.
the car was very good
really really like to see the car that shiny new car fits like made for walking trailsthe car was very good http://utamadomino.com/app/img/peraturan.html" rel="dofollow" target="_blank">http://utamadomino.com/app/img/peraturan.html and very fast http://utamadomino.com/app/img/jadwal.html" rel="dofollow" target="_blank">http://utamadomino.com/app/img/jadwal.html mix of colors http://utamadomino.com/app/img/promo.html" rel="dofollow" target="_blank">http://utamadomino.com/app/img/promo.html from which to http://utamadomino.com/app/img/panduan.html" rel="dofollow" target="_blank">http://utamadomino.com/app/img/panduan.html make want pobud http://utamadomino.com/ see hatnya http://dokterpoker.org/app/img/peraturan.html" rel="dofollow" target="_blank">http://dokterpoker.org/app/img/peraturan.html kecepatanya http://dokterpoker.org/app/img/jadwal.html" rel="dofollow" target="_blank">http://dokterpoker.org/app/img/jadwal.html was very nice ,http://dokterpoker.org/app/img/promo.html" rel="dofollow" target="_blank">http://dokterpoker.org/app/img/promo.html suitable for a "http://dokterpoker.org/app/img/panduan.html" rel="dofollow" target="_blank">http://dokterpoker.org/app/img/panduan.html sharp bend http://dokterpoker.org or not sharp I guess motorists http://633cash.com/Games like this is http://633cash.com/Pengaturan" very skilled in the speed I hope I can membilinya someday will whether http://633cash.com/Daftar http://633cash.com/Promo there are http://633cash.com/Berita new cars http://633cash.com/Livescore are better I http://raksasapoker.com/app/img/peraturan.html" rel="dofollow" target="_blank">http://raksasapoker.com/app/img/peraturan.html 'll wait for it , with a stylish car classic http://raksasapoker.com/app/img/jadwal.html" rel="dofollow" target="_blank">http://raksasapoker.com/app/img/jadwal.html style I http://raksasapoker.com/app/img/promo.html" rel="dofollow" target="_blank">http://raksasapoker.com/app/img/promo.html also like http://raksasapoker.com/app/img/panduan.html" rel="dofollow" target="_blank">http://raksasapoker.com/app/img/panduan.html to see would be http://raksasapoker.com/ whether there is a http://yakuza4d.com/peraturan" rel="dofollow" target="_blank">http://yakuza4d.com/peraturan car that is http://yakuza4d.com as fast and forius http://yakuza4d.com/home like in the "http://yakuza4d.com/daftar movie , the car very http://yakuza4d.com/cara_main good car http://yakuza4d.com/hasil designed a way apparently hopefully http://yakuza4d.com/buku_mimpi there will be new cars more good and the price is quite pantastis then chances are I can membilinya the same as you have at this time