In our first installment of Project Galaxie I introduced this bagged and flamed Ford but wasn’t sure I’d get the chance to work on it. I was supposed to only have the car for a week to give it a shakedown and let the owner know what it needed, but it actually hasn’t left my possession since. Once I got a chance to meet with the owner he decided to have some of the work done that I had suggested. Turns out the same things that bugged me (and many of you) were turn-offs for him as well.

To start I gave the engine a once-over. It actually runs quite well, and the 390 has a nice bark thanks to the headers and dual exhaust. One thing I can’t stand is a dirty air filter though.

I always hold an air filter up to a light source to see how tight the weave of the media is. In this case it had started to disintegrate and was letting dirt through.

So I walked back to the shelf at work and popped on one of these Airaid Concept air filters with a stamped aluminum lid. When the filters are free, all the project cars get ‘em.

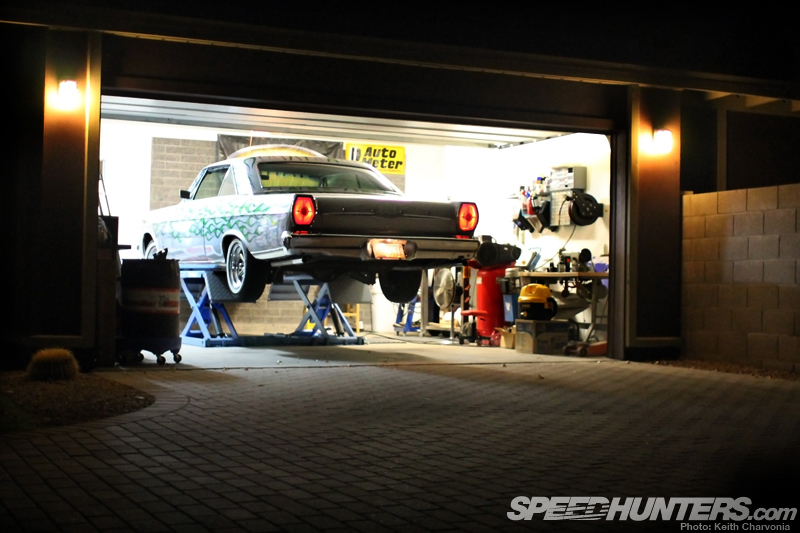
A few evenings later I shuffled cars around and removed the Kaiser from its safe little home: The Galaxie would be occupying the rack for the night. Lifting it a foot in the air makes working under the hood much more comfortable.

The rear suspension lowered very slowly and I knew it had something to do with this sintered exhaust muffler installed on the solenoid. Once I pulled it I discovered it was loaded up with debris, likely dirty condensation from not having a drier installed on the air tanks.

Fortunately I’ve done enough of this stuff to have built up a little stash of parts.

I swapped in a similar part and the problem was solved. Now the suspension lowered at a more appropriate speed.

While I was under the hood I turned my attention to the wiring mess. As I peeled back the layers I just couldn’t stand what I was seeing.

I raided another stash of mine, this time the wire loom box.

This one had me puzzled…

… and the bare wires at the terminal really bothered me. Ground or not, this isn’t cool.

So I started fixing things one at a time, slowly picking my way through the mess and trying to clean it up.

The 12-volt sins began to pile up as I corrected each problem.

On the driver’s side I found that the excess airbag wiring had been wadded up and stuffed into the fender.

It didn’t take much effort to cut the wires to size and tuck them all into a piece of loom. This may not be a Ridler-winning wiring job, but it’s acceptable and the next guy won’t be scratching his head like I am now.

With the scrap pile overflowing, I finally had the underhood wiring to an acceptable stopping point.

Next I turned my attention to the gauge cluster, one of the owner’s first requests. Besides being less than aesthetic, there was a practical problem too: without a fuel gauge or odometer there was no way to tell how much fuel was left!

A steering wheel puller is a tool that gets used maybe once a year, but when you need it it’s sure nice to have. After renting these a few times I finally sucked it up and bought my own.

Having the right tool made quick work of getting the ’90s Thunderbird wheel out of the way.

I wouldn’t be needing it anyway, since the Mooneyes metal flake steering wheel had just shown up.

I wasn’t sure how I’d attach it since the car has a ’90s Thunderbird steering column installed, but fortunately Grant makes an adapter for that.

I couldn’t resist a quick test fit of the new steering wheel, so I threw it on while the old wheel was out of the way. Notice that the gauge wiring was installed using ring terminals. Removing the cluster requires unscrewing each tiny nut – not a very clean or serviceable method of installation.

At this point I remembered that I wasn’t completely sure that the gear on the transmission end of the speedometer cable was correct. I had ordered the mechanical speedometer that was supposed to fit a Ford transmission, but with a car that’s nearly 50 years old (and one that has been customized by several owners) you never really know. I came up with the plan to mount my bicycle GPS to the inside of the dash and go for a drive. Fortune was on my side again – the speedo was reading perfectly!

With confirmation that the gauges I had purchased would work, I set about making a panel to hold them. I found a nice anodized aluminum scrap in my metal bin that would provide some contrast in the all-black interior.

I left the waste edge on my part so I could clamp it to the drill press and used a 2″ hole saw to cut out the holes for the small gauges. Normally hole saws cut a little big, and the 2 1/16″ gauges actually measured at 2.030″…

… but I guess this was a finely crafted hole saw because it didn’t give me the extra .030″ I needed. No worry though, I fired up the oscillating spindle sander and buzzed the holes out a little. At this point I had also finished cutting out the panel on a bandsaw, but wasn’t able to cut and take a photo at the same time. Safety first!

Back at my workbench, I started on the wiring for the cluster and got to use another of my rarely-used specialty tools. These are factory style crimpers with a male terminal on the left.

You crimp the terminal onto the wire, then also crimp around the insulation for a very firm attachment. Next the terminals are inserted into the plug you see on the left, making the whole cluster easily removable.

Here’s a shot of the finished wiring. I made sure to use colors that matched the factory wiring, it just makes it easier to work on later.

Again, this cluster isn’t going to win any awards, but it’s miles ahead of what the car came to me with.

With the cluster complete I now needed to terminate all the dash wiring into a matching plug. I thought for a second about doing the work up above…

… before realizing it would be easier to pull the wires through and work on the floor.

As I identified each wire I used a label-maker to mark it. Tape falls off too easily and looks sloppy.

With my wiring diagram in hand, a quick check with a test-light confirmed things.

Here’s what I removed. You can imagine the mess under the dash before I took out the excess.

Before installing the gauge panel I plugged it in and turned the key to confirm everything worked. If you look closely you can see the voltmeter giving a reading and the check engine light illuminated – both good signs.

Finally I could install the cluster and see how it looked…

… and also install the new metal flake steering wheel for the last time. Don’t worry, I put felt under the steering wheel so it wouldn’t scratch the paint.

I started with these mods at the owner’s request, but I think it was a good place to start for another reason too. The instrument panel and steering wheel are the items you interact with most when driving a car, and if they’re the worst parts about the car you’ll feel like you’re driving a pile of junk every time you sit in the driver’s seat.

There’s still plenty of work to do inside, but I feel this is a good start. I think I’ll work on the seats and mount some air gauges next…

… but in the meantime the Galaxie’s older brother came to visit too. Both of the cars belong to the same owner, and he absolutely loves driving the wagon. With a rowdy cam, slammed stance and even air conditioning, I don’t blame him. Now I’m in a hurry to finish the Galaxie so I can get started on the Parkwood!
Keith Charvonia
Instagram: SpeedhuntersKeith
Email: keith@speedhunters.com


Awesome work!
I'm building a 66 Galaxie 500 4 door in Aus that will be getting similar treatment over the next few years. If you do any mechanical upgrades, ie brakes, steering, etc please do a feature!