


In case you aren’t up to speed with this project, you might want to catch up with last month’s update first. Done? Good, let’s kick things off. There’s quite a bit to get through…
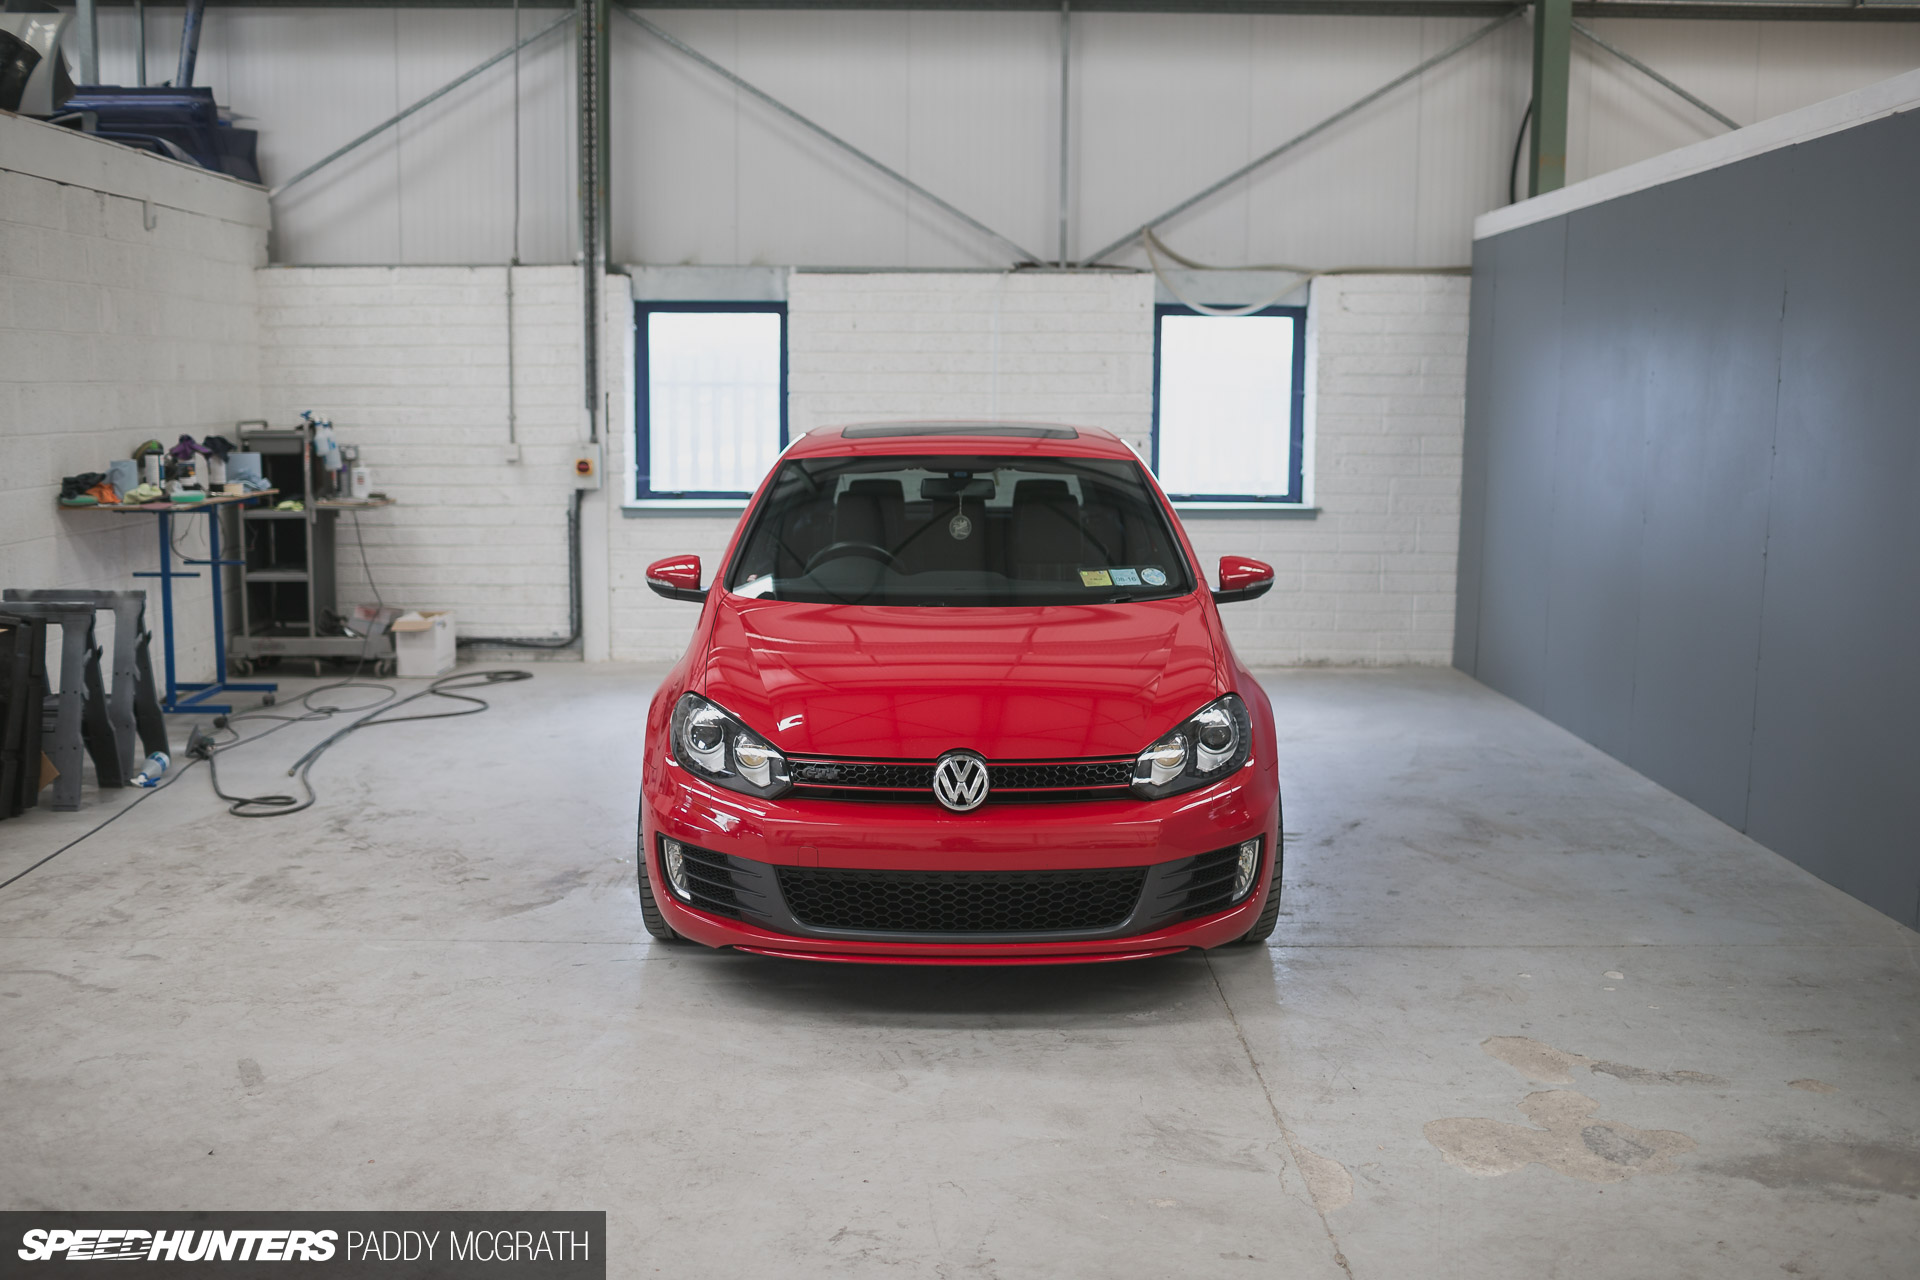
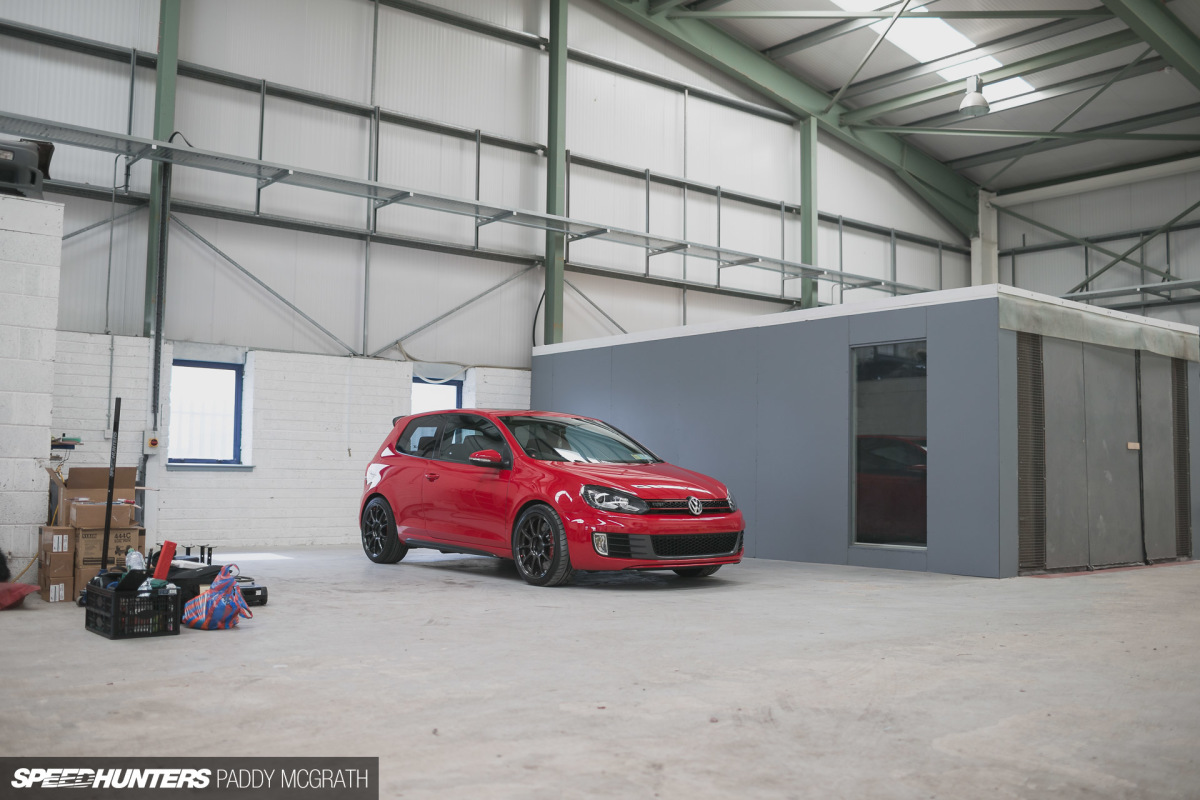
I’ve already made my case for why I think an air suspension setup is the correct path for my car, so it’s not something I want to go into too much detail about again. My Mk6 Golf GTI is daily driver and occasional track day car with a key focus on usability; it needs to be the car that can do everything and do it well.
I had originally planned on having a recognised Air Lift Performance installer complete the installation and just photograph the before and after. Something was nagging at me though. The system was to be installed in my car, and as such I wanted to know every little detail about how everything works, where the lines were routed and how everything would be set up and calibrated.

I’m not the most capable when it comes to working on my car. I’m not completely useless either, but I would still rather rely on those with more experience when dealing with critical areas of the car. With all the parts gathered, it looked like an intimidating install if I’m being honest. The closer we looked though, the more logical and straightforward it appeared to be.

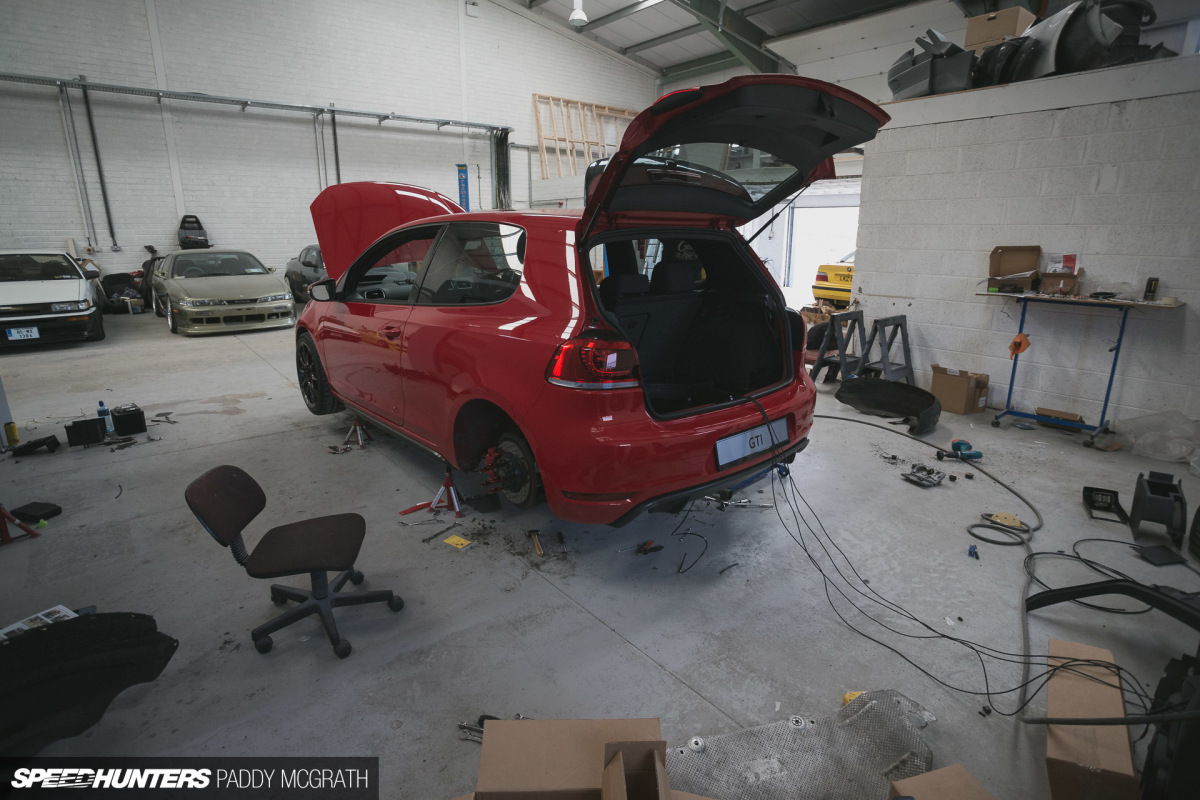
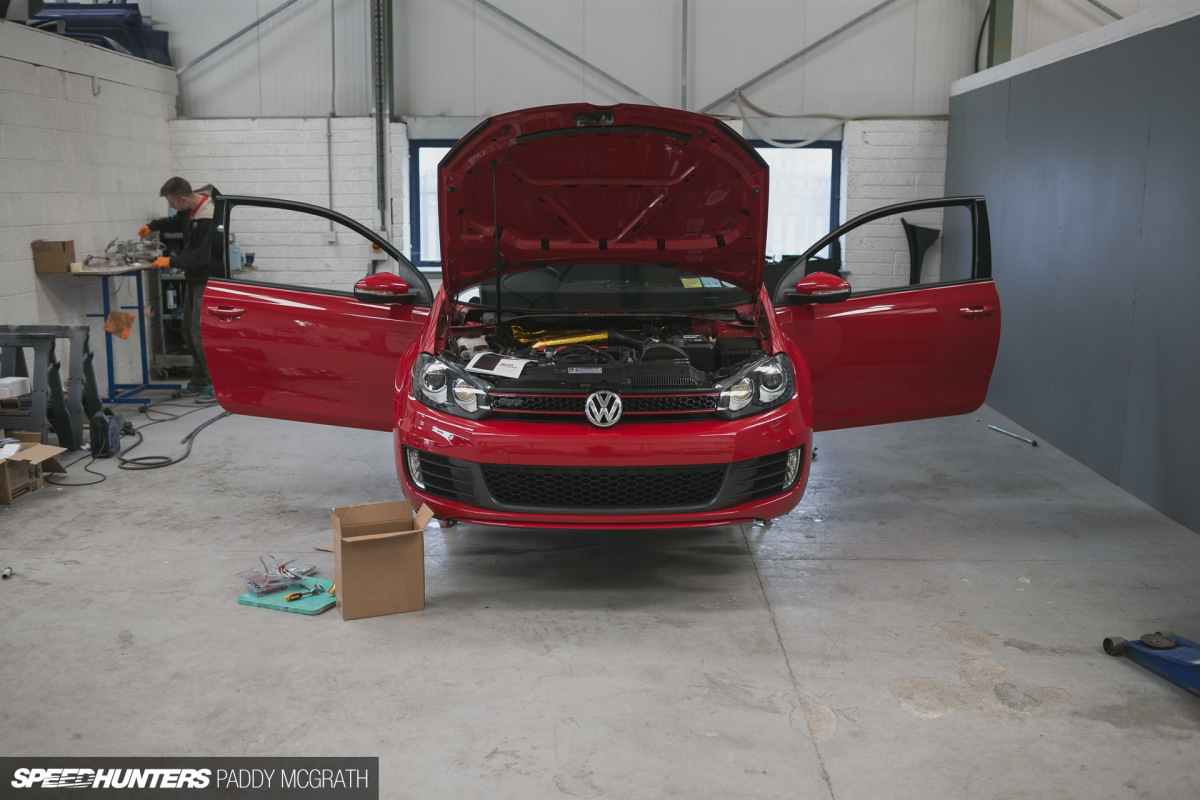
Whilst we did have a lift handy, we chose to raise the car on the floor as it made it easier to access the interior when running wiring and lines through the car.
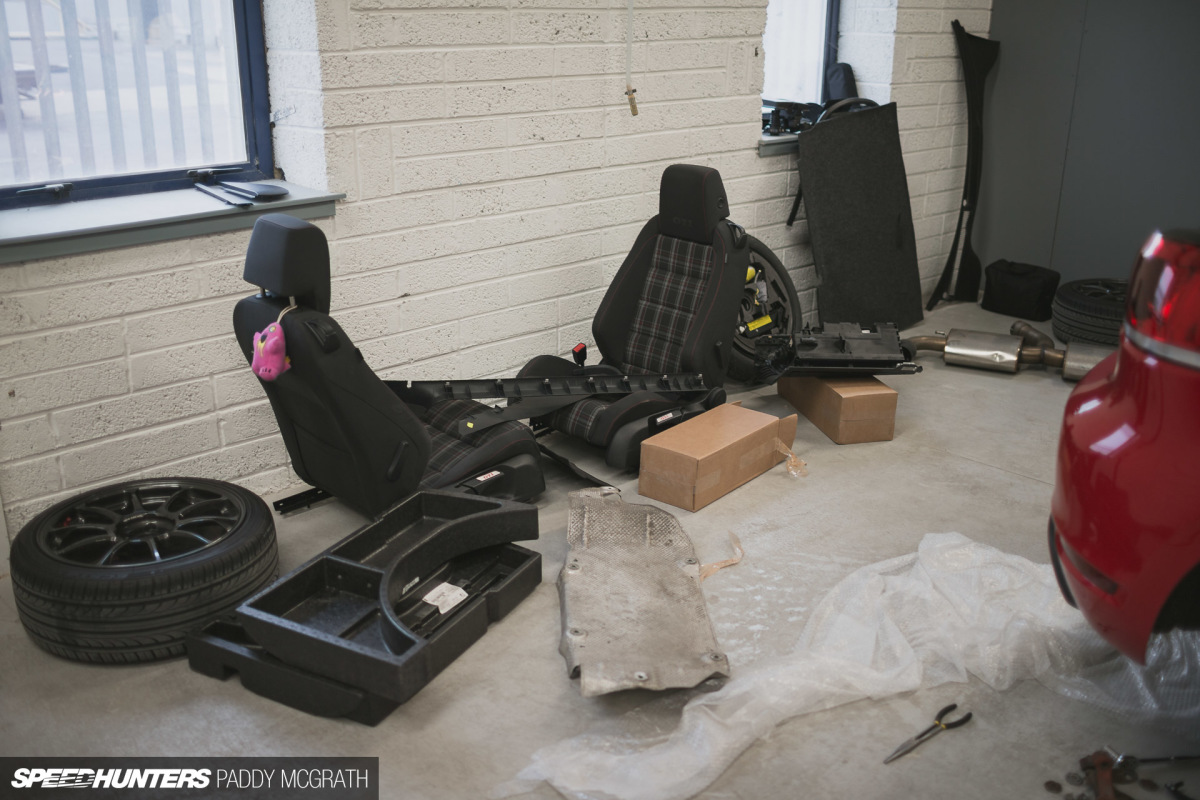
Before we got started, we made the decision to strip out some of the interior and to remove the rear section of the exhaust to make our lives easier. It’s not something that we had to do, but something I think saved us time over the course of the installation. It looks much worse than it actually is, but it probably only took an hour to put it all back together again.
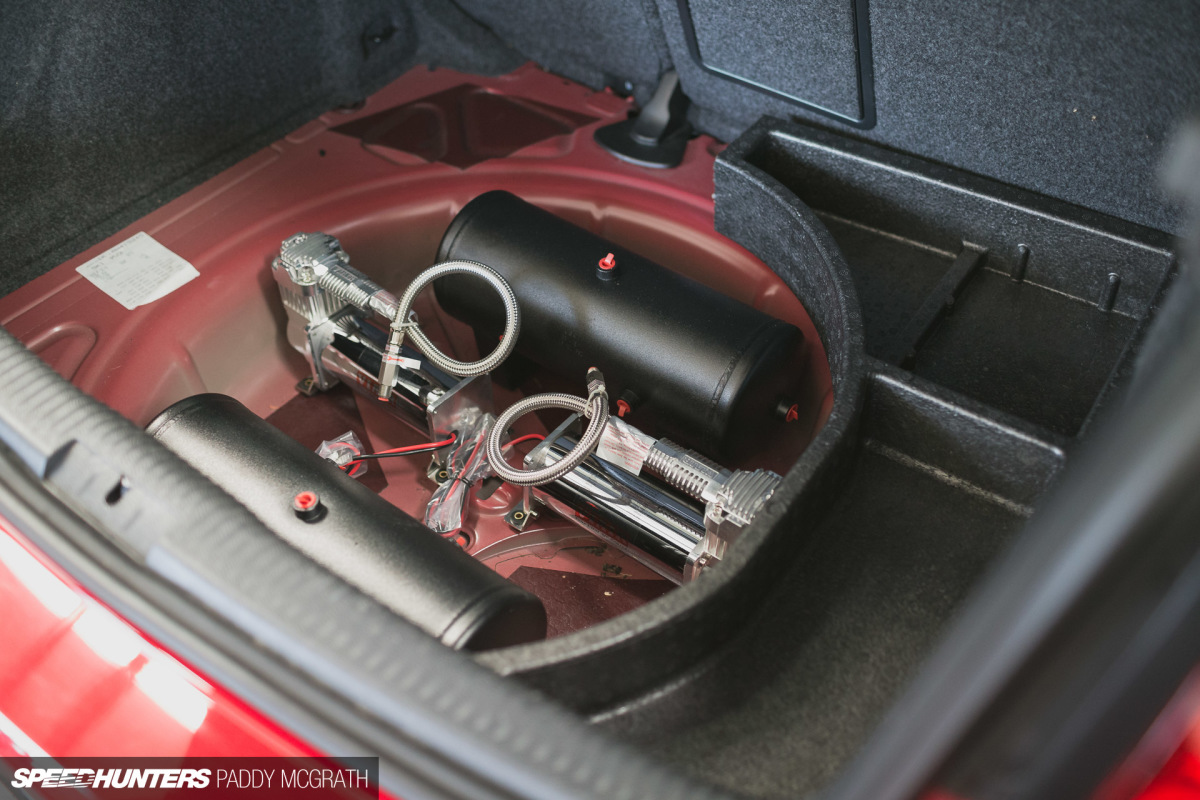
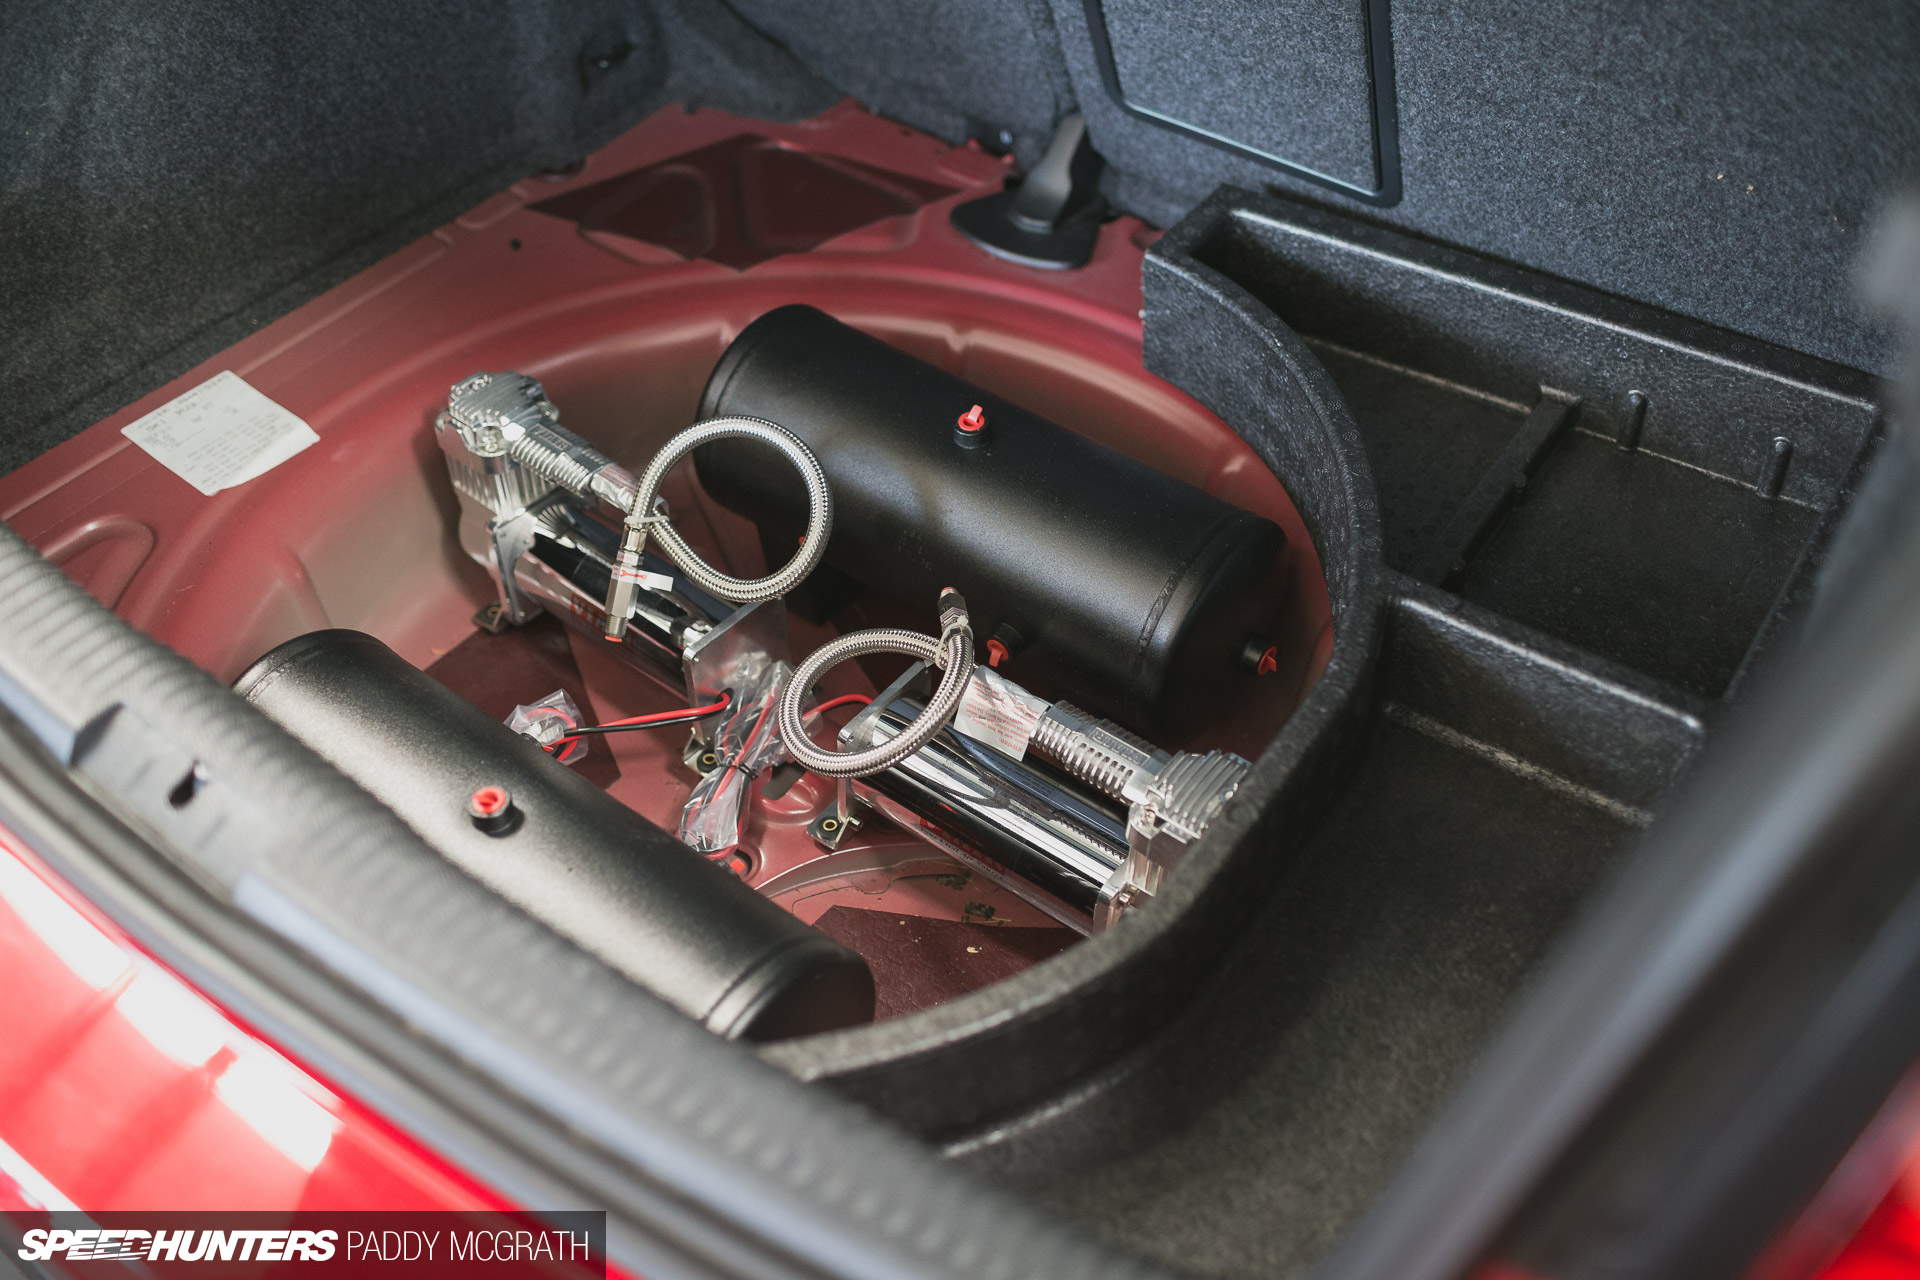
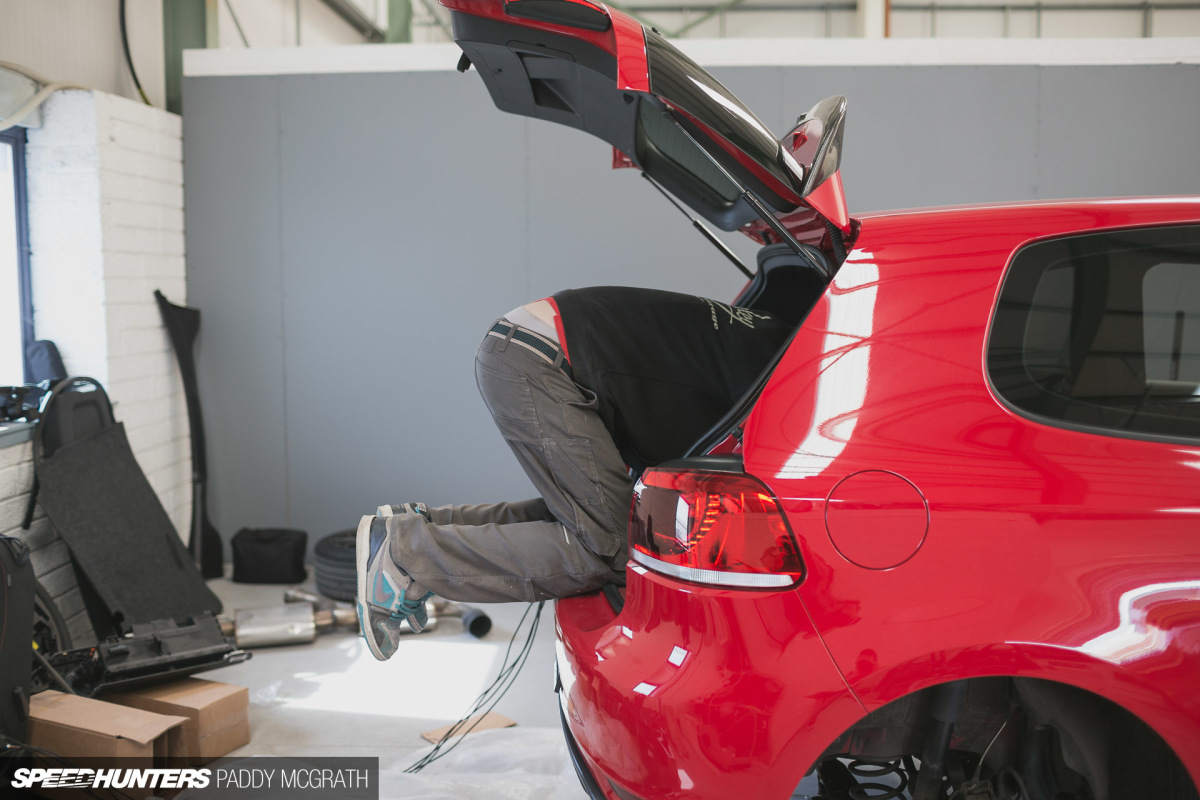
It’s at this point I’ll tell you that this was our first time installing air suspension, so it was completely new ground for all involved. In the days prior to the installation, I had sketched out ideas for how to make the most use of the spare wheel well. European Mk6 Golfs differ from their US counterparts by not having a raised hump in the middle of the wheel well, and this gave us a relatively flat base to work with. You can also see one of the OE foam underfloor dividers that we would use to raise the boot floor to clear the air tanks.
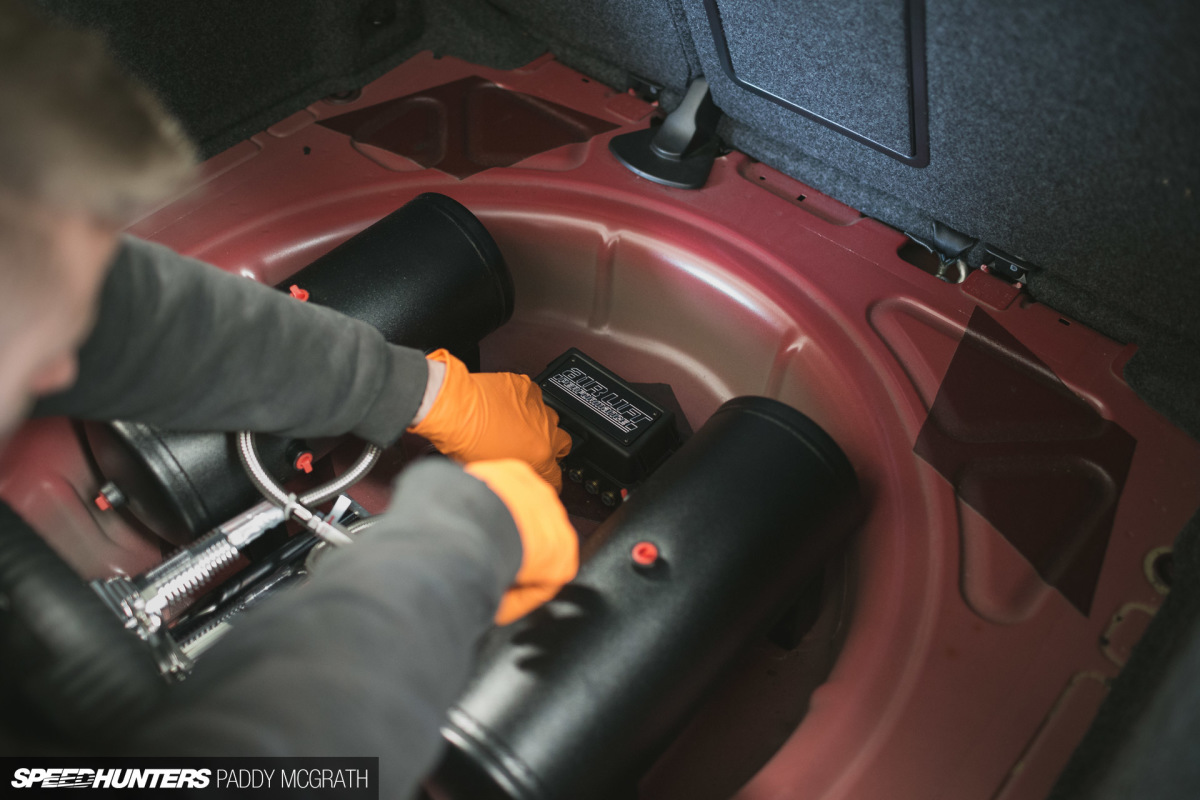
Ultimately, we decided on a longitudinal and symmetrical layout. The goal here was to have everything hidden under the boot floor in a clean and as simple as possible manner. This wasn’t going to be a hard-lined show install with leather and polished tanks; it was very much about function and cleanliness.
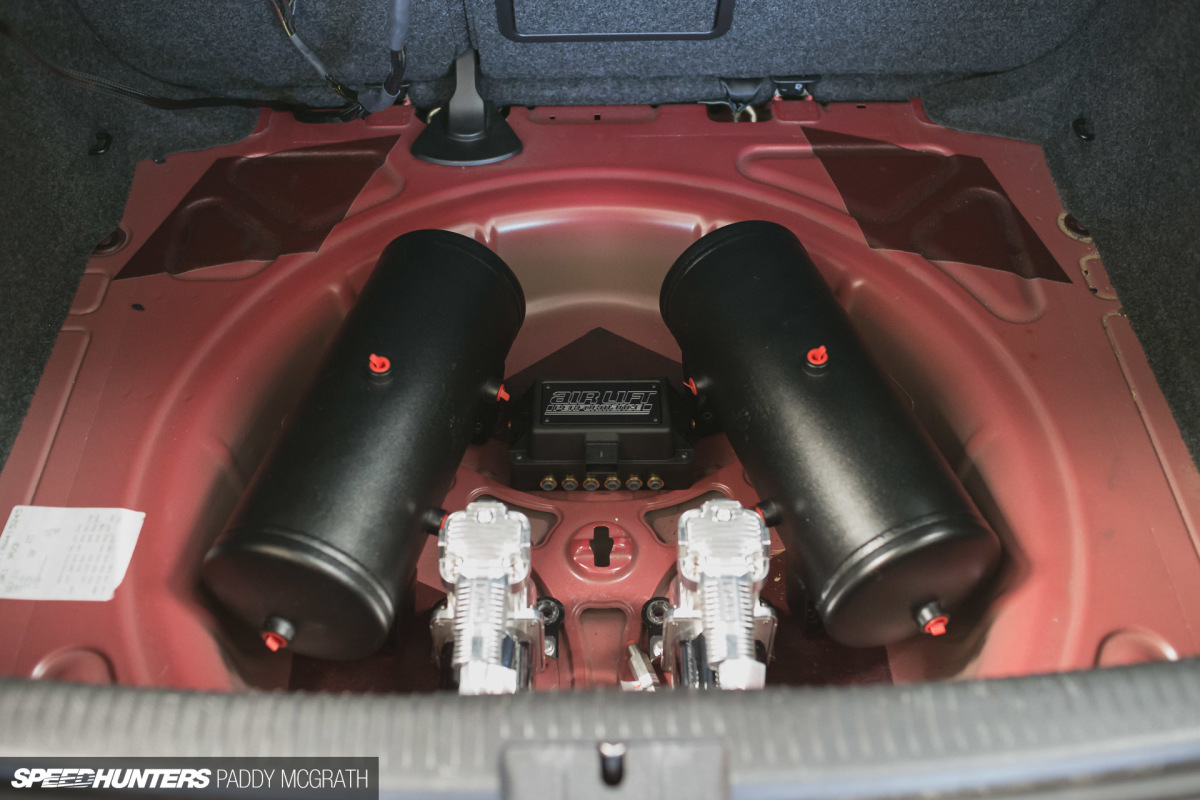
This is the final layout which allowed us to run everything as neatly as possible, whilst keeping the airlines away from the compressors as best we could. We talked about painting this area to freshen it up, but decided against it, as being honest, it might look like the rear floor had been repaired for whatever reason.
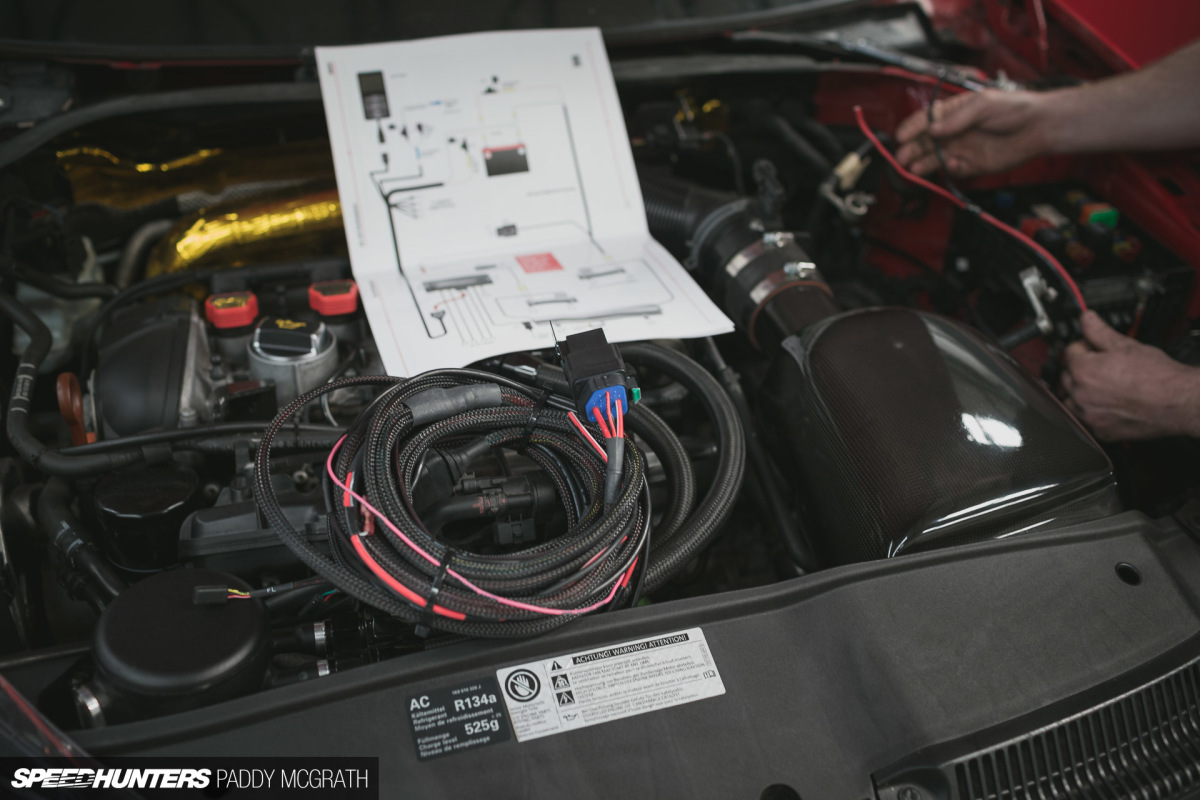
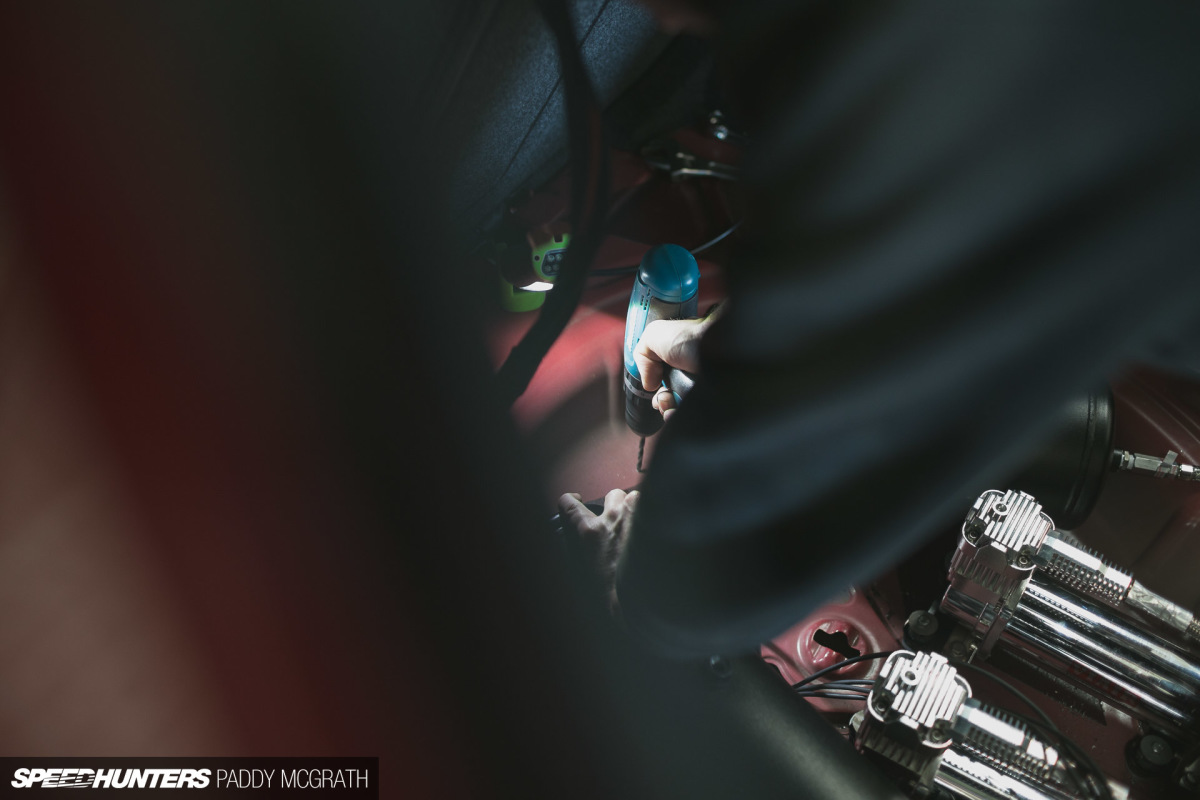
Next on the list was to plan how we would run the wiring harness through the car. Following Air Lift Performance’s guidelines, we kept it simple and routed everything down the battery side of the car, using OE grommets to break into the engine bay.
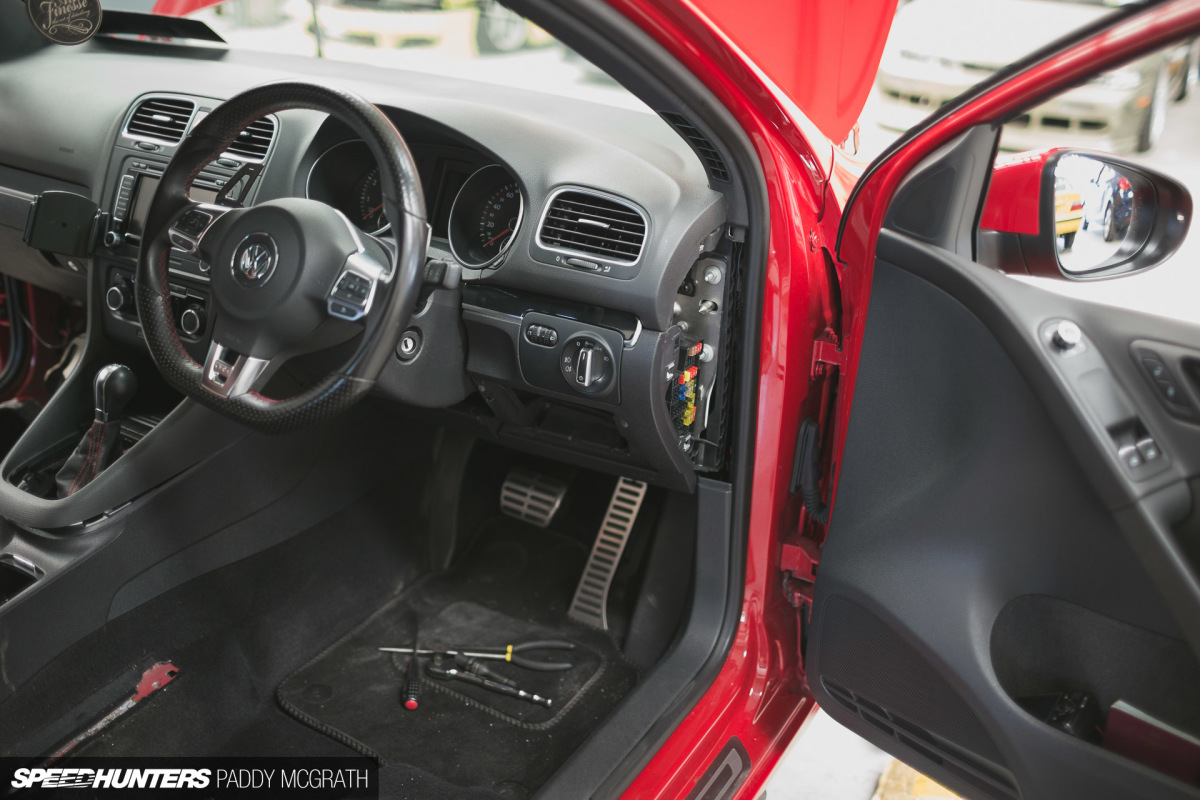
To find an ignition source, we just ran the relevant wiring behind the dashboard and straight into the fuse box. The wire for the controller also needed to be brought across to the driver’s side of the car, but we chose to run that underneath the carpet behind the front seats and have it sit freely beneath the driver’s arm rest. With all of the planning out of the way, it was time to make it happen.
CHAPTER TWO
Stubborn VW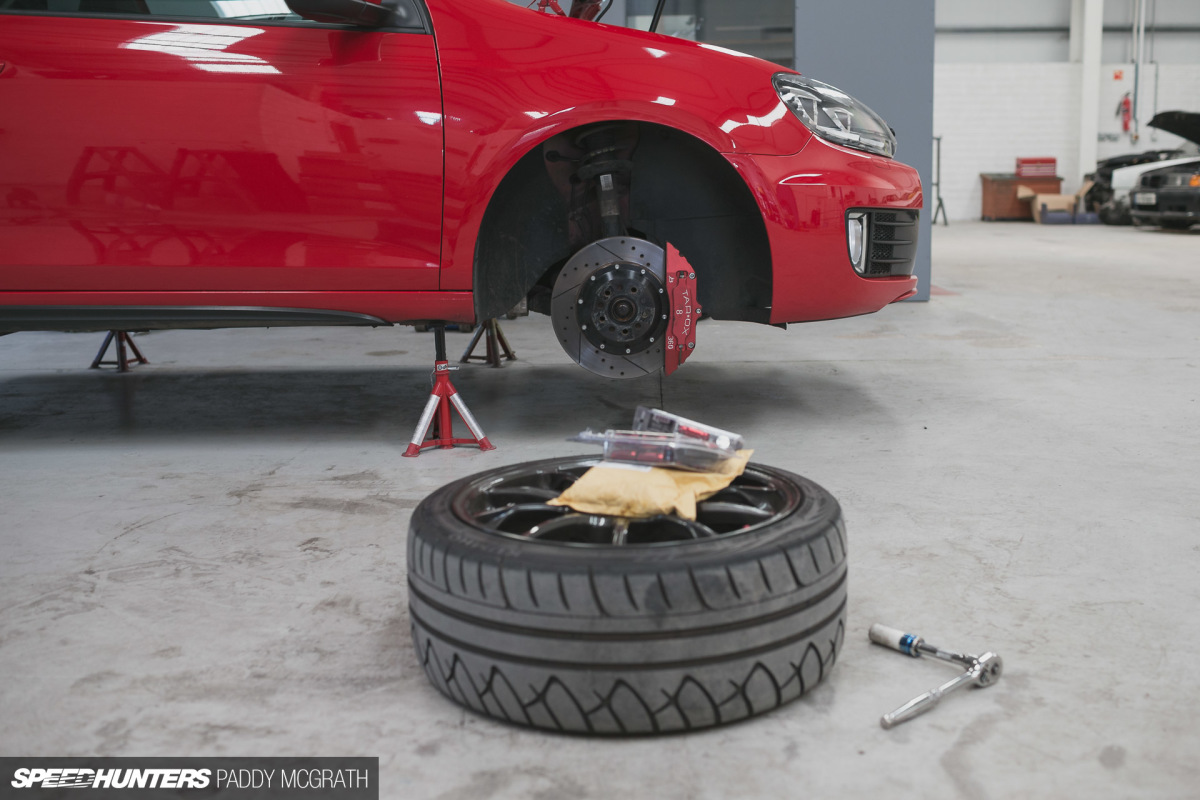
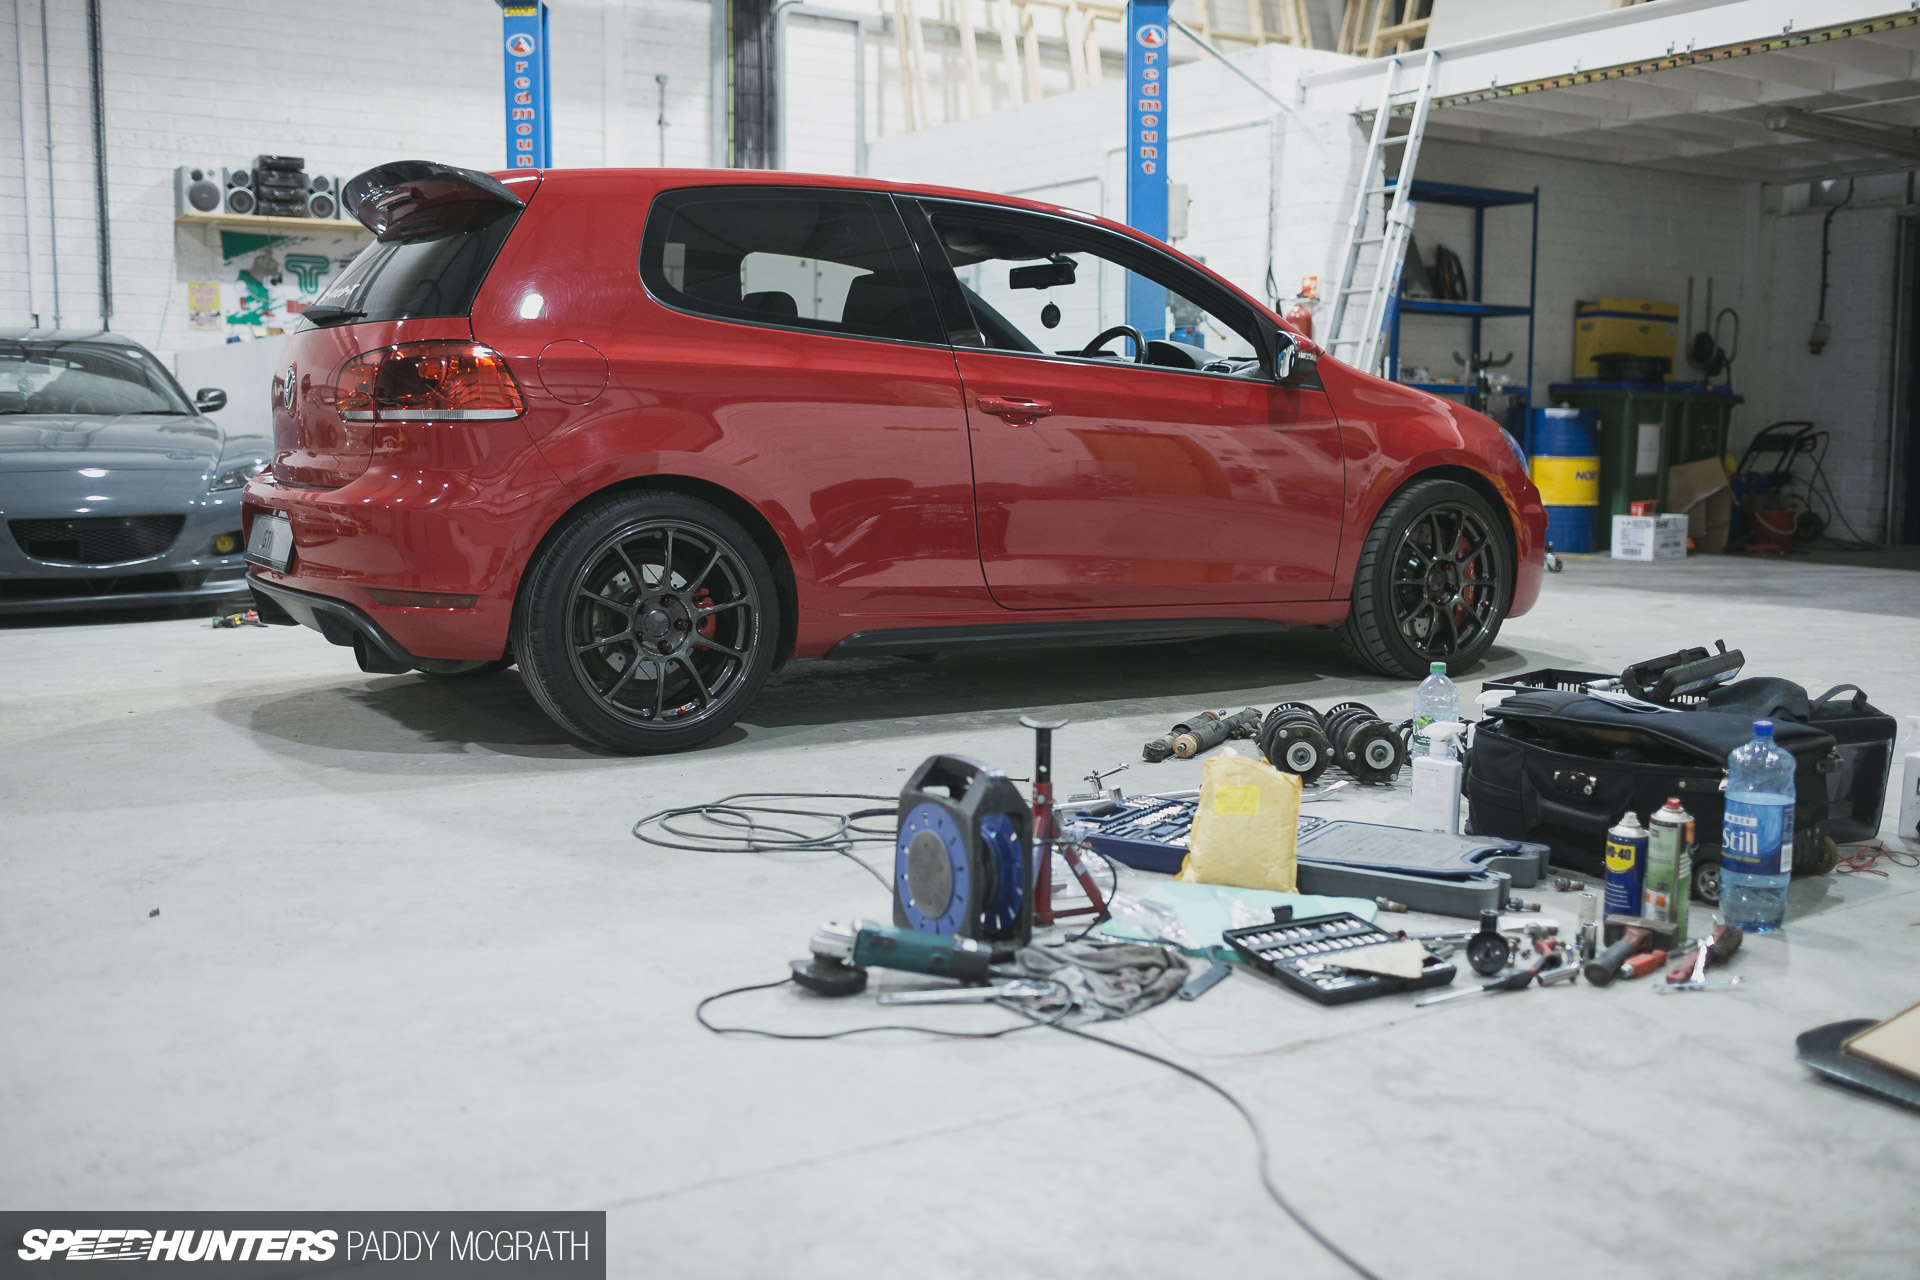
Whilst the guys started on the suspension install, I took the opportunity to quietly and easily convert the car to a stud configuration.
Garage Midnight supplied the conversion kit, which does away with the annoying factory wheel bolt setup and simply replaces them with a stud and nut solution. Asides from easier mounting, a stud and nut conversion provides better clamping along with the benefit of being able to run different size spacers without having to buy extended wheel bolts. I just applied some permanent thread-lock and tightened them via their allen key head. A simple and worthwhile upgrade.
Even Kouki was impressed. That, or she was terrified at the sight of a ratchet in my hand.
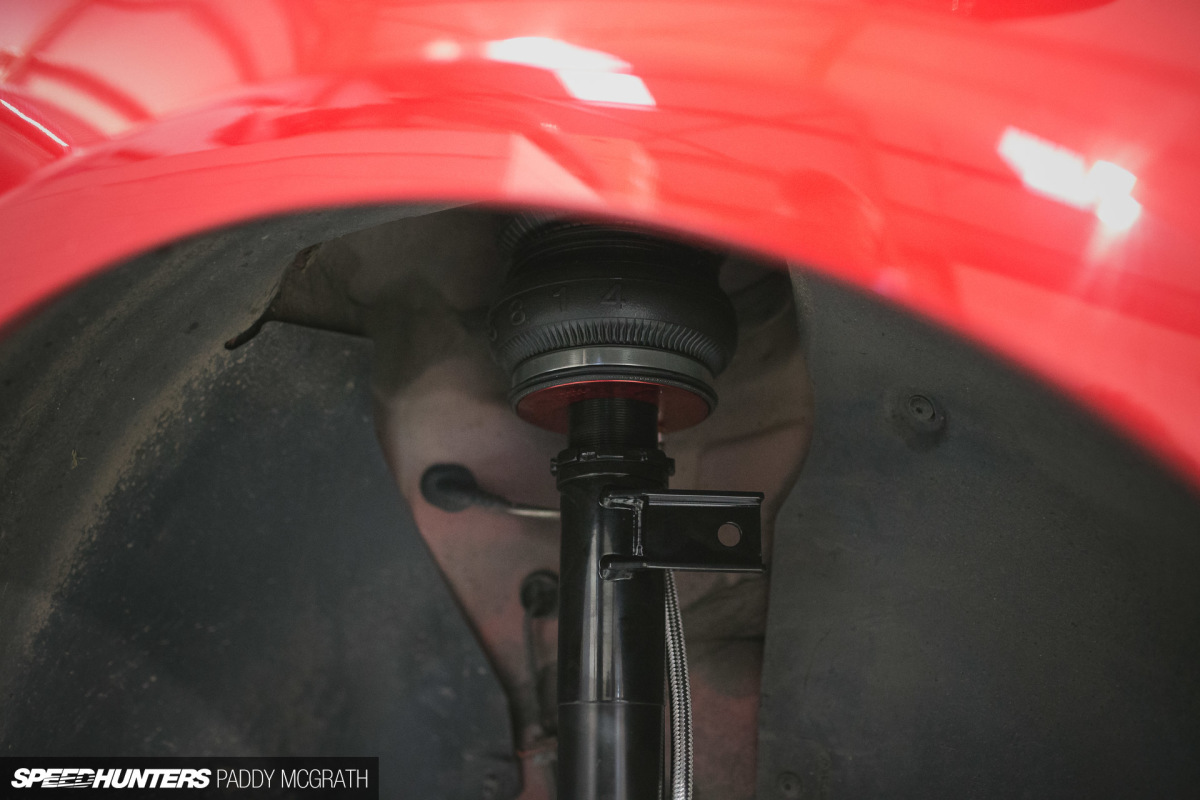
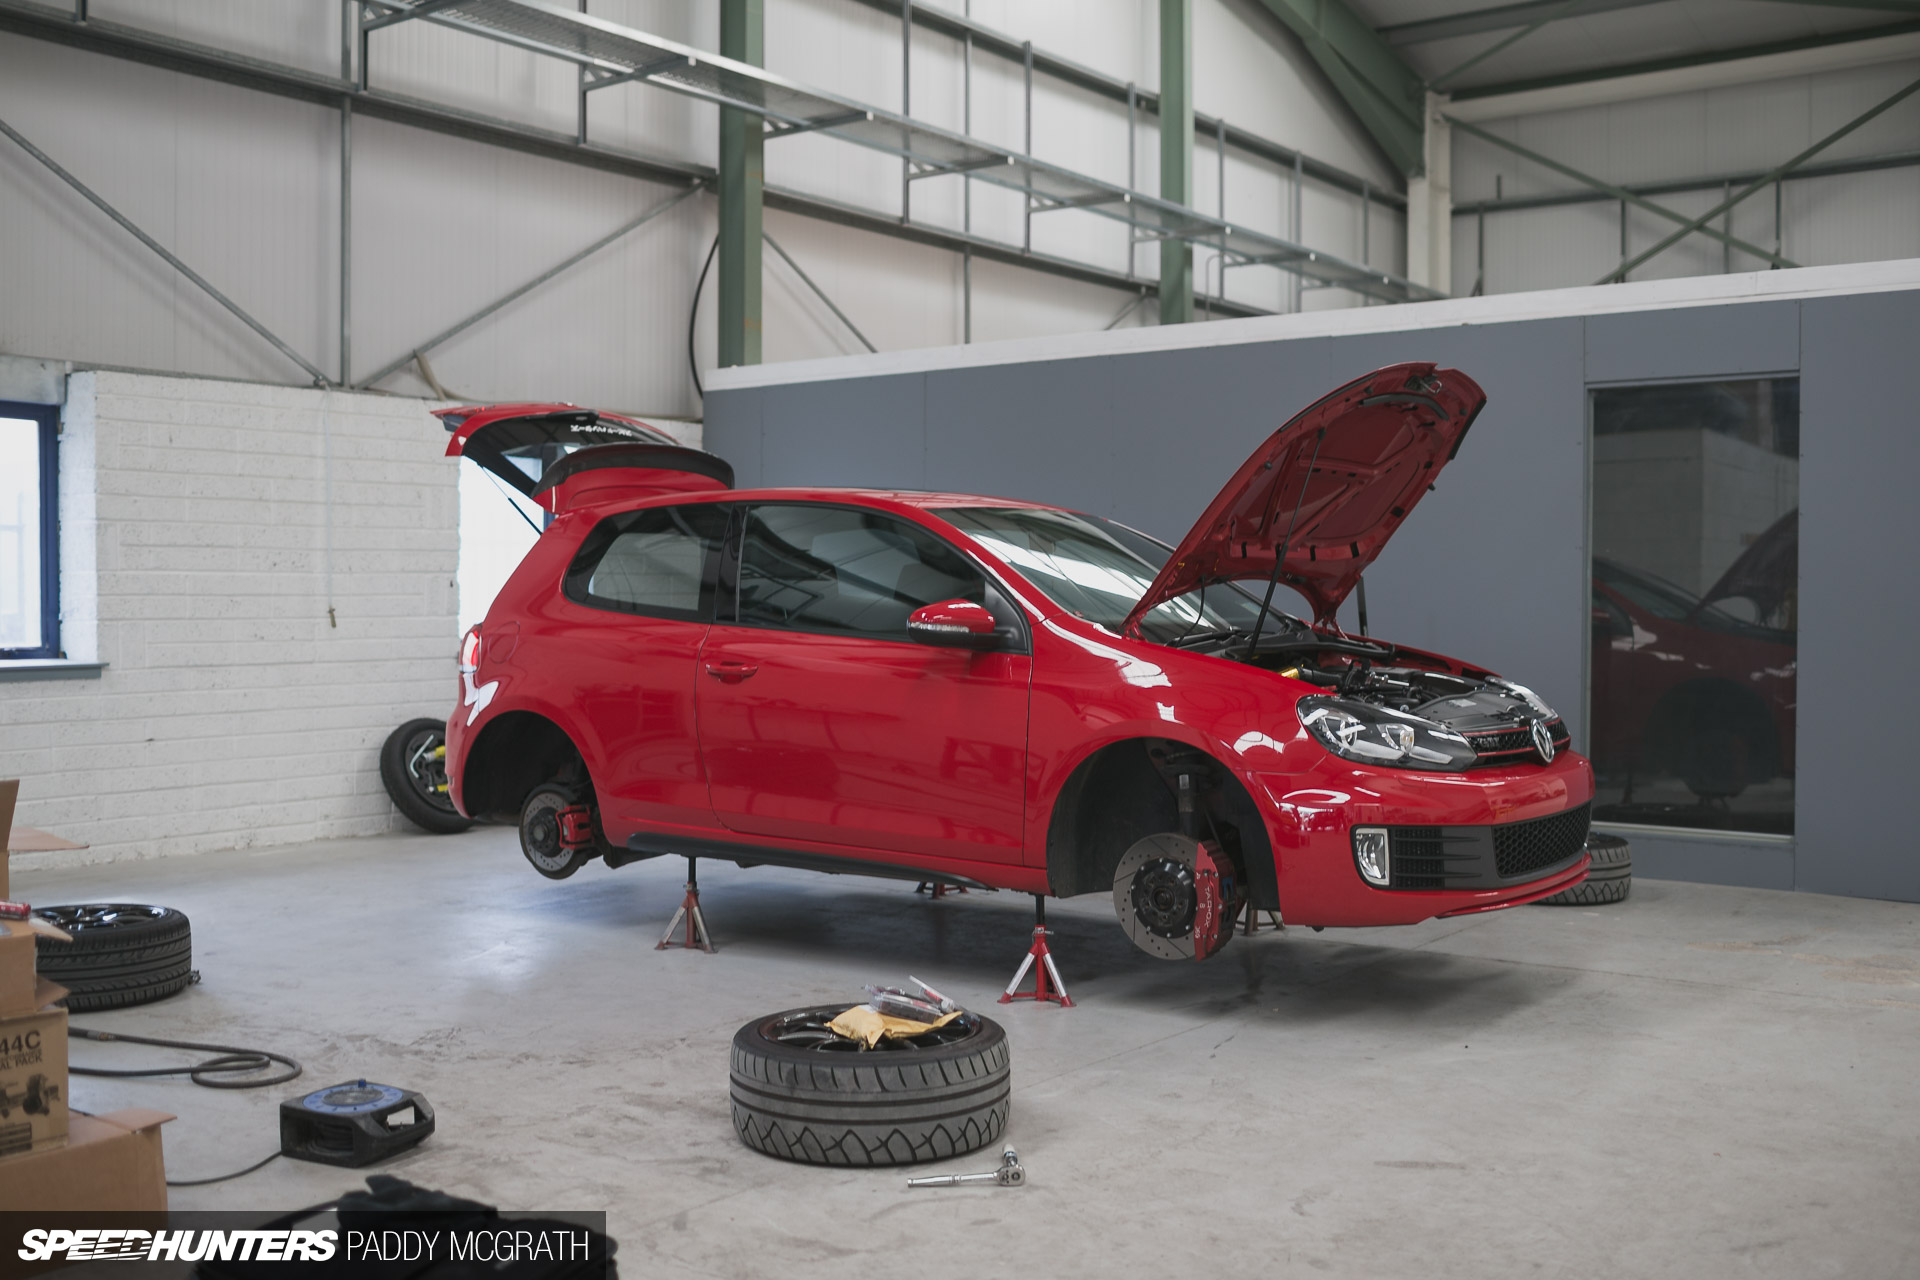
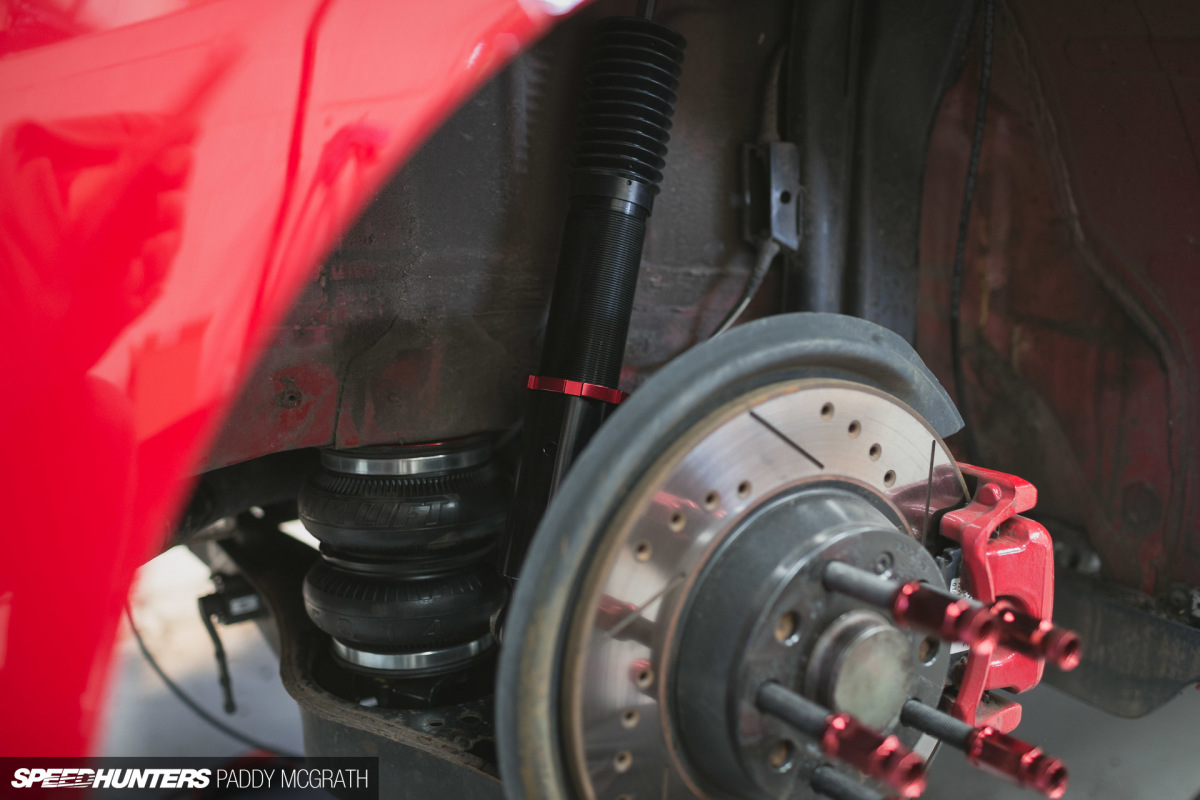
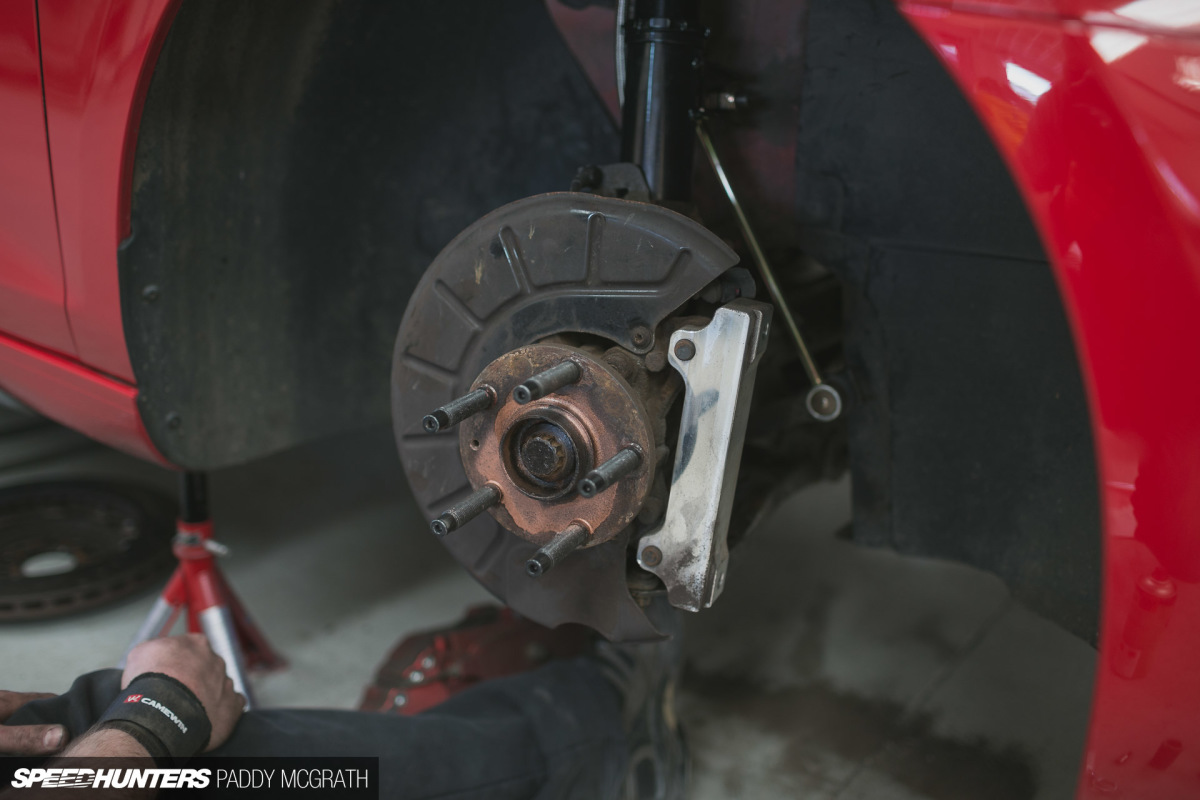
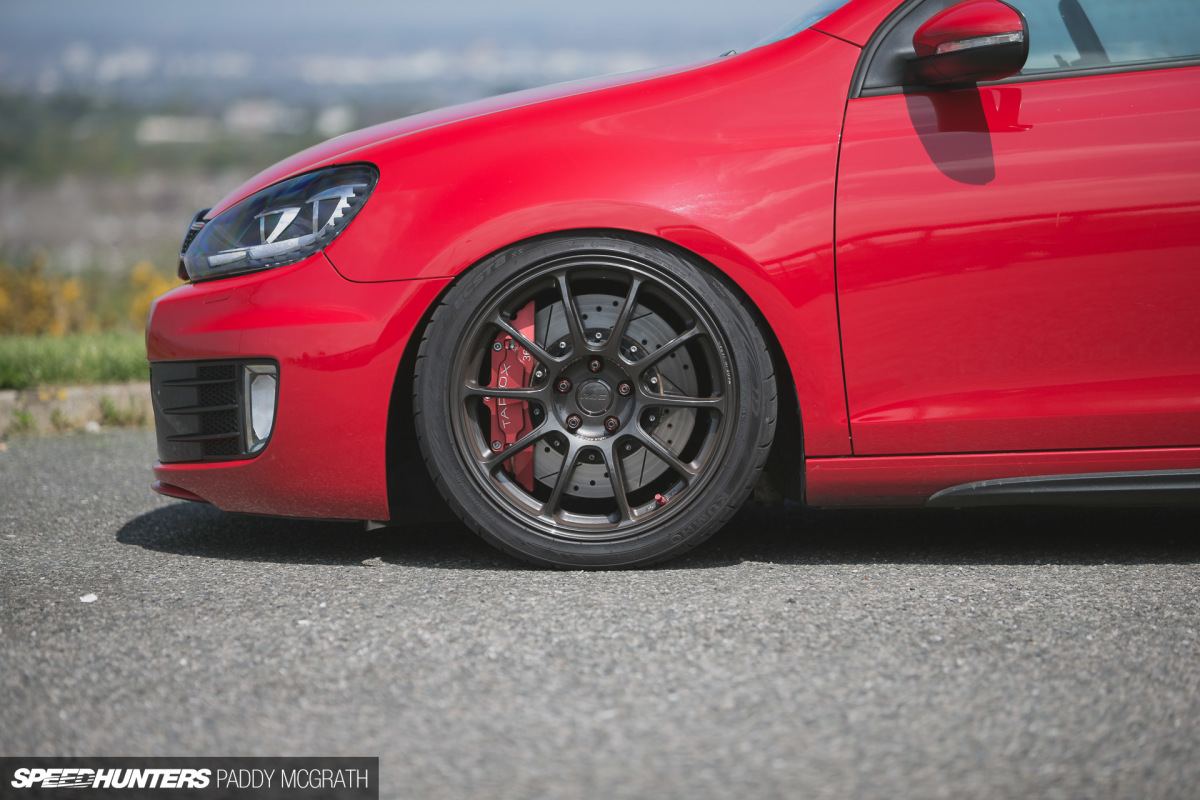
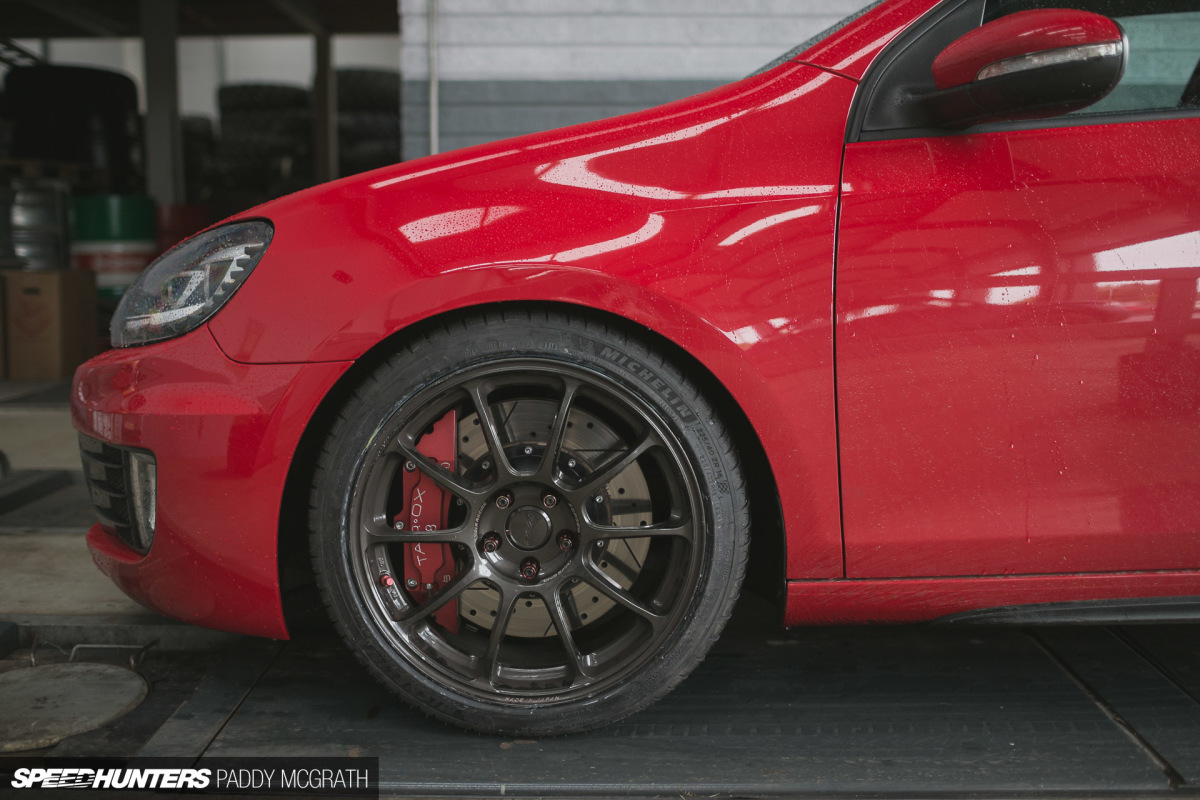
After freeing the factory front struts – something that took longer than anticipated no thanks to seized hub nuts – the new bag-over-struts were bolted in position. We set the camber adjustable top mounts to dead centre and threaded the shock body out to show three-inches of thread either side. From research, those who like to sit the fender on the wheel lip typically run around two-inches of thread, but ultimate low isn’t my goal. We also weren’t planning on notching the chassis leg for driveshaft clearance, so this little bit of extra height gave us plenty of breathing room in this area.
The rear install was completely straightforward.

The installation instructions and guidelines couldn’t have been any clearer, right down to scribe lines on the rear bag brackets so you can trim them appropriate to your setup.
For the air lines, we followed factory routing alongside the brake lines, protected by the plastic floor under the car. Once we had run everything to the boot, we could finally secure it all into position.
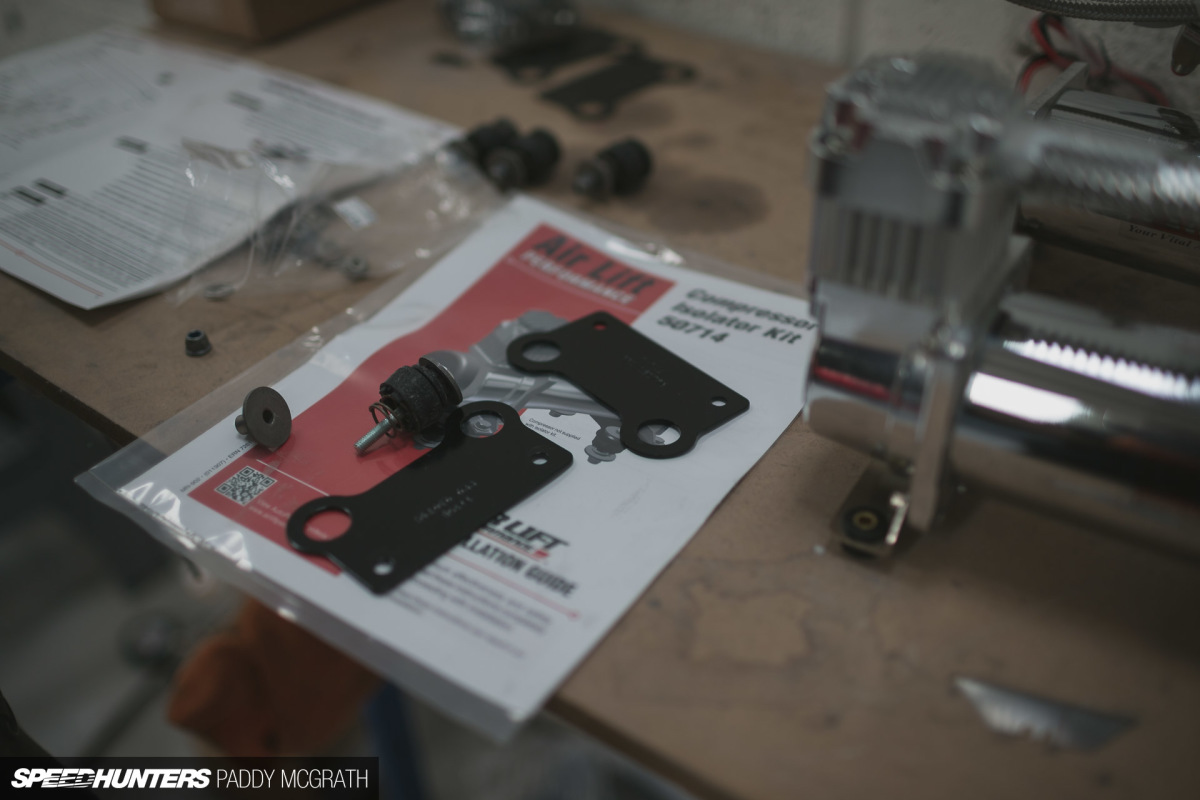
The compressors were mounted onto their isolators before being fixed to the boot floor.
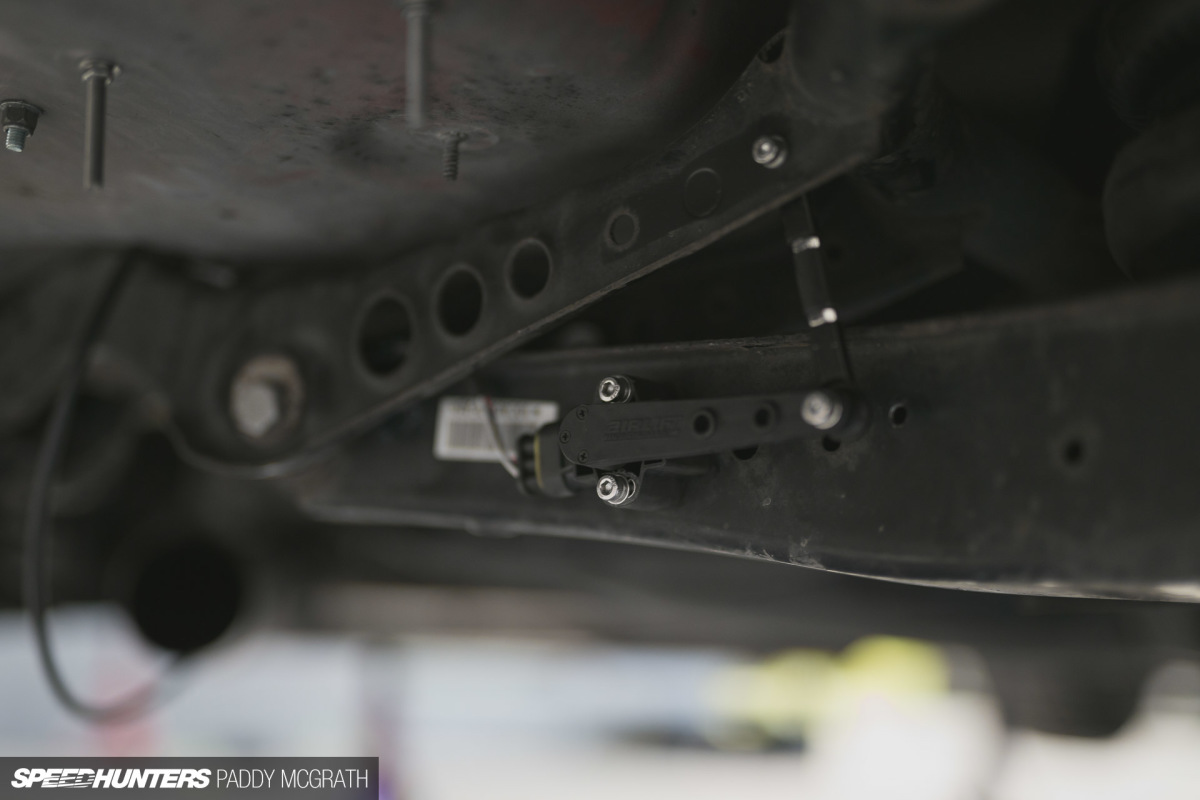
The height sensors – which play a huge role in the vehicle’s performance on air – were measured, temporarily installed, measured again and finally fixed into position. You can see some of the bolts protruding through the wheel-well floor; these would eventually be trimmed down and each bolt covered over with sealer before the factory heat-shield and exhaust were re-installed.
At this point, I was beginning to get very excited. We spent a lot of time measuring suspension travel to ensure we would be operating in a solid performance window. I can’t recall the specific measurements, but at ride height, the car is sitting just about bang in the middle of its full suspension travel. This would bode well.
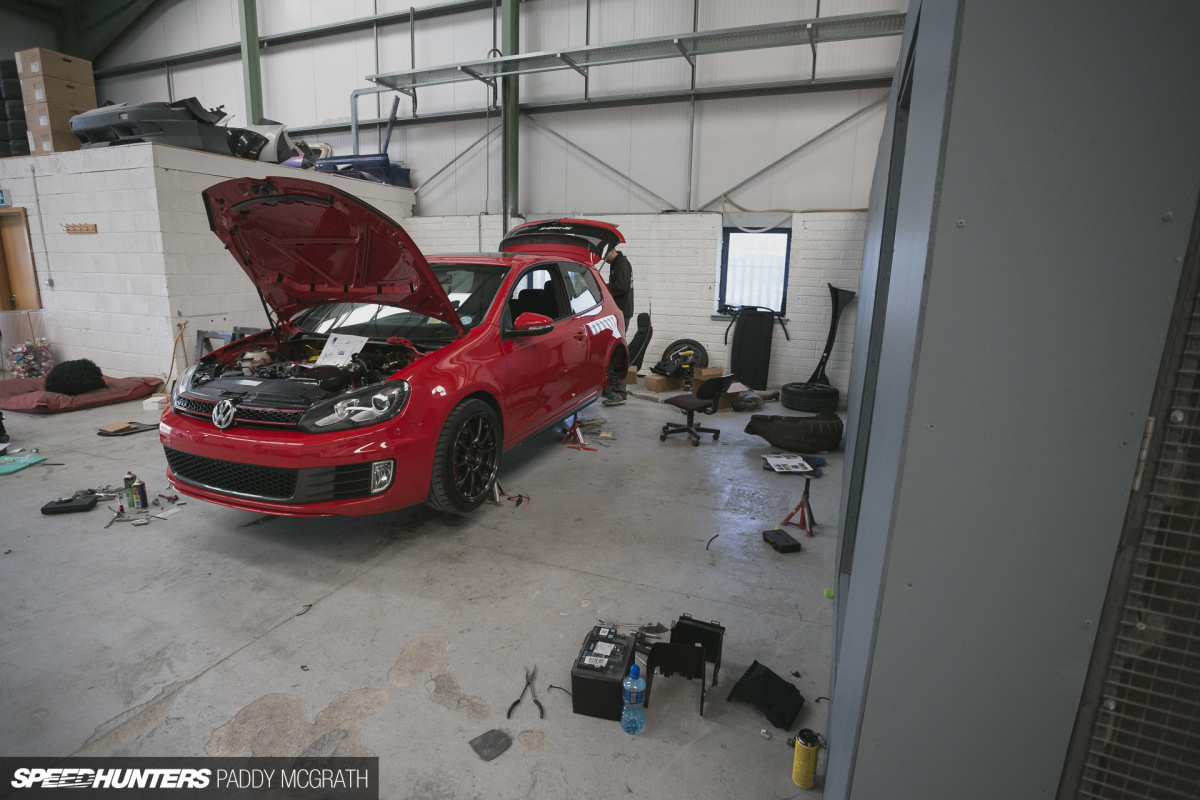
At this stage, it was time for reassembly and to plug everything in.
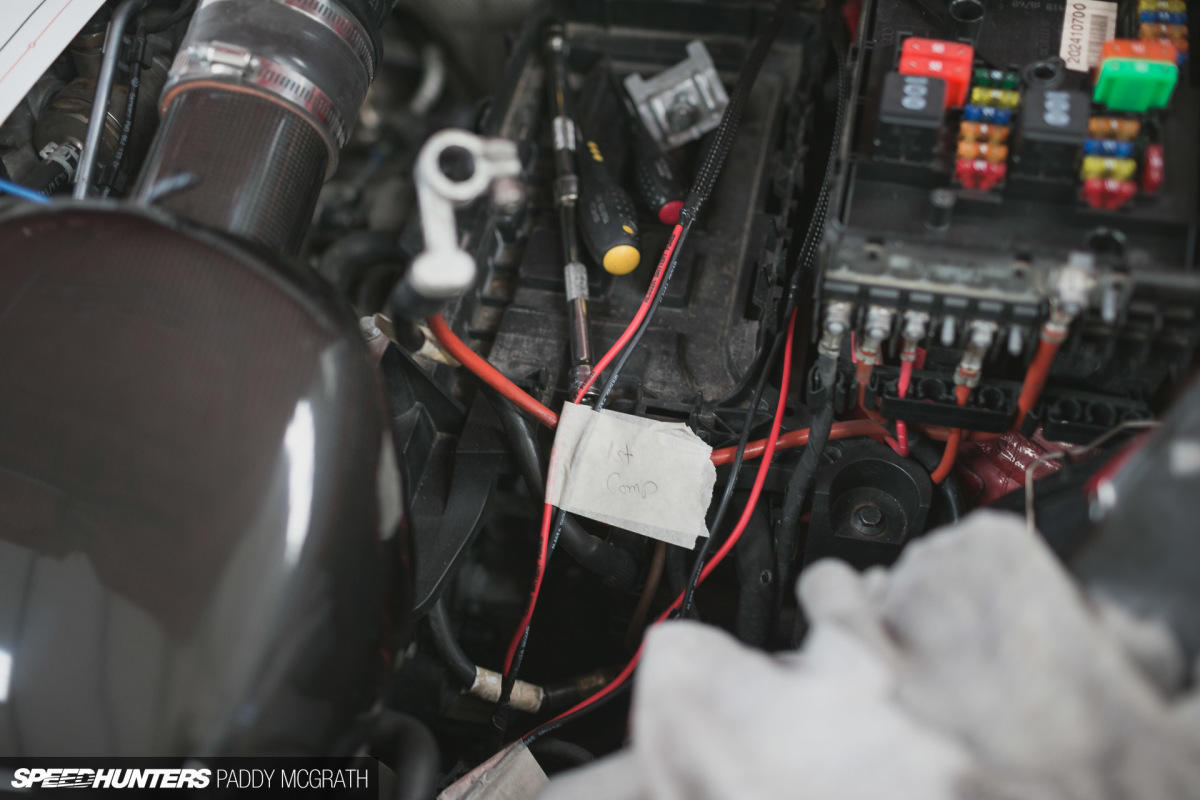
Wiring terrifies me, but even so, this looked as straightforward a process as you could ever make it. I still didn’t touch it mind you, but I could at least understand what was happening. We just labelled the compressor wiring that we had run into the engine bay so we knew which was which, gave them both a live and and earth and that was about as complicated as it got. Everything else was plug and play.
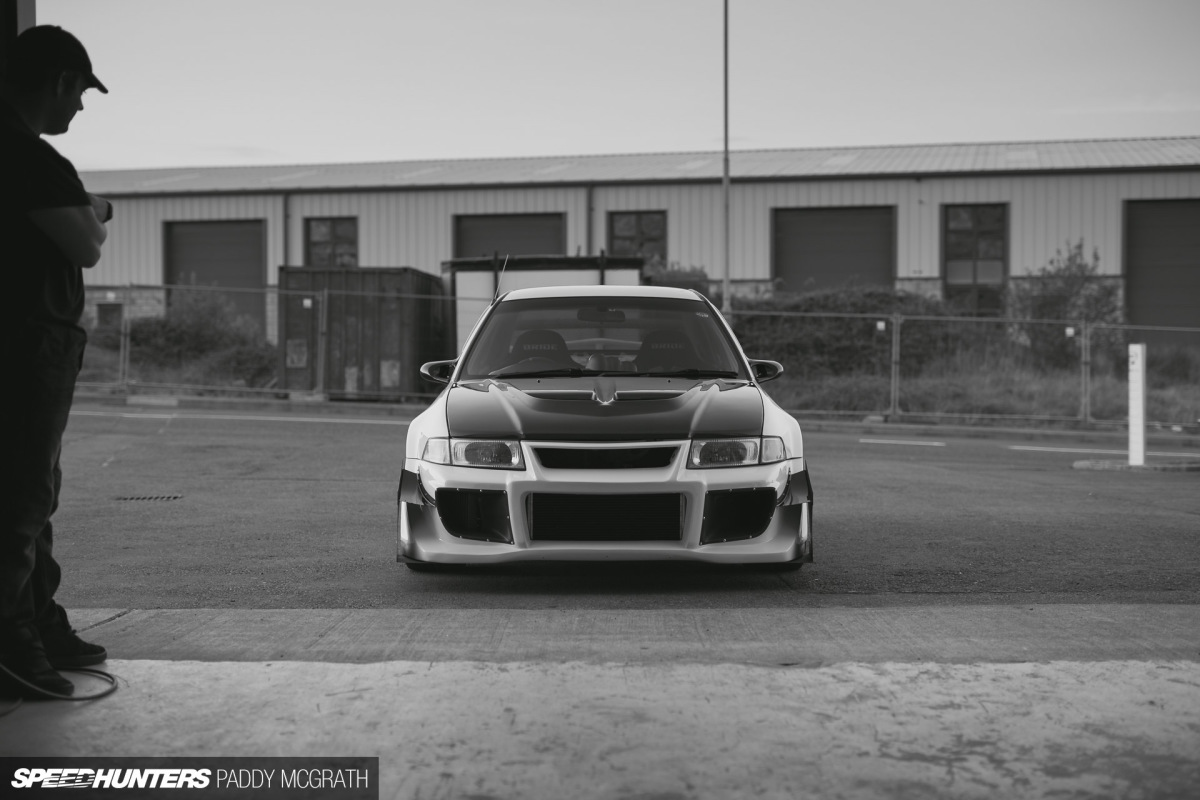
It was around this time that a wild Evo appeared, and I sort of lost track of time for a bit. Still, you wouldn’t turn down a drive in one either, would you?
FINAL CHAPTER
On The Floor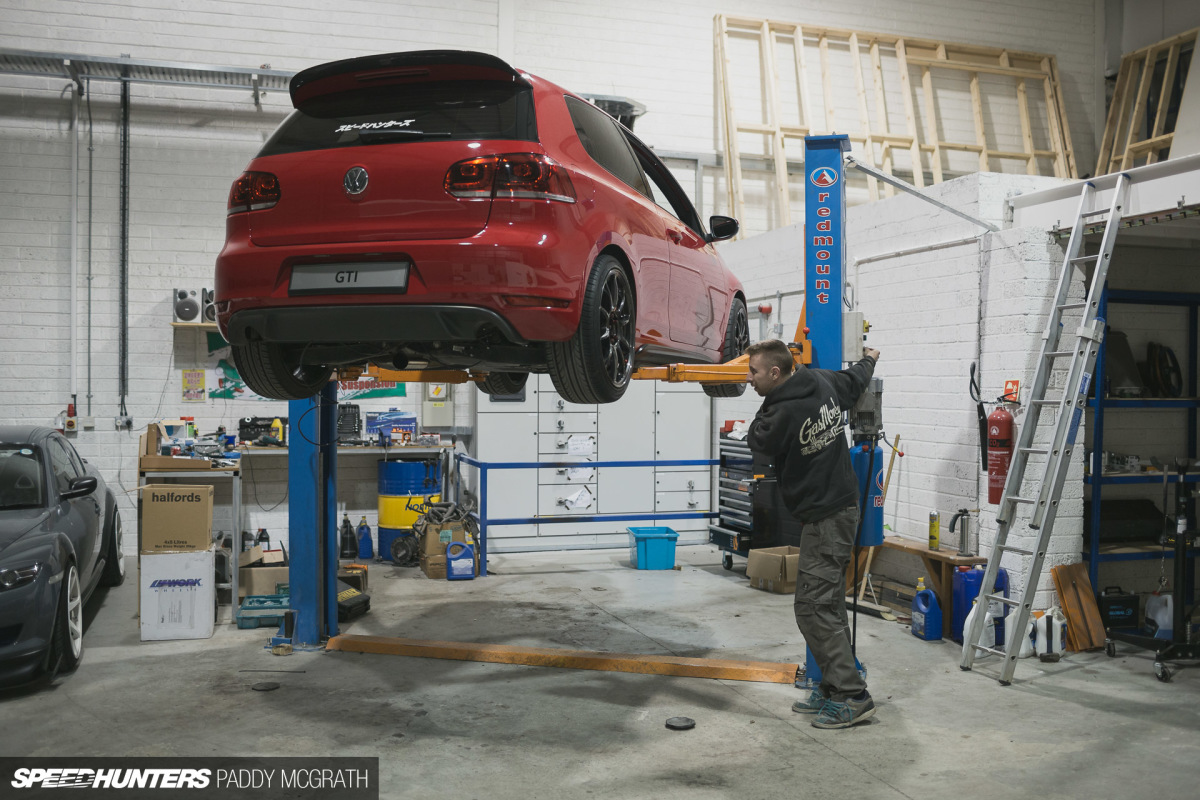
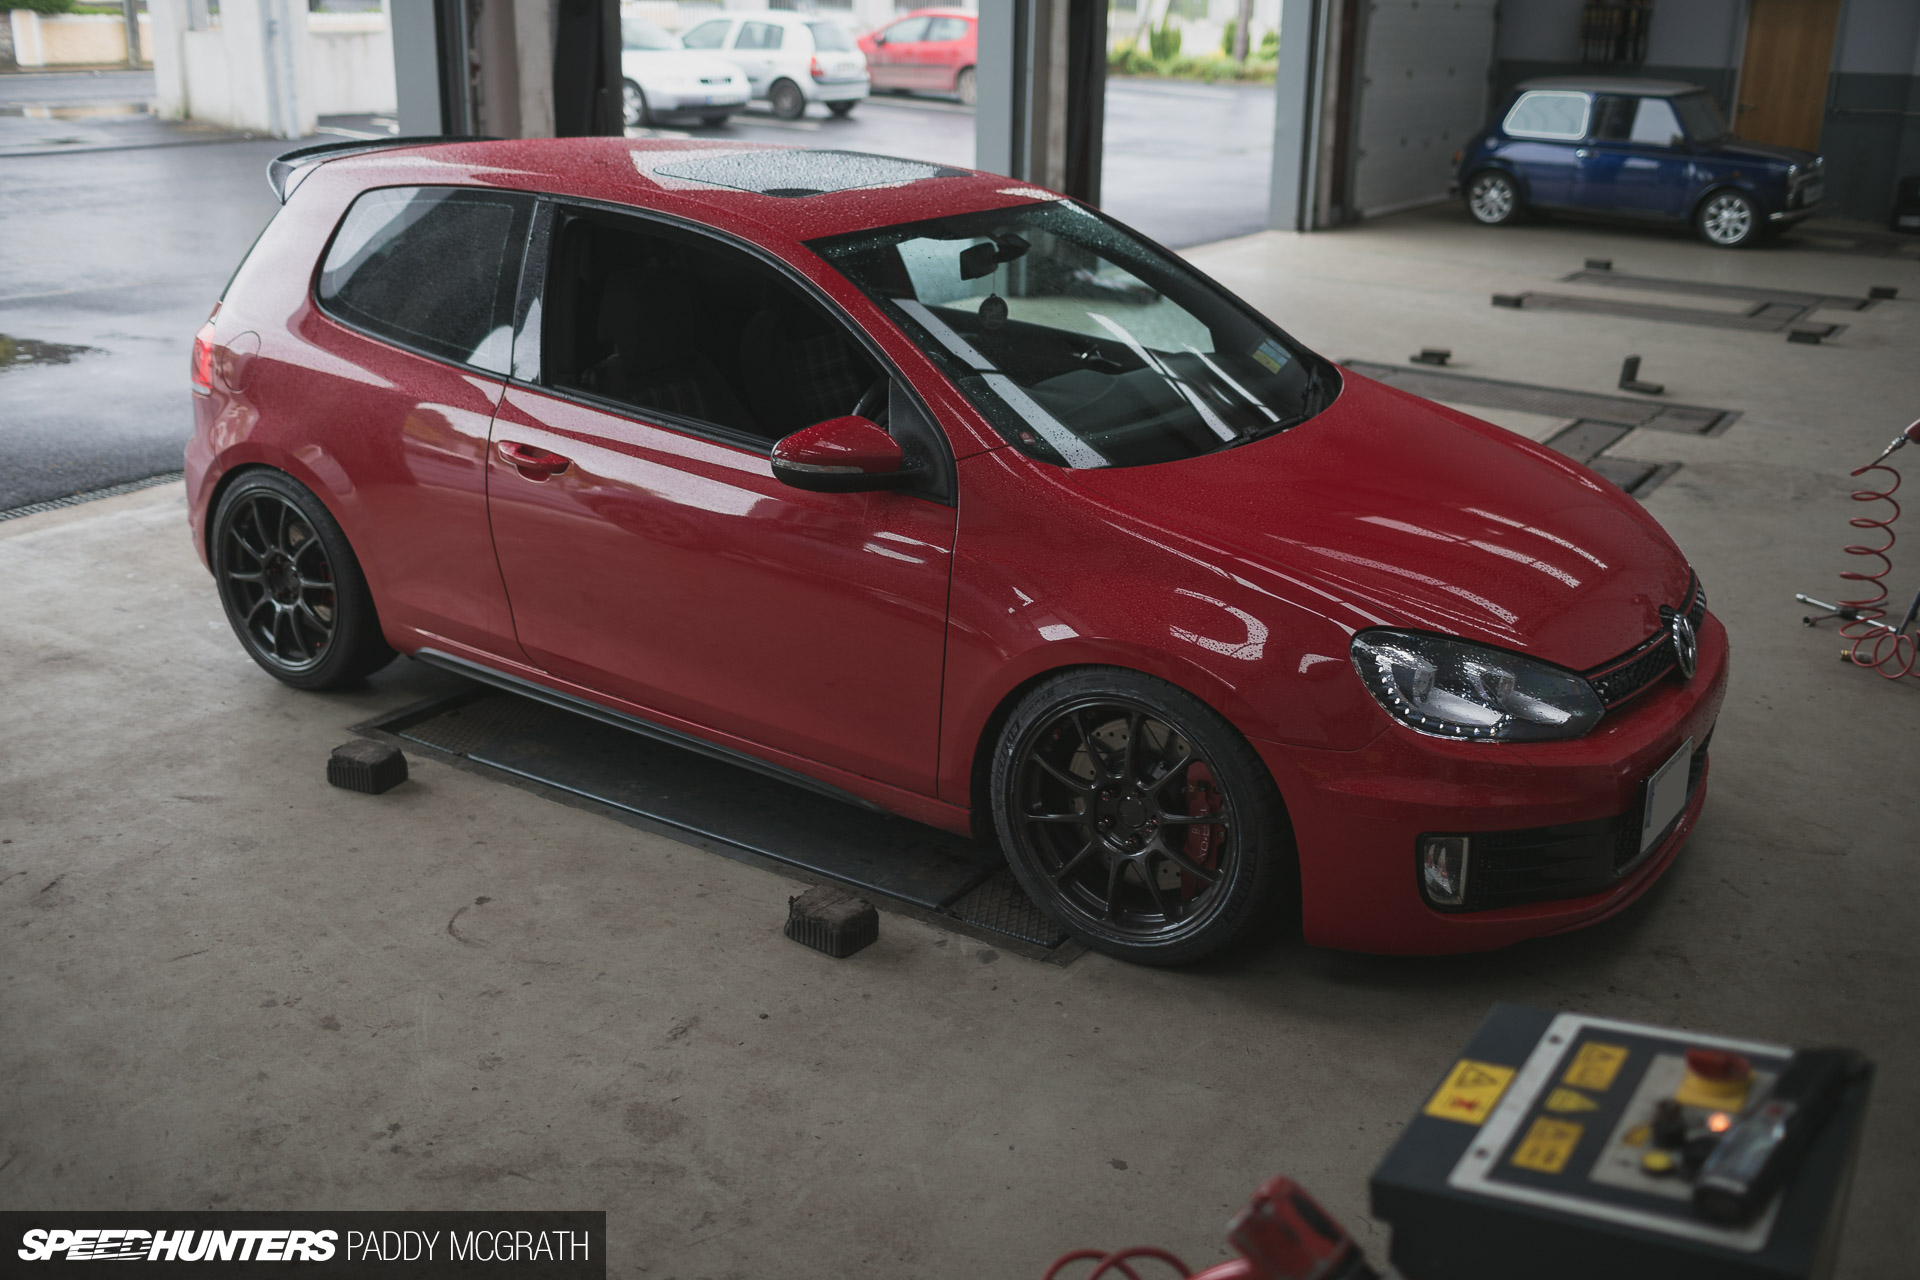
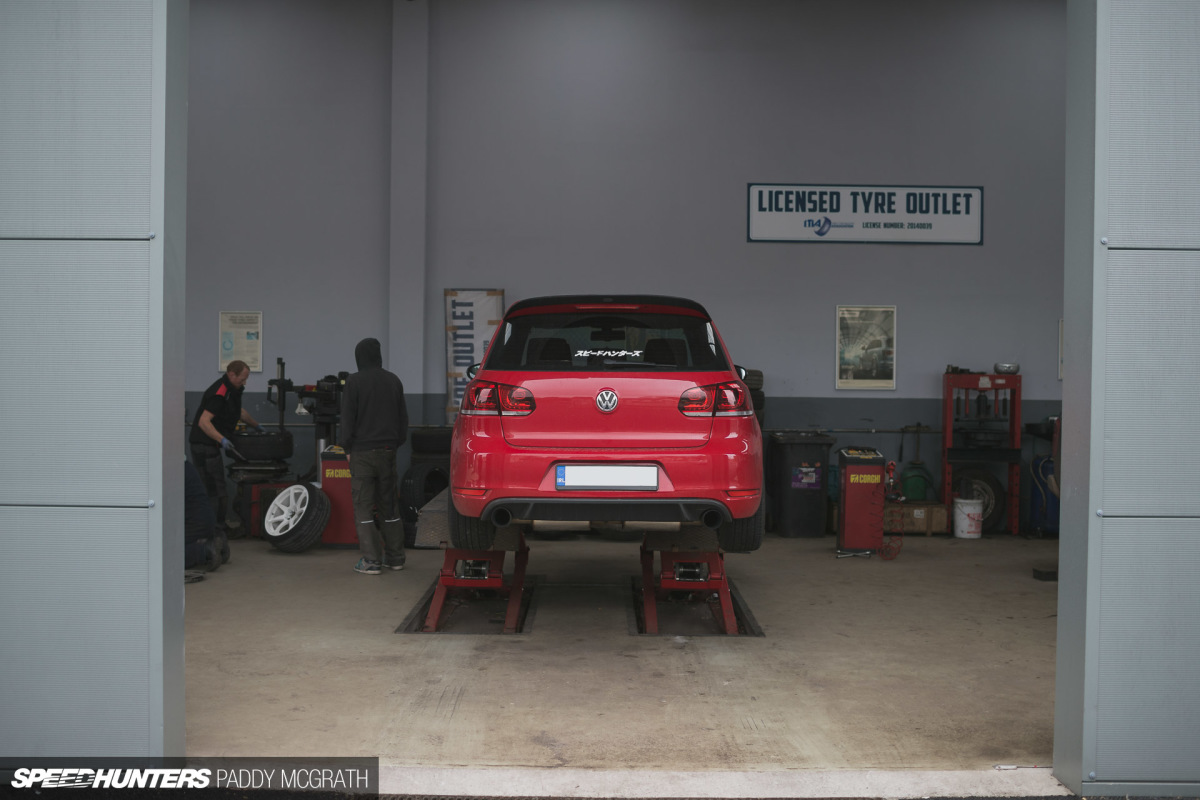
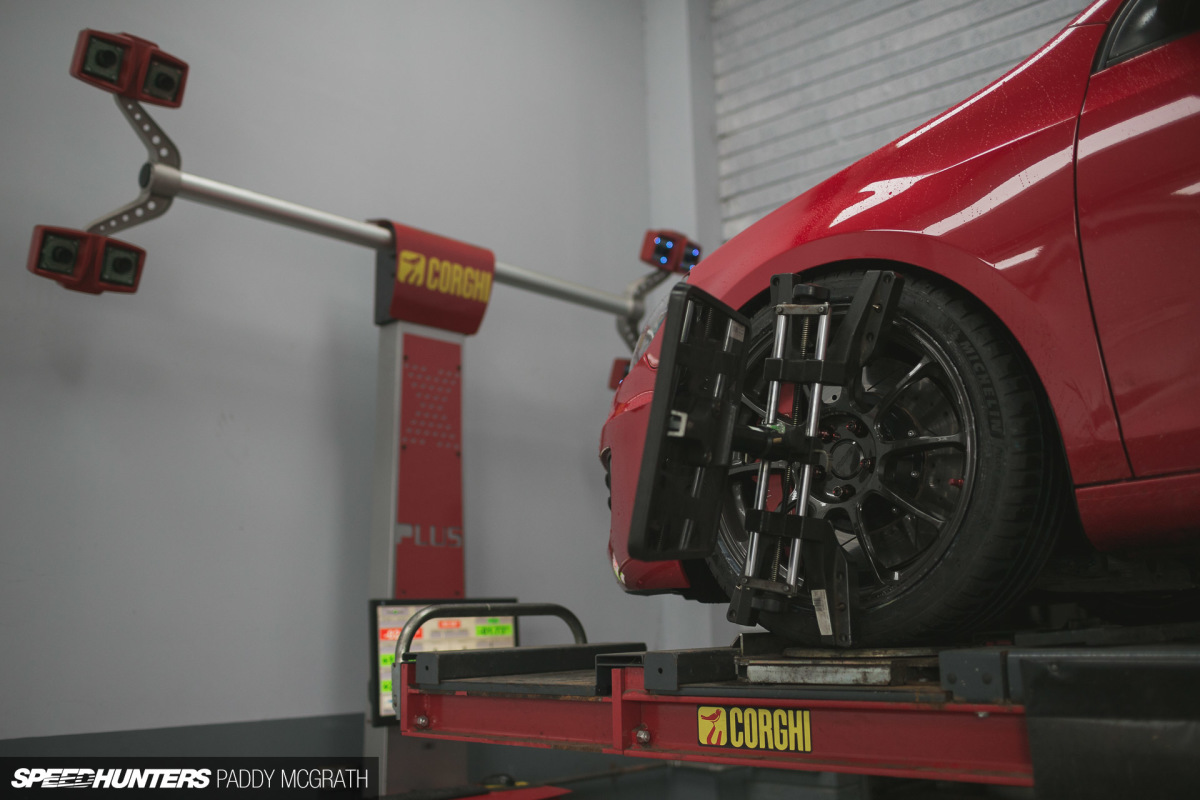
I returned from my exploits to find my GTI had moved from one side of the garage to the other and was now on the lift for the finishing touches and to double-check that everything was in good order. Lines looked good, no leaks, fittings were tight, and all electronics were working correctly; there was only one thing left to do.
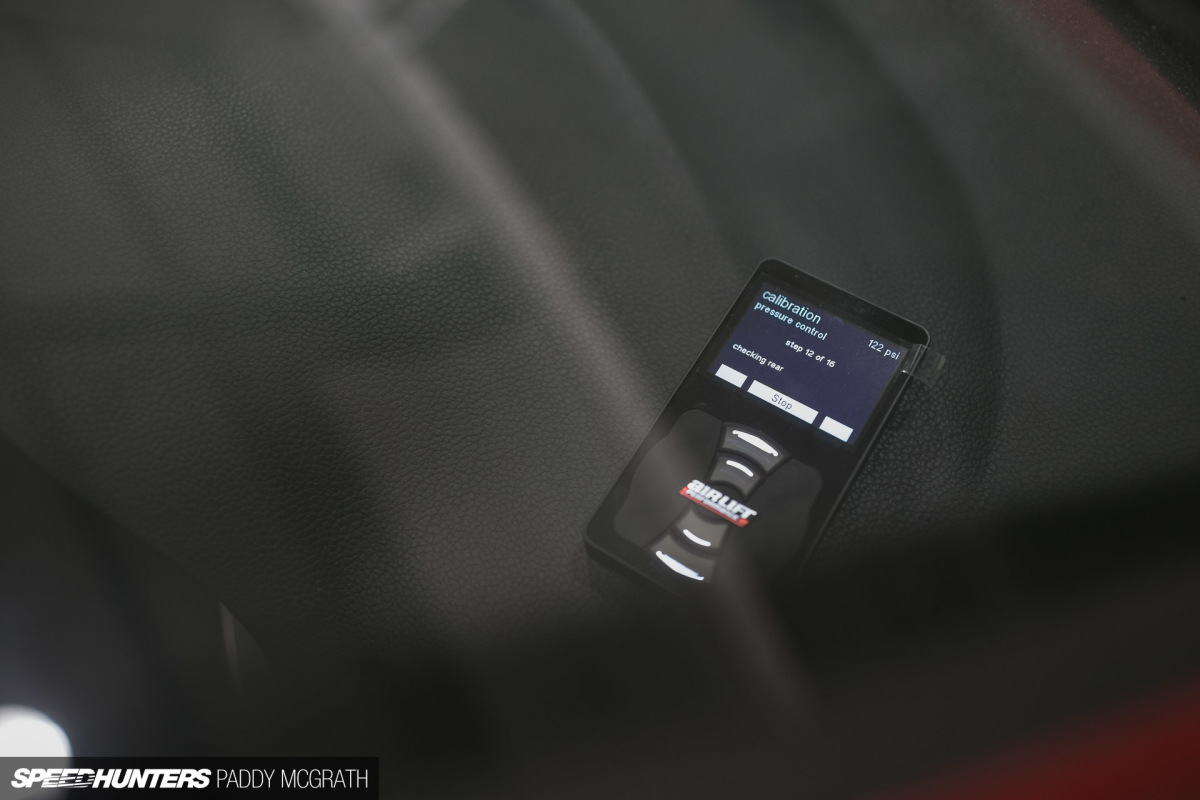
Put the car on the floor and calibrate the system.

As the car cycled its height, a few issues were highlighted. Firstly, because I don’t want to run stretched tyres we would need to roll the front arches as the broad-shouldered Kumho KU36s were just meeting the inside of the metal. That was something easily sorted with an arch roller. We then had an issue where the car would fail height calibration which left us stumped. It was now into the early morning; we were tired and nothing was going to be achieved with fatigued minds. Luckily, the 3H system can run on either height or pressure-based sensors, so I was able to easily set up some pressure presets and drive the car home in comfort. I was extraordinarily tired, but I had one hell of a sh*t-eating grin on my face.
The next day, I contacted Air Lift Performance’s helpline, explained the issue and was offered a solution over the phone after using the sensor tool built into the handheld controller to diagnose the issue. Within minutes, we knew what the problem was: we had cut the connecting rods between the sensor and suspension mounting point about an inch short. With the two front wheels removed, we were able to quickly and easily extend the connecting rods, reinstall everything and run calibration once more. This time, it passed everything and was fully operational. The smile on my face was bigger than ever.
Because I was able to put some miles up in the meantime, we were able to pore over the car once more and double-check that everything was in solid working order. There was a small leak at the tank, which I managed to cure on my own with the help of a soapy water solution and fresh PTE tape. At this point, everything was perfect on the car. It was time for a drive.
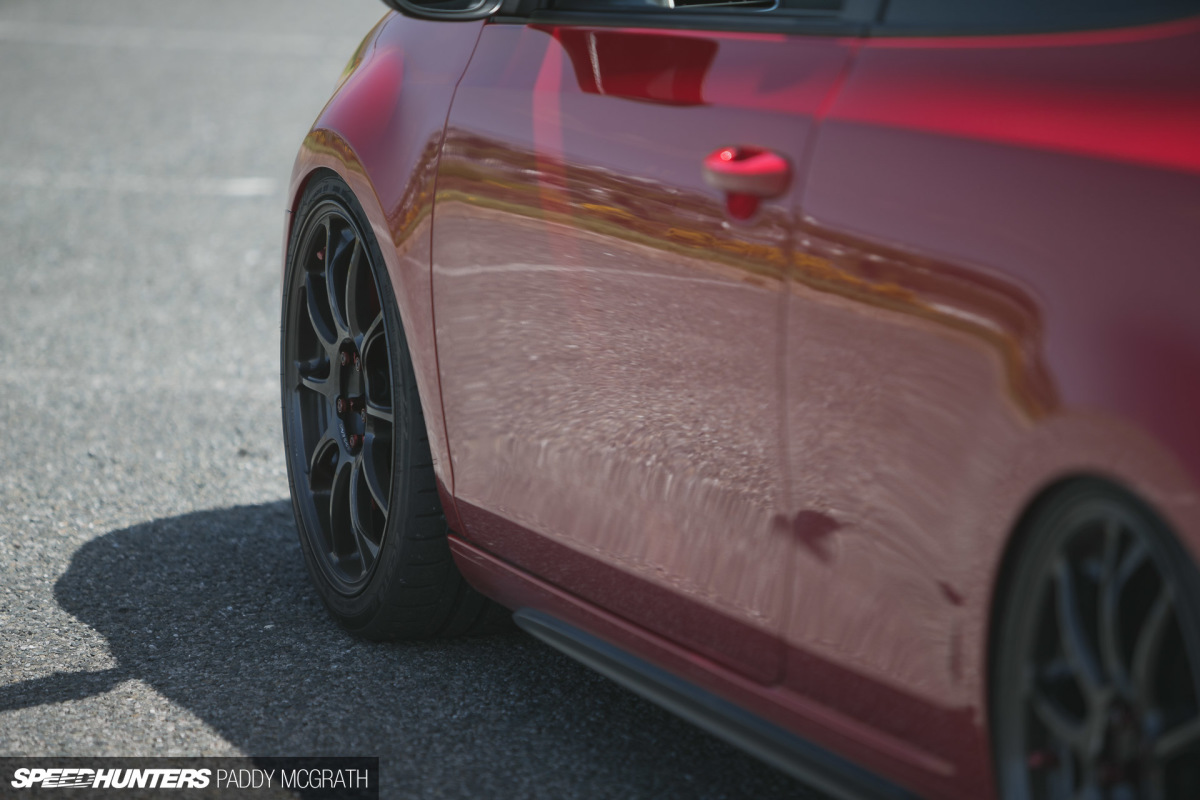
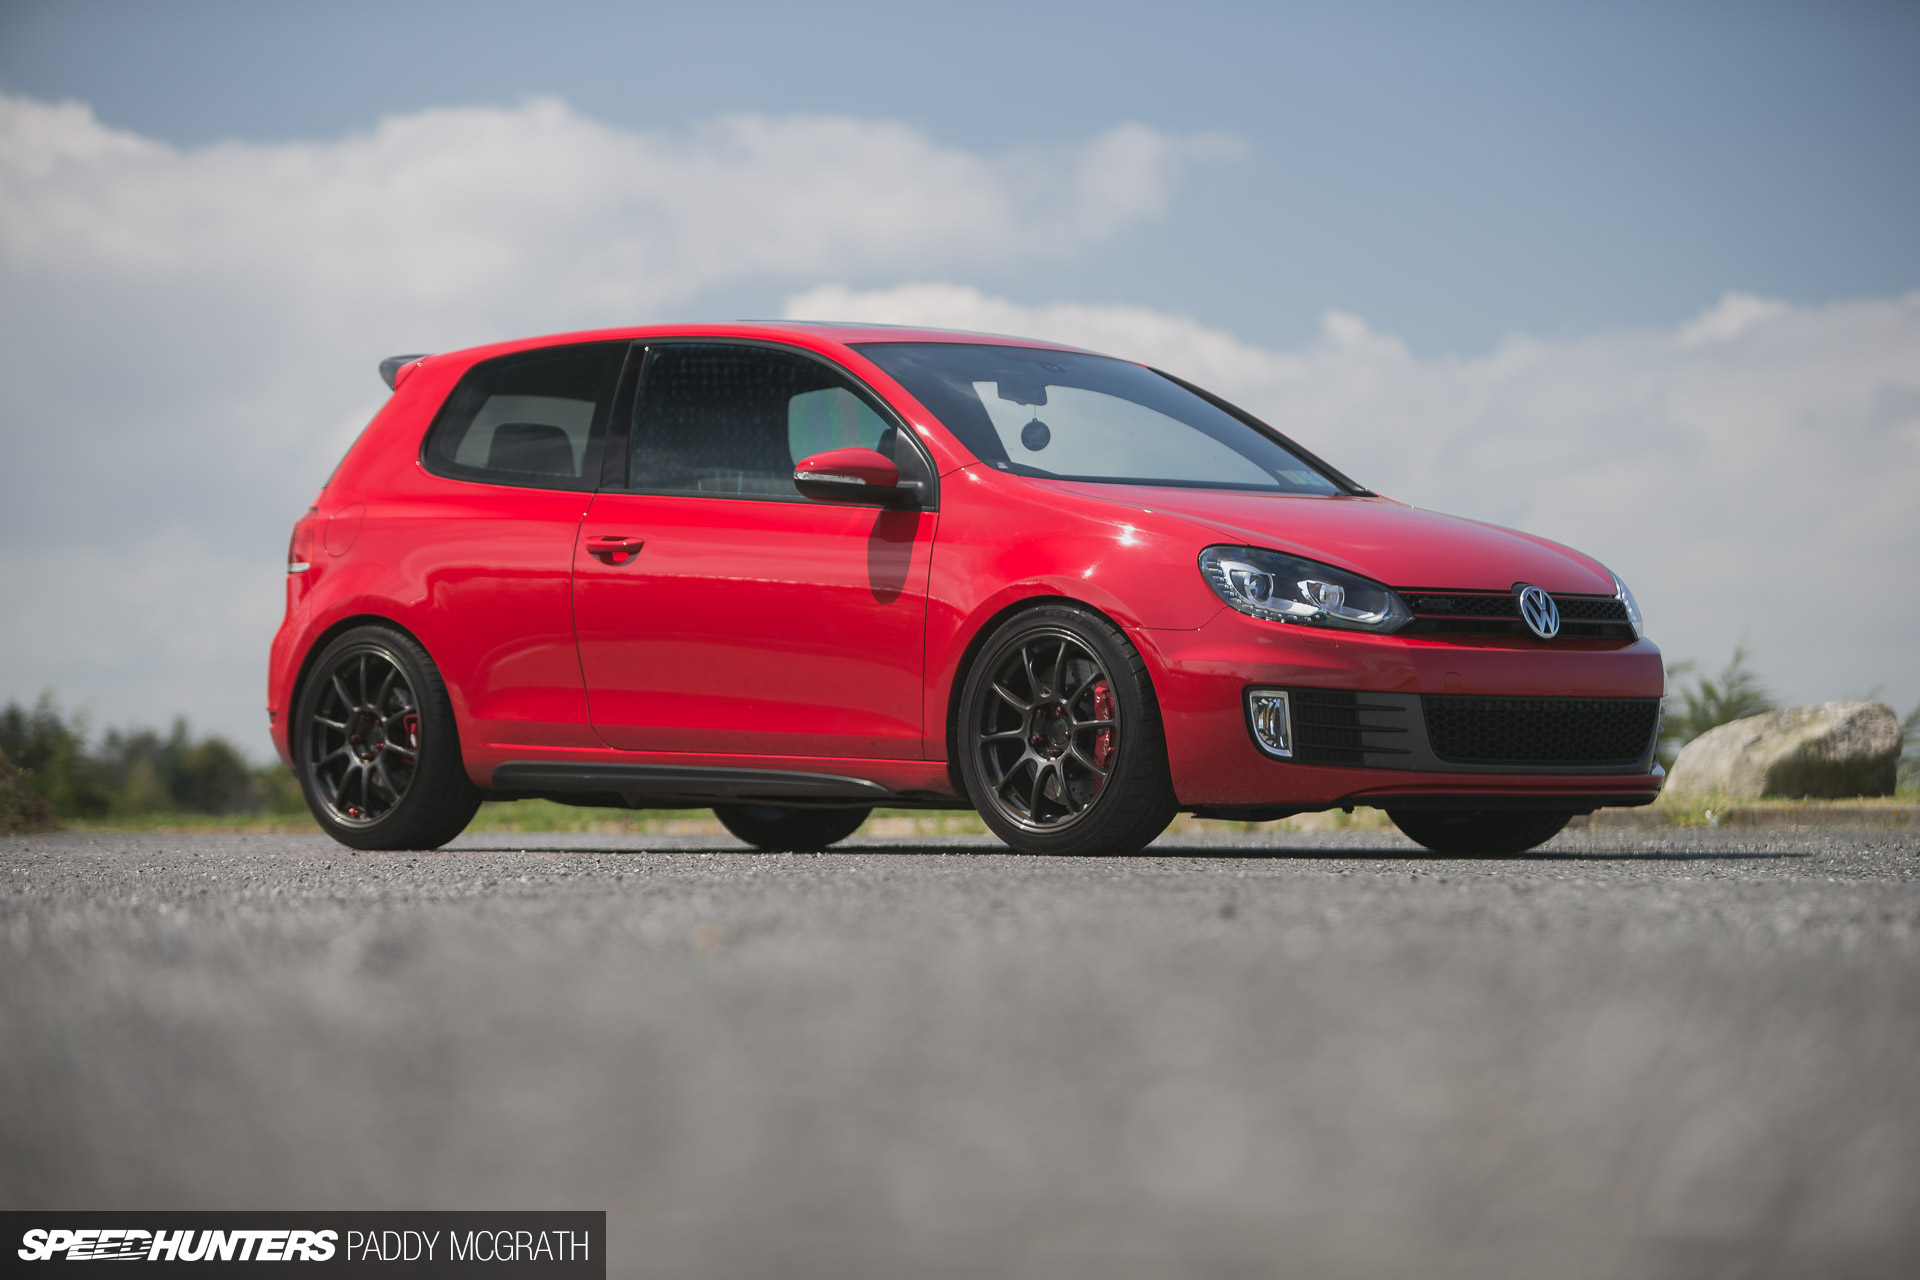
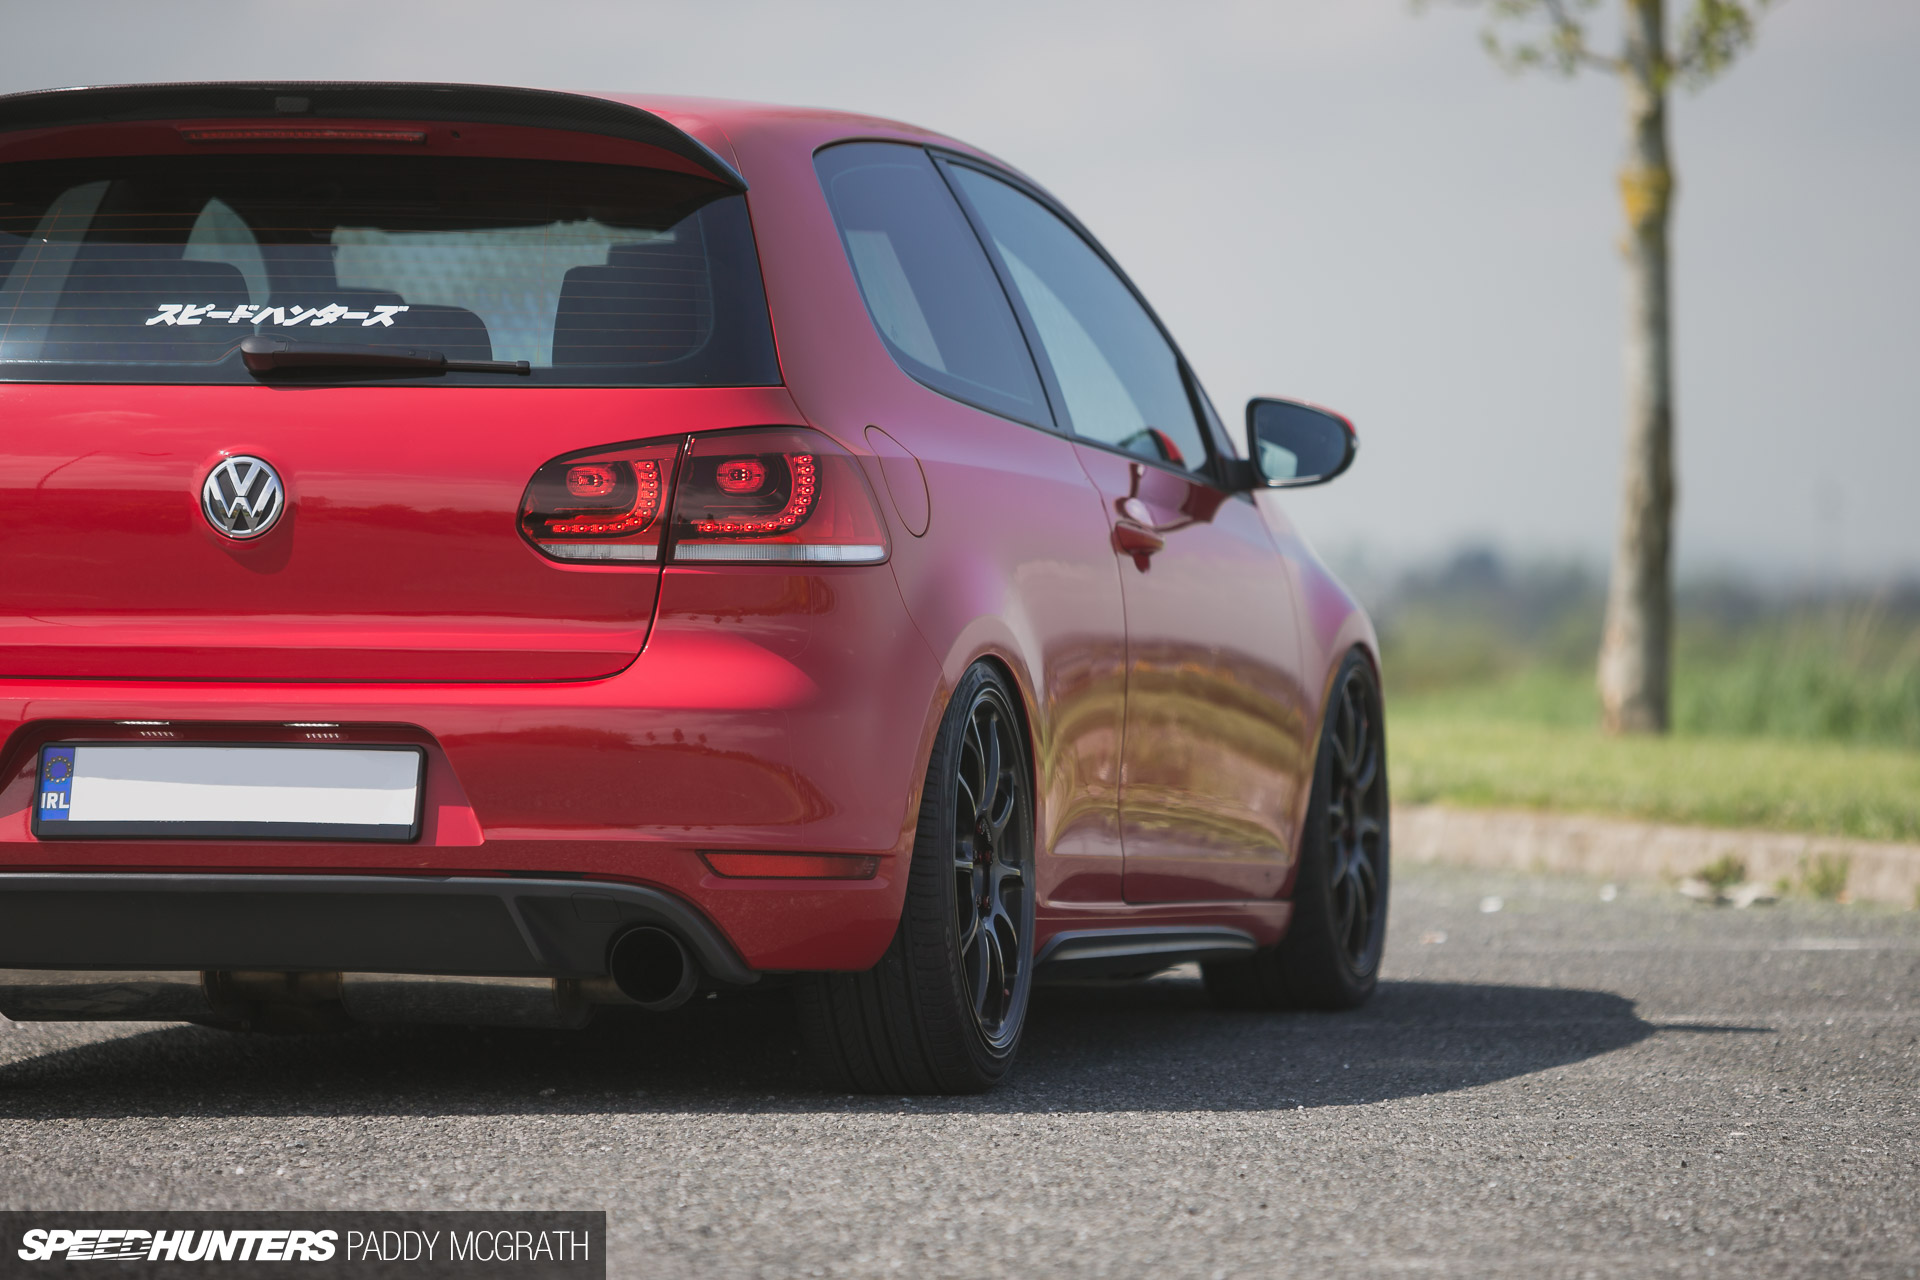
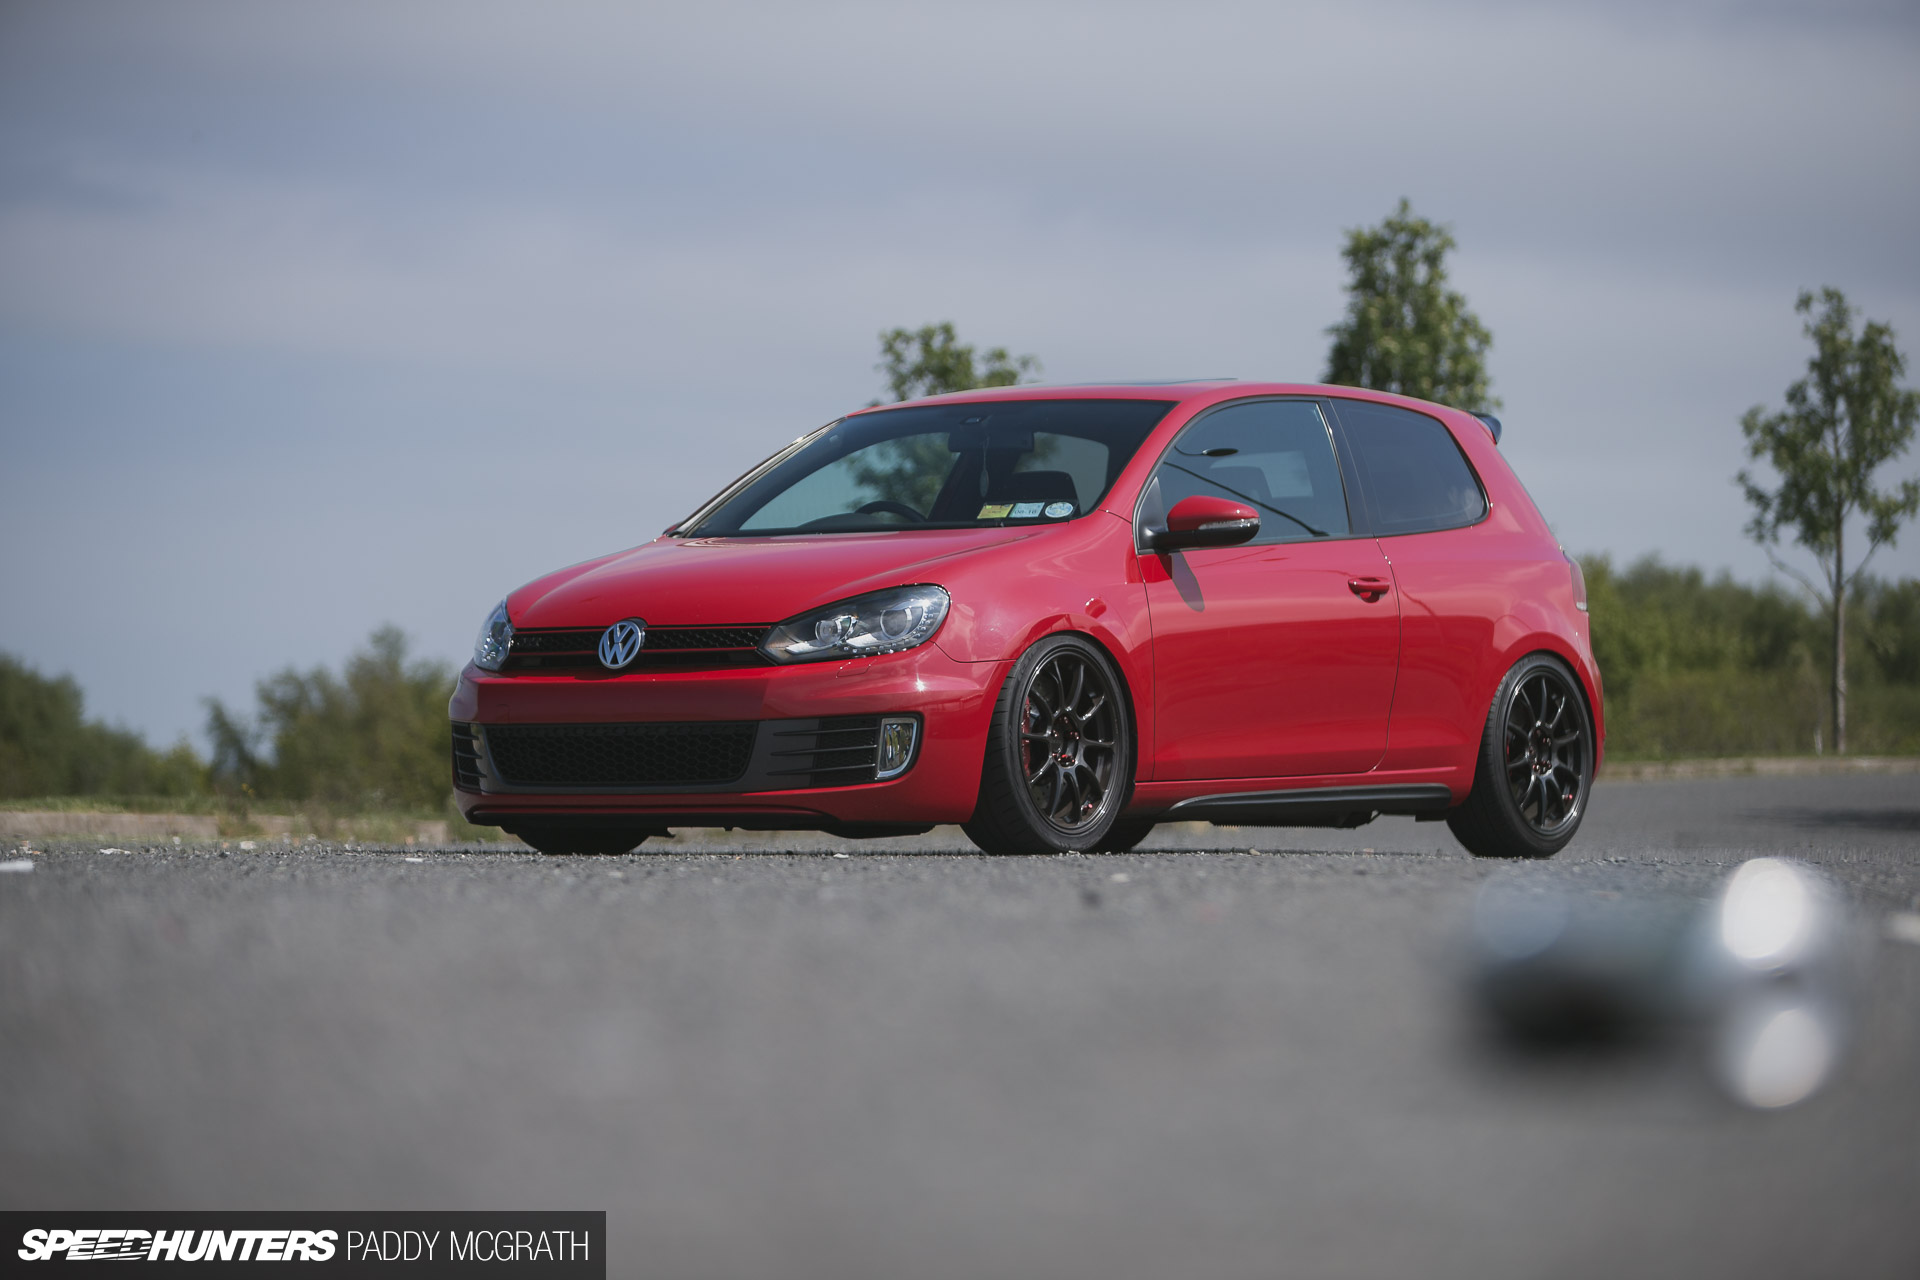
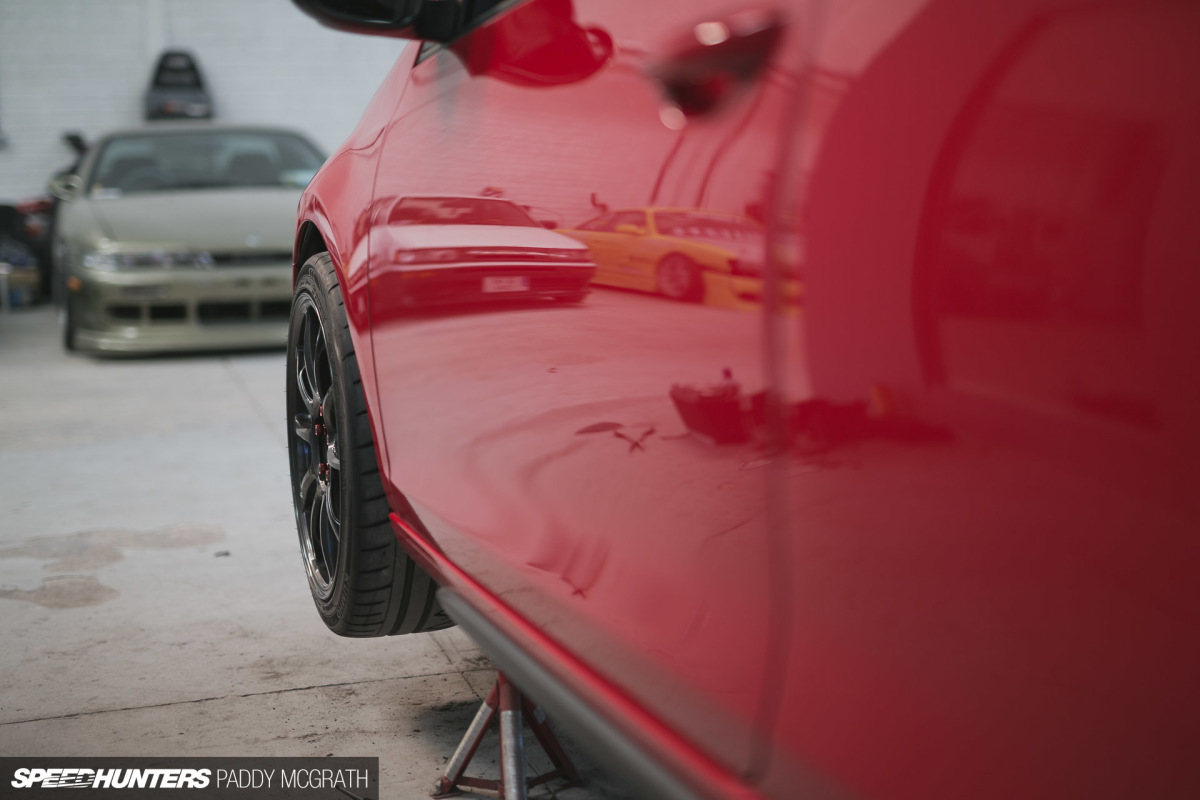
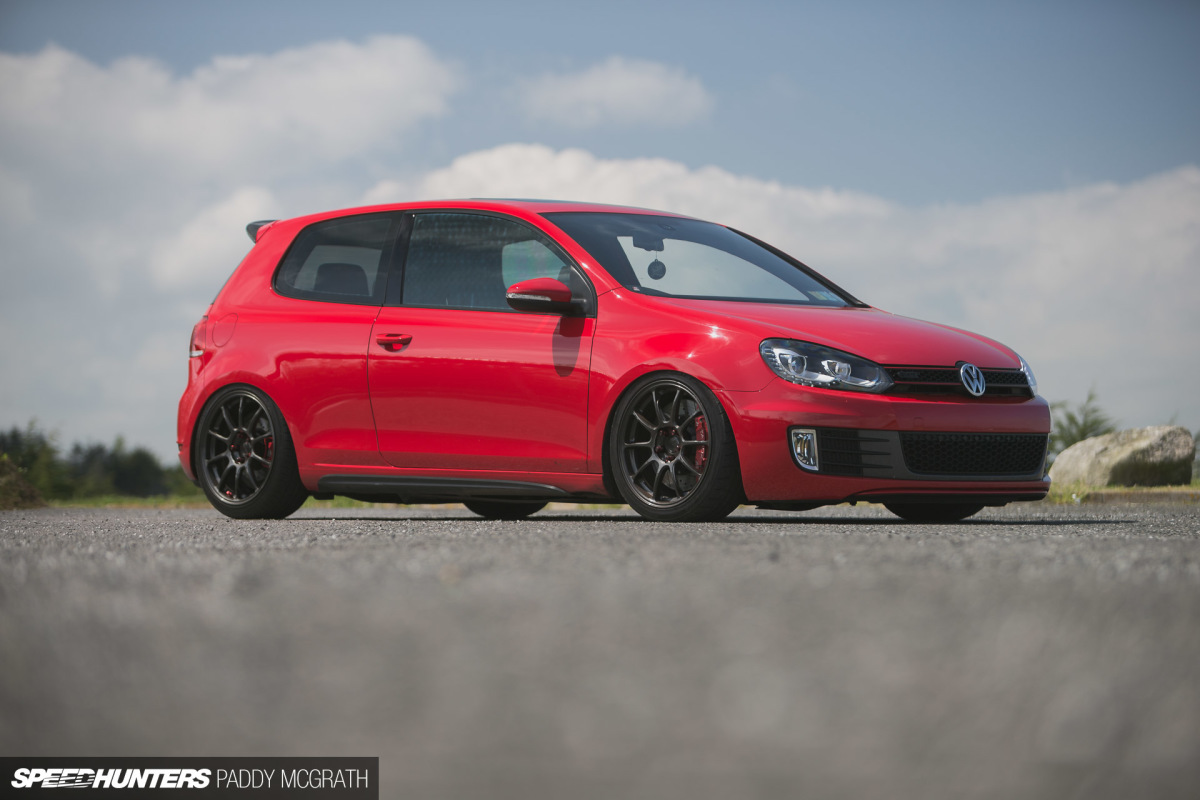
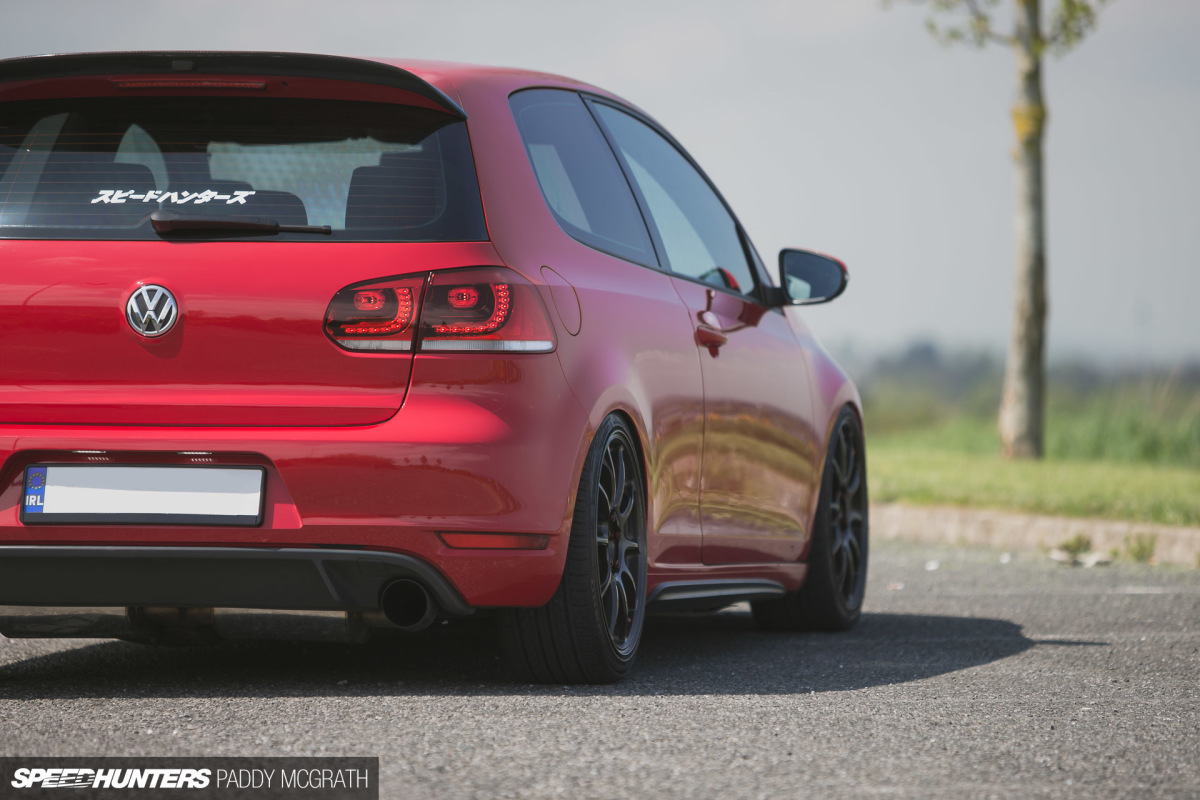
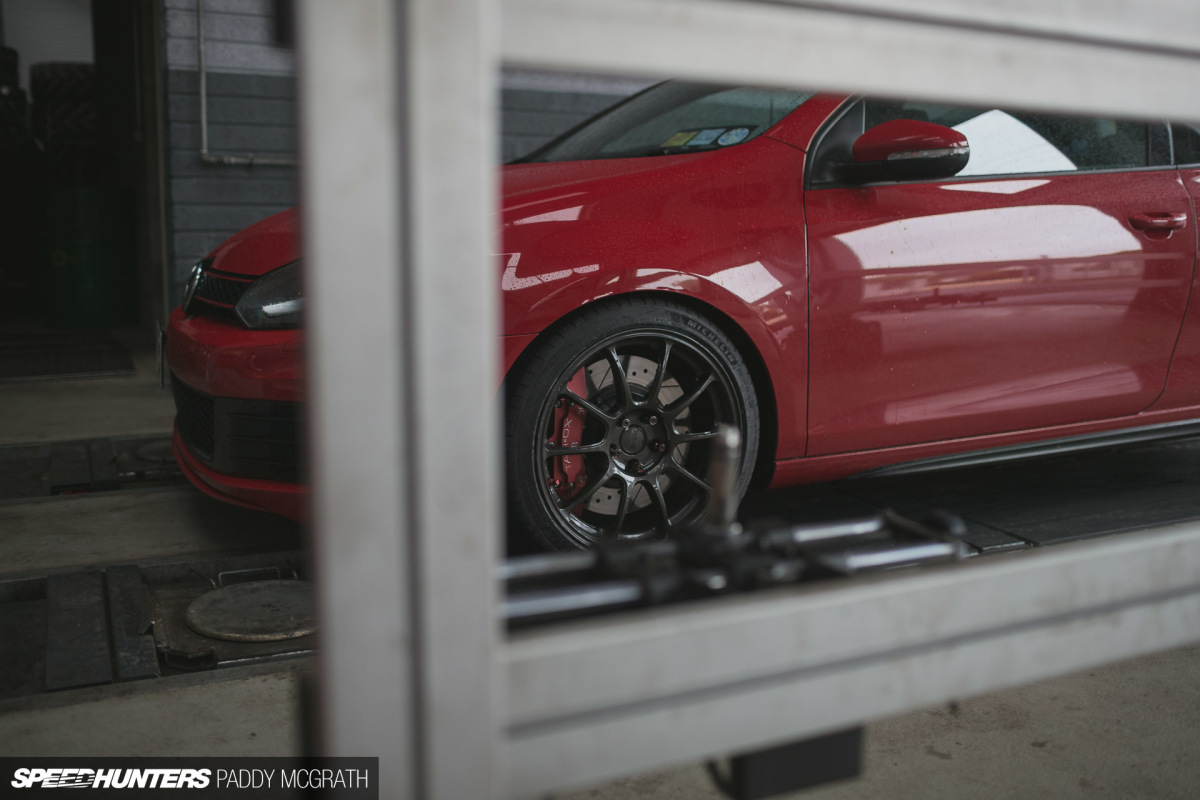
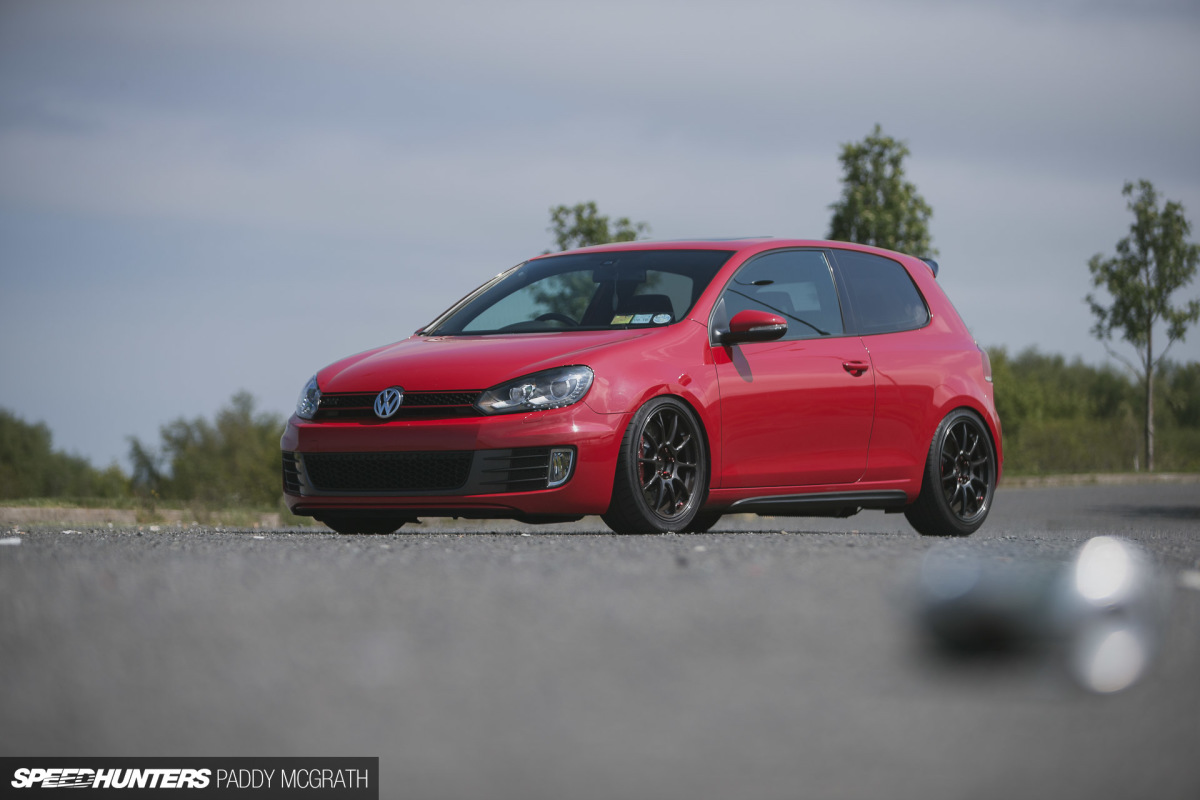
Ultimate frame-laying low was never my goal with this build, although any lowness I could extract would be a bonus. Low cars look good, just not when they’re smashing their bodywork, grinding their arches or evacuating the contents of their sump onto the road after an unsighted speed bump.

Even before I managed to get the car re-aligned and fit fresh rubber, my immediate reaction was that of being impressed. The car drove incredibly well, certainly better than it did stock. It was firm (I set the dampers to 20-clicks hard front and rear) but it wasn’t harsh. It’s quite a hard thing to explain, but imagine the reassuring stiffness of a coilover setup but without the drawbacks. There’s no crashing or banging over imperfect surfaces; there’s no sudden jolts or shocks through the car which cause you to grit your teeth. It just soaks things up so well.
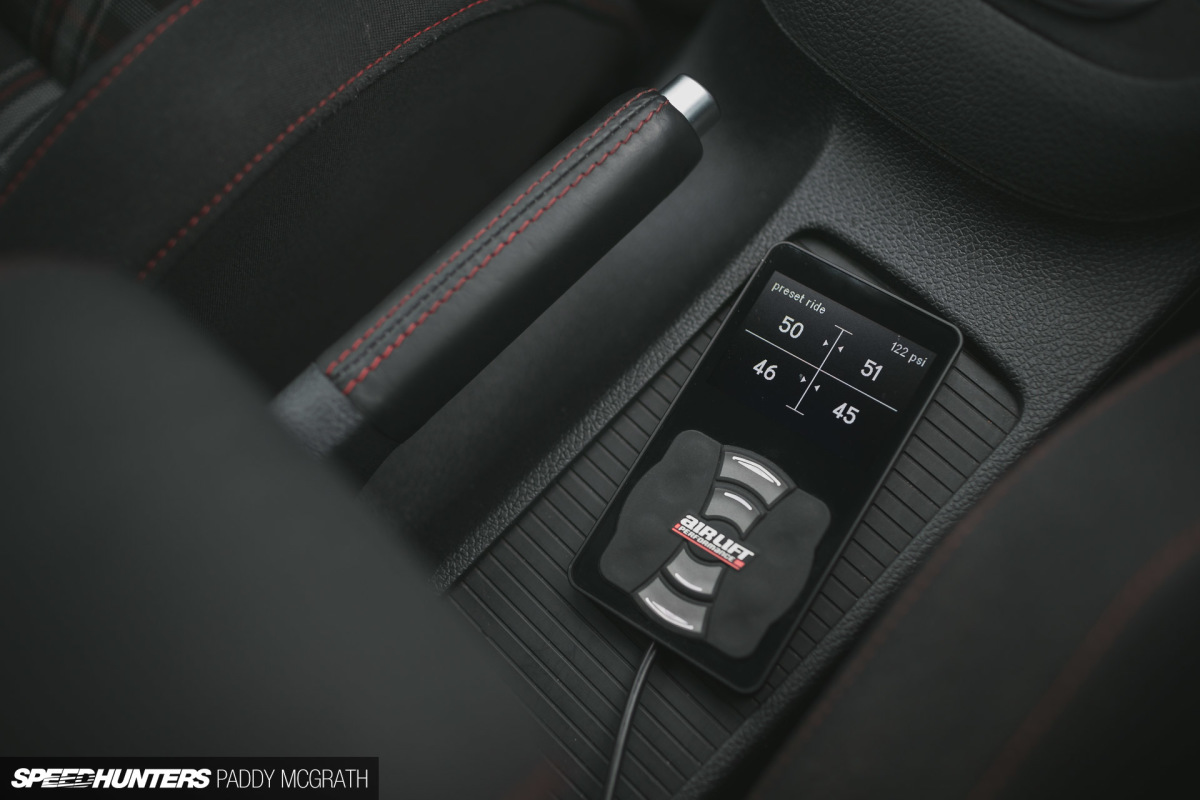
How quickly and easily height adjustments can be made is impressive too. I haven’t really been fooling around with it, but I have had to use it in a couple of situations where I know from experience that I would have scraped quite badly if I was on a static setup. With the height sensors, I just picked my height from outside the car with the app on my iPhone over Bluetooth, saved it as my driving preset and don’t really have to think about it anymore. When I get into the car it maintains its height. When a passenger or two get in, it continues to automatically maintain its height. The same goes for adding luggage; the management looks after everything for you.
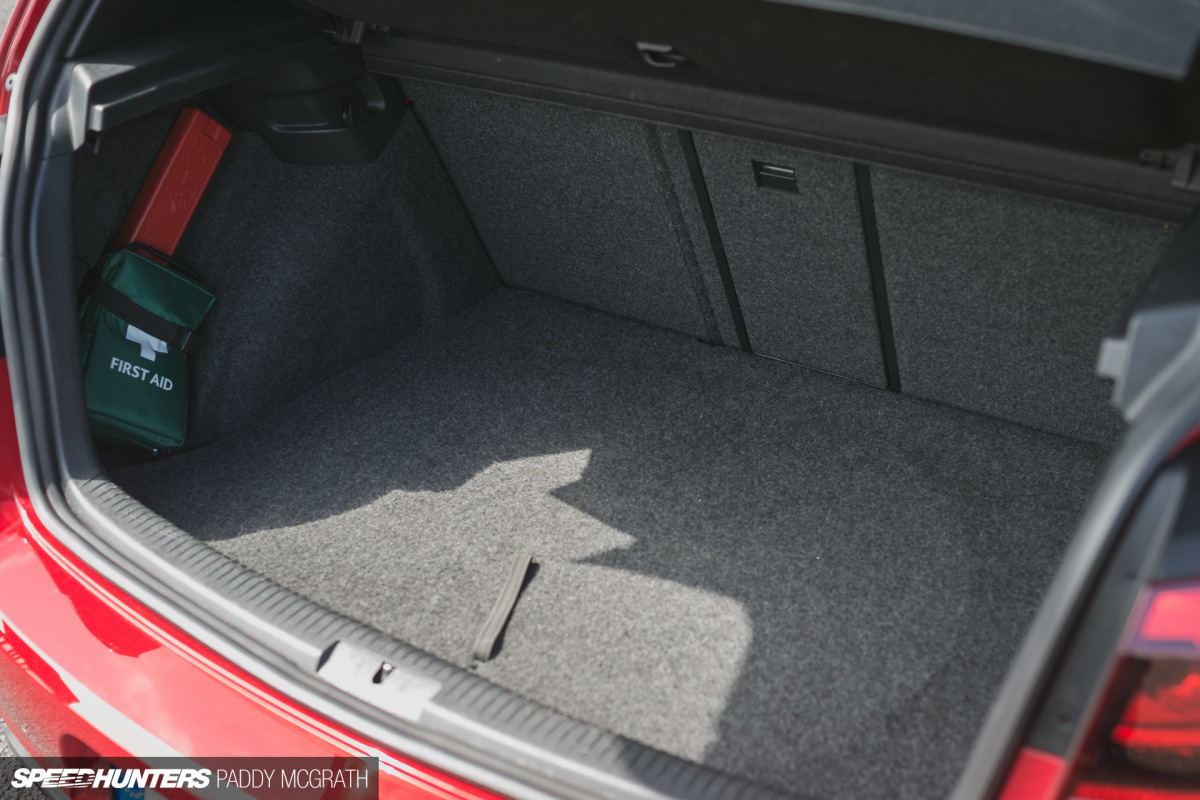
As for the completed install? This is how it looks; completely invisible, without sacrificing boot space either.
I’m still gathering my thoughts, as it’s only been in the car for a little over a week now. I want to avoid using superlatives and instead find the correct words to give you an accurate account of what a ‘life on air’ means today.
At the time of writing, I have just had new tyres and alignment completed on the car before a track day next month. It’s awful early to have a car ready, but I’m away on Speedhunters work and won’t see the car for the next two weeks.
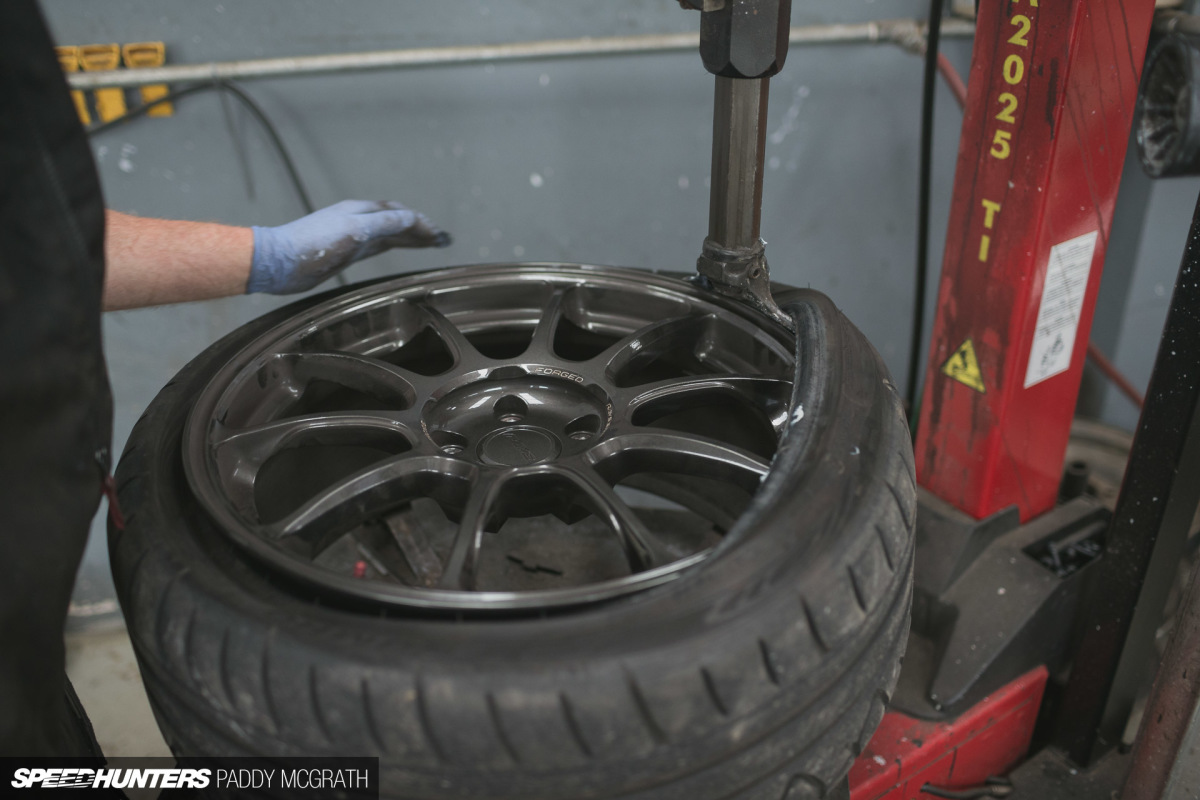
In order to find some traction, I temporarily tried some Kumho KU36s on the front of the car. For their price, they offer fantastic performance. I found them good in the wet but superb in the dry. I’m doing a lot of mileage which doesn’t suit their soft compound (they’ve a treadwear of 180), so sold them to a friend whilst they still have some life in them. I would definitely run a full set of them on a second set of wheels for track days though.
In their place I’ve opted to try a full set of Michelin PS4s in the same 225/40R18 sizes. I’ve always heard and read good things about the Pilot Sport range, so I’m excited to put some miles on them.
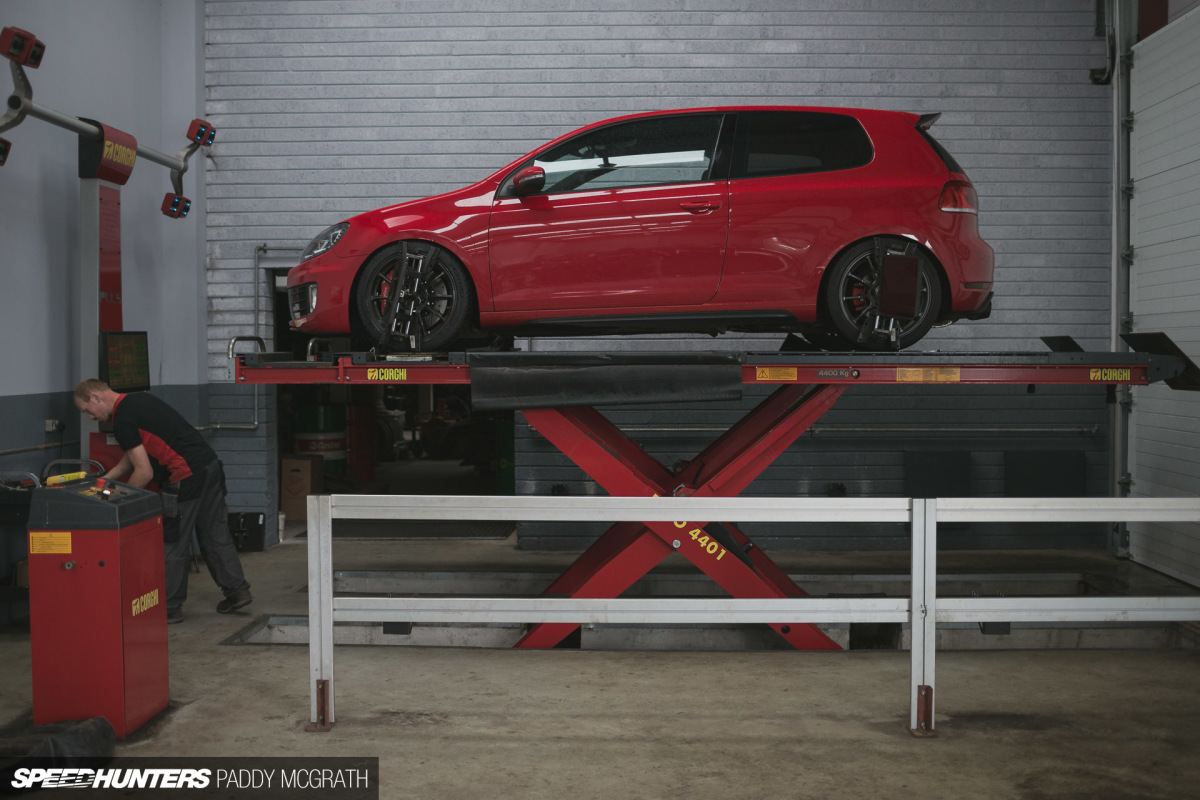
Having finally decided on my driving height, we were able to align the car correctly. As it turns out, it was pretty much perfect post-install, but it was certainly no harm double-checking this and removing any doubt. Thanks to the height sensors, I can reliably return the car to the same height at the push of a button or even the turn of a key if it’s parked below this height.
As I’ve already said, it’s still early days and I haven’t even come close to exploring the full array of features on this Air Lift Performance 3H setup. By the next update, I’ll hopefully have had some track time to really gauge the performance benefit offered by 3H. When I originally came up with the idea of running a daily/track day car on air, I thought it was outlandish to a certain degree. Now that it’s installed, it feels like the most logical and straightforward choice I have made so far.
Roll on Goodwood.
Paddy McGrath
Instagram: pmcgphotos
Twitter: pmcgphotos
paddy@speedhunters.com


Looks like you set it up perfectly, it doesn't look stupidly low when parked. I'm sure members of the public would walk past it without noticing anything different to stock but it's still low enough to catch the eye of enthusiasts.
Is the system clever enough to perform any sort of anti-roll correction during cornering?
Also, is there a 'speed bump' mode where you can quickly raise the ride height to clear obstacles?
truckosaurus Thanks!
Yeah, the system features a built in accelerometer which can make adjustments in real time at all four corners. I've found already that the car doesn't squat or dive as much in a straight line either.
With the presets, you can just set up a button which you can quickly use for speedhumps. I've my top button on the controller set to full height so it raises to probably just over stock almost instantly.
I get paid £85 every hour from online jobs. I never thought I’d be able to do it but my friend AT is earning £10k /monthly by doing this job and she showed me how. Try it out on following website…social36.comᴵᴵᴵᴵᴵᴵᴵᴵᴵᴵᴵᴵᴵᴵᴵᴵ
Very nice writup Paddy. I like the wheel Nuts, where did you get them and which brand are they. It isnt easy nowadays to get the righ ones. eBay is flooded woth cheap china Nuts....
Onecton They're Monster branded I think, sourced them from the US. Unfortunately, the finish has already started to fall off them so I might strip them completely and just polish them or paint them (black) myself.
Paddy McGrath Onecton Man you are quick thanks for the input, im in germany and frankly its a pain to find decent ones. im on the hunt for golden nuts to complement my black wagon and yellow brakes.
Onecton Paddy McGrath Hahaha, just happened to be online writing a piece and looking for any reason to procrastinate.
M14 sized nuts are a pain to source!
Paddy McGrath Onecton Well then im lucky my volvo has m12x1,5 so pretty common, but vw studs are m14 which are as you say a pain.
also procastinating here....
waiting on my brake rotors, i have ebc greens to pair them with, going to be epic
cool write up Paddy, like you say it seems like the best of both worlds. I'm very keen to see how it handles the track day, would love a setup like this, compared to coils for our horrible roads here. Will see how it goes after i sell a limb or organ first though lol
If I wasn't horrendously poor, I would like to get a set for my Hawkeye WRX wagon.
This is coming along nicely, I love how everything doesn't compromise daily use, makes for a very practical project!
looks so good.
Whattaya gonna do regarding a spare wheel then Paddy?
HattManley some guy named "http://www.livefyre.com/profile/107365299/" commented this :
 :D:D
:D:D
"Super and Easiest 0nl!nee Home opportunity for all. make 87 Dollars per hour and Make 52512 Dollars per month.All you just Need an Internet Connection and aComputer To Make Some Extra cash.............. Social36.comᴵᴵᴵᴵᴵᴵᴵᴵᴵᴵᴵᴵᴵᴵᴵᴵ"
http://www.speedhunters.com/2016/05/minnesota-cars-and-coffee/
Tomo Pattison I never had one in my last car, so I'm used to not having one. I always carry a can of Tyre Weld in the car, along with a 12V compressor which has been more than enough over the years. Ultimate worst case scenario, I have recovery on my insurance policy.
DanieleScozzaro Thanks!
iProGam3r That's definitely been the hardest part so far, every choice and modification has to be thought about and weighed up so much.
ethosVeritas_Z32 Me too! I've a good feeling about it although I just realised on the way to the airport that the alignment was done with the steering wheel off centre, so need to sort that before travelling to Goodwood.
I know that every install is different but roughly what is the bill for the parts on a setup like this? im working on an old volvo 245 and the combination of auto leveling and clearance on demand seem like a home run for a daily driver / racer / utility wagon. oh, nice car btw.
Nice 'stance'!!!
Makes me think of how bad Honda has fallen off.
Nice writeup Paddy, was thinking about Air installs just today. Can you tell me, how you adress steering geometry when the height changes? On my Golf when I change the height of my adustable coilovers, the toe in changes and has to be re-aligned, as the car handles terribly especially in the wet
Awesome write up!
Seems like the perfect all around car
Me three. In all the new civics I've had they didn't come with a spare, it seems to be the way forward.
(Thinking of adding a full size spare to my CRX as ballast though....)
I was quoted 3k all in by performance air. That's lines, tanks, solenoids etc plus fitting. Which, when pricing up coilovers for my daily, having similar uses to yourself, seems a bloody decent price.
The height on this car is perfect. It's not scraping the ground, and the fitment looks amazing. And you can always pump it up an inch or so when you are out daily driving, so you don't crack an oil pan or break your front splitter. Loved the write up. +1
Yet another excellent bags question that I hadn't thought of.
What is the total weight difference? I'm interested in better brakes but the unsprung weight increase is a problem.
Absolutely amazing looking @Paddy McGrath! I think a slight front lip spoiler, would really set off the car! Just throwing a suggestion to you.
zapsnyder It depends on each application, it's like asking how much does a car cost. You can build a setup that you can upgrade as time goes on too, so the initial purchase price is reduced. For example, you could run just pressure sensors with the new ALP manifold, but add the height sensors later down the line. I dealt with Air Lift Performance directly, so you should be able to figure out a rough cost on their site, just use the 'Find Your Car' dropdown menu: https://www.airliftperformance.com/
roeby Why thank you
Lukas Kana Great question and one that's easy to answer.
After a couple of days driving (pre-alignment) I figured out an approximate height that I wanted to daily drive the car at. I based this off of each bag's pressure and how it felt driving (agility, comfort, no rubbing etc.) I was able to fine tune the height from outside the car using the Bluetooth ALP 3H app, knowing that the height sensors would maintain the same height even when I got back in. Once I was happy, I saved this height on the controller (could have used my phone either) as the default ride preset. This means that every time I start the car, the car raises to this precise height or if the car is parked at a higher height, I can simply return to the default height with a quick double tap of the ALP button on the controller.
My default height is what I'm going to use 99% of the time whether I'm daily driving or on track, so that's the height that the car was aligned at in the pictures above. If I decide to change this default height, I'd likely need to realign depending on how much I change it by.
I consider my other rolling presets (low driving and maximum height) to be temporary driving modes, used under specific circumstances for a short period of time i.e. accessing a steep driveway entrance, speed bumps, rolling through a show at ultimate low etc.
RichlyOrange Thanks!
beetfarmer1989 Glad you enjoyed it and can appreciate what I'm aiming for. VW's aren't exactly renowned for their invincible sumps!
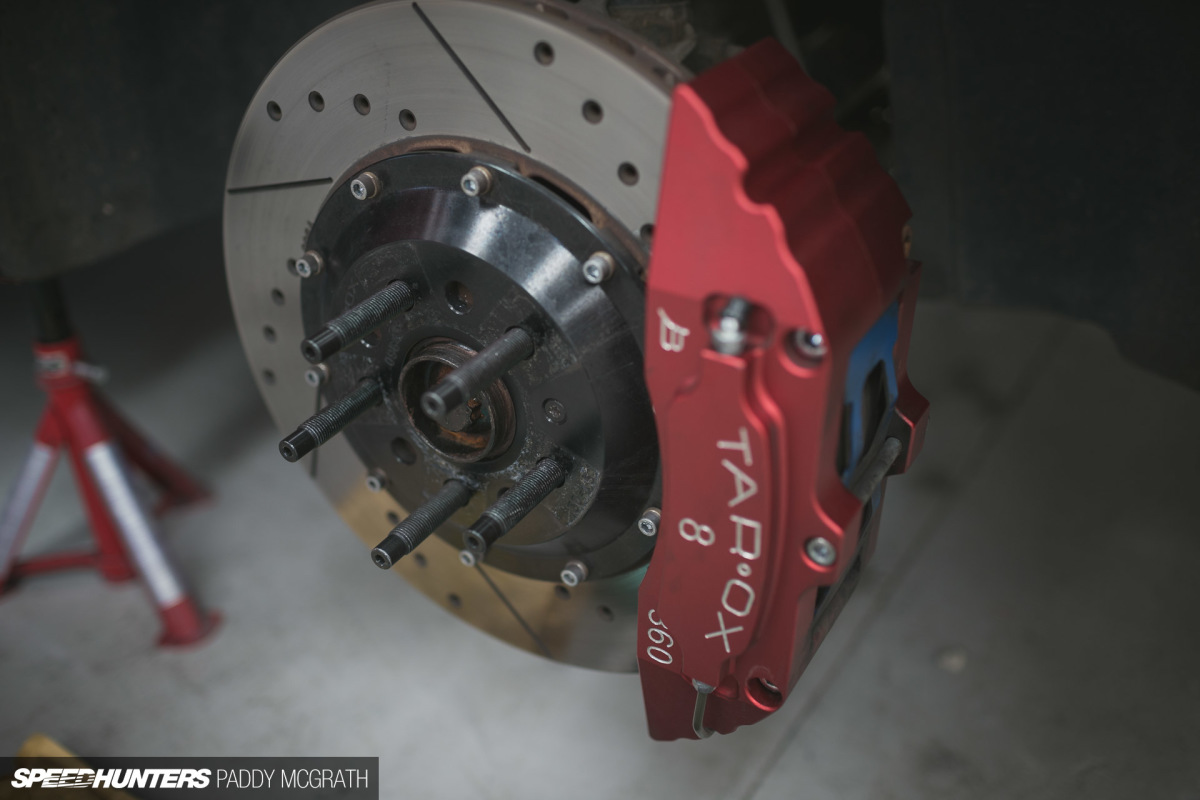
rook56 I forgot my weighing scales when we were installing, which I'm still kicking myself about. I would be very surprised though if there was any significant change in overall weight of the car on air suspension and would expect that I've lost quite a bit of unsprung weight, especially when you lift the standard strut versus the Air Lift Performance strut back-to-back. I know the car's weight prior to installation (1435kgs with half a tank of fuel) so might try and get it weighed again to see if it's changed.
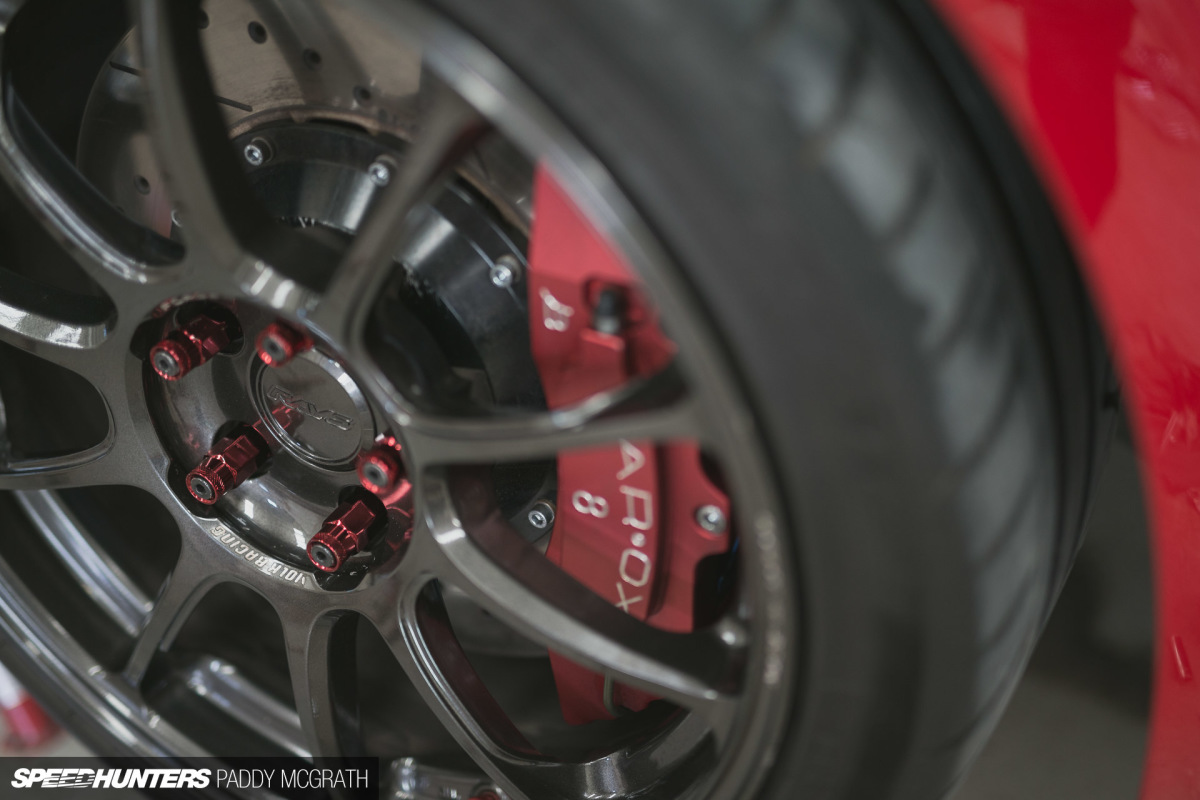
With regards to the brakes, you'll have to check the relevant update but off the top of my head the Tarox calipers were around 1kg lighter than the standard brake calipers, but the discs were around 1kgs heavier. The wheels were the biggest weight saver on the car, saved around 5kgs per corner with the ZE40s.
@Nick Funny you say that, I've been waiting for my front lip since February! I just got notification that it arrived whilst I'm here in Australia, so will hopefully get it fitted for Players Classic when I get back.
Fantastic! Keep up the great work with the car and the awesome content you put out!
Dat fitment yo
Jk looks great but i've always wondered how much noise does the compressor make ?
Paddy McGrath Nice, thank you for the answer. This just shows, how far the air systems have really gotten.
JustinOdijk They're like having a tiny fridge in the boot. They don't run for long, maybe 10 or 15 seconds tops after airing up, but there's no real sound insulation so to speak in the boot of the GTI. I plan on sound deadening the boot floor in the coming weeks but they don't bother me at all when they're running.
Damn, it looks clean!
I wouldn't run KU36 unless they were really cheap. You have Hankook RS-3 available for track days.
Still absolutely love that evo
Just too much love for this car !!!
@MyLifeAsLouis It needs a wash. Badly.
niZmO_Man We can't get RS3s here, AD08Rs have to be imported (I think) but can get R888s off the shelf but they're really expensive.
LukeEVOVIII So do I. If I could afford it, I'd buy it. It really left an impression.
@Peden Cheers buddy
So clean and perfect, only thing that's missing is a subtle front lip.
Front lip is at home, waiting to go on U0001f918U0001f3fb
Insanely clean build
mandeepchase It's getting there, still some time to go yet.
Paddy McGrath I've got some sound deadening you can have.
Jessica Rabbit still doing funny things to my body into my adult years.
Ben Chandler Paddy McGrath I will take it.
IRONWOLF RD I'm happy that name is sticking.
The car looks incredible Paddy well done! Hopefully I'll get a look at the next Auto Heroes!
Wow Paddy, it totally transforms the car! Amazing, nice work, Love that you did away with the spare and went with putting the tanks etc in the well.
Really interesting to see this project unfold! Will be very interested ti hear how it rides and how responsive it is
What a great technology Very Nice
http://www.dubaidesiescort.com/
The car looks so fine now Paddy! The fitment is superb when it's lowered, so damn jealous.
Evan Walsh Cheers, Evan.
Think the next Irish event I'll make will be Global Warfare III
TurboHippie Thanks, mate. I'm looking forward to getting home and driving it
Gytis Mickevicius Maybe a small spacer is required on the rear to match the front's naturally wider track, but I'm pretty happy with it.
Paddy McGrath Any plans to come UK side? Will be at players classic on 11th, assuming some of the Speedhunters crew will be there?
TurboHippie Paddy McGrath Should be on track at Players Classic all going to plan.
Excellent, hopefully we'll see you there. I'll be bringing the FRST (fingers crossed) a good friend has just acquired a Stagea RS-Four which he should be bringing too! Best of luck with the Golf Paddy. If you are with it at players it would be an honour to check it out in the flesh. Catch u soon
TurboHippie Absolutely come over for a chat, mate. I might be bit stressed during the day between cleaning, preparing car, driving, shooting and interviewing owners but should be a bit more relaxed in the evening! (I hope)
Car looks great Paddy; as far as keeping the install hidden, is there anywhere else you could have put them to keep the spare tire?
otar A lot of guys run a single tank & compressor combination and retain the spare wheel by raising the boot floor. It can definitely be done, it was just easier for me to get rid of it. Also, I can run an airline off the tanks to inflate my tyres if I'm stuck too.
This makes me extremely jealous, just seeing what you've done to the car as the months pass, and seeing just how little I've done to my MK5 GTi. I haven't any money to do anything, and even repairs are getting expensive. New cam-chain, tensioner and follower to do. Air bags have a permanent fault because of a faulty loom under the drivers seat (have to remove the upholstering to fix it) and numerous other little niggles.
Stop making me jealous. God damn you.
Paddy - brilliant!
EZ