


We’re nearing the end of our Scion Tuner Challenge MAXIMUM ATTACK FR-S build story, and things are really starting to come together now.
Follow along as we get the painted roller back and start final assembly with just 30 days to go until delivery…

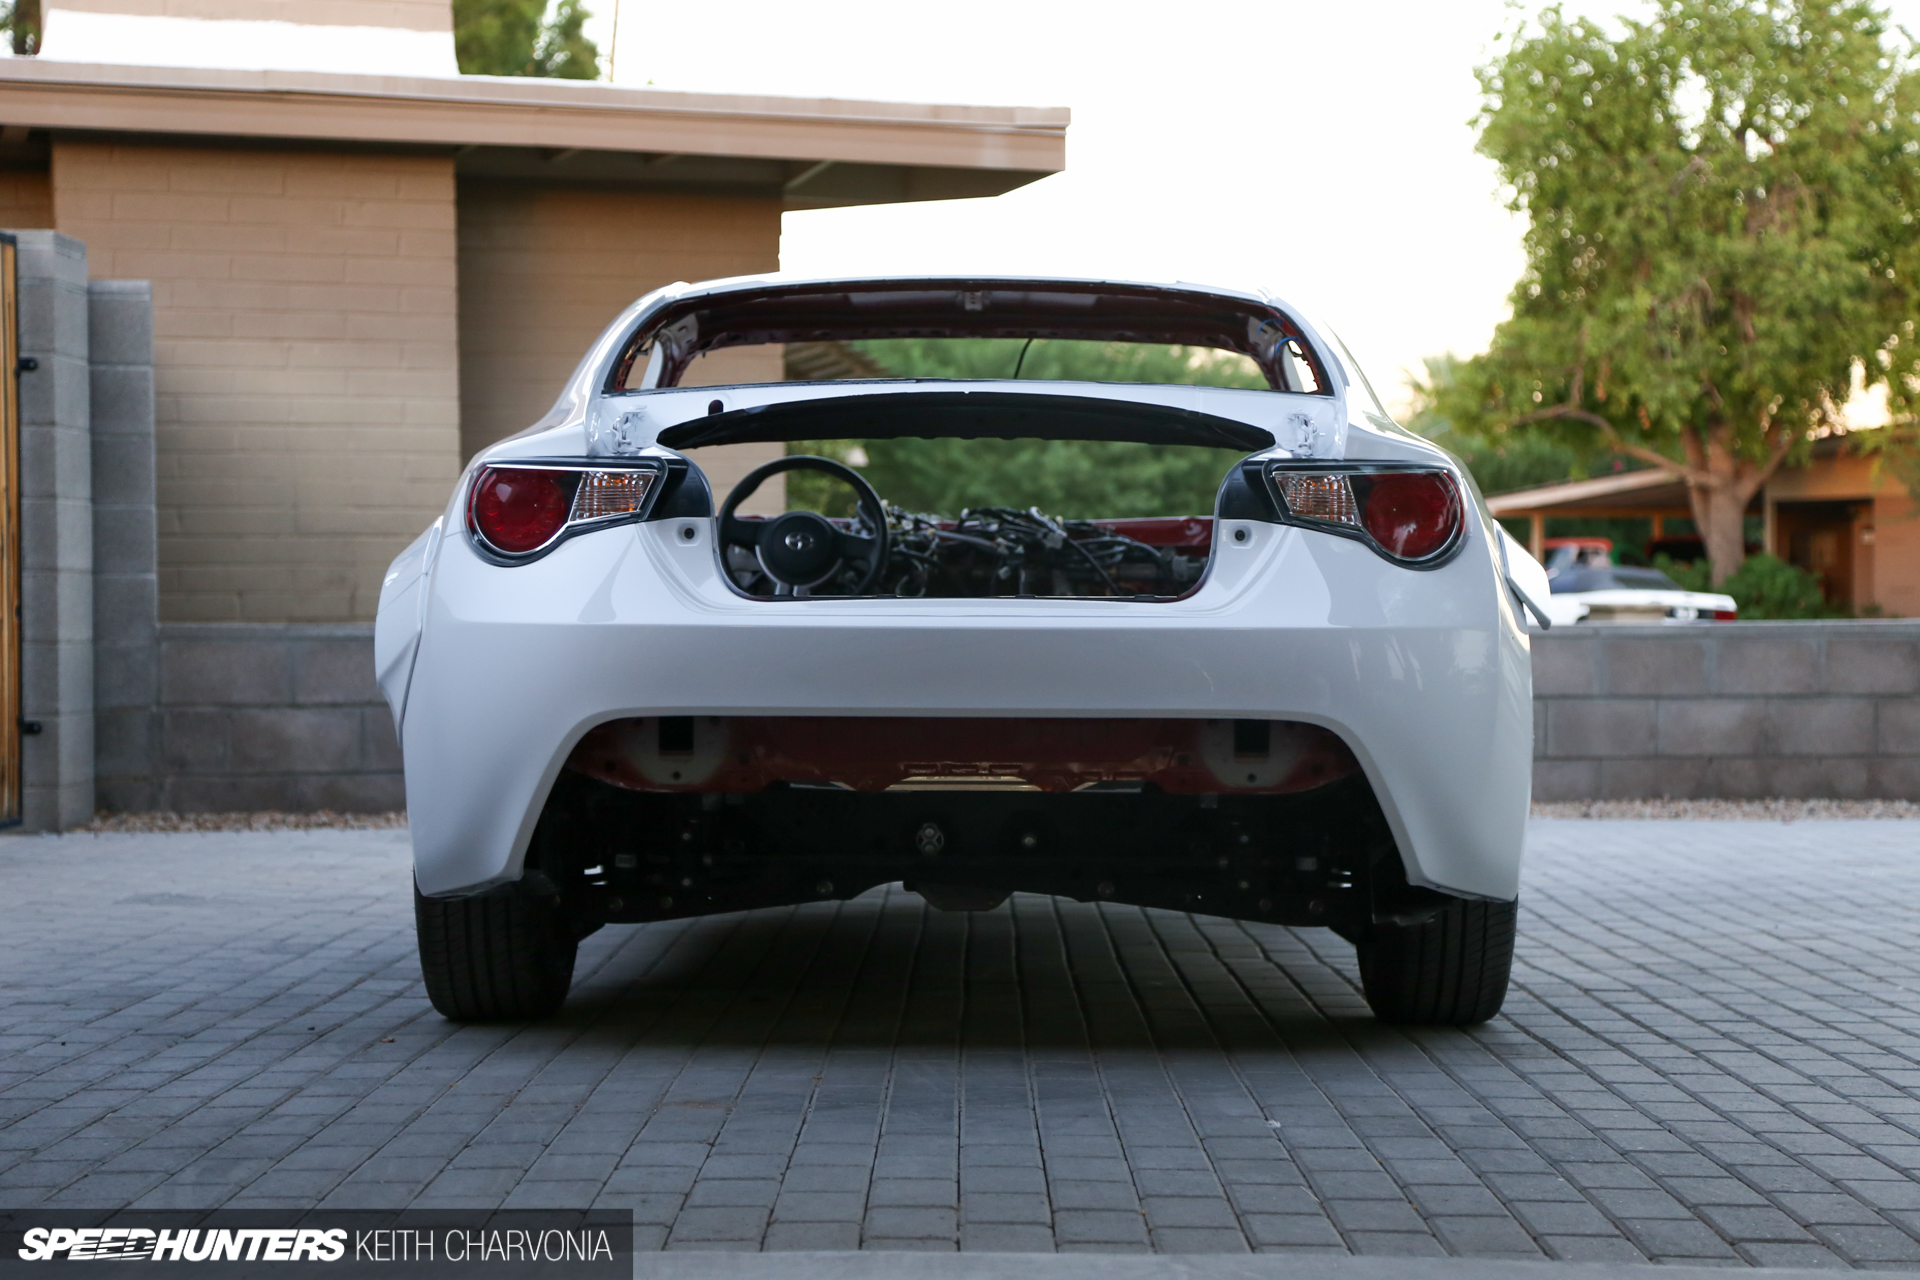
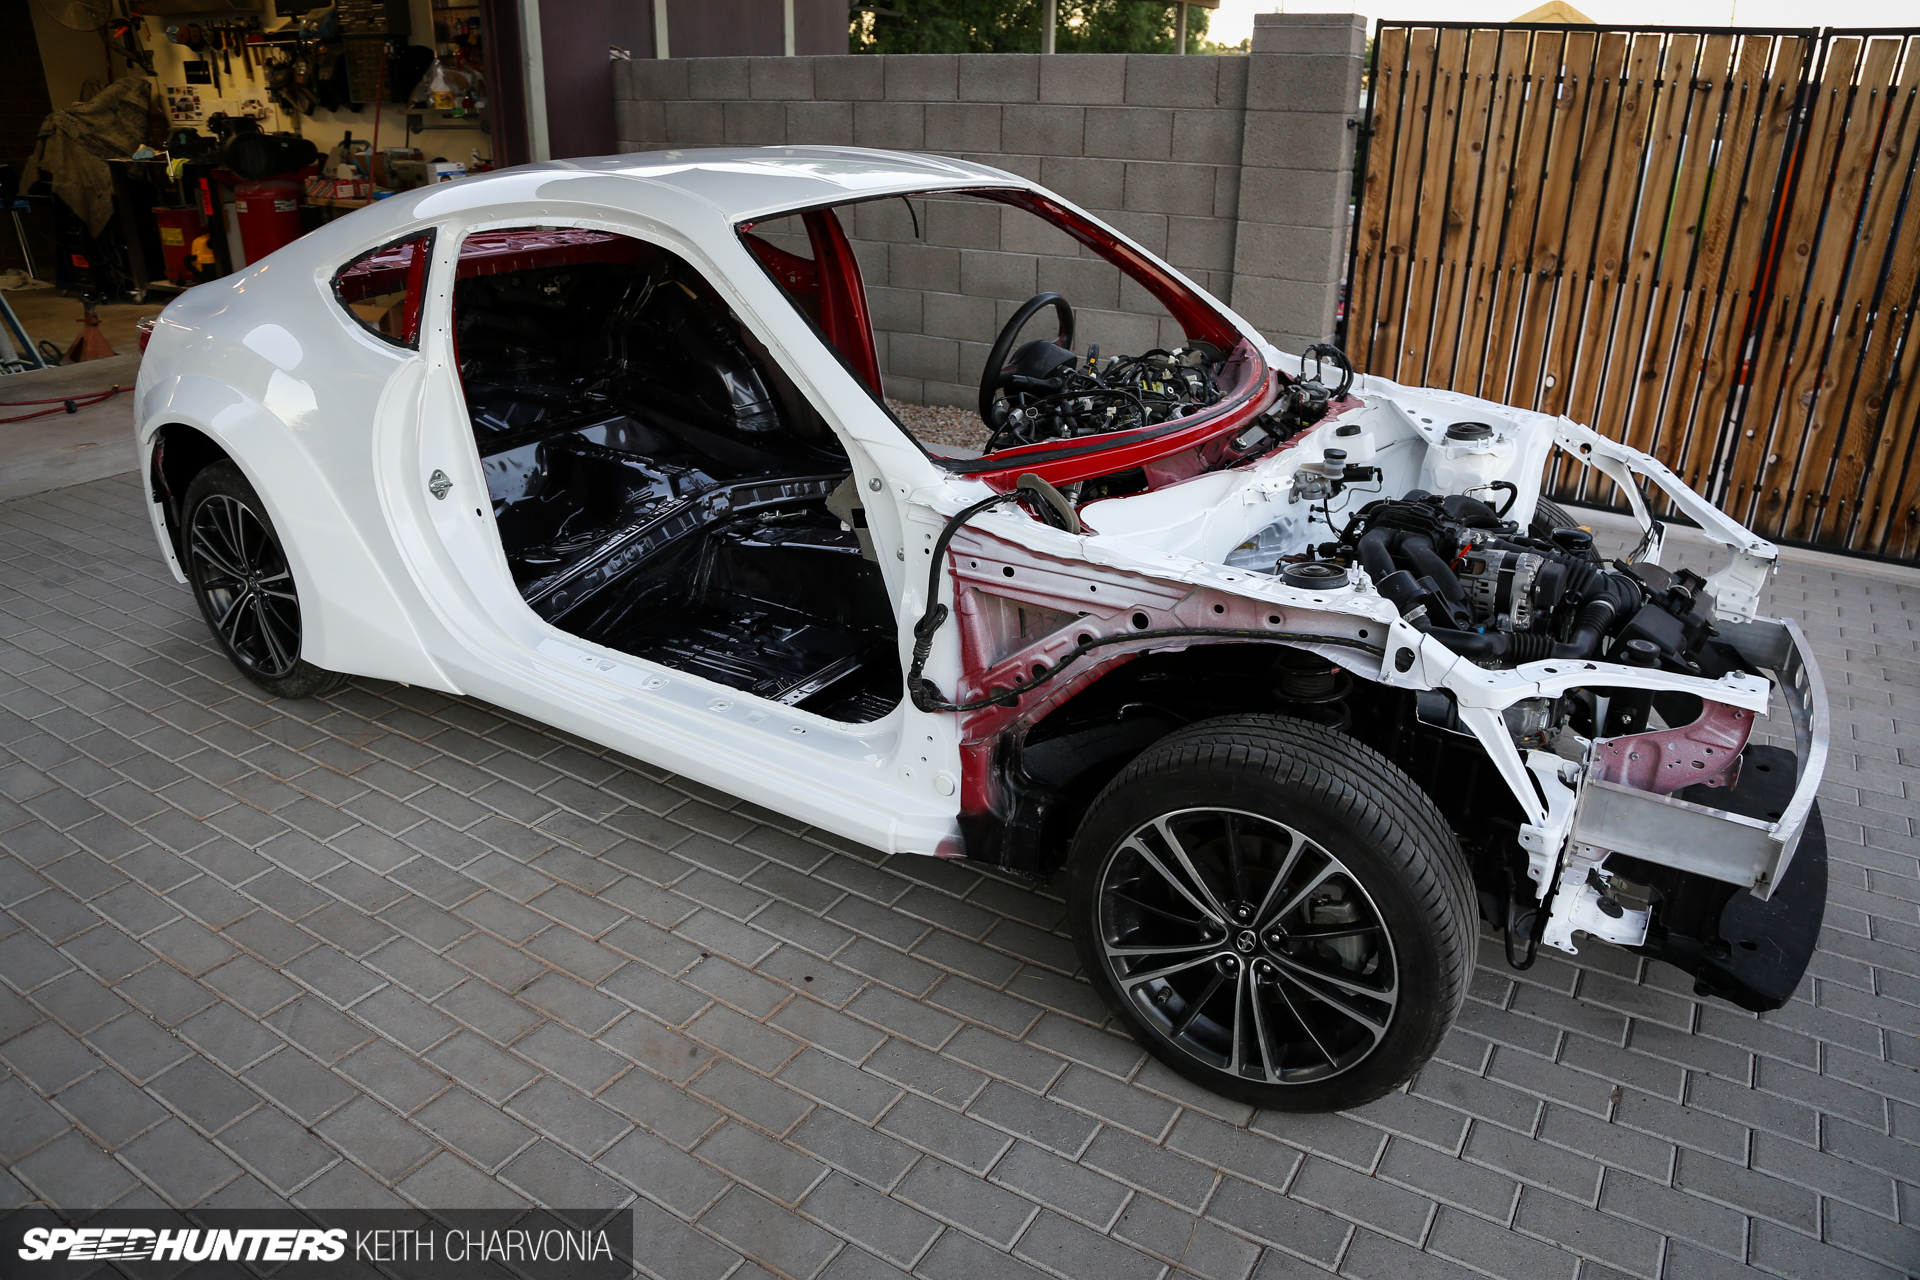
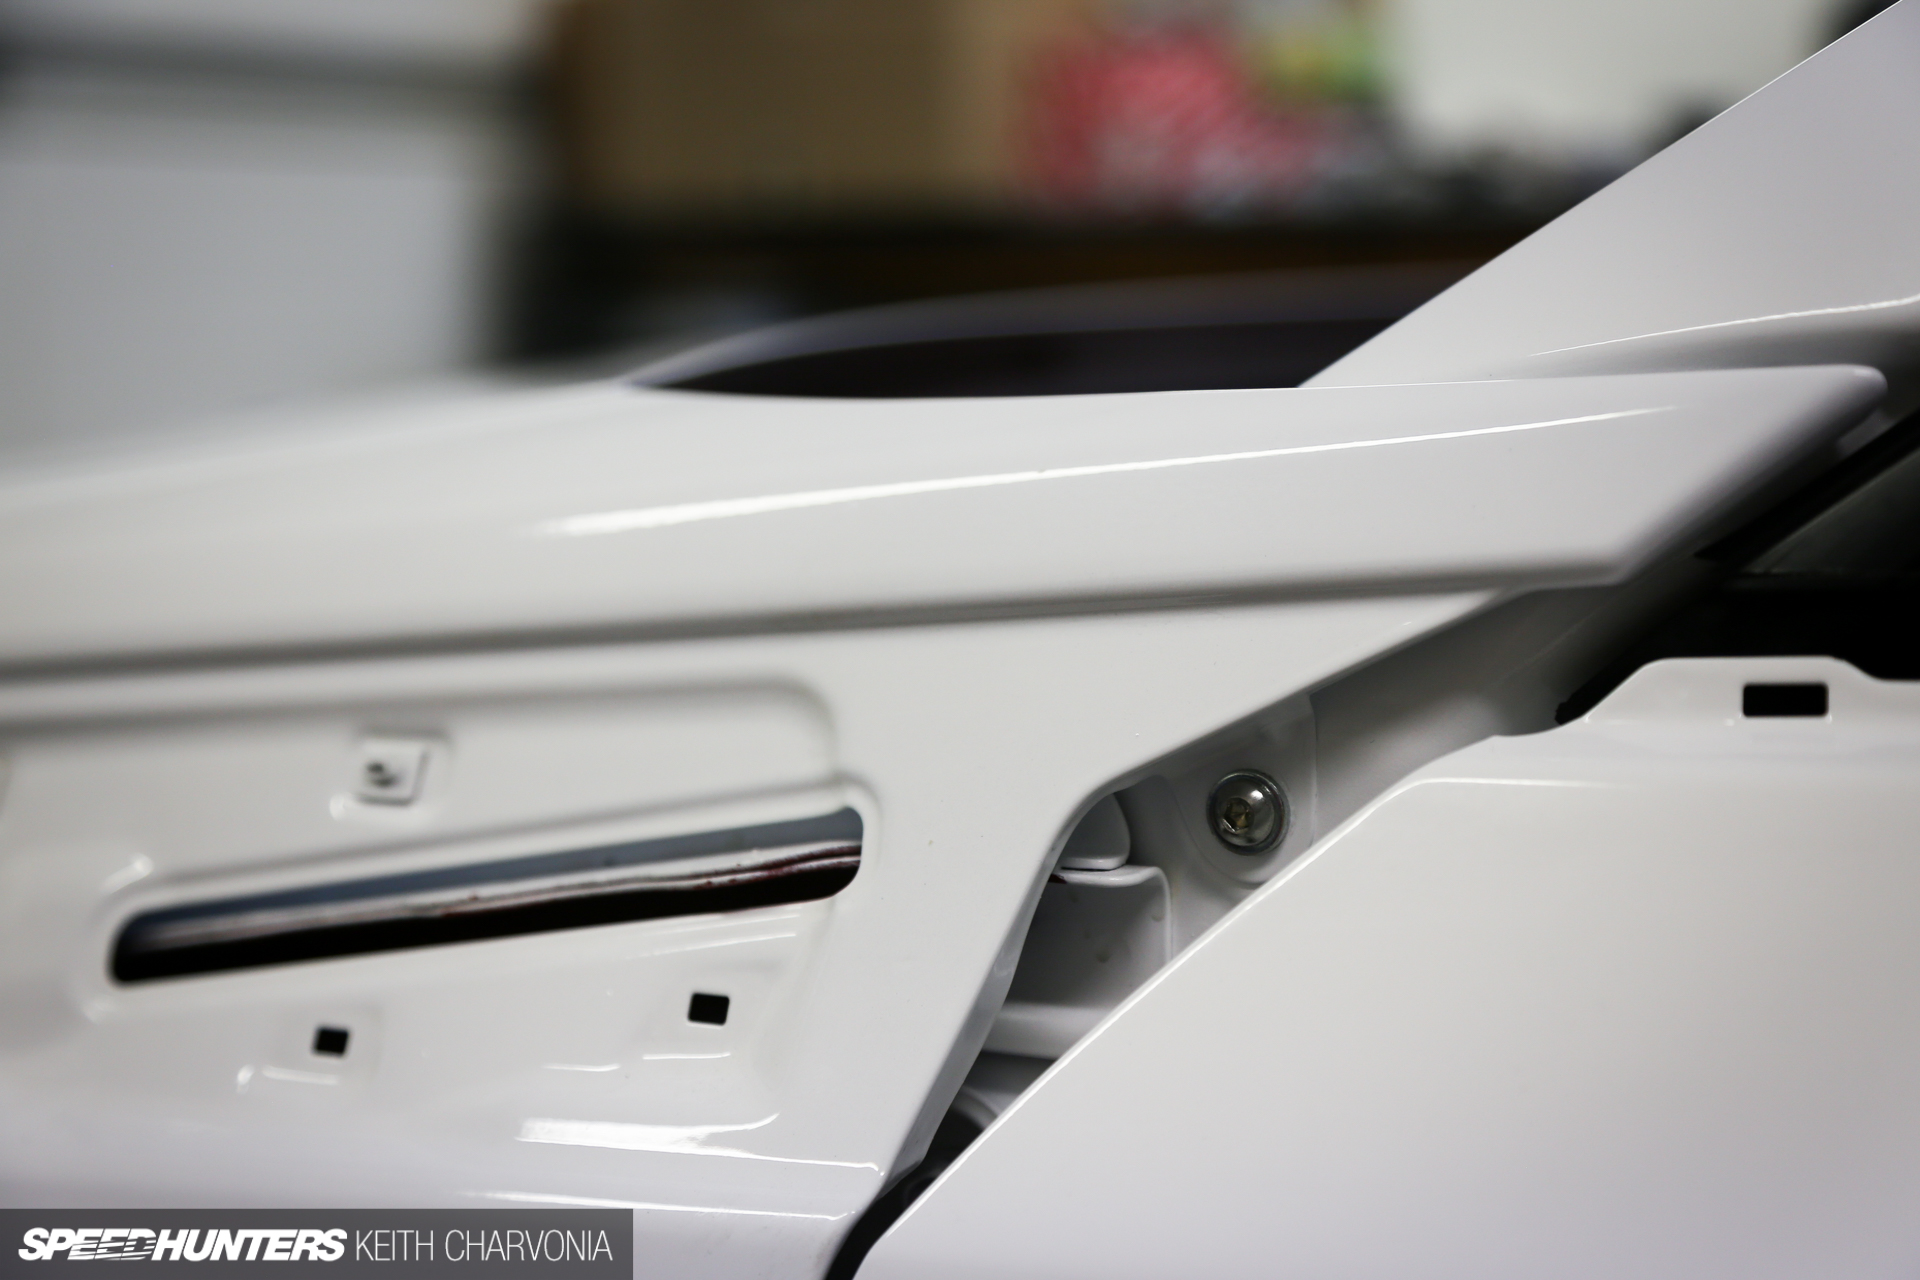
This is the sight that greeted me when I returned from a short trip to 86Fest last fall. Elite Auto Creations had worked their magic on the ZN6 body, performing a final straightening of all the panels and spraying a beautiful coat of Pure White R-M Paint from BASF.

Colin Stevens, the owner and painter at Elite, told me the R-M clear coat was really easy to work with and he was able to pile it on without risking any runs or sags. That’s good news when you want a really shiny show car for the SEMA Show!

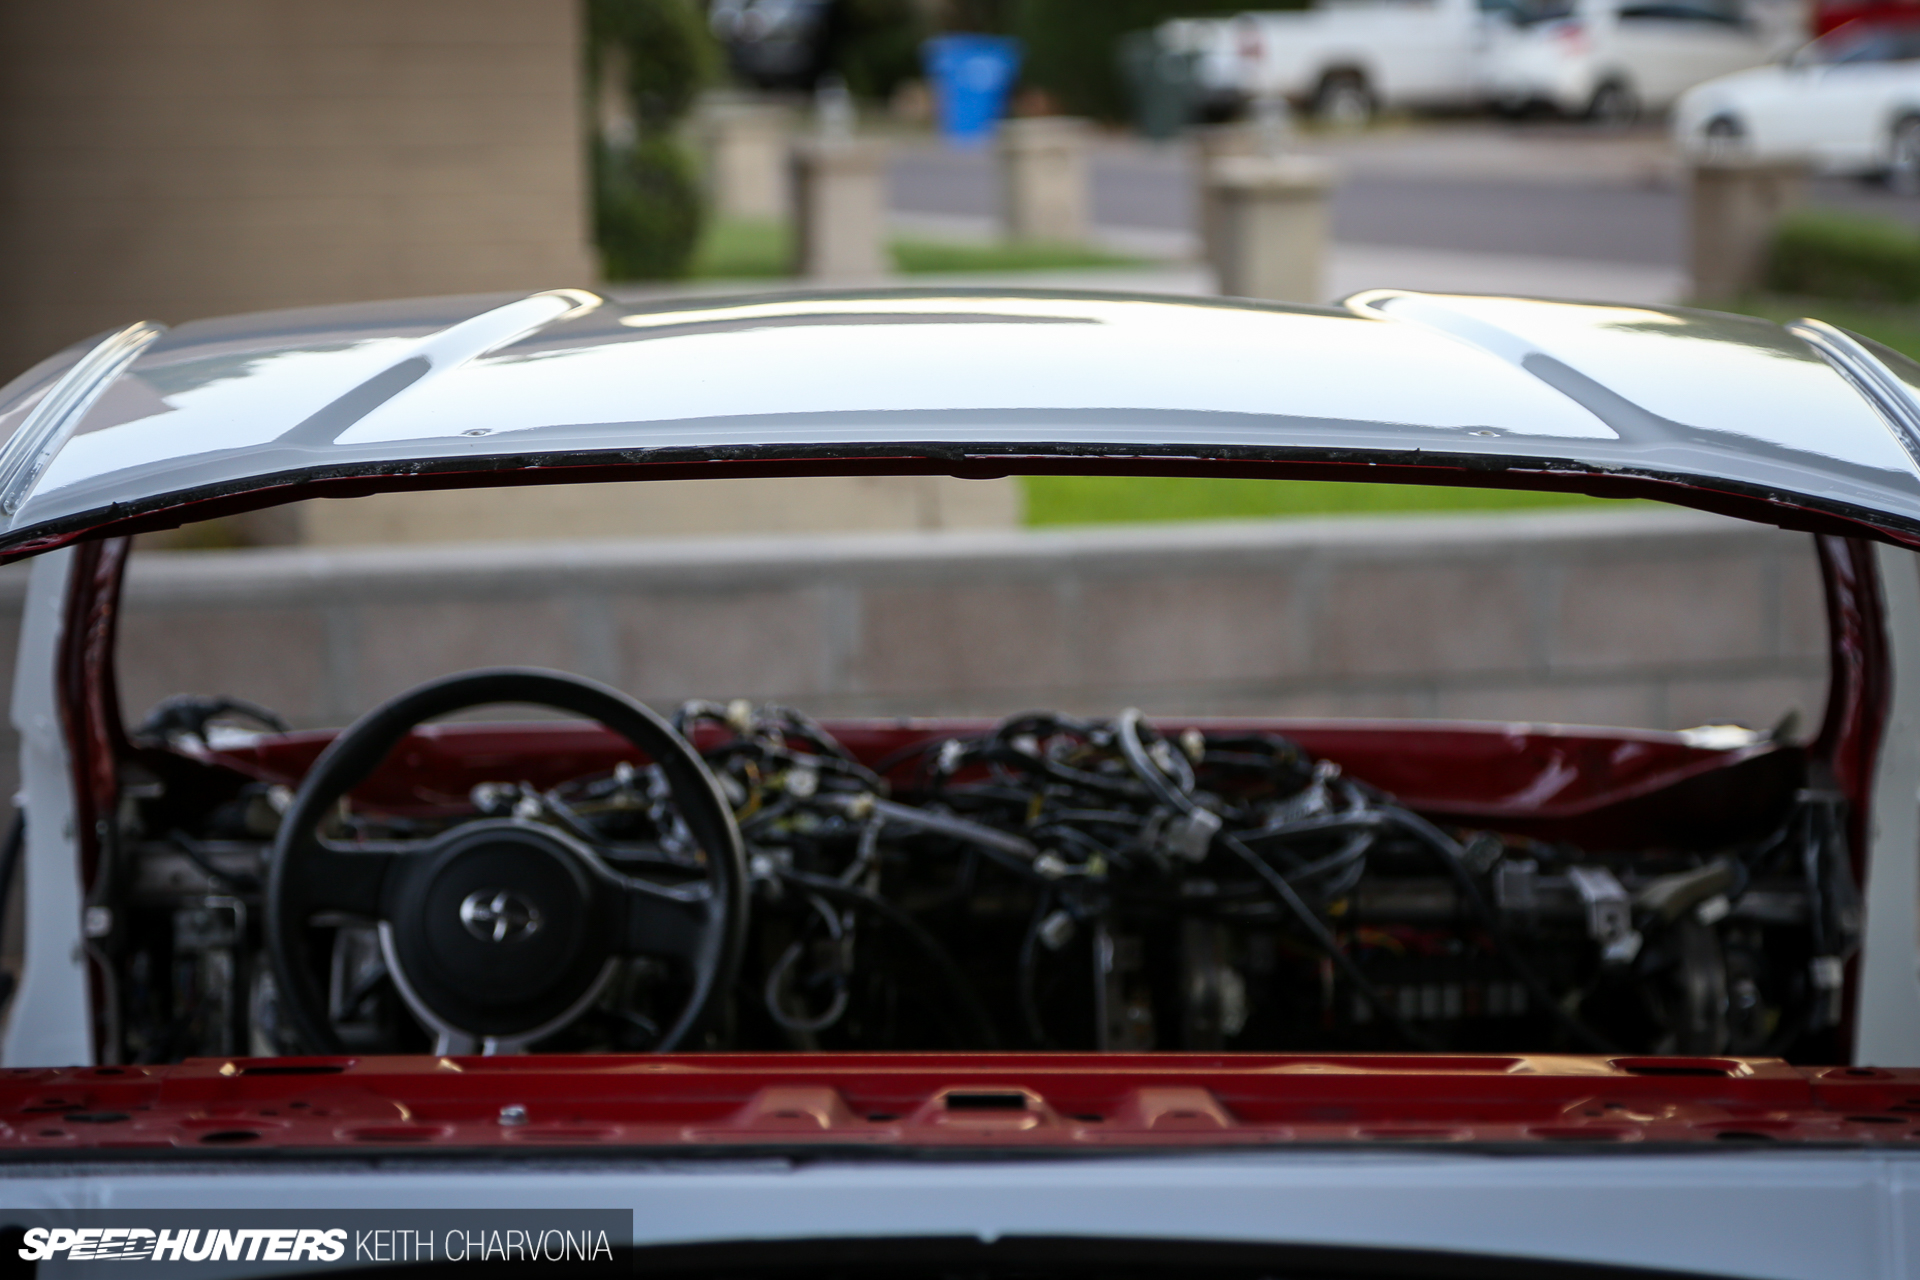
As you can see, some of the parts were still off the car. We were in such a hurry that I delivered the hood, fenders, trunk and doors separately so we could get each part back the second it was ready. Of course, we were sure to bodywork each part on the car, otherwise there would be no guarantee the panels would line up once assembled.

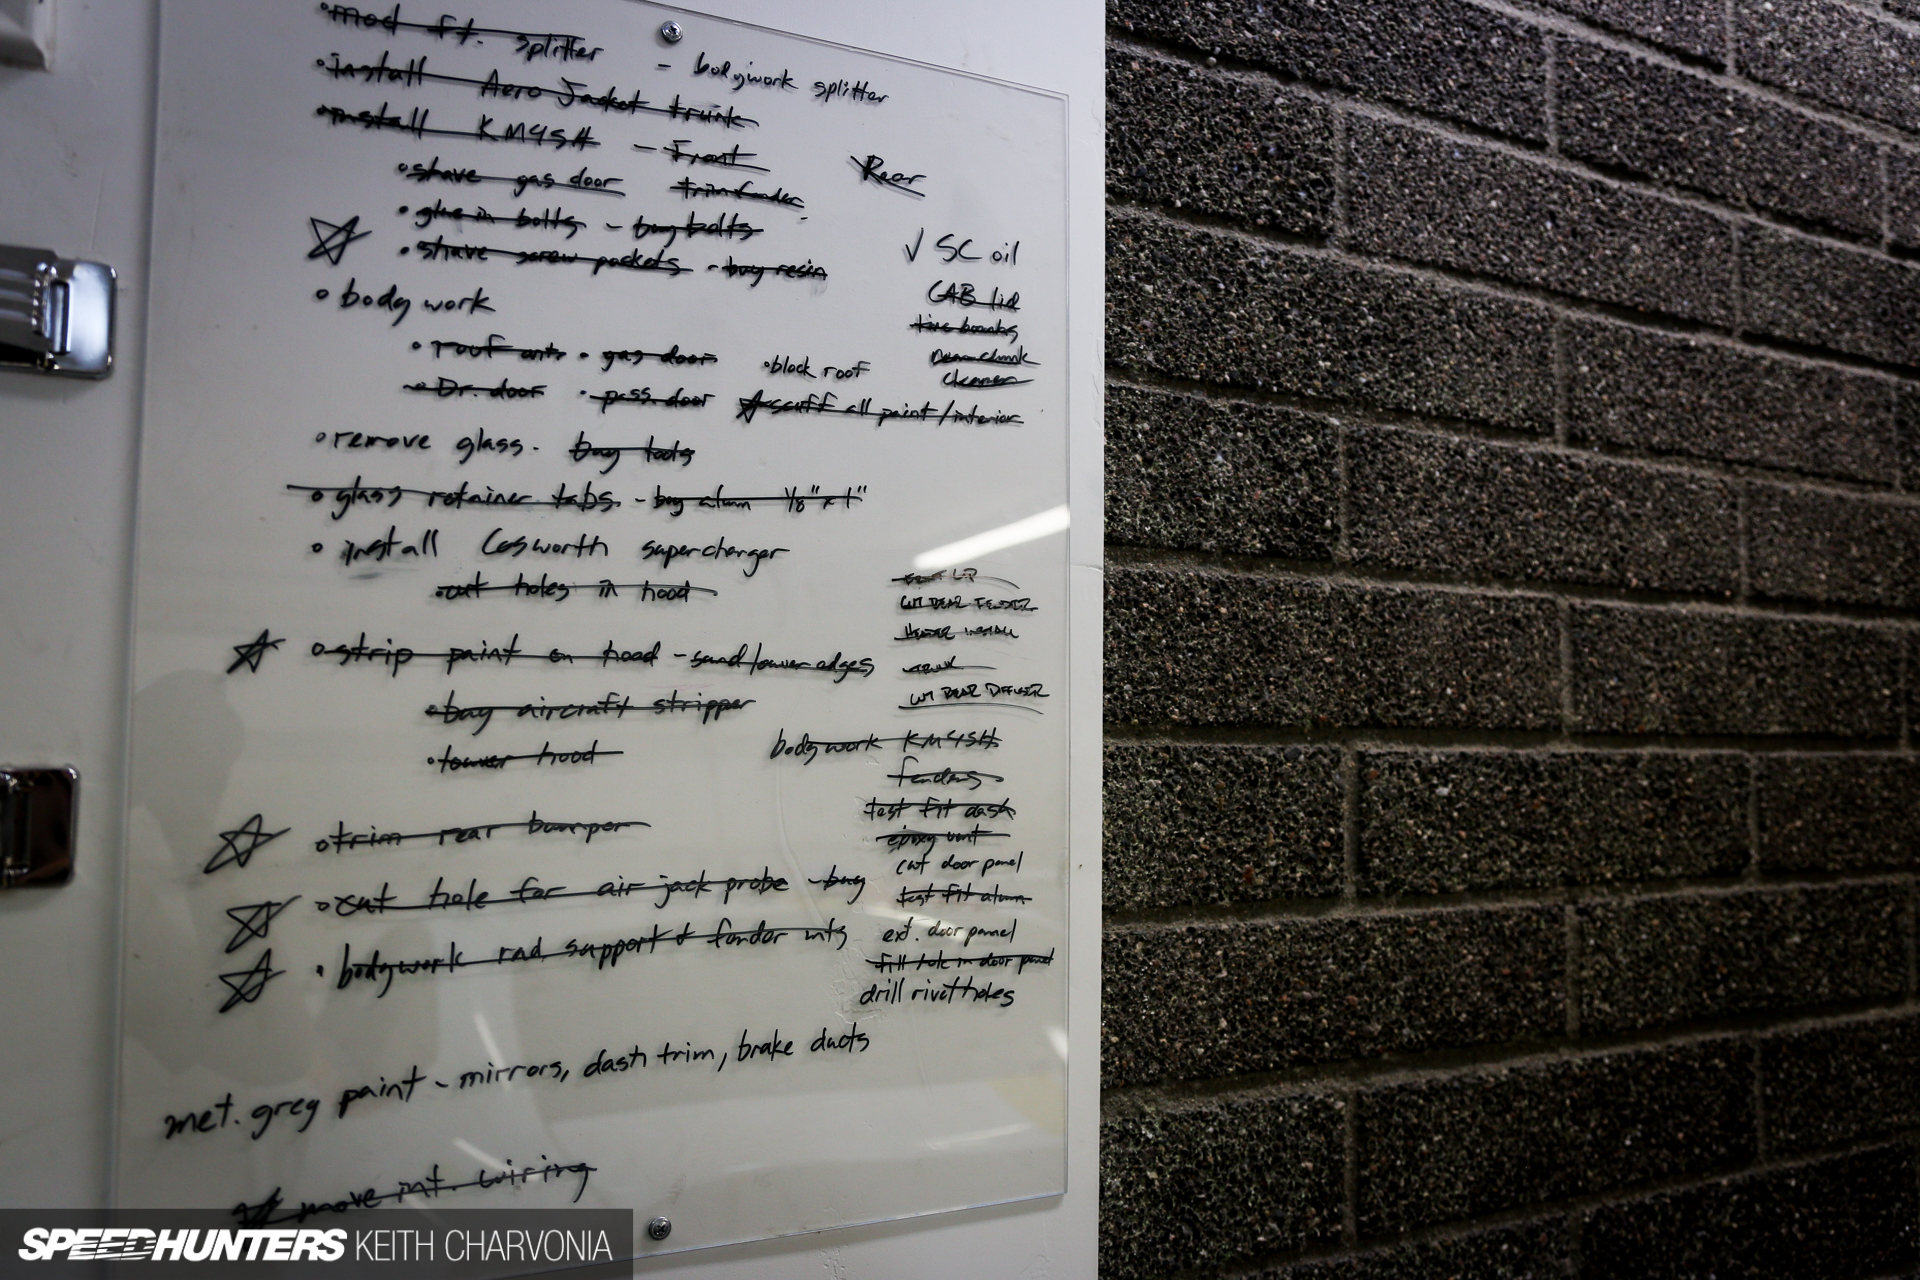
We kept a list on the wall and just as quickly as things were crossed off, more made their way onto the bottom.

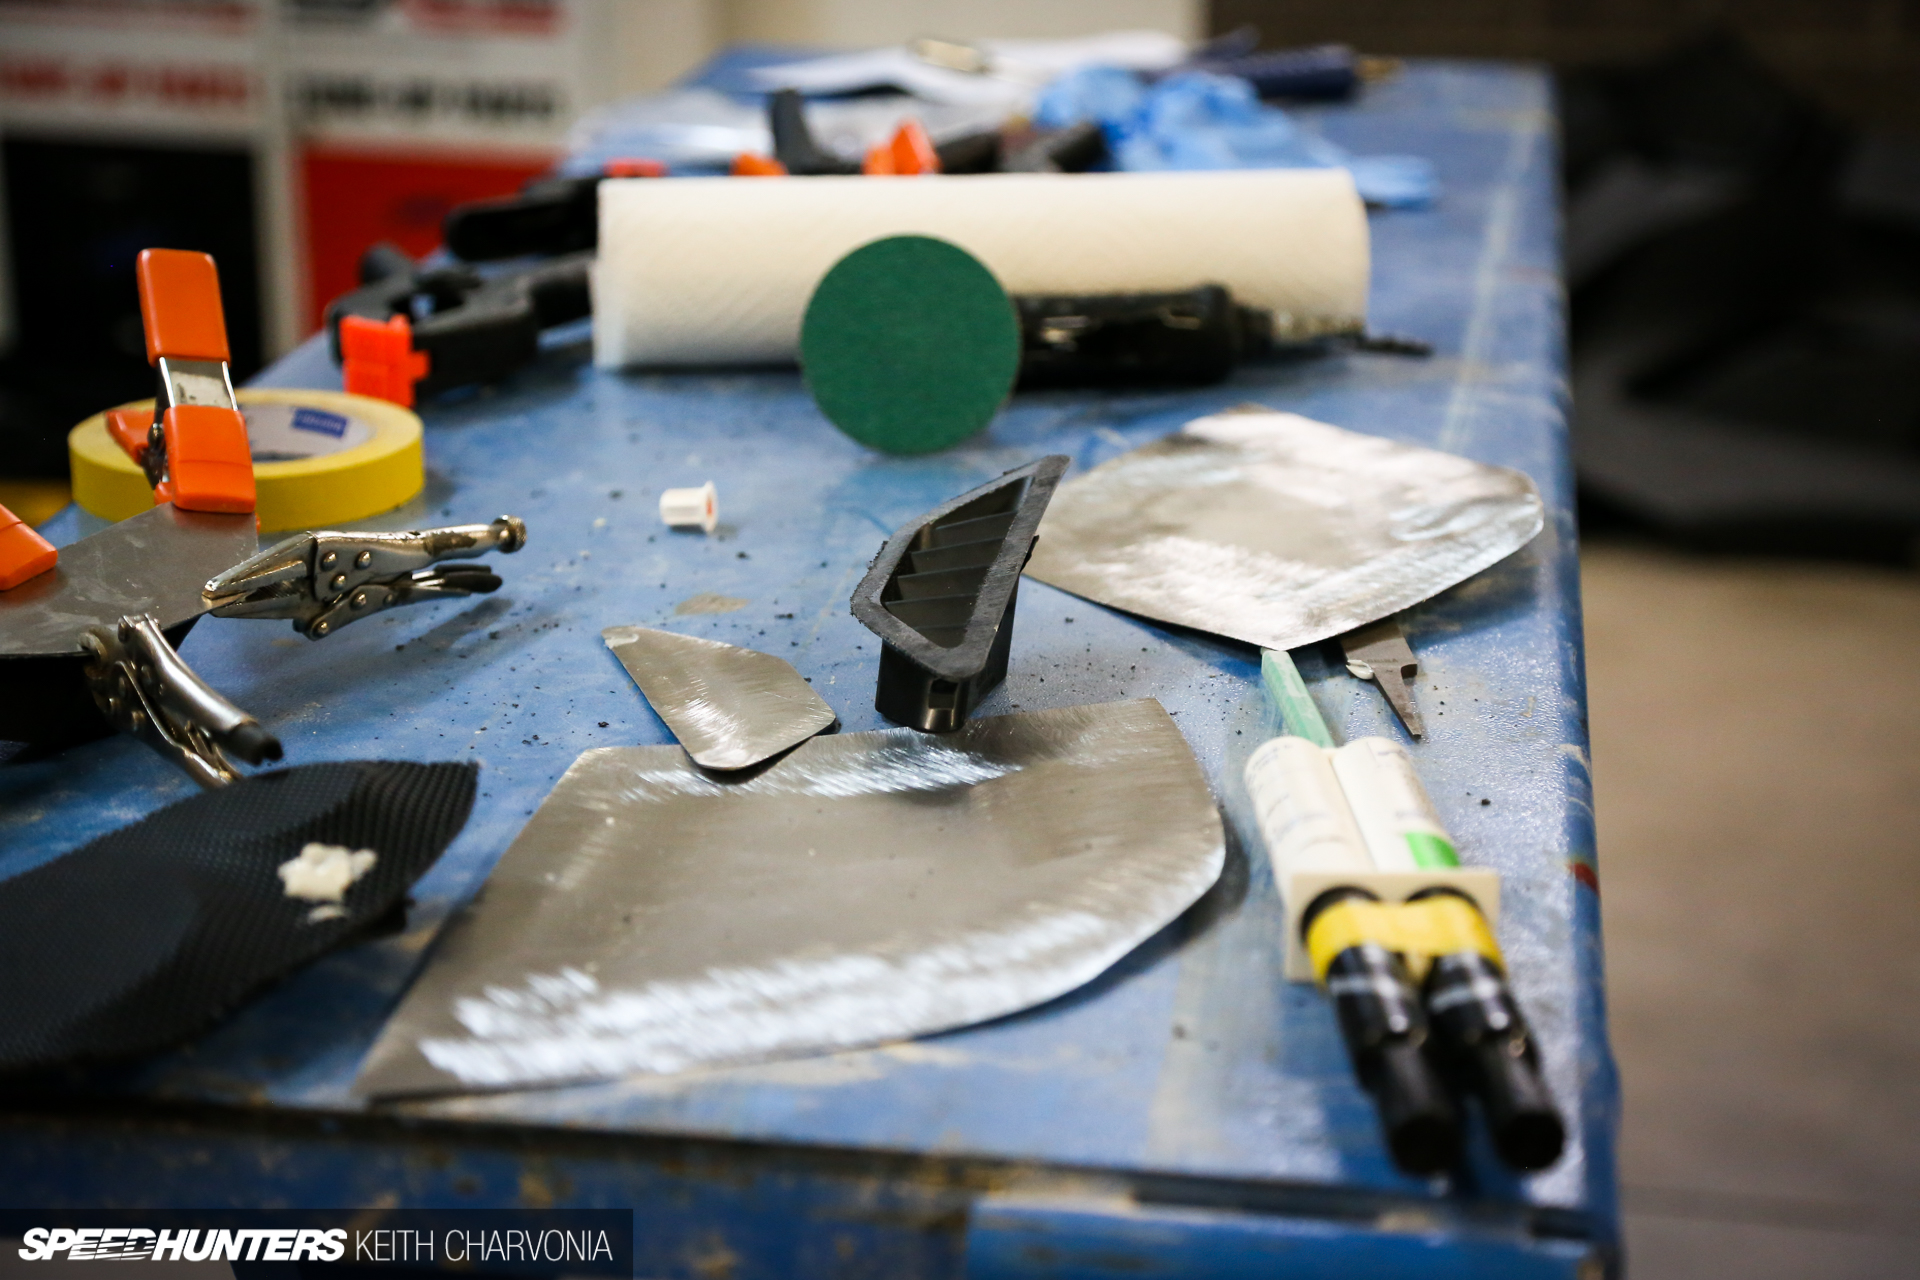
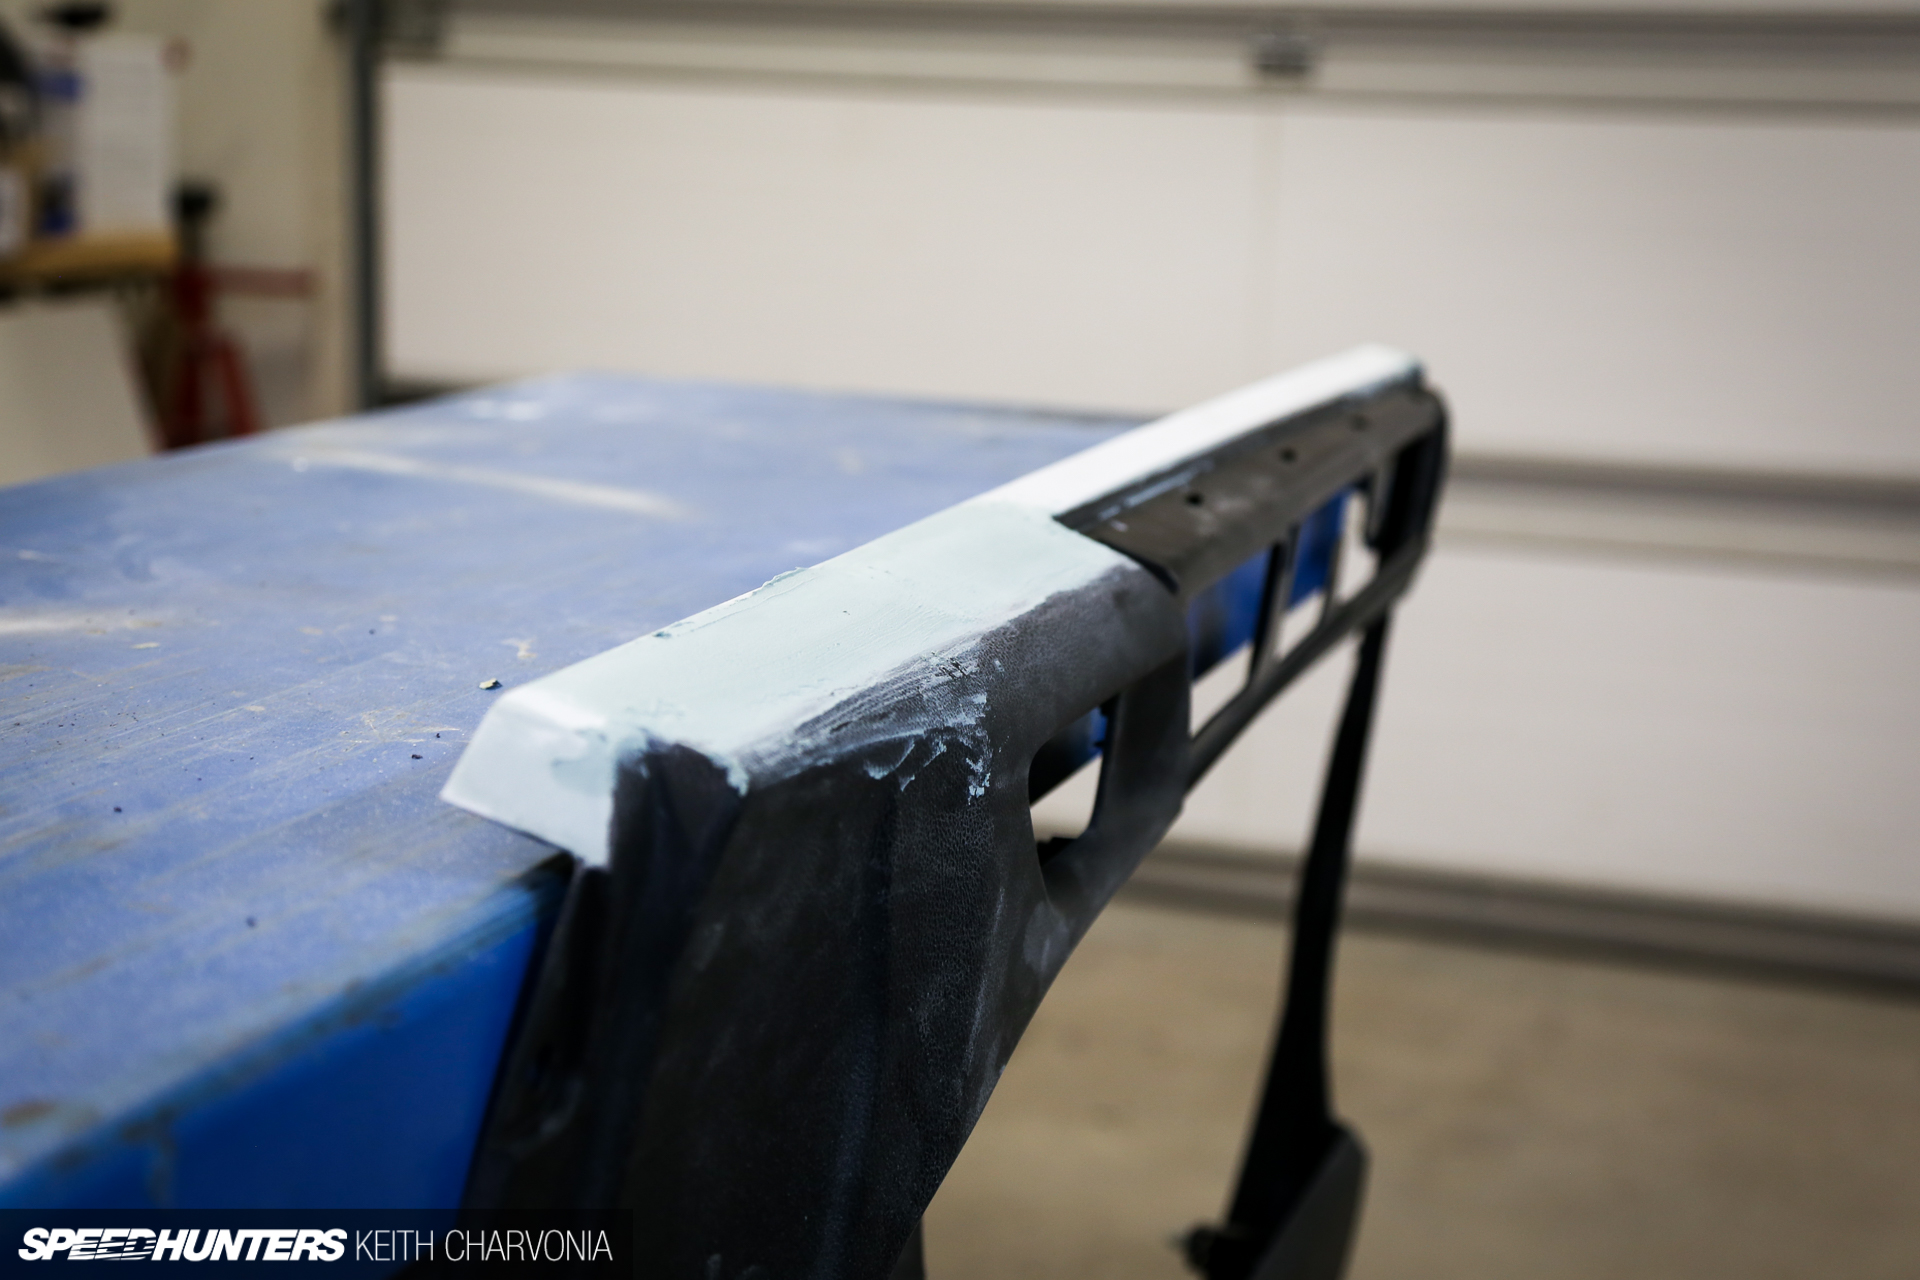
With the car out of the garage, we started work on the interior. It would have been too easy to gut the inside of the car with the excuse that it’s a race car, but we were going all-out with a full custom treatment. In order to shave some of the vents and other features, we experimented with different types of glue and epoxies until we found one that could reliably bond sheetmetal to the factory plastic. The winner? Plain old Five Minute Epoxy.

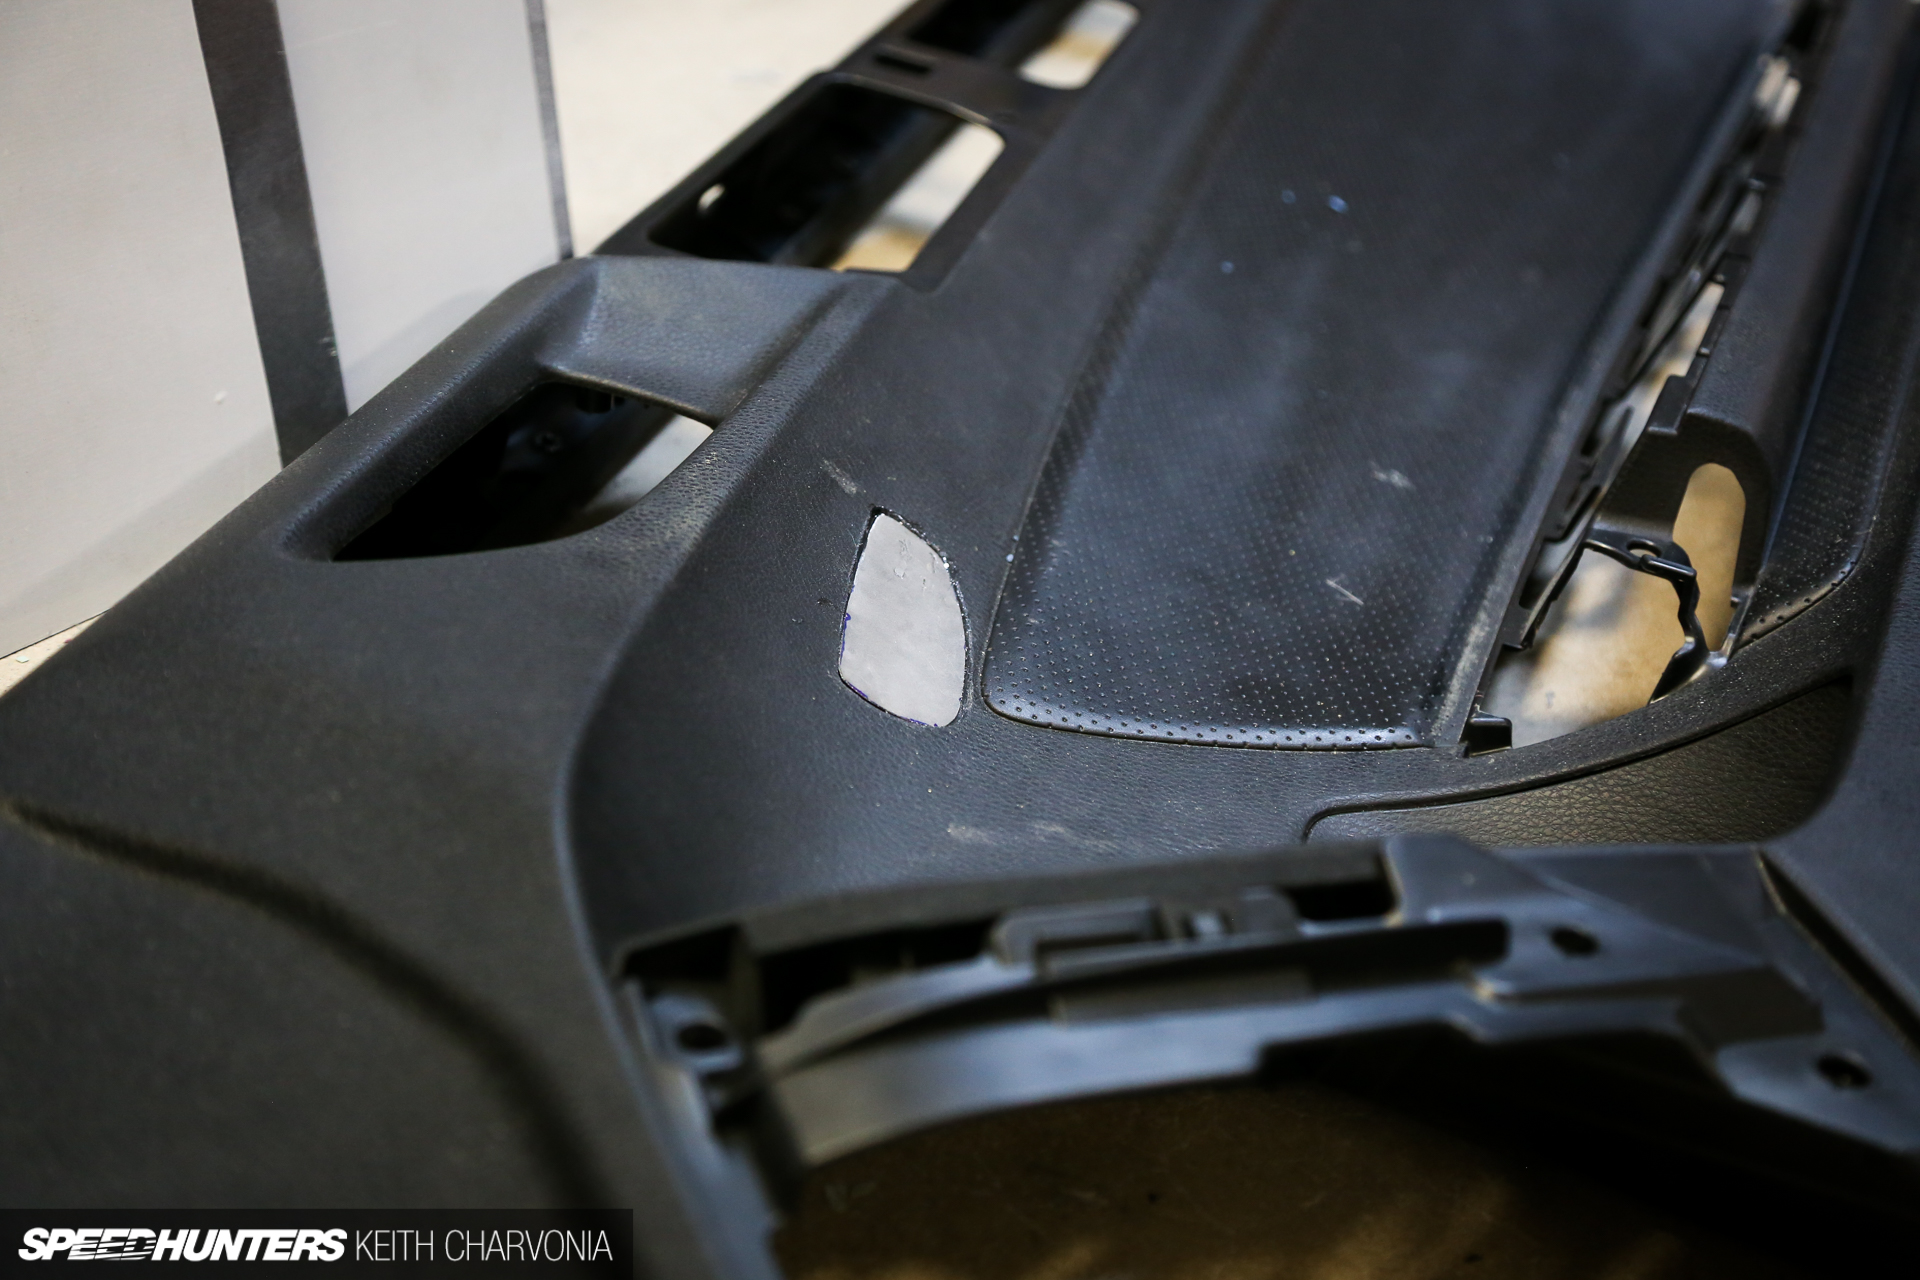
After roughing up the area to be bonded, we made a sheetmetal patch and epoxied it in. But then what?

The goal was to send these part to EIS Fibercoating for flocking – a treatment usually reserved to cut glare on the dash of a race car (among many other uses). Andy Blackmore and I came up with the idea of using it as a texture inside the car. We would be taking a finish that was traditionally very functional and applying it as an aesthetic detail, which made both of us pretty giddy as designers.

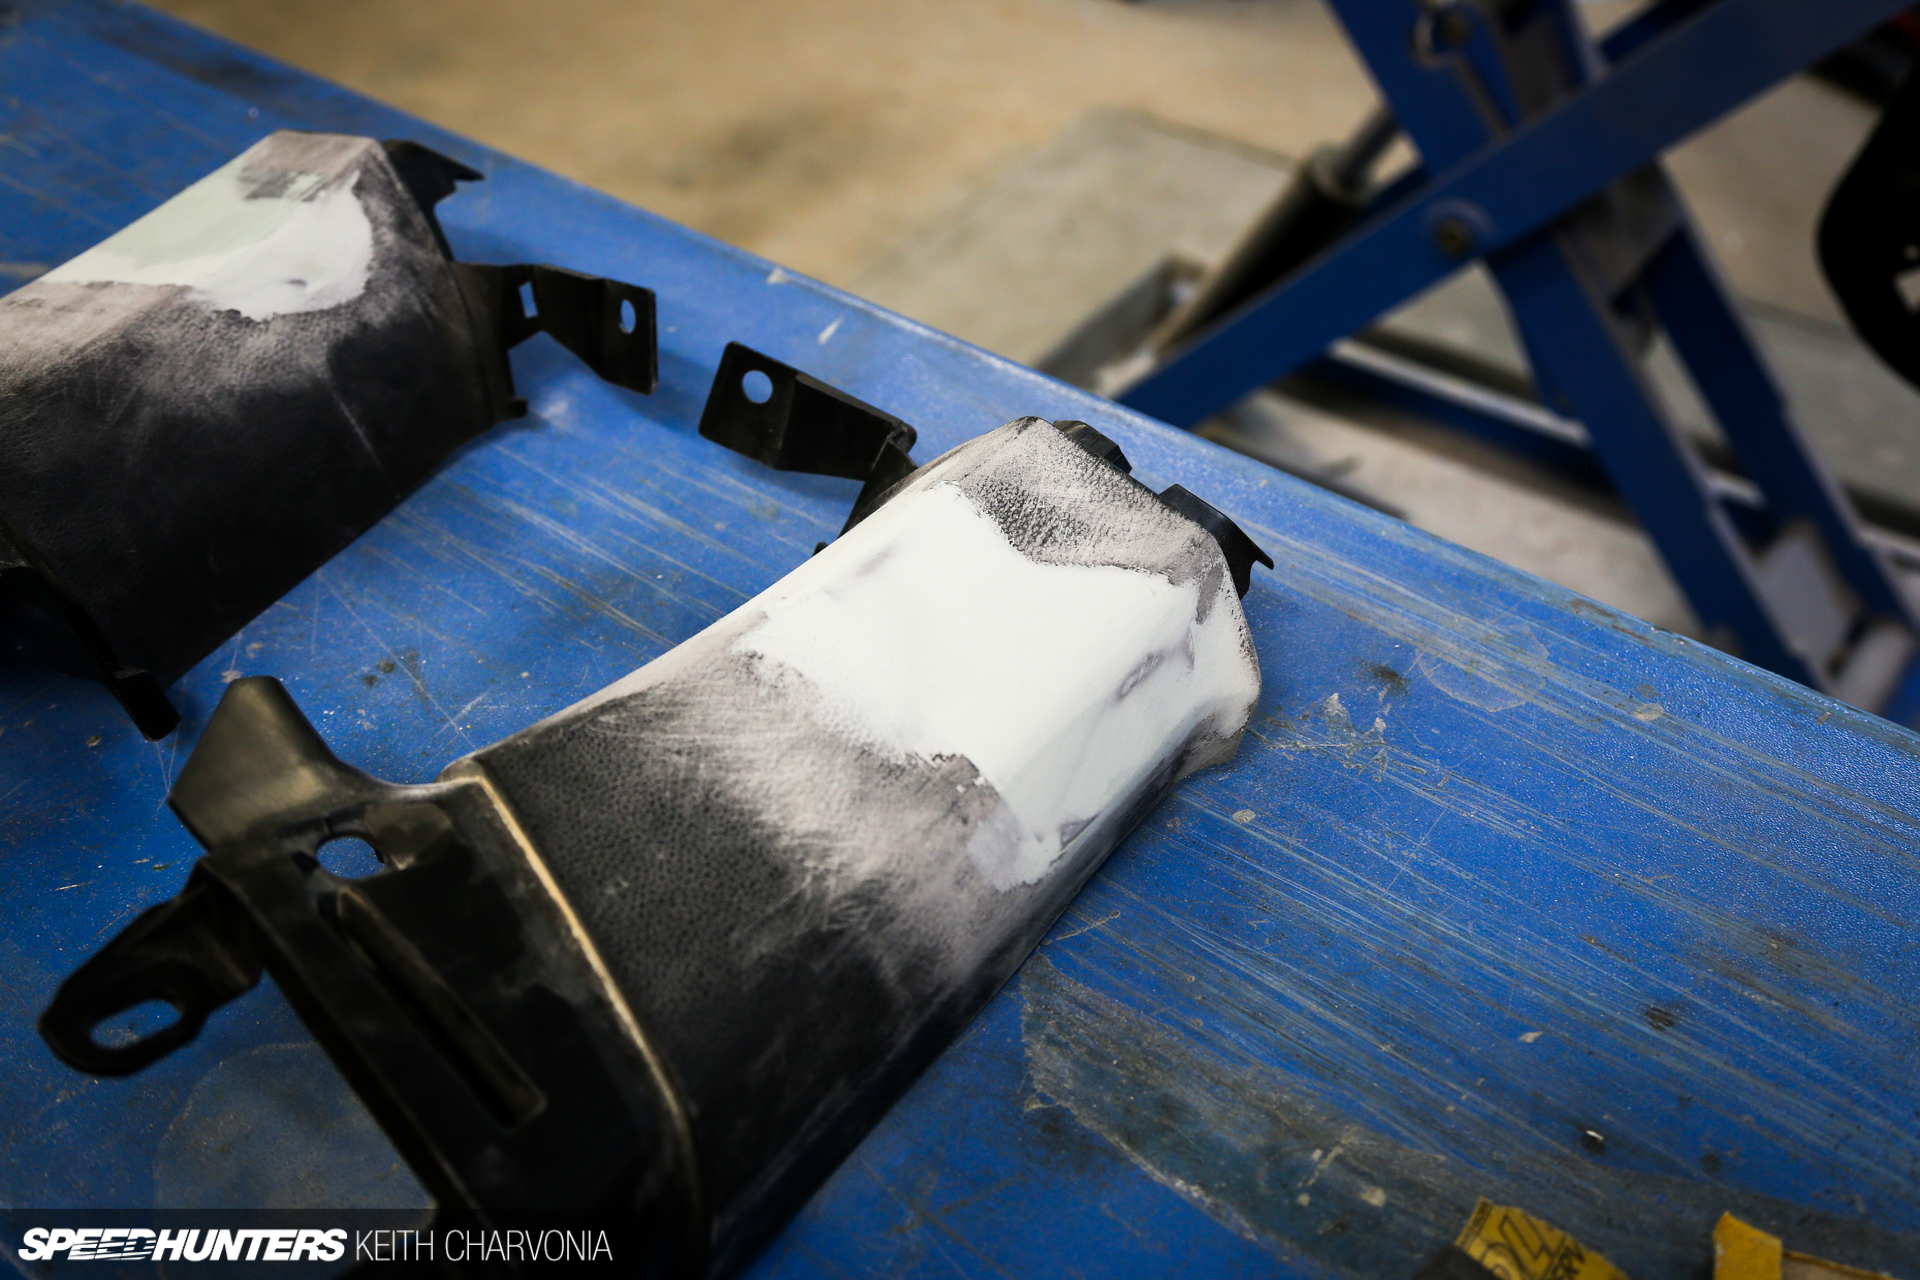
This meant the shaved stuff had to be as smooth as a part that would be painted, so out came the body filler and sandpaper.

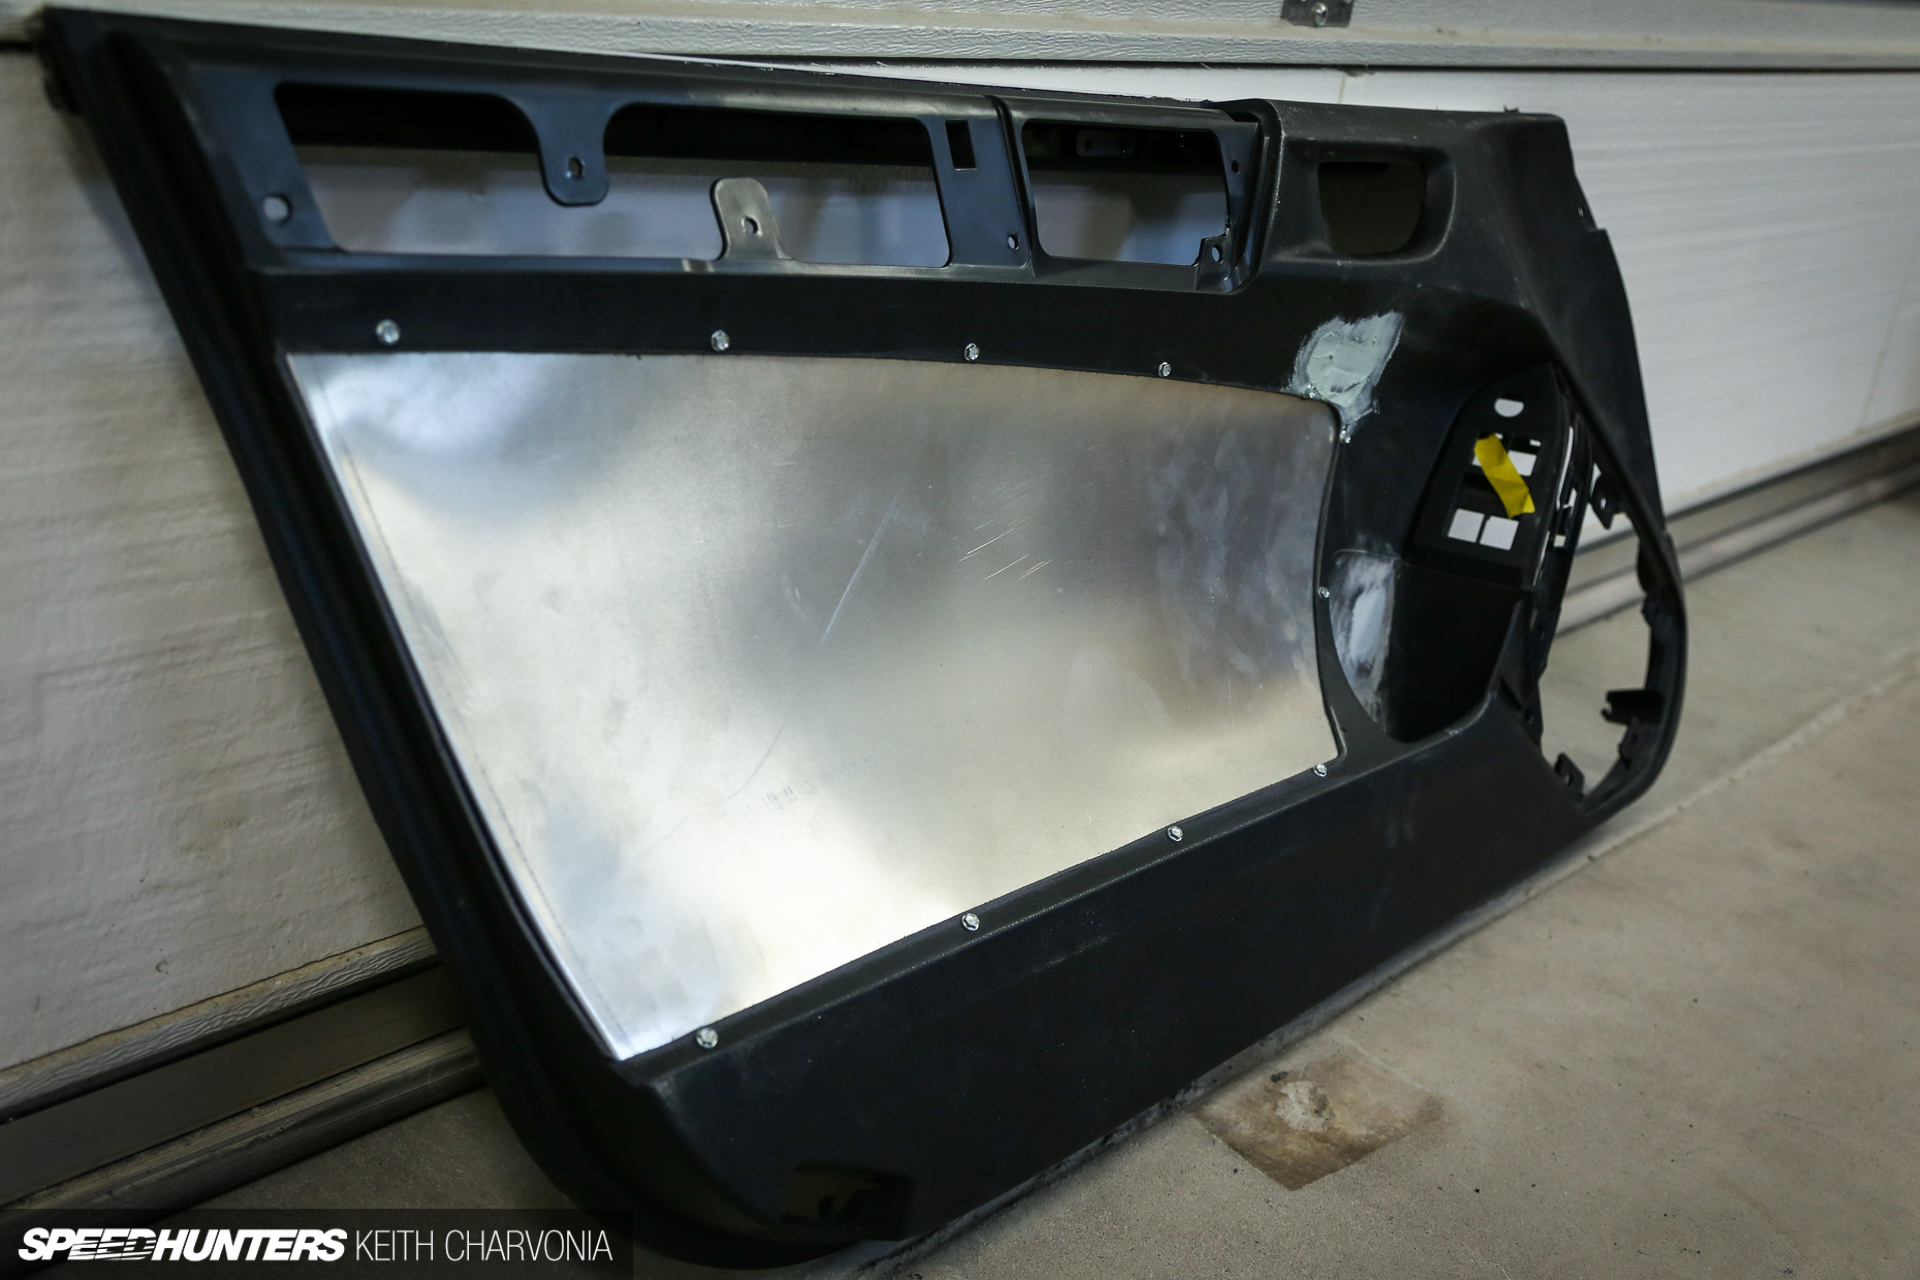
The door panels would get the same treatment, but they needed something to break up the otherwise solid black panel. I formed up some aluminum sheet and used self-drilling screws to temporarily hold it in place. Notice the shaved door pull and lettering too.

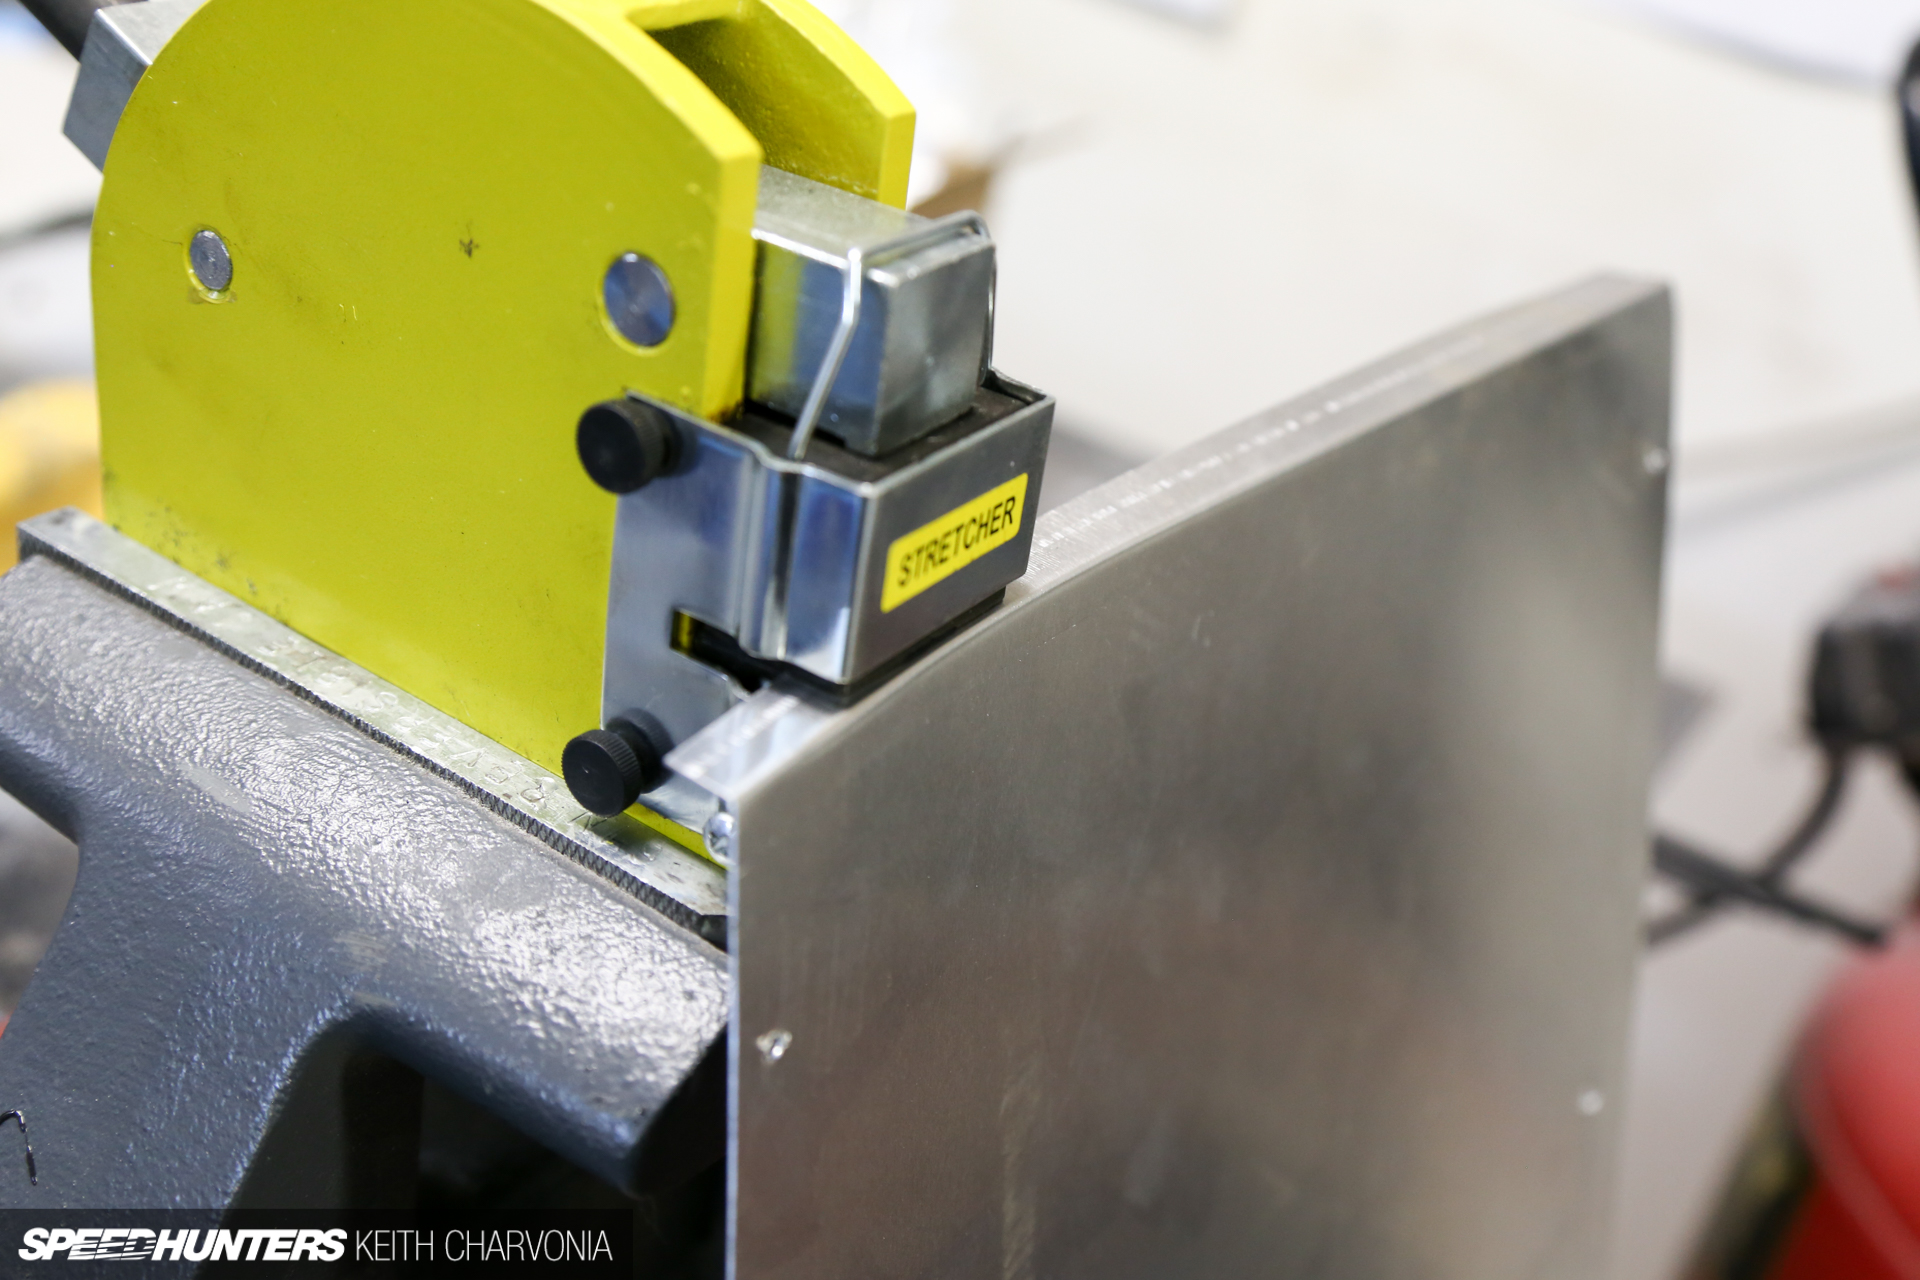
When I say ‘formed up’ the aluminum, I actually gently curved the panel by hand, then broke an edge and stretched it to match the curve of the door panel. You know, hot rod stuff.

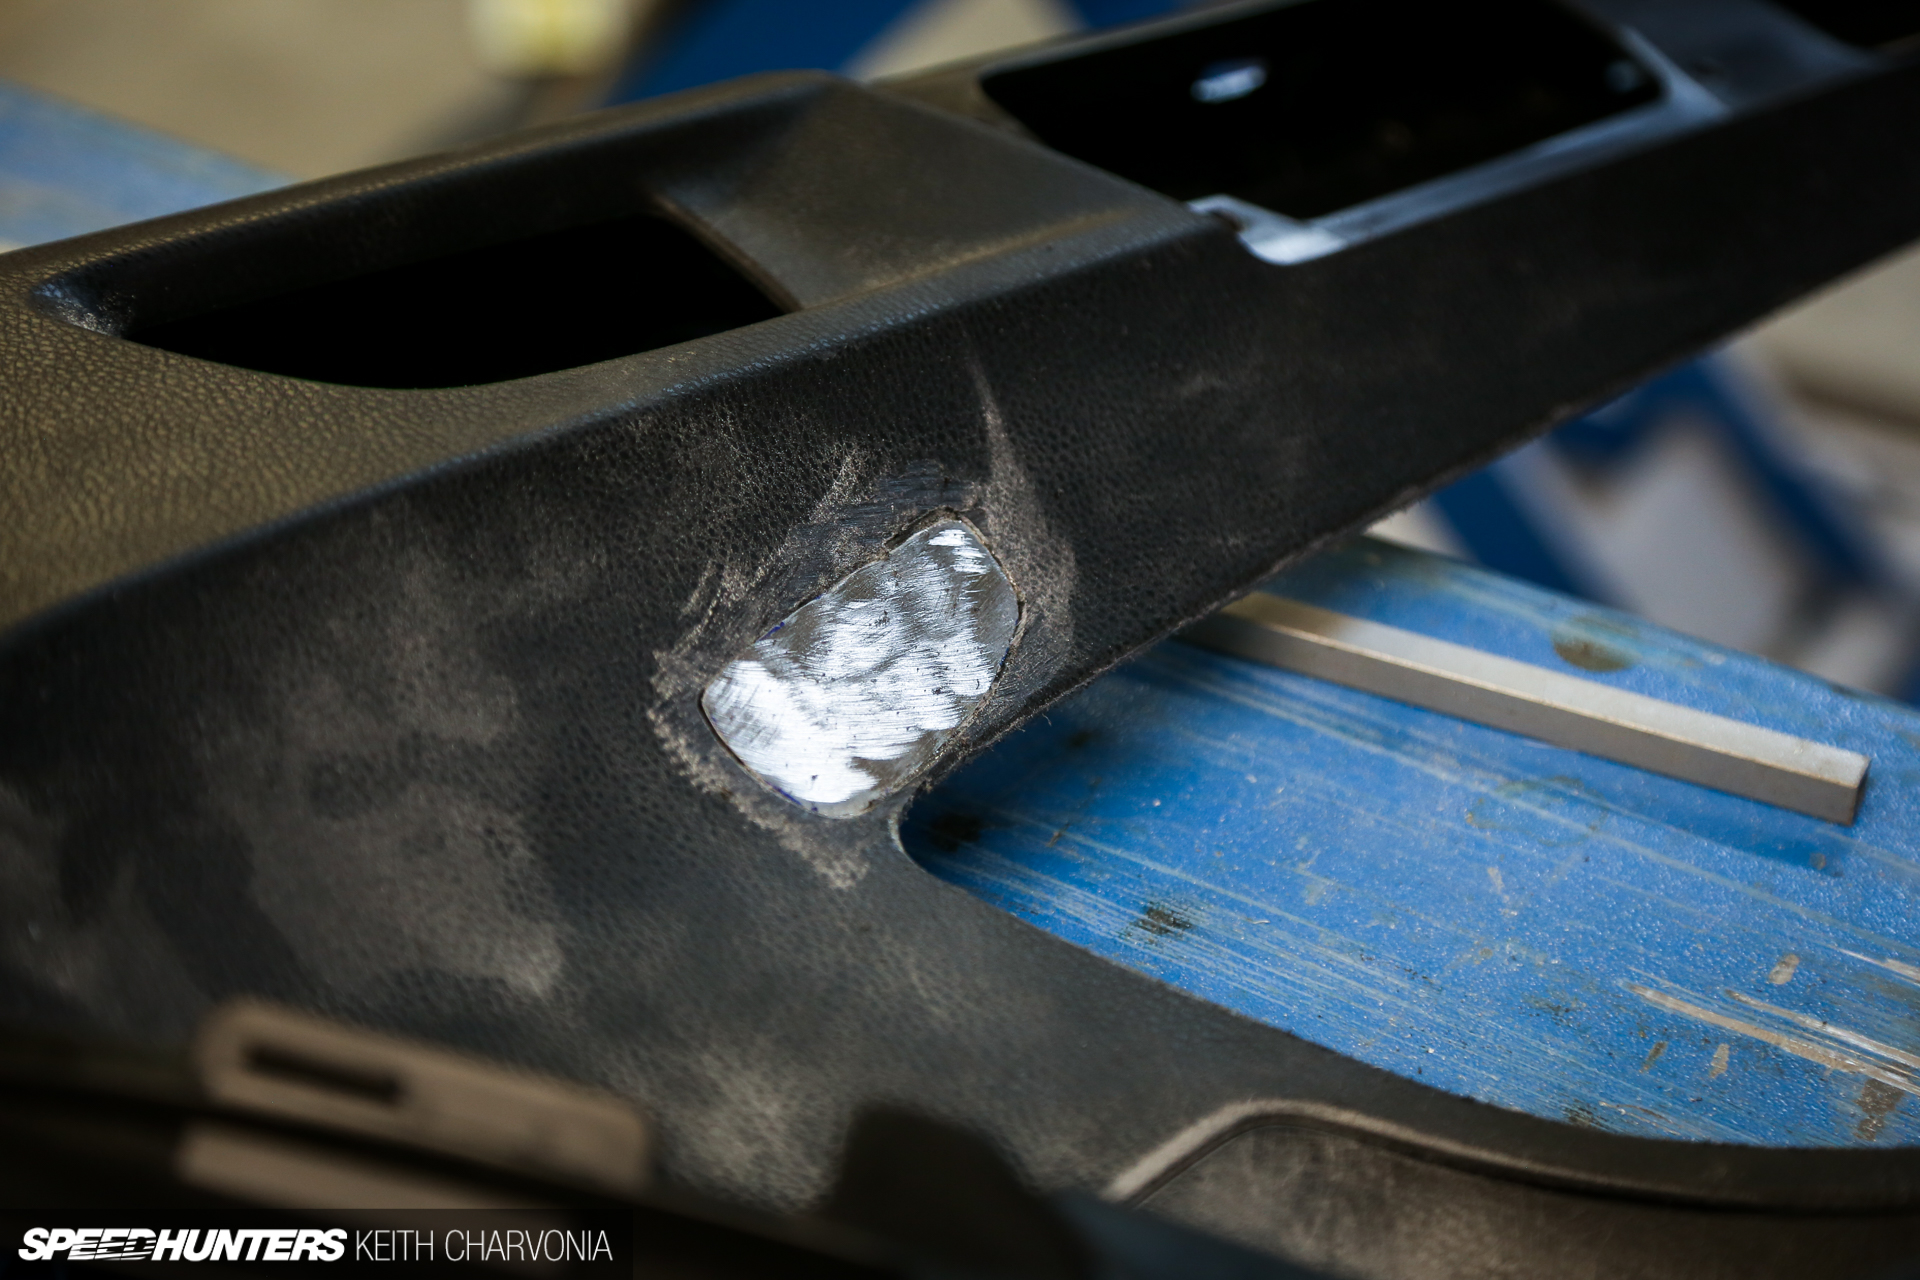
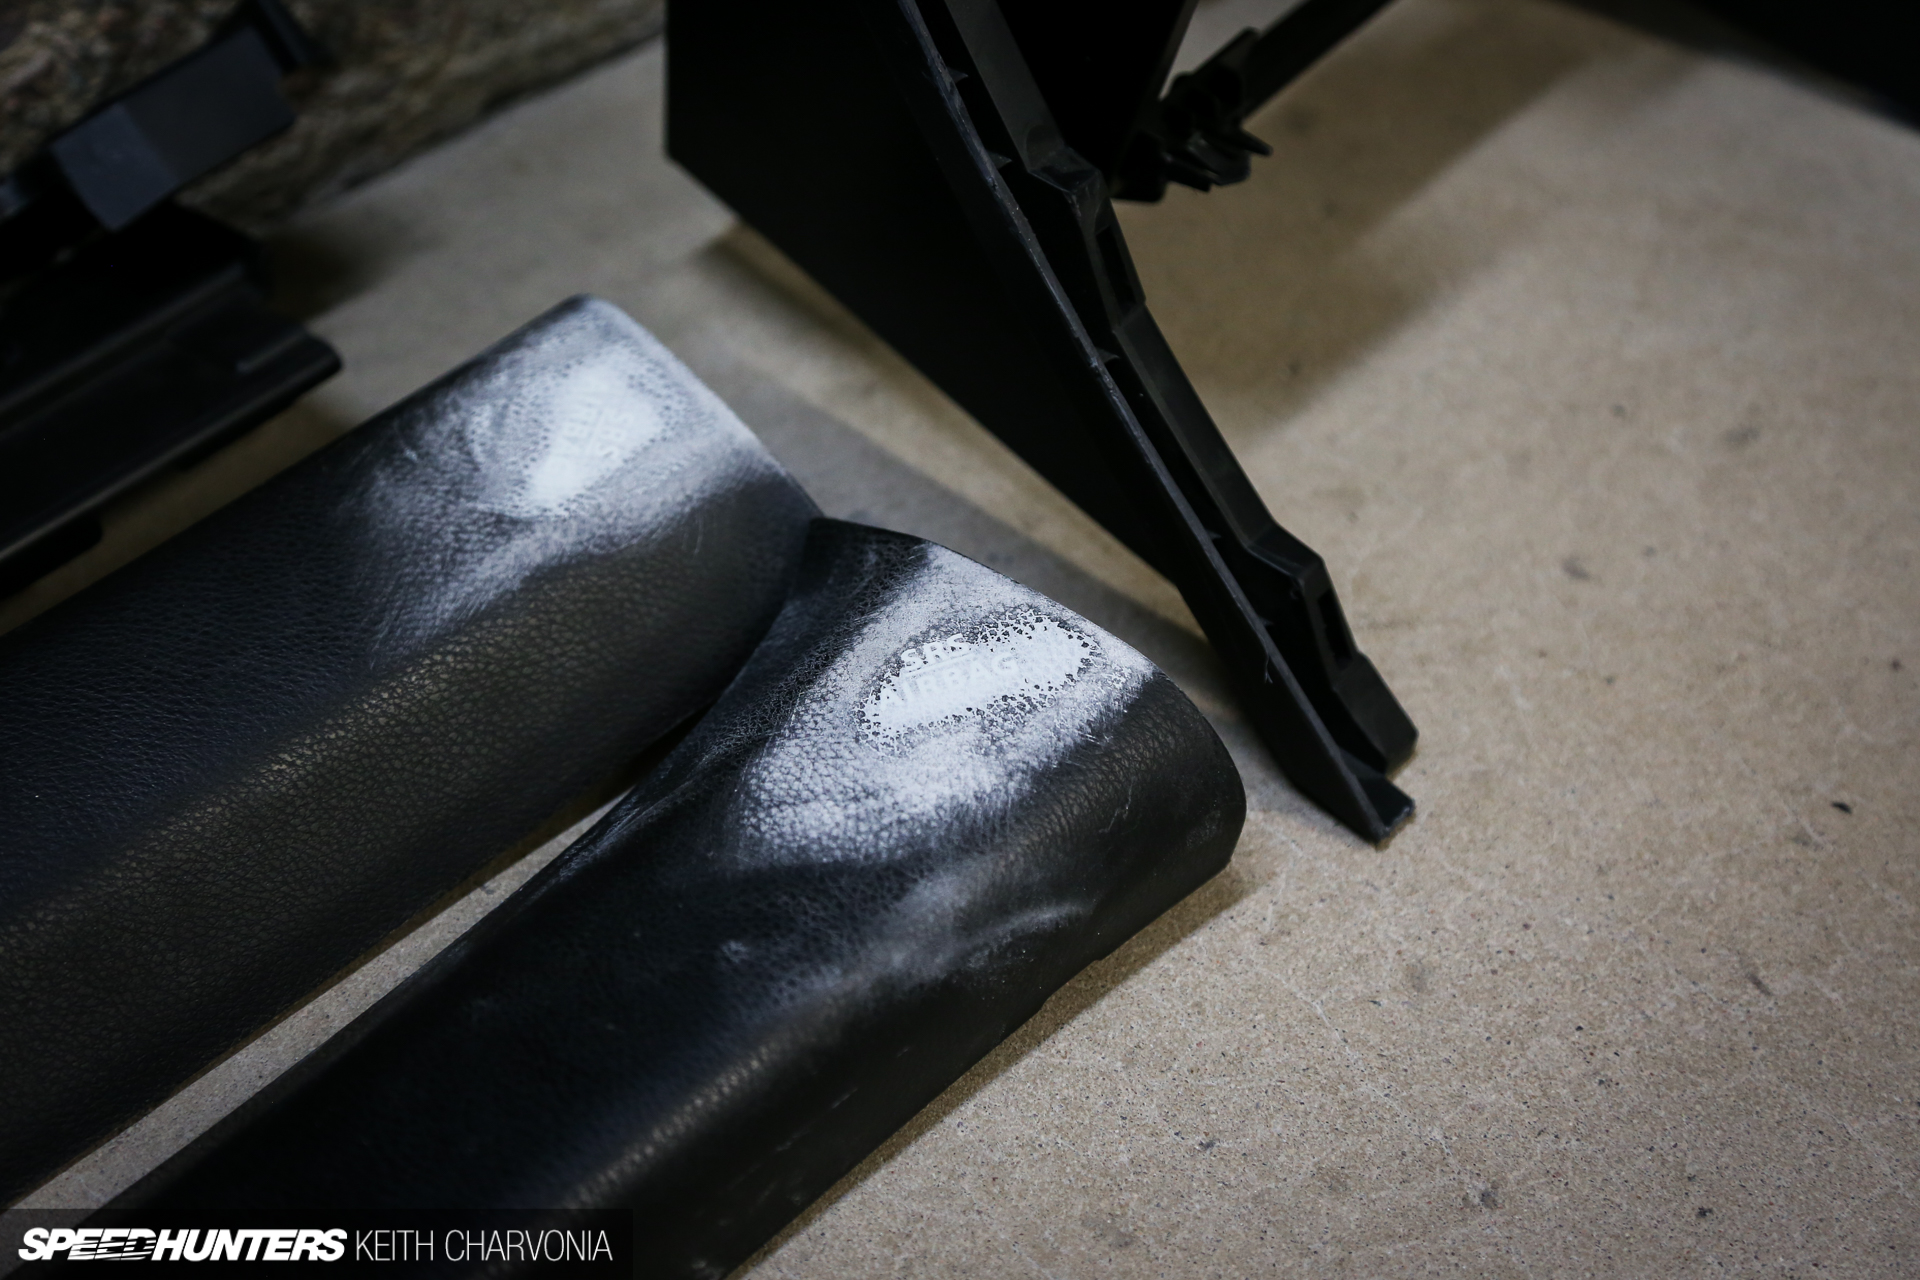
Since we planned to run low-back Cobra bucket seats with Takata 4-point ASM harnesses, we wouldn’t be needing the stock shoulder belt locations anymore. This was one of the more tricky items to shave, requiring formed sheetmetal to fill a compound curved area with two radiused bends. No matter though, we would be using filler to get it all smooth.

By far the most difficult item was filling the window channels in the door panels though. It required a long, thin strip of plastic that had to align just right with the exterior window trim – something these parts were never designed to do in the first place.
CHAPTER TWO
Bolt It Up
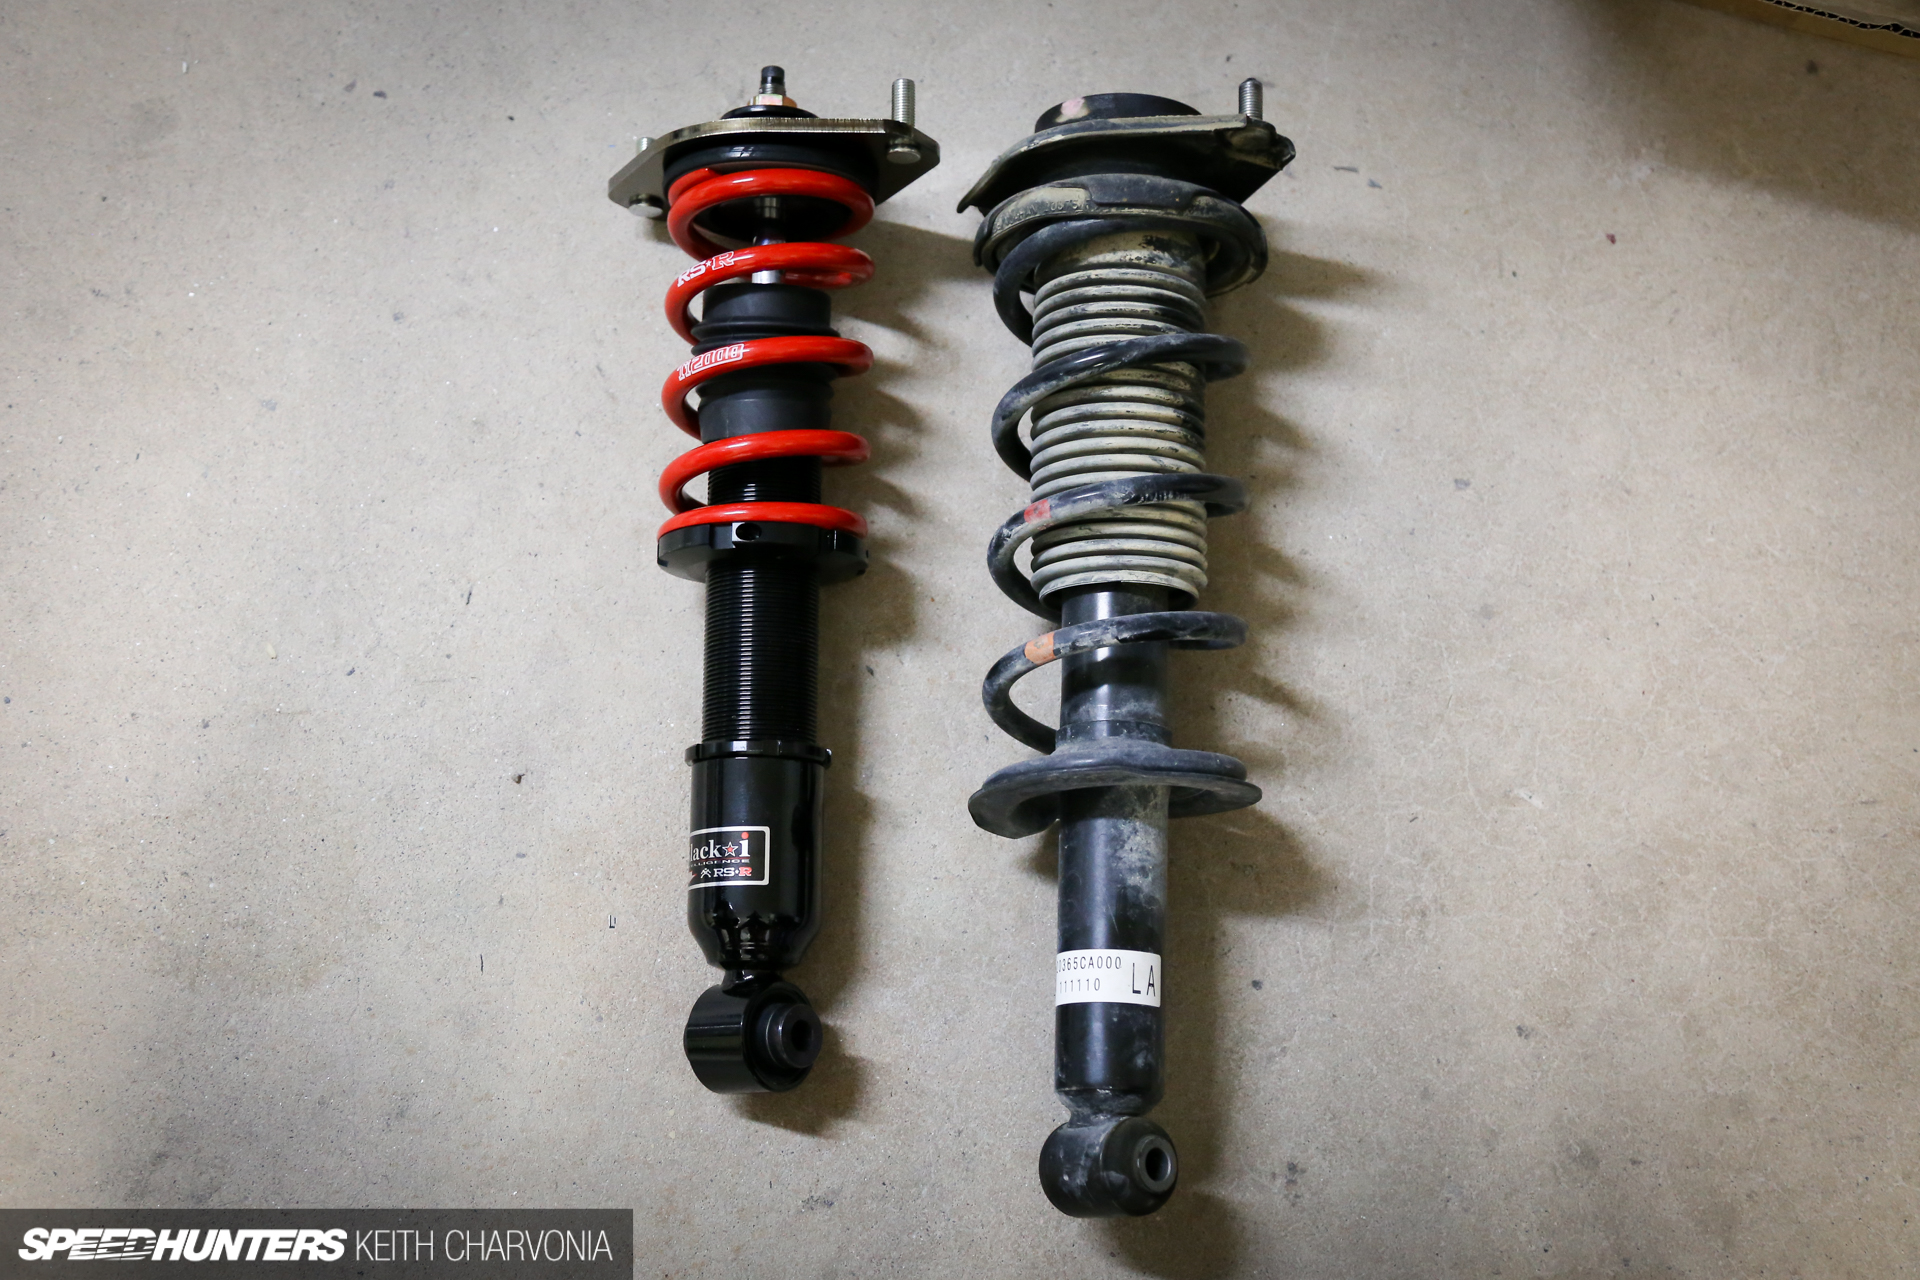
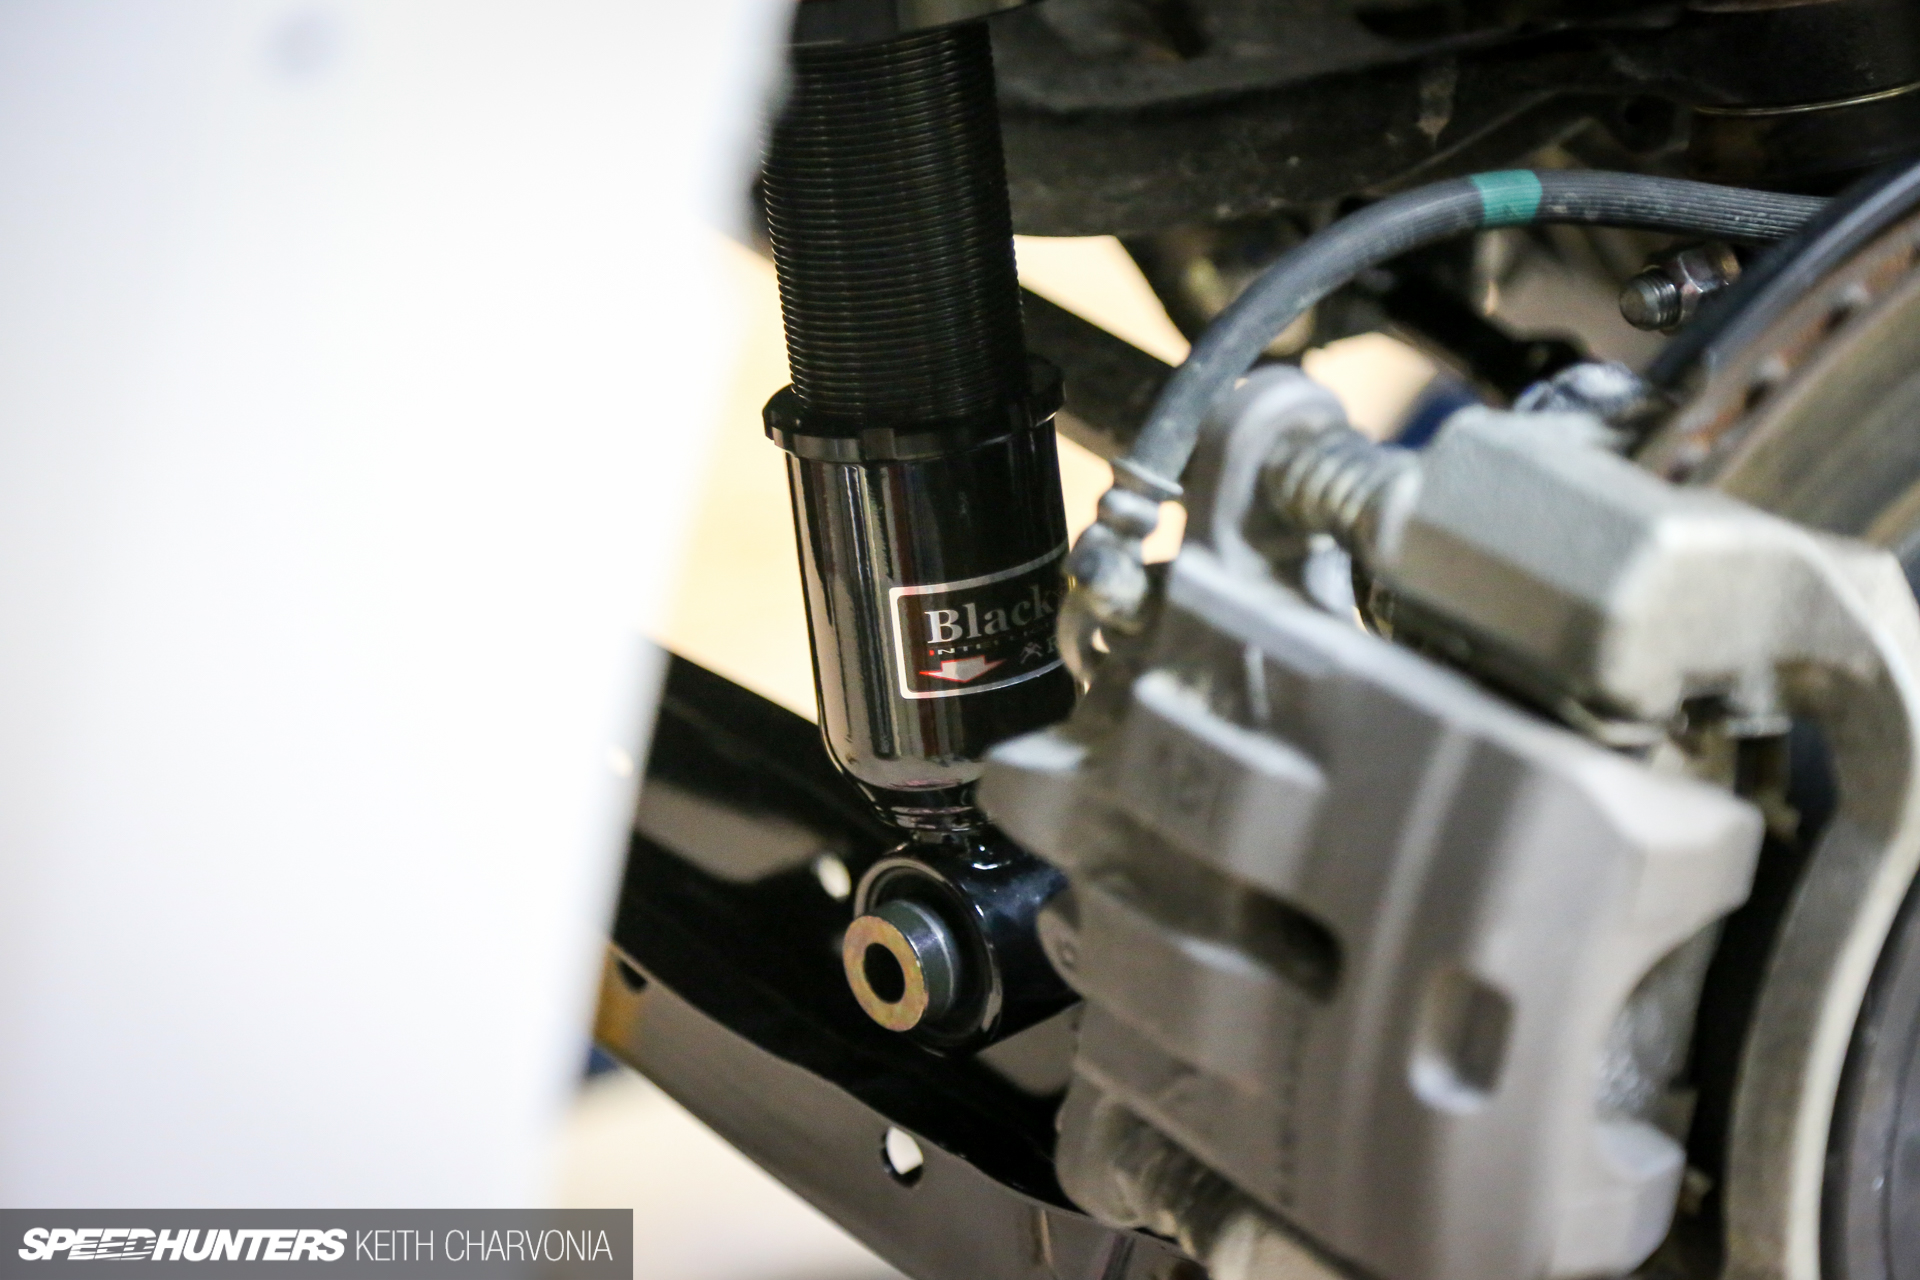
With all the custom fab we had going on, some days it was nice to change pace and just bolt stuff on. Through Speedhunters drifter Fredric Aasbø, I was able to meet someone at RS*R, and they were kind enough to send a set of their Black-i coilovers.

I went with the RS*Rs because I knew we wanted the car really low. Not only are these units known to maintain a decent ride with an extreme drop, but the coilover body is threaded so you can actually change the length of the shock – not just run the coil up and down to change height. This gives you more flexibility when setting ride height and travel both up and down. I’ll show you later why this was so important for this build in particular.

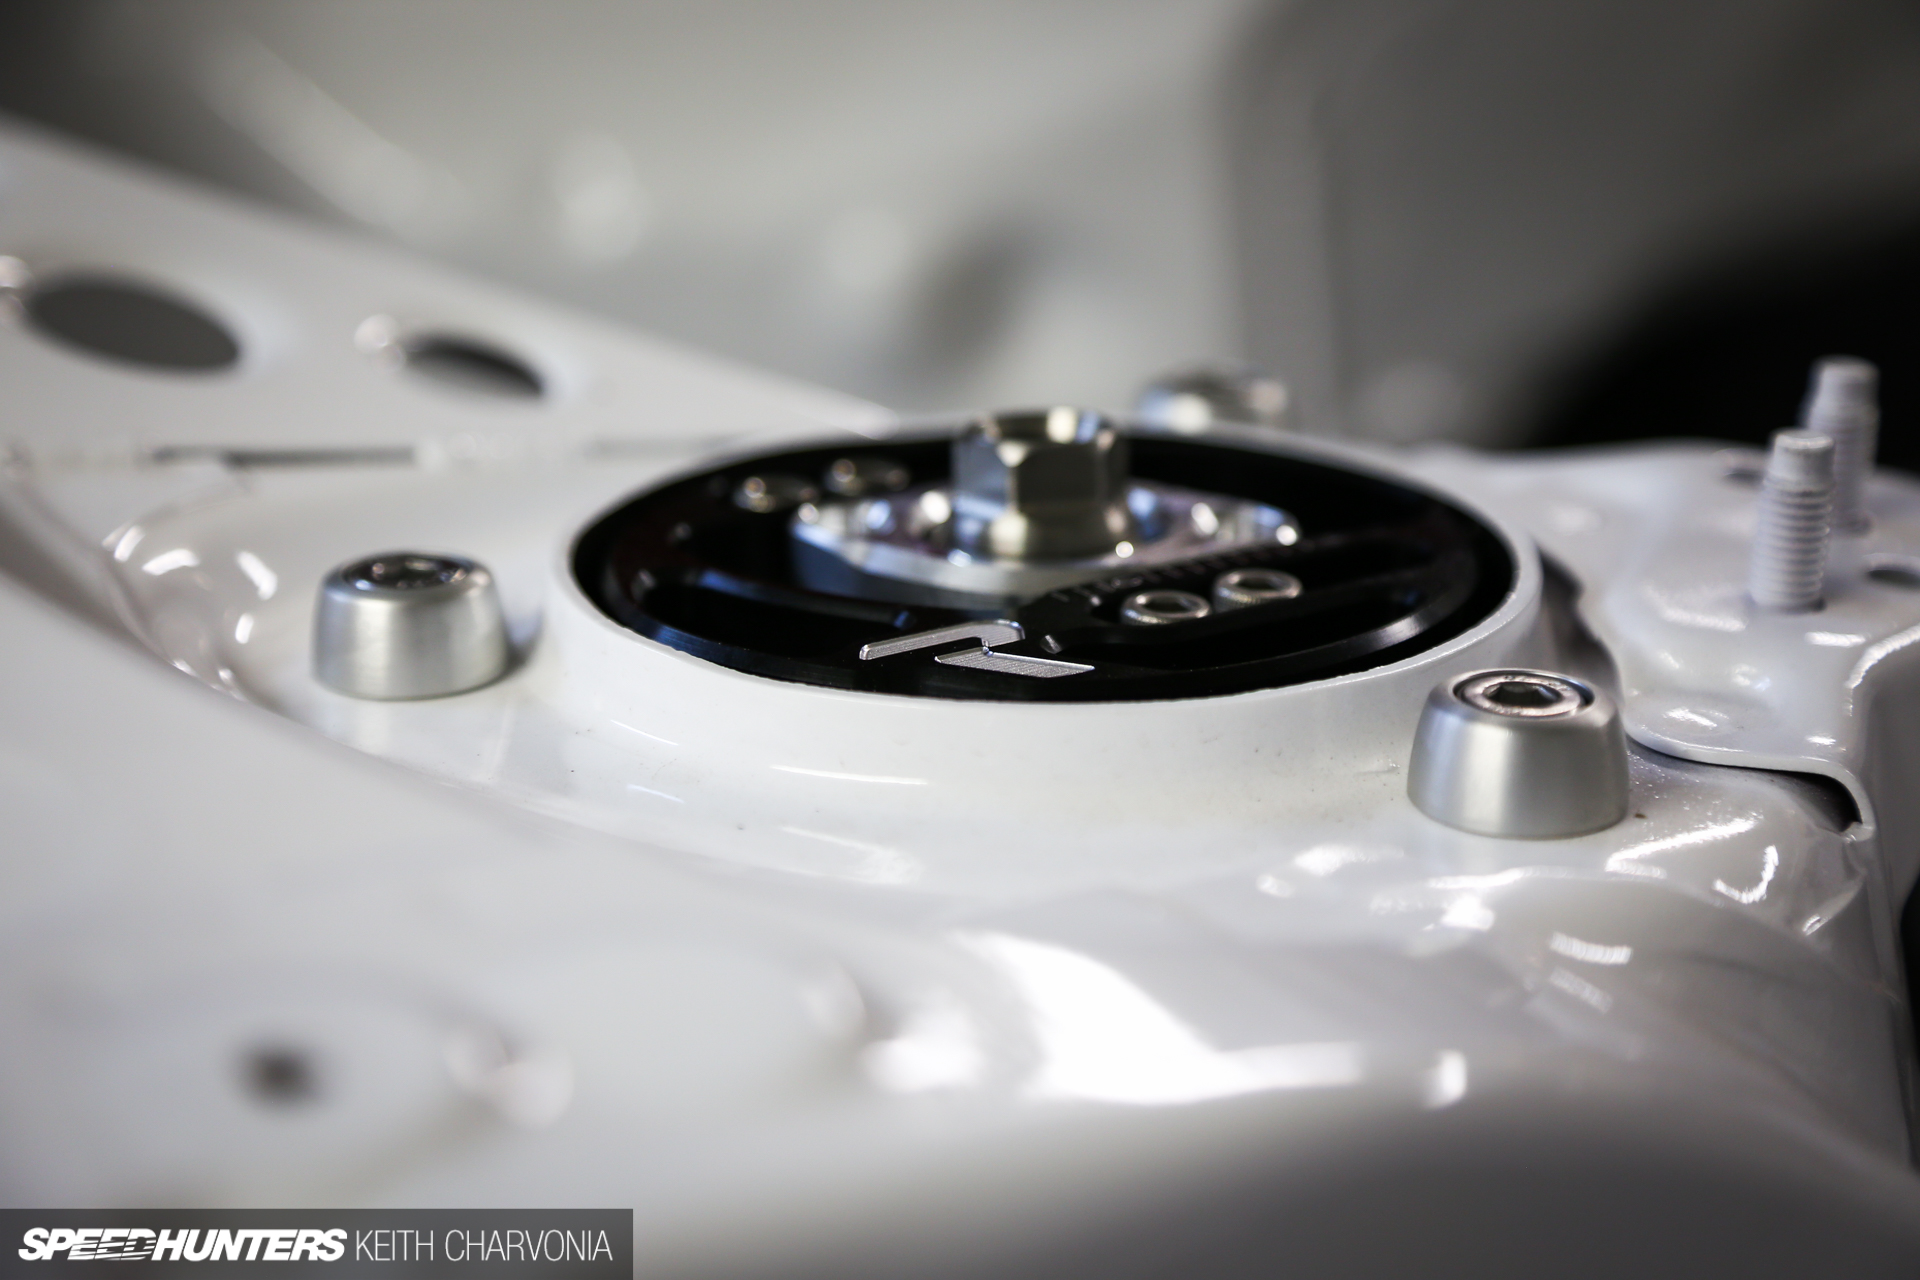
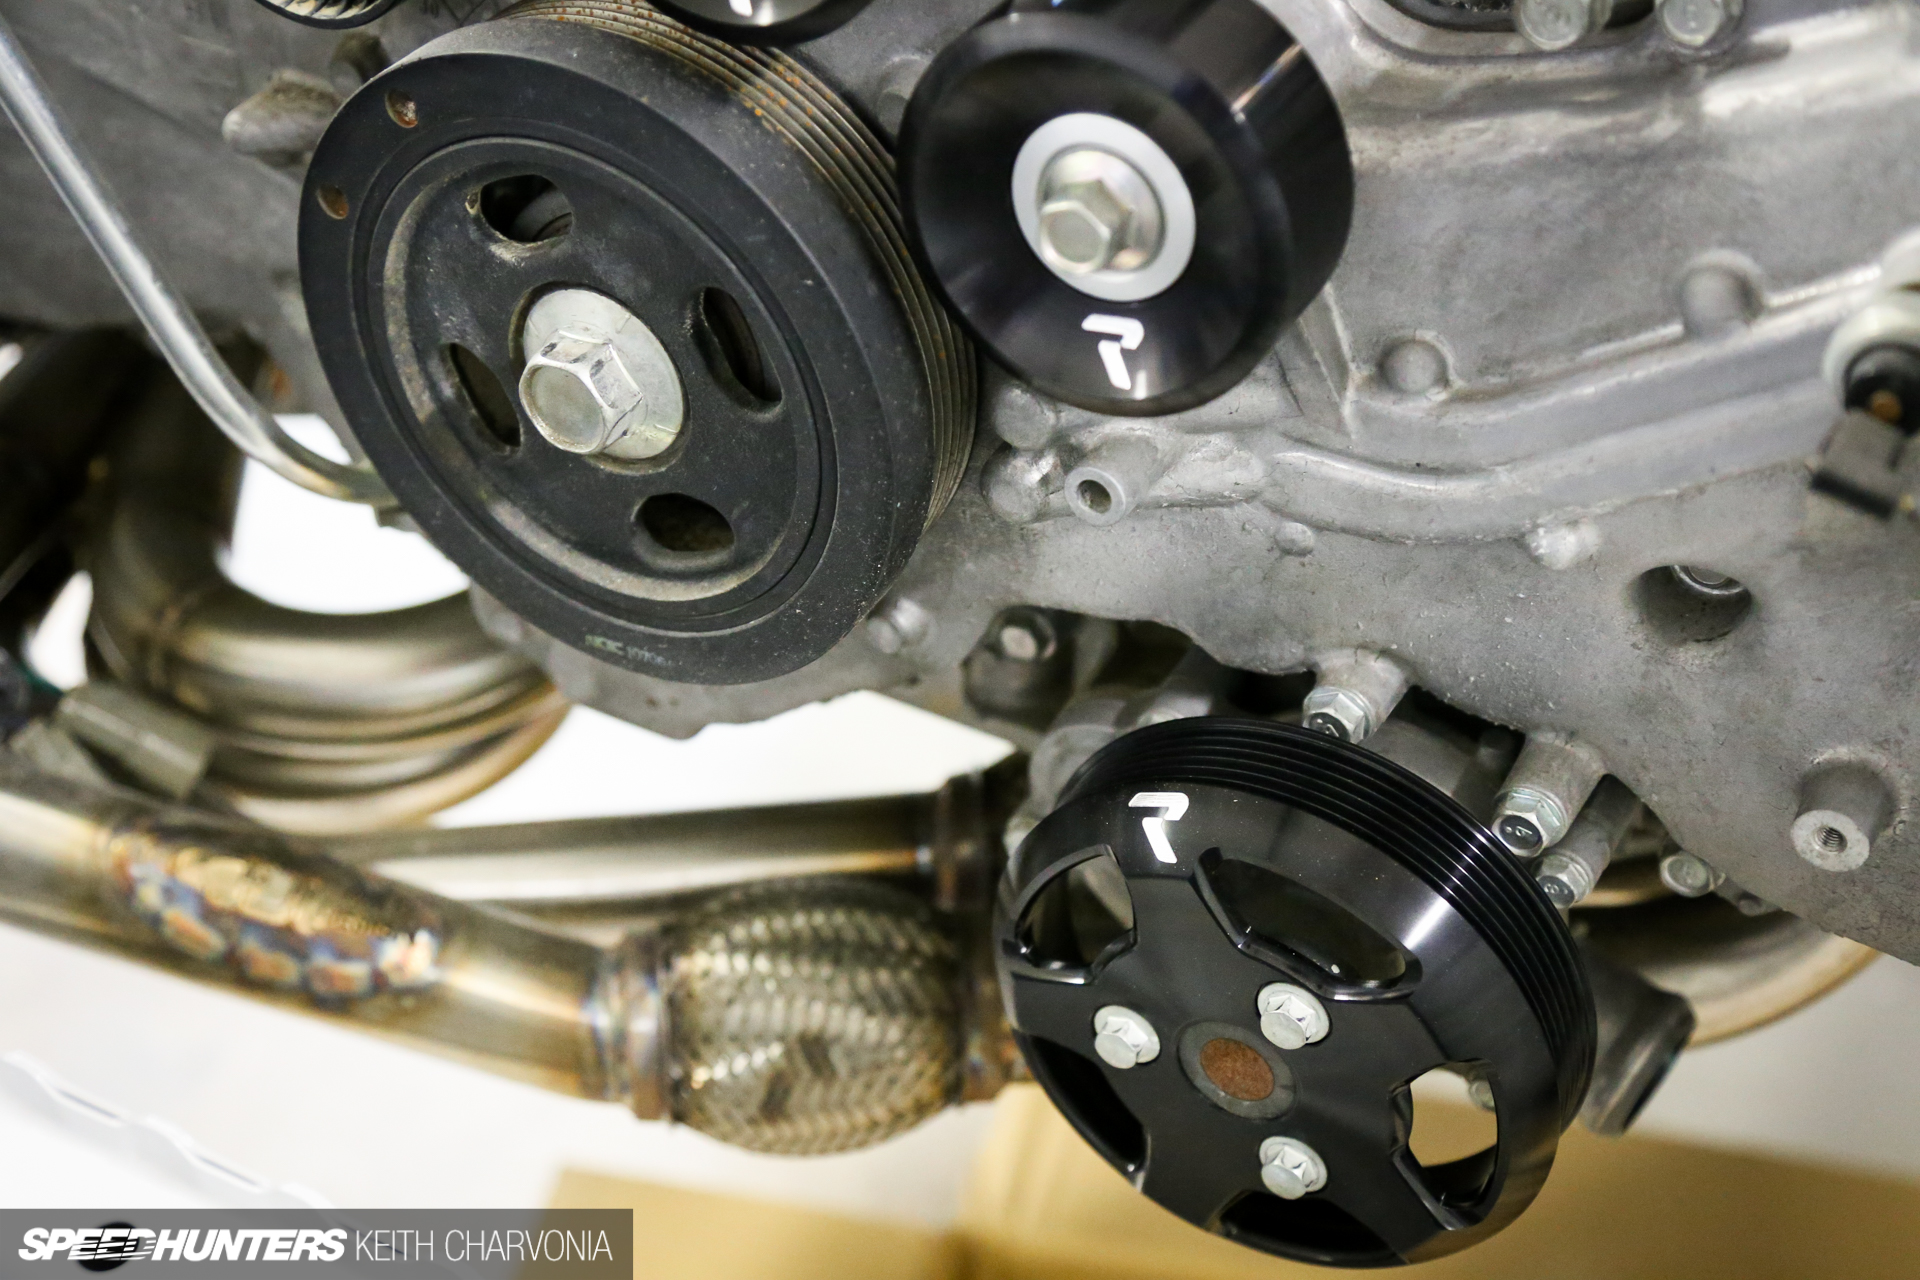
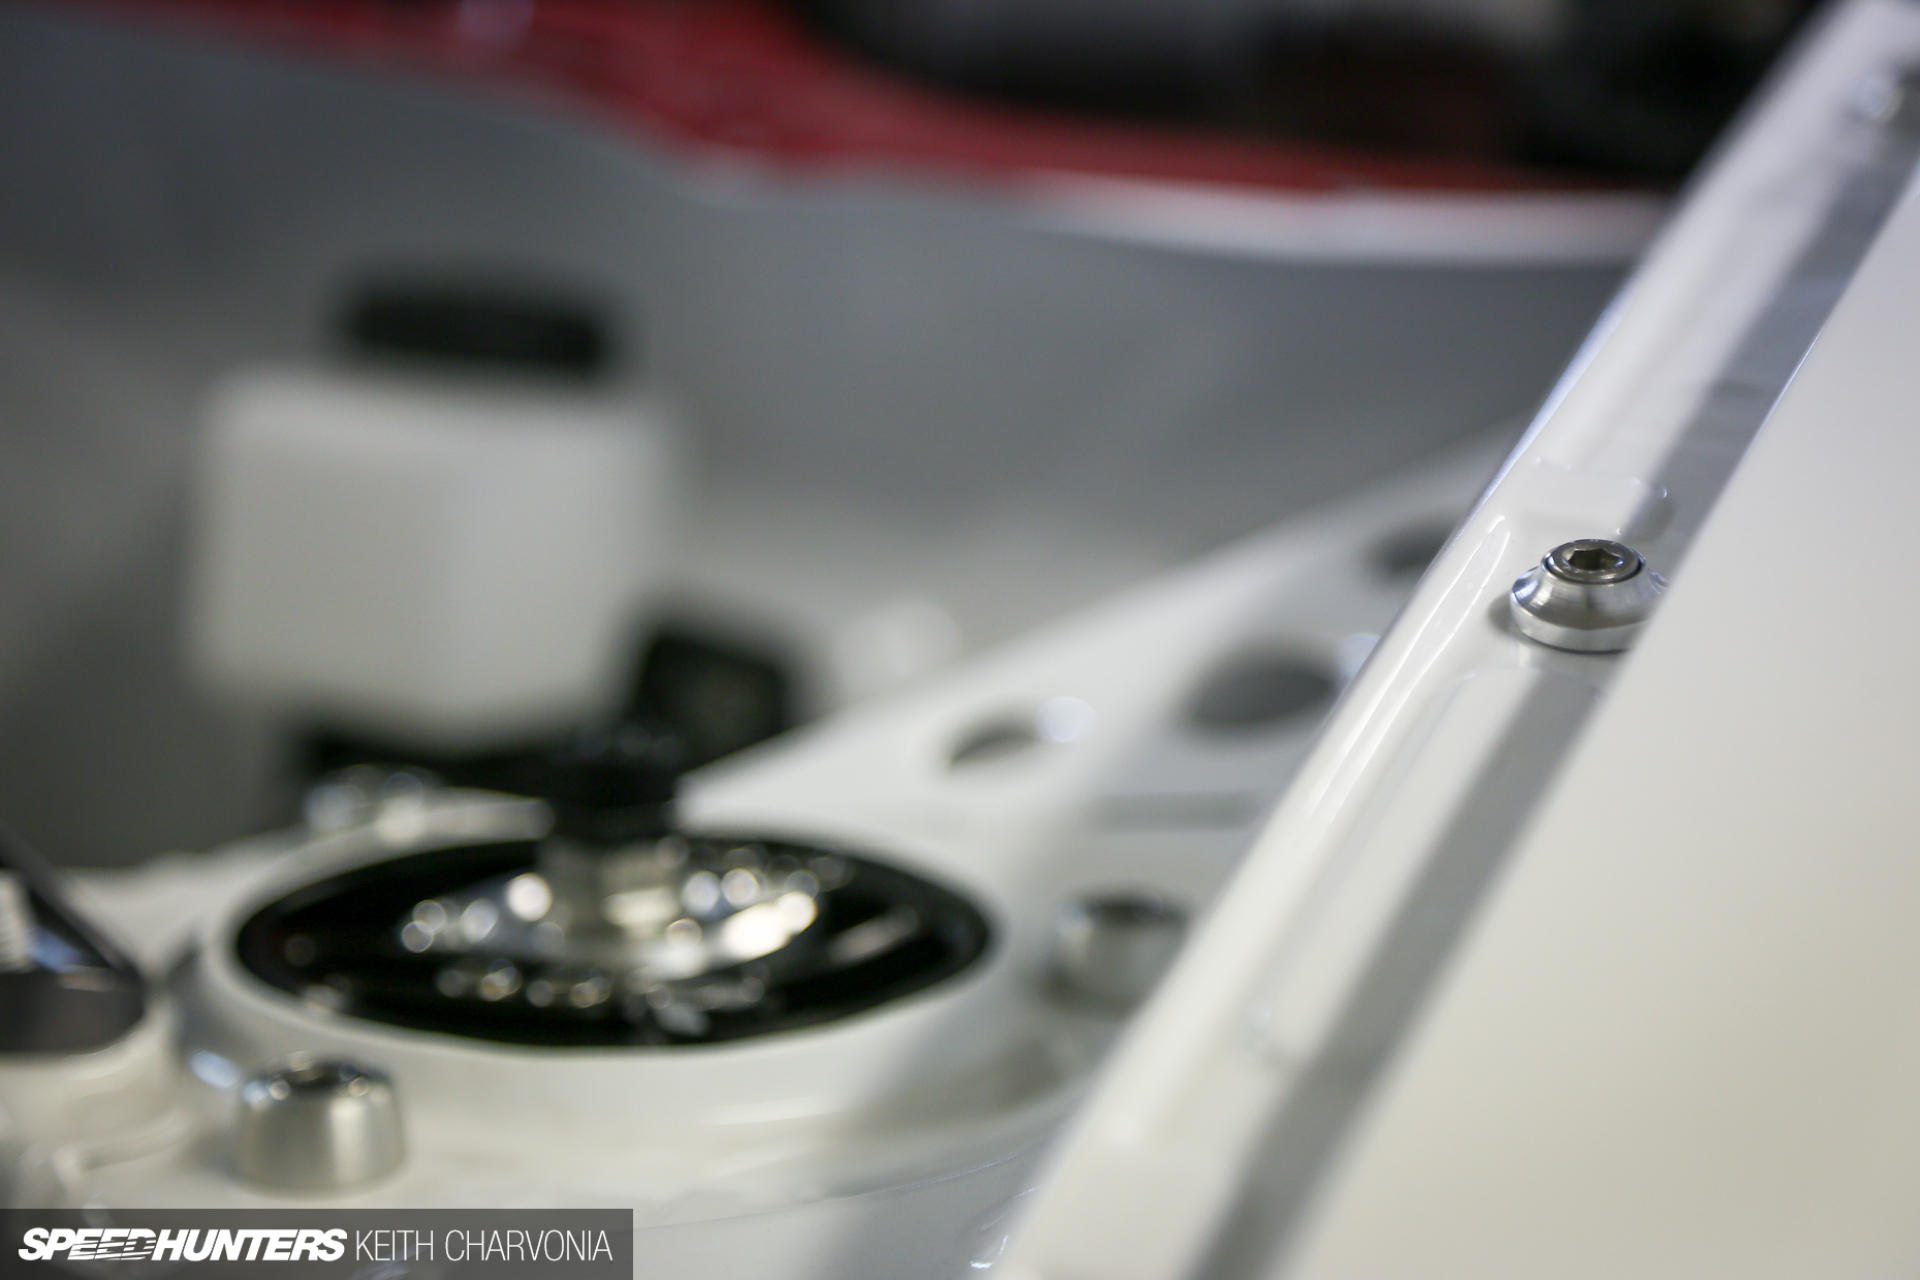
As I’m sure you’ve noticed, we didn’t leave much on our Scion Tuner Challenge FR-S unmodified and the Black-i coilovers were no different. With partner Raceseng on board, we had to get a custom set of CasCam plates made. This set was made specifically for the RS*R coilovers, and were anodized black with machined logos at my request.

This would also match the full pulley set Raceseng sent over for the car. We installed the lightweight crank pulley too, but the crank bolt was a bit, ahem, stuck, so I had to wait until the battery was connected and crank the motor with a breaker bar resting against the concrete floor. It sounds way more sketchy than it is, trust me!
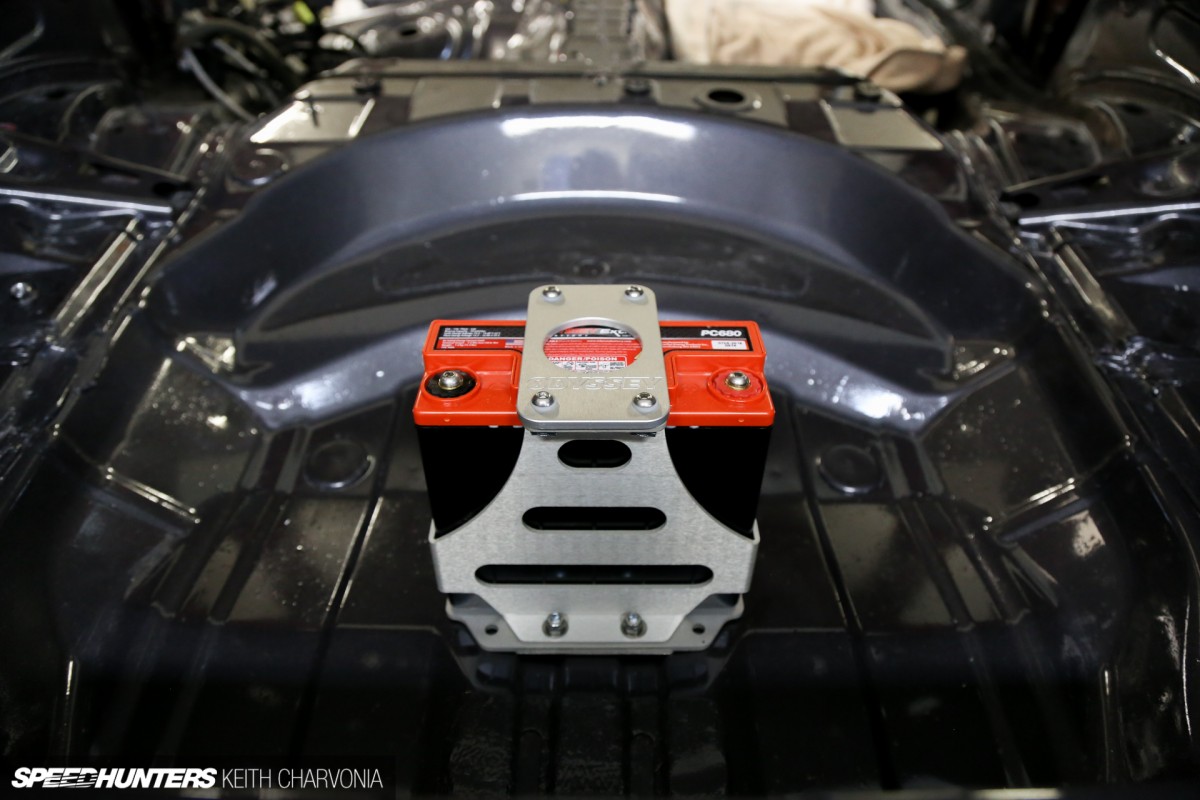
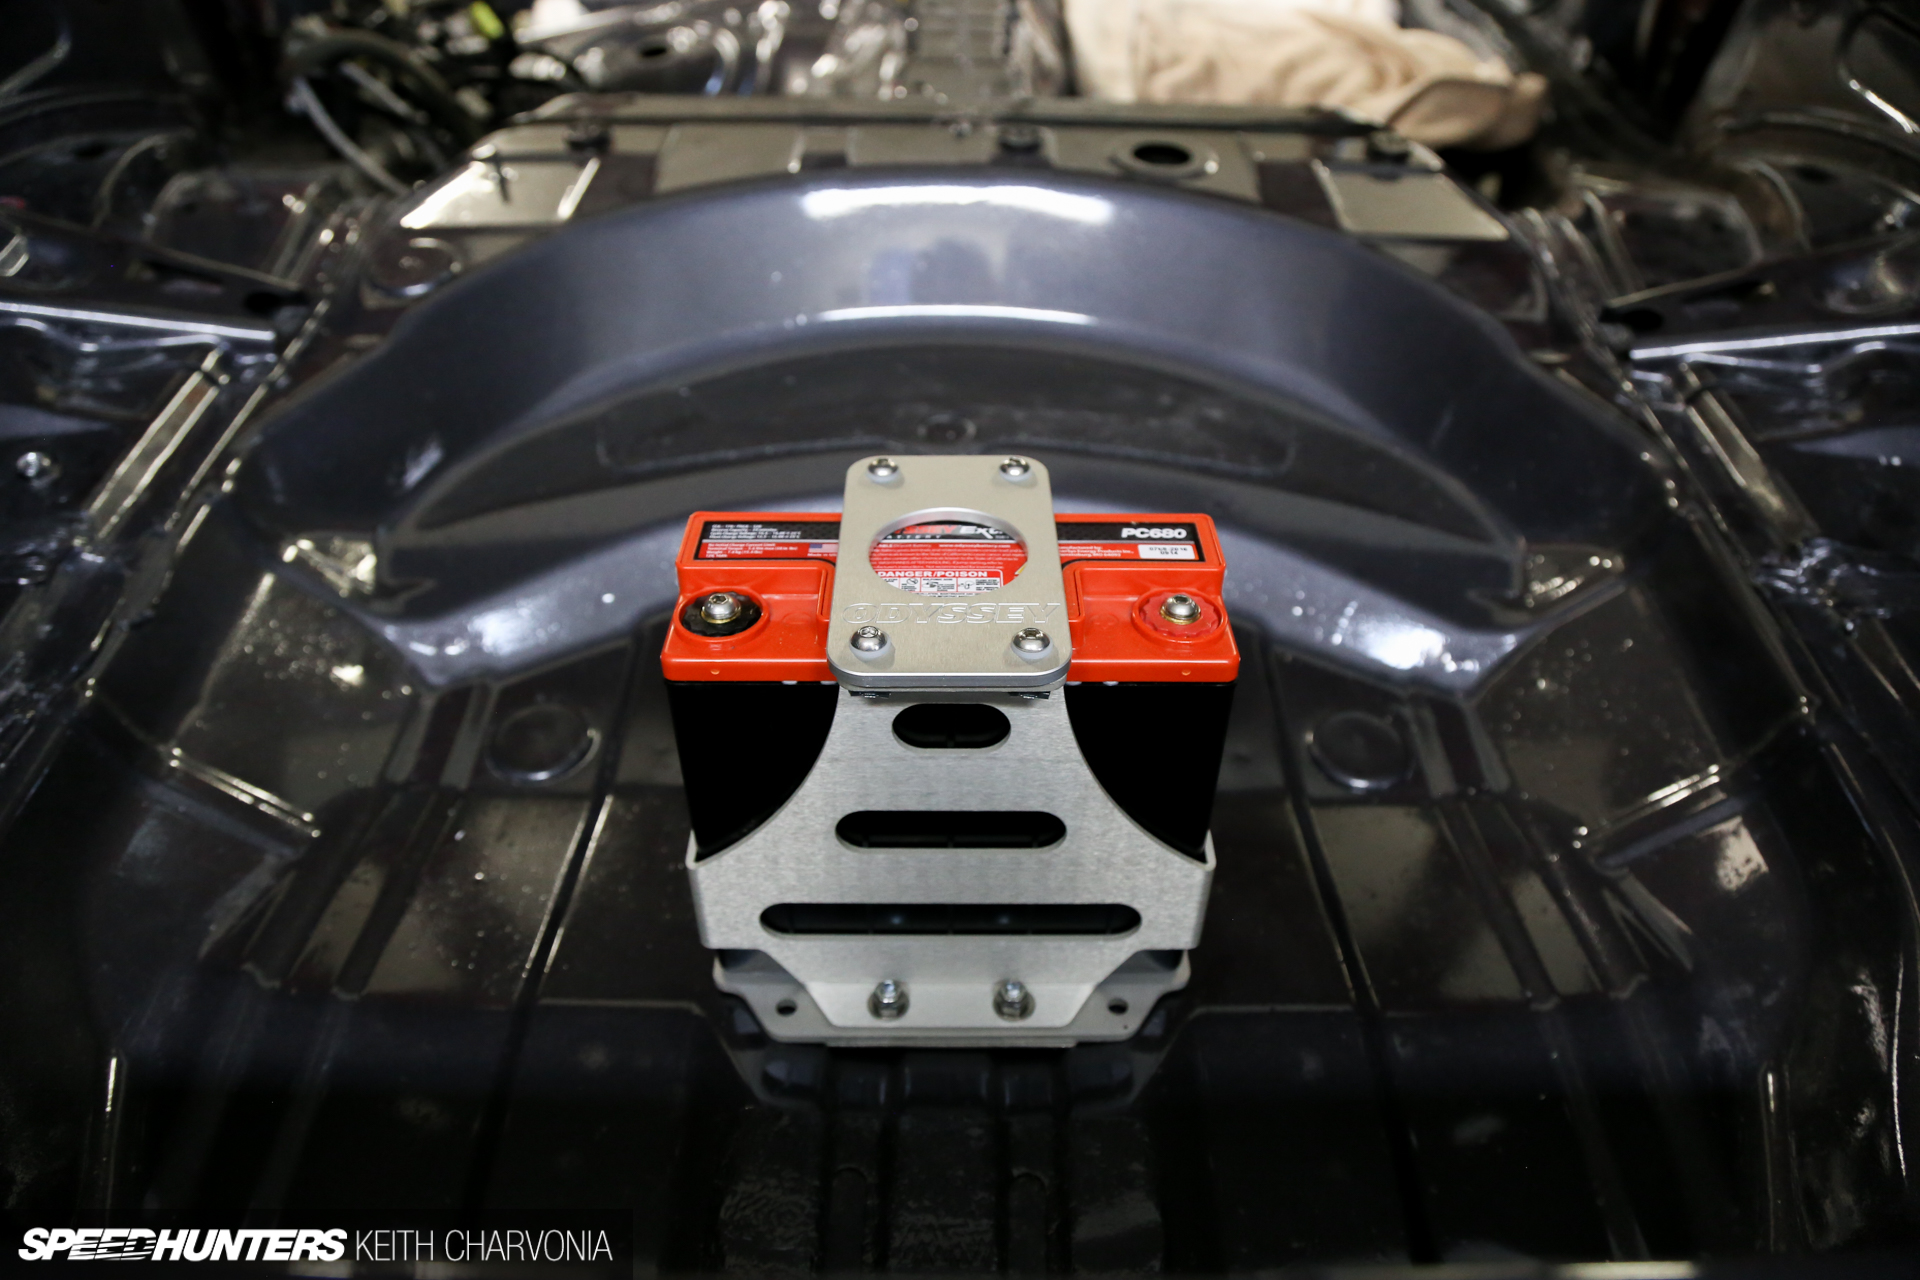
The next item to go in was a lightweight Odyssey PC680 battery, mounted right in the middle of the trunk. I was about to fab a bracket when I realized they offered them for sale. No sense wasting time then, right?

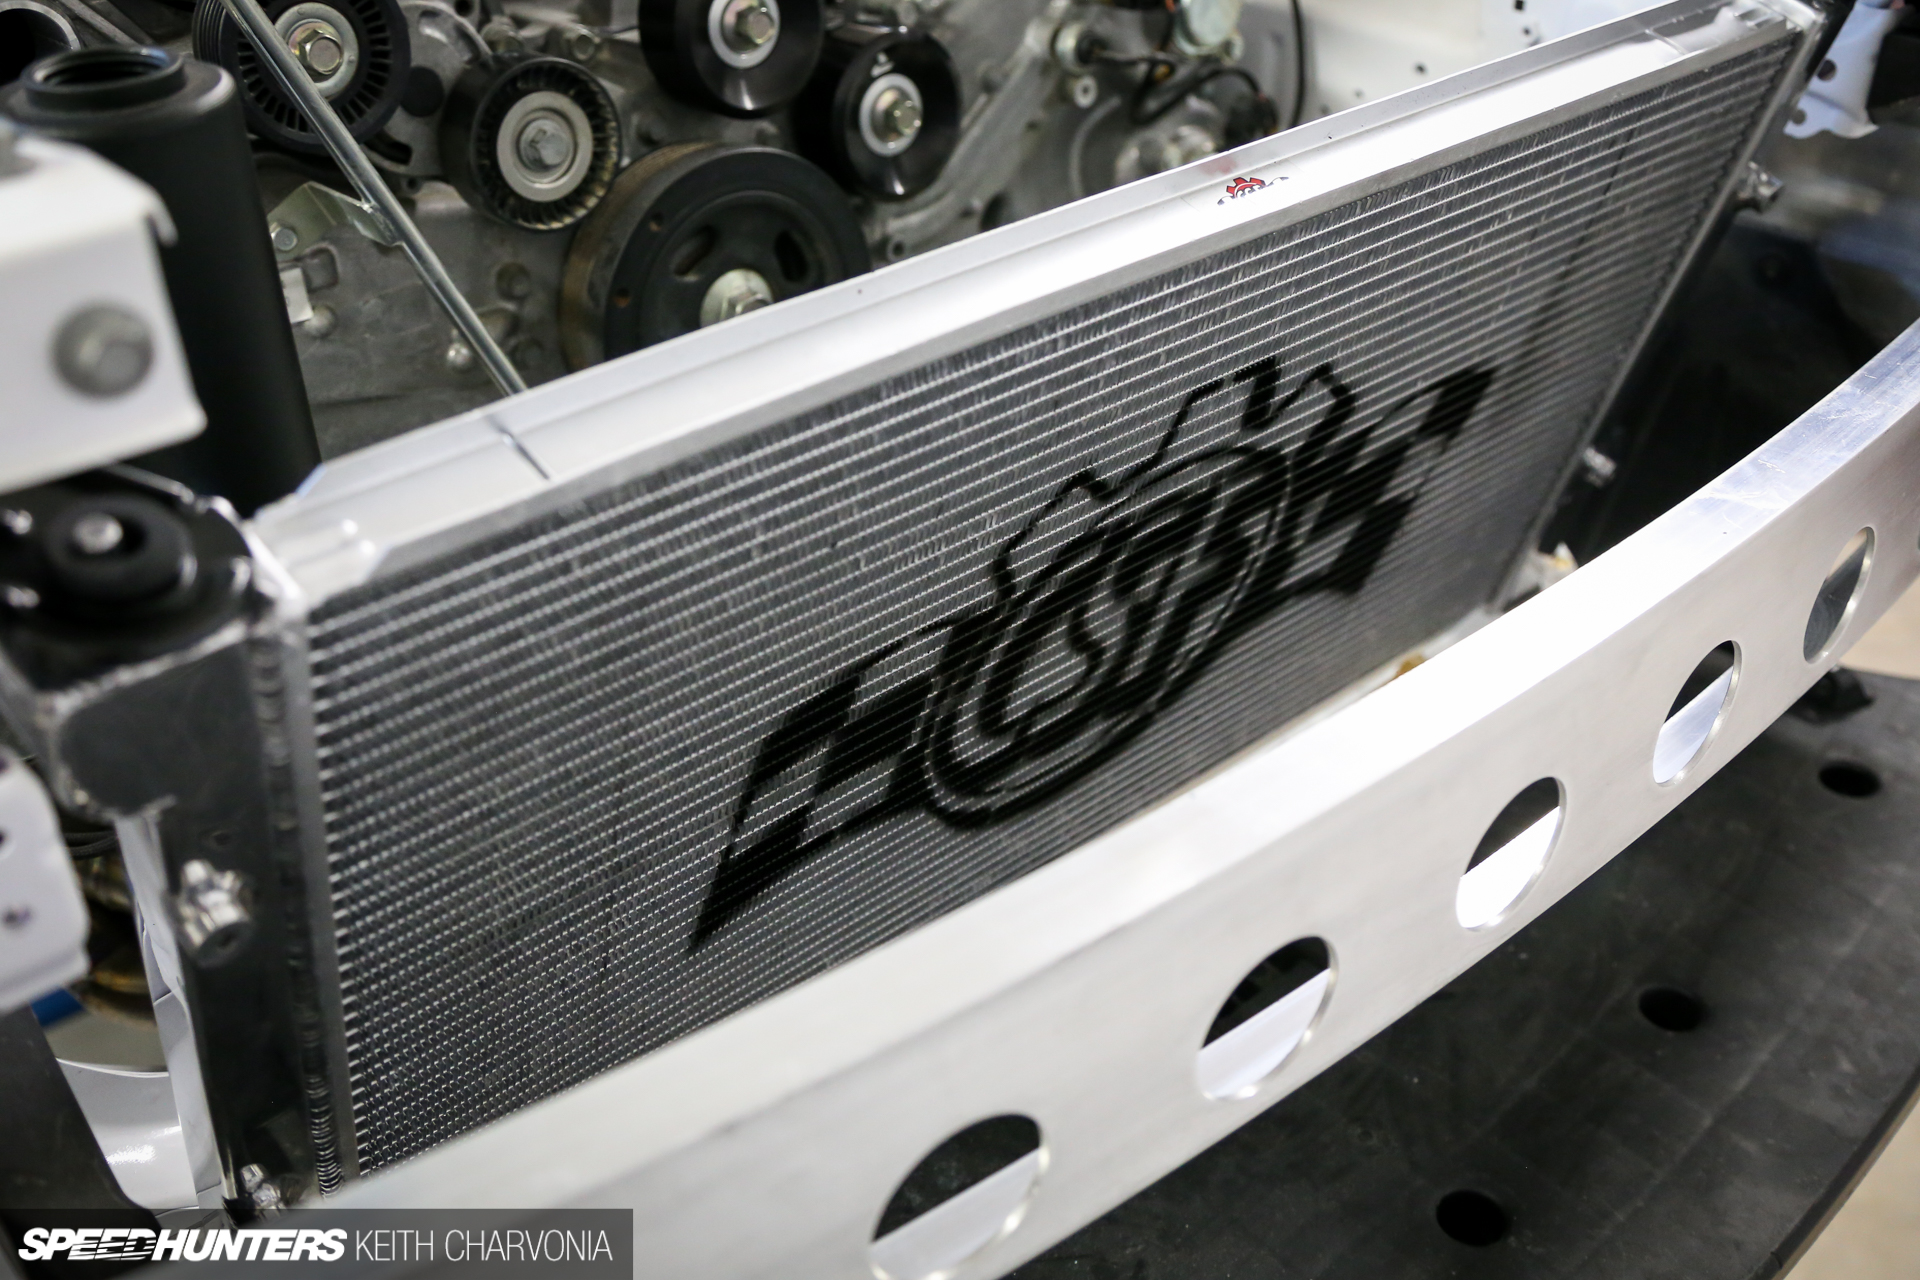
The parts just kept rolling in, with a new box on the porch every day. CSF Race sent their all-aluminum FR-S radiator along with a little something special.

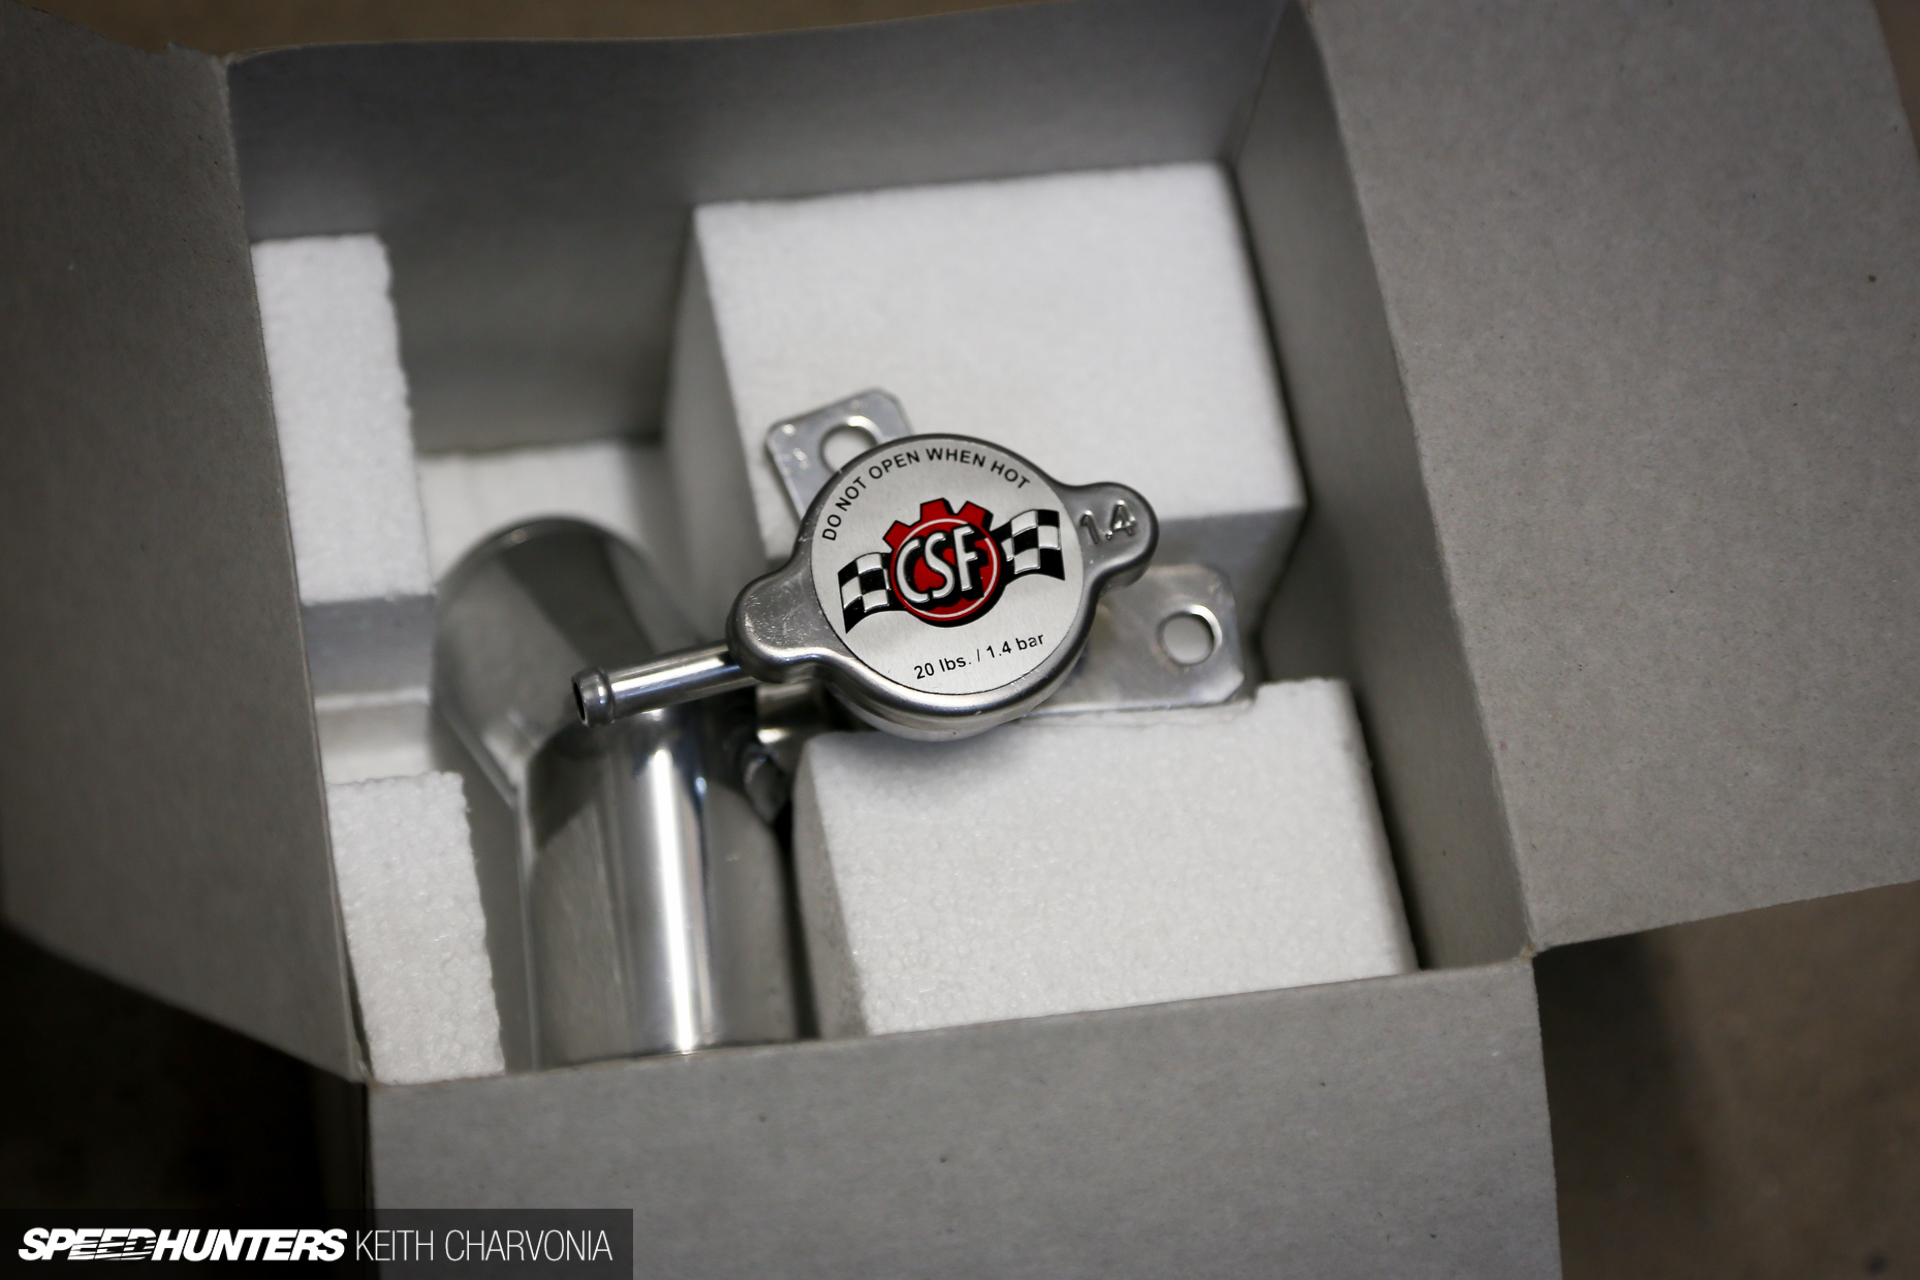
When I asked Ravi at CSF if he planned to offer an aluminum filler neck to go with his radiator, he agreed that it was definitely a part the FR-S community was going to want. Ravi wanted to fast-track the project, so I reverse engineered my factory part and sent the data to CSF so they could prototype them and send me the very first one. I believe these will be available soon, and I’m predicting they will become a must-have mod once the plastic gets old on these cars and filler necks start breaking. It also includes an upgraded, high pressure 1.4bar mini cap.

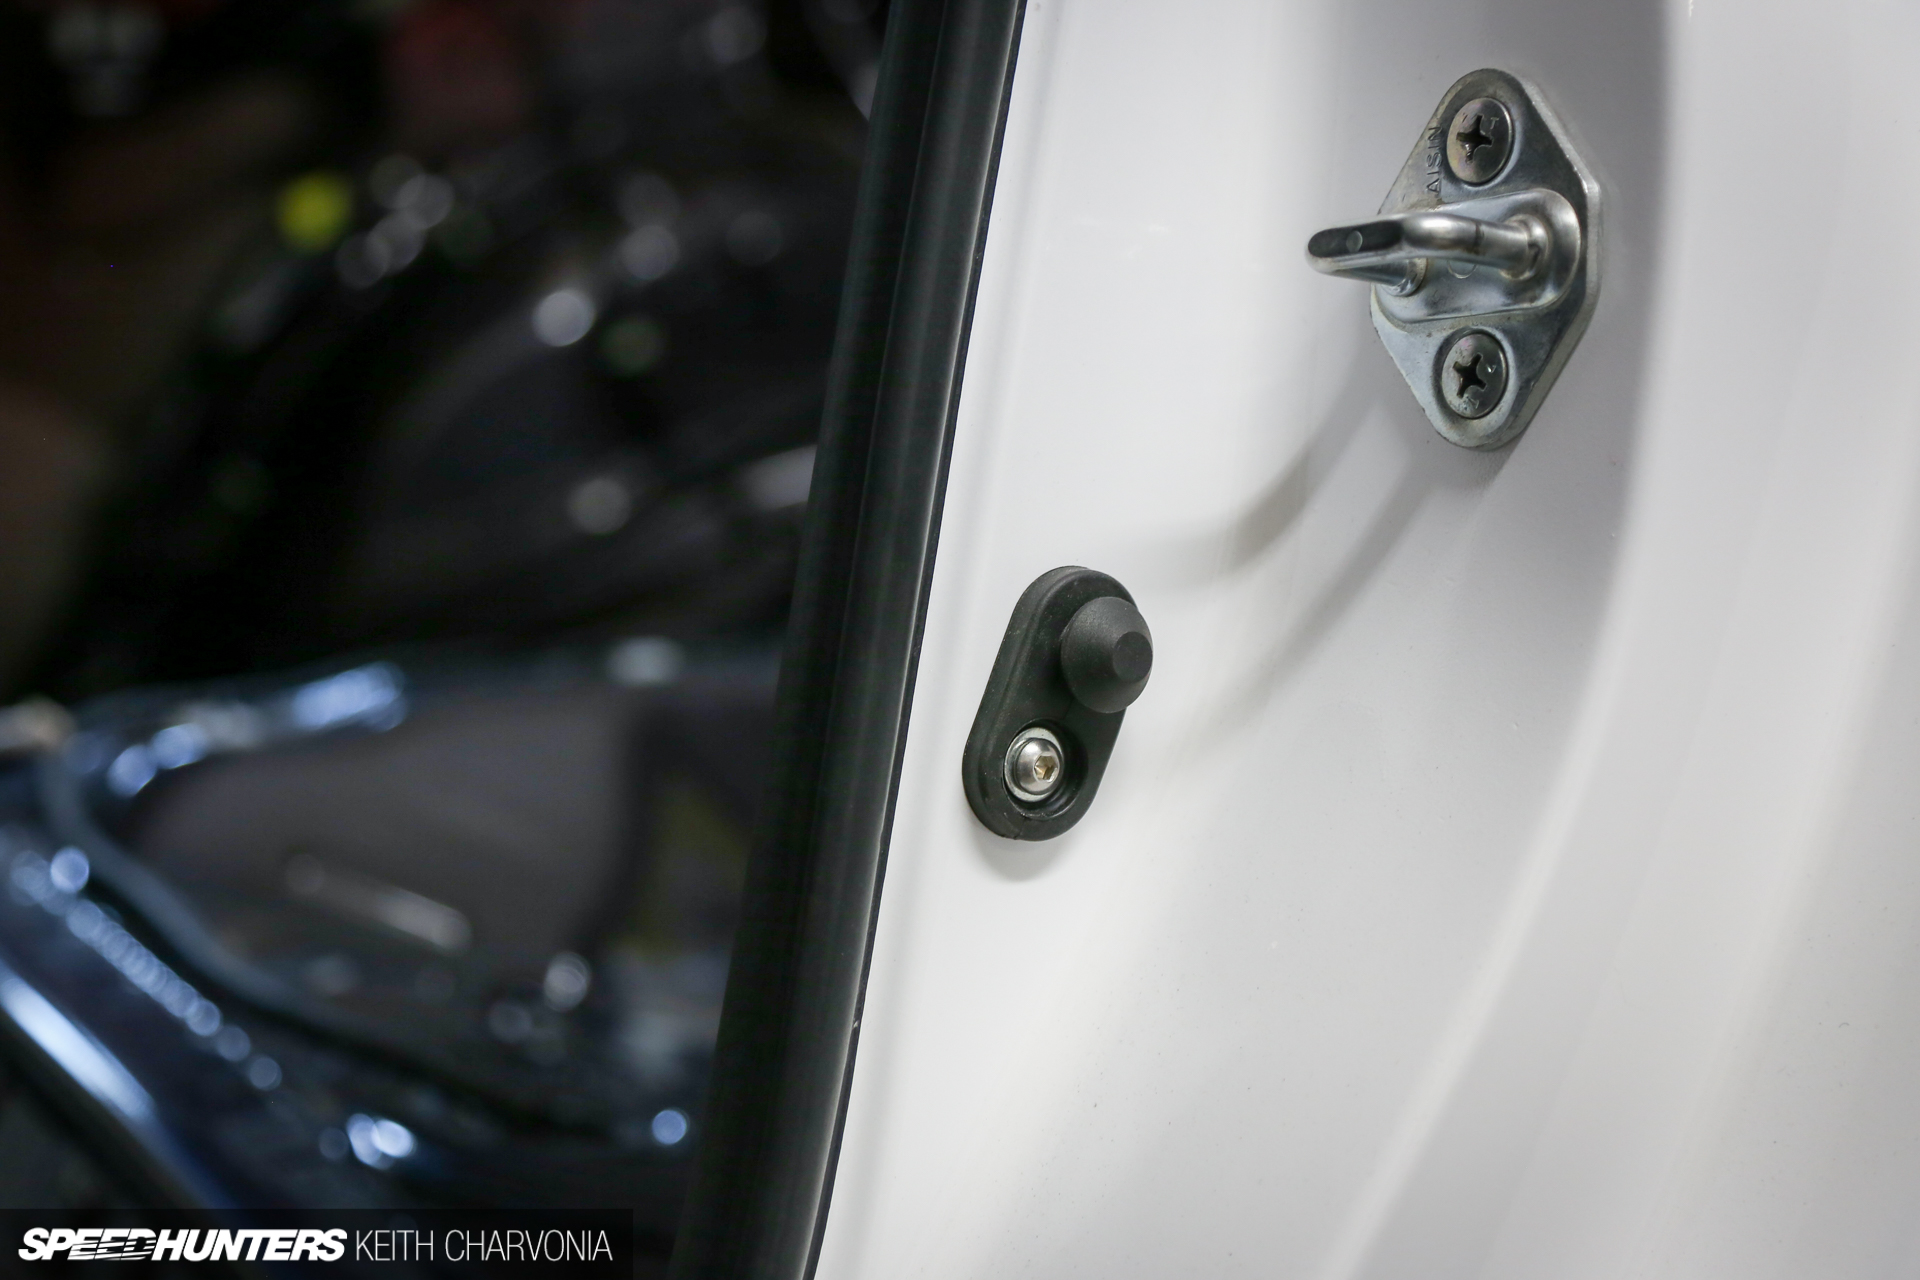
It wasn’t just performance parts that had to be bolted up though. All the body panels had to be re-hung after the paint job, and there was no way we were going to install the used-up factory bolts. I sourced some metric button head cap screws and stainless trim washers for reassembly.

Once we had several boxes of common metric hardware on hand we found all sorts of uses for it during reassembly.

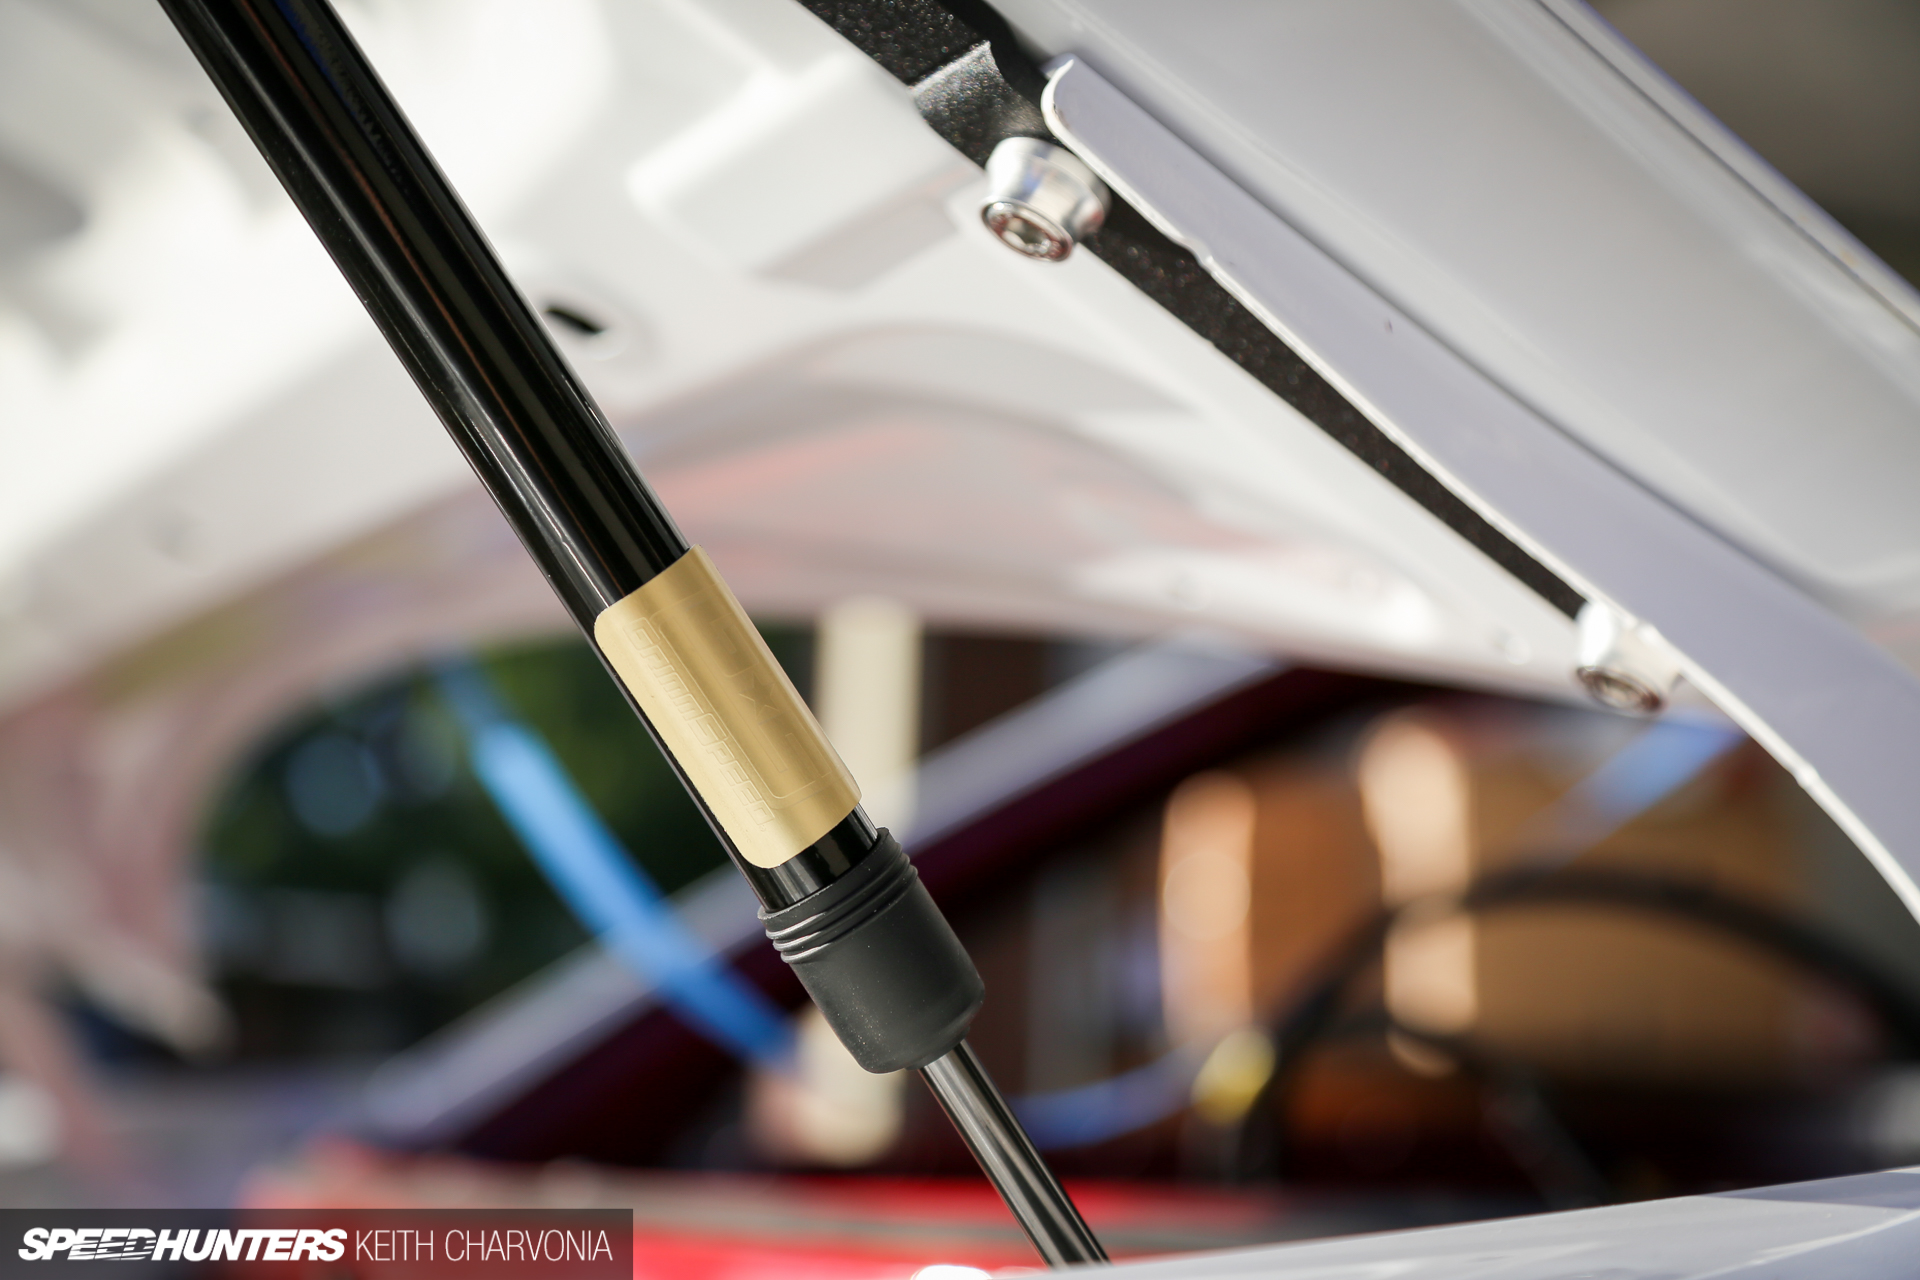
In the engine bay I went with a full hardware kit from Downstar. They were cool enough to send a couple of extra shipments of their custom hardware too, as we found more and more places it could be used.

For example, we found a use for Downstar hardware when we installed the Grimmspeed hood strut kit. I’ve talked about it in my own Project ZN6 stories, but I love these hood struts because they open the hood much higher and get the hood prop out of the way. This is great for show and for wrenching under the hood. Plus you can just drop the hood and it has the perfect amount of resistance to latch shut.

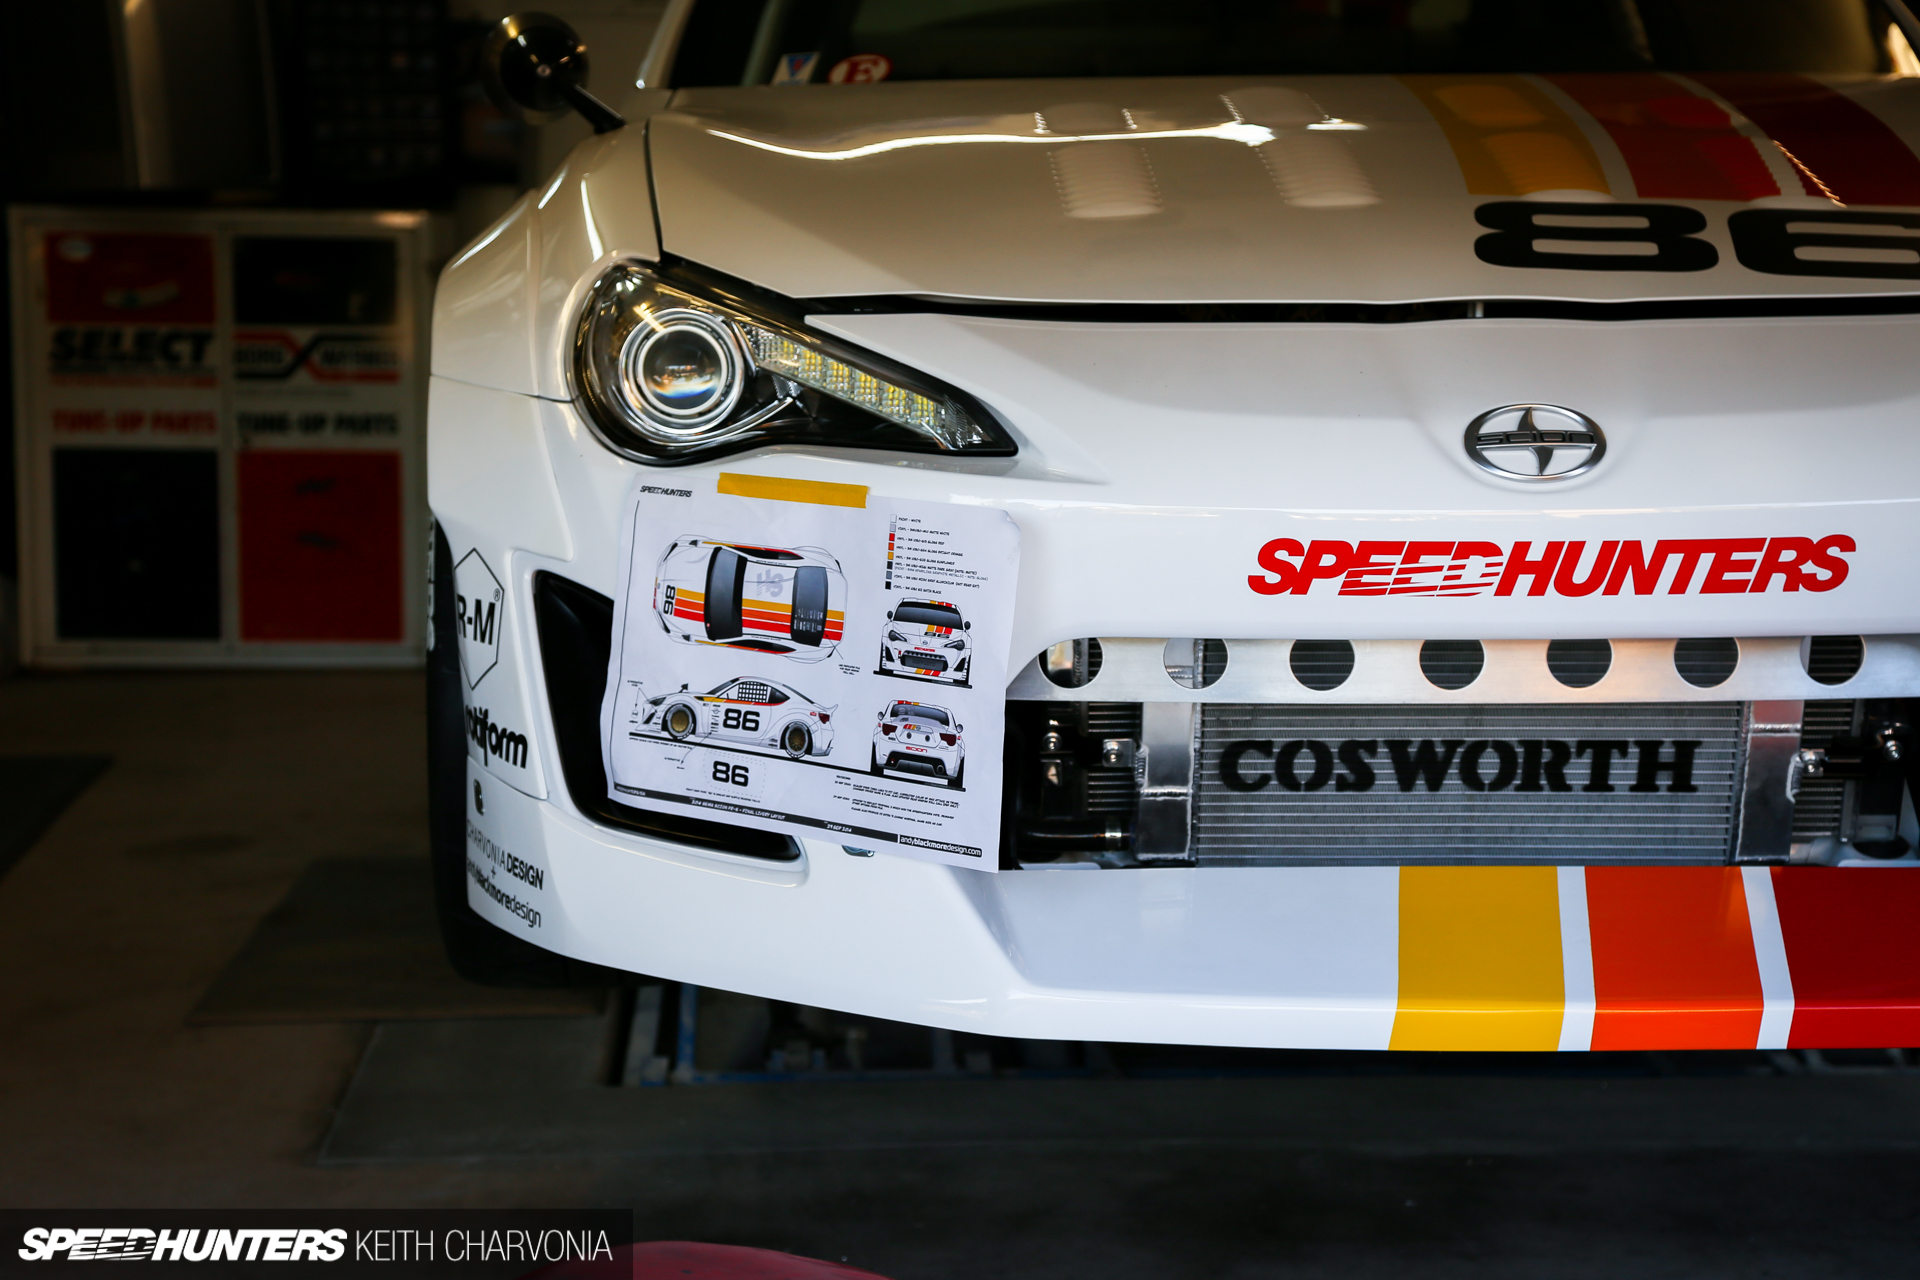
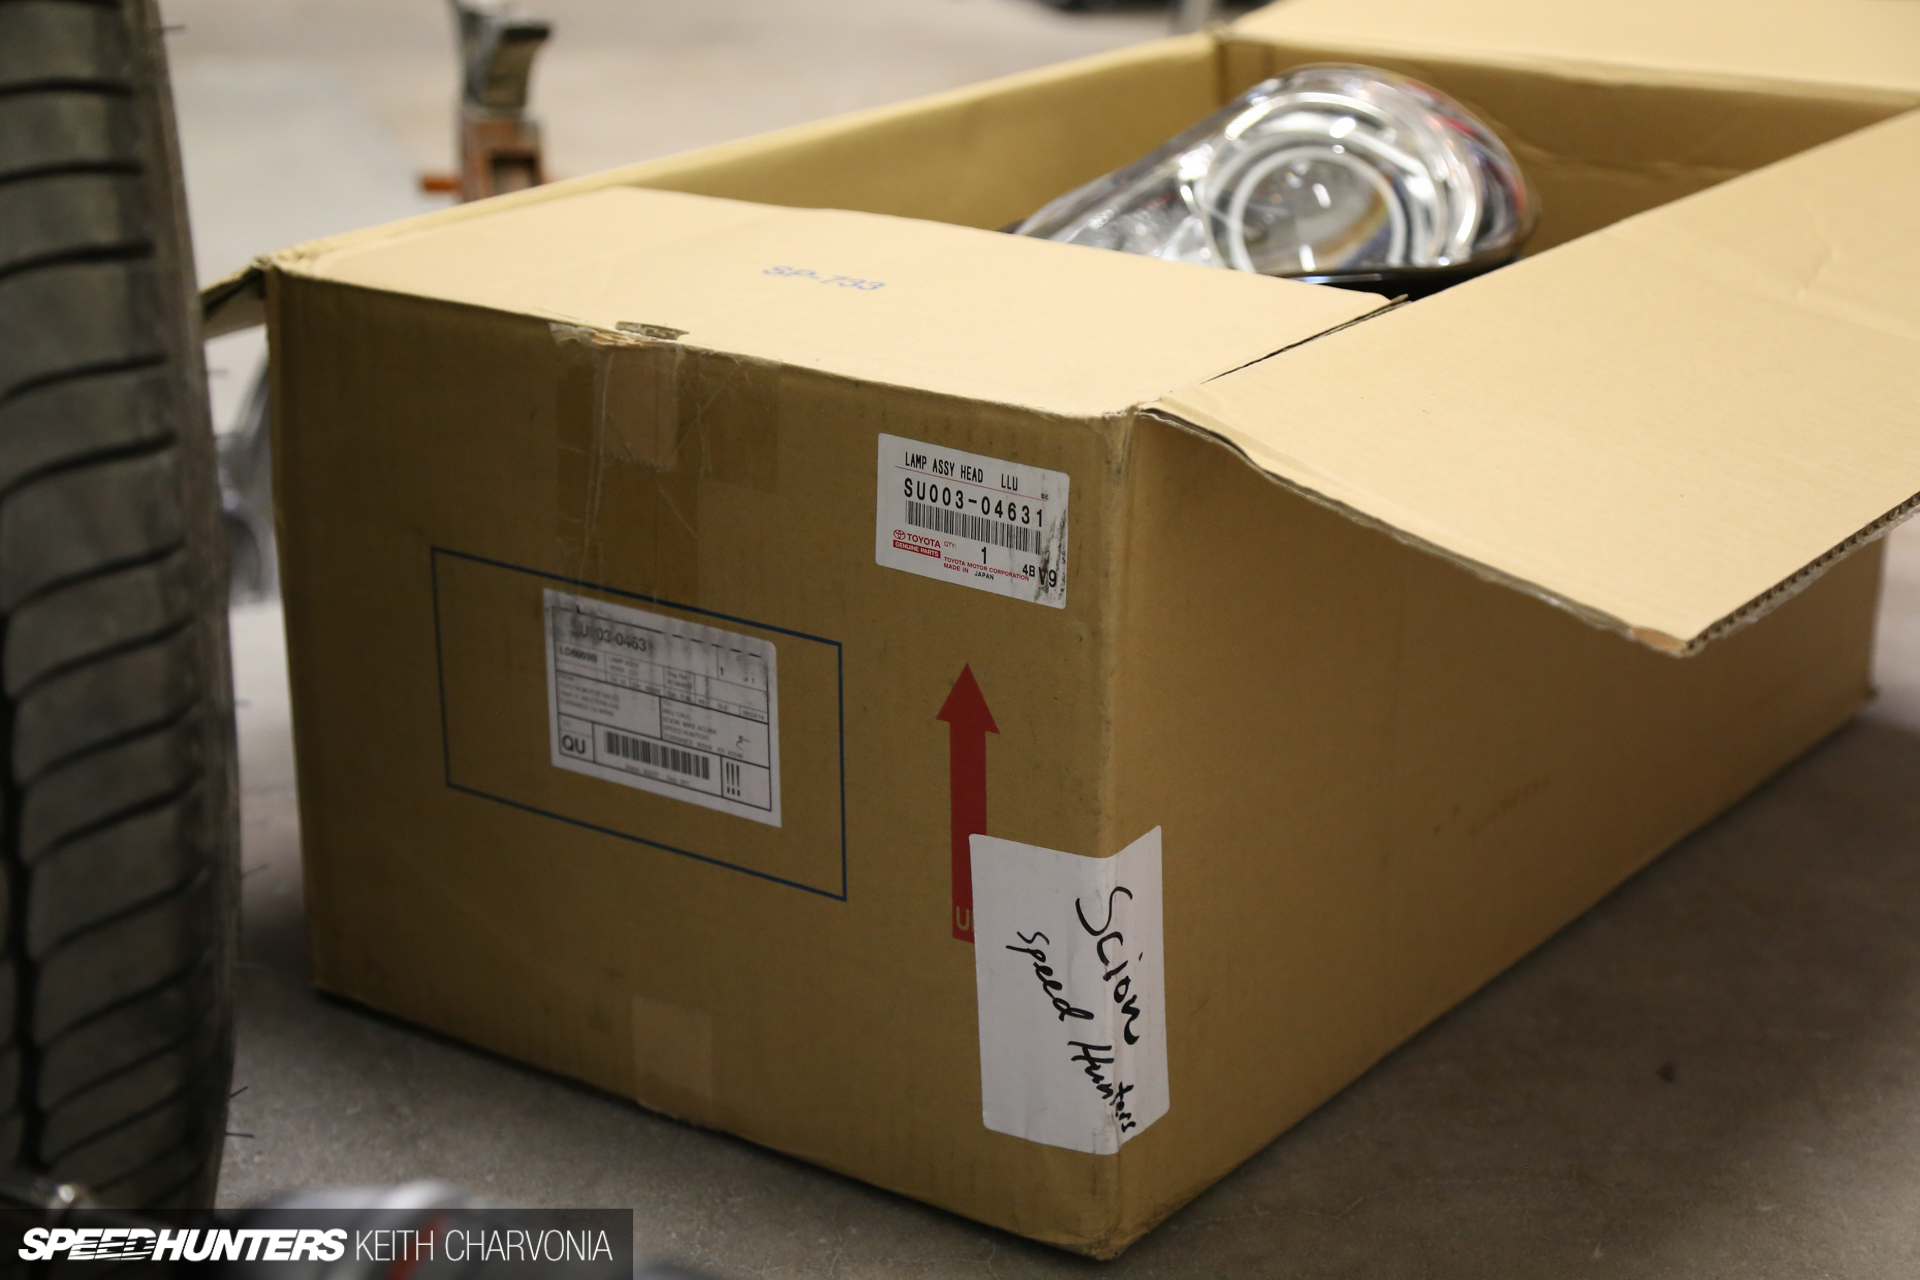
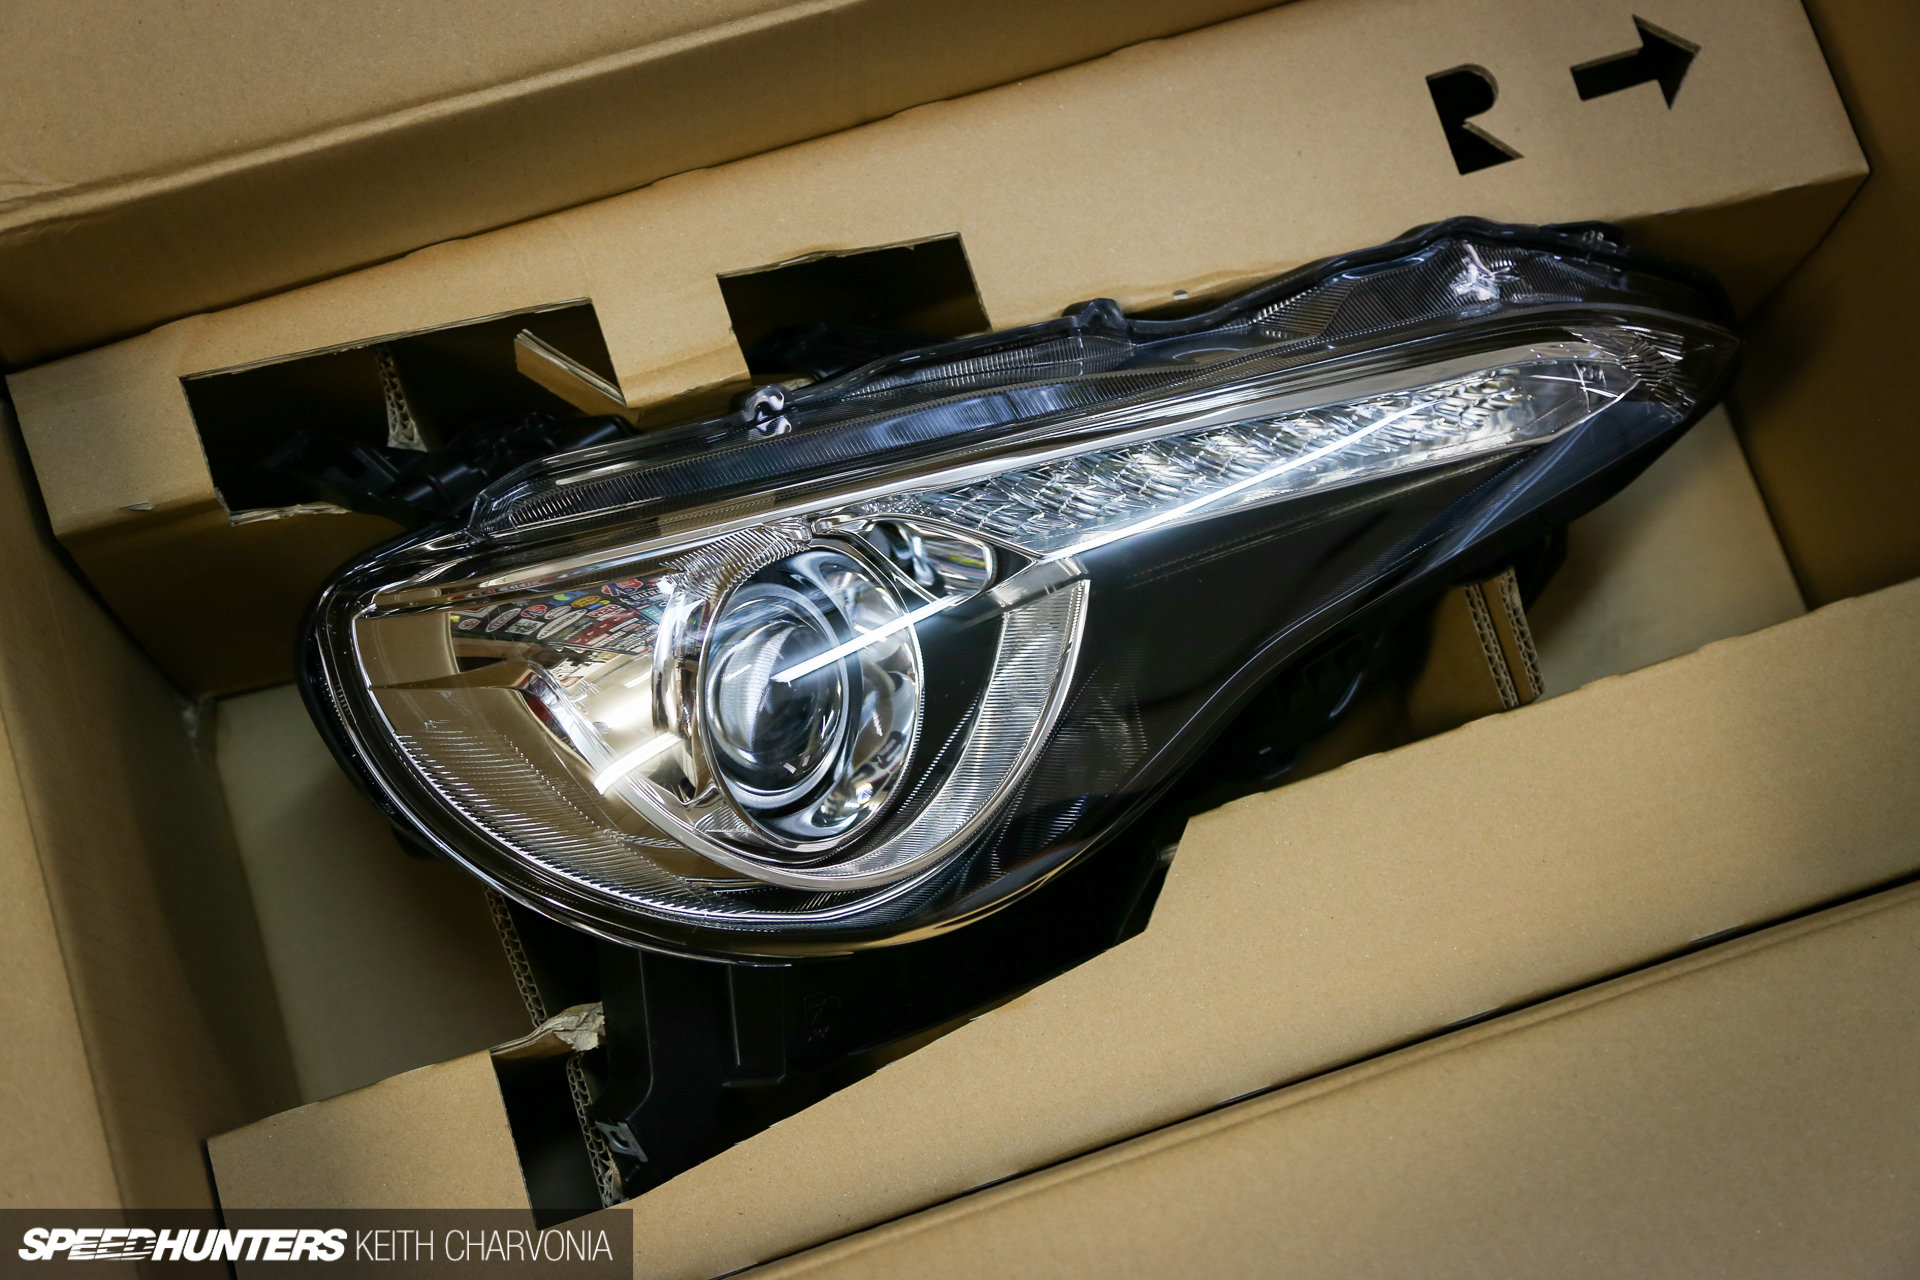
One of the requirements from Scion was to integrate Release Series 1.0 parts in anticipation of the new model’s debut. This was great news for the builders because we got to choose from a catalog that included an exclusive front lip, TRD start button and these LED/HID projector headlights, among many other items.

To me they looked far better than the chrome halogen beam headlights that come standard on an FR-S.

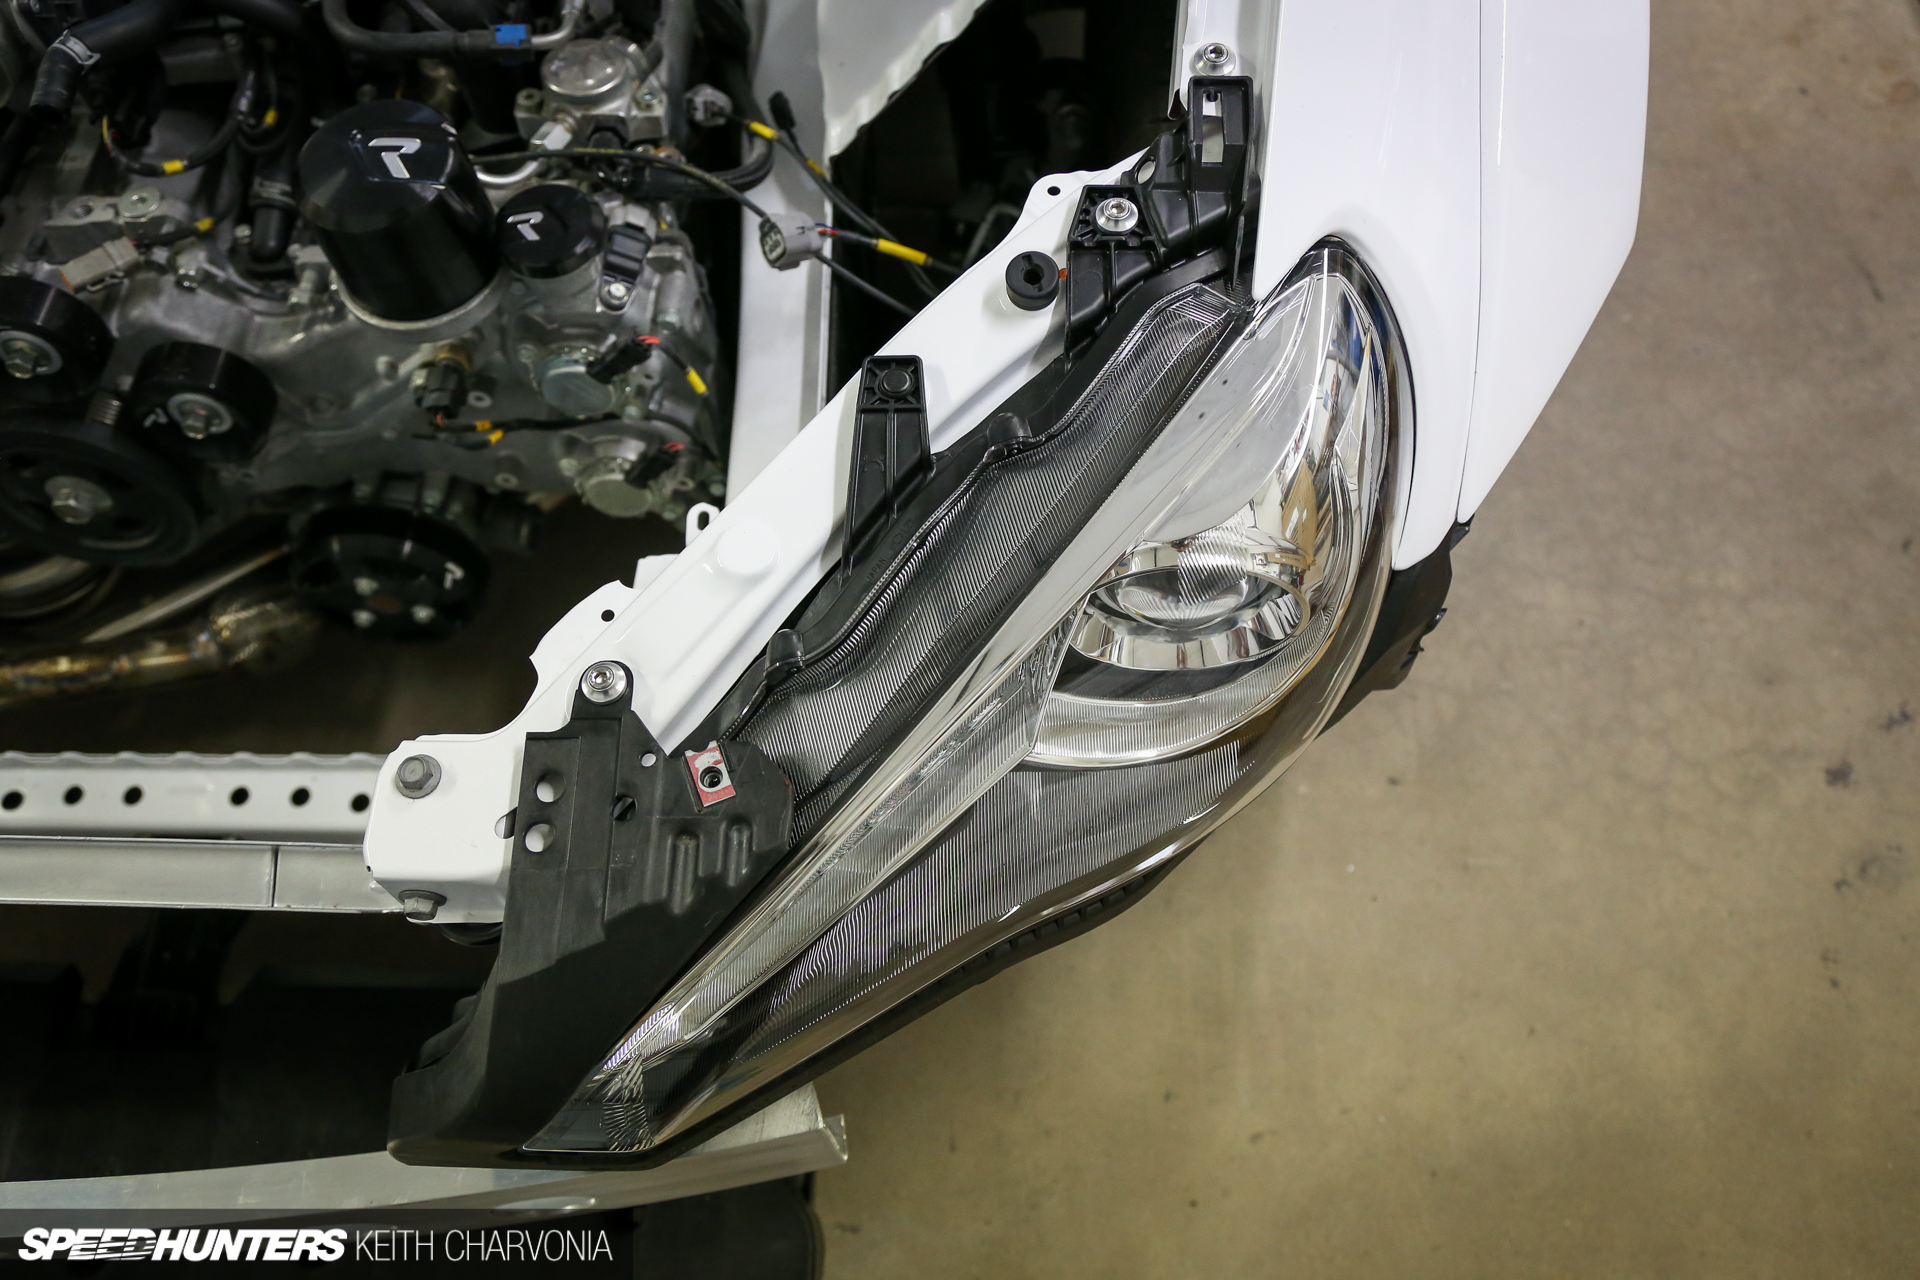
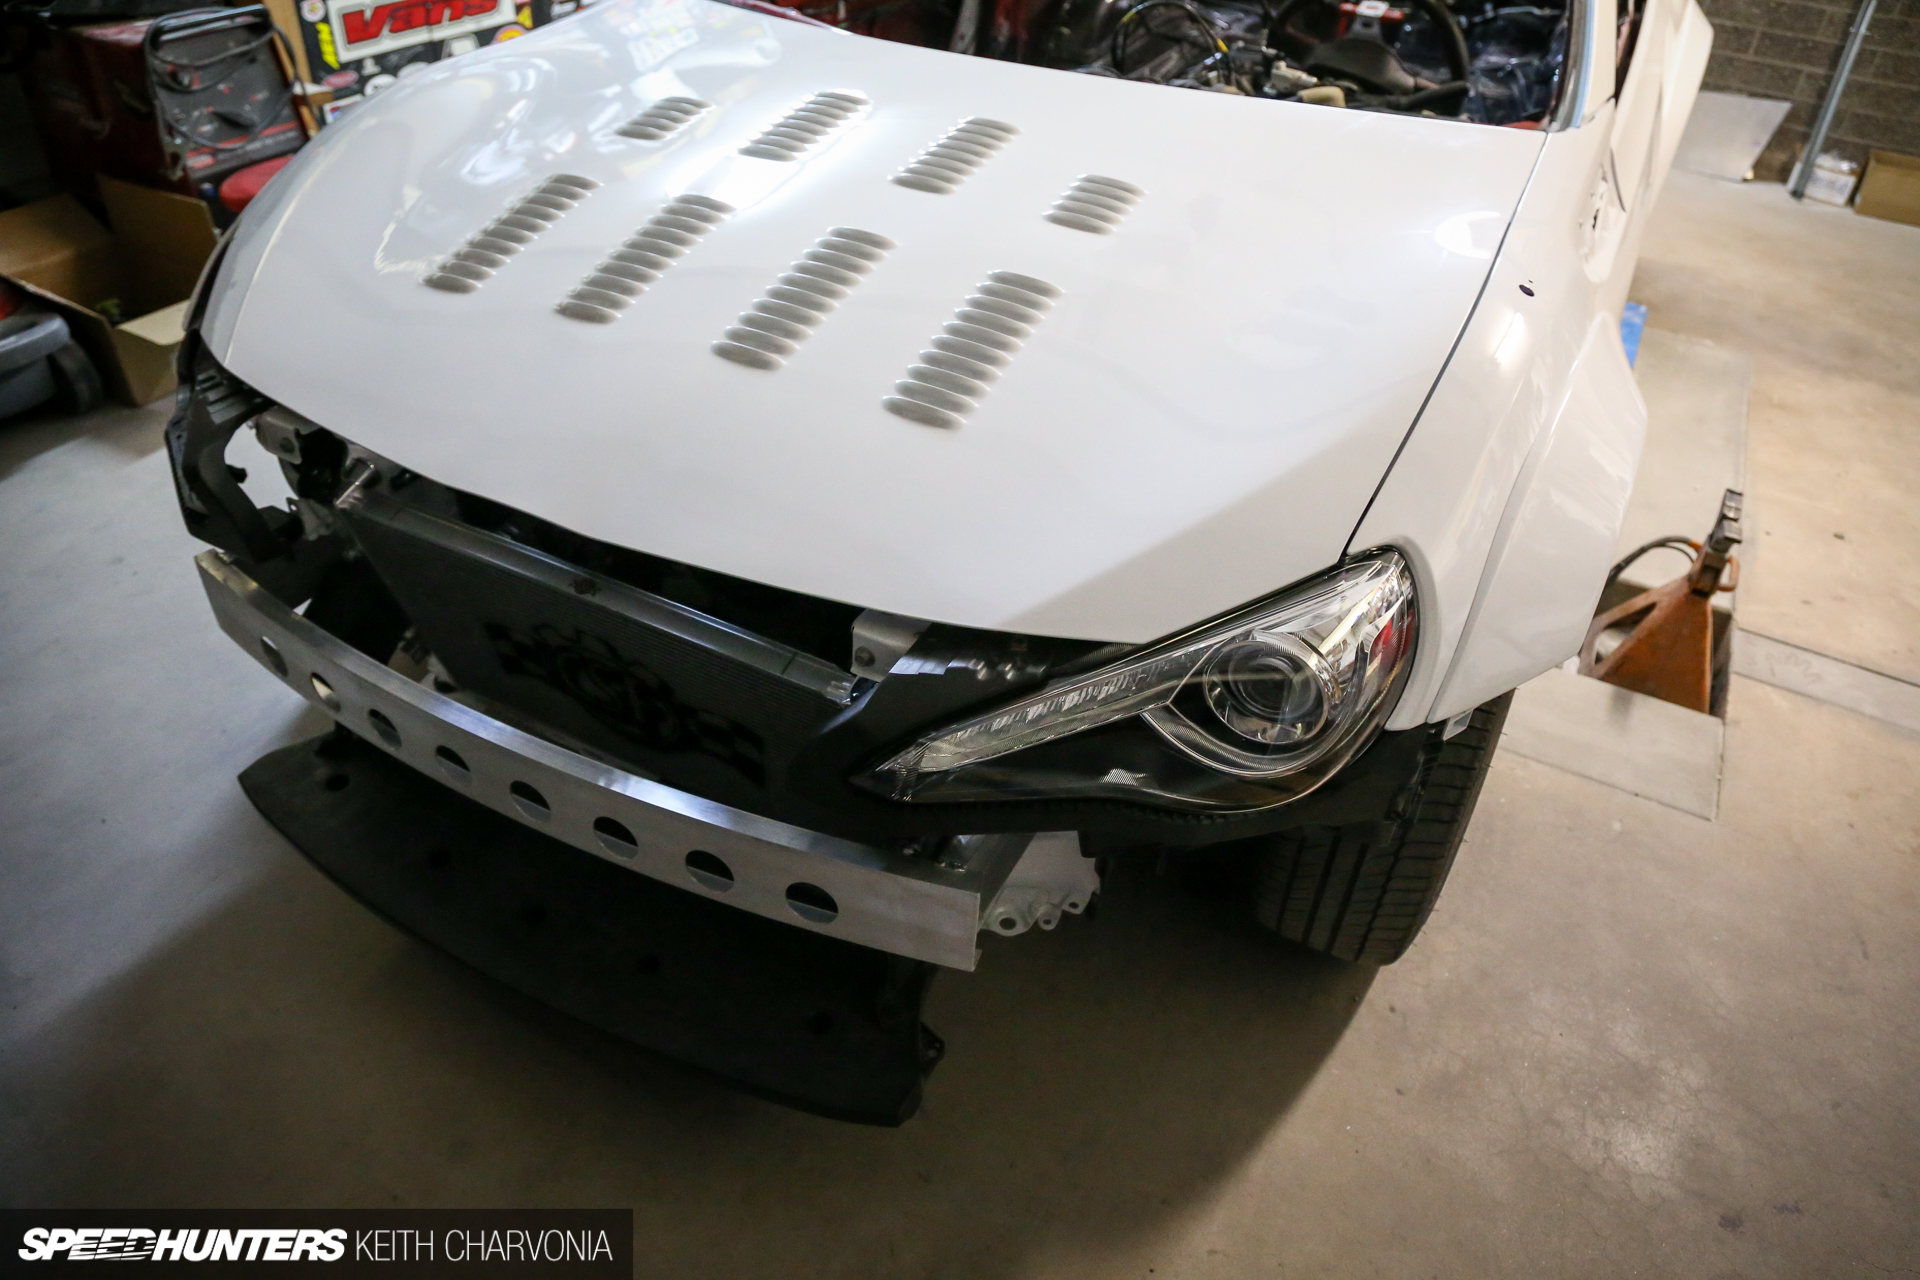
I would quickly discover however that the FR-S harness had a six-wire headlight plug while the new headlights had an eight-pin connector. After consulting friends ChaseBays and Auto Tuned to confirm the function of each wire, we then confidently re-pinned the harness so the lights worked. I didn’t know if this would be judged in the competition or not, but I sure didn’t want to be embarrassed by headlights that looked cool but didn’t even turn on.

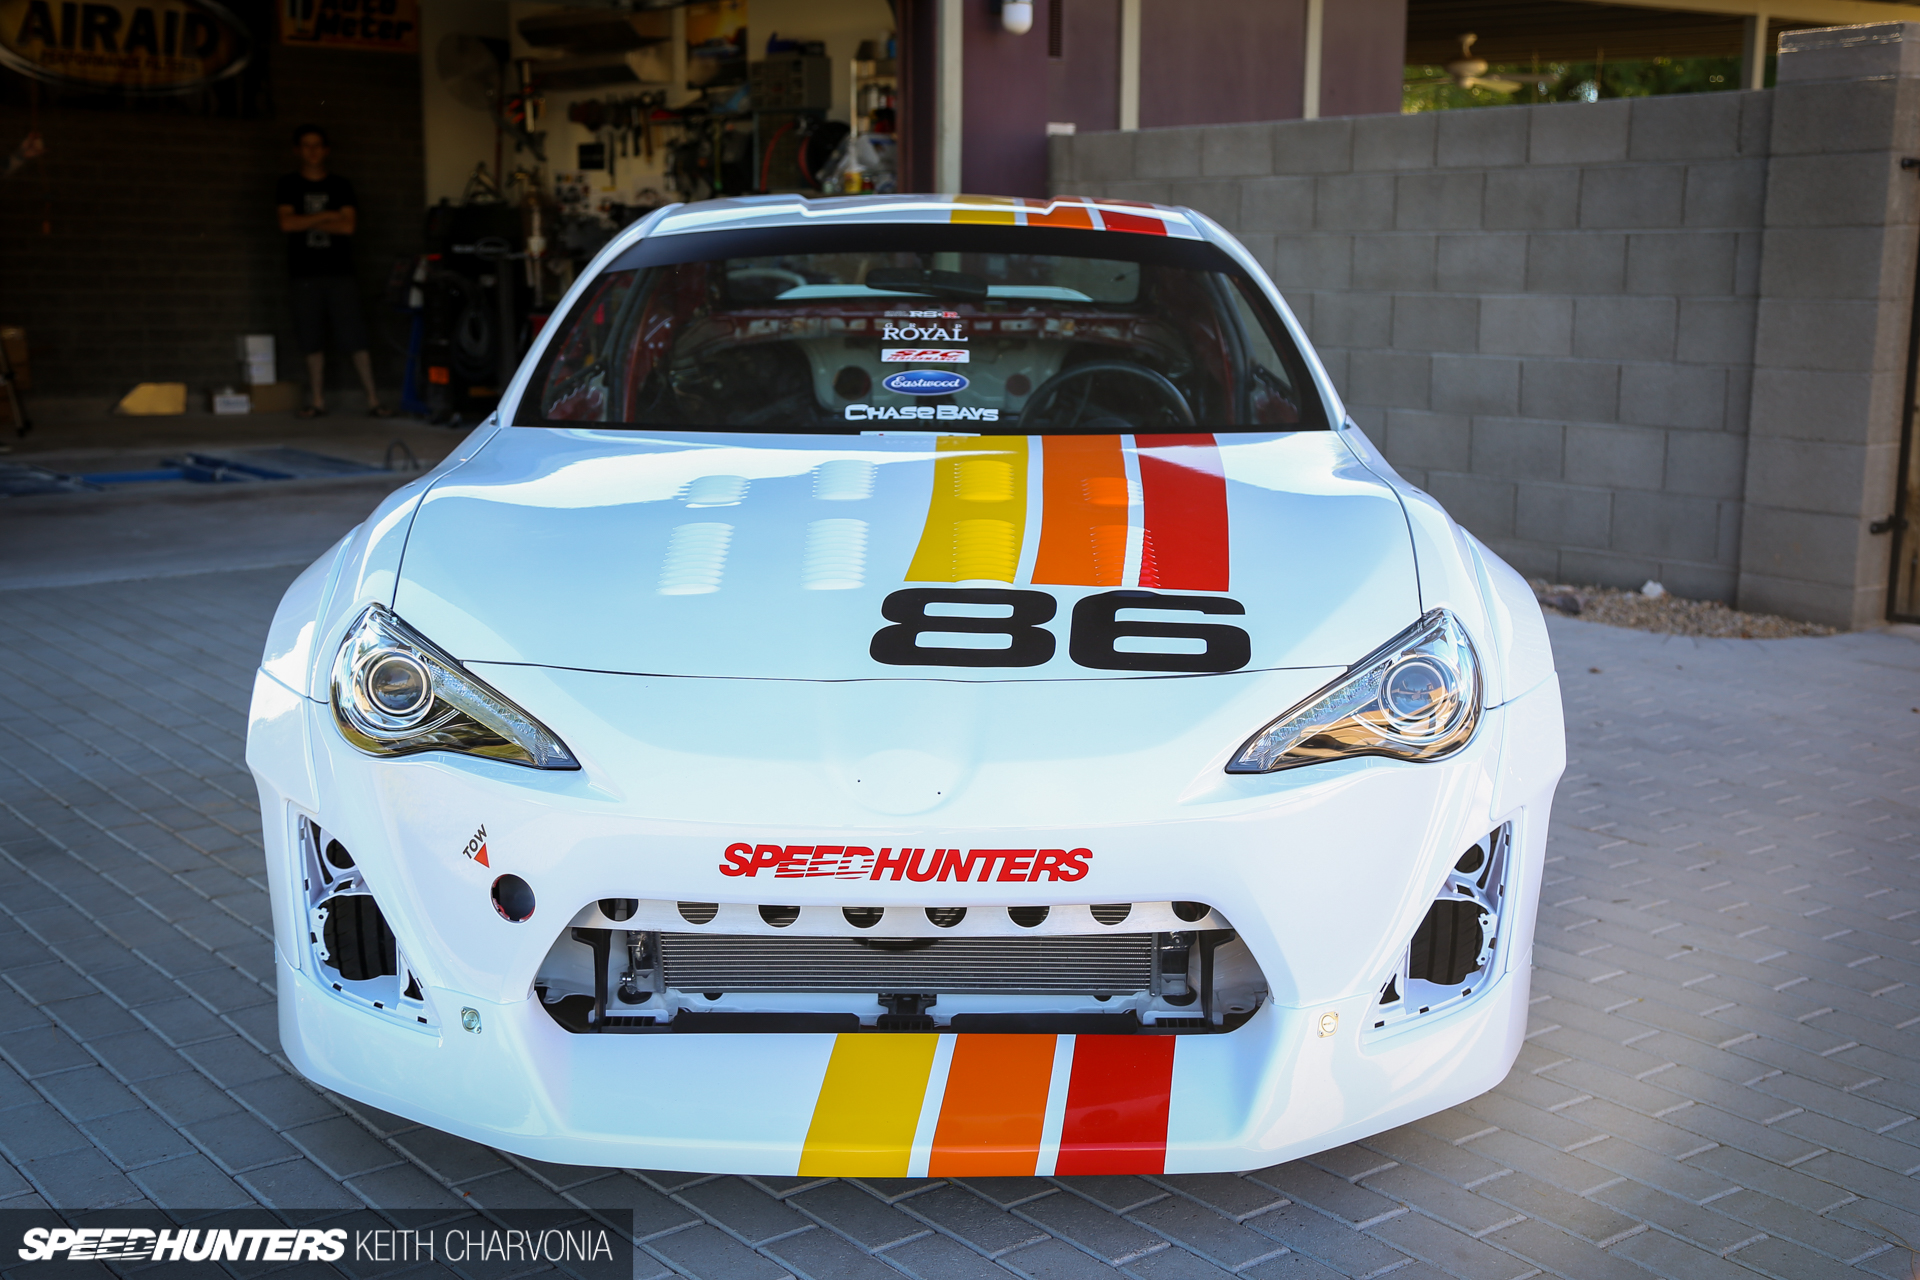
As each part arrived in the mail or fresh from the paint booth at Elite Auto Creations we bolted it up, and soon it was starting to look like a whole car again.
CHAPTER THREE
A Custom Livery
When it comes to livery design, Andy Blackmore is one of the best there is. You guys know he was the man behind the concept for our Tuner Challenge FR-S, but did you know that he spends most of his time designing liveries for professional race teams? When it came time to visualize a graphic scheme that would tie in with the heritage of Toyota Racing, but also lay down properly on the lines of a brand new vehicle design, I knew we were in good hands with Andy on board.

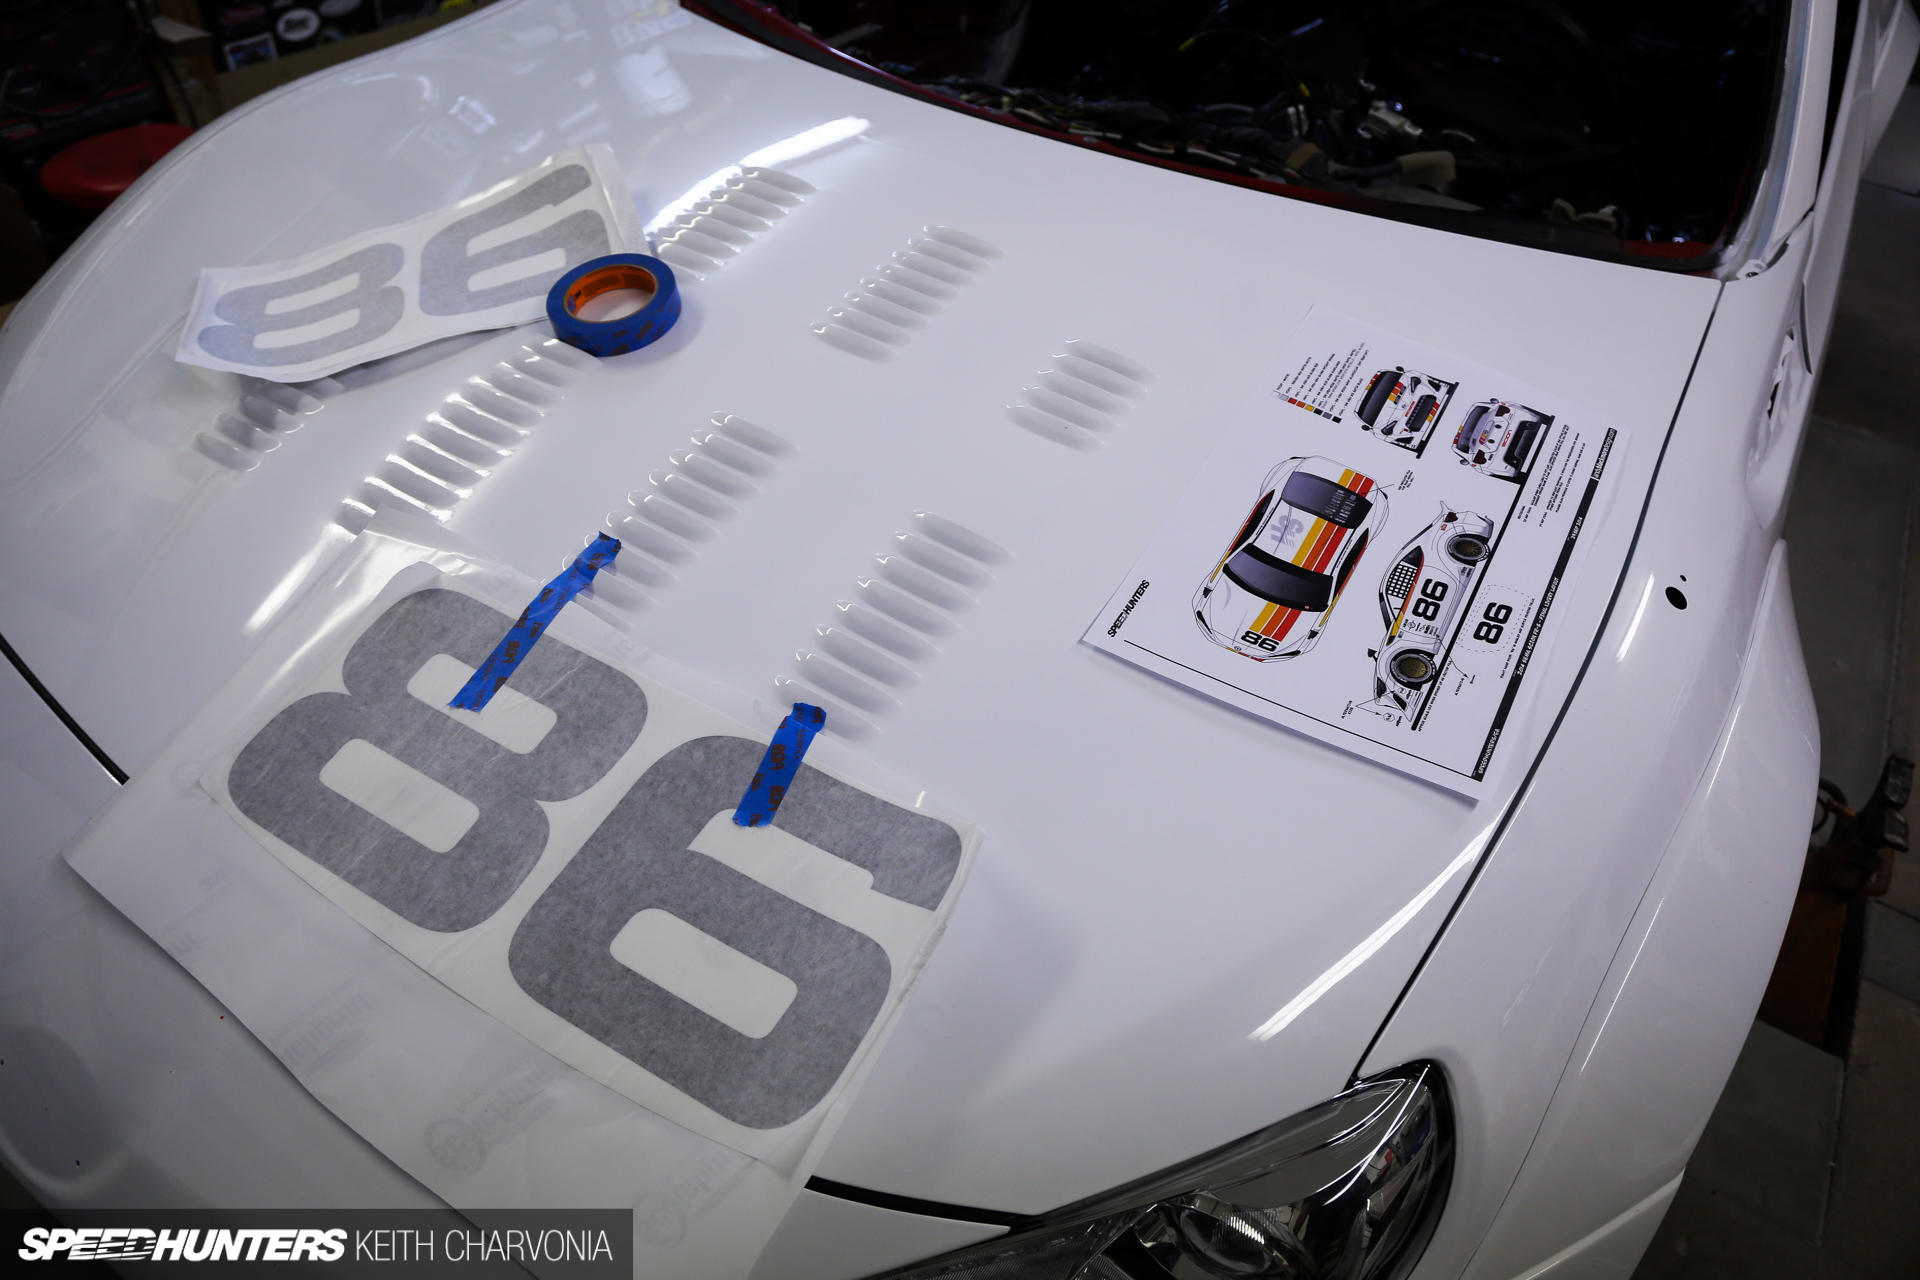
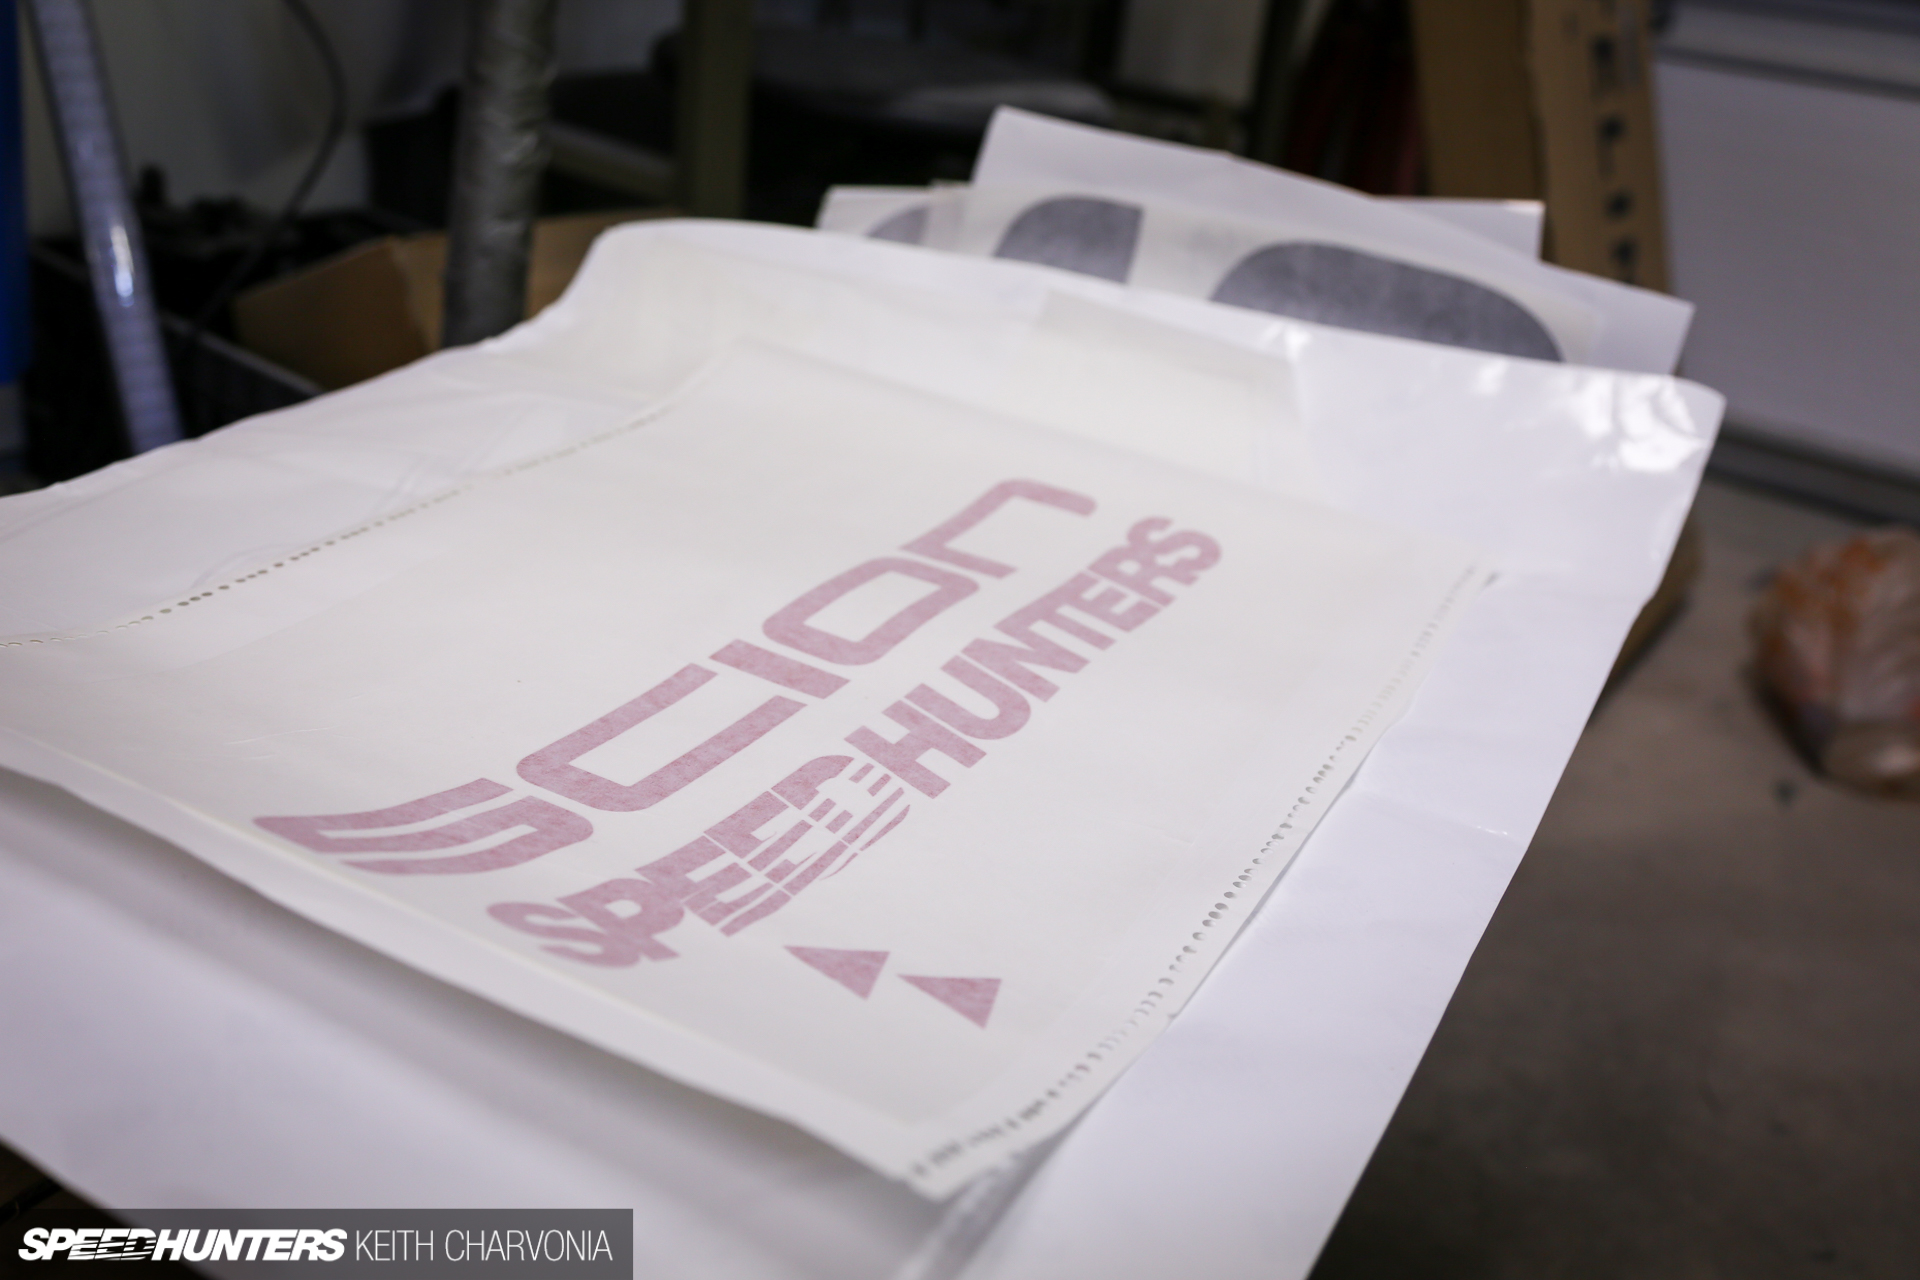
Not only did he design the car and its livery, I just about fell out of my seat when he started sending emails with the graphics ready for vinyl cutting and at true scale too!

For the actual application of the graphics, we flew in Dominik from Vinyl Loft. Speedhunters met him on the Gold Rush Rally, and it was then that he stepped up with an offer to wrap the car. However, as the concept developed we decided to make it as true to a period IMSA race car as possible, so we vetoed the full wrap and went for a new coat of paint with vinyl decals for the graphics. This is exactly how the old race cars we were trying to emulate were done.

Dominik’s forte is full wraps on high-end cars, but he said the graphics on our car wouldn’t be a problem.

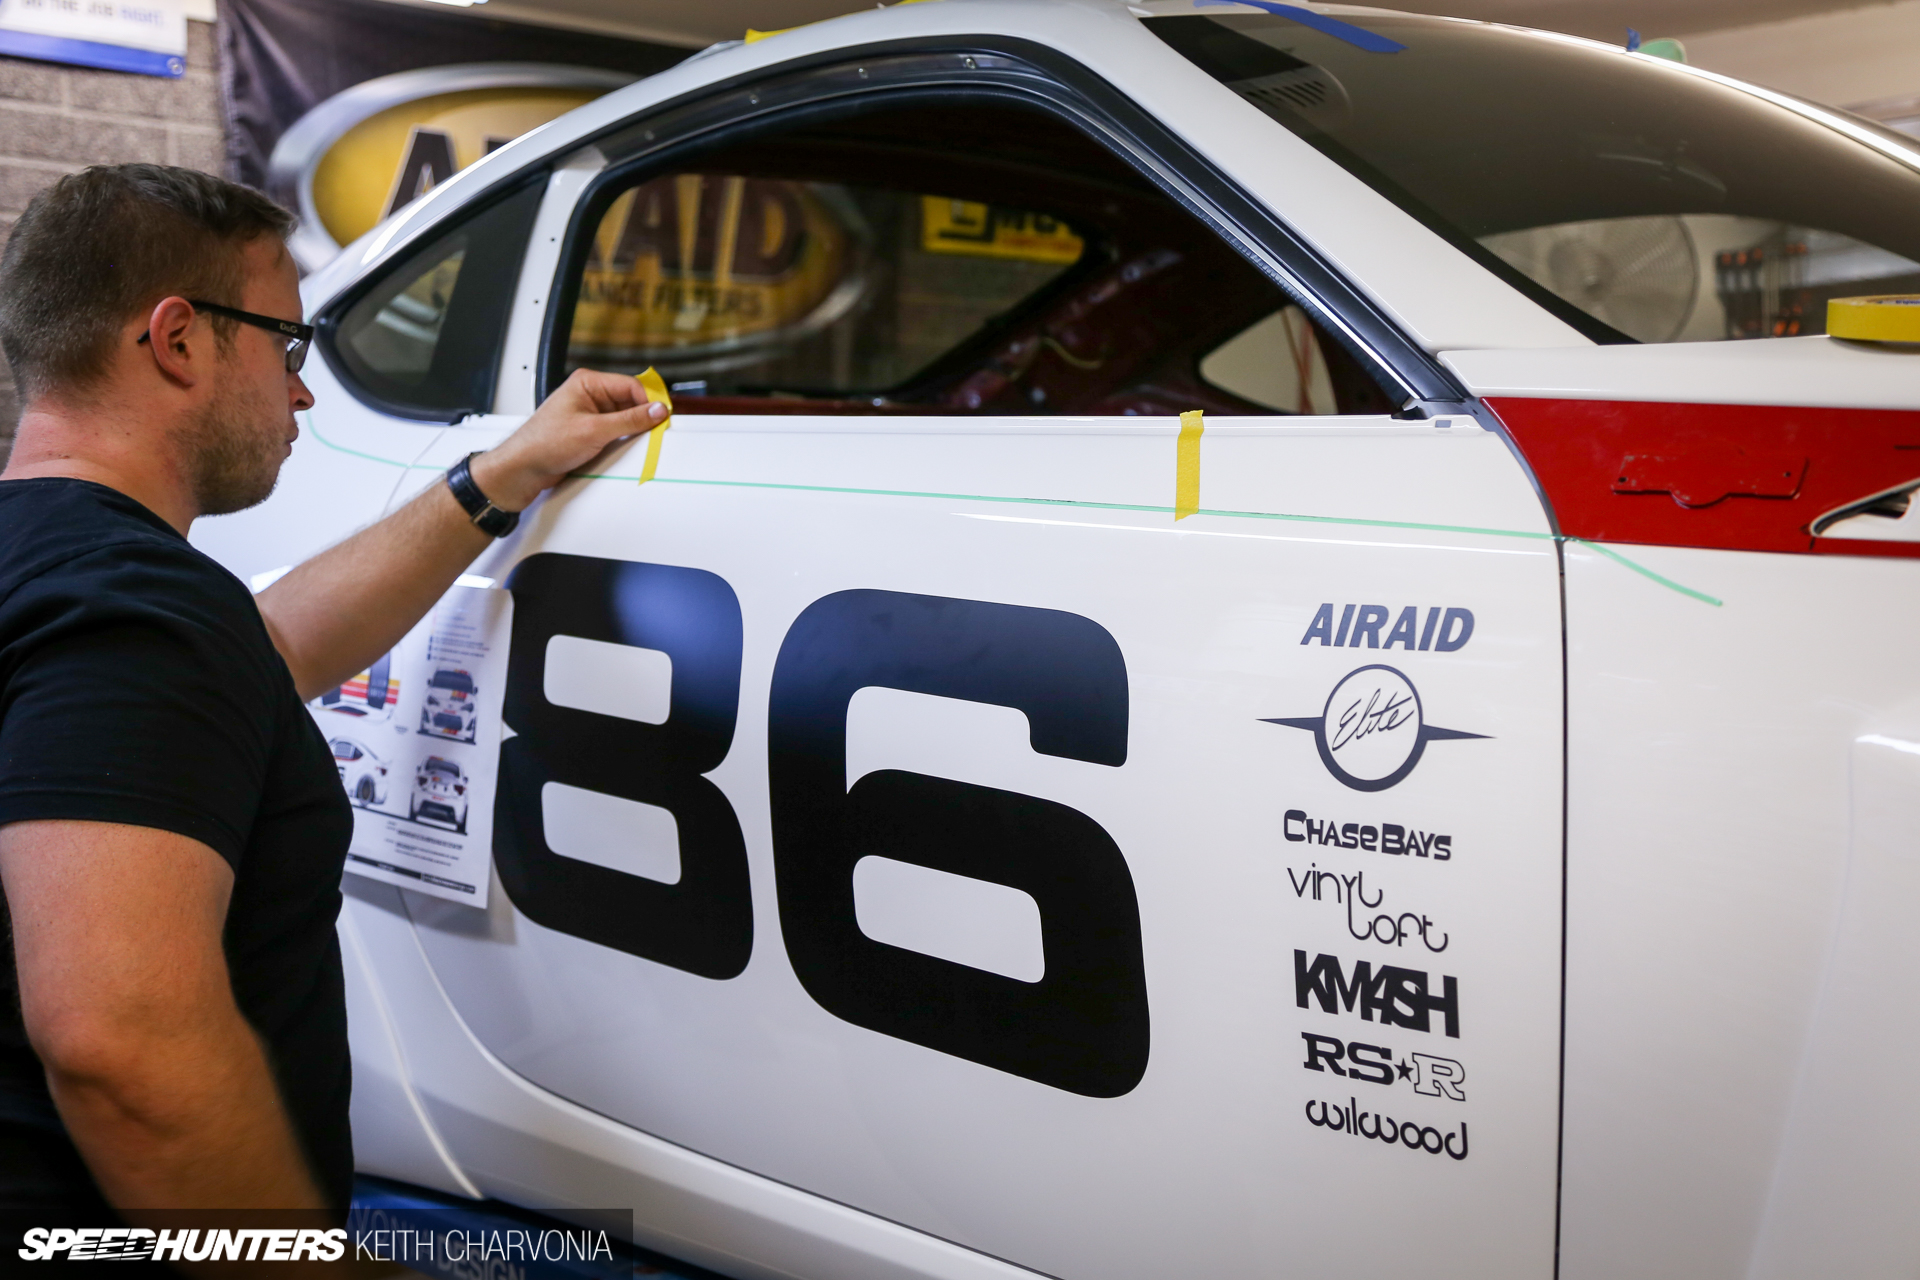
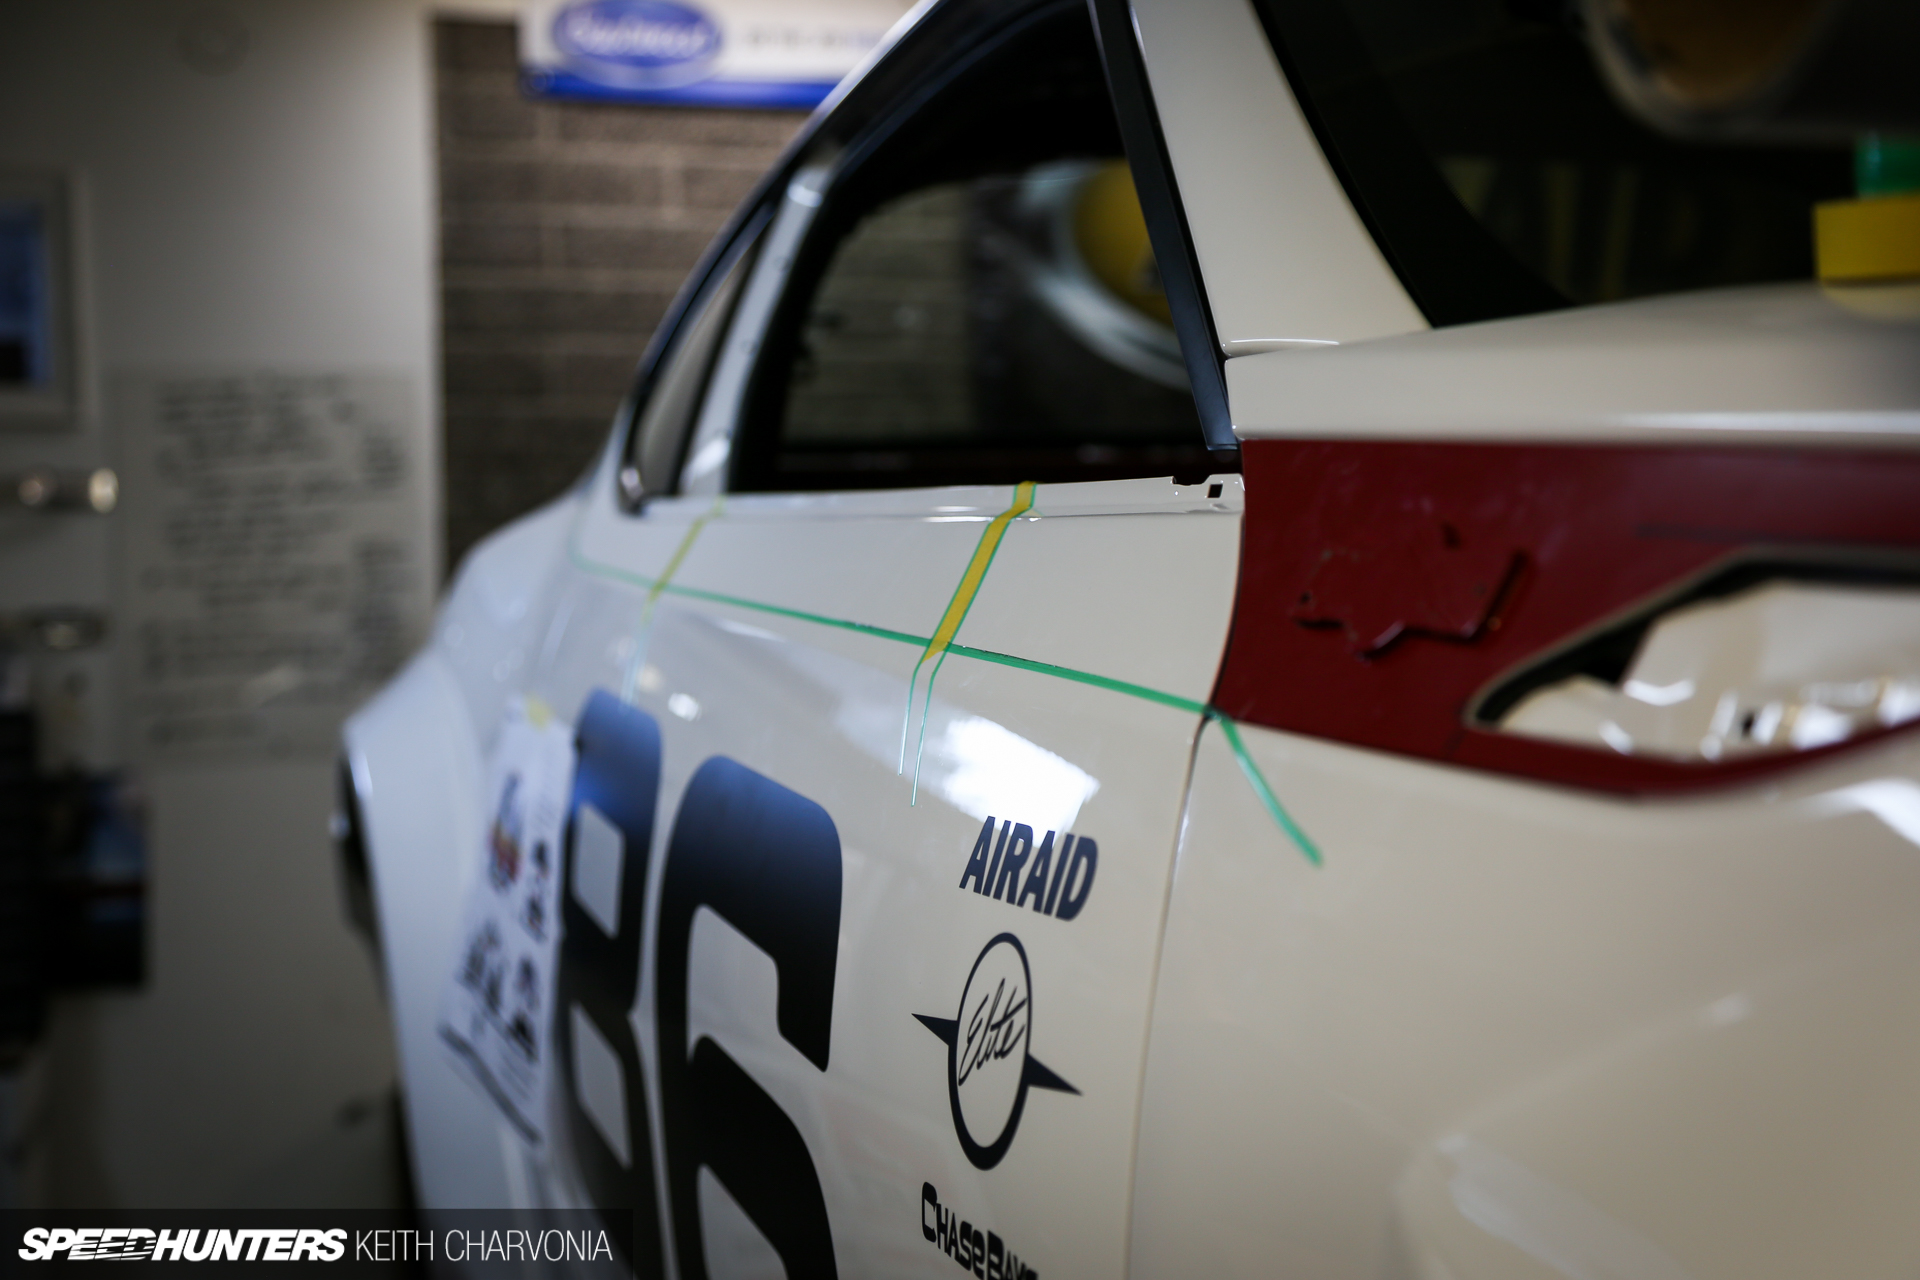
Most of the work was done using knifeless tape. Layout is critical, because when you pull the small wire through the green tape it also cuts through the vinyl, leaving a clean edge.
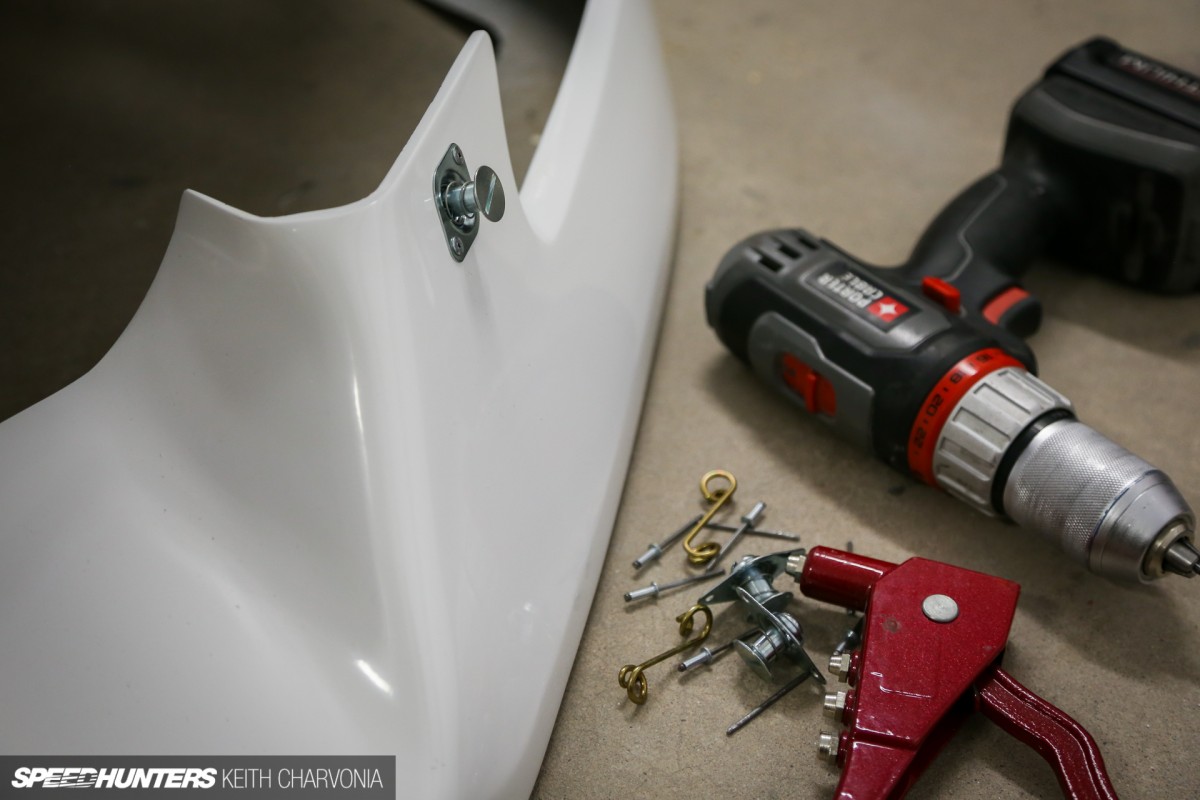
As Dominik worked on the car, I readied the one-off front lip for mounting. He needed the car to be complete in order to lay down the historic TRD stripes that were shown in the rendering.

Andy even went as far as acquiring the correct Pantone numbers for the yellow, orange and red stripes from a contact at the Toyota Museum. We then gave this info to Dominik so he could find a correct match for the stripes. We didn’t want something that kinda, sorta looked like a TRD stripe; we wanted them to be as authentic as possible.
FINAL CHAPTER
The UPS Truck Is Here… Again
With the wrap complete, we turned our attention to the ever-growing stack of boxes. I won’t lie, it’s pretty awesome to have performance parts sitting on the door step every single day. If only they were for my car!

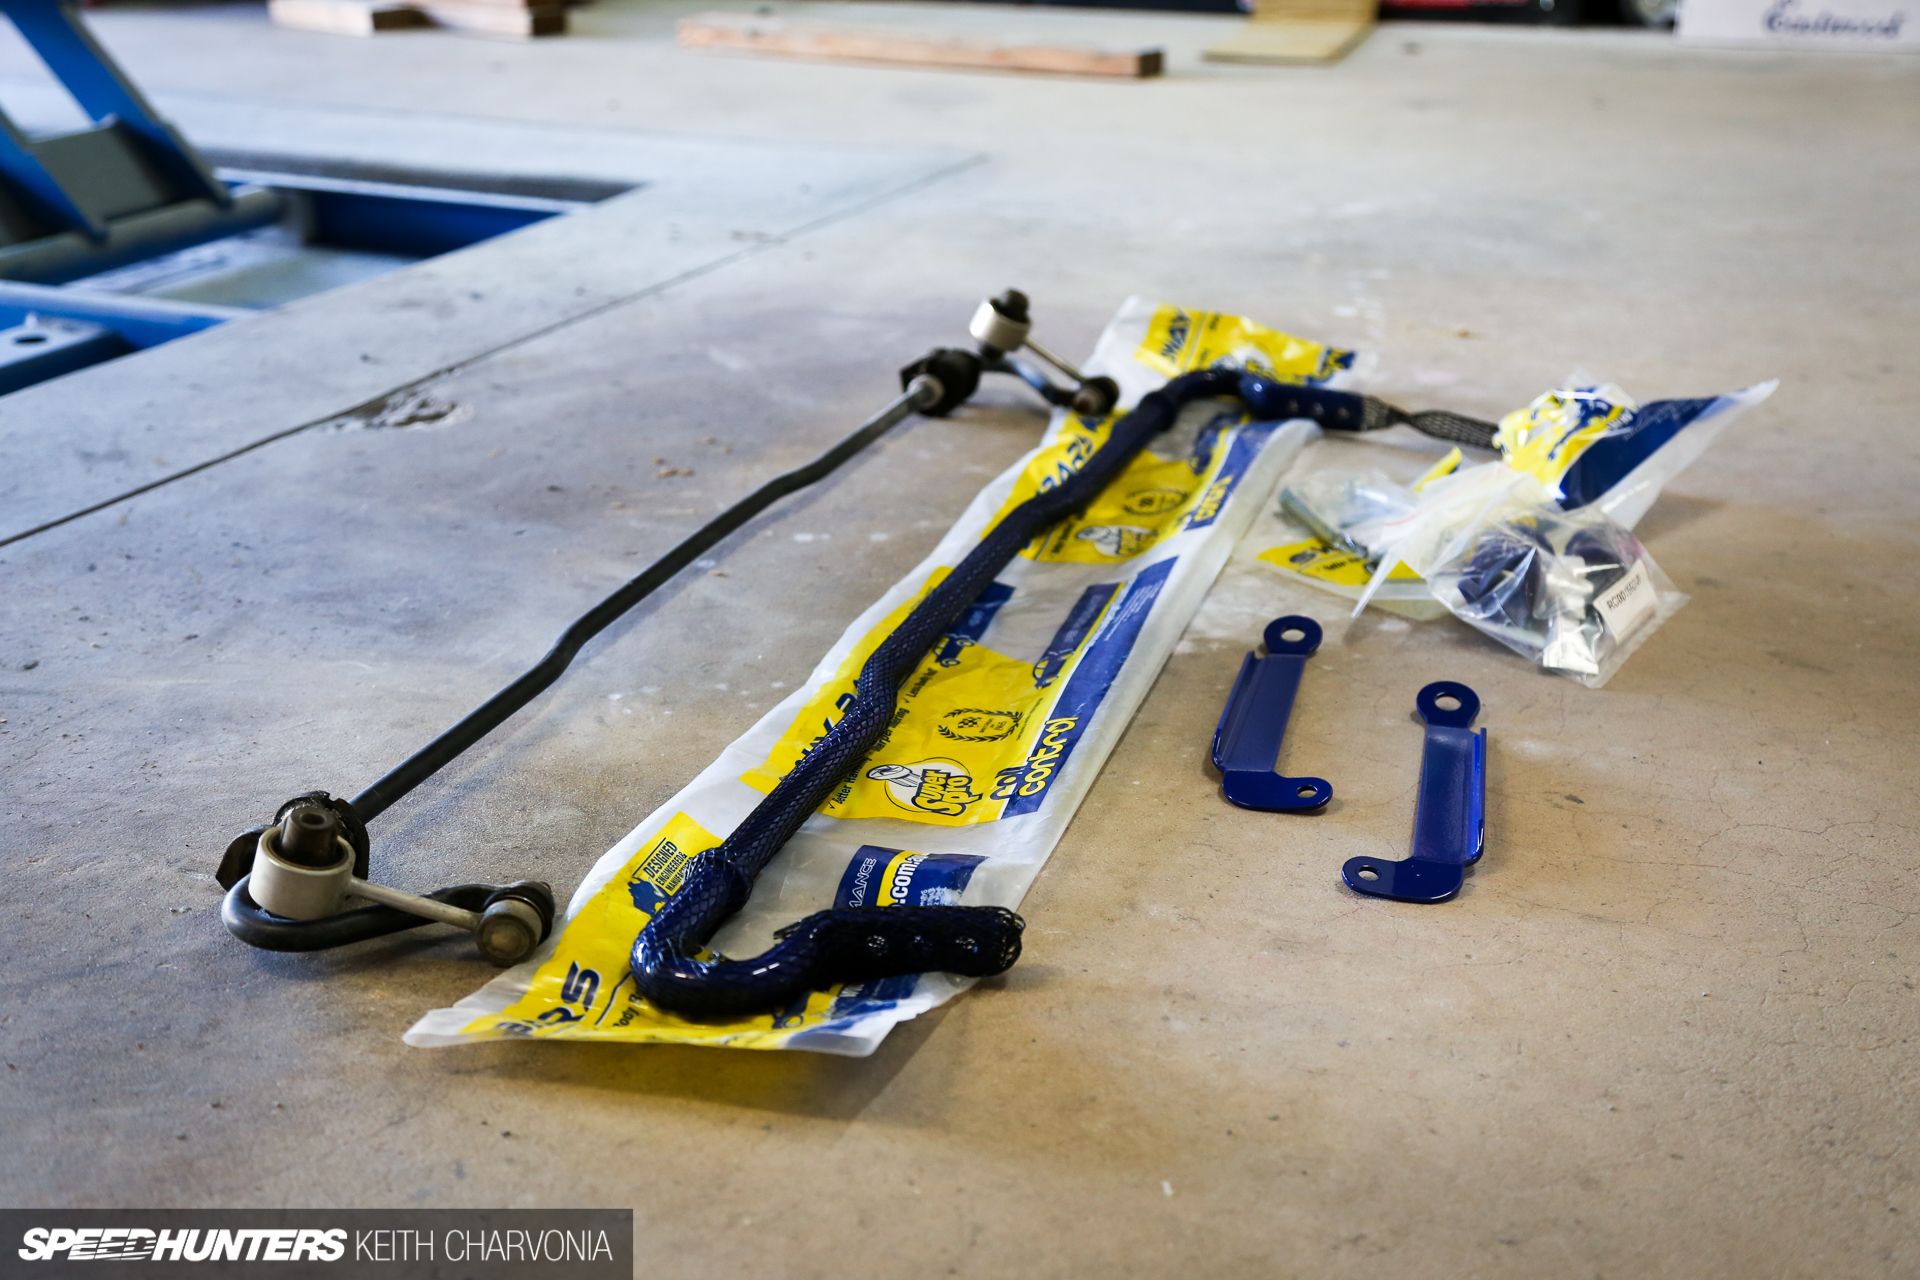
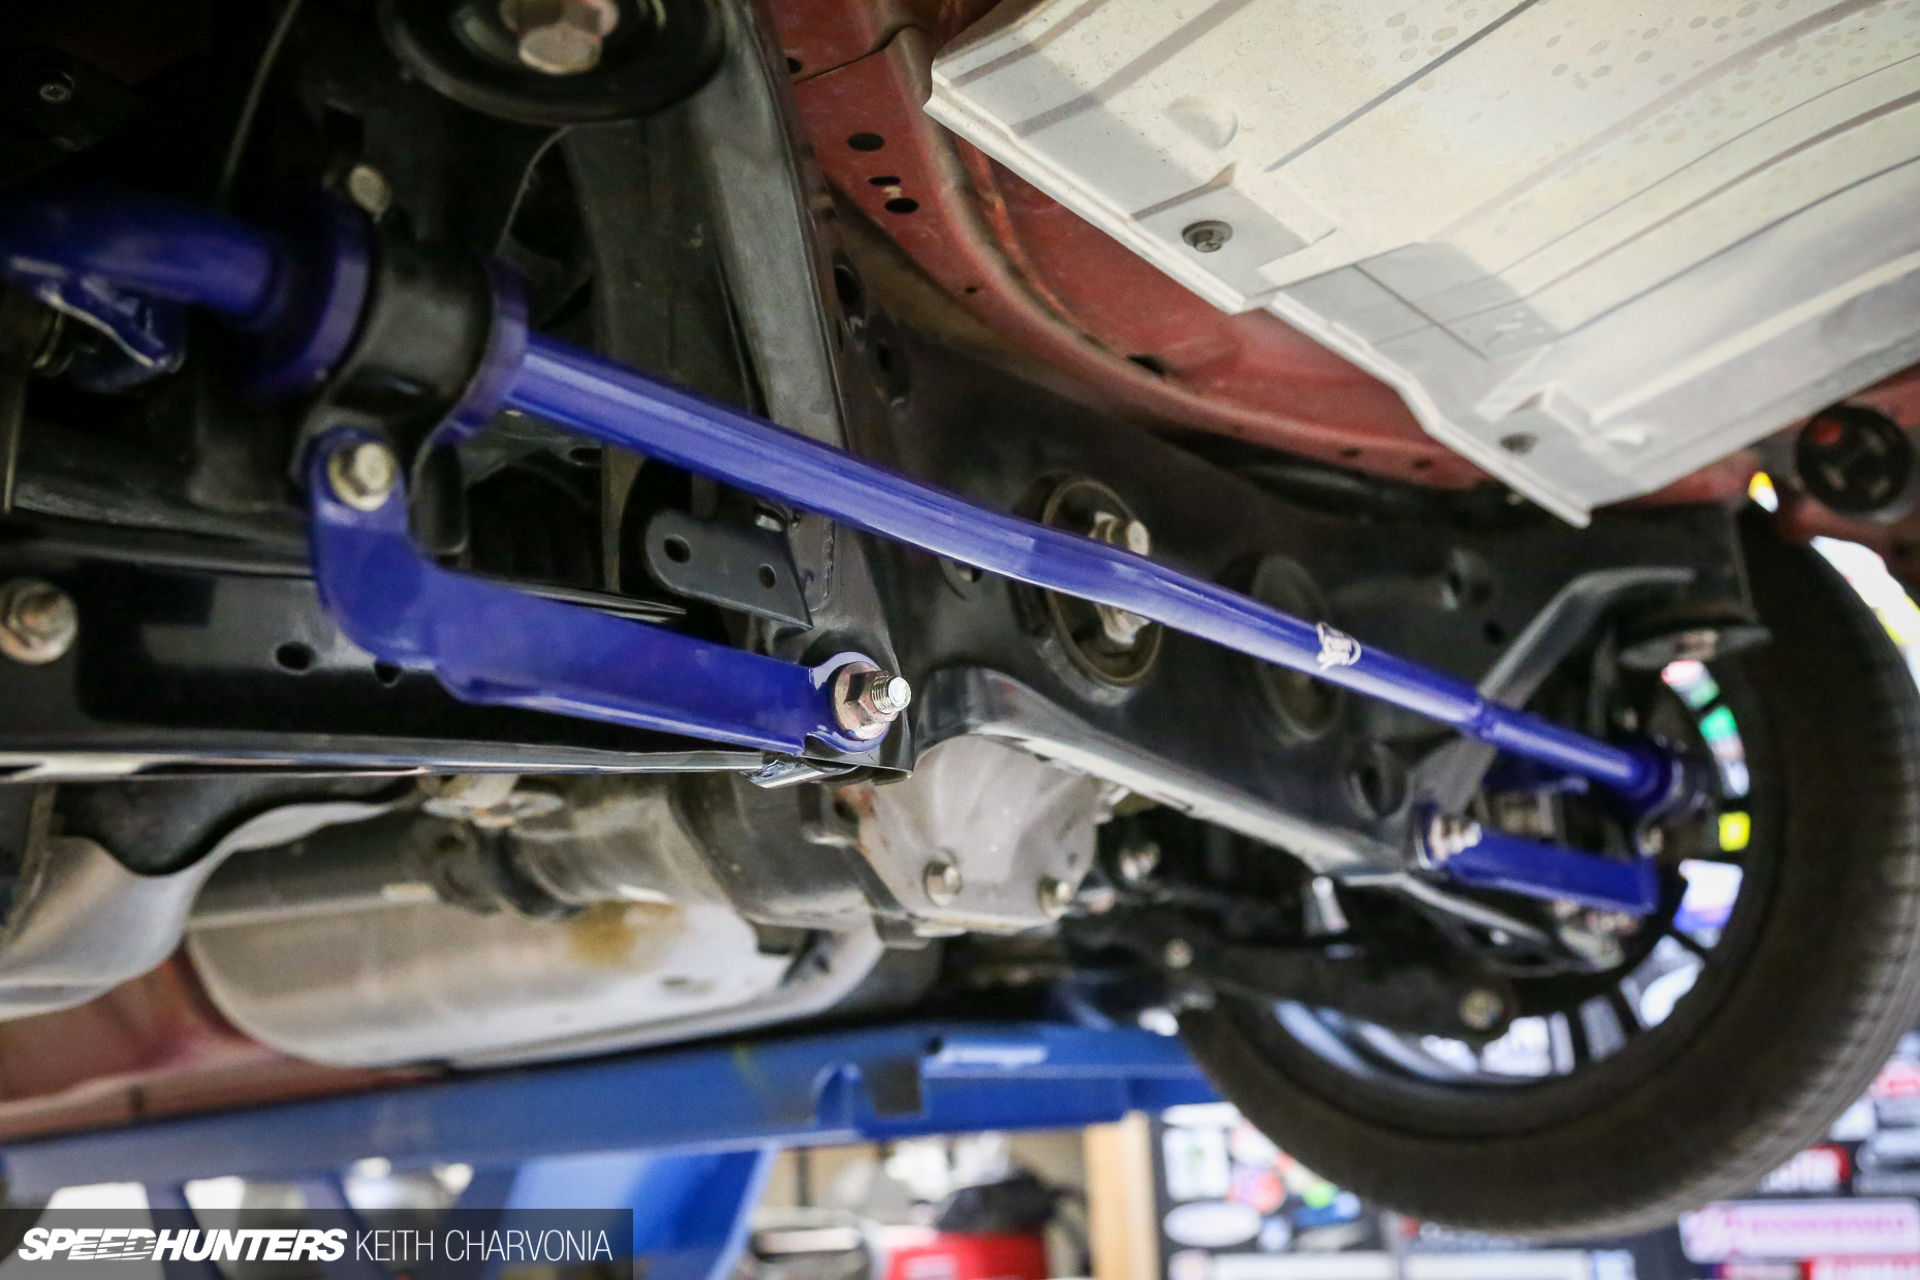
SuperPro kicked in a set of their beefy swaybars and new stiffening brackets. I run these swaybars on my personal car, so I had no doubts installing them on the Tuner Challenge build.
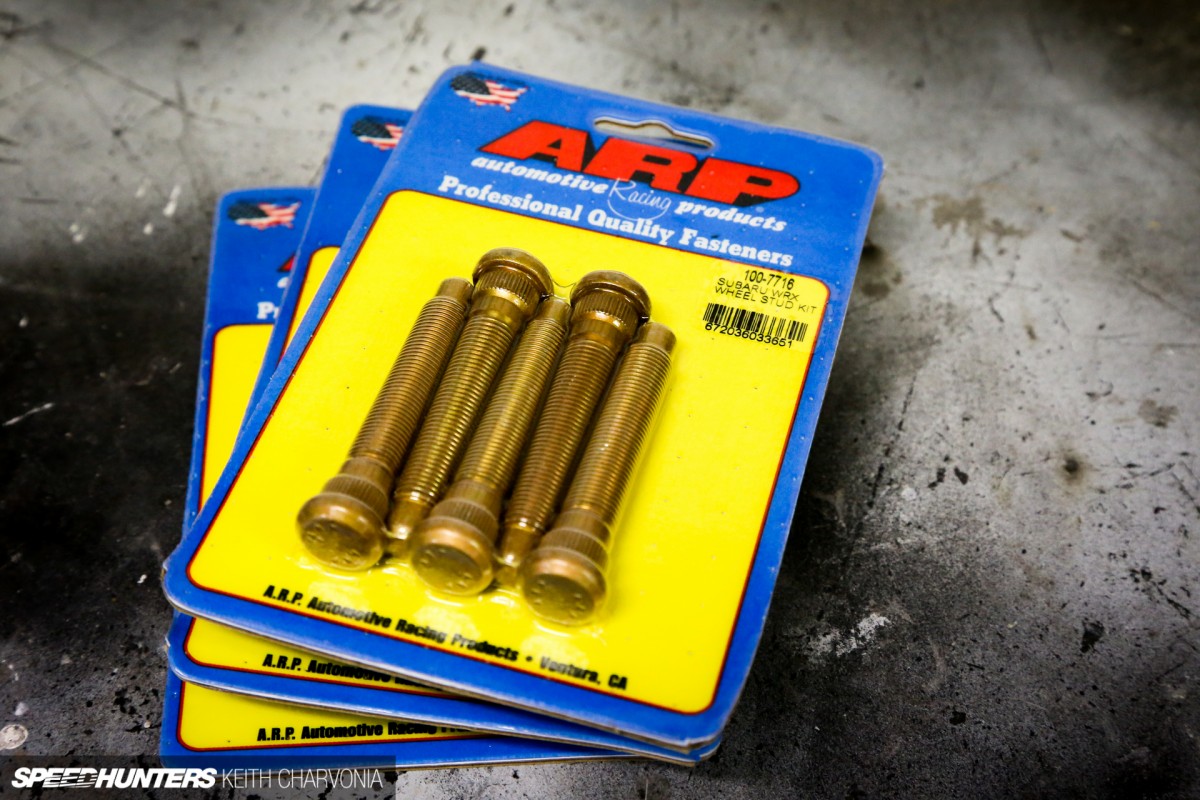
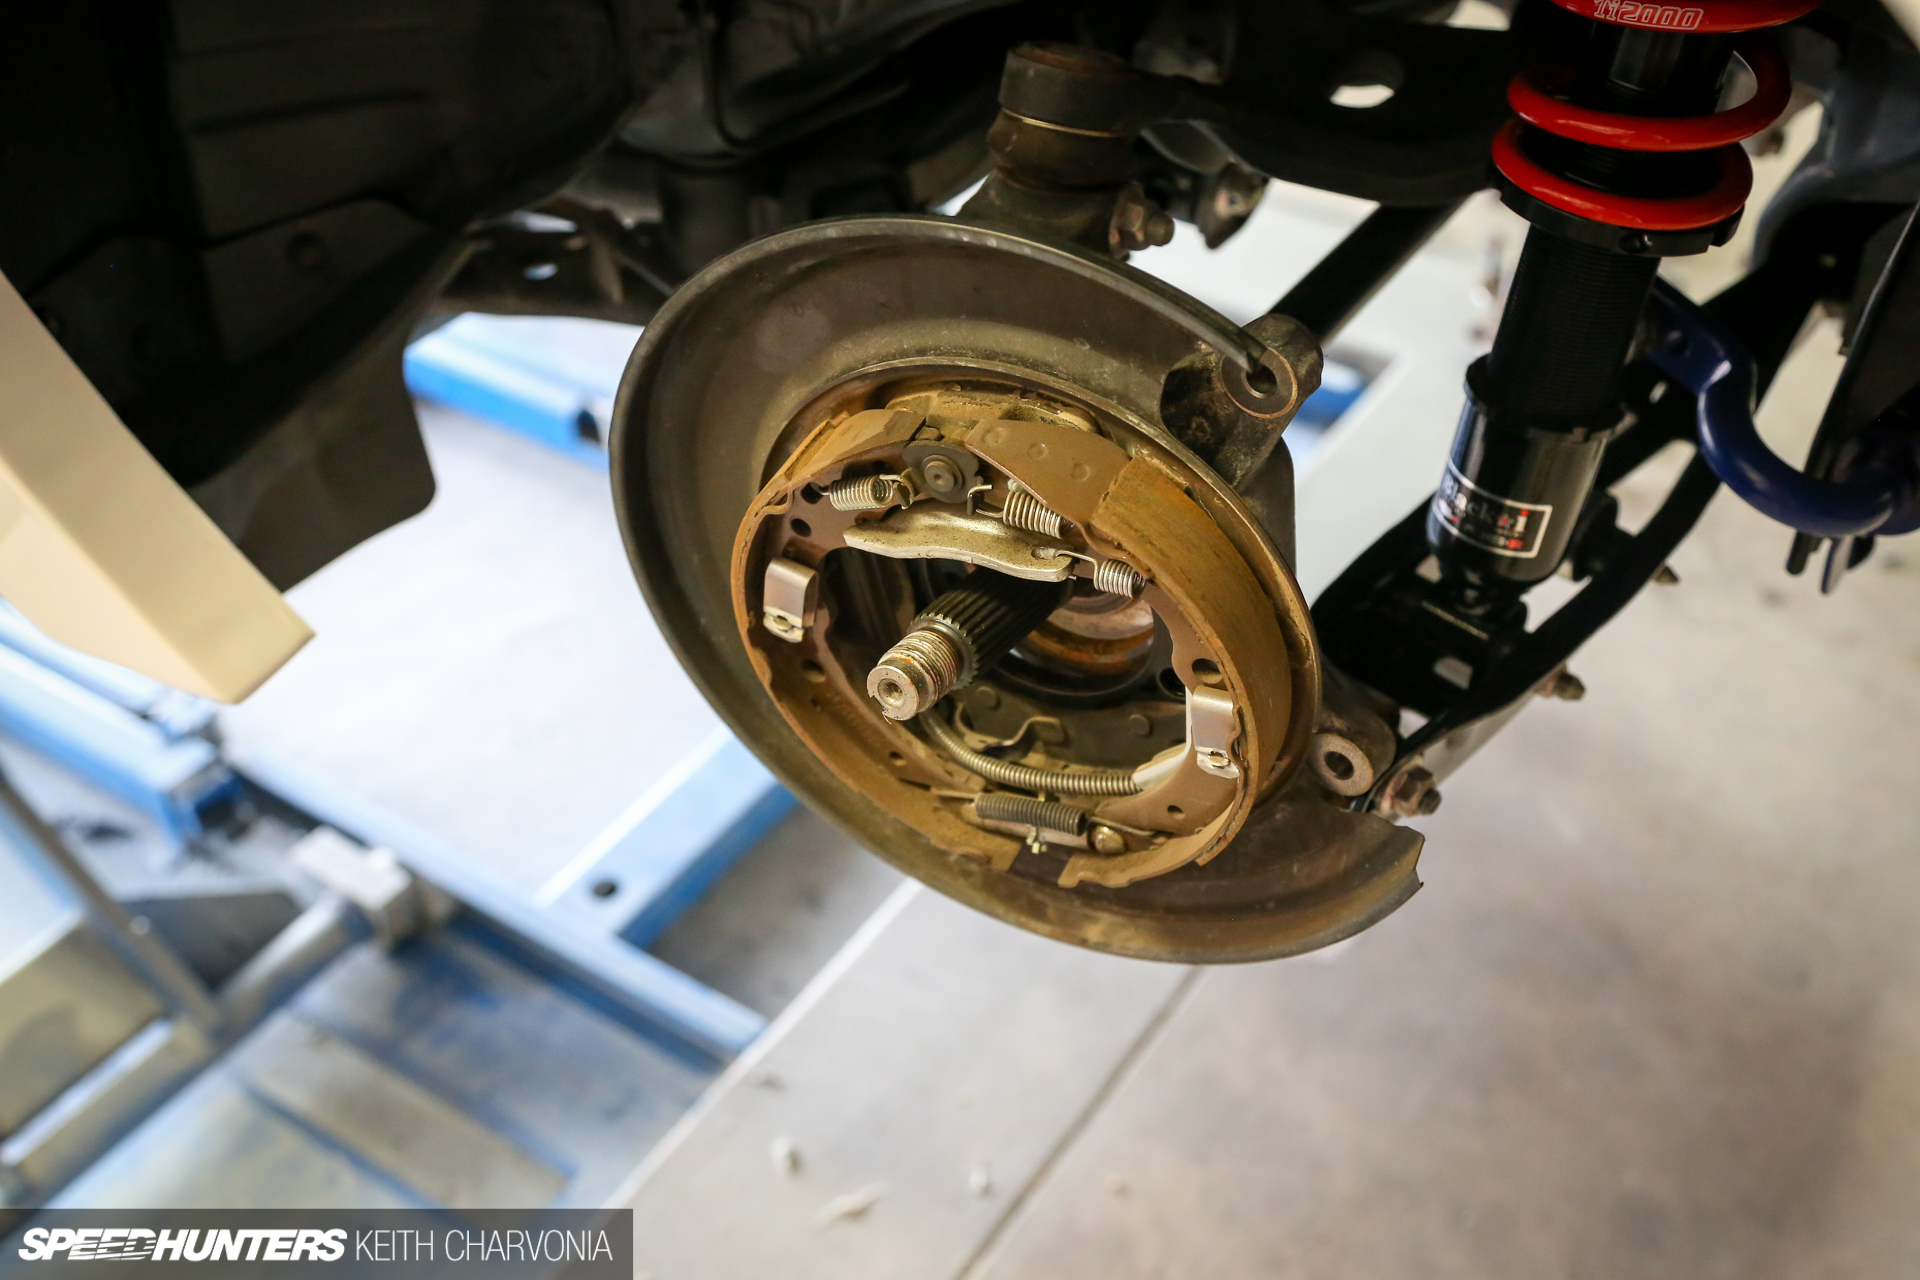
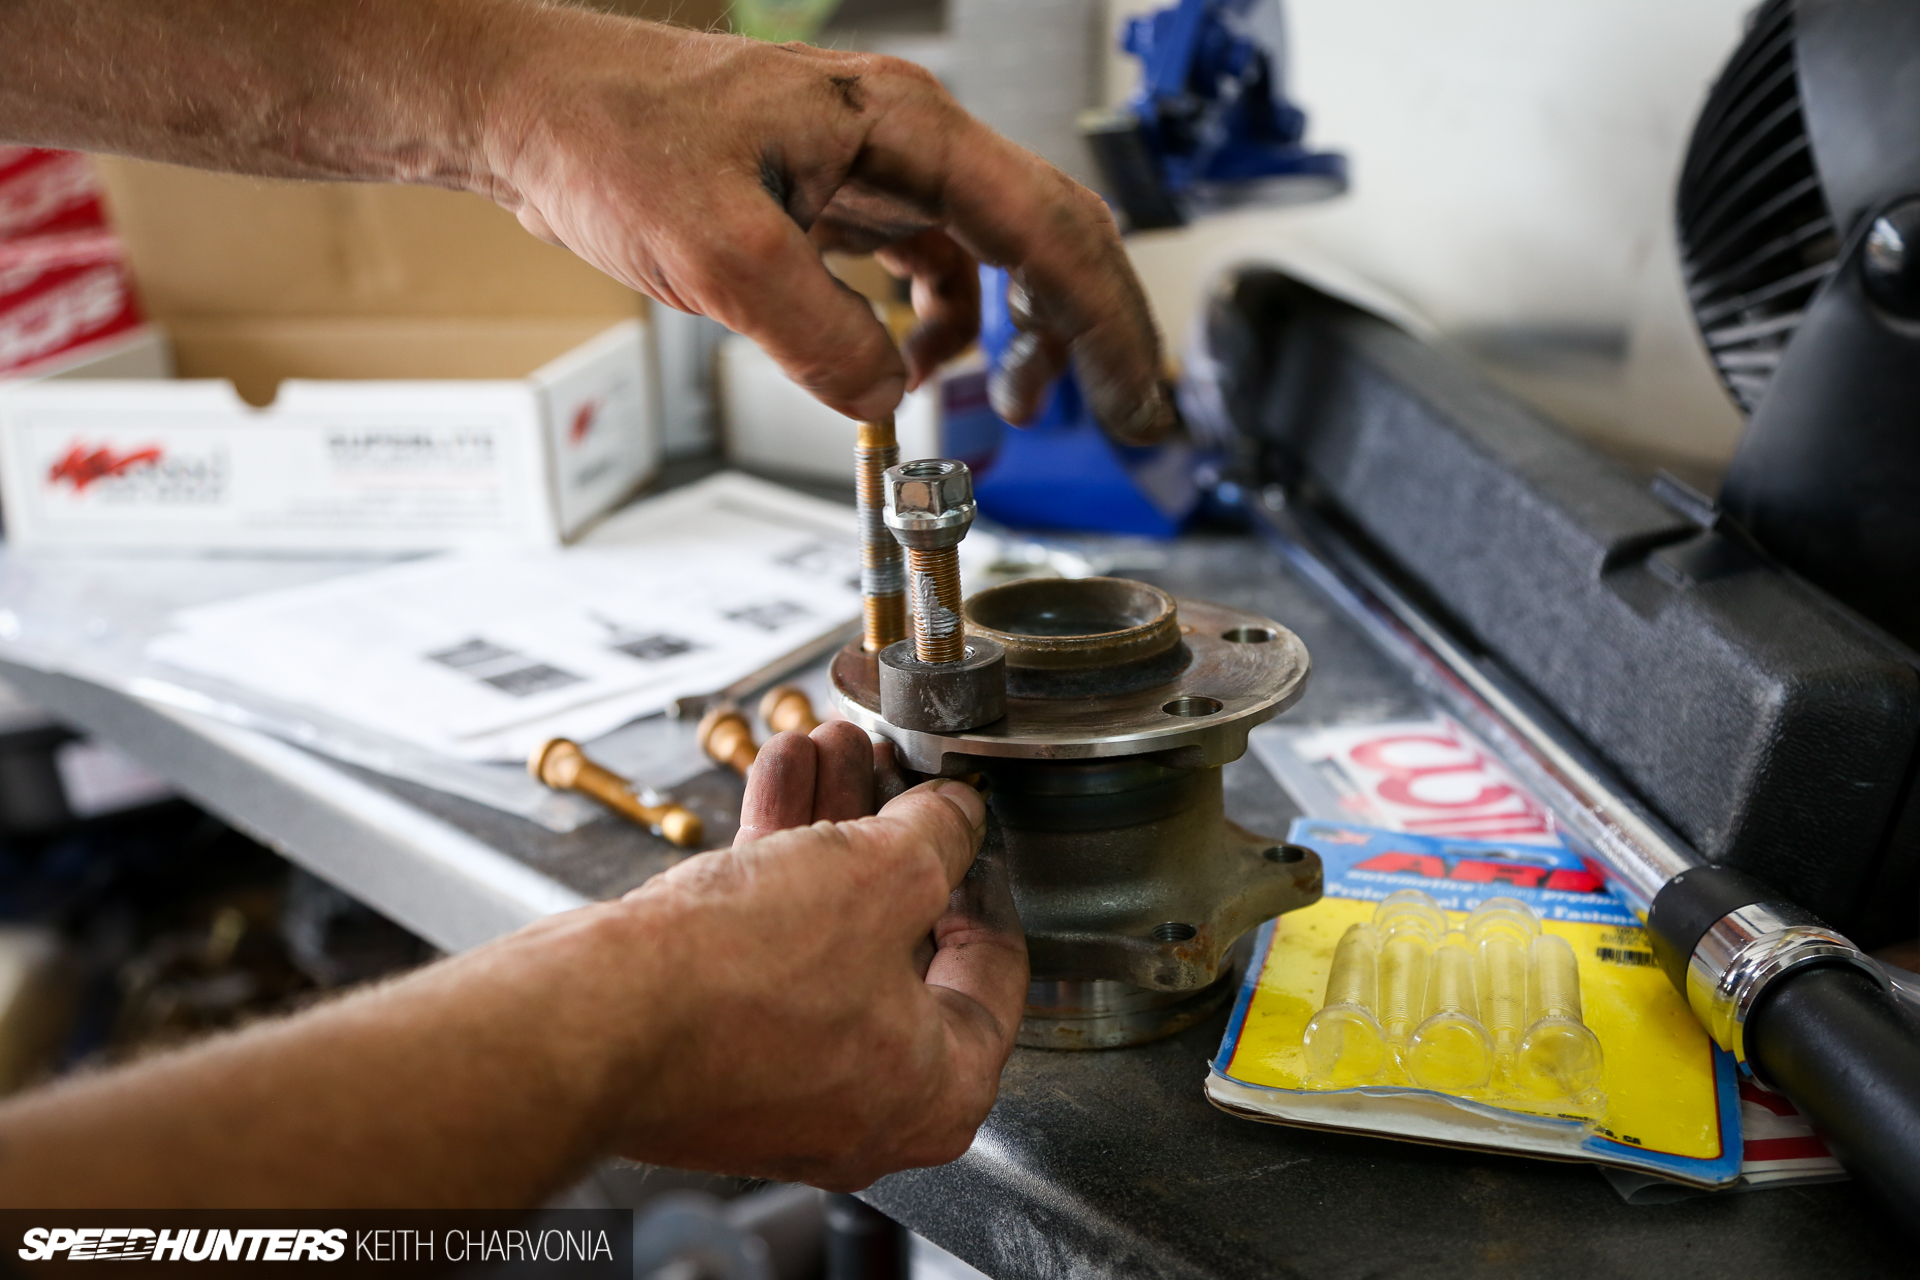
We couldn’t possibly claim this was a race build and leave the stock wheel studs in place, so a call to ARP revealed that their WRX studs were a perfect fit for the FR-S.

I was a bit worried that this job would take forever, but it actually went very smoothly. The rear hub unbolts pretty quickly, and then you can press the studs in on the bench.

We found the quickest method was to use a lugnut against a steel spacer and drive the stud in using an impact gun. Anti-seize was used to lubricate the threads since this process can generate a decent amount of heat. We also used a few lugnuts and threw them in the trash if the threads started looking suspect.

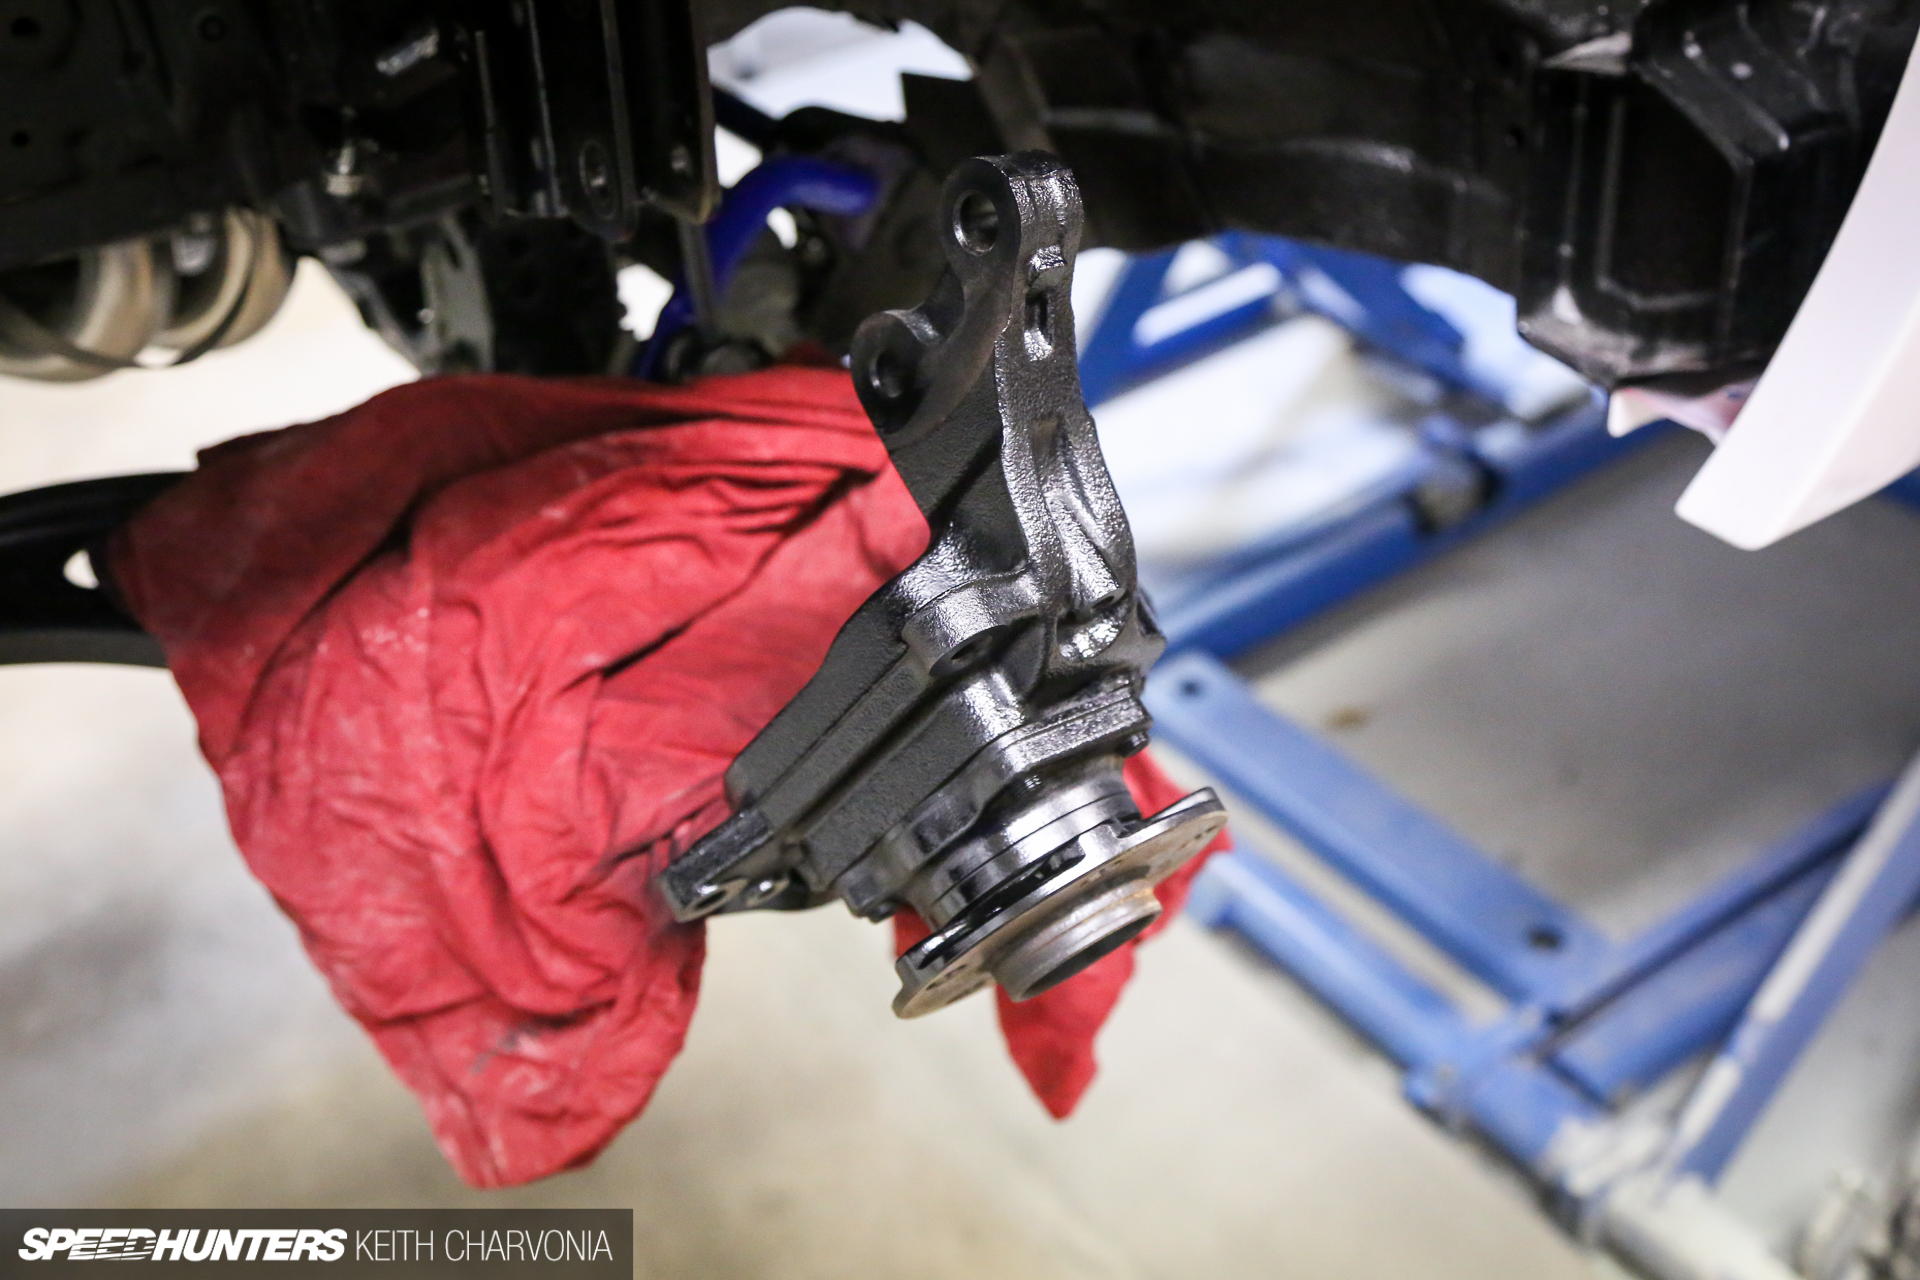
The front was even easier: I just whacked the old studs out with a sledge hammer and drove the new ones in with the impact. While the spindle was apart we gave it a coat of fresh paint too.

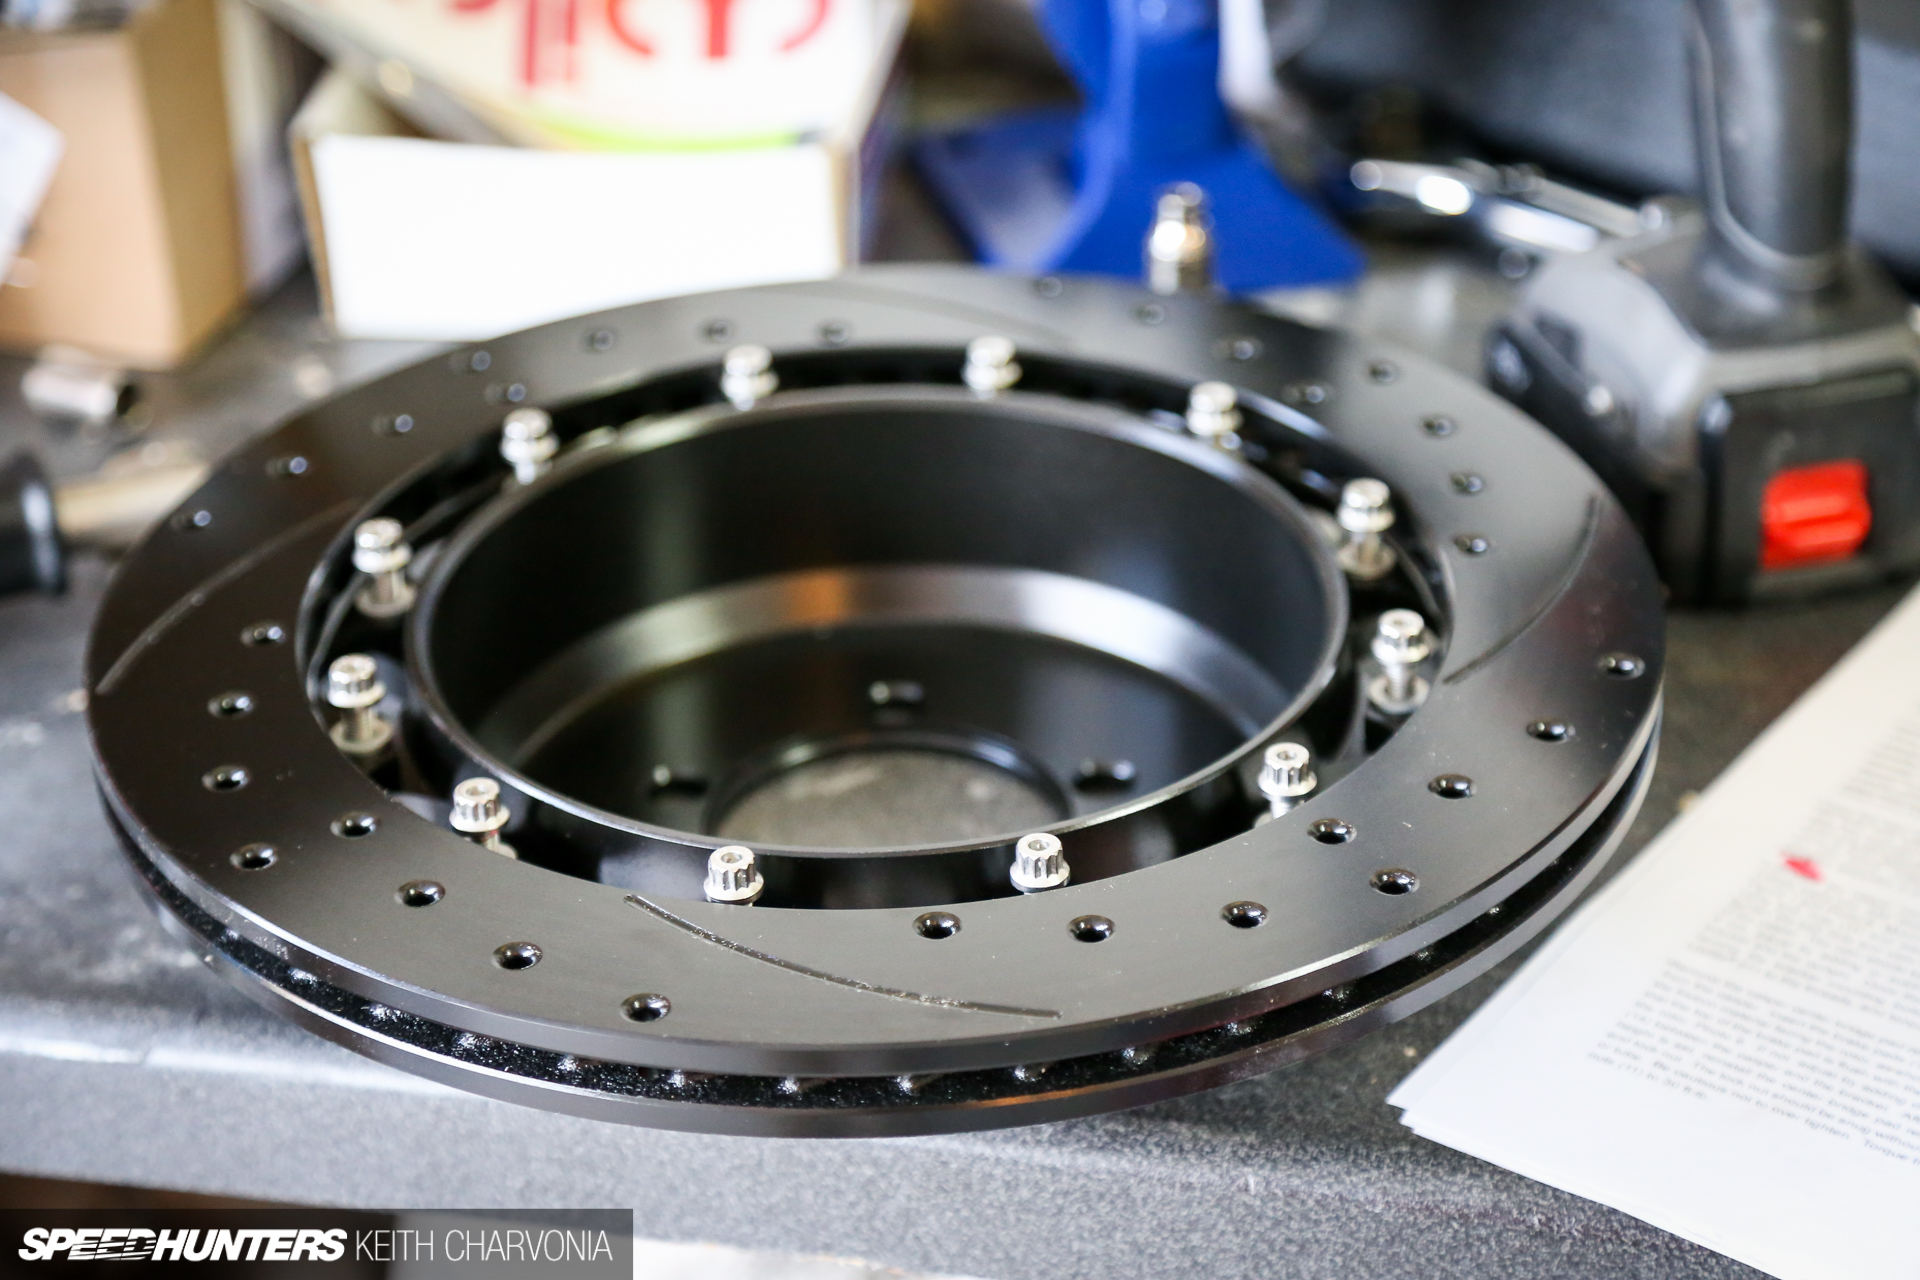
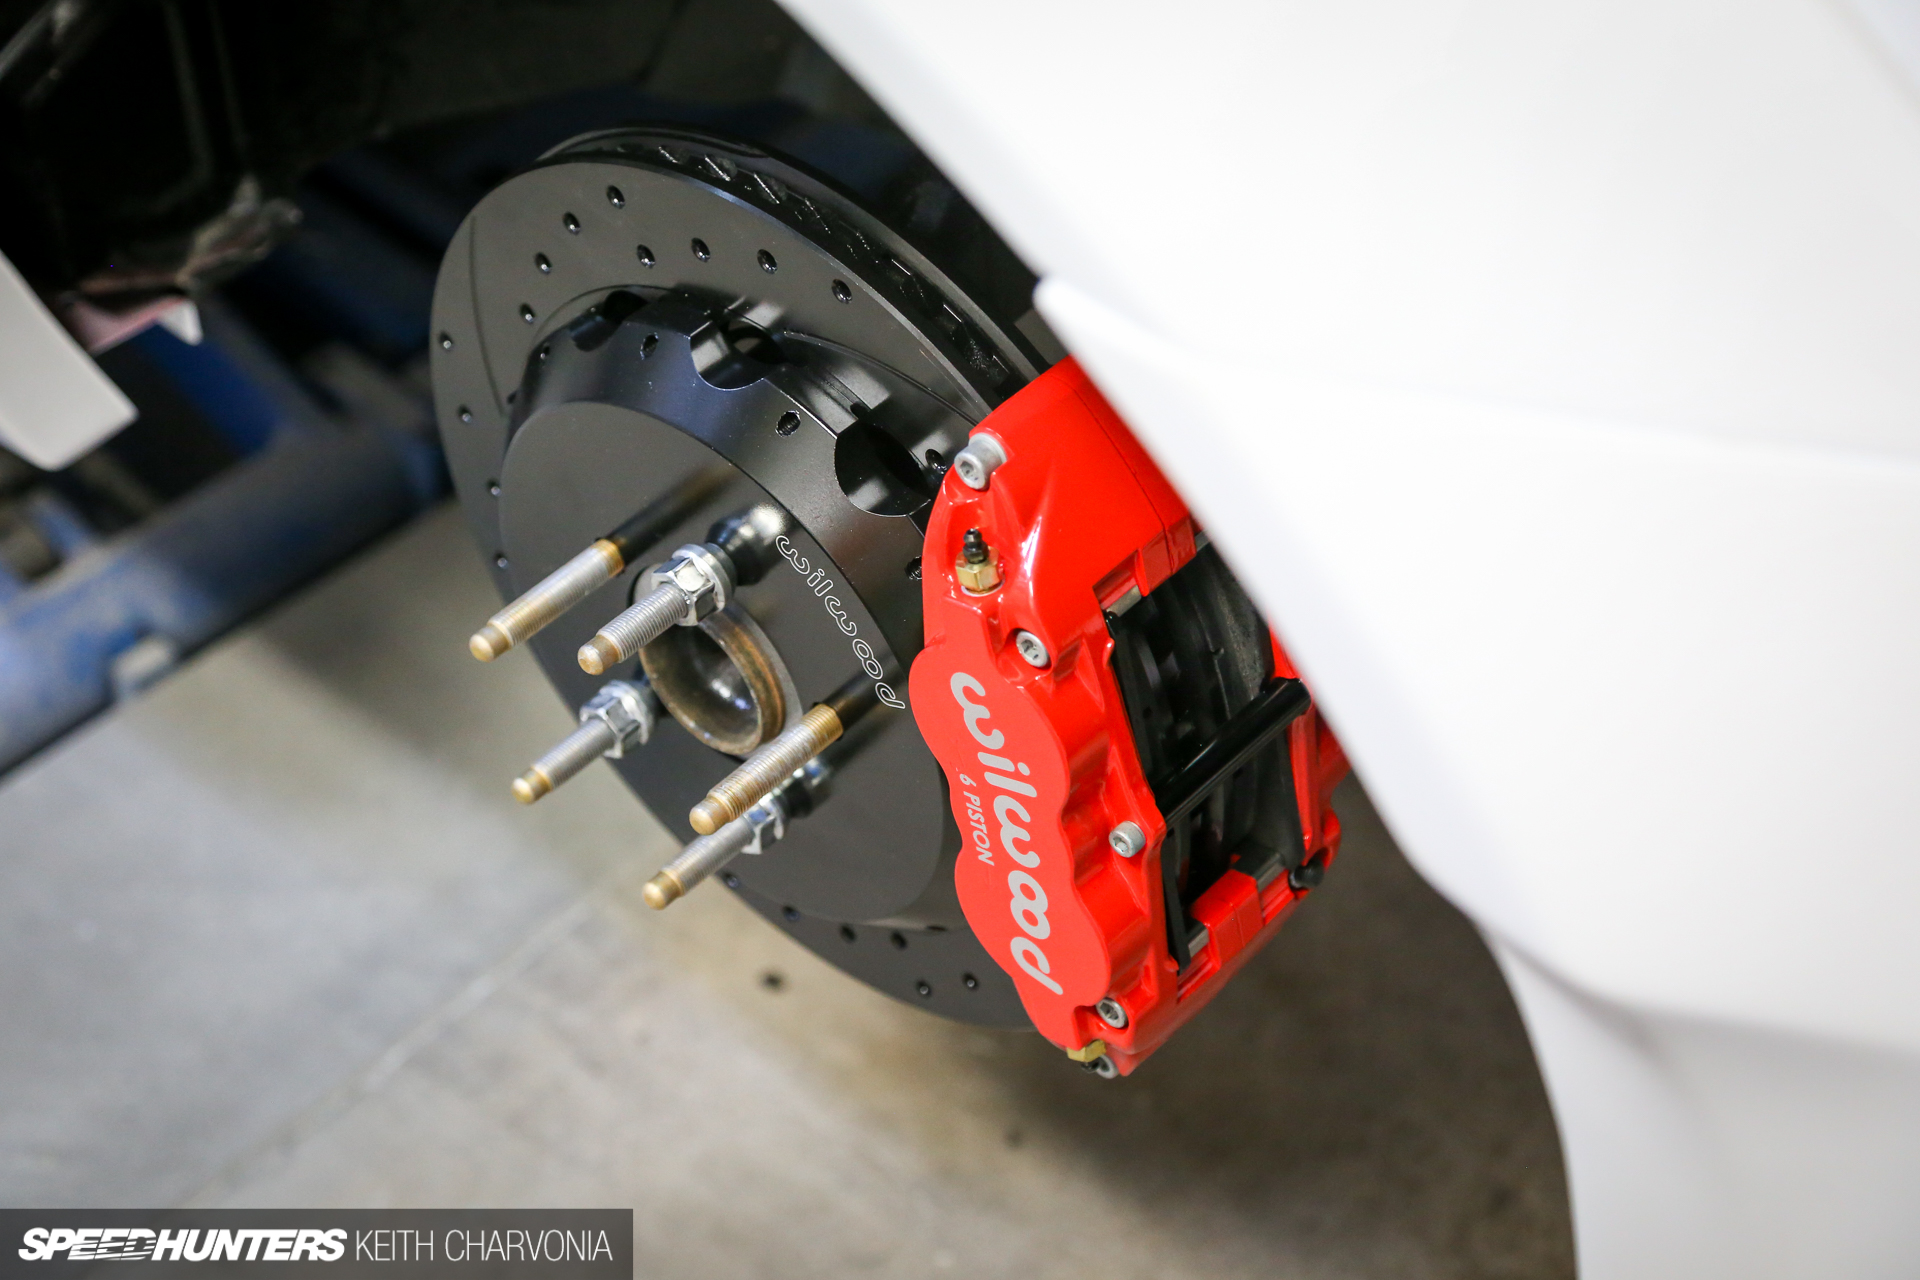
With the ARP studs in place we could turn our attention to the big, promising stack of Wilwood boxes in the corner. It was a pretty enjoyable install, where we got to learn how to properly shim a caliper and assemble the hats to the rotors. There’s something rewarding about torquing every single 12-point fastener on your new big brake kit, then burning off that coat of paint on the rotors and bedding in the pads.

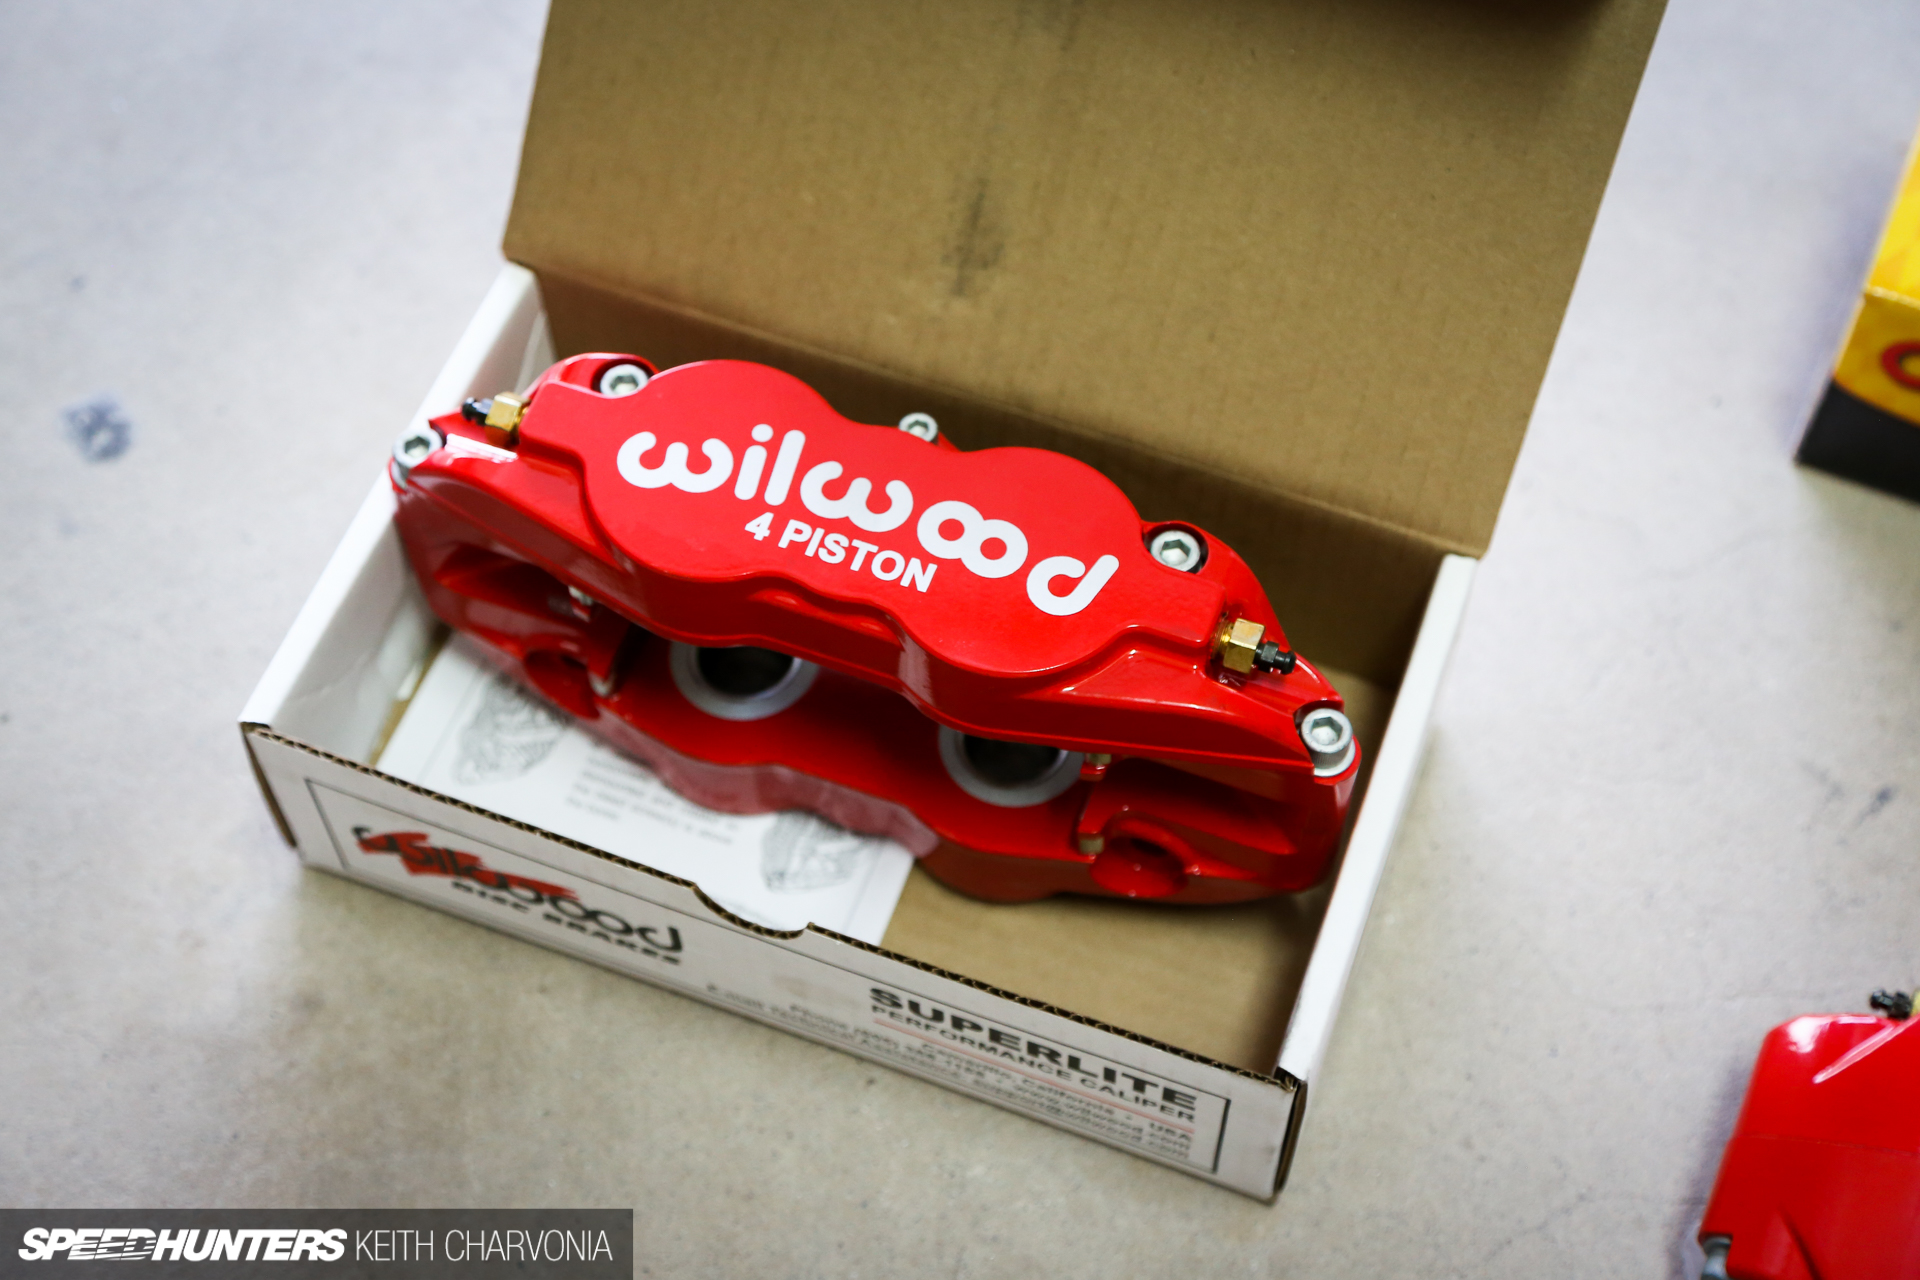
The kit used these 4-piston calipers in the rear and even bigger 6-pistons in the front.

I had an interesting challenge when it came time to choose a big brake kit for this car. Obviously it had to be, well, big – but not too big because we had specced a set of 17-inch Rotiforms in keeping with the vintage feel of the car. Many kits of this nature require 18-inch wheels, but Wilwood has packaged theirs into a tight assembly that stuffs impressive brakes inside a 17-inch wheel.

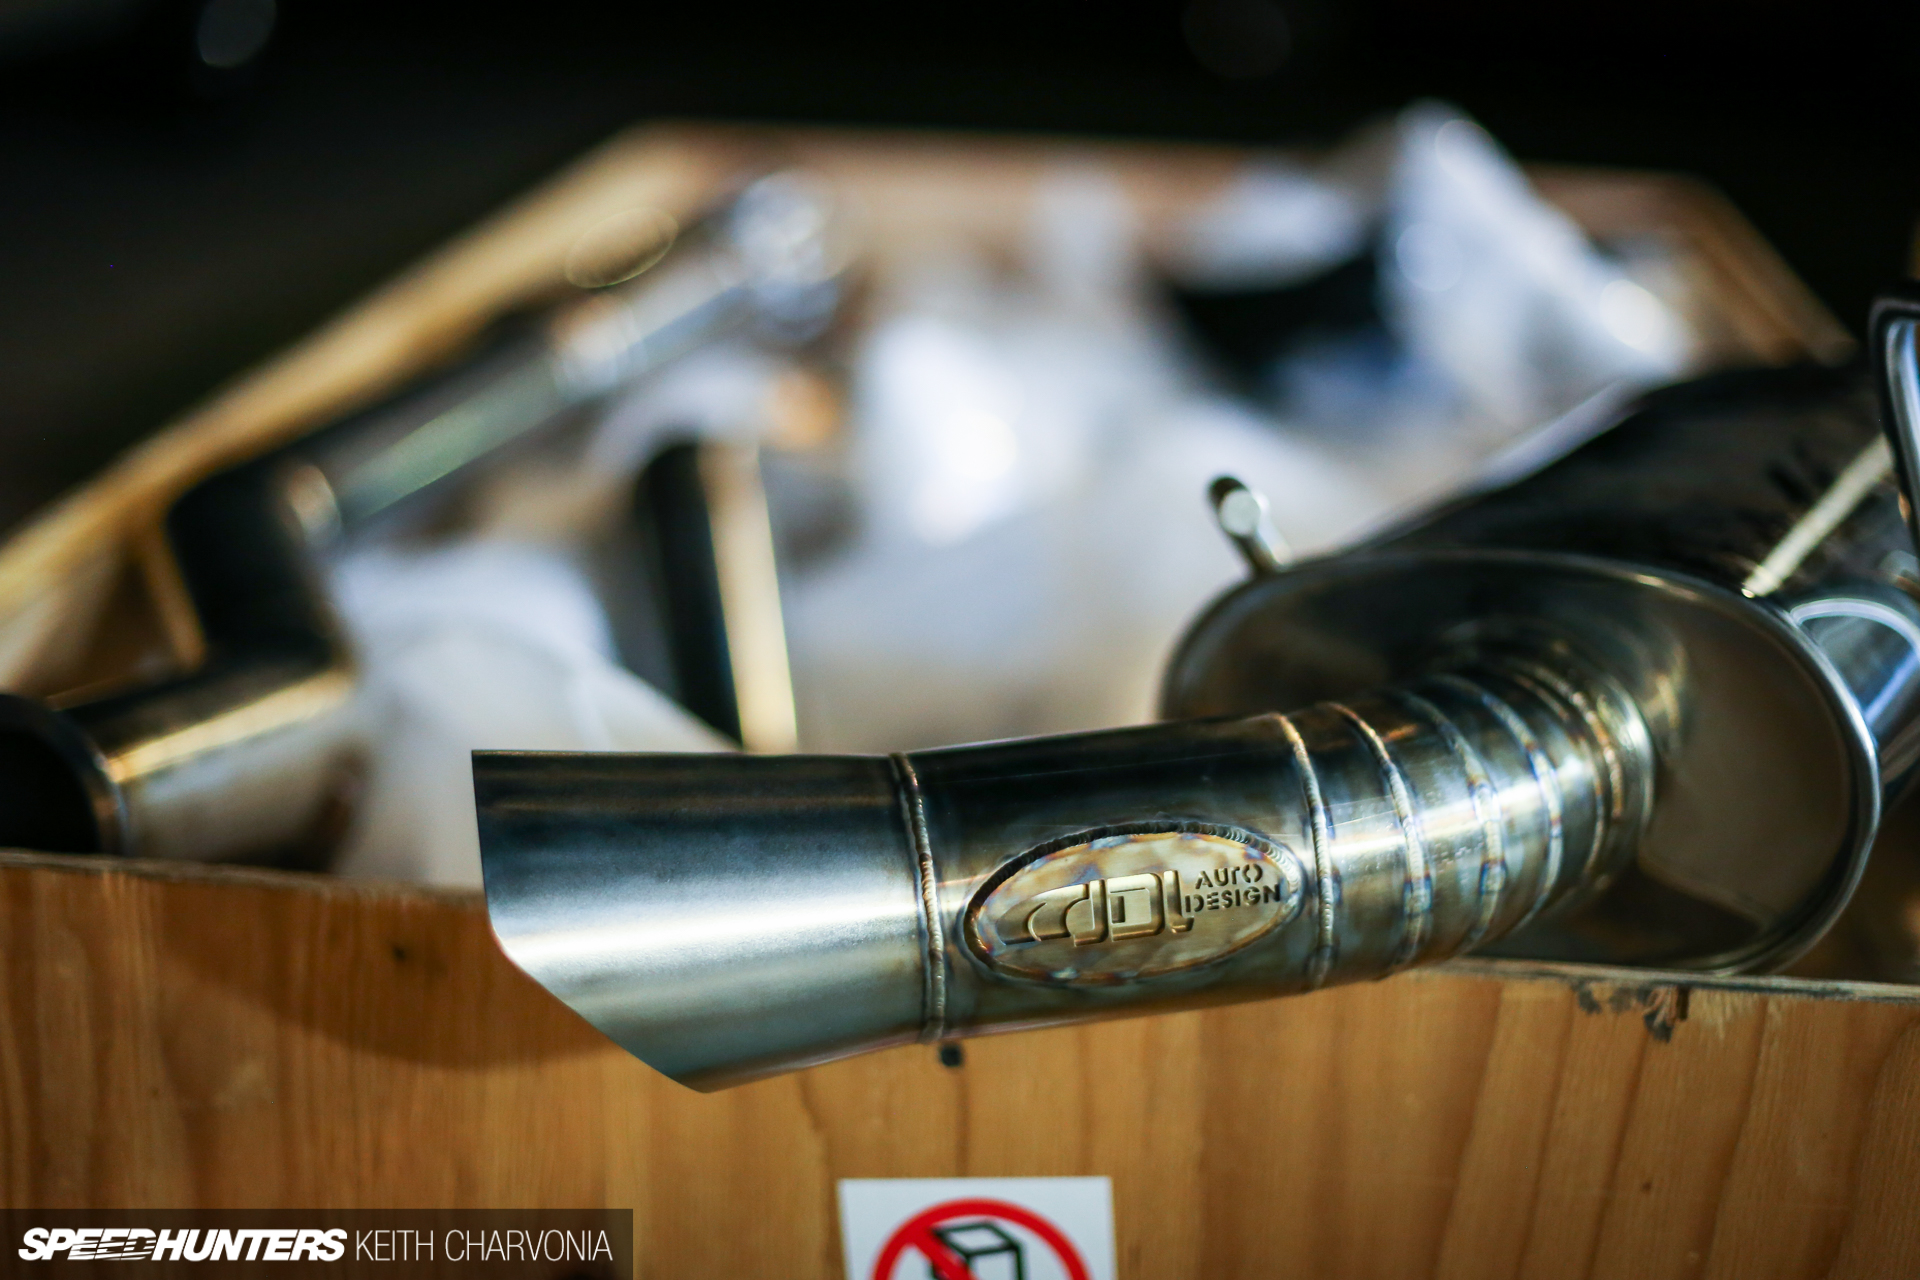
The build was really coming together now, and we could feel that we were on the tail end when we finally hung the JDL Auto Design cat-back exhaust. JDL is a local Arizona company that hand builds all their parts, keeping the quality very high. We went with a single exit, 3-inch-all-the-way-through exhaust system as we felt it best fit the theme of the car.

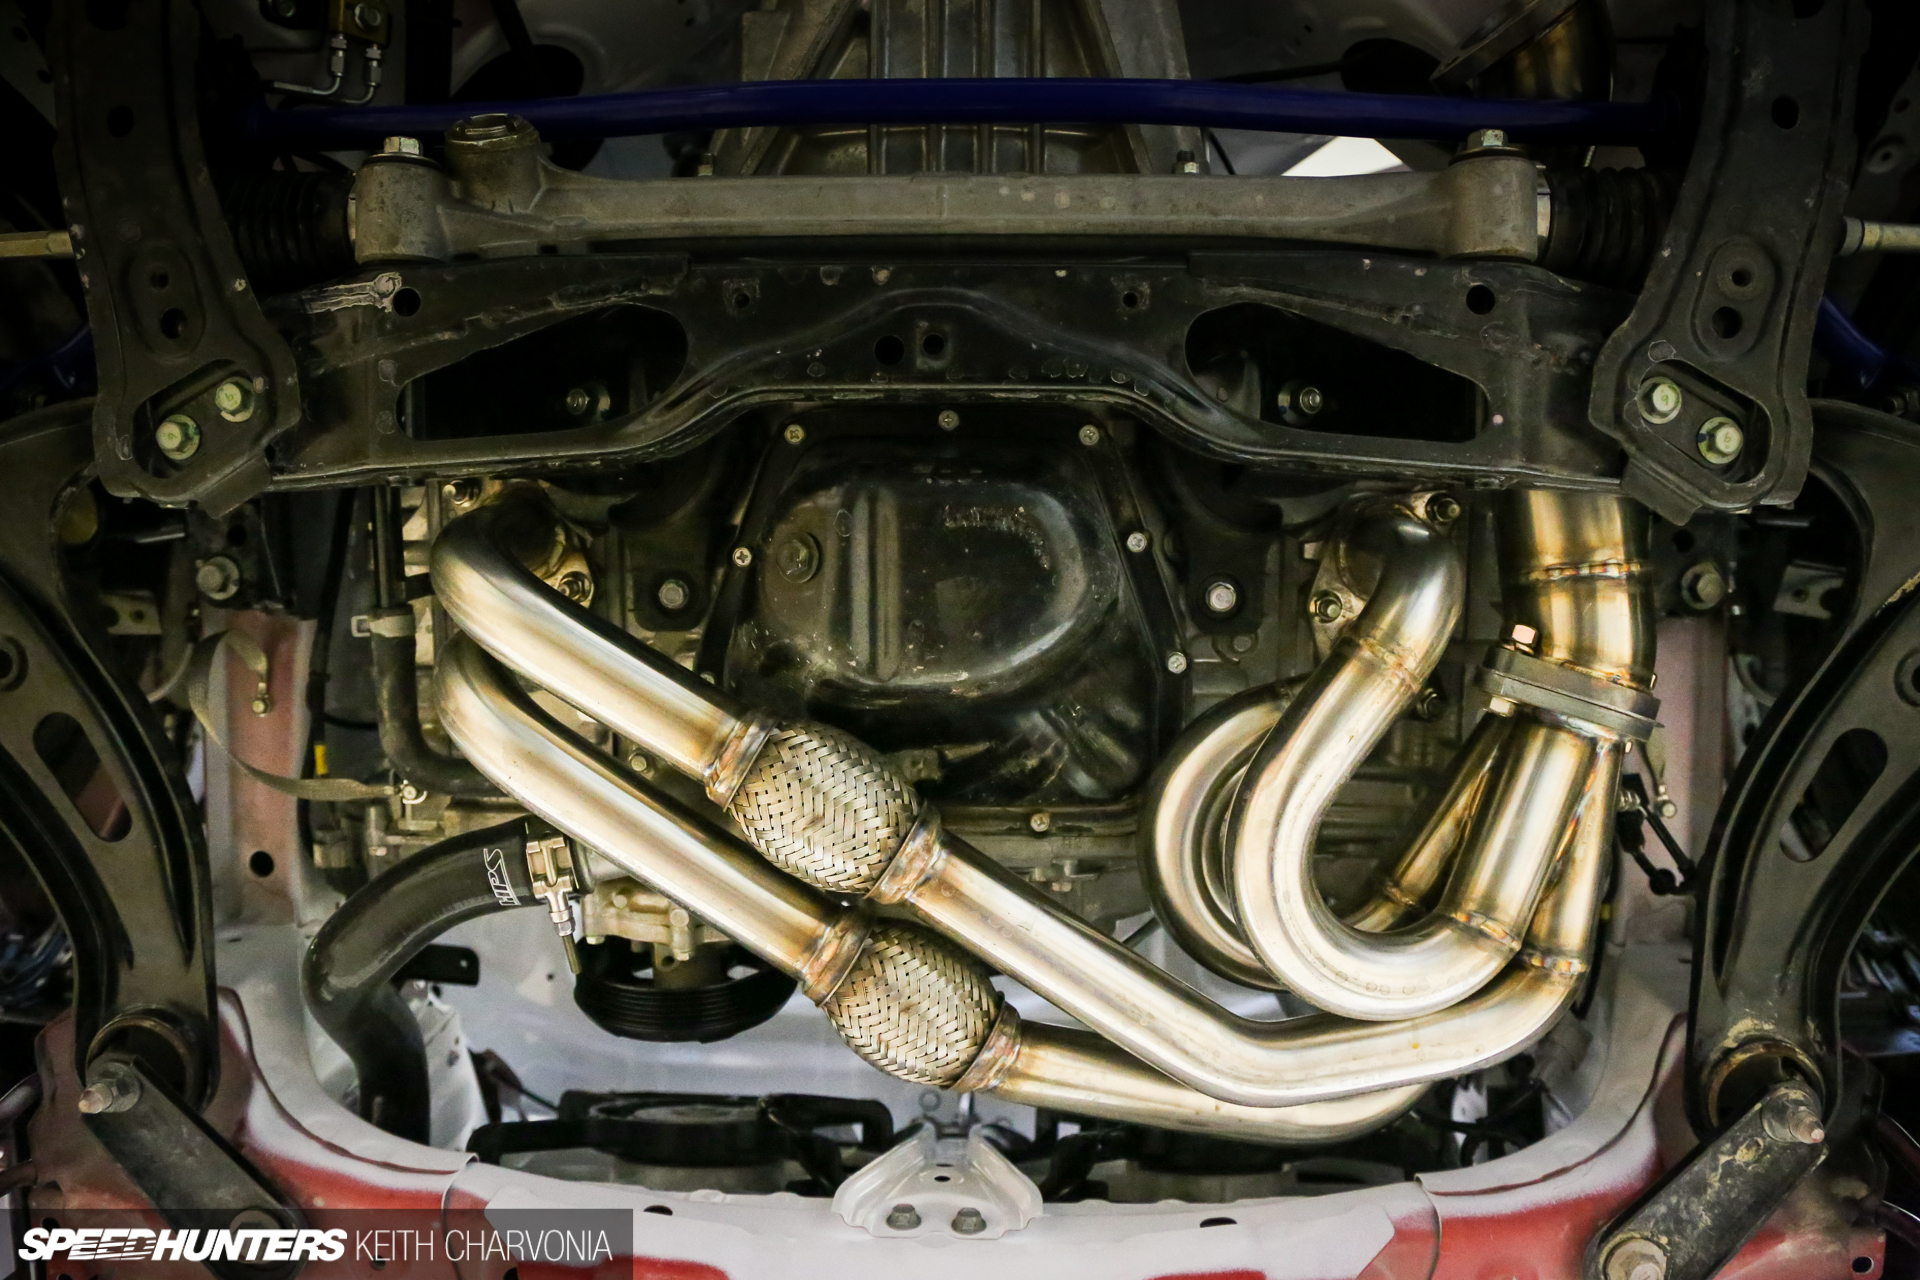
JDL also built an unequal-length header with a 3-inch merge collector to give the engine a proper boxer rumble and flow like crazy once the supercharger was bolted up.
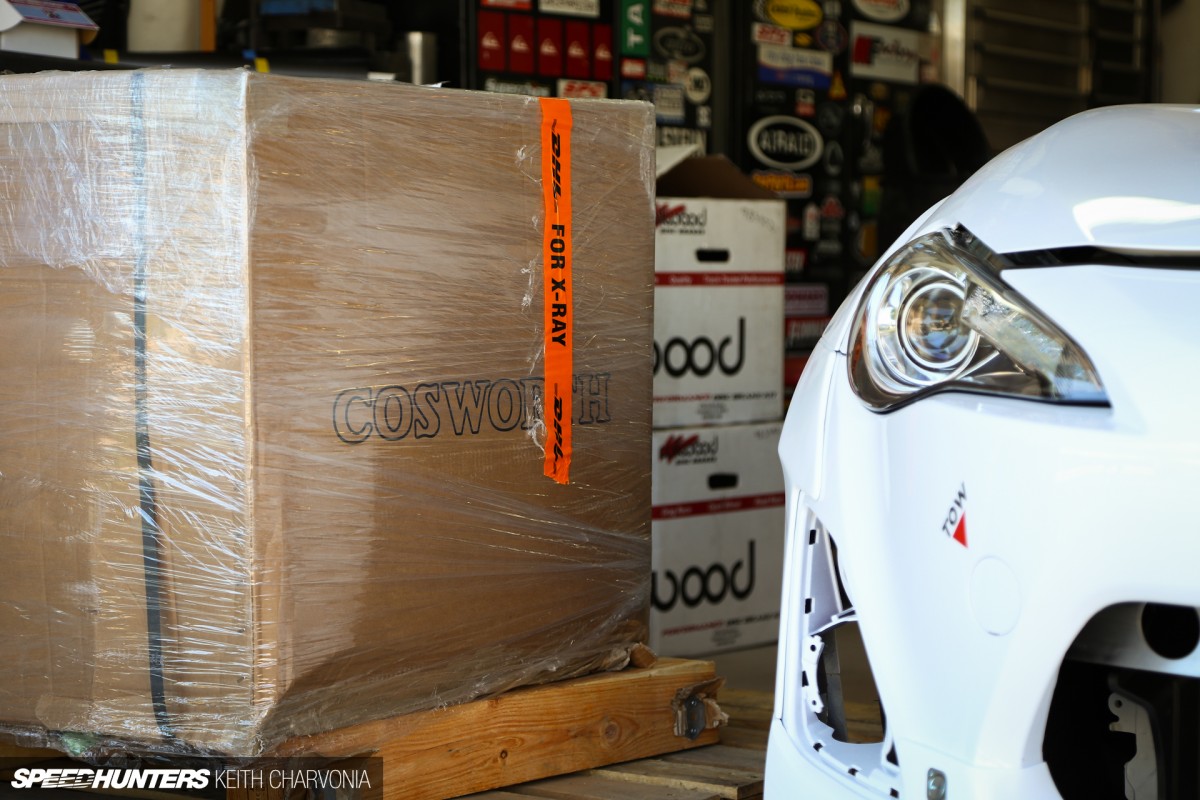
Oh right, we haven’t even touched on the Cosworth supercharger yet, have we? What about the custom wheels Rotiform made for us, or all those interior parts we crated up and shipped across the country for flocking?
It might seem like the build is wrapping up, but a whole lot of work occurred in the final weeks, days and hours before the clock stopped ticking for the 2014 Scion Tuner Challenge. Stay tuned for the final installment of our winning build!
Keith Charvonia
Instagram: SpeedhuntersKeith
keith@speedhunters.com


Looks Awesome!!!
Have you ever thought about talking to someone about your fastener/hardware obsession...
Does those rear sway bars come with end links?
when are we going to get some sweet SH hats?
Nice Writeup KeithCharvonia looking forward to the next installment!
I had the pleasure of witnessing a Cosworth GT86 at full chat whilst walking past their factory today, sounded ace, especially on the overrun
Anyone know if you can put the FRS front bumper on the BRZ?
Out of curiosity, why did you choose to use metal to fill the holes in the dashpad/seatbelt trims. Wouldn't fibreglass have been easier?
Not hating, but the thing is with FRS/BRZ/86 is you have to start from 190hp base, and work your very long way out of there to get any decent power, for enthusiasts worthy.... I know it's lightweigh and all, but come on, usual bolt ons wont get you anywhere, it's eiather an engine swap (on a new car... Yuck!!), or go forced induction.... why not start with a 370Z for example, very well balanced, good engine capacity, and 350hp comes standard from factory, and there's plenty of room to go more..
Well if you have the money the brz/86 has more potential than a 370z. They a far lighter car and because of that they will always handle better And accelerate faster than a 370z with the same power. Also 370z are not to fast with out forces induction either and someone looking for over 400hp at the wheels would need to go down that route in the long run anyways. I also think in terms of a tuner car the brz/86 is where its at as it's very affordable and most people like that they can afford a car that has X amount of potential. For the price of a 370z you could turbocharge or supercharge a brz/85 and it will be faster, more fuel efficient and give you more respect than a 370 imo.
- if people missed the detail of shaved door handles, then they'll never know of the shaved seat belt holes
- replacing all bolts with shiny new ones is one of those pipe dream excesses. i cringe a tiny bit putting back grimy bolts too but... man... they still do the job...
i just cant get over how good it looks
Gary89
Just for your information the Toyota 86 produces 154 hp/Ton, whereas the 370Z makes 225 hp/Ton, so buddy stock for stock the 370z would slay the 86 despite the extra weight, now the better handling case alone is useless if not matted with decent power, so on a track day, the 370Z would assasinate 86s all day long, as it has the track times of Porsche Cayman, all in one package. Now the SH car above is a time attack car, I can't imagin them needing the back seats for time attack, and I don't see how money is an issue for SH looking at the extra few grands $$ difference. To sum this matter, go forced induction on both with same turbo pressure, and let the strip judge
Mahfoodh Gary89 Yeah, only thing is this build isn't a Time Attack car, it was build for a car show :p
Mahfoodh Why would they build a 370Z for the Scion Tuner Challenge?
I never said stock vs stock the brz/86 is faster, I said "a brz/86 will always handle better and accelerate quicker if it has the SAME power as a 370z" so if I have a 400hp brz it will always be faster and hand,e better than a 400hp 370z. @Westhave I was covering all reasons as to why I think the brz/86 is better. It's far cheaper (which gives you more money for mods), it's always going to have more potential than a 370z and it is the BEST tuner car at the moment! This is because people can actually afford the car, and what's better than tuning a car the average person can lust over cause they can actually afford it.
I look forward to each of these features so much
LukeEVOVIII Well that's great to hear! I was a bit worried that you guys would grow tired of these updates, but there's so much to cover that it's taking some time to get through it all.
JustinOdijk
crinale Yeah, but I could NEVER sleep at night if I put crusty old bolts back in to hold perfectly refinished panels.
@tim Fiberglass might be easier to a fiberglass guy, but I'm a metal guy. All my equipment is geared toward metal so it's easier for me. I dislike working with fiberglass due to the mess and getting itchy when you go to sand it down. I have a friend who is an expert in composites, so I'd rather pay him for that work.
Smiggins Yes, you can. If you have a pearl white BRZ I'll trade you!
ForgedPhotography KeithCharvonia Thanks!
No5ki You got me there. It really is a sickness.
SuperPro mentioned some beefier end links awhile back but I haven't seen them yet. I'm sure they're in the works.
I'm not bothered about the wait at all man! I'm one of those people which just loves seeing what goes through making something as amazing as it is
Every one of these posts I kick myself for missing a detail in person. You really knocked this out of the park.
cgpexcoupe Mahfoodh Maybe it's my bad in misdescription, personally I would alway go for a used 370z VS new 86/FRS, and to answer your question I meant to express my wish if this challenge was on a 370Z instead, but nevermind, I don't hate the 86/FRS, it's just underpowered pretty hard in stock form, don't try to mess with a hot hatch on the highway if you have a stock 86/FRS. Gary89 now talking about potentials, I don't see how a 4 pot 2 litre, can have more potential than the famous VQ37HR 3.7 V6??? ..... this is no Mustang V6, it's a propper Nissan V6 that have proved it self over the year to have high HP
Gary89 , now saying 400hp vs 400hp on both cars is kinda silly comparison, because it depends on how each engine would deliver the peak 400hp power, an 86/FRS to get 400hp has to be forced induced with relativly high boost, whereas the 370Z can get to 400 (or very close) in NA form, which is better for track events, that's why the Porsche GT3 is not boosted..you might handle better, or accelerate a bit quicker for a few seconds, but once both cars get to certain speeds it all depends on engine capacity and personality.
The vq37hr isn't a very torquey engine and apart from v8's, v10's v12's etc naturally aspirated v6's are quite peaky and tend to lack much low end torque when paired with bigger can shafts and necessary mods to get more power. It's not about the engine as it is the chassi, the 370z chassi is almost never ever seen in drag racing or time attack racing as it's just to heavy.. The only time you really see the chassi used is professional drifting but they swap out the v6 for v8's anyways. It's hard for the 370z to compete against smaller cars like the gt86, silvia etc which are more than 200kg lighter. Getting 400hp out of a fr20 engine is pretty easy, in fact its quite possible on standard internals and a mid size turbo such as a garrett gtx3076r. Power and torque is still very usable and there isn't to much lag at all on a turbo of that size. If you follow "time attack" you will see that there are numerous 800-1000+hp 2l cars that are far quicker round a track than any v8 or v6 could ever be just because they So light and nimble. And if you went follow drag racing or drift you will see that a 2j in a gt86 chassi kills any 370 in terms of acceleration and control. Weight is everything.
Mahfoodh Completely redundant argument here.... we are reading the Scion Tuner Challenge article after all, not the Nissan/370Z Tuner Challenge.
These articles are always a treat, so much eye candy!
DaveT Ha, thanks! That's why I'm such a fan of the build thread. If you've followed one and then you finally see the car in person you'll know all the nuances.
Wish we had more time to hang out at SEMA so I could have shown you the car. It was a whirlwind!
Mahfoodh You're also comparing Nissan and Toyota. Many enthusiasts are partial to one or the other.
KeithCharvonia DaveT
It's true, a lot of my favourite cars of last year's show were ones I had followed builds on either through IG or forum threads.
It's funny a few other Canadians caught me at the car three times and they were like 'you're still here?' and I said I had to come back I missed something!
Hopefully you document your next build just as thoroughly!
Was there a budget on this project? (Not including the car)