
I’m often asked, “What’s under the hood?” when I pull up in Project Trailhunter, and until now my answer has been a reluctant, “Oh, just a tired old Big Block.”
You see, the 454 in my Land Cruiser was so dirty and worn out that I didn’t take much pride in letting people know what engine it had. I decided this had to change. Because what’s the point in having a massive engine under the hood if it’s old and underpowered?
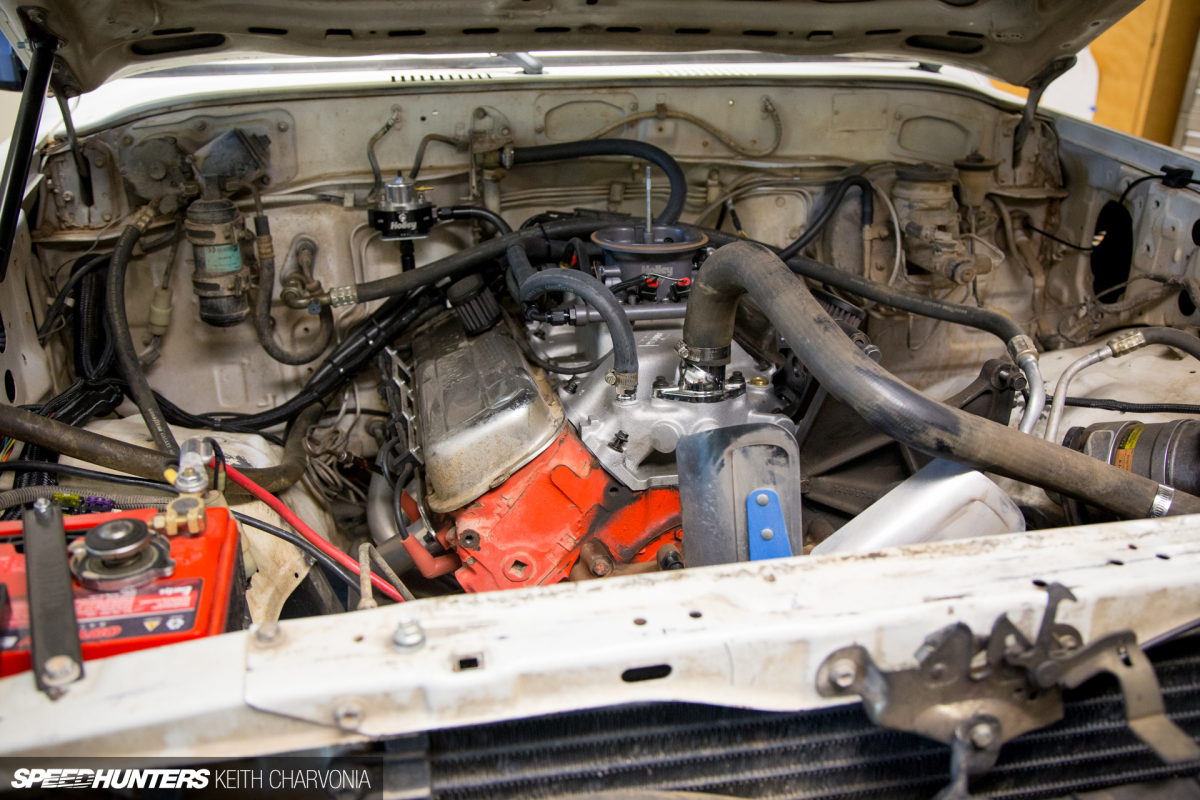
Previously, I had done a Holley Terminator EFI install that brought my Big Block out of the Stone Age. While this upped the power and response by quite a lot, there was still room for improvement within the mechanicals of the engine.
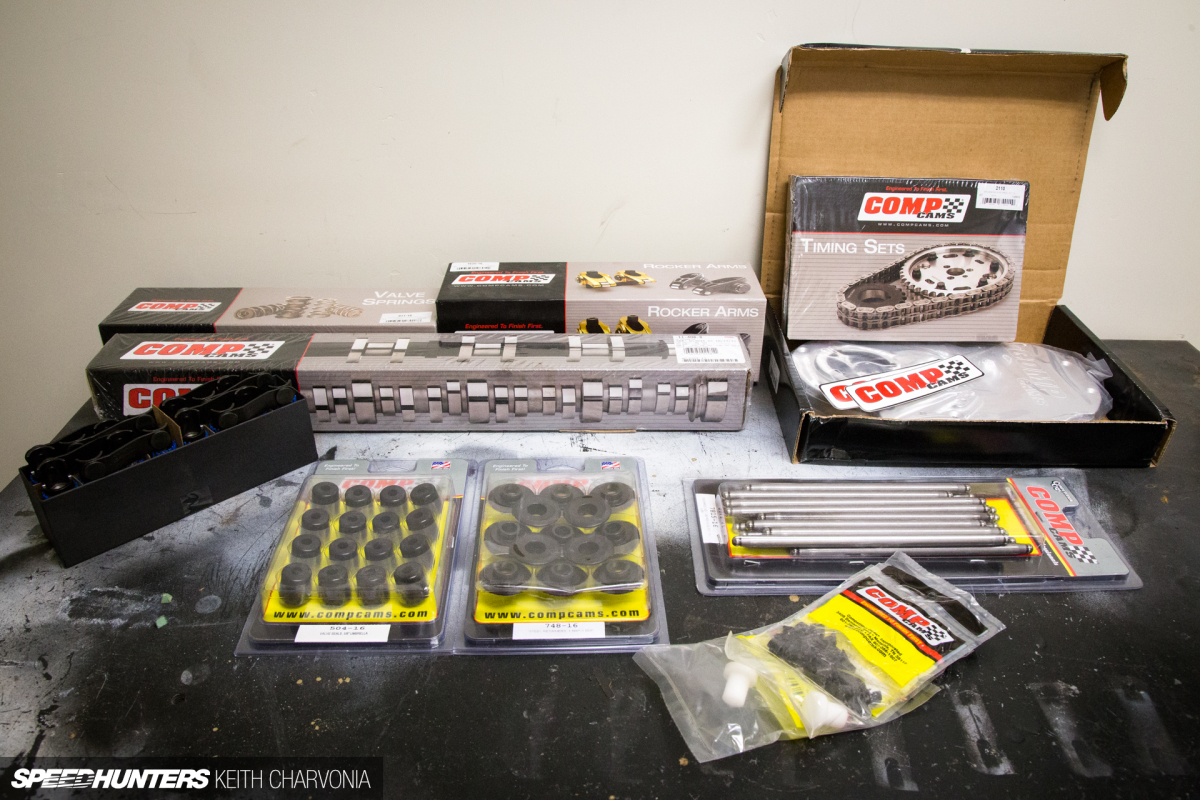
I emailed Comp Cams tech support to see what kind of mild cam package they made for my very common 454ci engine. Fortunately, Comp sells this whole kit this as a bundle, so you know you’re working with matched parts. This was a good package to open up!
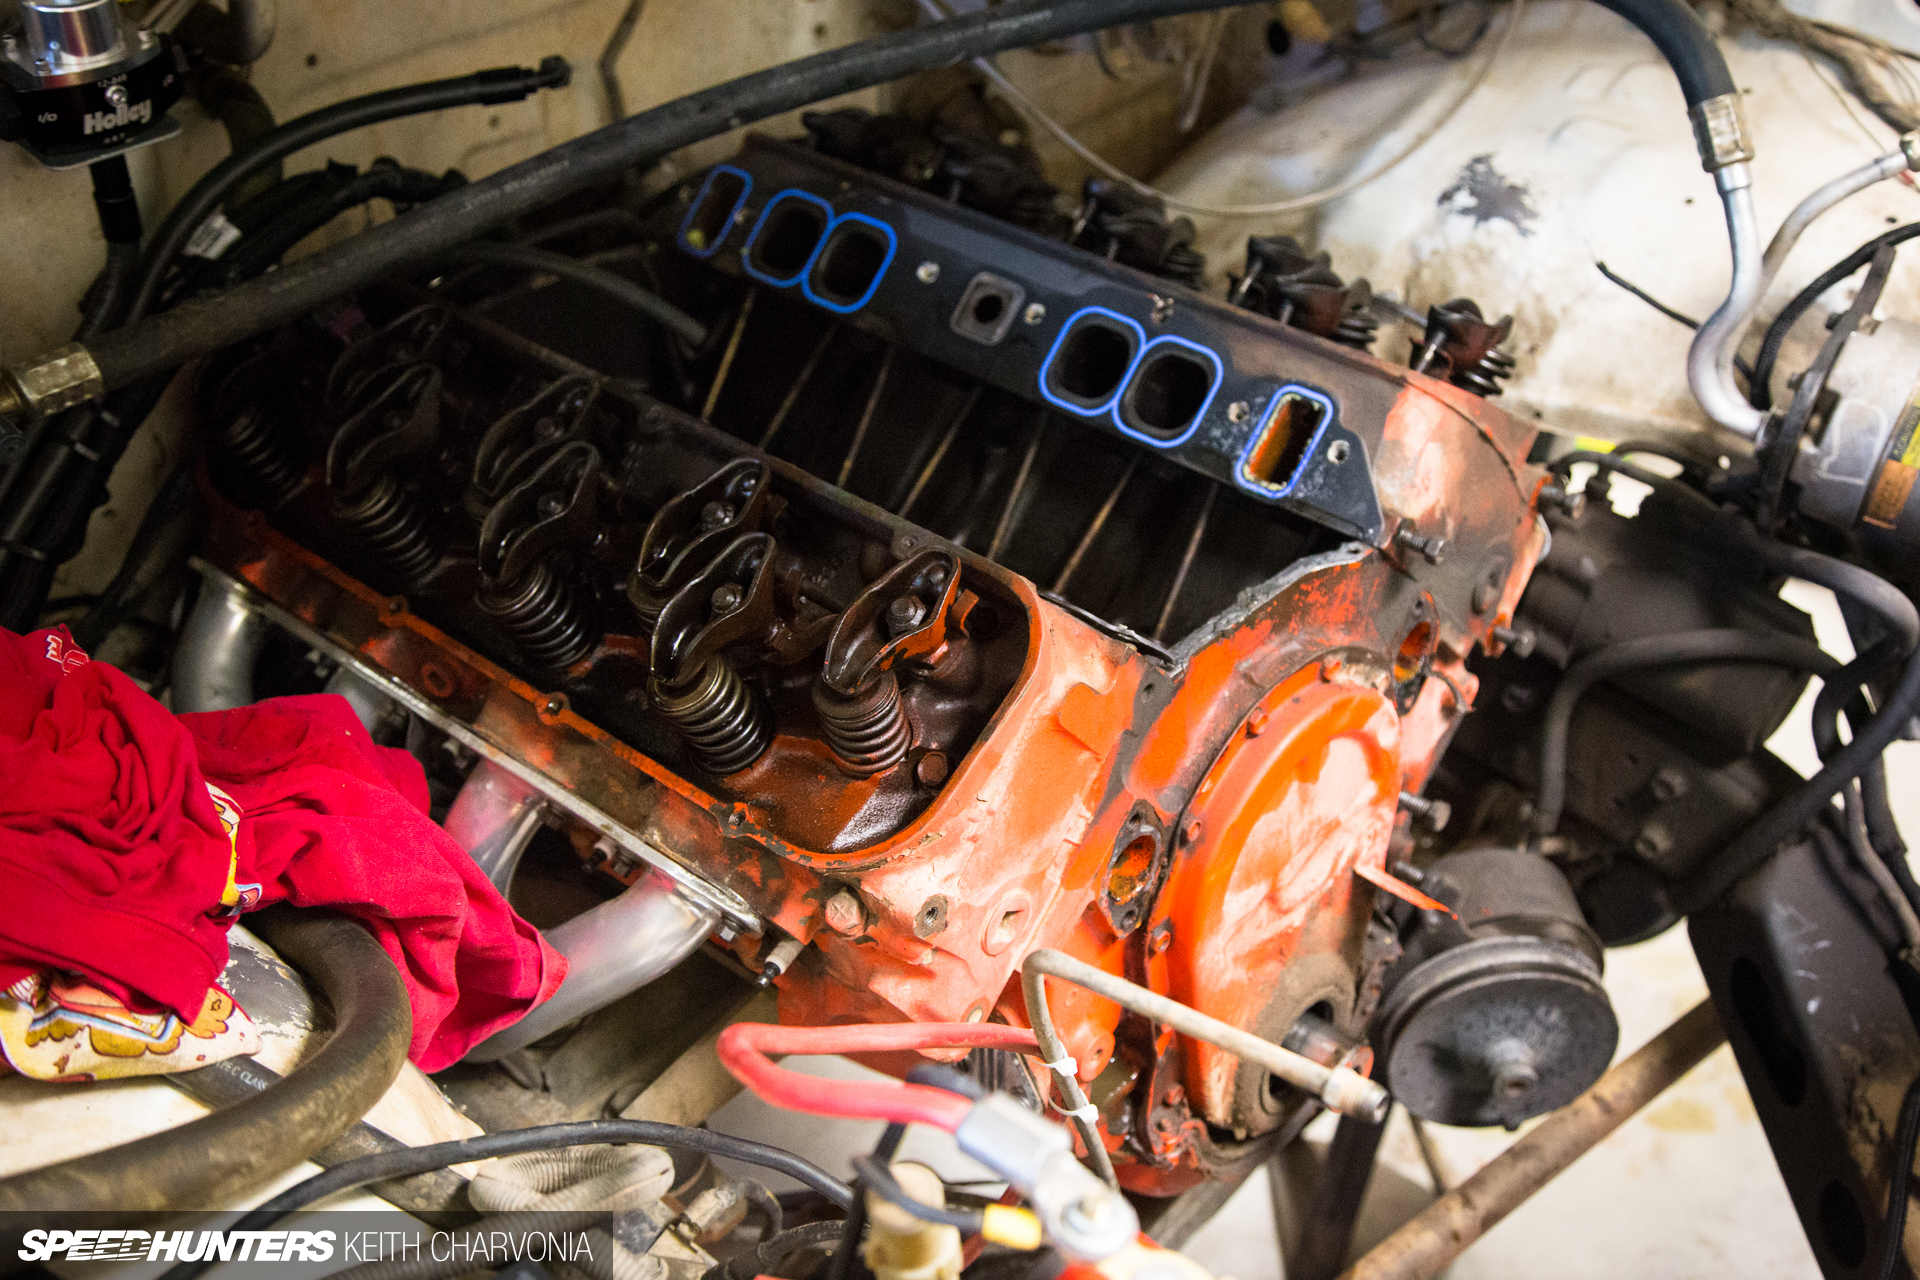
Even though the RTV had barely dried on the intake manifold from the EFI installation, it had to come back off.
Instead of a flat tappet cam, I opted to swap to a full roller valve train for greater efficiency. These stamped steel rocker arms had to go.

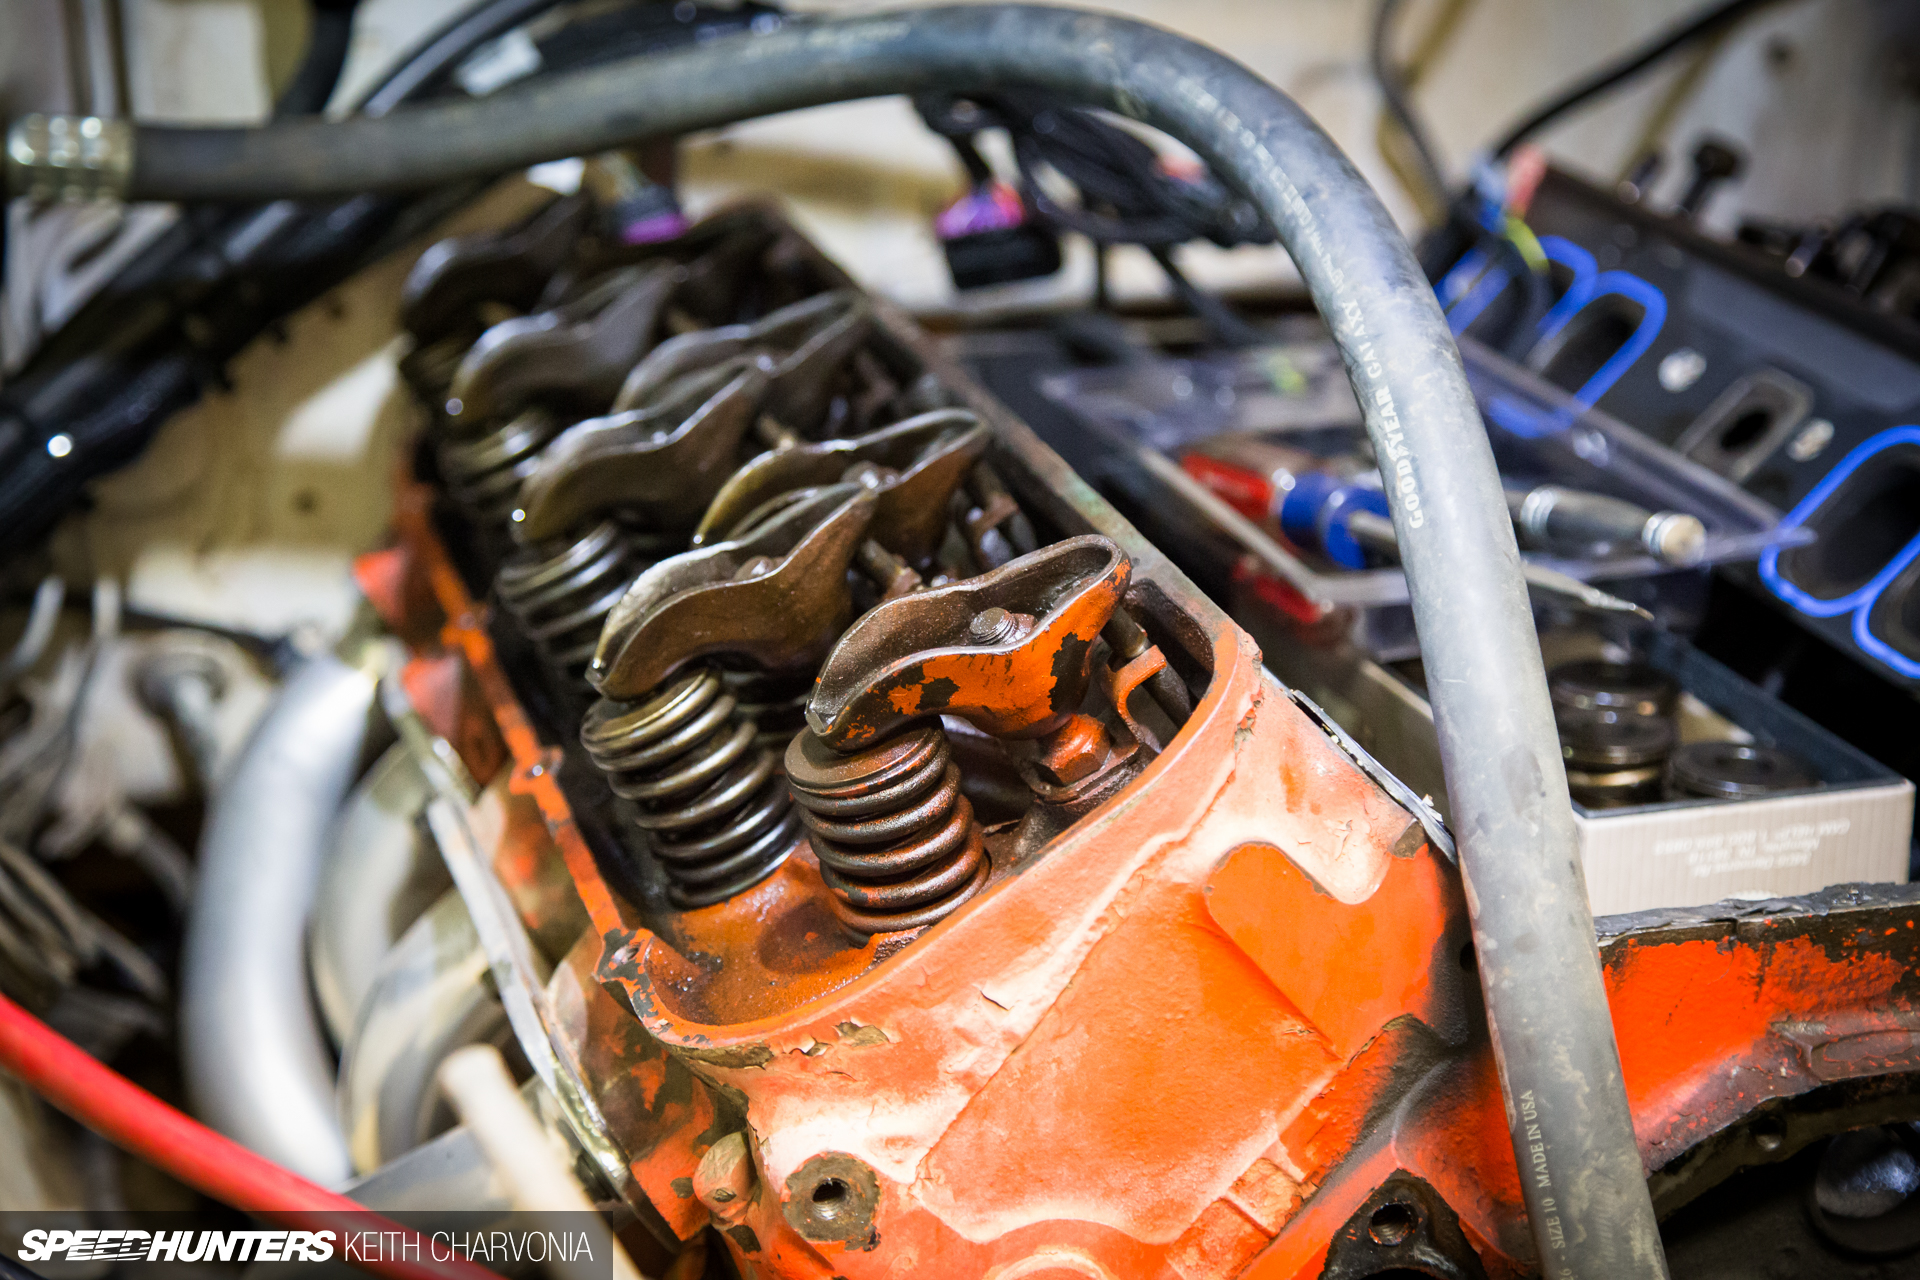
I once again enlisted the help of my jet mechanic friend Phil. He restores Corvettes when he’s not working on airplanes, so he has a lot of experience working on these old Chevy engines. First he showed me how to compress the valve springs and drop in the poly-lock retainers.
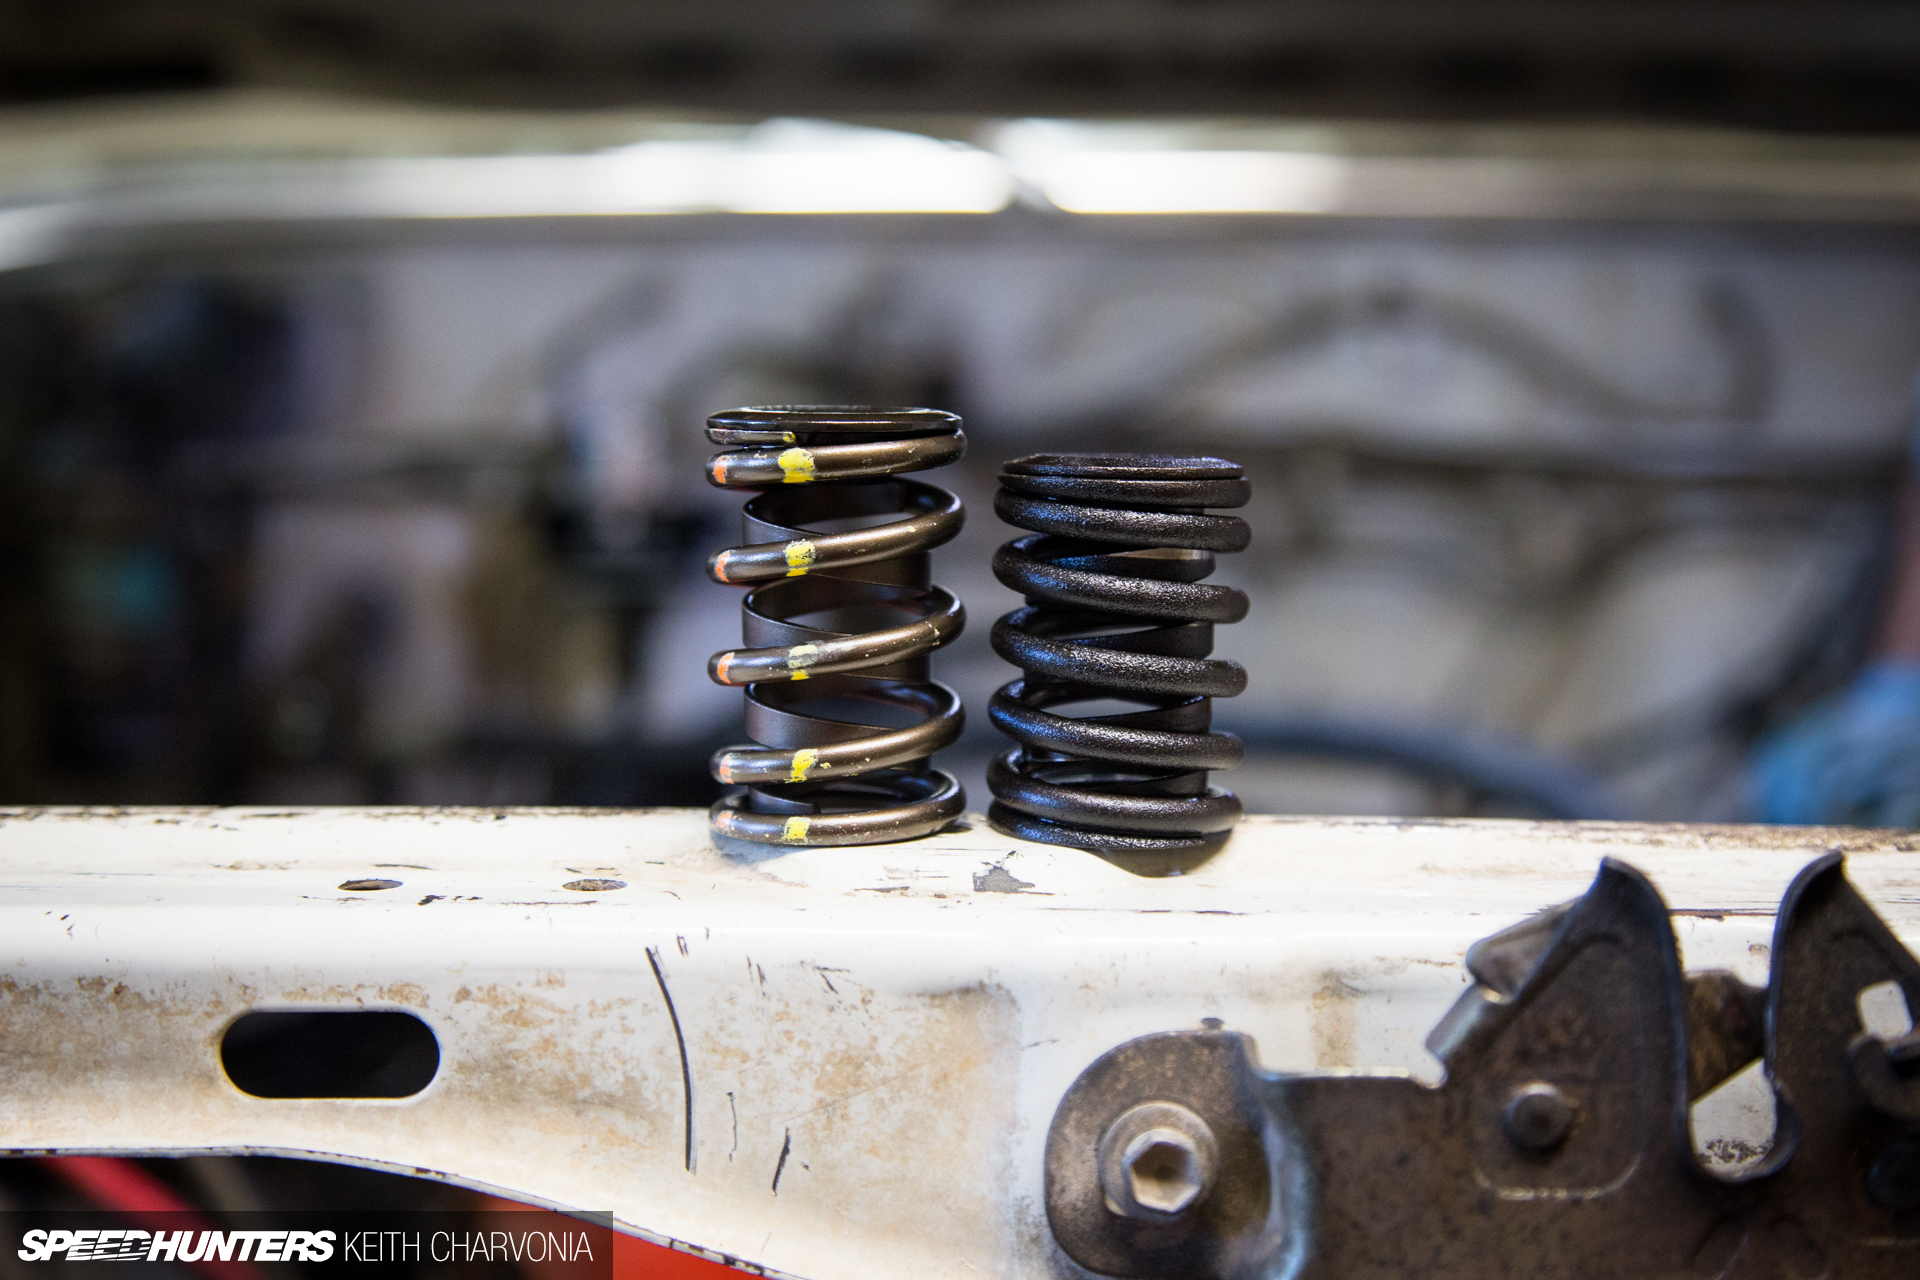
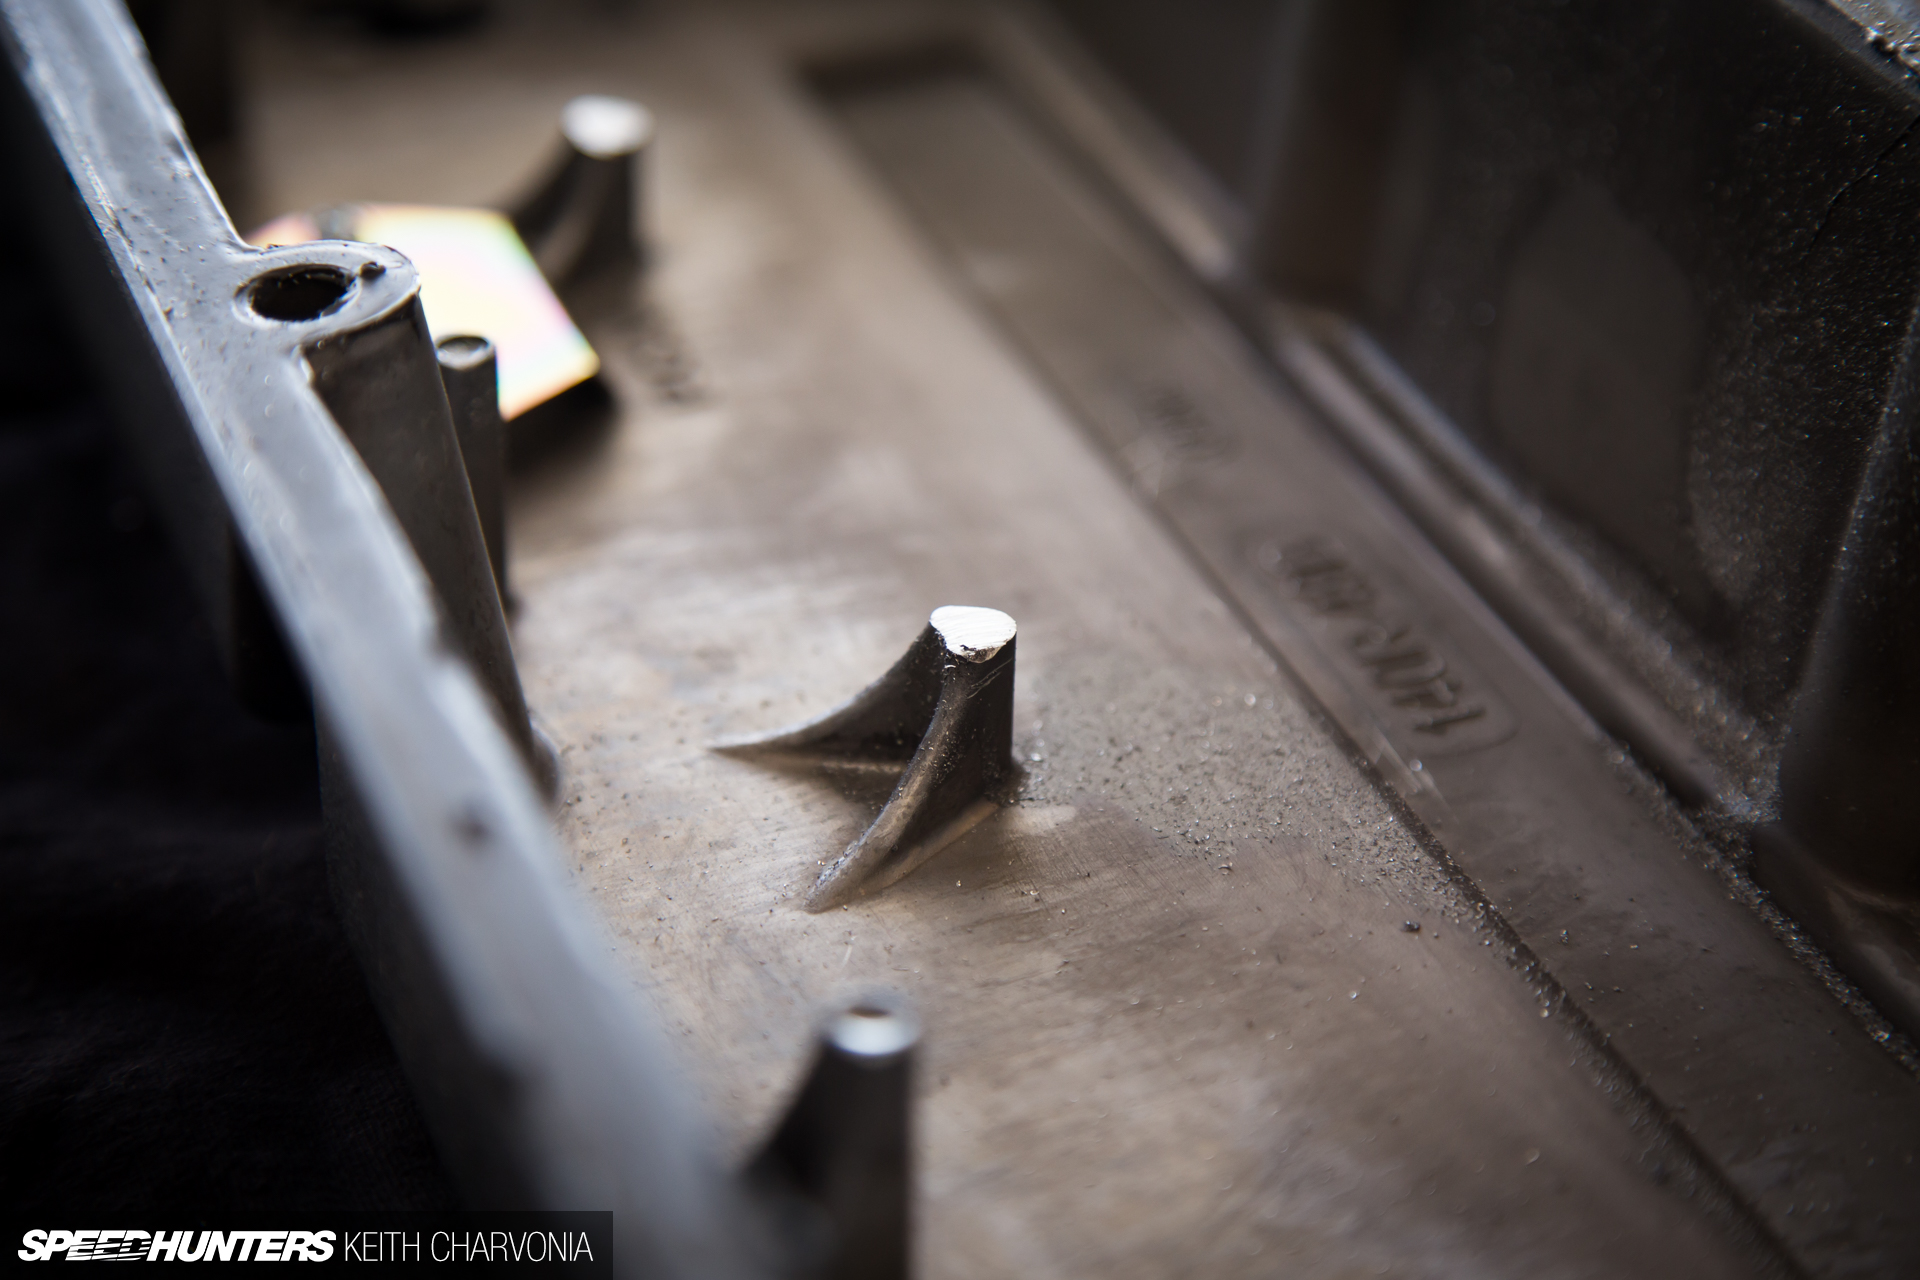
This is what a 40-year-old valve spring looks like next to a quality, performance part.

With my 454 coming from the late ’70s, it had an extremely weak cam in it from the factory to reduce emissions. On top of that, the lobes had worn down over the years, leading to even less power. Out it came!
A Fresh Valvetrain
And in went the new Comp Cam. I went with a mild hydraulic roller cam for strong torque and good mileage. These are meant for a stock engine and often used in trucks, RVs and towing stock applications. Perfect for a Land Cruiser that would be seeing a lot of trail miles like mine.
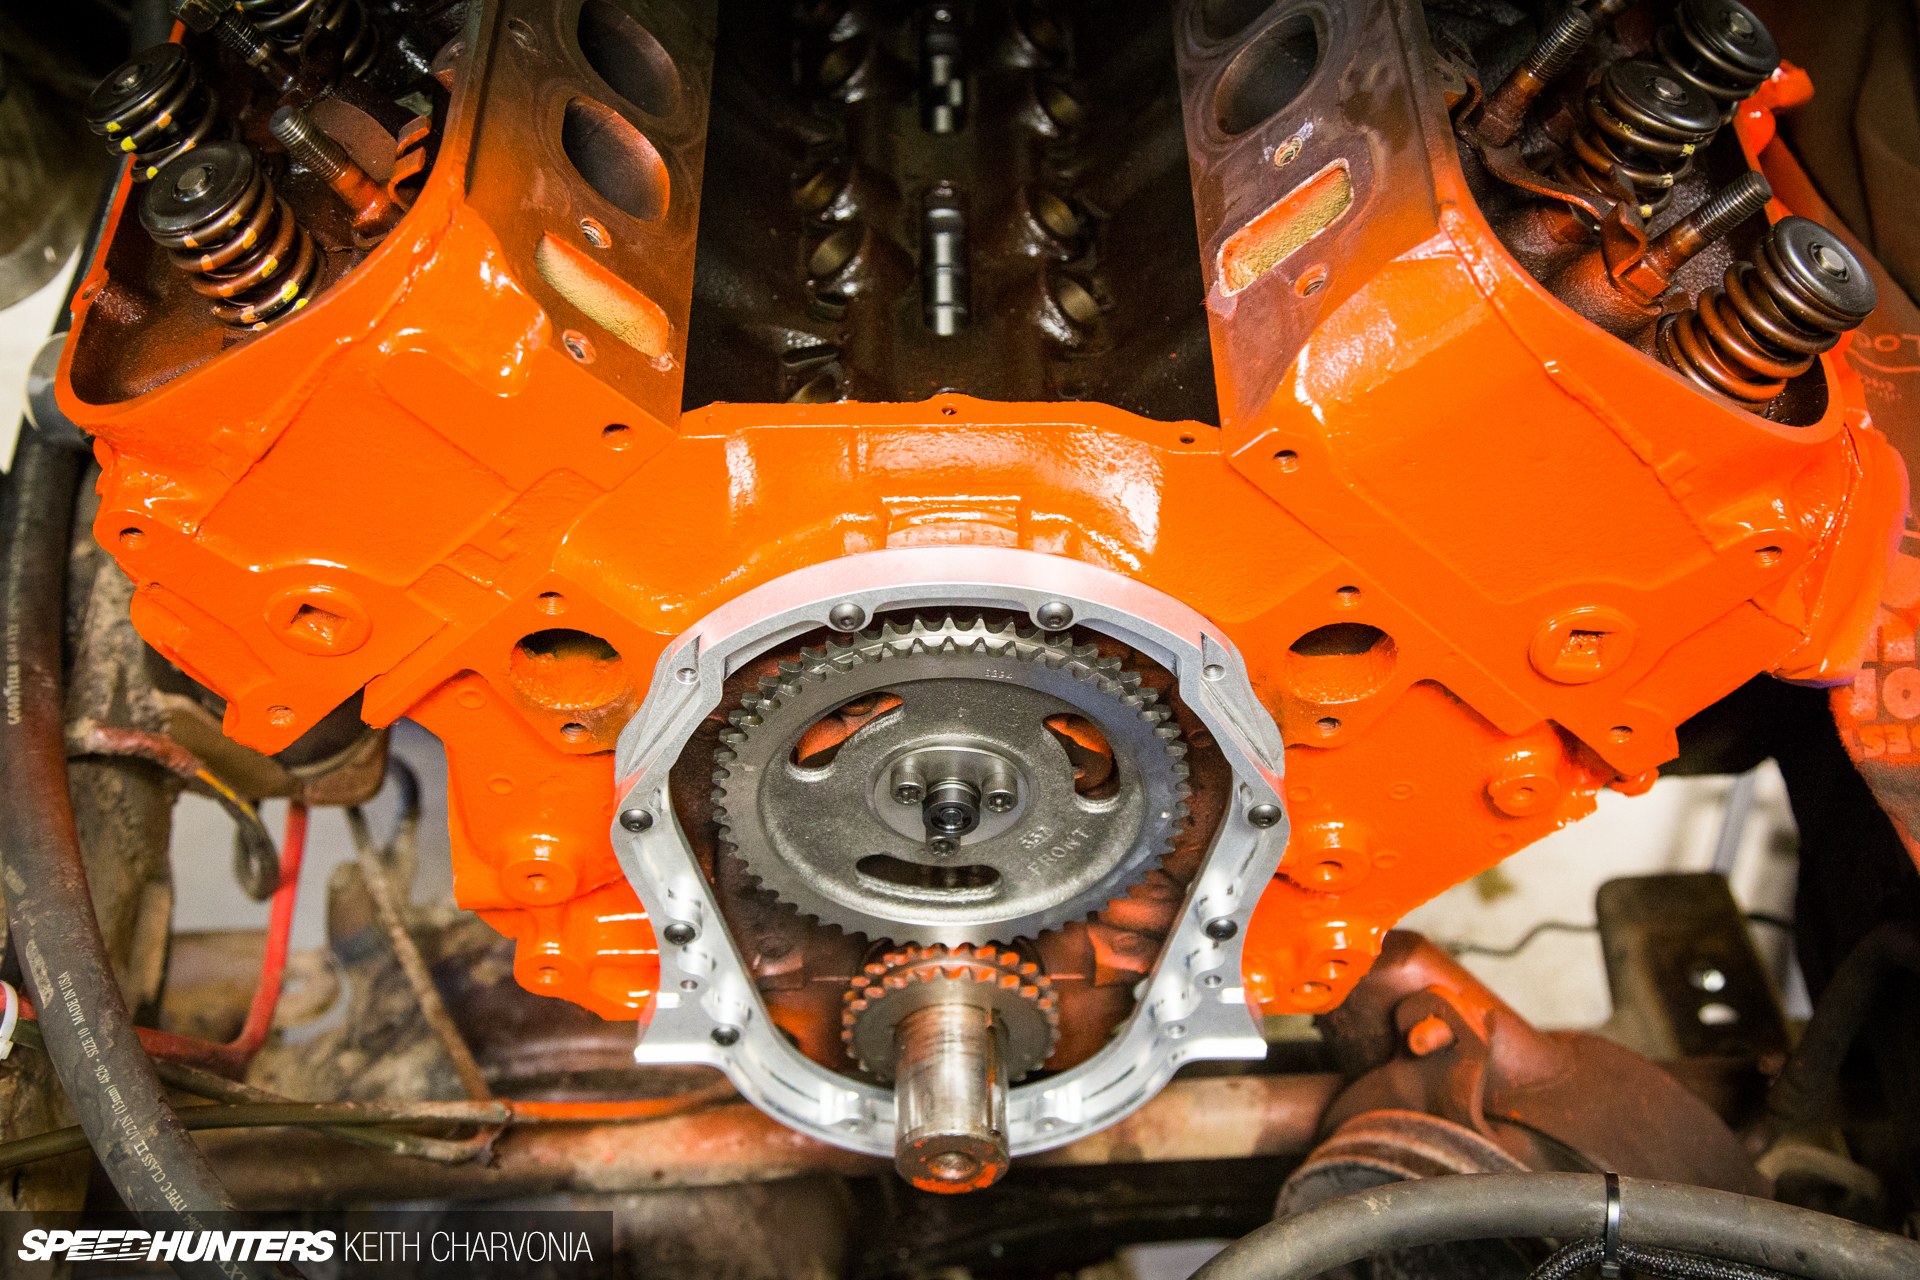
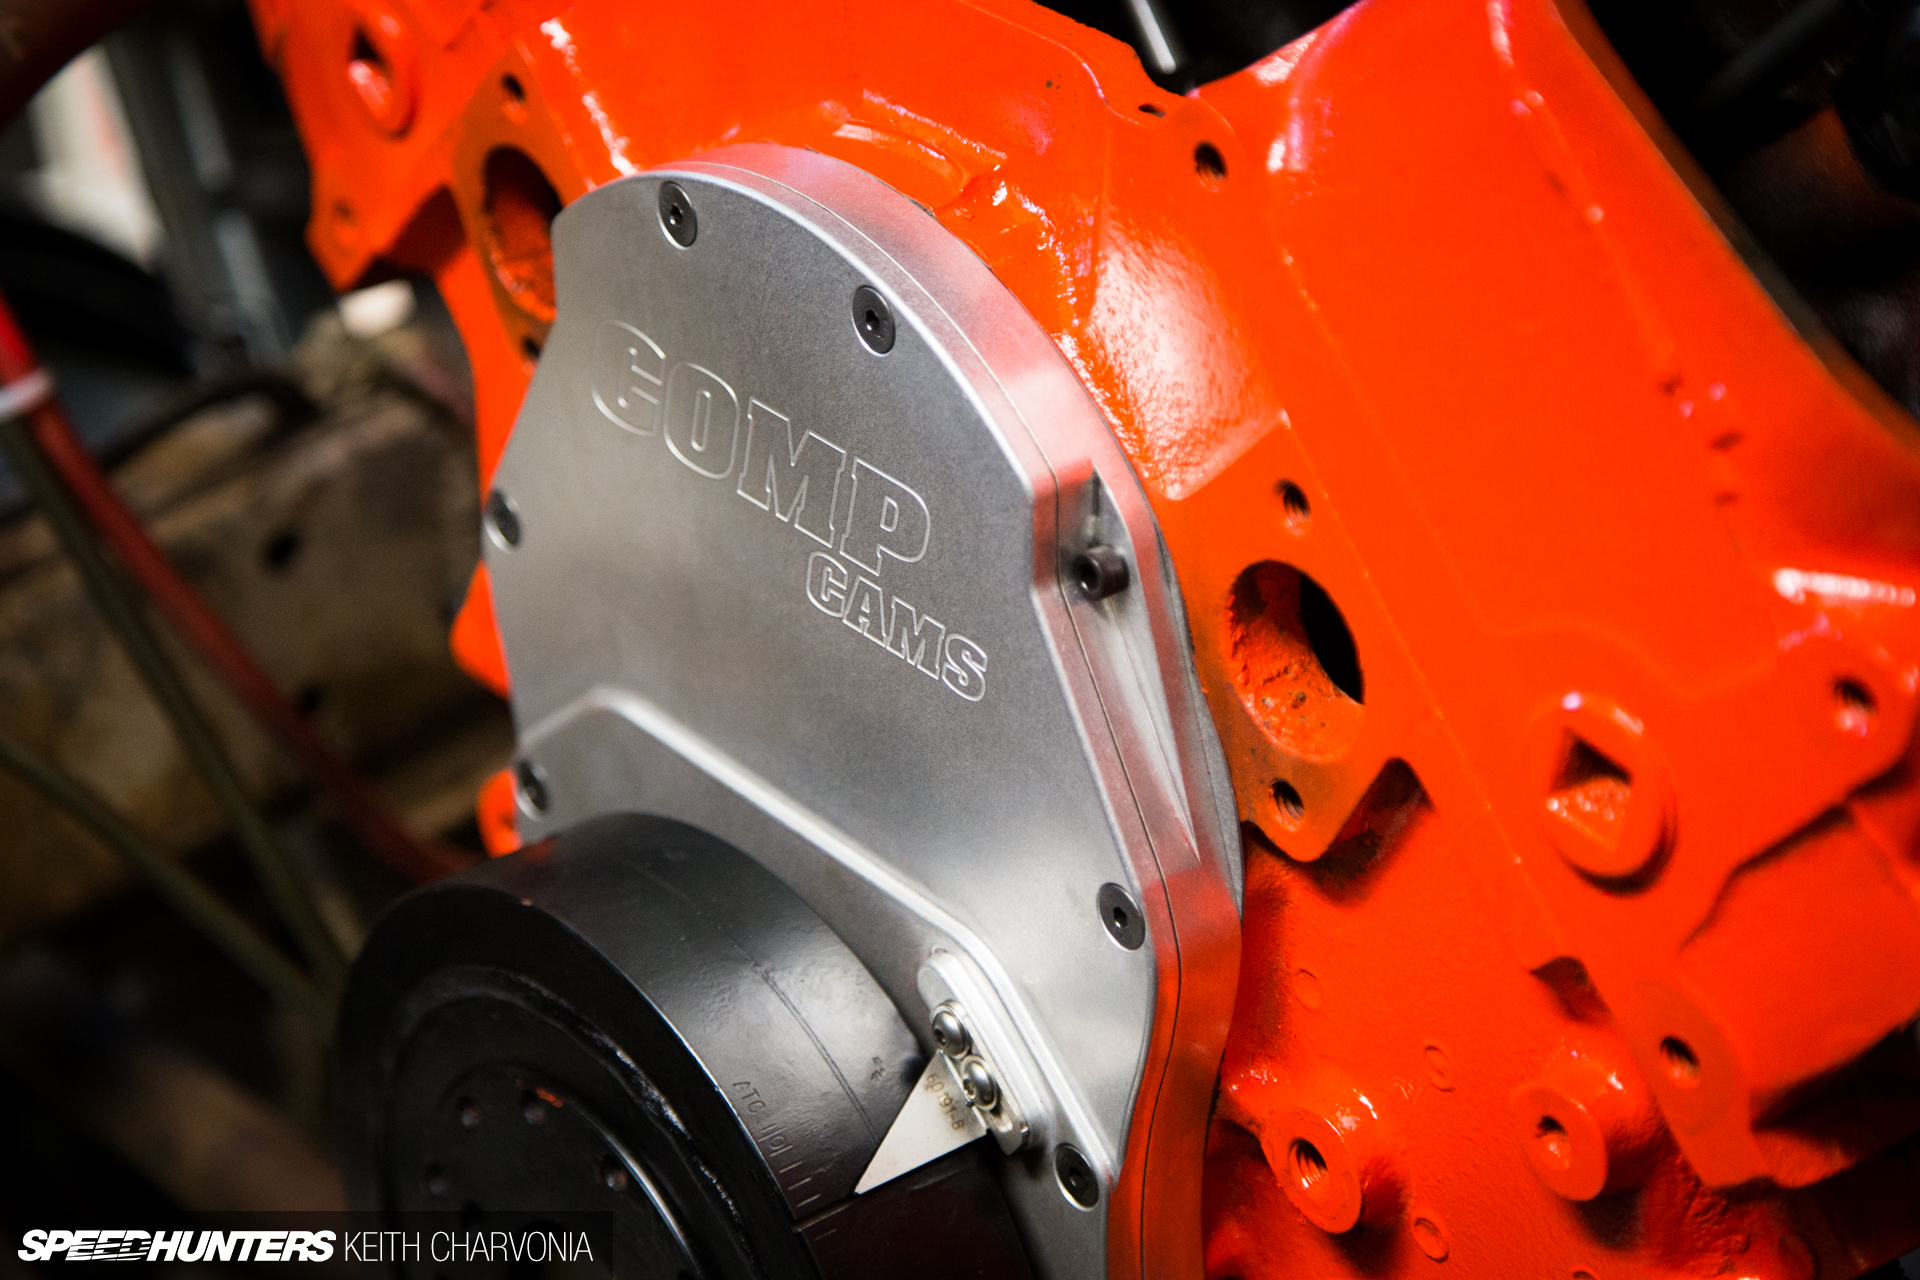
I cleaned up the engine and hit it with some orange engine paint, then installed a new double roller timing set and this trick billet timing cover. The timing cover has a removable front plate which made setting up the cam much easier because you simply remove the cover to measure endplay.
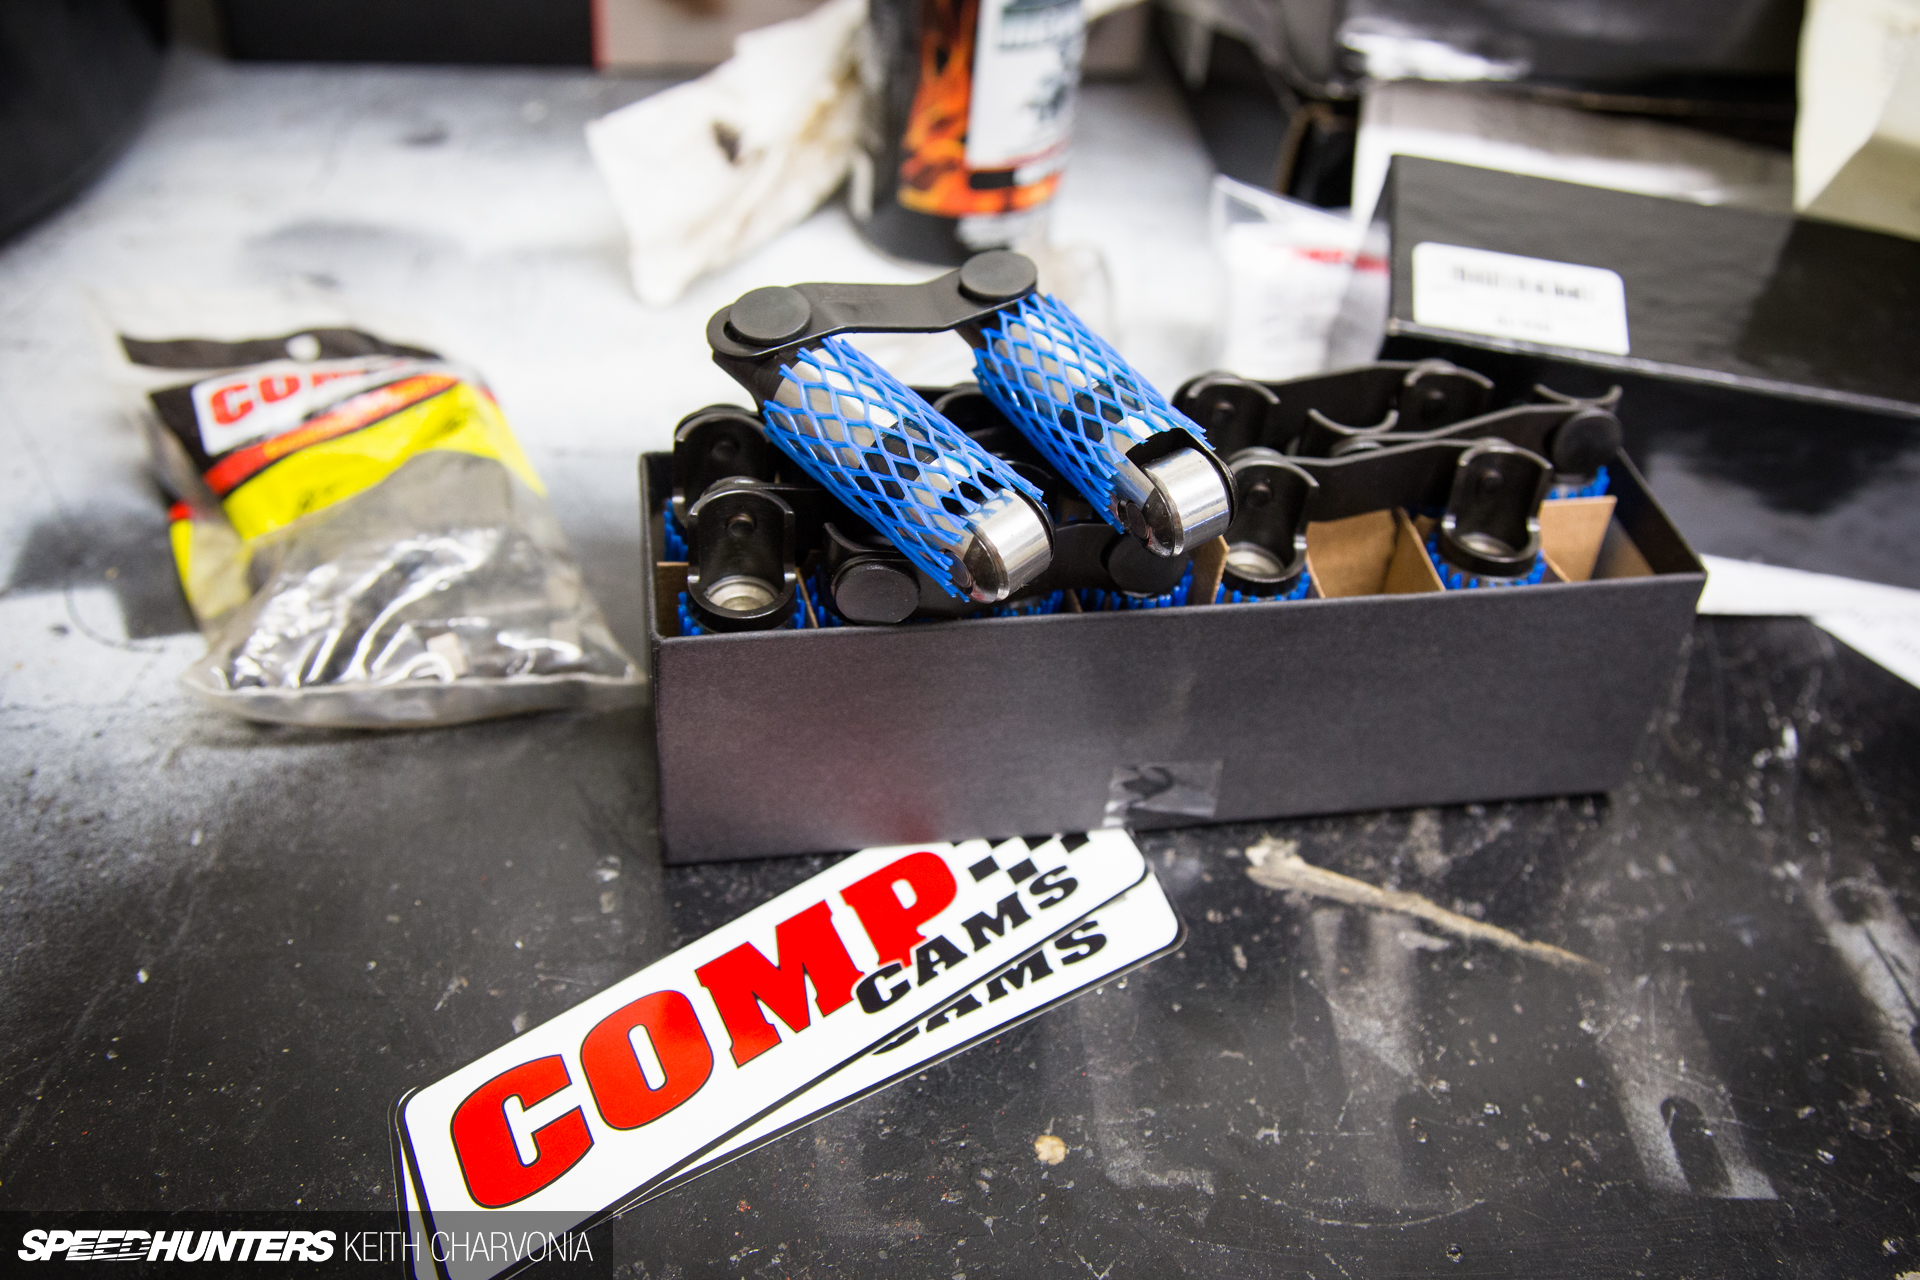
The roller lifters were next.

I squirted each pair of lifters with oil, then felt them slide into the bore to make sure there wasn’t any binding.
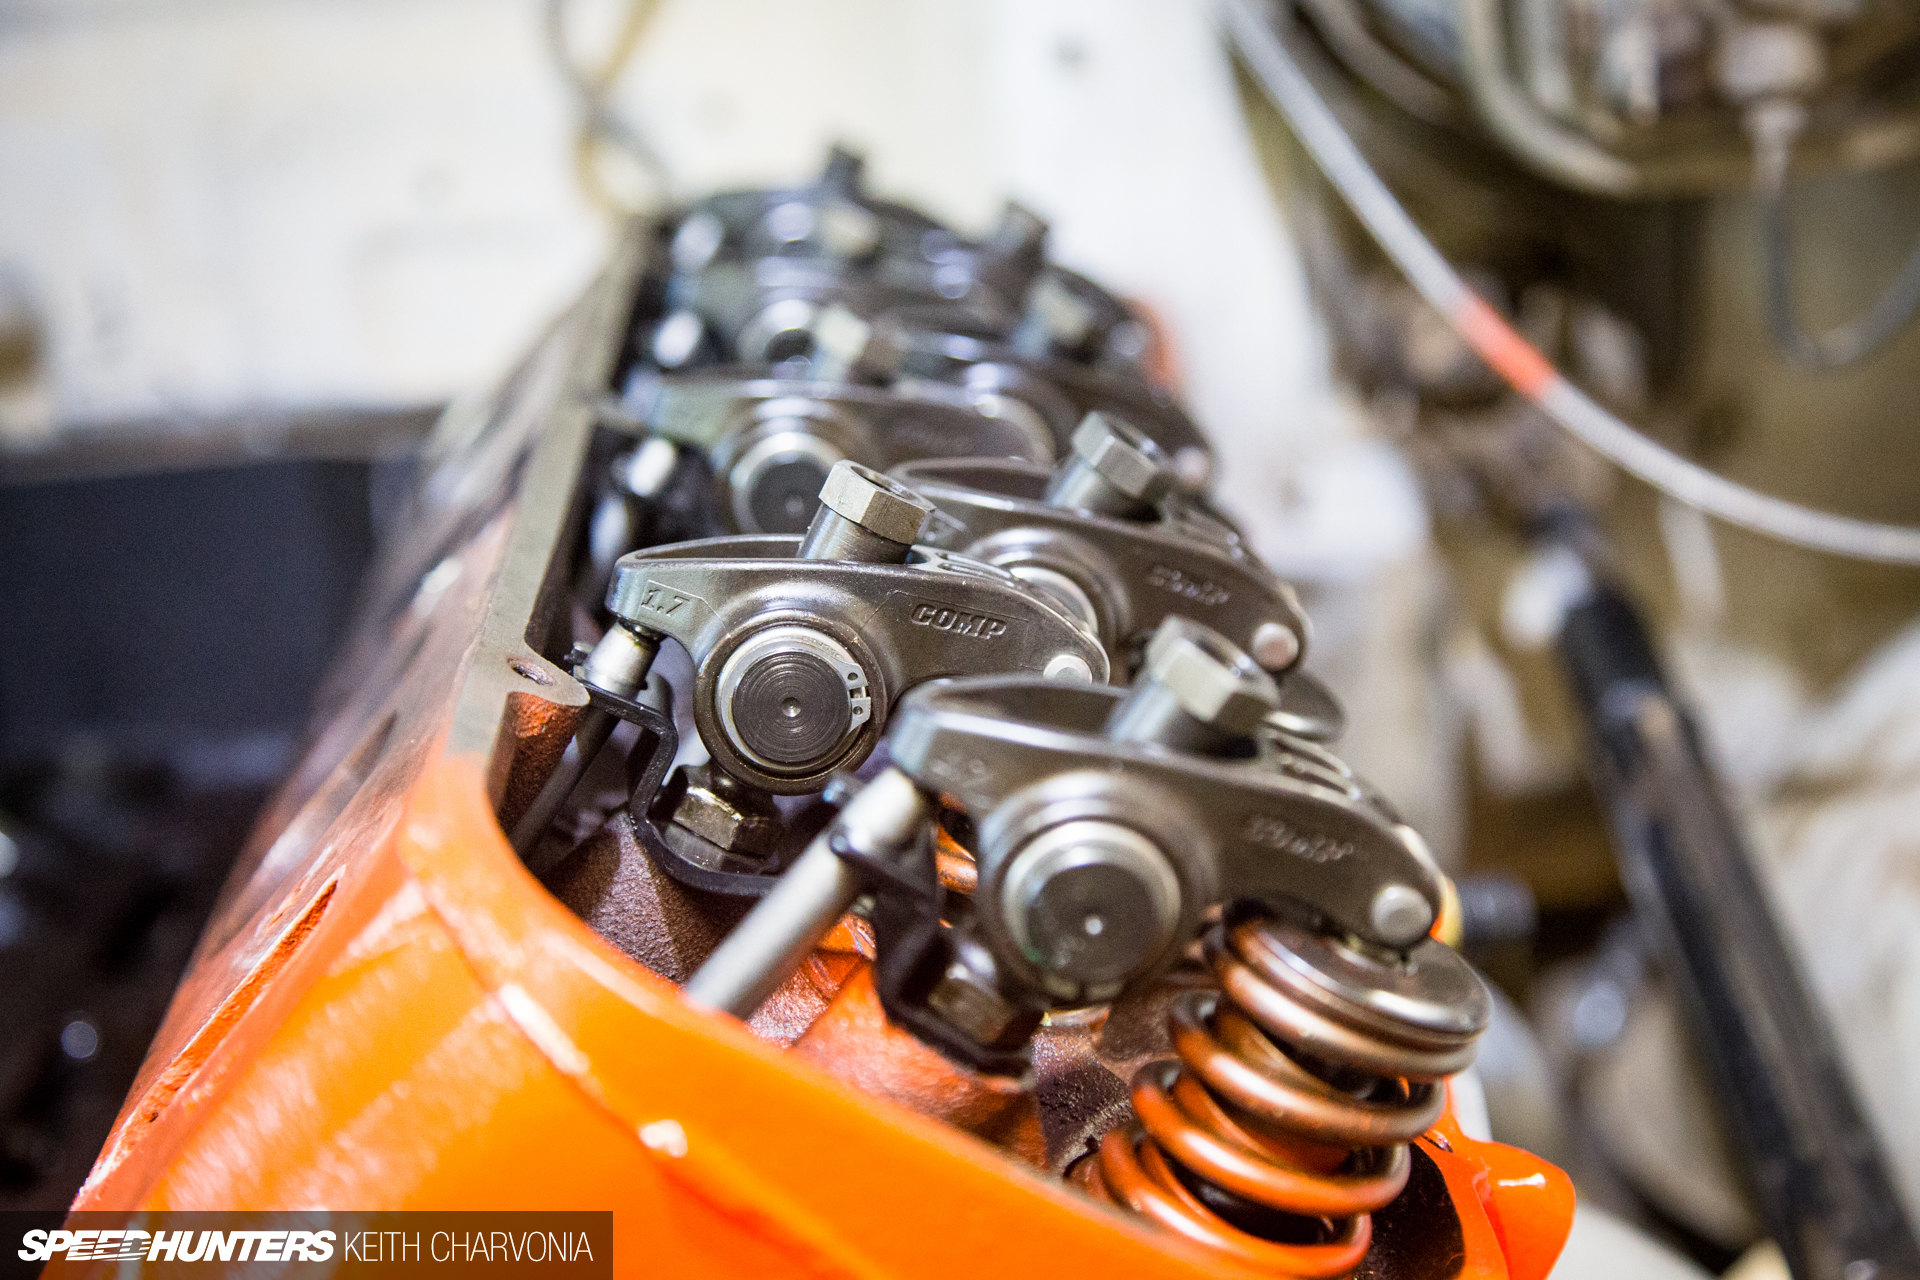
After bolting down larger 7/16-inch pushrod guide plates and dropping in the beefier pushrods, it was time to install these Ultra Pro Magnum roller rockers. Made from investment cast chromoly, this should be the last set of roller rockers I buy for a 454.
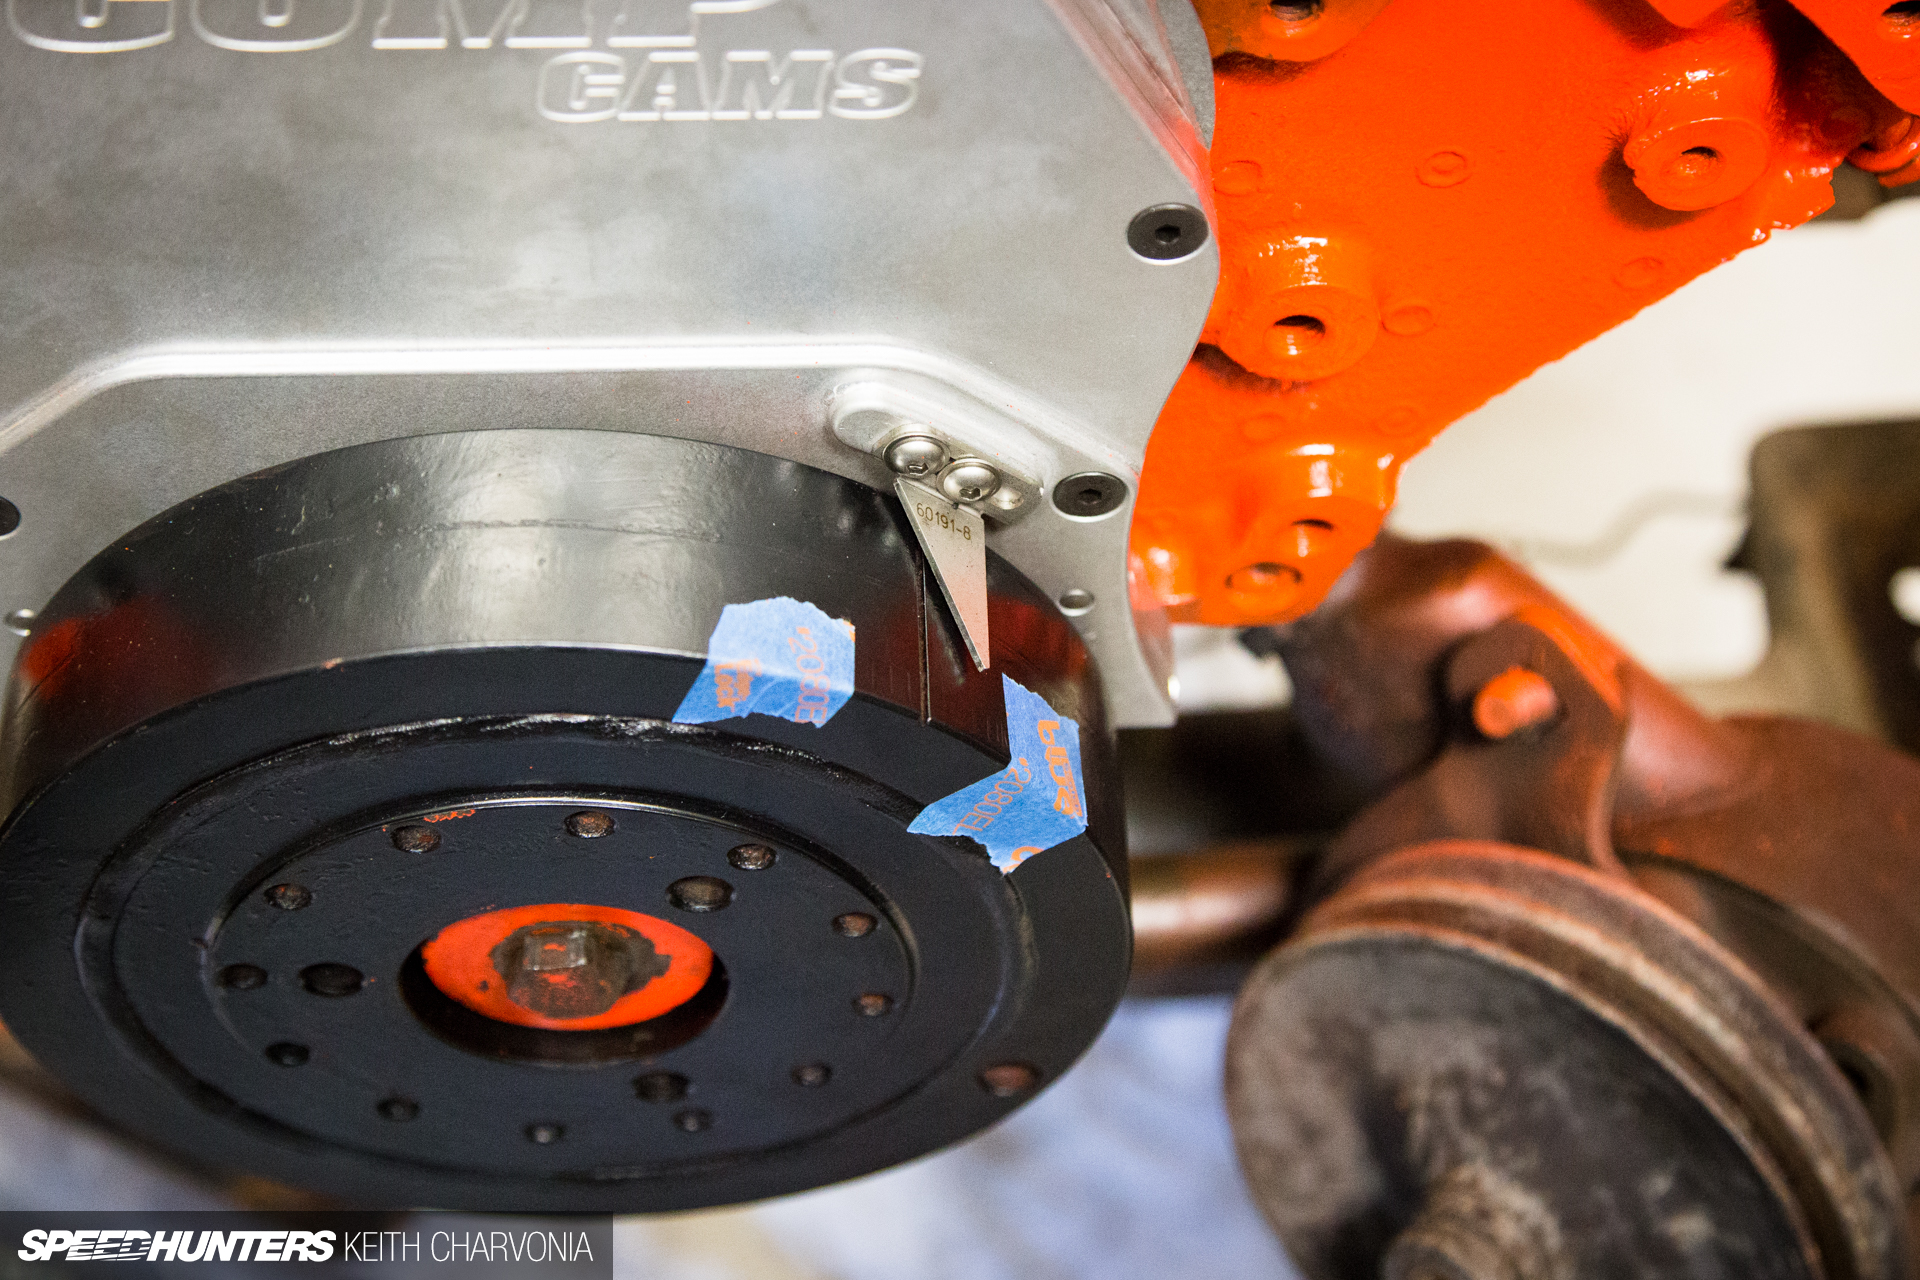
With the timing cover and harmonic balancer installed, I barred the motor over to feel the exact start and stop of TDC. I then marked each side of this window with masking tape, and set the timing pointer on the balancer mark.
The hard part was done, and I learned a ton in the process.

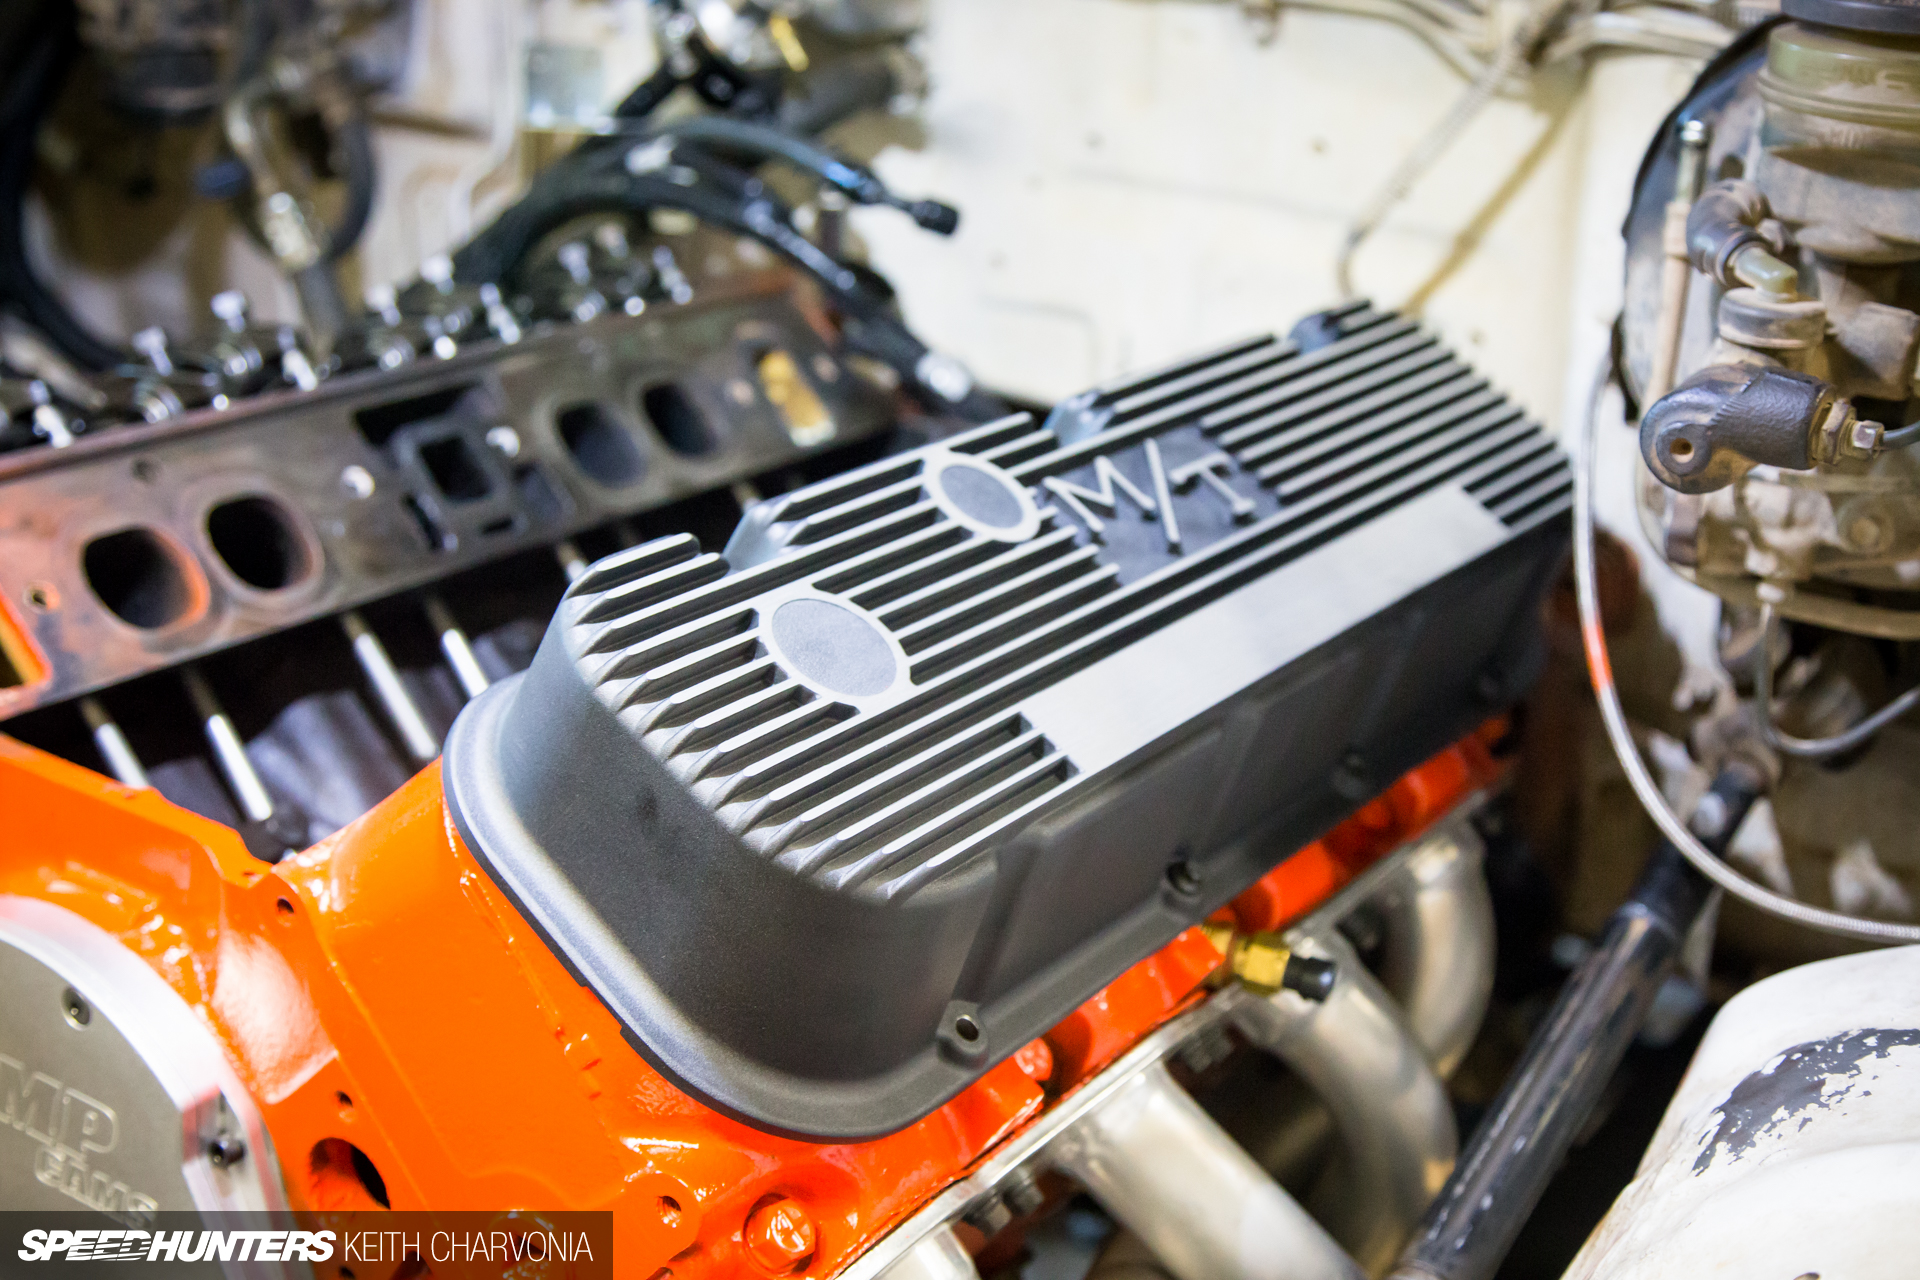
To clear the larger roller rockers, I needed a taller set of valve covers. I picked up these retro Mickey Thompson valve covers, which even came in throw-back packaging.
I put Play-Doh on the rockers, set the valve covers in place and carefully turned the engine by hand to verify there wasn’t any interference.
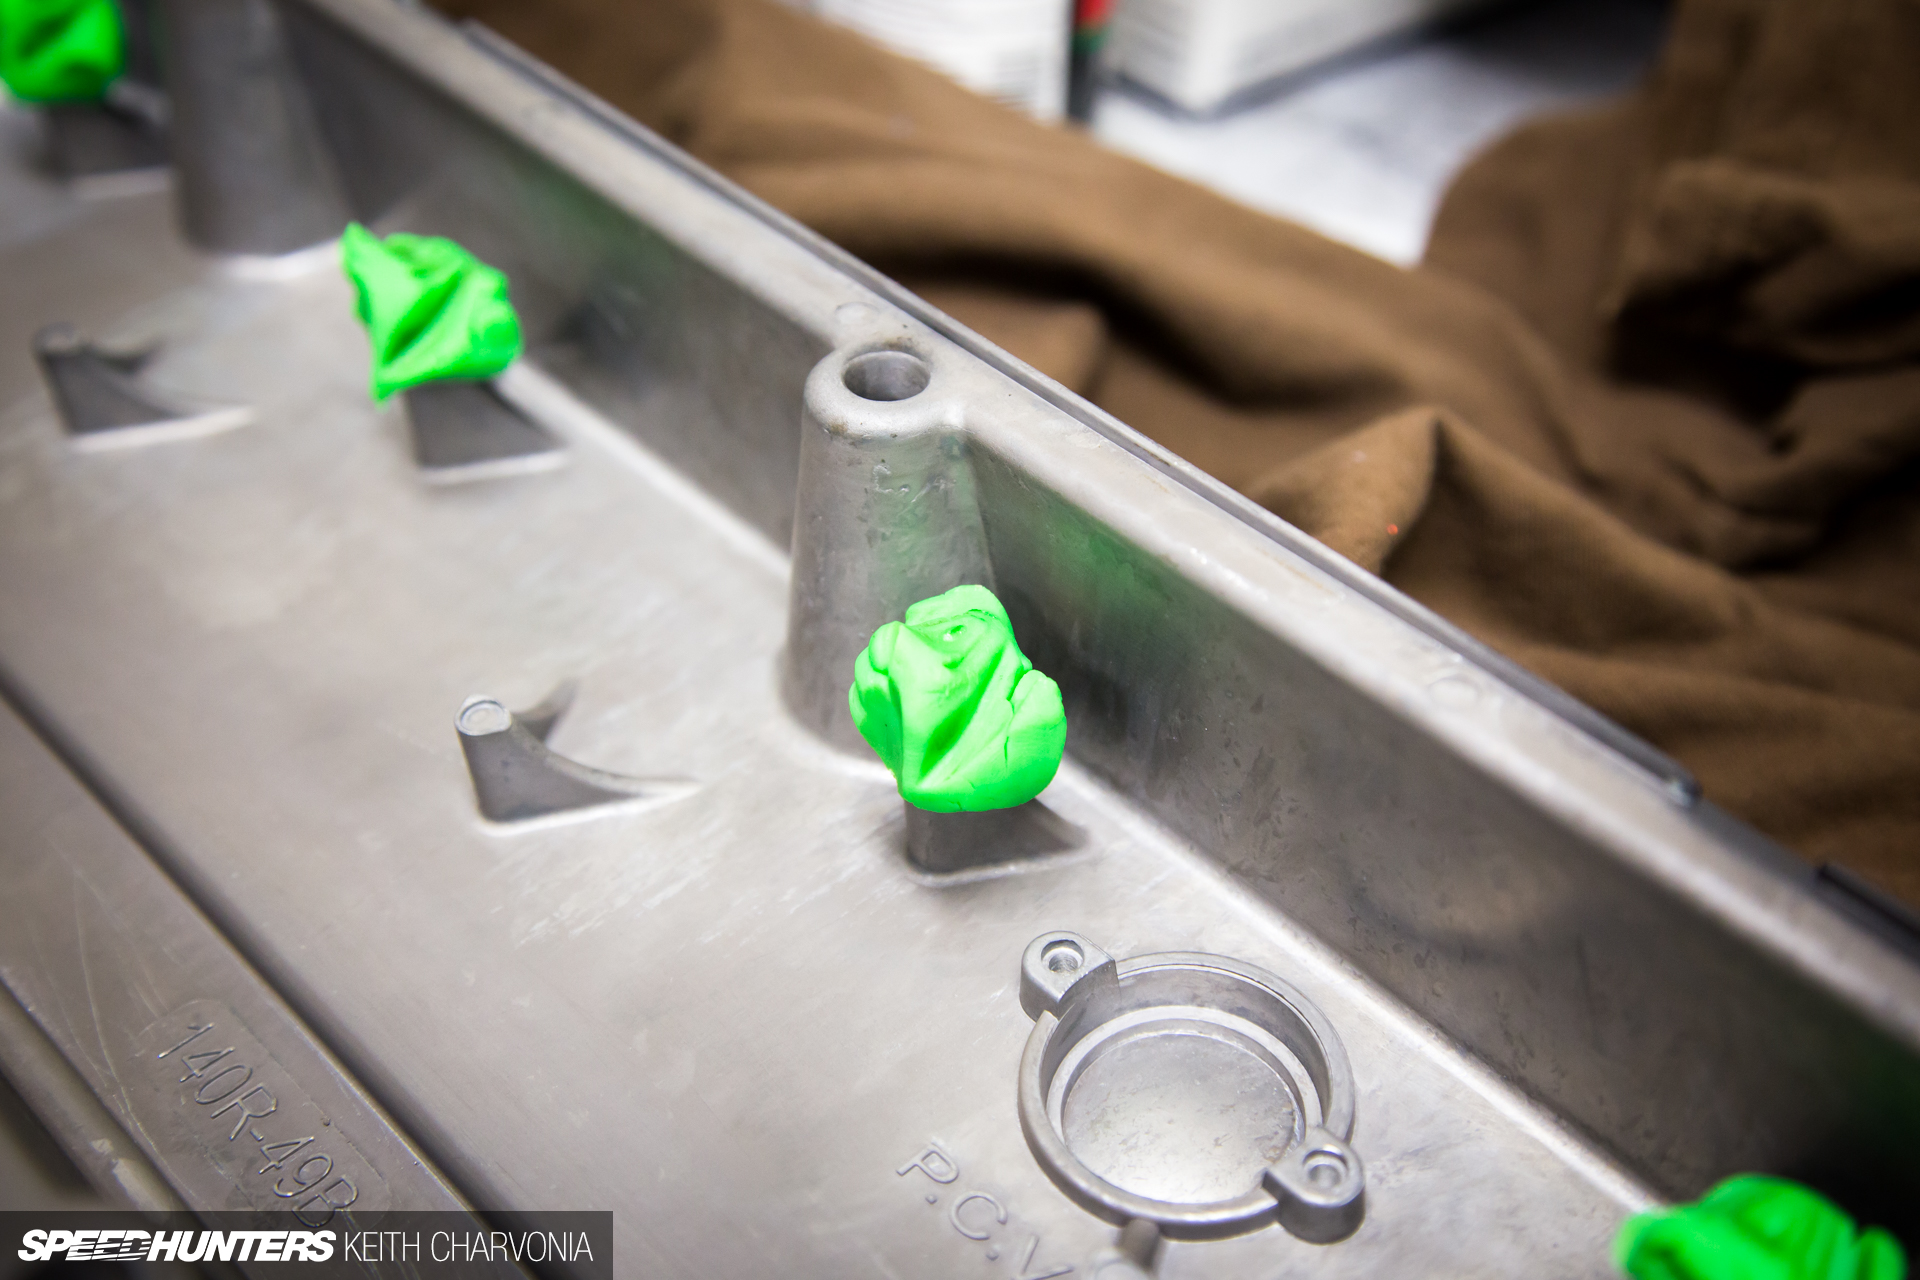
Unfortunately it was a little close for comfort, so I had a bit more work to do. I could have sourced even taller covers, but I really liked these ones and was determined to make them work.
These are called oil drippers and their job is to collect and drip oil onto the rocker arms. I used a die grinder to sand them down and gain some clearance, then reinstalled the valve covers.
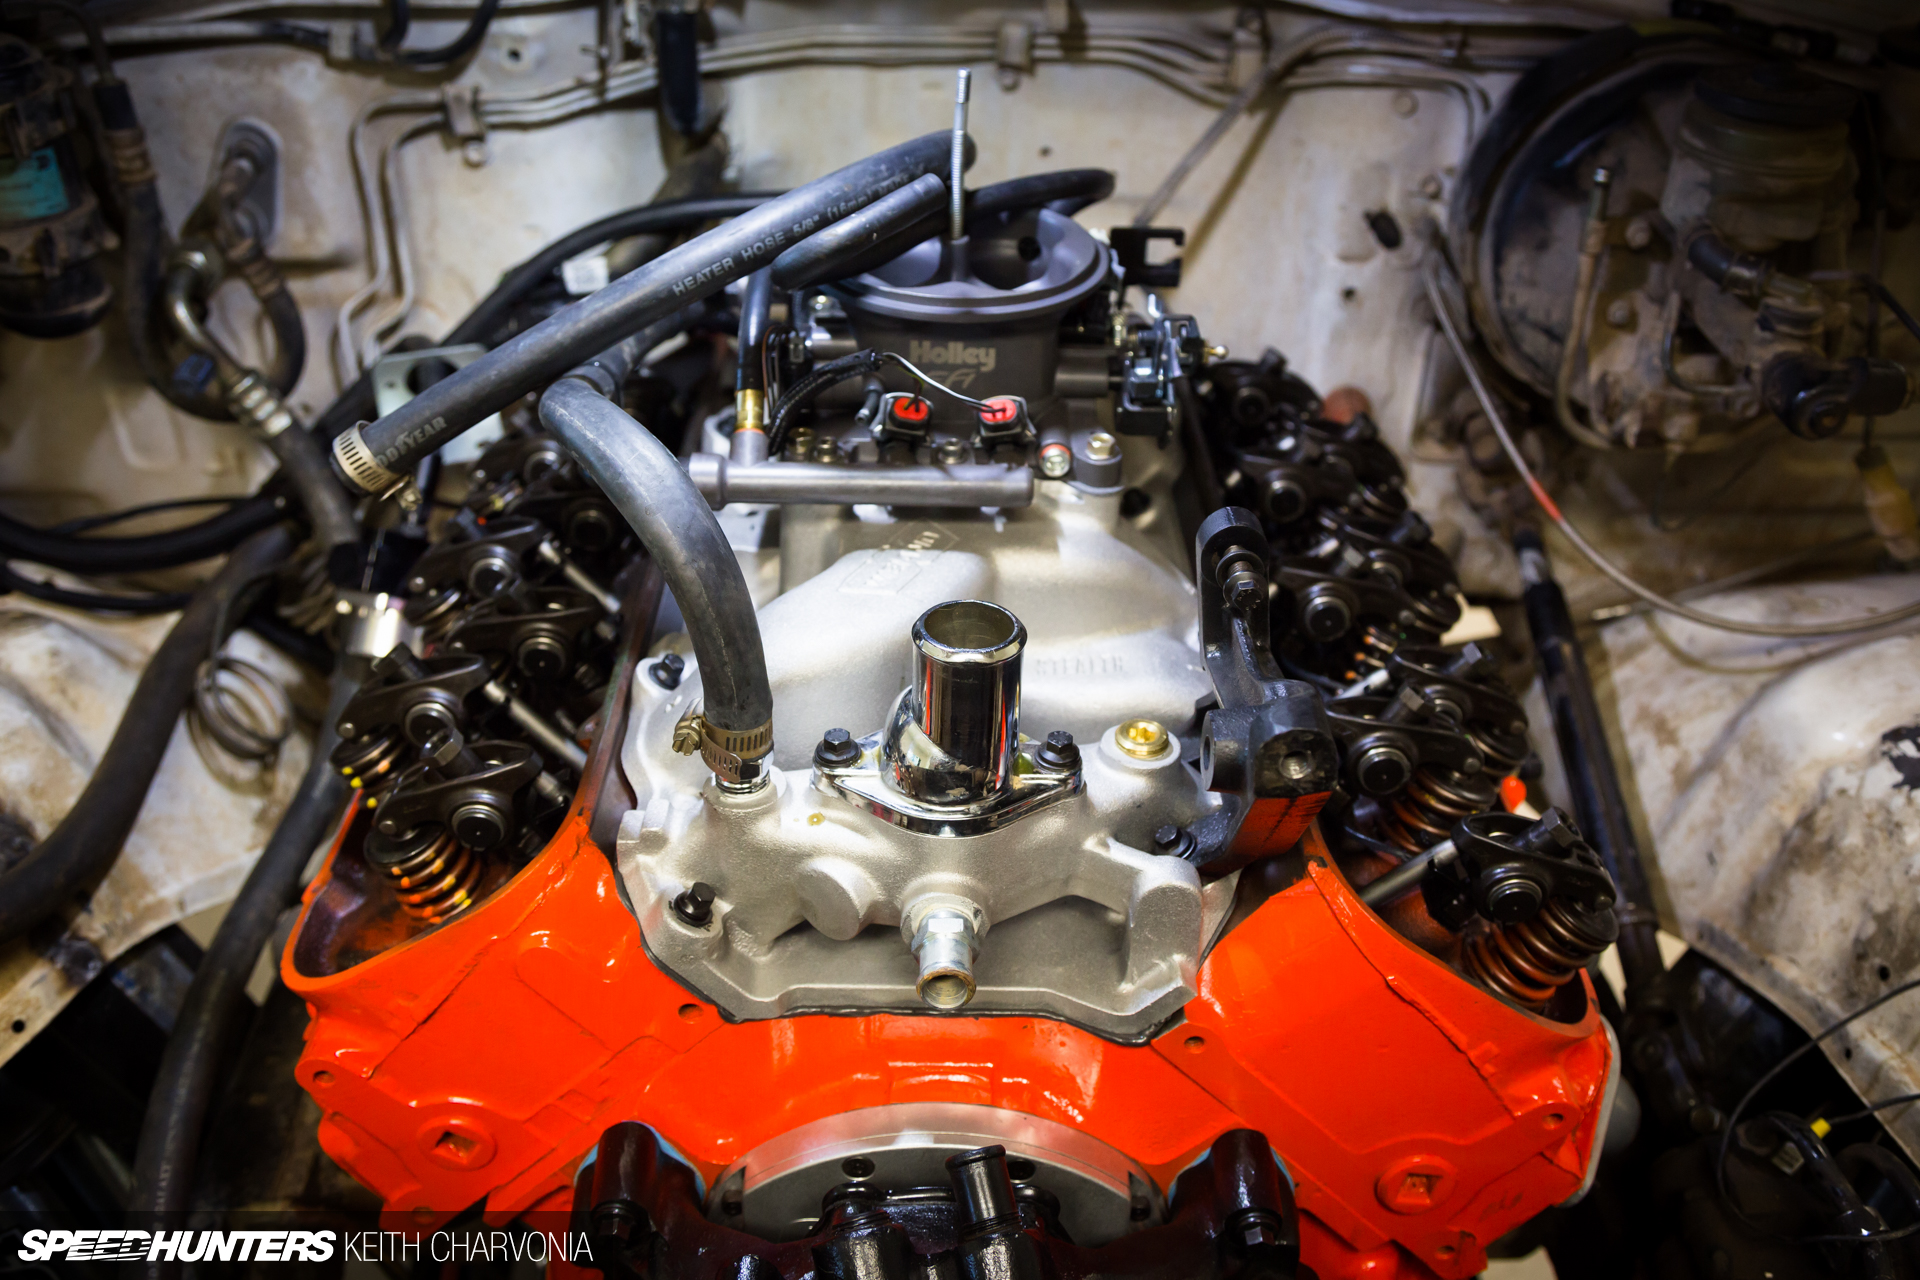
The Holley Terminator EFI and Weiand Stealth intake manifold found their way back into place while I worked on clearancing the vintage valve covers.
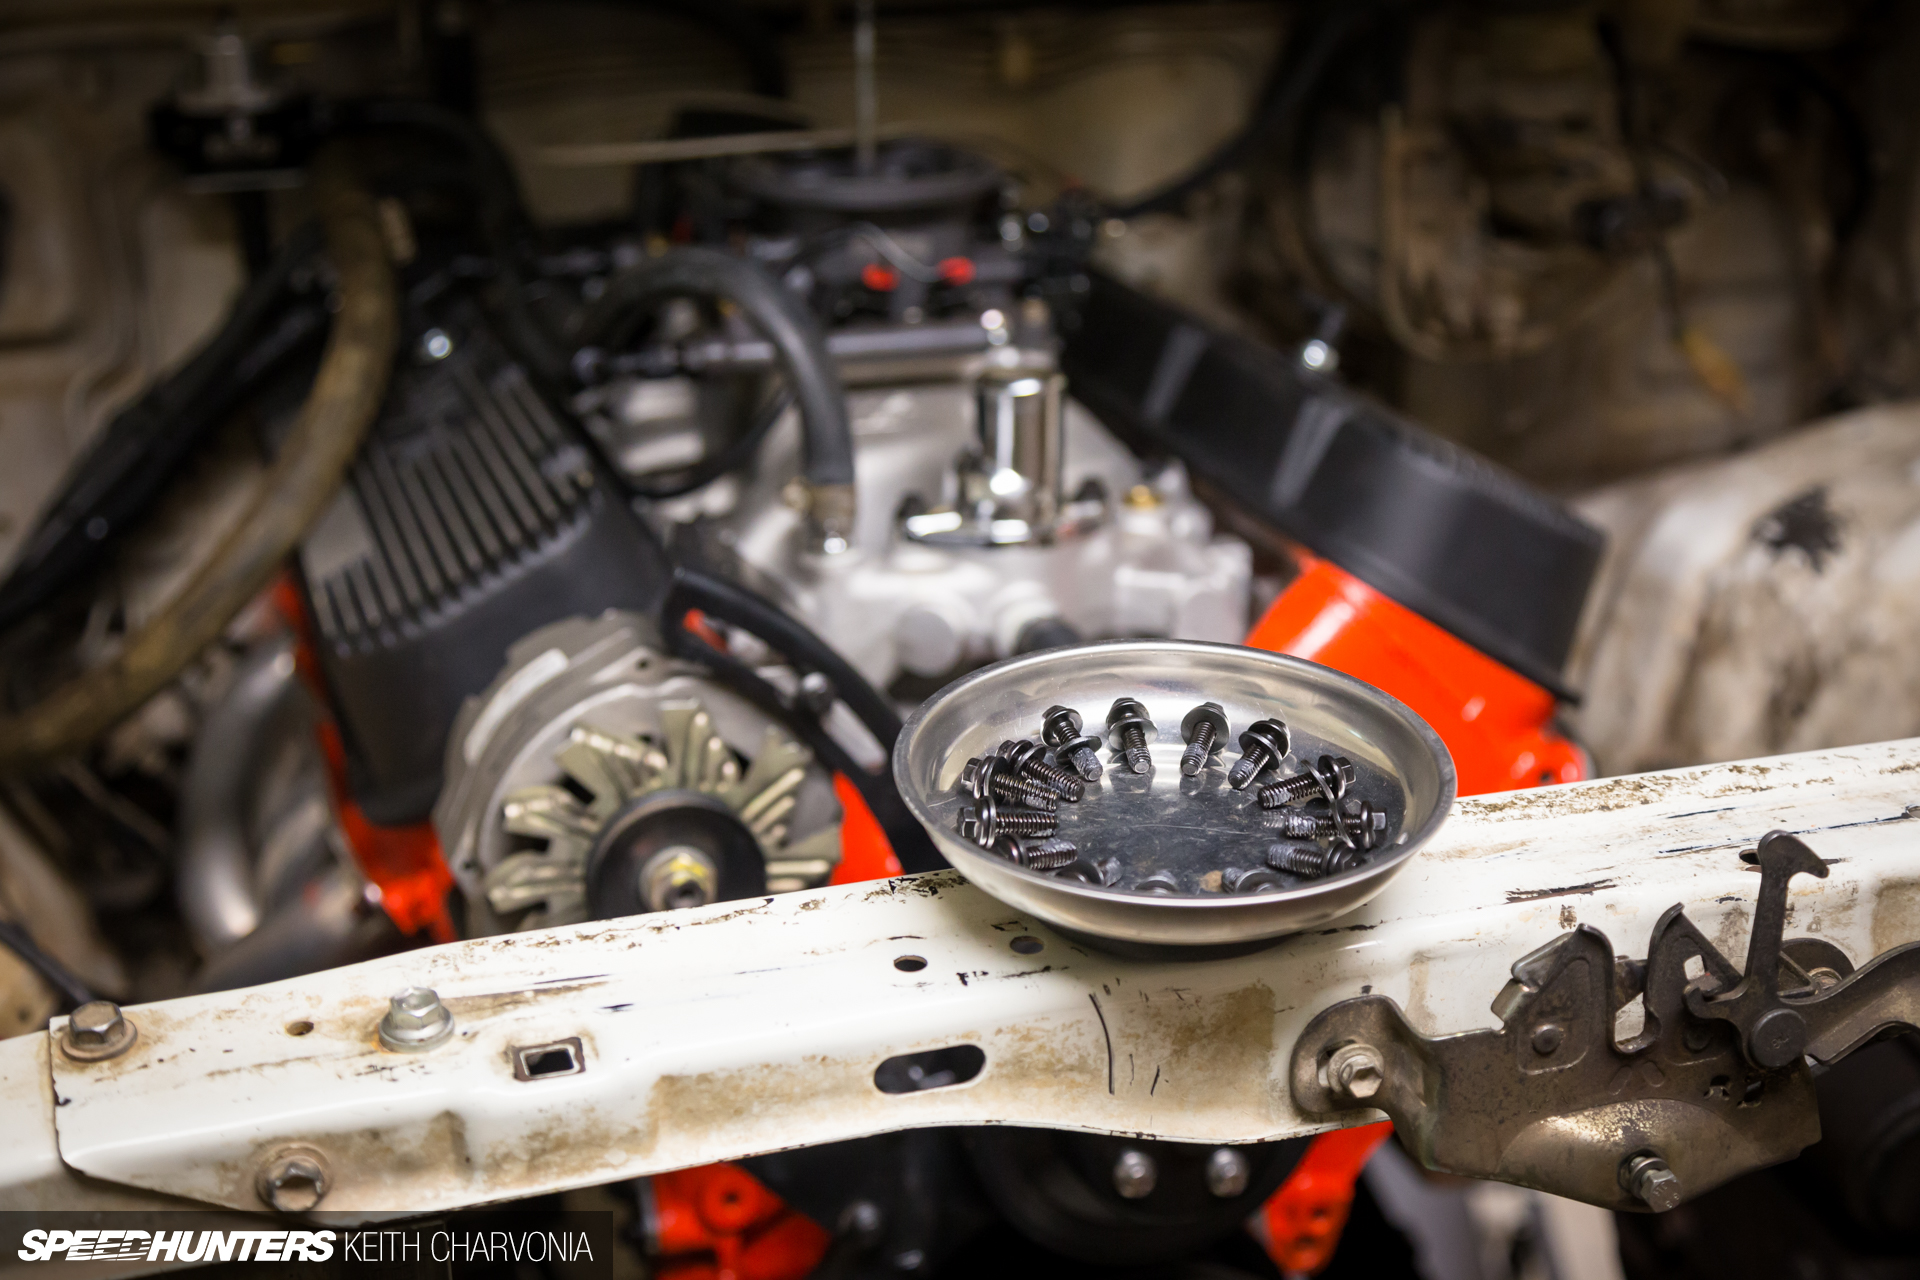
More fresh ARP bolts snugged down the valve covers, and the engine was done.
Cleaning Up A Mess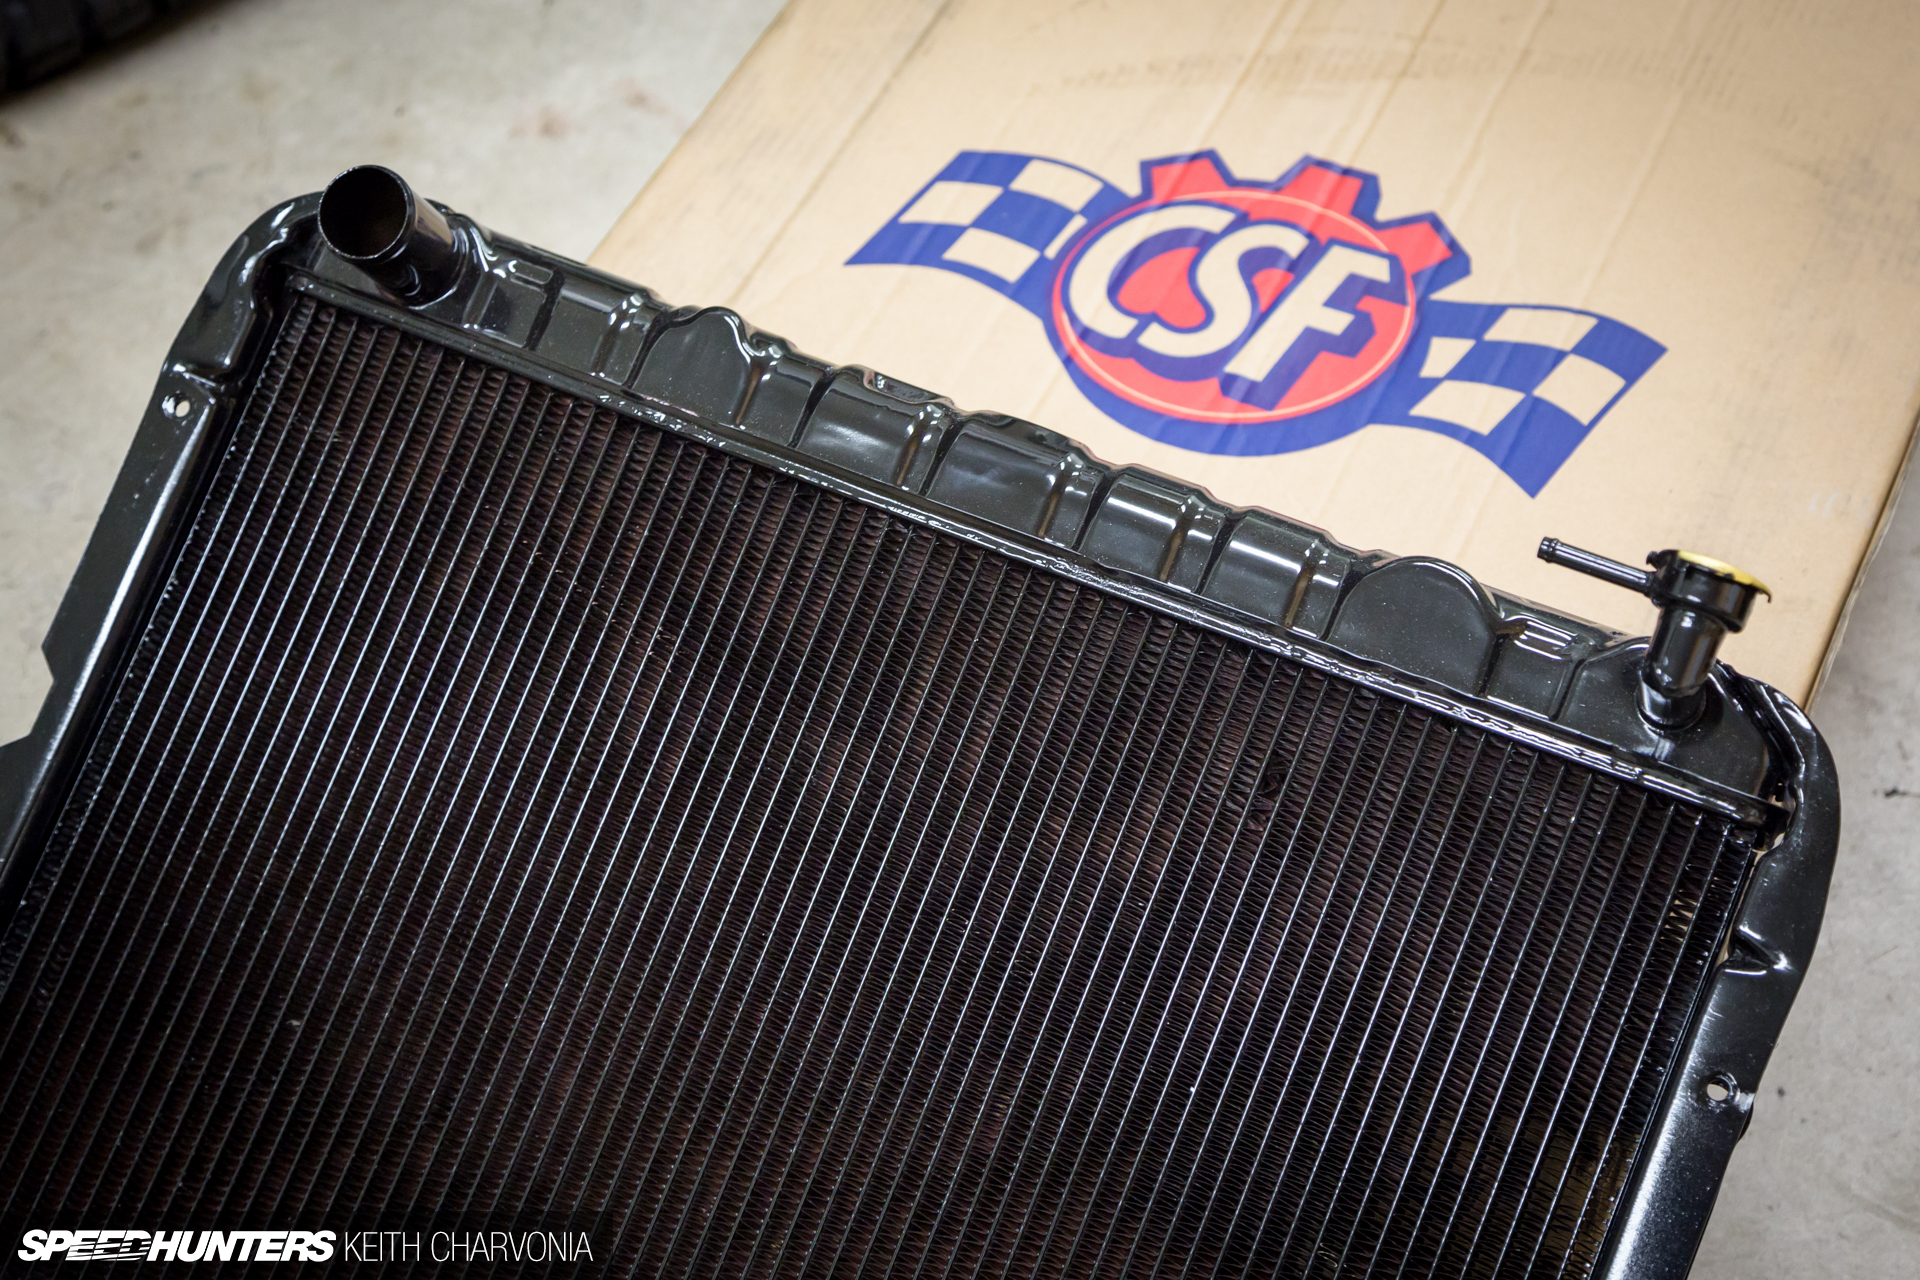
I removed the Trailhunter’s donor Chevy radiator to work on the cam install, and when I got to looking at it I decided I would rather put in a radiator that was meant for an FJ60. After few texts to Ravi at CSF, he had a heavy-duty copper radiator in the mail to me.

Not only did the new CSF unit have more cooling capacity than a stock unit, it would also bolt in using the factory mounts.
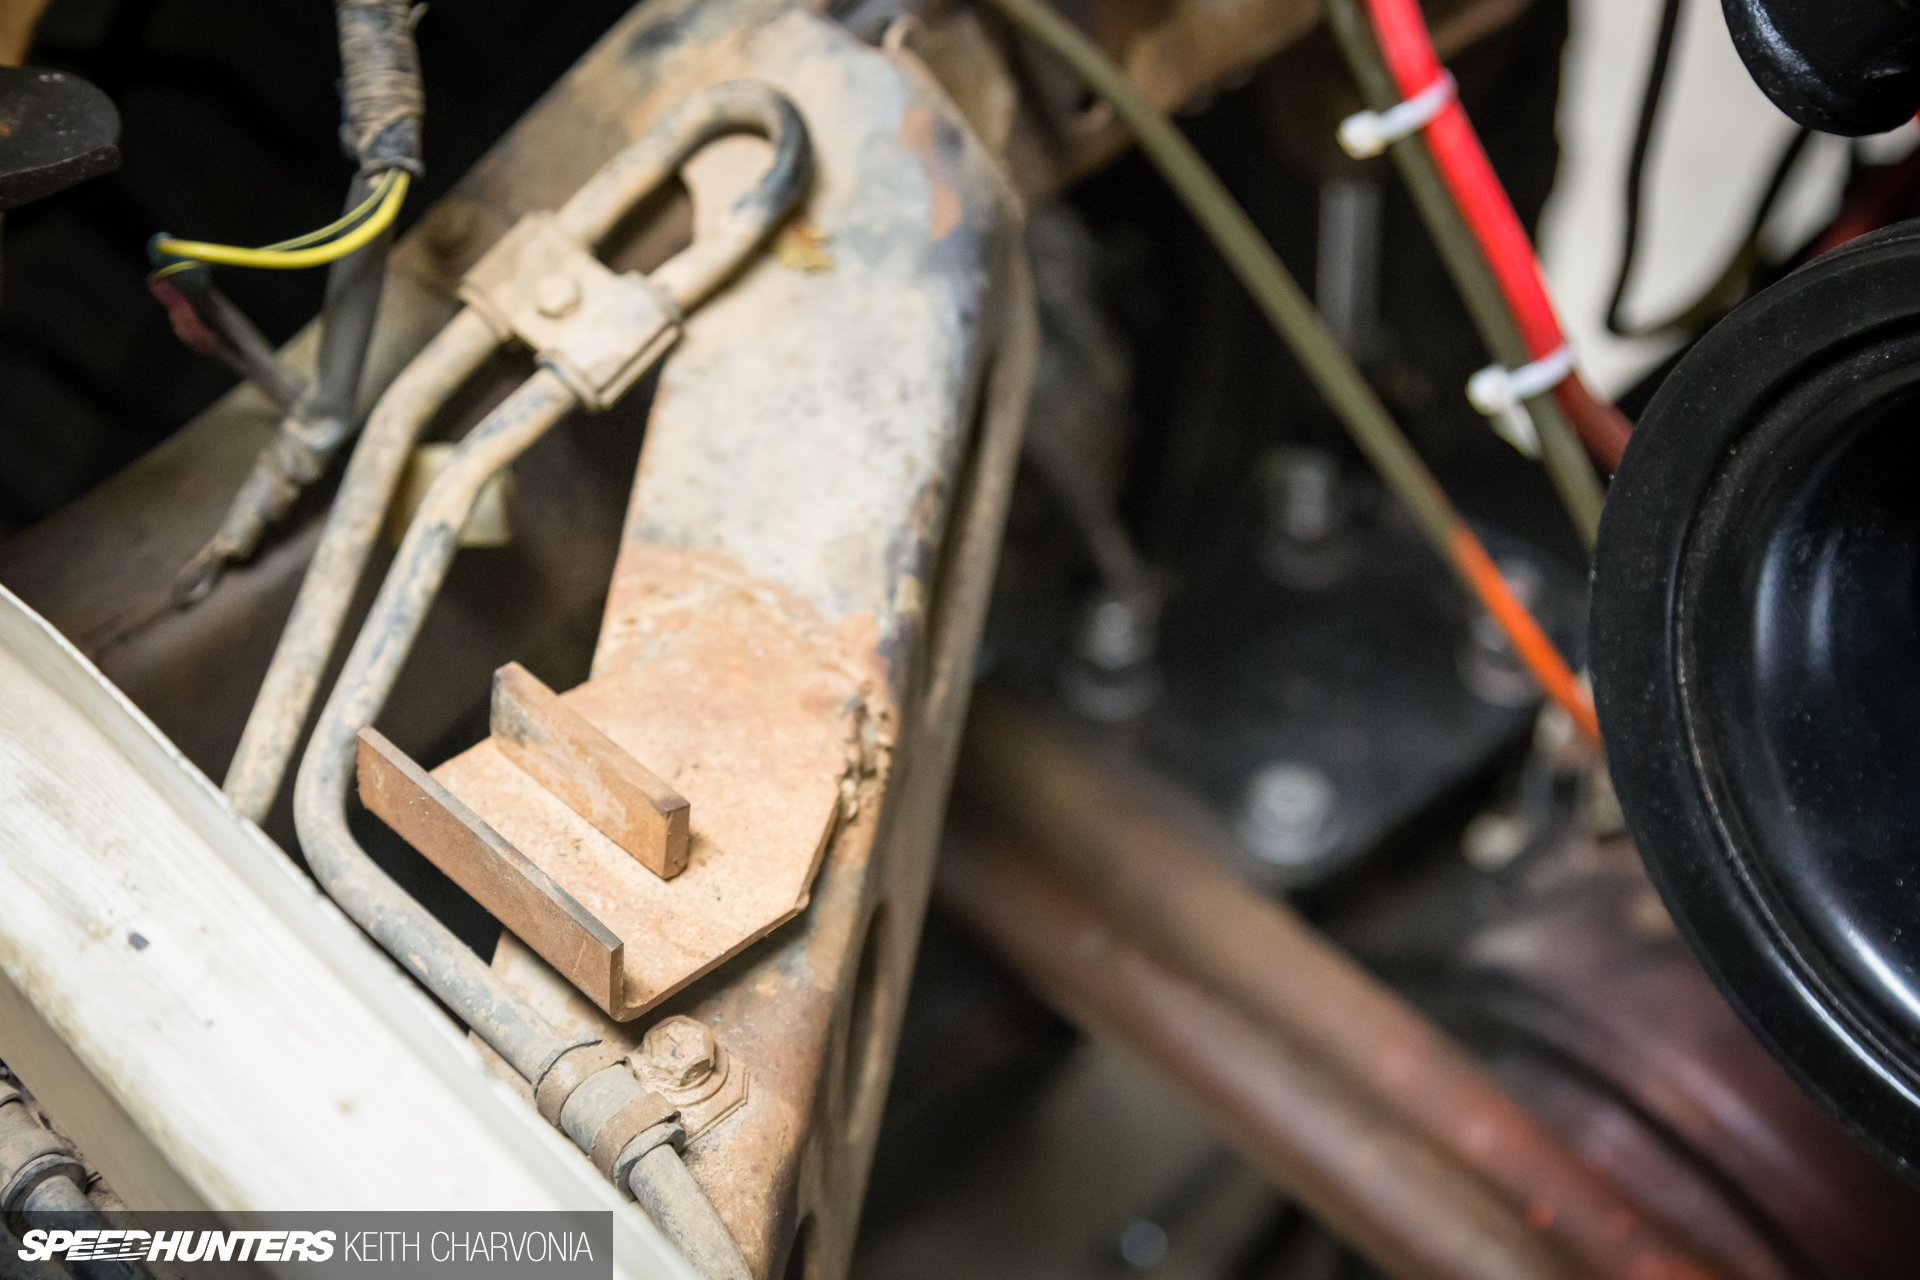
This just meant I had to cut out the mounts the previous owner had welded in. I was not a fan of this steel mount that directly contacted the radiator.
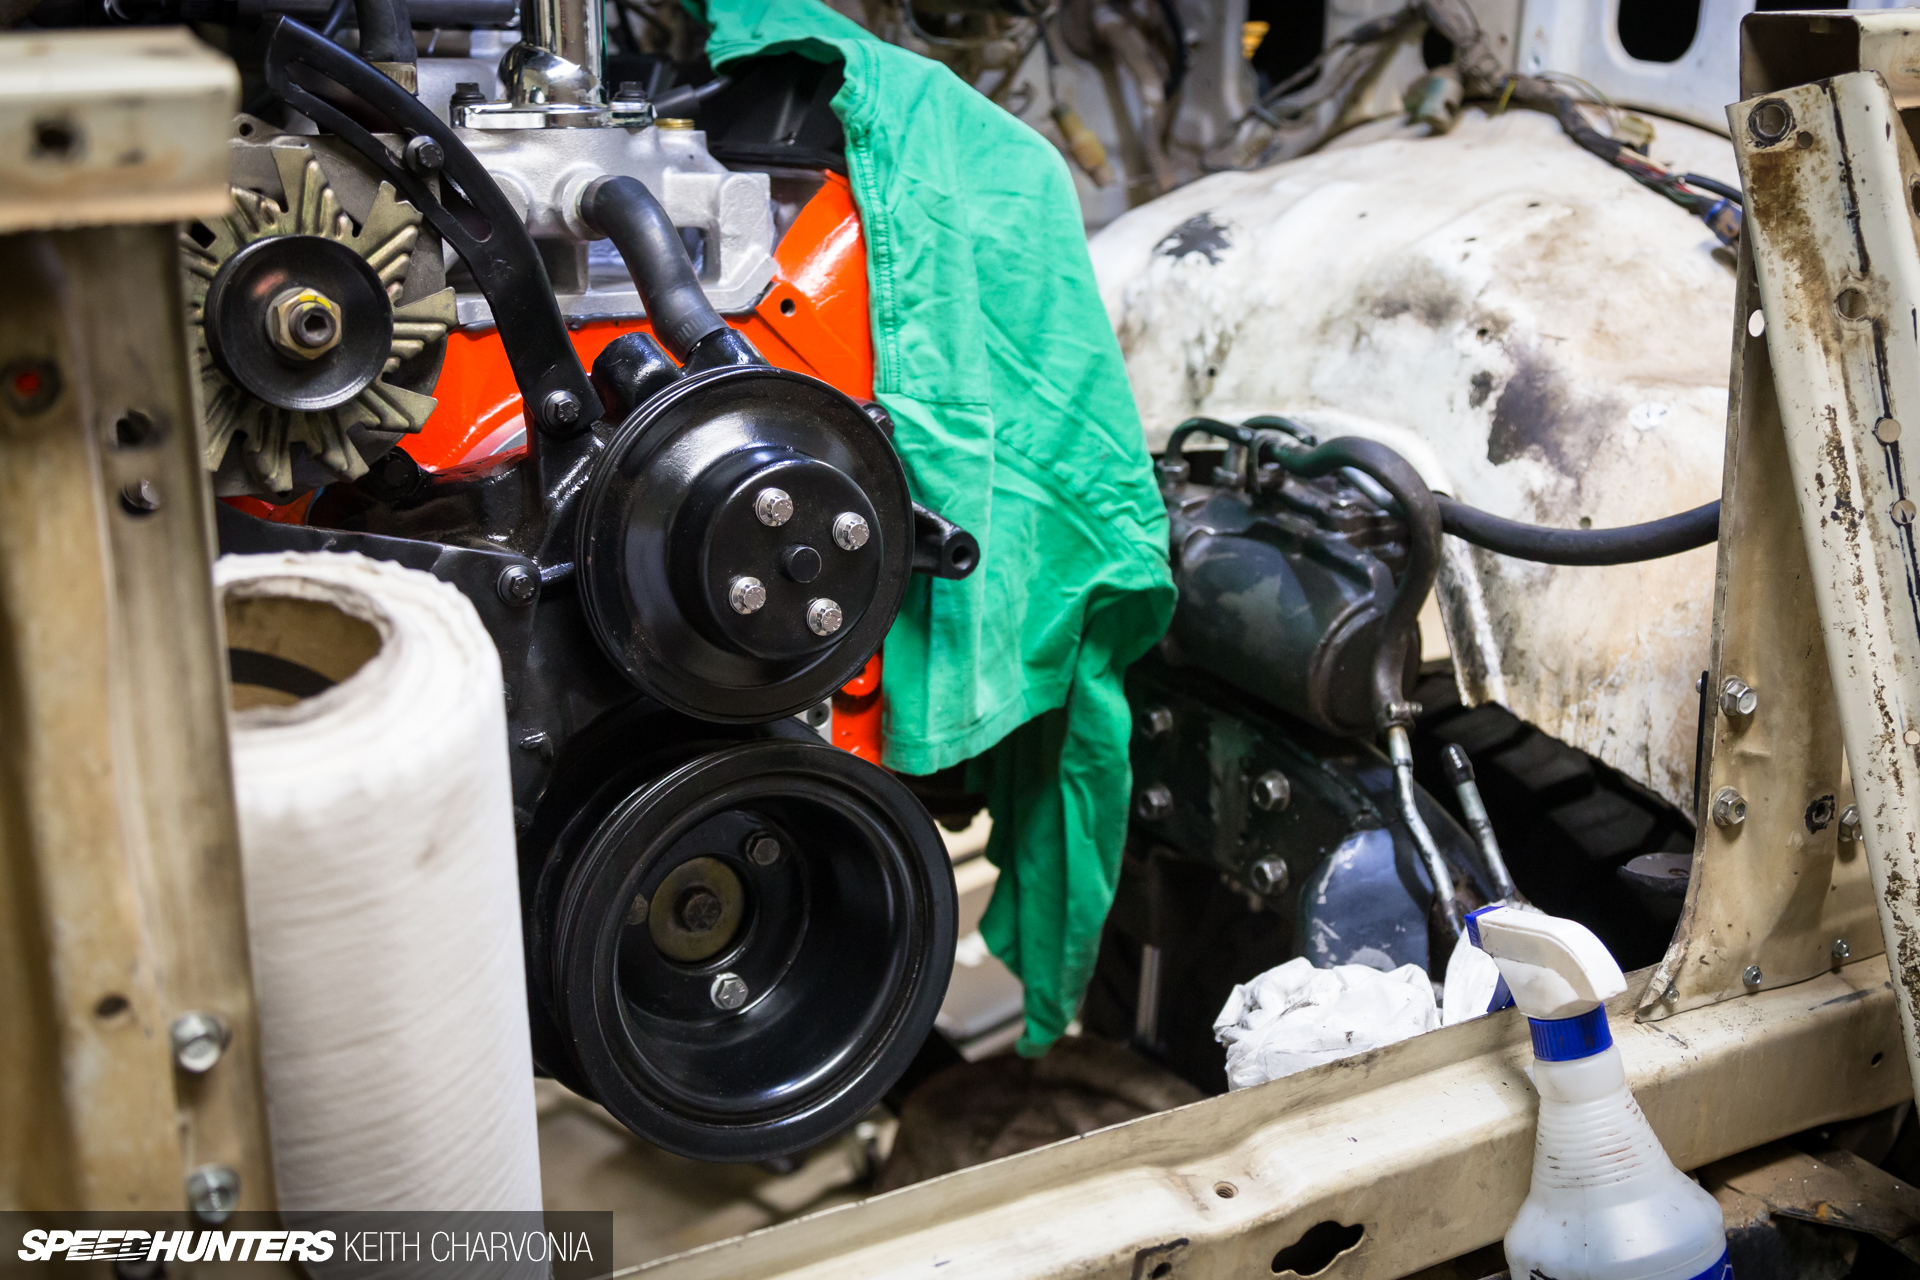
Of course, as I cut the radiator mounts out I found the opportunity to do even more cleaning. So, with the radiator our of the way I crawled in front of the engine and got to work fixing a power steering leak and cleaning up the resulting mess.

The oily hardware went into my parts tumbler with degreaser.
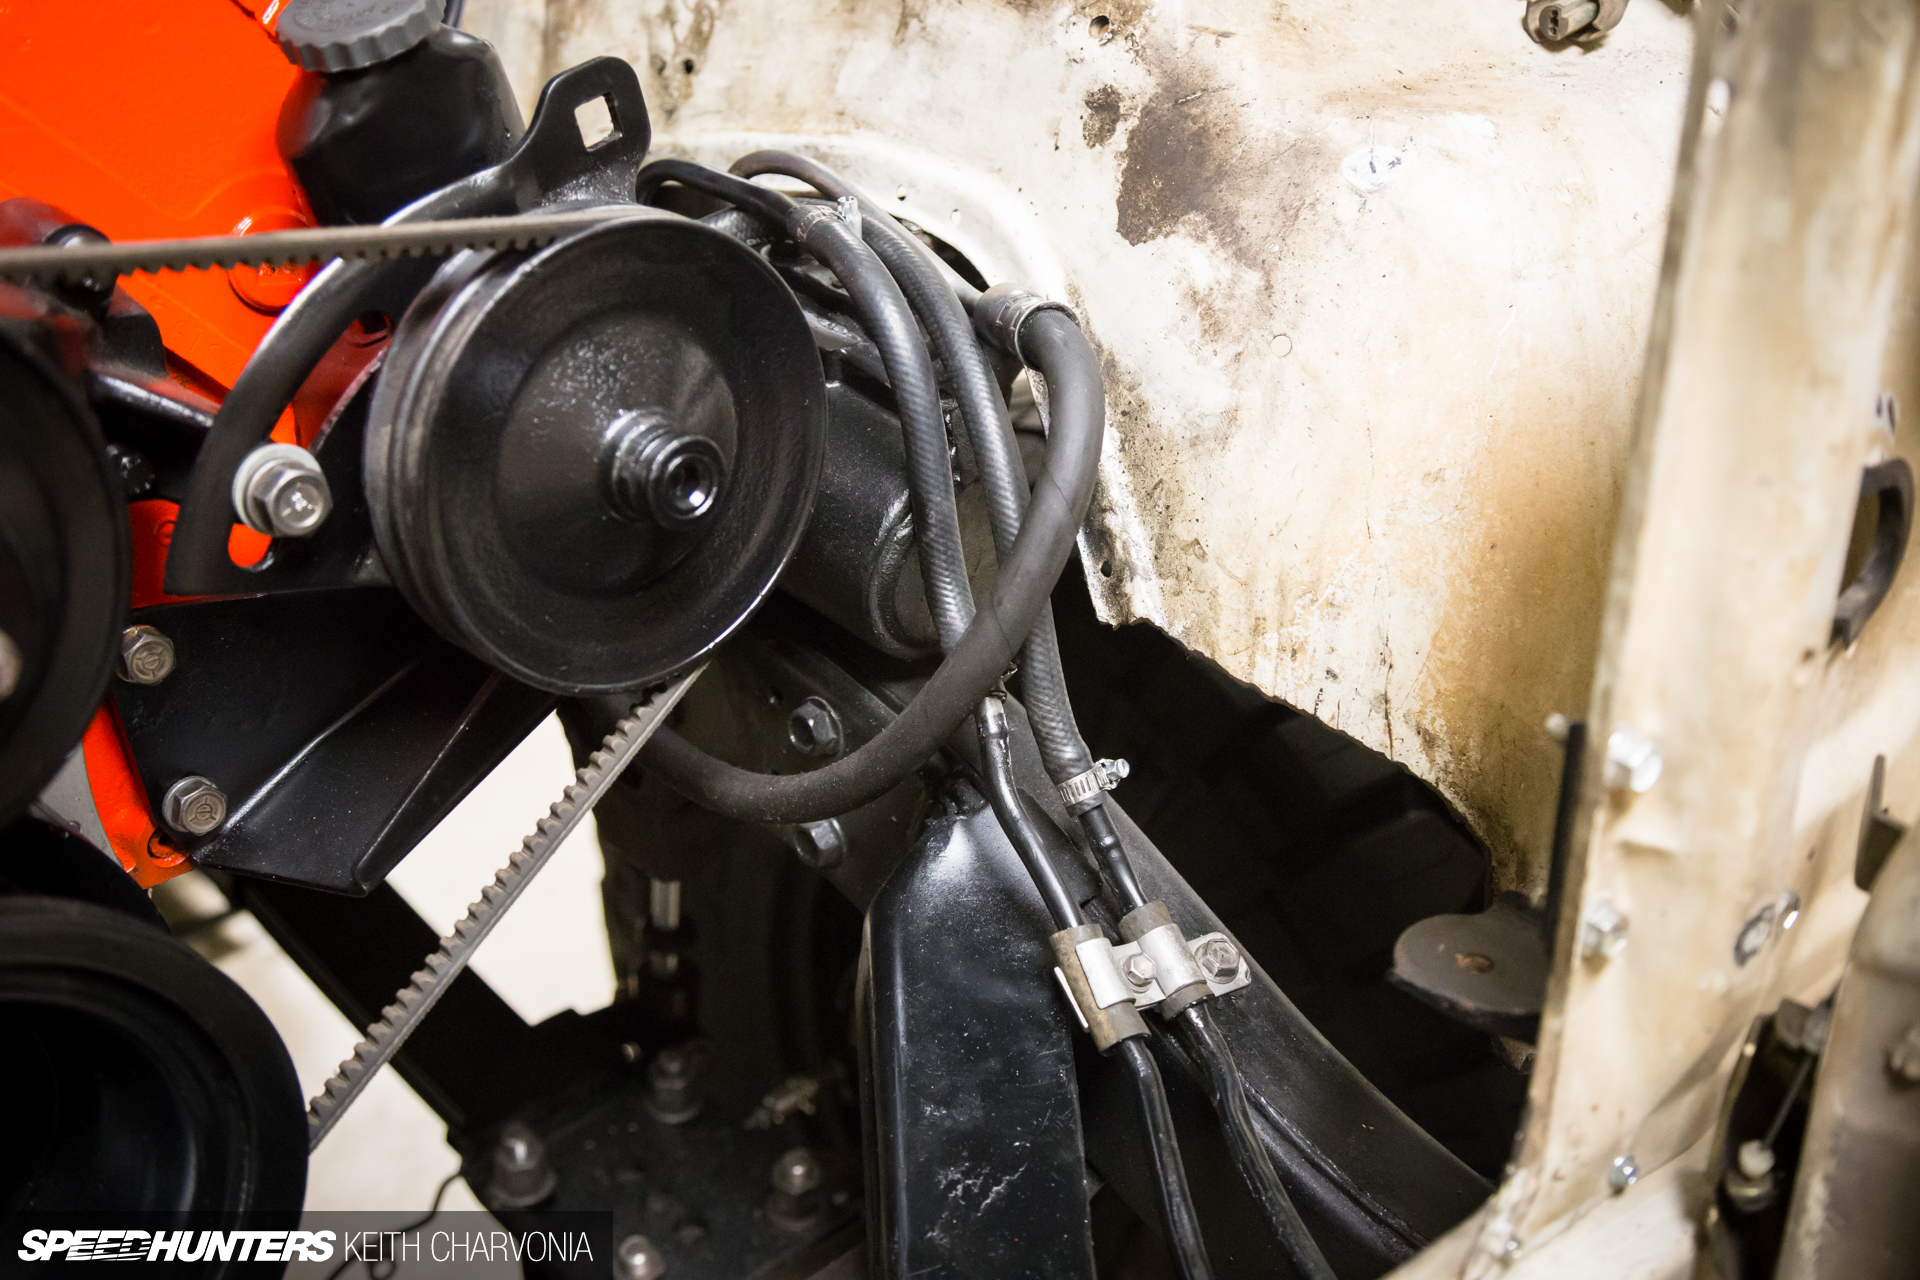
I replaced all the power steering hoses and put it all back like new.
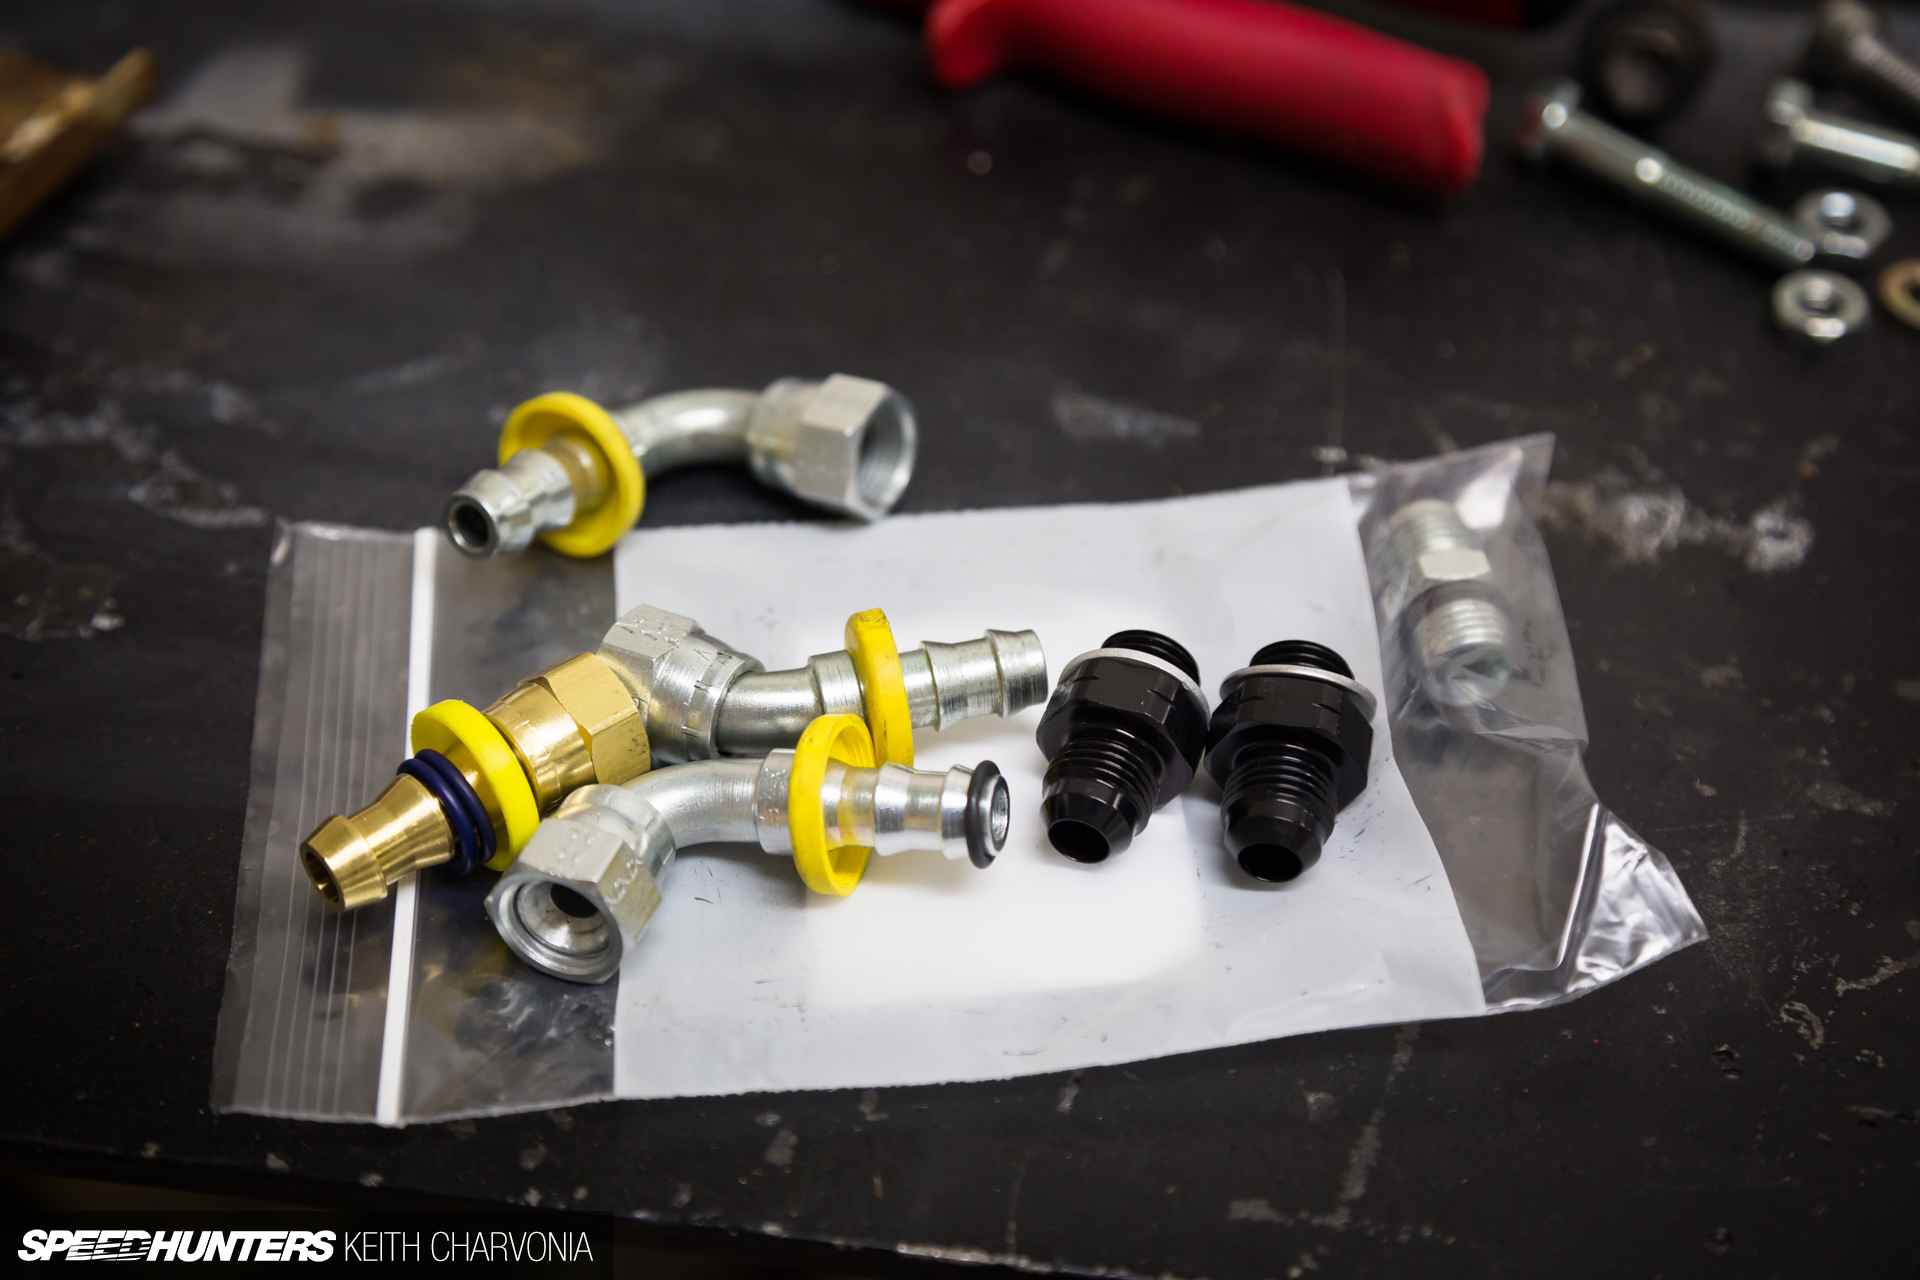
I picked up new fittings to adapt the transmission cooler lines to the new CSF radiator to wrap up the install.

The final step in cleaning up the engine bay was to sand and paint everything I could reach without pulling the engine. A little spray paint can go a long way!
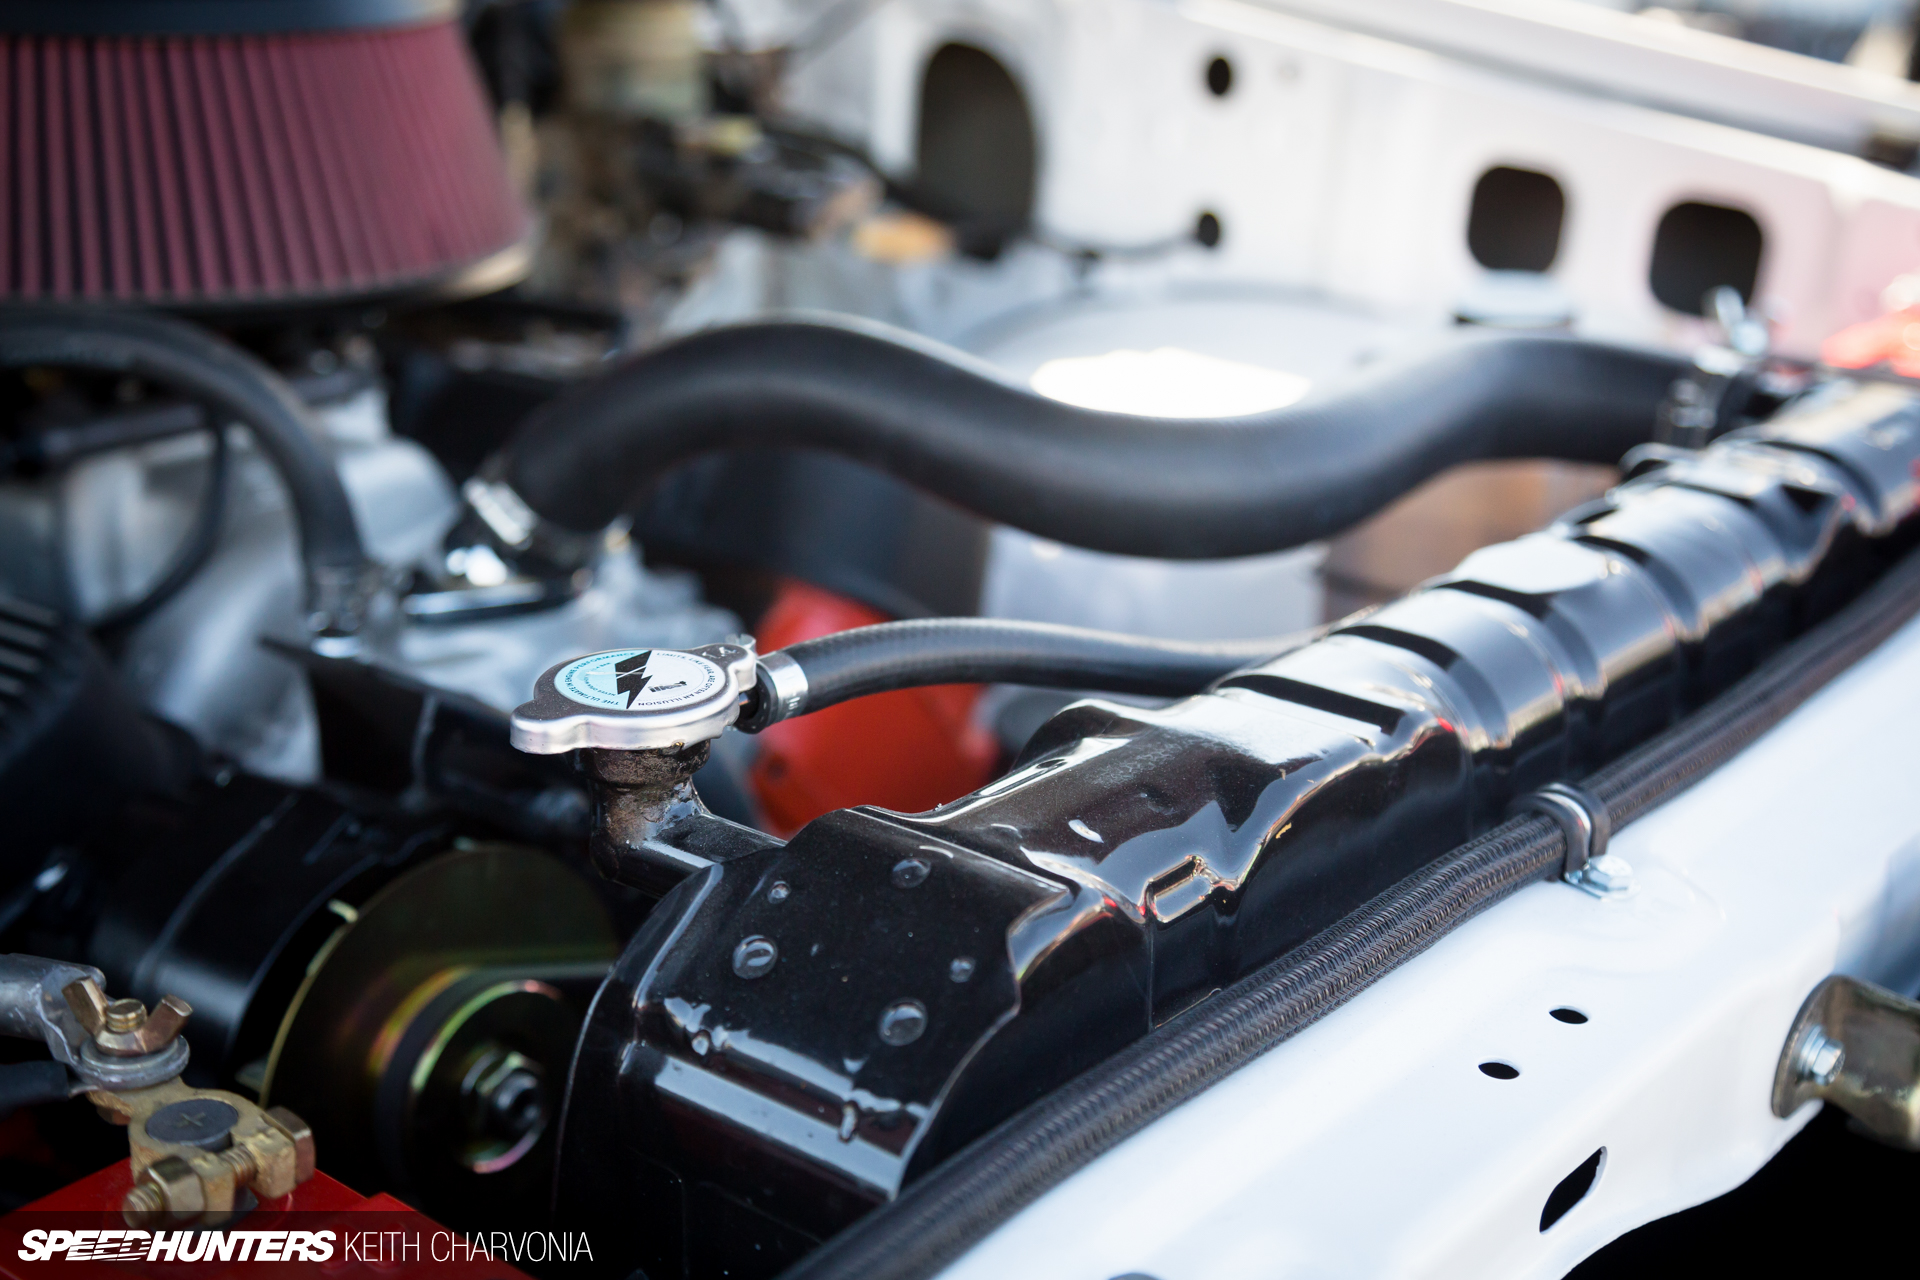
Finally I could bolt in the CSF radiator and fill it with coolant to see how the Trailhunter ran with the new cam and all the other new performance valvetrain parts.
This was definitely the next step I needed to take. It was like the Holley Terminator EFI woke the engine up, then the Comp Cam valvetrain brought it up another notch again.
Keith Charvonia
Instagram: SpeedhuntersKeith
keith@speedhunters.com
OFFICIAL SPEEDHUNTERS SUPPLIERS


video! Let's hear that big block do its thing!
great work!
My God, so clean, it looks way better, and I bet it performs as well, great job Keith!
Thanks!
I always look to this project when I'm thinking of what to do next with my 1st gen 4Runner
Love it! Great write up!
This project TrailHunter is inspiring ^_^
Love your projects Keith, speaking of which we need an ISF update.
I definitely need a parts tumbler (along with a hoist)
Thanks! A parts tumbler is a cheap, worthwhile investment, especially if you have a Harbor Freight or Northern Tool near you.
Makes me want to get back to work on my '61 Jeep
Looks great. Must feel good to gut the thing and make it new again. Makes you think about how we scrap cars so quickly nowadays.
I love reading about this old landcruiser and project yankee. I don't see many old vehicles like this in the UK and the only builds i see tend to consist of someone putting air suspension on a vw.
You need to look around a bit more then Matt, there are plenty of very interesting builds in the UK and a whole bunch of shows where you can check them out
I was exaggerating a bit but I lament the fact that the UK never got the same variety of interesting cars as the US and most of the old models that were here have been scrapped or used as deposits in our version of "cash for clunkers". The most interesting thing I've seen besides this build was a guy who stuffed an sr20 (n/a) into a 95 nissan micra.
Check out the forum known as retro rides, go to the retro rides gathering in august, your faith in the UK's car diversity will be quickly replenished.
I'll check that site out, hope you're right about my view of the UK modding scene. I'll always lament the absence or shortage of muscle cars and the weird Japanese machines that everywhere else seemed to enjoy though.
I bet just the sound waves of the BBC at idle now breaks apart Prius batteries. Good shizz. How much higher is your rev limit now?
LOL
I definitely gained some RPM, probably another 1000, just based on normal driving.
And just how exactly have you found the time to do this recently Keith? Lovely stuff man!
Ha, well, you know...
I finished a lot of this in Arizona before moving East, but had some loose ends to finish up once we got settled here.
Any chance you'll release the Trailhunter stickers for sale?
Since you asked....email me at the address above
yes!!!! I need one too!
Since you asked....email me at the address above
Even though this isn't my project, I felt a since of satisfaction and accomplishment from the work done. When reading the part about cleaning the power steering leak and degreasing the hardware, it really is the little things that make a project yours and you get a since of satisfaction from knowing its done right. The tedious work that goes into it can be a bit frustrating at times but when seeing the results pan out like this, it makes it all worth it. Just got a little more motivation for my own project, thanks!
Glad to hear I could provide a little motivation. It really does just take a lot of hours, especially if you want to do things "right" whatever your version of that is. I once had a friend teach me to never, ever reinstall a dirty part and it really stuck with me.
Nice article, and the engine bay looks great! I couldn't help but cringe at "poly-lock retainers" though. I think you were referring to the valve spring retainers in that picture. It looks like you put poly locks on to hold your rockers in place.
Oops! It's been a little while since I did the install and I was learning on the fly.
Very nice job again Keith! I love reading your diy stories and learning from them. thumbs up!
Appreciate it!
I certainly loved this article ! Very informative and useful to those with old cars who need to do some maintenance.
Cheers!
Thanks for the mention Keith. Sorry we didn’t have a bit more time for schooling.
You’ve done a outstanding job cleaning up and doing this project the right way.