


The internet is a fascinating place.
Besides providing a perfect safe zone for trolls and keyboard warriors to unload their mindset on others, the internet can be an endless source of information shared from all corners of the globe. This can be especially fruitful when trying out new projects for the first time. Stuck or not confident in the next steps? Google and YouTube are you friends. The trick is how to sift through the information overload to get what you need.
For as long as I can remember, I’ve wanted to play around with composites. University provided an opportunity to try my hand, but those times were always under the careful guidance of an instructor. Never had I attempted to construct something myself from start to finish.
A goal with Project Rough, my ER34 Nissan Skyline, is to try and improve various skillsets whenever possible – composites being one of them.
But before diving into how I built a custom airbox for my car, I should fill you in on why I attempted this in the first place…

I wanted to try and work with both fiberglass and carbon fiber, because ultimately I’d like to be able to produce various parts in carbon with high quality results. I knew it was impossible for me to get it spot-on the first try, but I would try my best to end up with a professional-looking result. Since the airbox is mostly hidden, I felt like it was the perfect thing for me to attempt first.
I decided to go with a method that didn’t involve vacuum forming or autoclaves for two reasons. With advancements in technology, getting your hands on a suitably-sized vacuum kit and autoclave for small projects has never been easier, but I decided to go down the path that virtually anyone could, if they so choose to. This method is perhaps the least complicated, but it requires a lot of patience and dedication – more than I had imagined. I now fully understand why carbon fiber parts fetch such hefty prices.
To get an absolutely perfect finish with carbon fiber requires a lot of skill and experience, something I had none of. The trick is not to give up – you have to keep trying. Yes, the first (and maybe next few parts afterwards) may not be perfect, but with each go you improve leaps and bounds. Hopefully I can show you my progress as Project Rough continues.

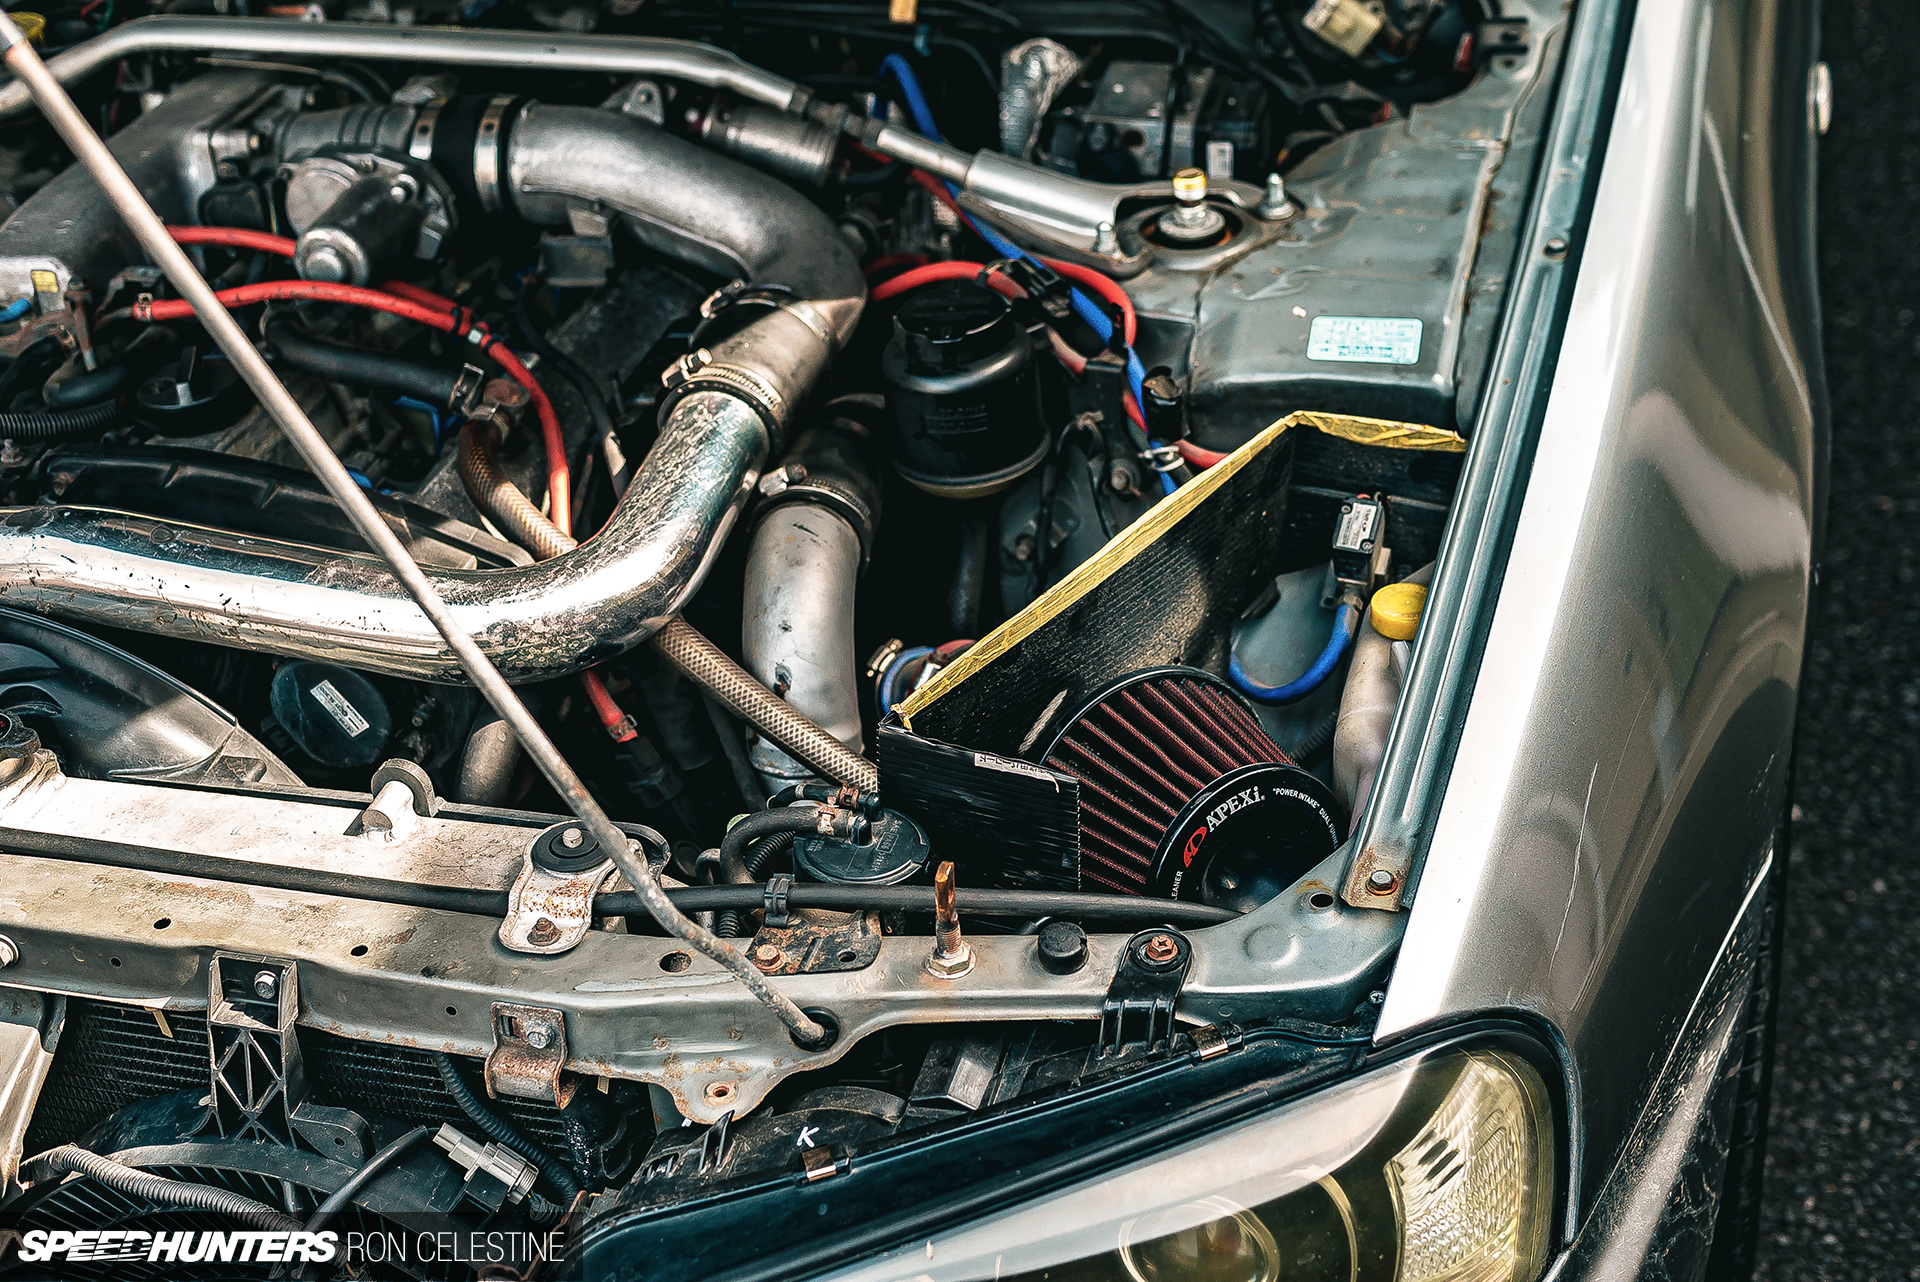
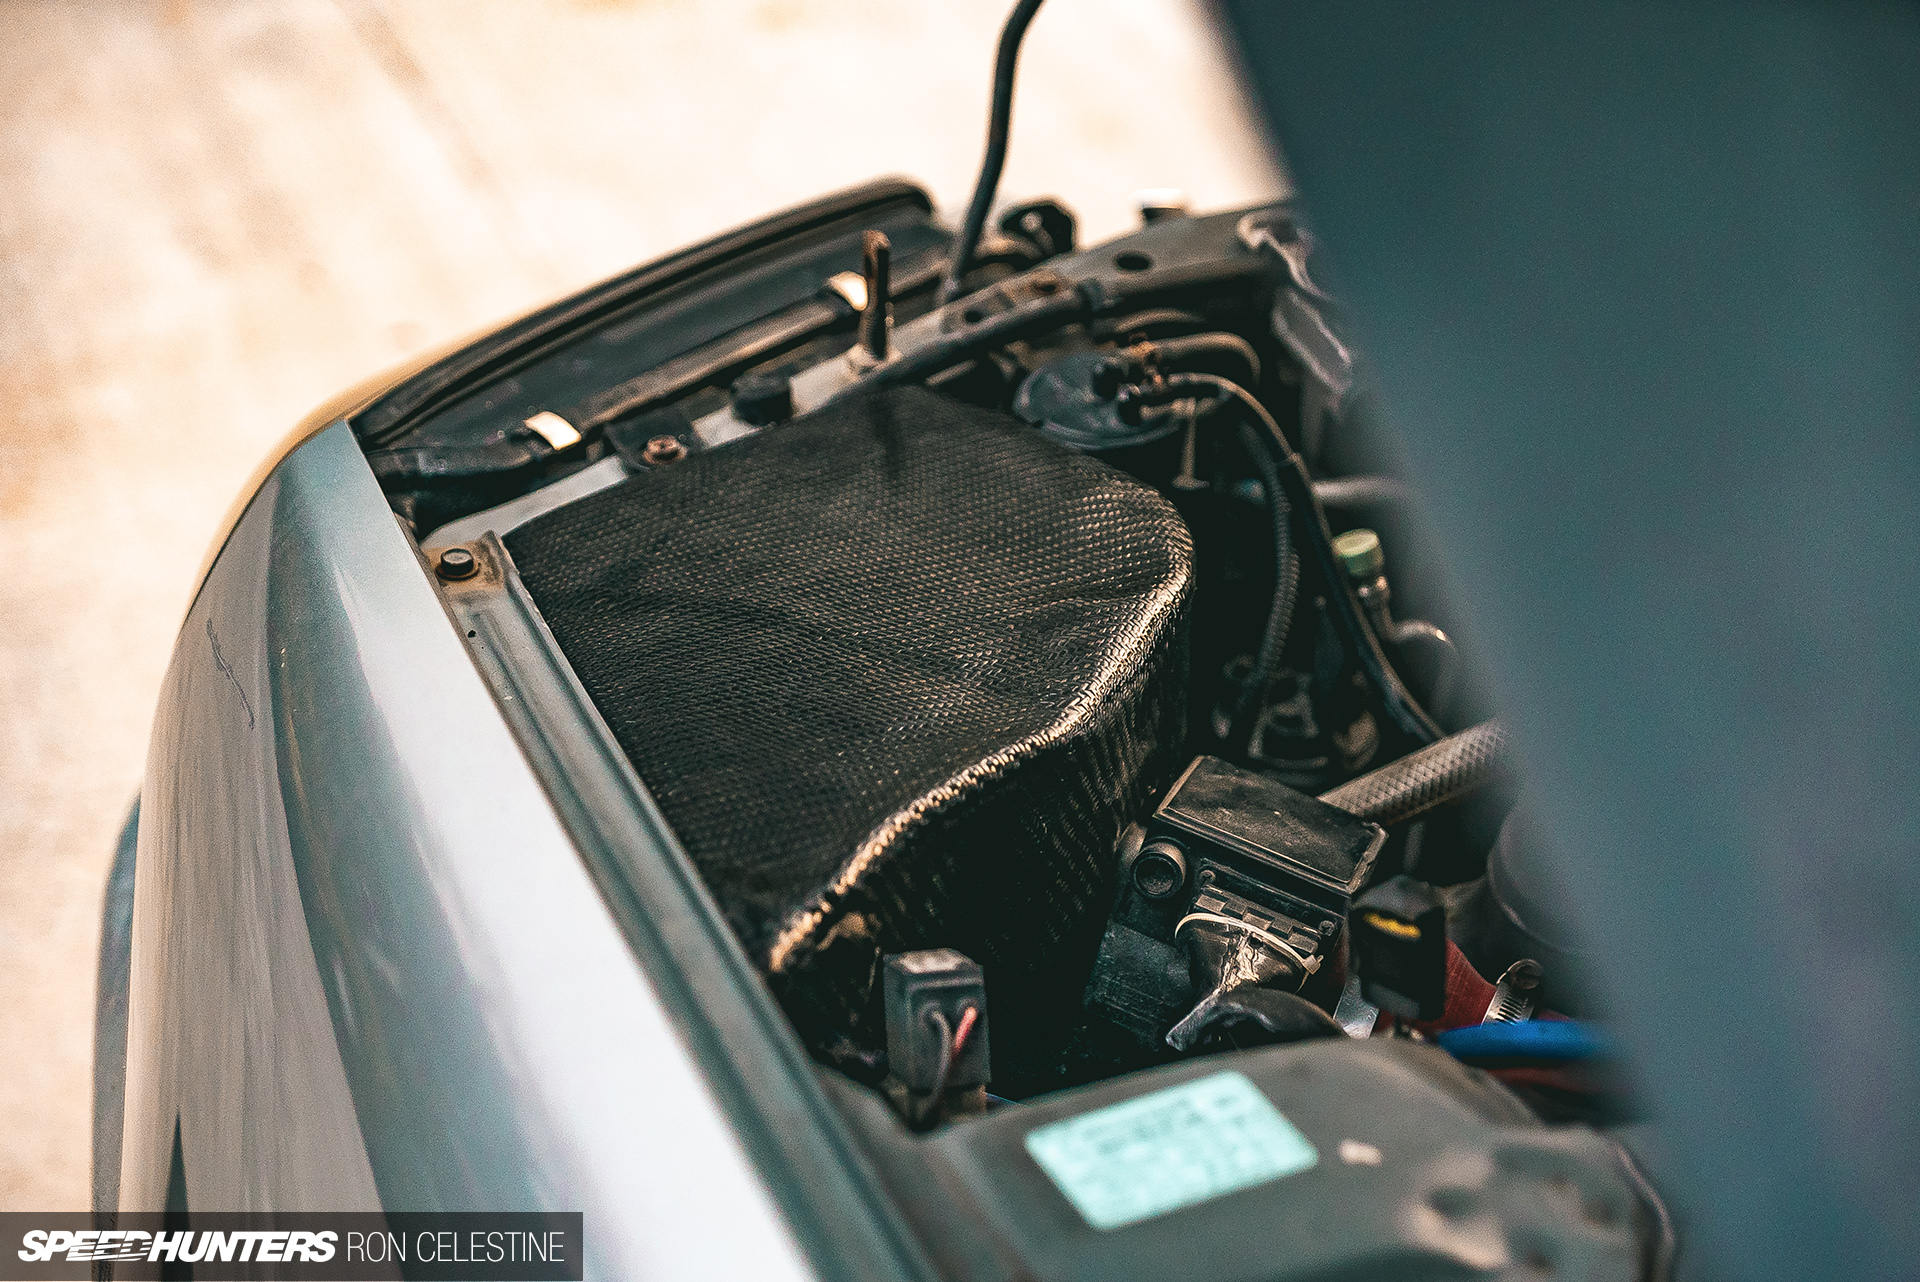
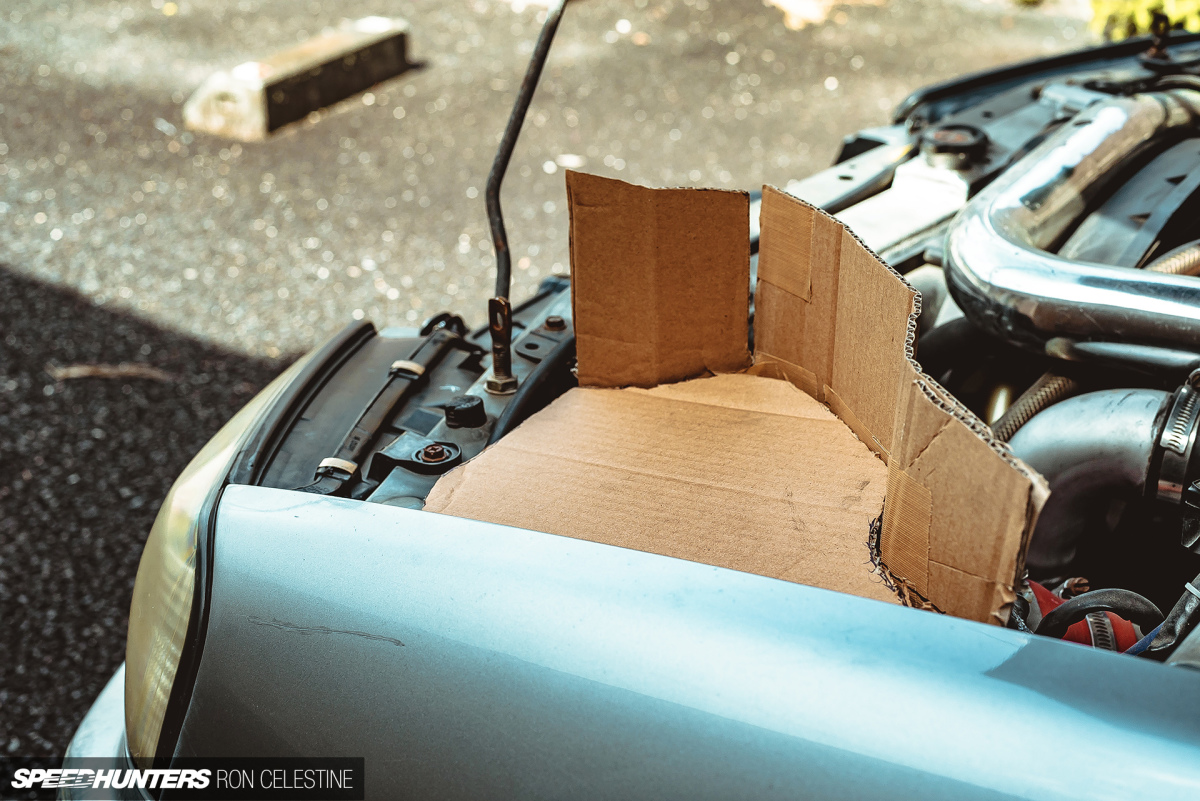
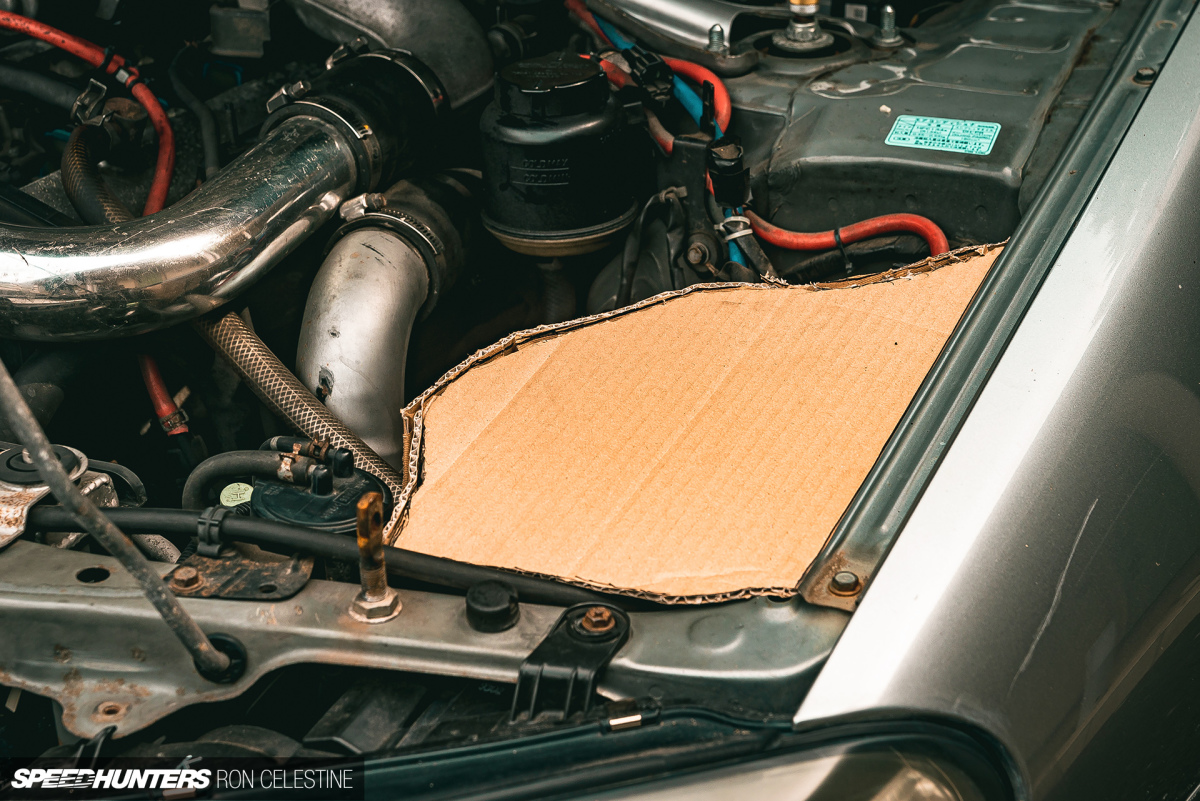
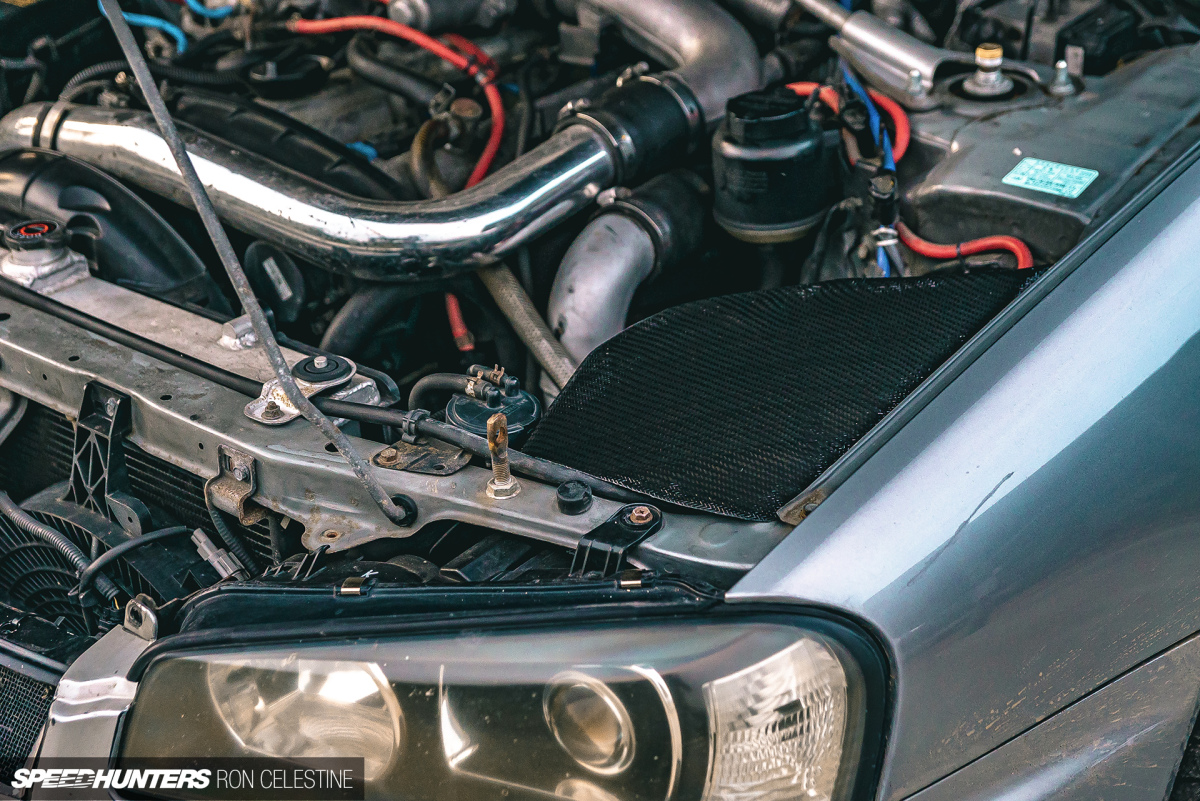
When I picked up the car, a corrugated plastic separator of sorts had been fitted in the engine bay by the previous owner. The theory behind it is that once the hood is closed, it would become the top, sealing the intake off from the rest of the engine bay in the hope of sucking cleaner and cooler air into the T04E turbocharger.

I suppose it worked, though I would question the efficiency. I really wanted to try my hand at improving things with a custom DIY carbon fiber/fiberglass airbox. But how?
SECOND CHAPTER
How Hard Could It Be?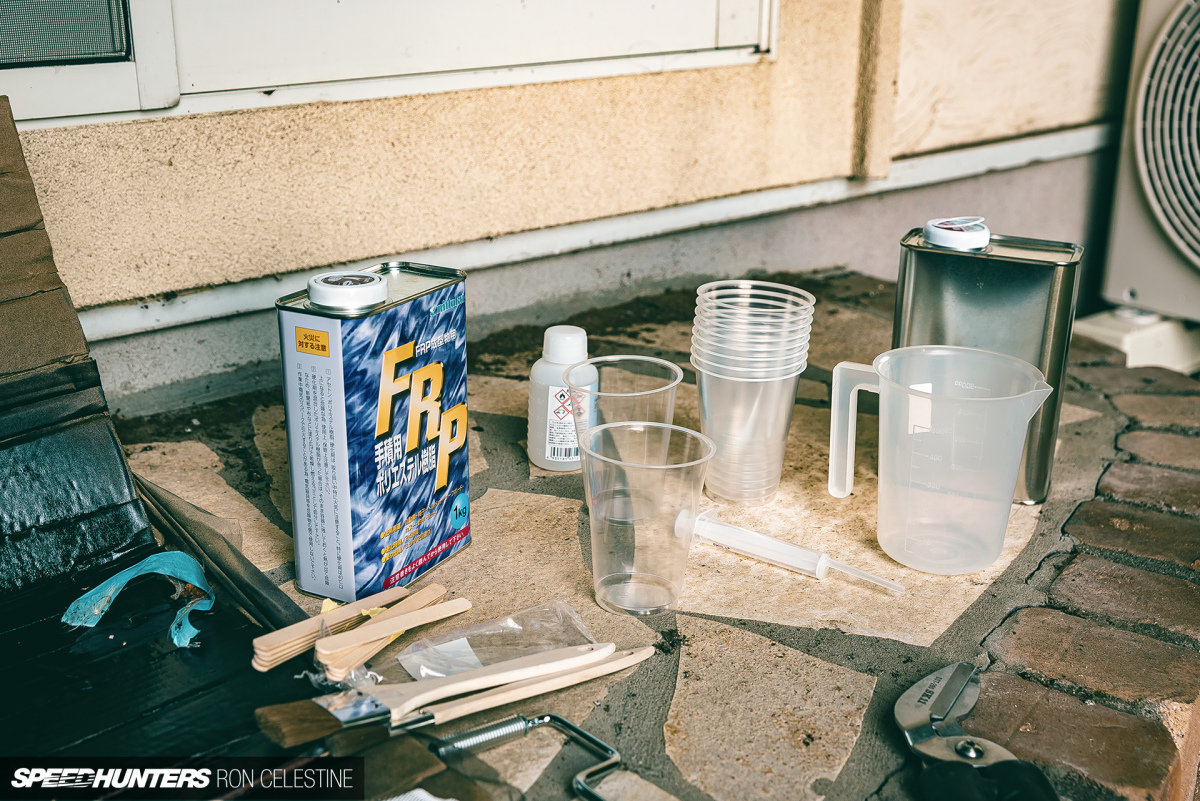
This is where the power of the internet, determination, and some ignorance comes in.
After countless hours of researching and watching different methods, I came upon a video where a special effects wizard creates body kits from scratch, and discusses almost the entire process. Two hours of screen time later and with more confidence that really made any sense, I was ready to dive in.

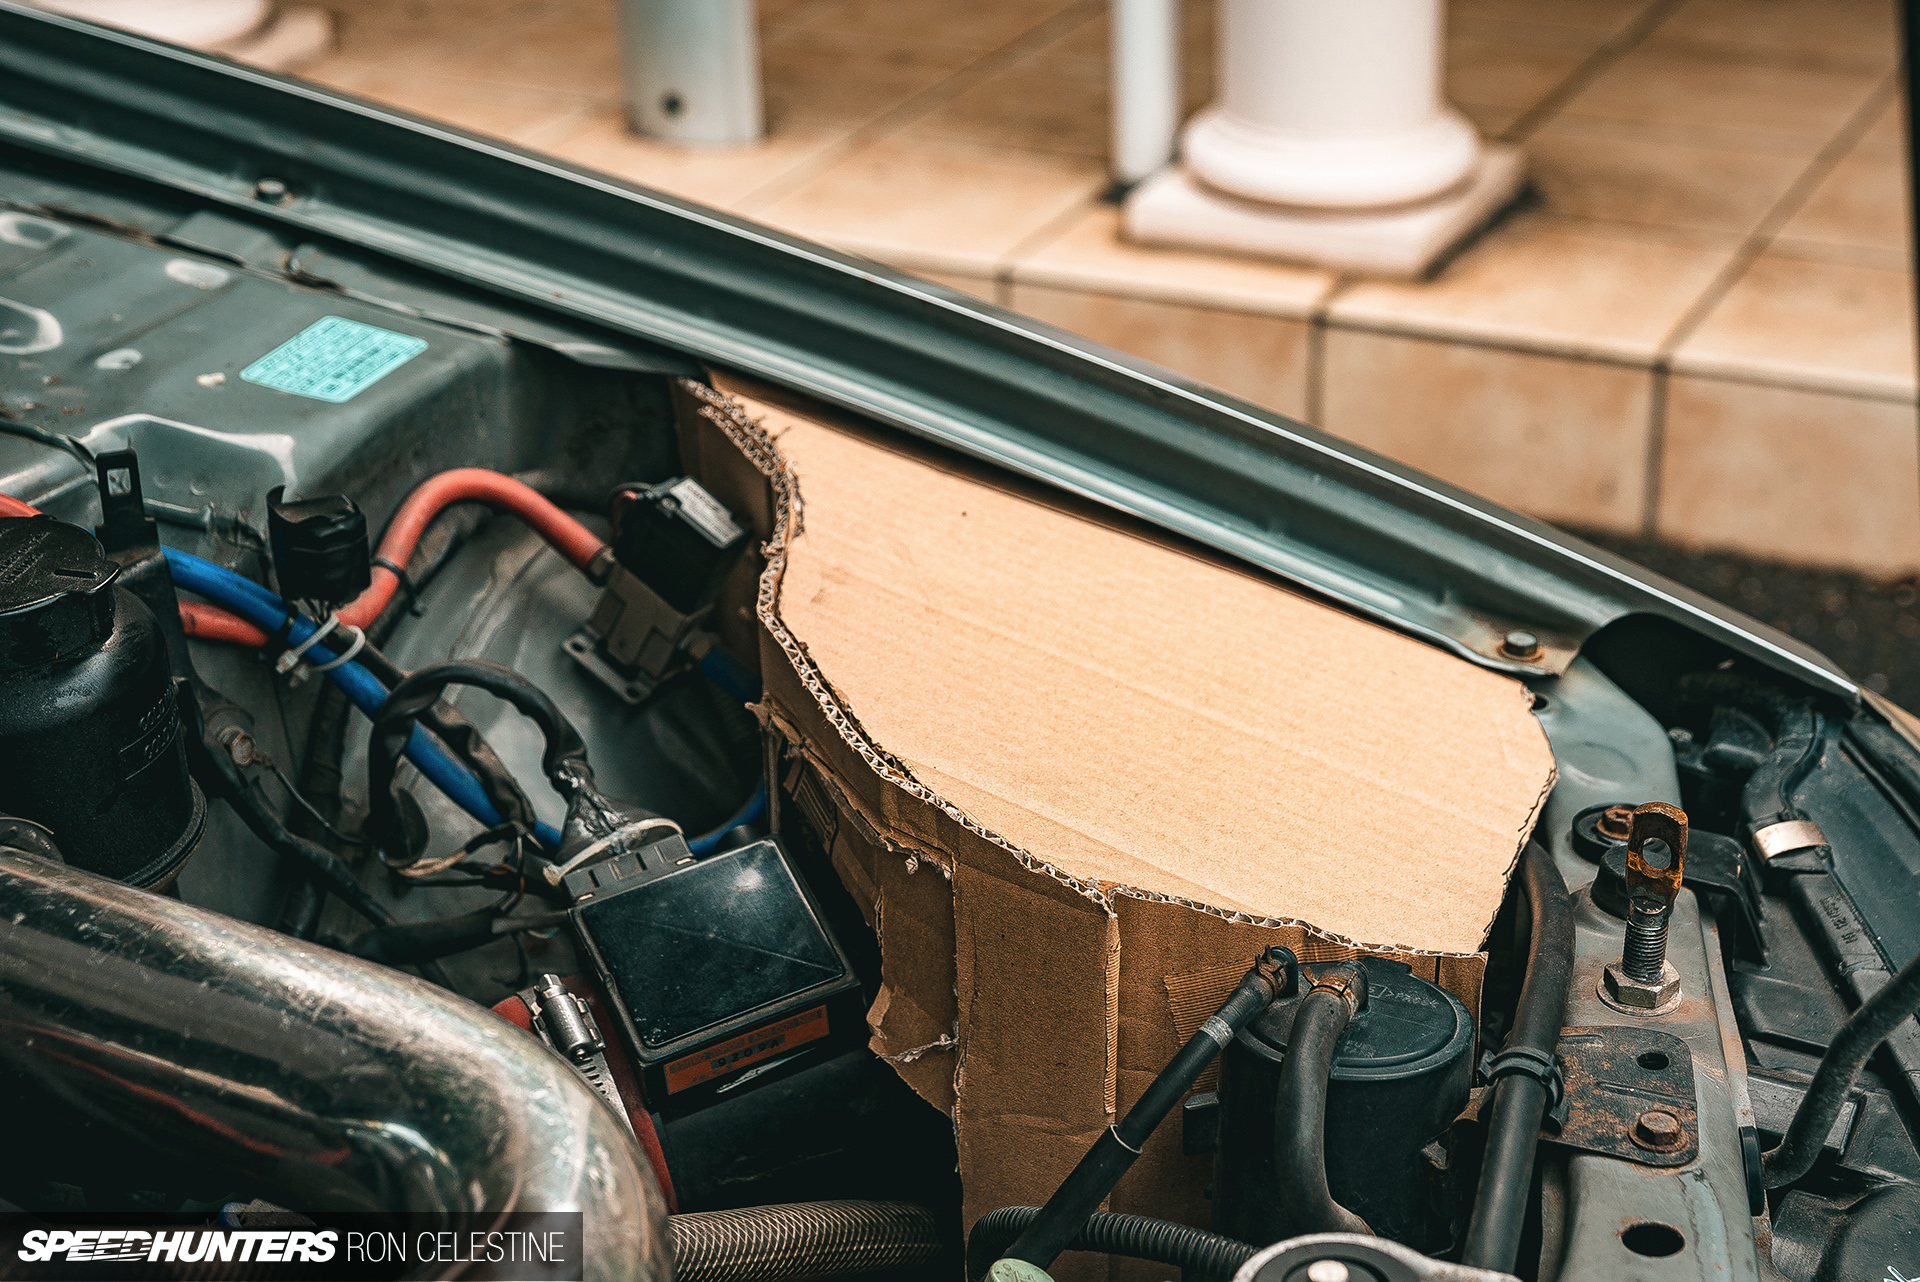
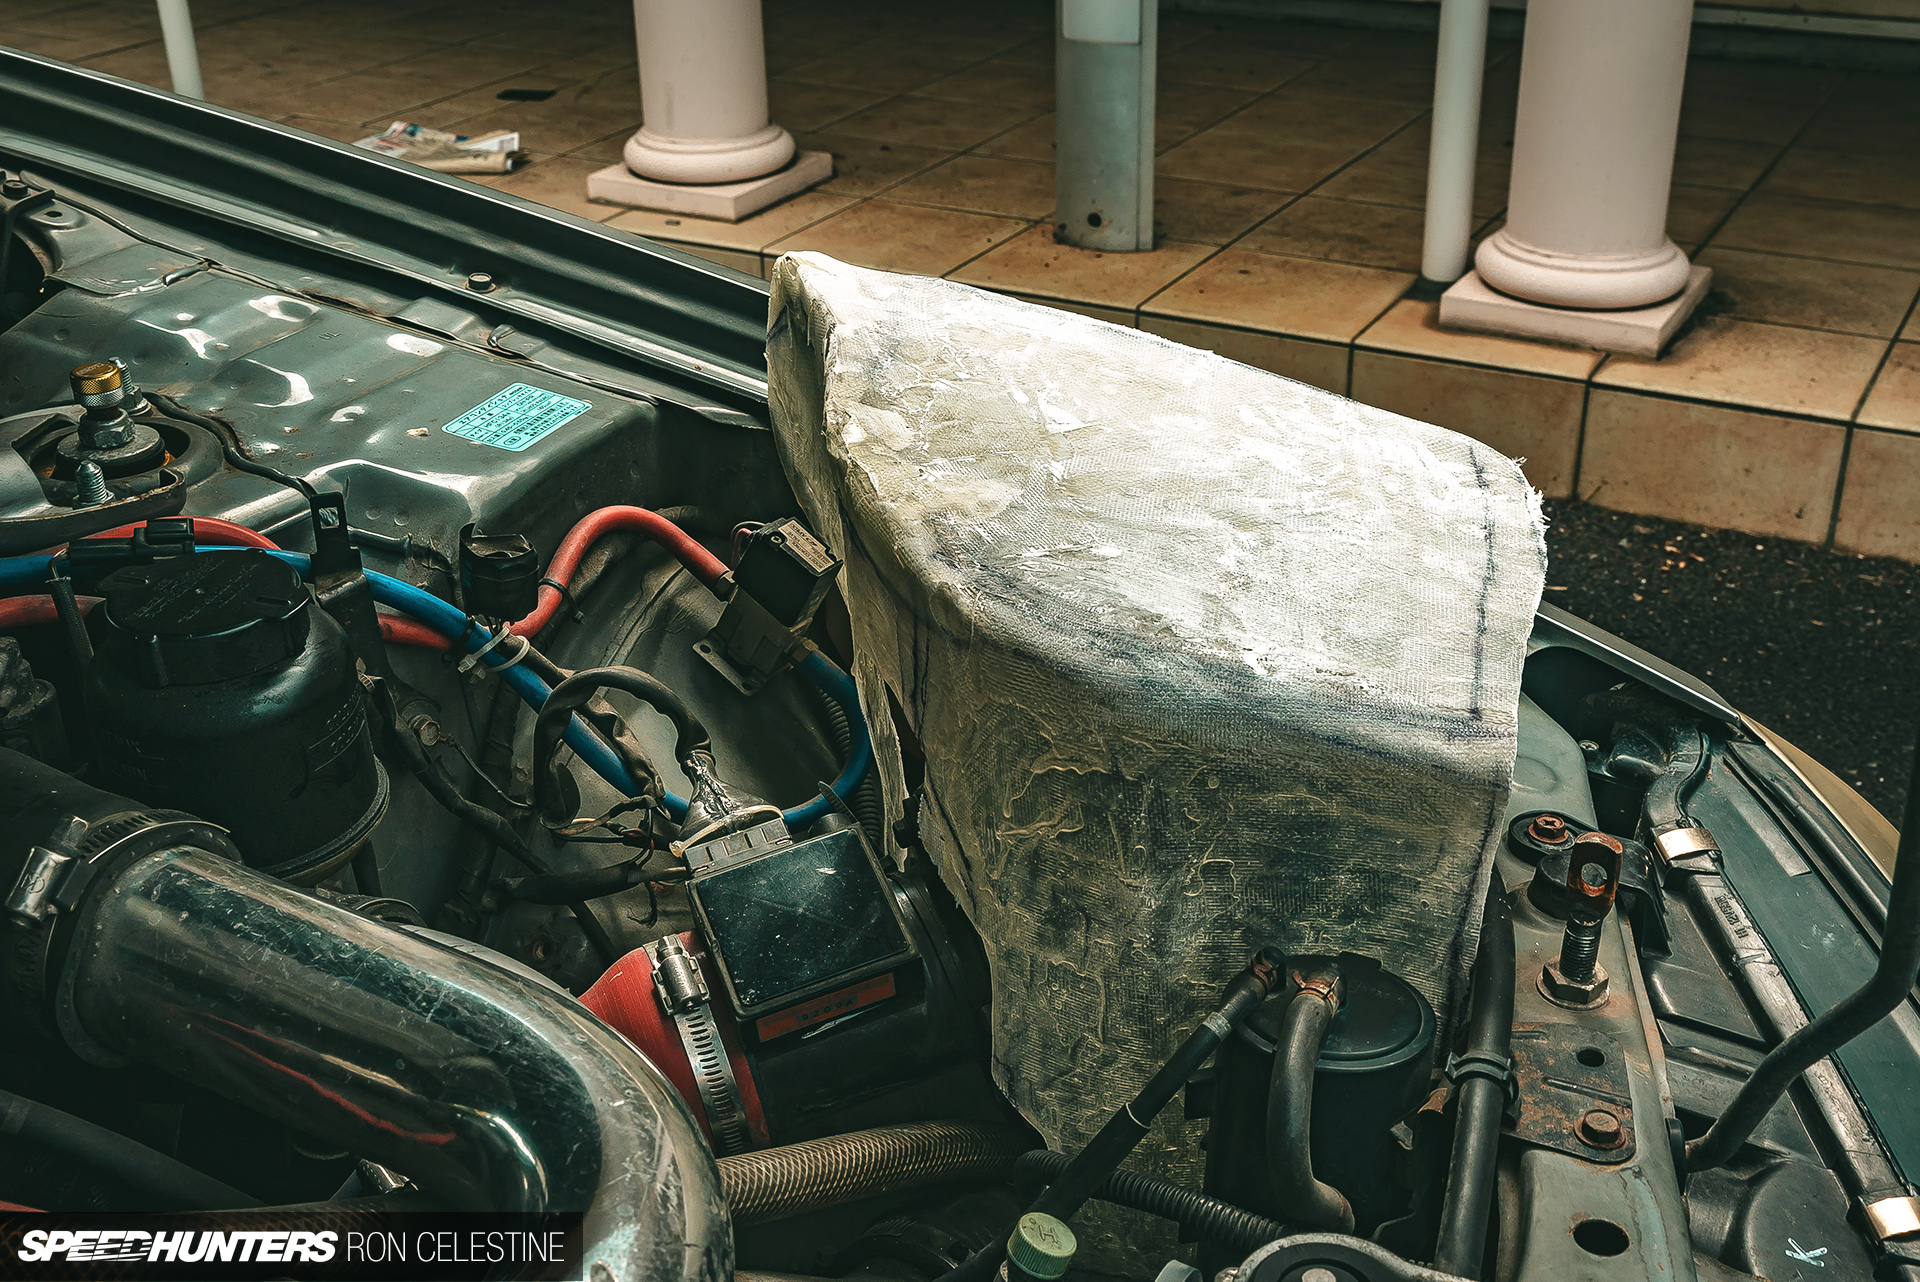
To form the basic shape of the airbox, I used some old cardboard boxes I had laying around.

My thinking here, was that the cardboard would be easy to manipulate and strong enough to take the weight of the clay I’d be laying over the top to form the shape of the airbox, without deforming. I could also make extra supports wherever needed.


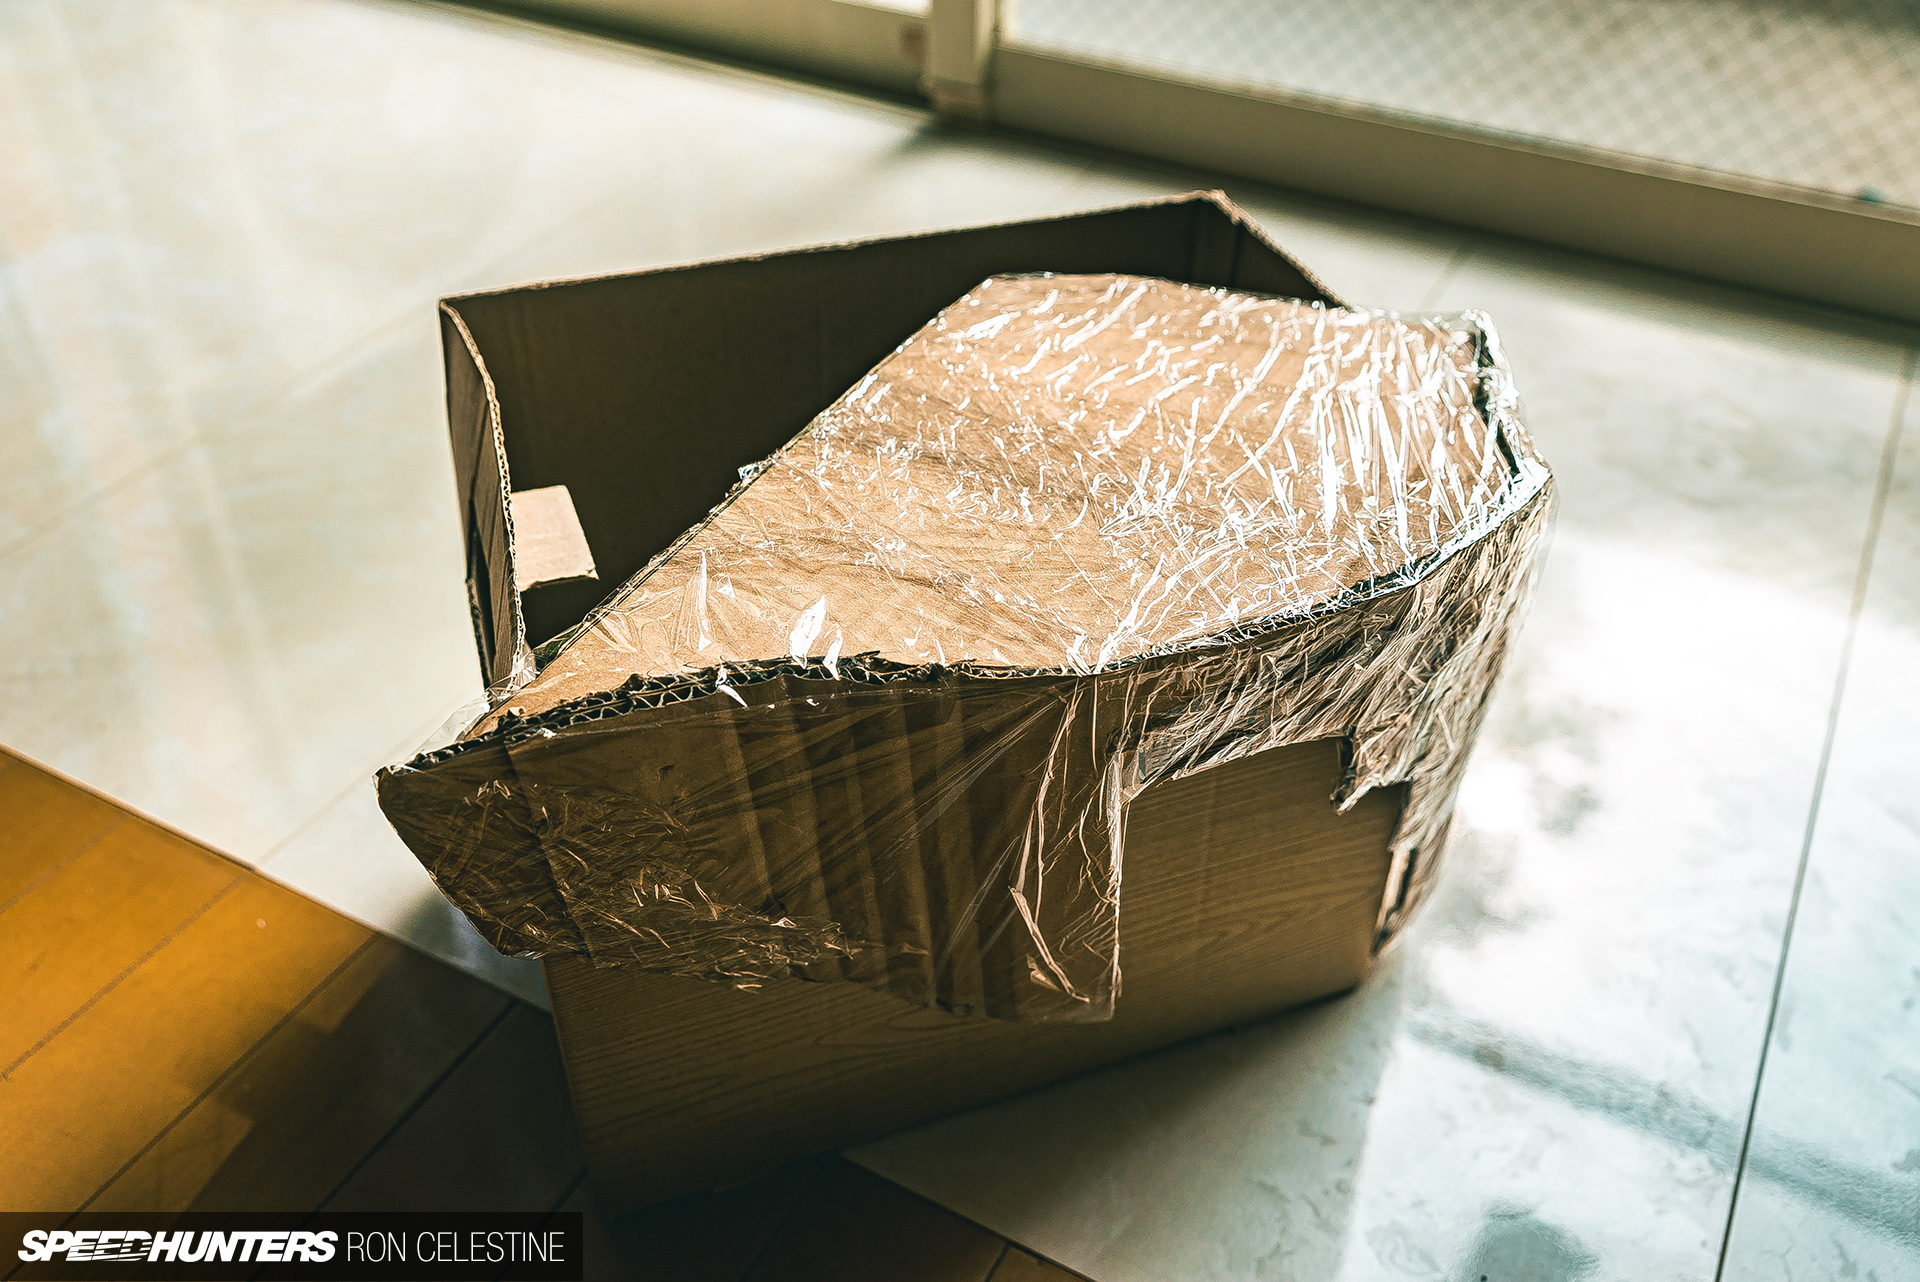
With the basic form pretty much the way I had envisioned it, I covered the cardboard in plastic cling wrap to protect it from the clay’s dampness.
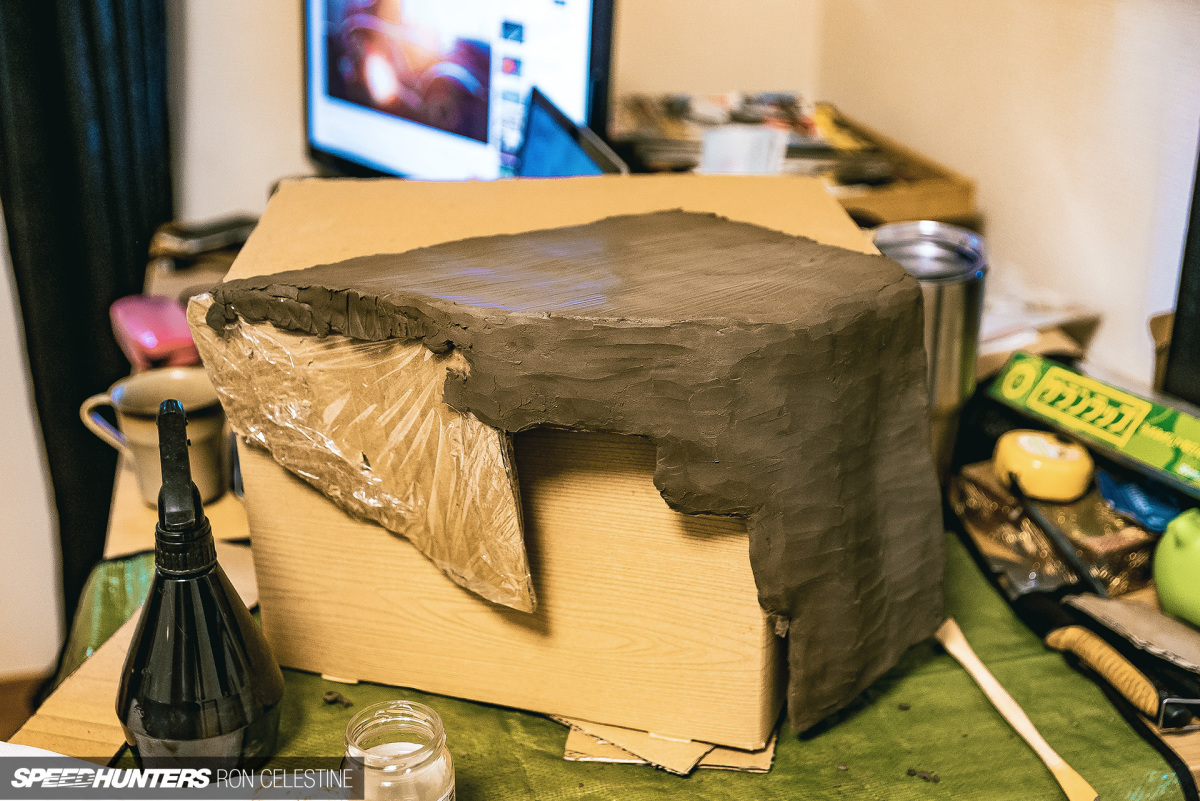

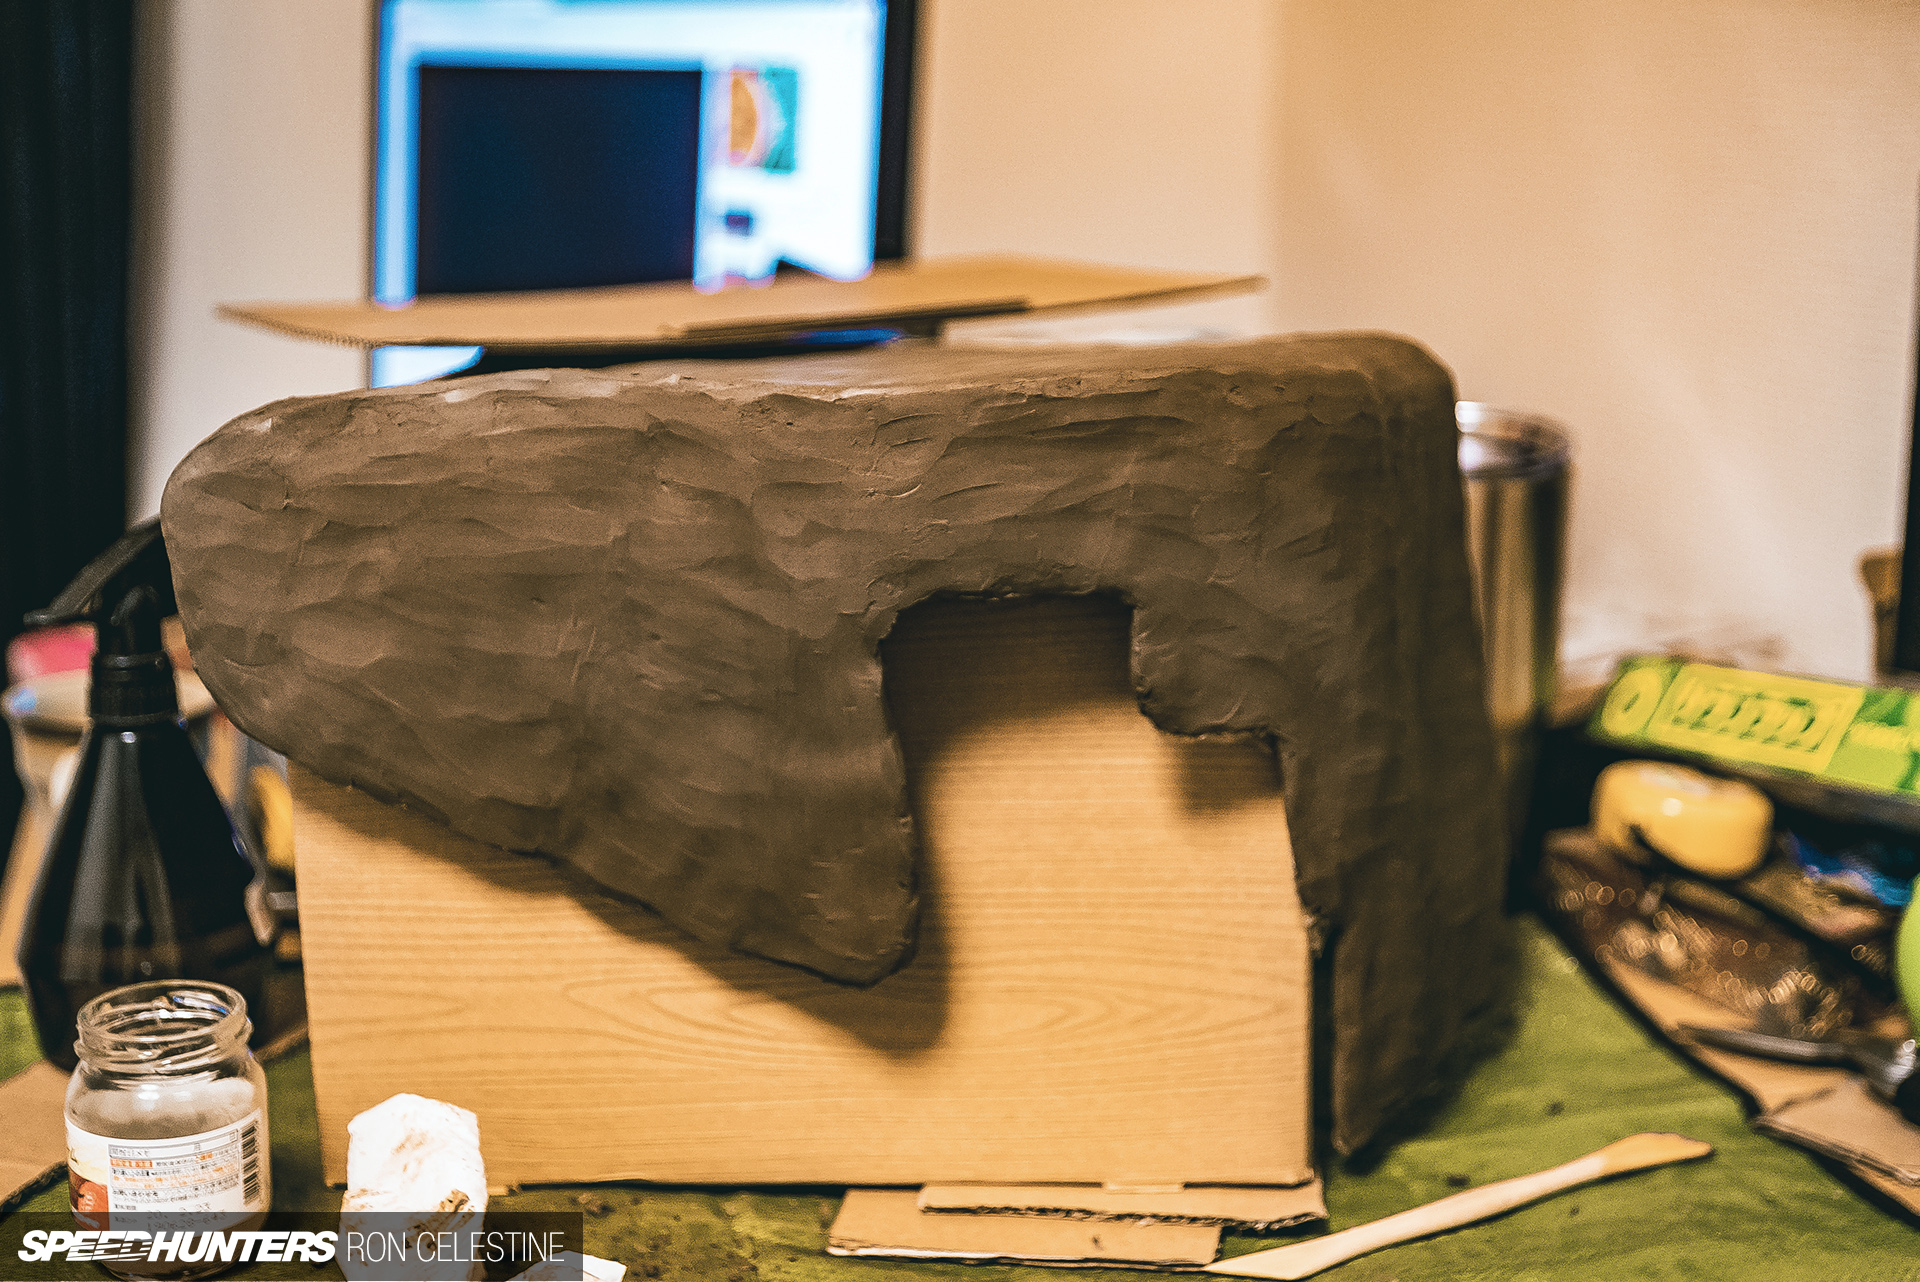
Next, I had to channel my inner sculptor in order to create the mold. You really don’t need to have expensive clay for this step, though it would help with the sculpturing I’m sure. The clay I bought said it was good for beginners, and honestly it was.

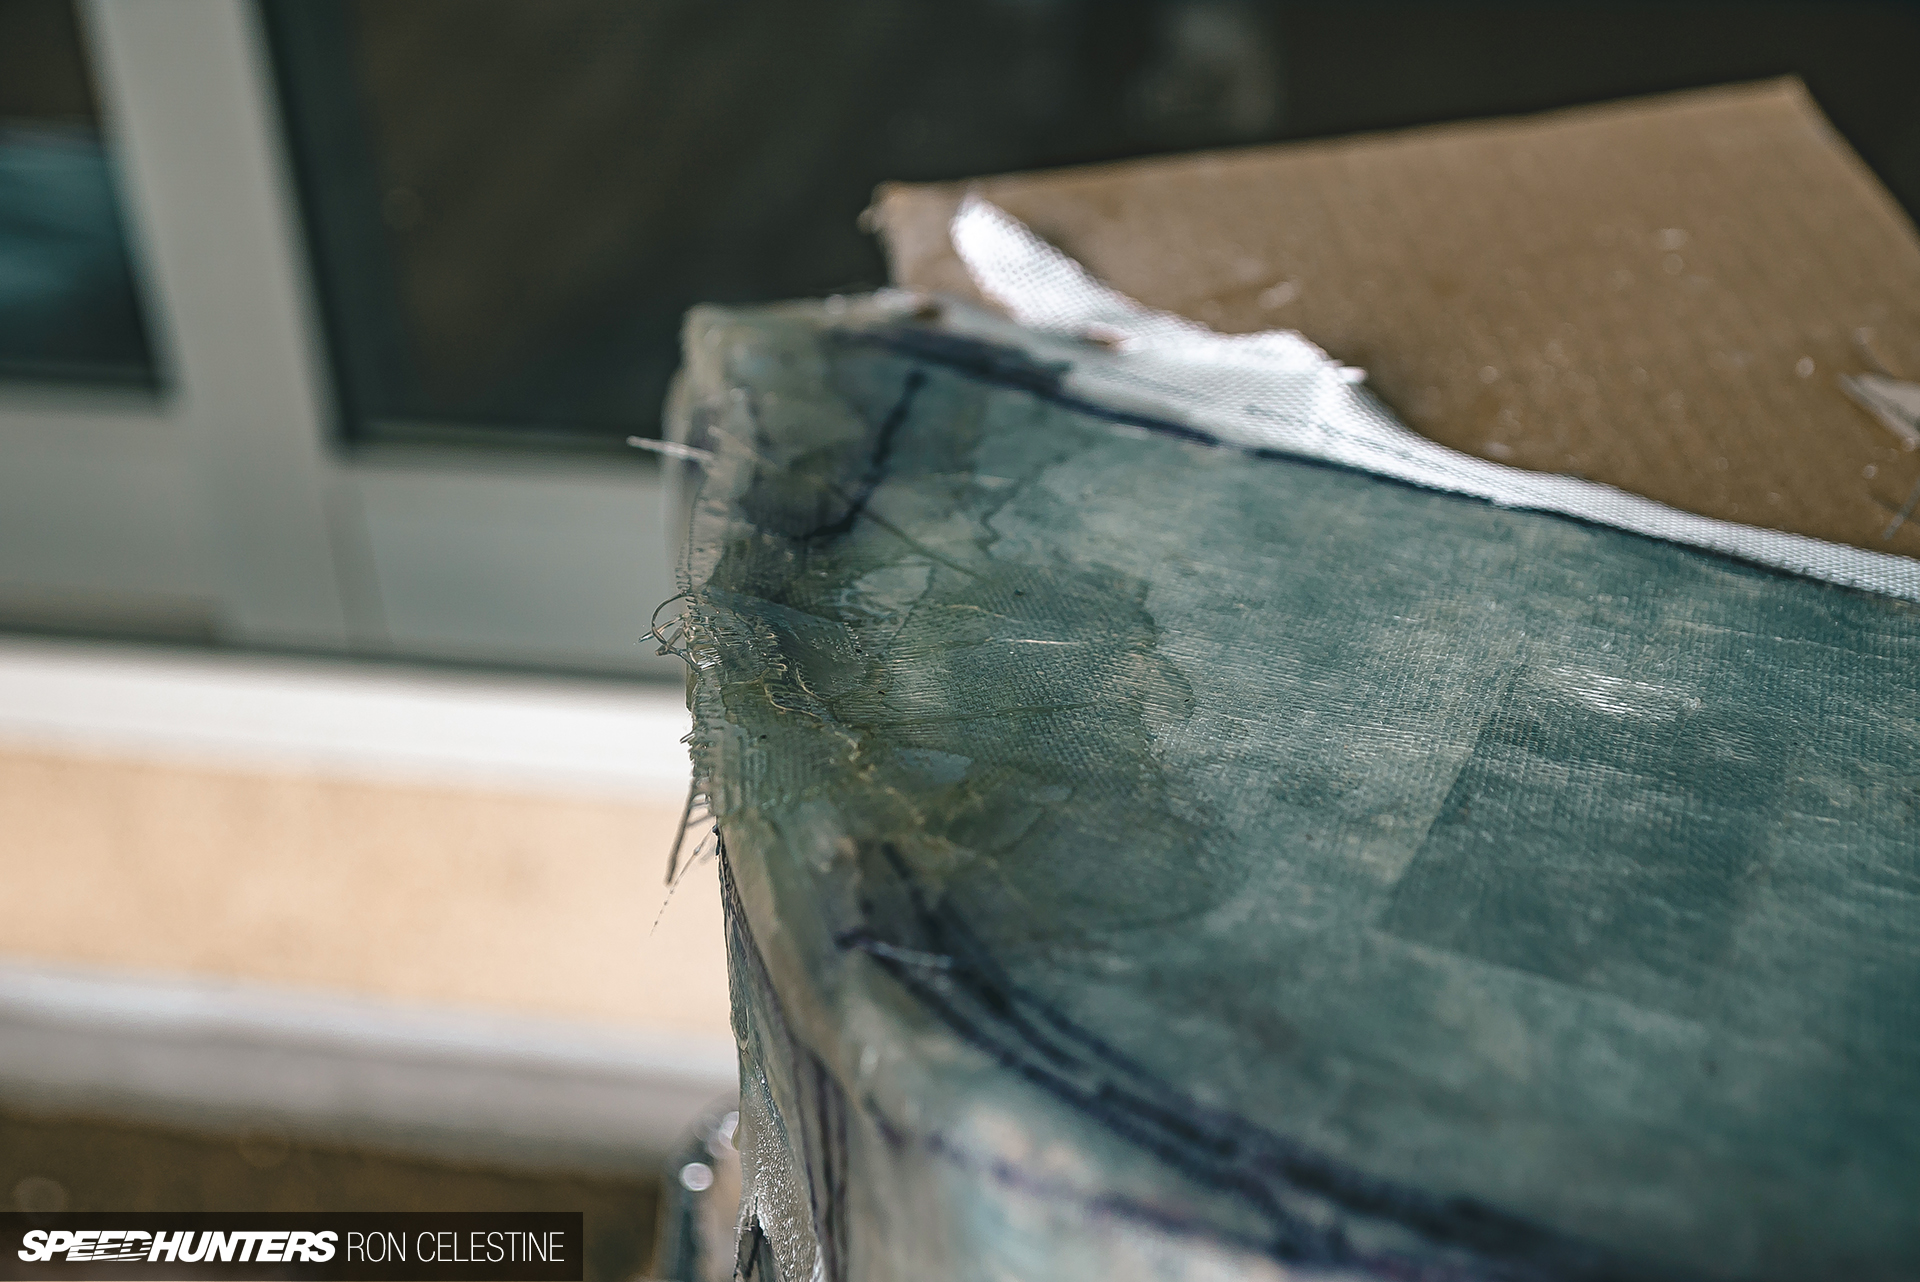
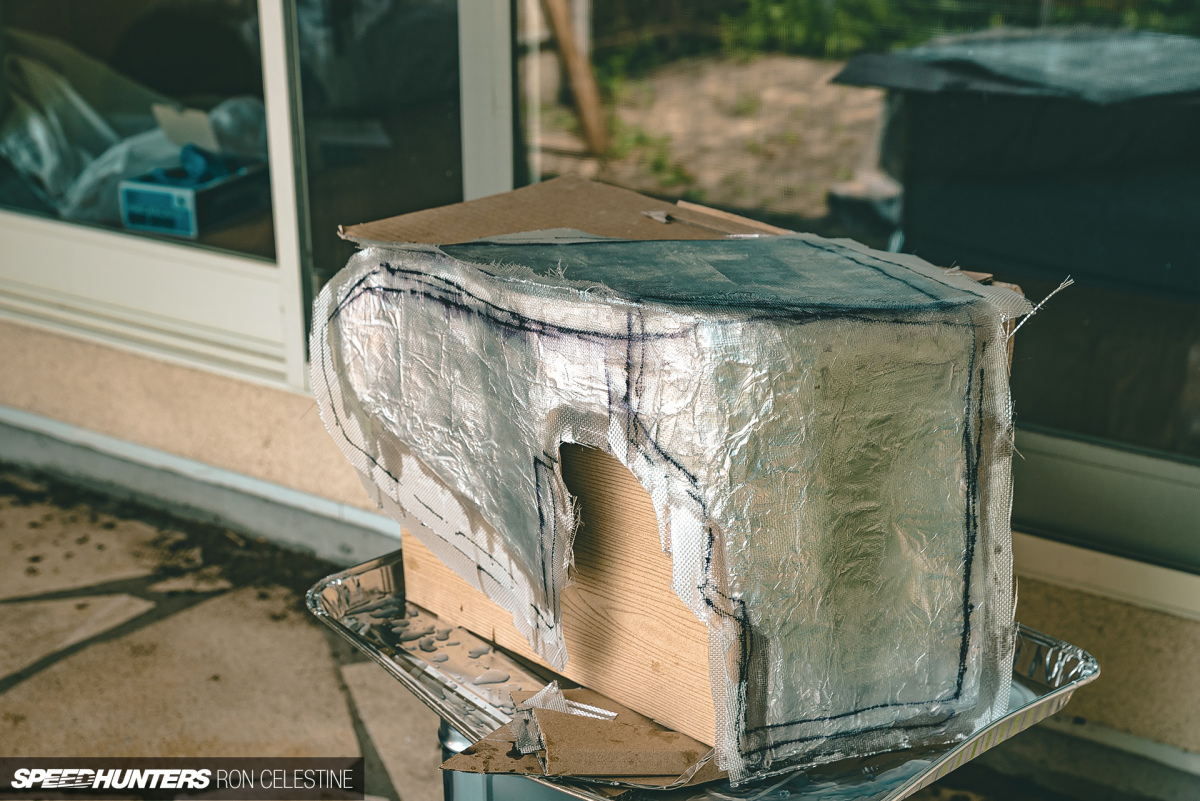
The next step in the process was to wrap the clay in aluminium foil and then add packaging tape on top of the foil. The foil makes for a good barrier between the epoxy and clay, and the tape helps break the fiber mold away from the foil.
The added bonus of the foil is that it keeps the clay moist so it can be reused for your next project. The drawback is you really need to take your time to smooth everything out or you will have to spend more time in the finishing stage. It may be a bit more expensive, but using aluminum tape on top before laying down the packing tape could help create a nice flat surface.
The first and pretty much only ‘oh sh*t, I may have bitten off more than I can chew’ moment came when I went to figure out the resin-to-hardener ratio. The guy in the video had neglected to mention the ratios he used. A quick look online revealed that most kits come with clear mixing ratios, but the product I had got my hands on didn’t, thus I was flying blind.
I tried some math using a calculator I found online which ended up causing the exothermic reaction to go a bit out of control, and it was legit terrifying. Remember to keep a good amount of acetone to neutralize the reaction and a respirator on hand for times like this.


With the accident cleaned up and a newfound respect for what I was about to do, I tried again with a much smaller amount of hardener. In hindsight, I should have used even less to give myself more time to try and cover the the mold in one complete sheet of fiberglass instead of three individual cutouts. The result of this was a lot more time sanding.

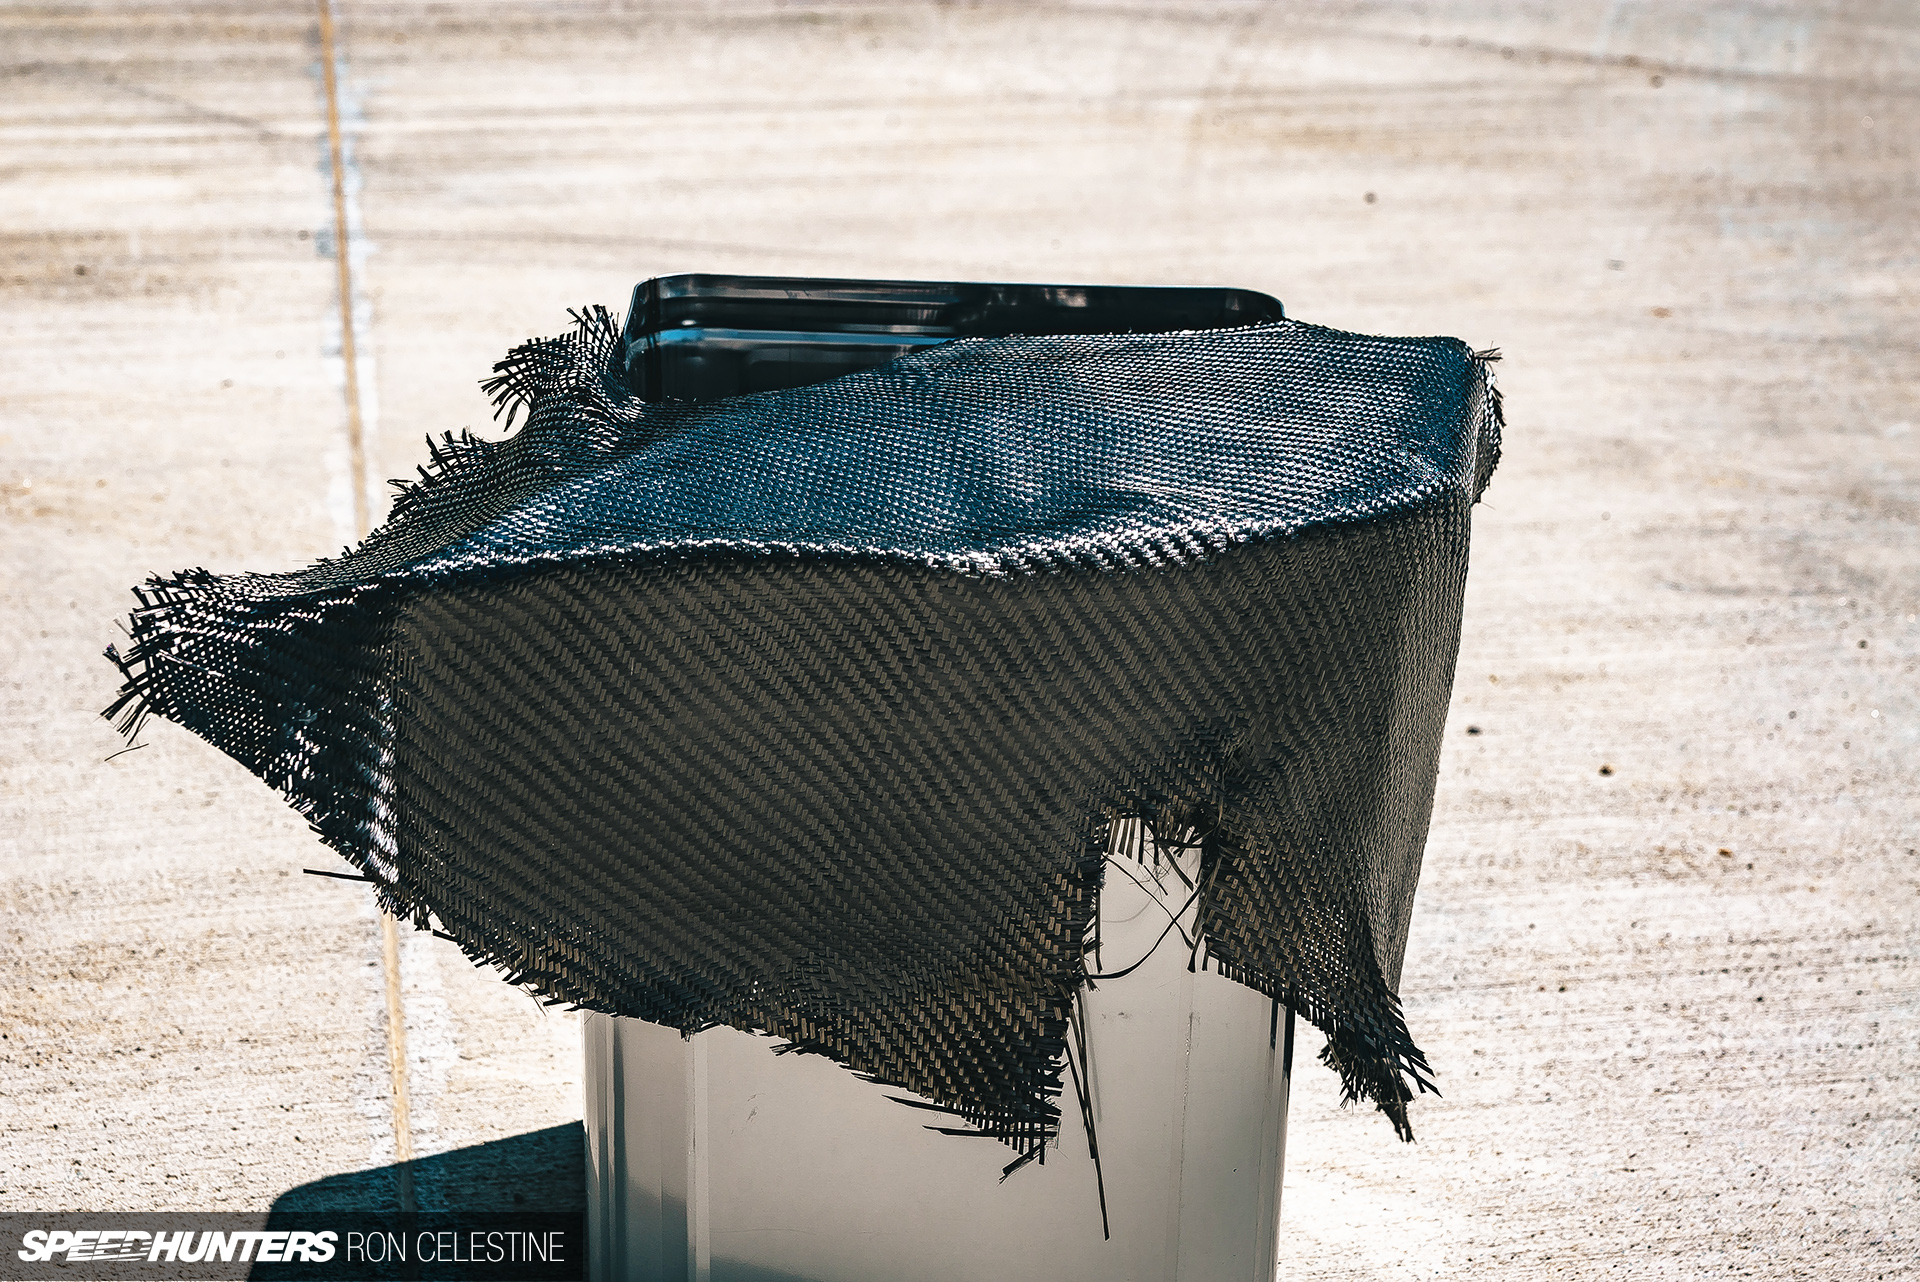
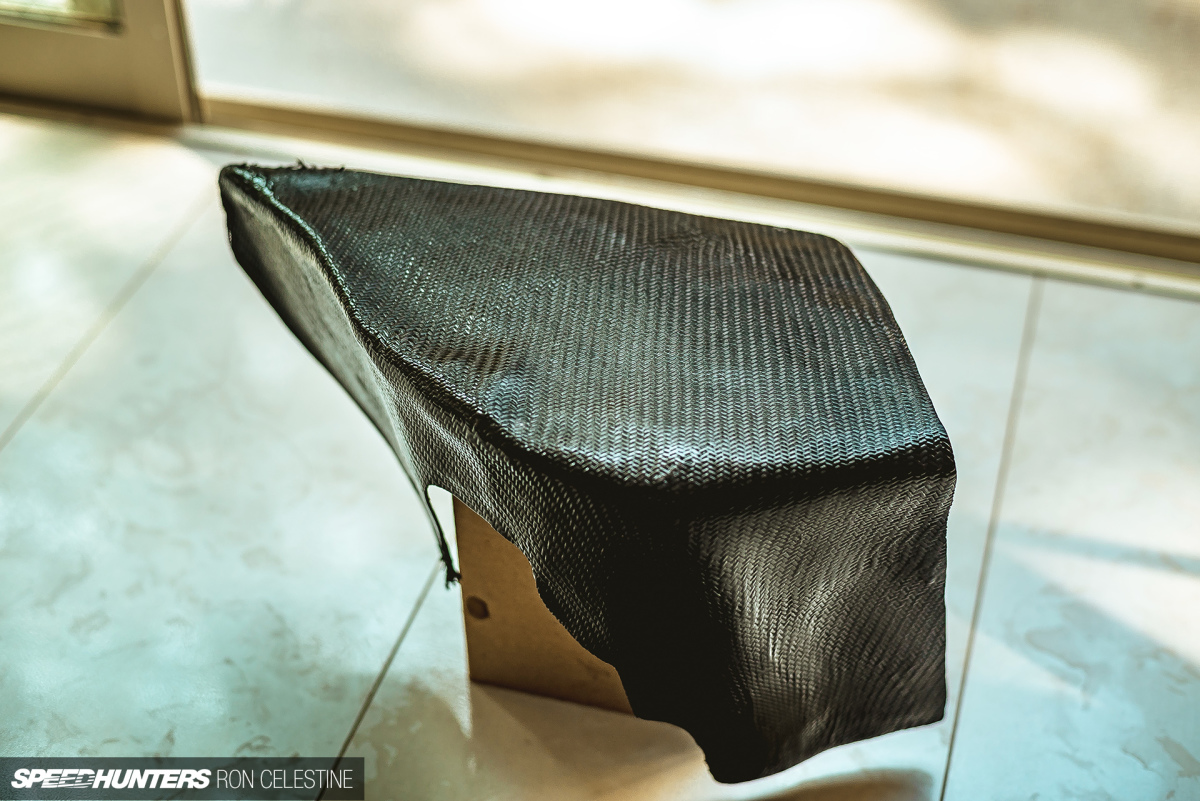
With the fiberglass mold coming away from the aluminum foil and packaging tape combo with relative ease, I finally was able to see the results.

Erring on the side of caution, I had added more fiberglass than necessary to give myself some breathing room in case my mold shape was off. More sanding and cutting was going to be required because of it, but to say I was over the moon with excitement at the completion of this step would be an understatement.

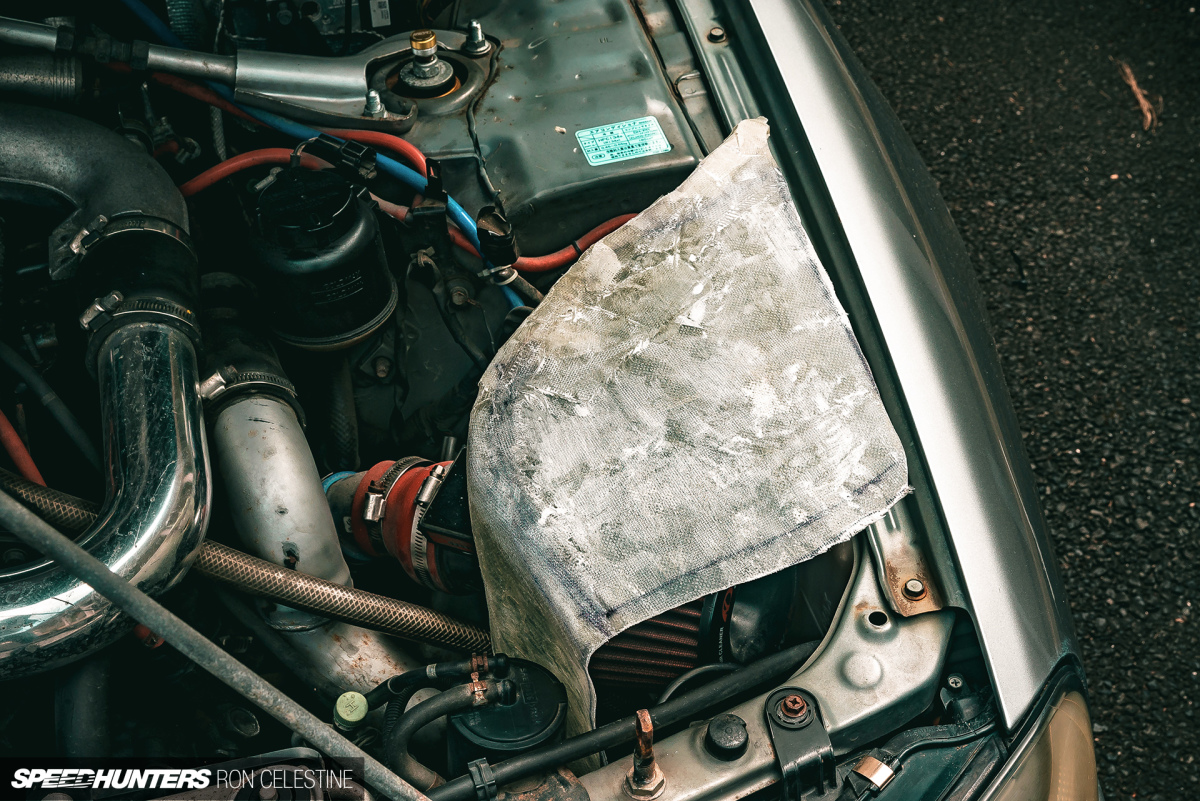
I strengthened the radius with chopped fiberglass before getting the overall fitment correct.


Perfect!

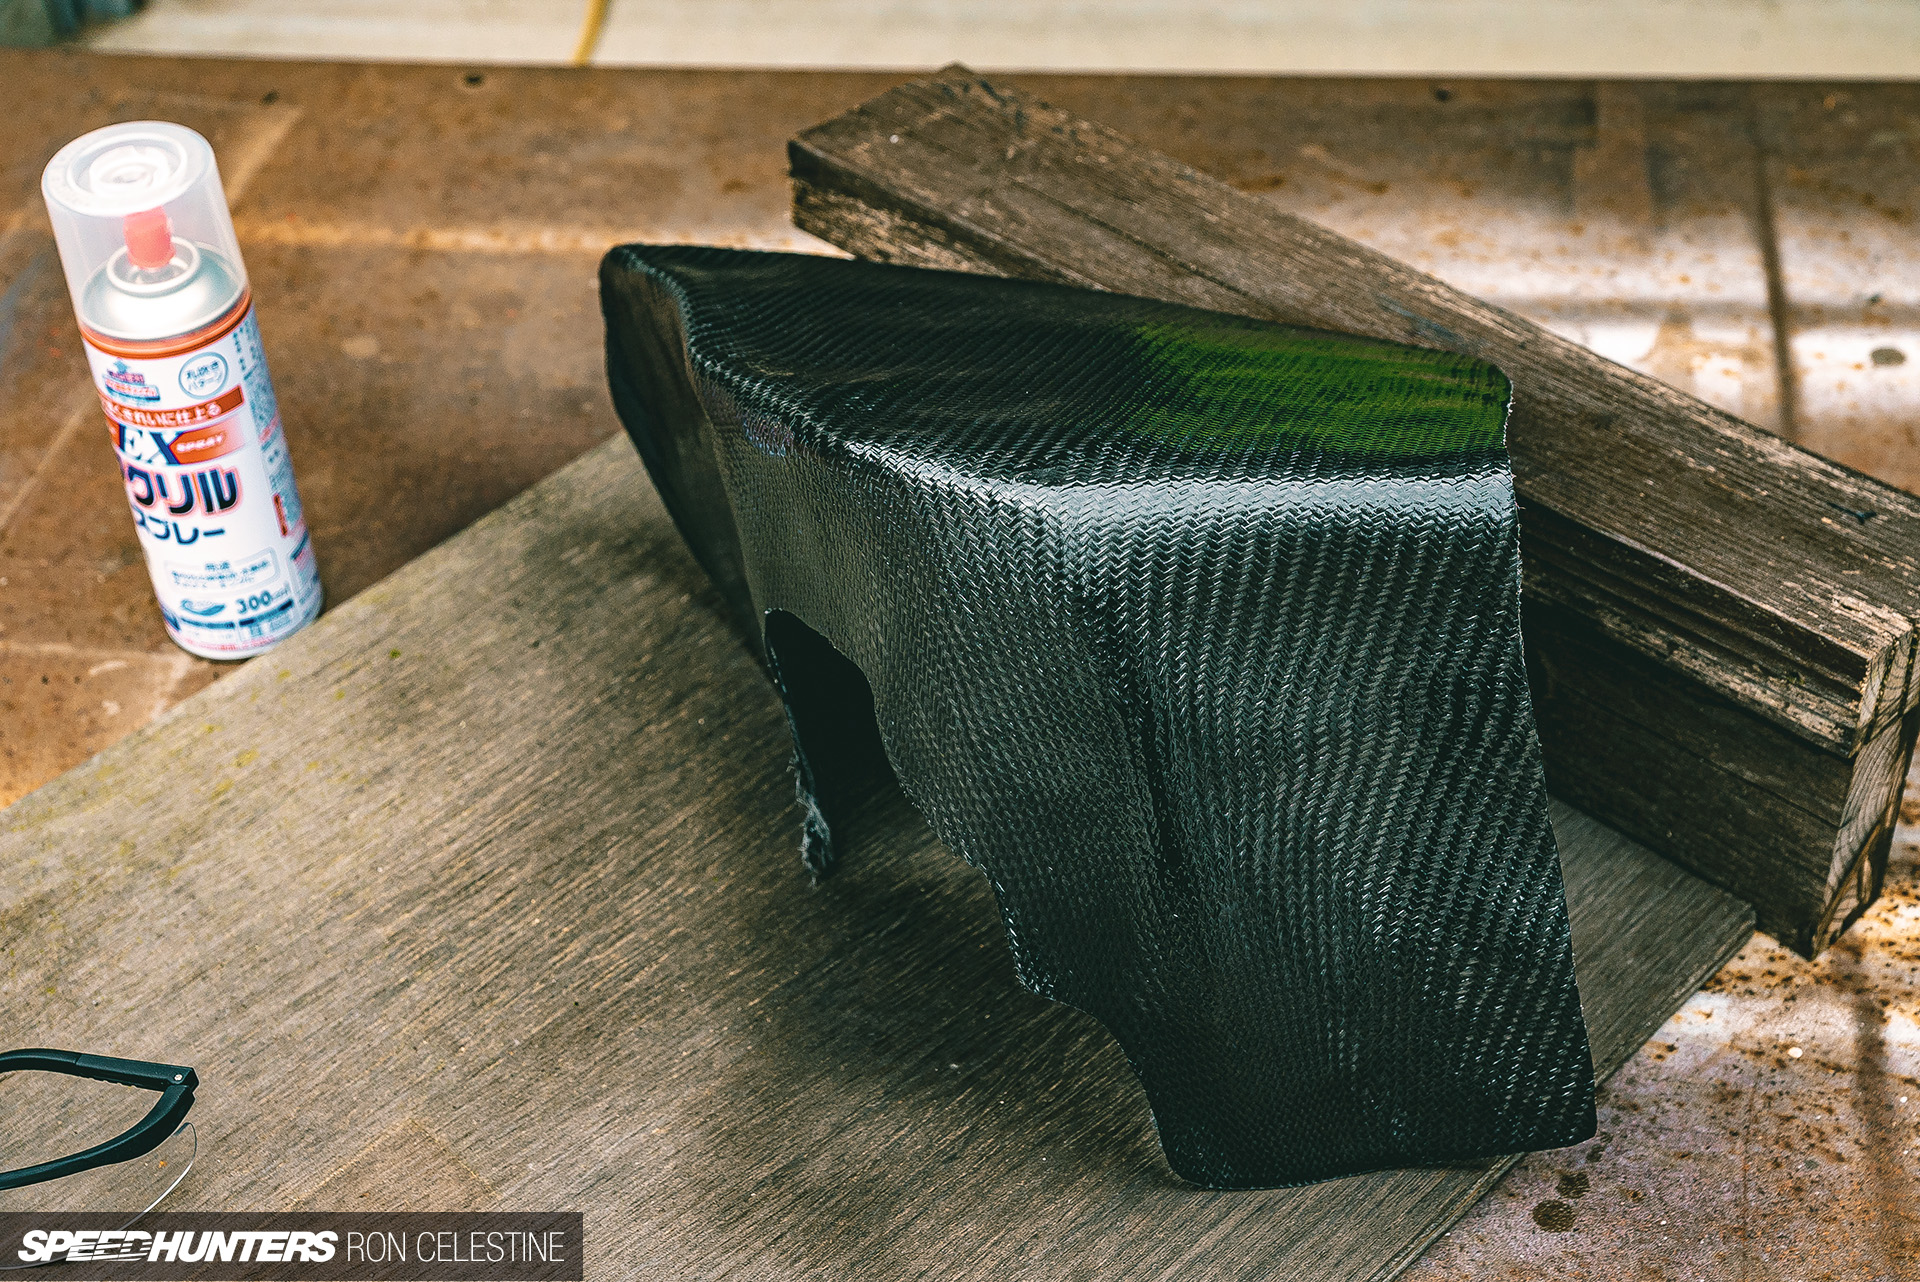
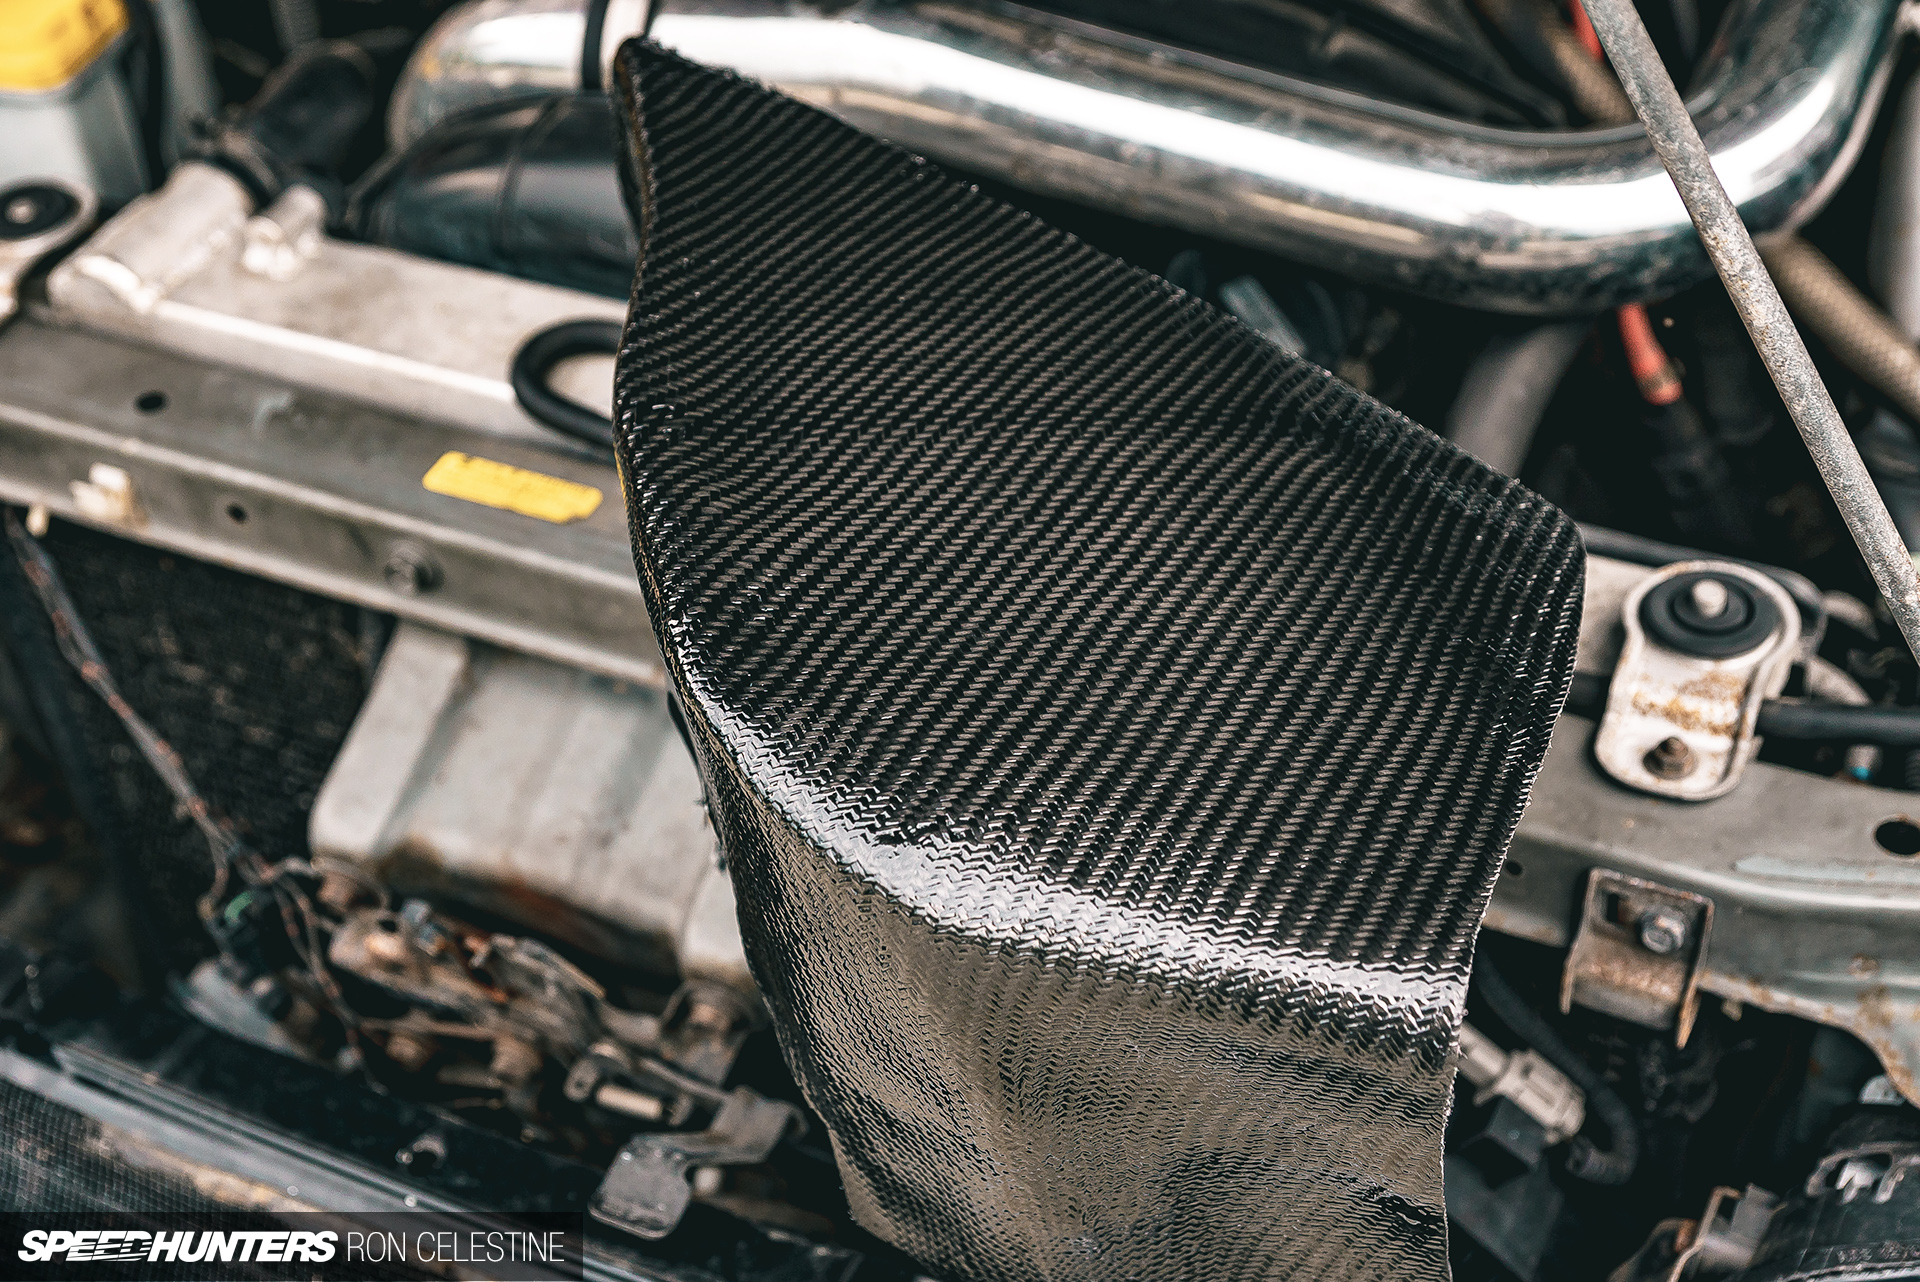
Besides wanting a carbon fiber exterior finish on my airbox, I wanted to add a bit more strength to the part, although the odds of this ever seeing any type of serious load is slim to none.
Learning from my earlier mistakes, I used magnets and a slower curing batch, and took my time adding the carbon fiber layers. At this stage it’s important to cover the entire part in epoxy, something I thought I had done, but hadn’t.
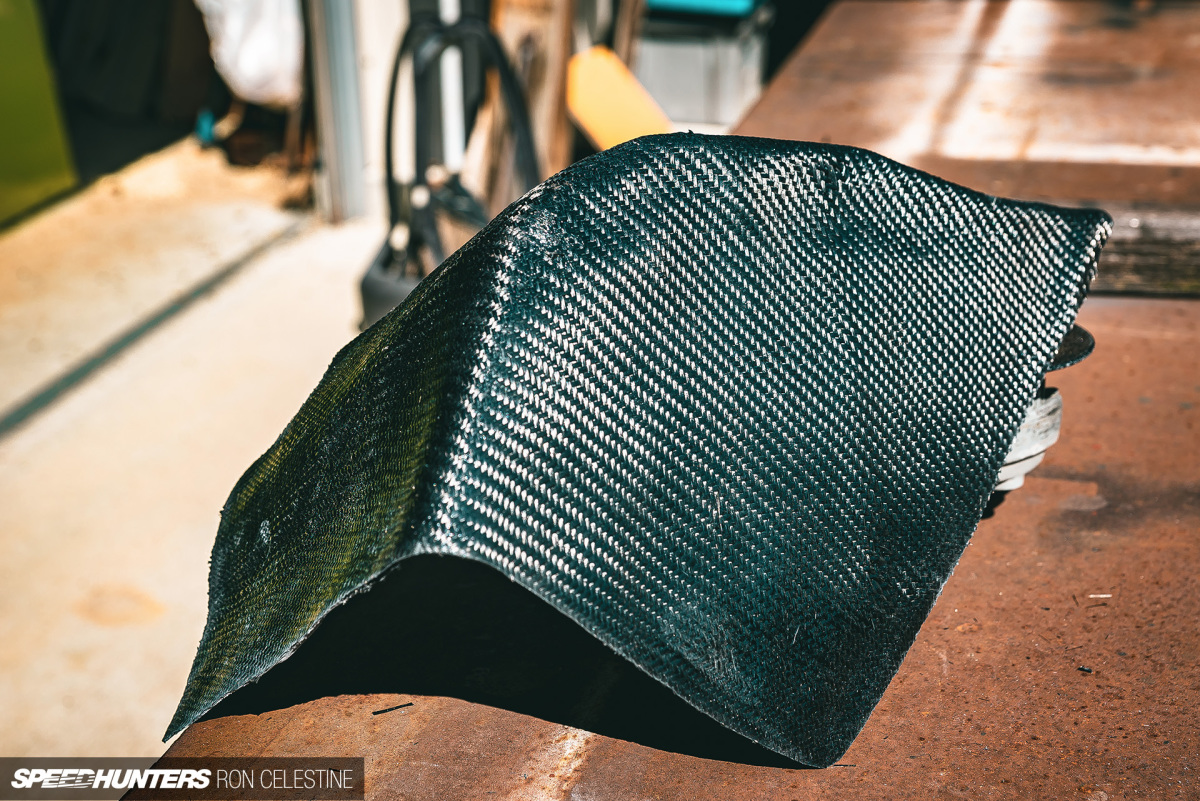
A few more layers of carbon fiber and some trimming later and here we were.
During my research, I saw a number of different ways to finish off the carbon fiber. For this project I decided sand the epoxy wax coat off, and then work my way up from 120-grit to 2,000-grit paper before applying some clearcoat.


And here’s the final result. I’m not sure I would have gone this finishing route again if I was to do it all over, but I could have spent more time sanding and used a different type of clear to make it really pop.

I’m sure you’ll agree that it’s lot better than the plastic separator originally fitted. Of course, the function aspect of the airbox needed to be present for this to be a true success in my eyes.
I won’t say that it’s a huge gain, but it does seem like the turbo is spooling up a little faster now, though I want to build either a ramp or tube to really create a ram-air effect. An added unexpected bonus is that the turbo fluttering sound that occurred when the boost wasn’t high enough to trigger the blow-off valve is now amplified. Since the blow-off valve is set to try and minimize lag, the fluttering only occurs at low vacuum levels. Sure, it’s not the loud stutututu that fills every corner of YouTube, but something that puts a smile on your face when you get it just right.
If you’re keen on learning a bit more detail on what I did with this DIY project, let me know in the comments. I plan on building a lot of things for Project Rough, and although this was one hell of a learning curve, I’m hooked.
Ron Celestine
Instagram: celestinephotography


This is pretty cool! Hmmmm... this looks pretty time consuming also, but it might be something I'd want to try once I have my garage space sorted again. I'm not very good at building stuff with my hands though, so maybe my CF parts would come out kind of crappy. haha
Hahaha this way of doing it is very time consuming but relaxing at the same time hahaha. Think with time it could be faster ^^ def worth a try!
good work love this little part of the build, honestly its the small things in life.
Thank you! It really is the small things that can put some of the biggest smiles on a face haha
Thx man ur a pretty cool guy
Nice project glad to see diy. Try foam for more complex shapes you can sculpt it with a hot knife, cheese grater, maybe not a sander as the foam can outgas. Yes to ram-air you may read how it only works a highspeed etc but if you are willing to have some fun you cant beat it Ive had good luck with giant scoops but tuning for the effect is kind of different
Thank you for reading! And ya, I thought about doing foam as well though the hot wire part worried me a bit haha. But when I get to a really complicated shape,I may give that a shot!
Thanks for posting this. The DIY semi-bodges are my favourite part of modifying cars
Right?! Haha and thank you for reading ^^
This is so inspiring... So clean, so simple and a lot of love for cars! hahaha
Glad you enjoyed! Give it a try!! Just take your time
Having done a few pieces in carbon fiber I can honestly although time consuming it is hugely rewarding! It's also not as scary as a lot of people think! So far I've managed a skinned front splitter for my old mk1 Golf GTi, a skinned rear valance for my current Mk6 Golf R as well as a full carbon fiber airbox and dash panel for my old s14a 200sx (RIP). Great work!
I totally agree! Already getting ready to work on the next piece haha. What did you do to get the finish look nice on the front splitter?
Would love some more detail on this! Its something ive thought about attempting but just never got around to it. Great work!
Let me know what you would like to know and I can try and help out the best I can!
Definitively cool!! Gives me ideas for my projects and show me that I can still make some actual CF parts, instead of just CF wrap over aluminum...
Glad it was able to give you some ideas! Definitely give it a try!
Rad, I always love custom one off pieces. you did good work on the layup, nice smooth layer of resin and whatnot, seems that making custom carbon pieces is alot cheaper then I expected
Tofu.
Thank you! I definitely could have done a better job of laying up / resin but you gotta start somewhere haha. The price you pay is really the time consuming part to get that ultimate fit and finish
"After countless hours of researching and watching different methods, I came upon a video where a special effects wizard creates body kits from scratch, and discusses almost the entire process. Two hours of screen time later and with more confidence that really made any sense, I was ready to dive in."
Wow, I´ll really appreciate if you can share the link of that tutorials.
https://m.youtube.com/watch?v=UHdJYL7iiRk
Here is a faster version I what the gentleman did but if you search his channel, you will see the 1.5- 2 hr videos
First of all Congratulation for a Great first attempt.
I totally agree, if people will just put a side the negativity.
Internet was build with a great set in mind for all the information all over the world
to be accessable to anyone. Without the internet we will miss a lot. Internet is a GREAT PLACE TO BE.
ow any Totally love you project rough, because I can relate, I own a SR20 Sentra here in Philippines
and internet was my first friend that got me going.
Just a quick question you used resin on it, mine also has resin if it gets old and patina comes in, can I sand it and just put clear coat?
Thank you! And yes, basically what Fabrik8 said
Depends on what the "patina" actually is. If the resin is turning amber from heat or UV exposure, there's exactly nothing you can do about it. If it's just dulling or surface oxidation, then sanding and properly protecting could make it look better.
From your anxious moment about figuring out hardener (catalyst) ratios, The picture of what appears to be a quart can of resin and a little bottle of MEKP, and your talk of sanding off a wax coat, it sounds like you're using a polyester resin and not an epoxy resin. No big deal, but worthwhile to use the correct terms for the products you are using if you are going through the effort of learning to work with composites.
By the way, if you're going to use a polyester resin that has a surfacing wax included in it (it's used to air-inhibit the surface layer so it cures properly), make sure you observe the max time between resin coats, else the resin layers may not properly crosslink to each other. If you wait too long, you need to sand off the wax layer for proper crosslinking between the old resin and the new resin.
The best beginner tip I can possibly offer for polyester resin is to use graduated mixing cups for the resin, and a syringe for the MEKP catalyst (no needle, just a syringe with graduations on it). Polyester has a pretty wide ratio range, but it's good to be somewhat consistent and know what your ratios are, or at least know where your start point is so you can then adjust for hot temps, cold temps, thick areas of resin, etc. Different climates and different seasons need some experimentation. If you get into epoxy resins, ratios become absolutely critical, else the resin may never properly polymerize.
Also, preventing exotherm can be as easy as pouring the resin into a shallow pan (foil disposable baking pans work fine) so it can shed heat with a lot of surface area, instead of building up heat in a deep cup (with a big section of resin and little surface area).
I can write a mini-novel on this kind of stuff, and I'm trying not to. As you can guess, I have a bit of experience in this area.
Good first project though, and don't be afraid to try and fail. This is the best way to learn!
Thank you for wealth of knowledge and insight!
With the disposal baking pan, would you still use a brush to apply the poly or a different method?
A brush still works fine, or whatever your method of choice ( brush, squeegee, hard card, paint roller, etc). The foil pan is just to slow down the exotherm with a thin section of resin and more surface area, so just mix your resin in a cup as normal and then pour it all into the pan for application.
Ahhhhhhhhhhhh. Cheers for that!
'This is where the power of the internet, determination, and some ignorance comes in.' That made me laugh haha ...much appreciate the sharing of your grounding experience. Many will relate.
Hahaha sometimes a little ignorance is needed to get the ball rolling
please post more of your DIY exploits, very interesting. makes me want to attempt it now.
would love to see some carbon fenders on project rough..
great job
You and me both actually hahaha but maybe with time and more practice with some other parts thank you you!
Building a frame from wood and stretching fabric over it is a simple way to create a mold with a mix of flat and curved sides. Just ad resin to the fabric and you have a smooth hard surface
Very cool, i like the outcome, it fits great!
I may have misunderstood, but you put CF on your GF box? Please don't do that in the future. While it might be not much of a problem here, those parts tend to crack over time because of the different temperature expansion coefficients. To think about it, it might also form cracks in your part, as the engine bay goes through a lot of cold-hot-cold cycles.
It's really not a problem at all for a part like this, because it's almost completely unconstrained because of the simple geometry. Worst case, it just changes shape a little like a bimetallic element in a mechanical thermostat.
It's also polyester resin, which has a lower Tg than most epoxies so generally gets more flexible at lower temperature. In other words, you're overthinking things for a part of this type.
Keyboard Warrior: noun.
A person who disagrees with anything online regardless of how valid their opinions are. Used in a sentence:
"If the internet had been around when Copernicus was voicing his 100% valid opinion, he would have been labelled a keyboard warrior."