


Corner balancing a car has been one of those things that seemed off-limits to the average automotive DIY enthusiast.
You can find a wide range of electronic scales from a speed shop like Summit Racing; however, a ‘decent’ set will set you back at least $1,000, and a higher-quality set will cost double that.

You can use the bathroom scale hack, where you jack the car up and lower it on a set of cheap bathroom scales. I even tried this back in 2020 with Project Rough, my ER34 Nissan Skyline GT-T, and had… moderate success.

To do this correctly, you must ensure you are working on a perfectly flat surface. The car needs to be as level as possible while on the scales – i.e., on some sort of platform – and you need a way to relax the arms after jacking the car up to move the scales into position.
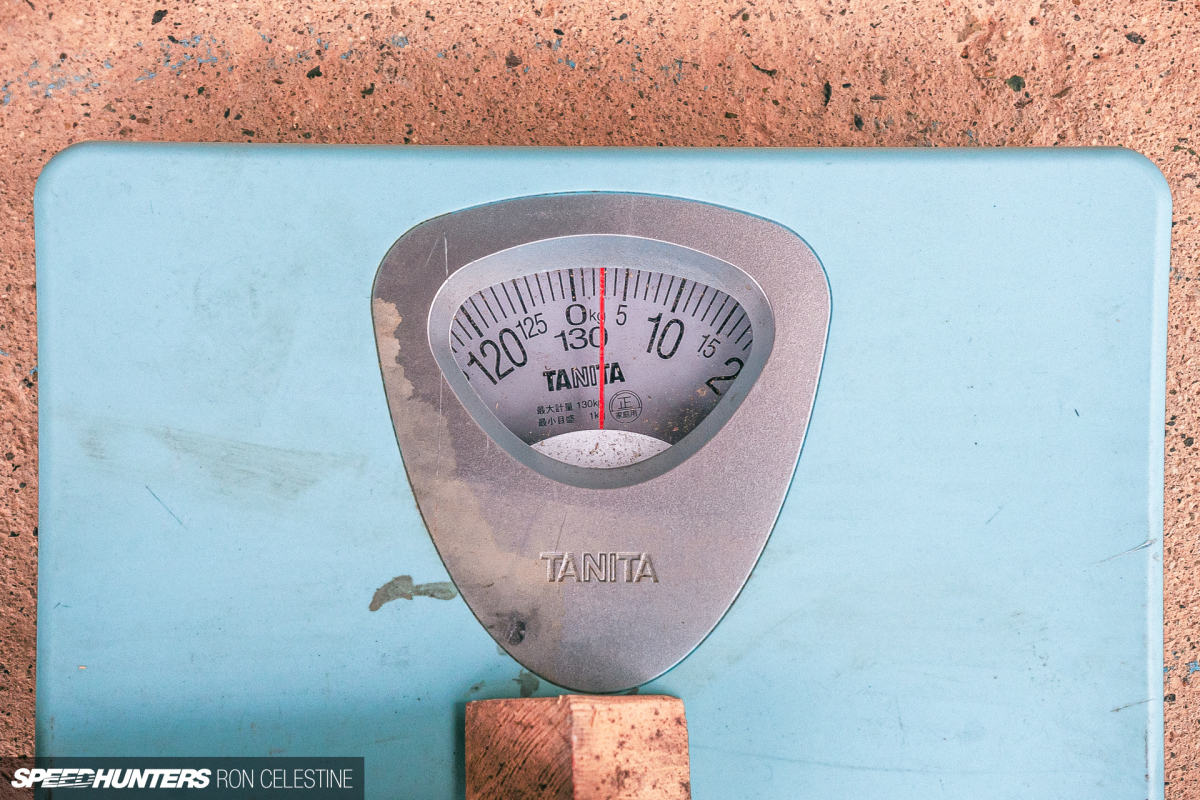
It’s quite the dance, and there are a host of variables where things can go wrong. One of my scales broke due to going far beyond the maximum weight limit of 130kg (286lbs).
So, measuring the weight at all four corners, making any adjustments, and having to perform the whole circus again made this technique far from practical. It seemed like dedicated electronic scales were still the only viable approach.
CHAPTER TWO
Or Is It…
Fast-forward a few years, and I discovered a YouTube channel called SuperfastMatt. Matt’s videos are as humorous as they are insightful, and one called I Invented a Better Way to Weigh Your Car. And it’s Cheaper, Too. discusses how you can use leverage and a bit of math to calculate the weight at any given corner.

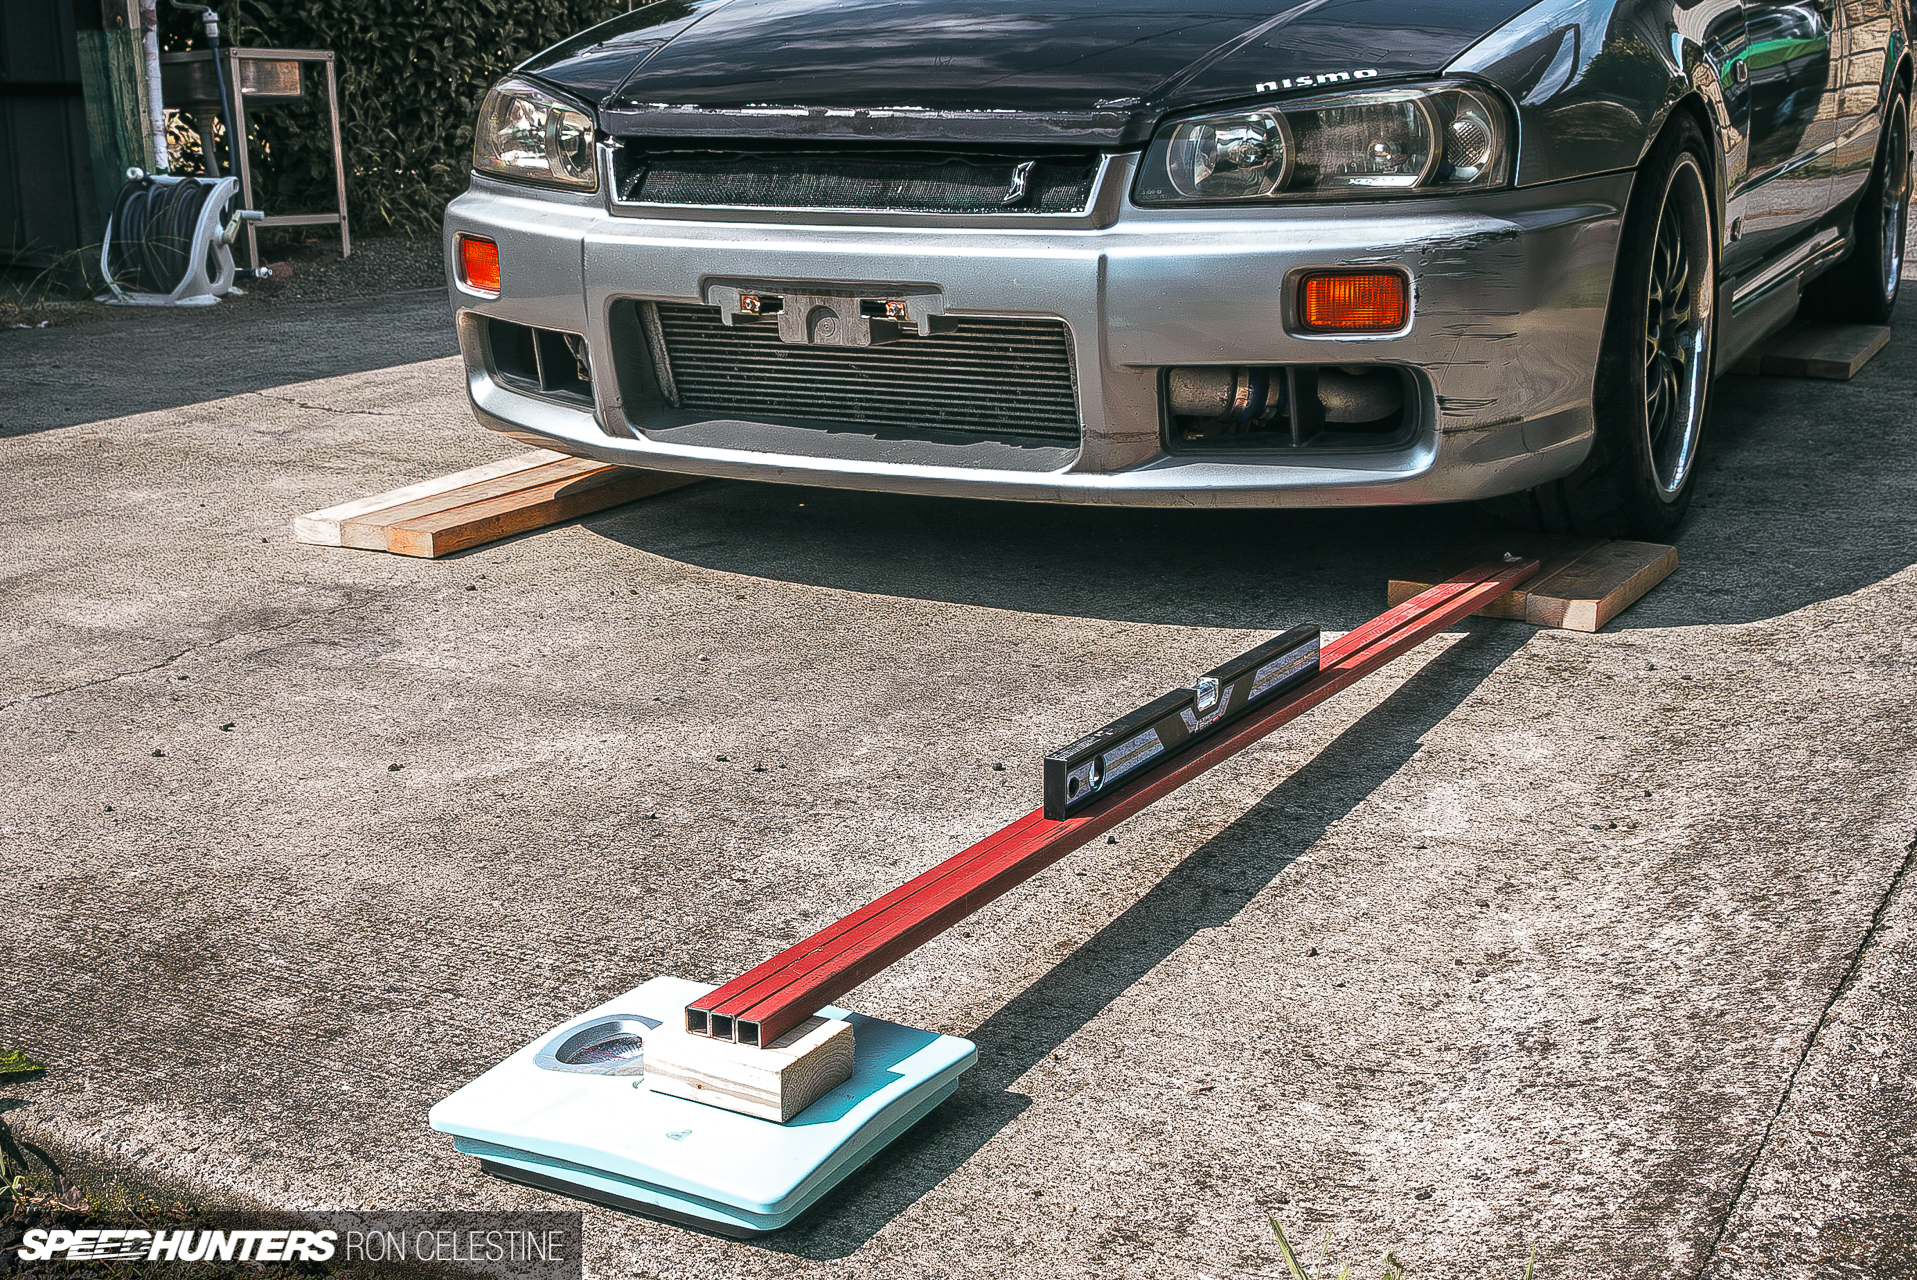
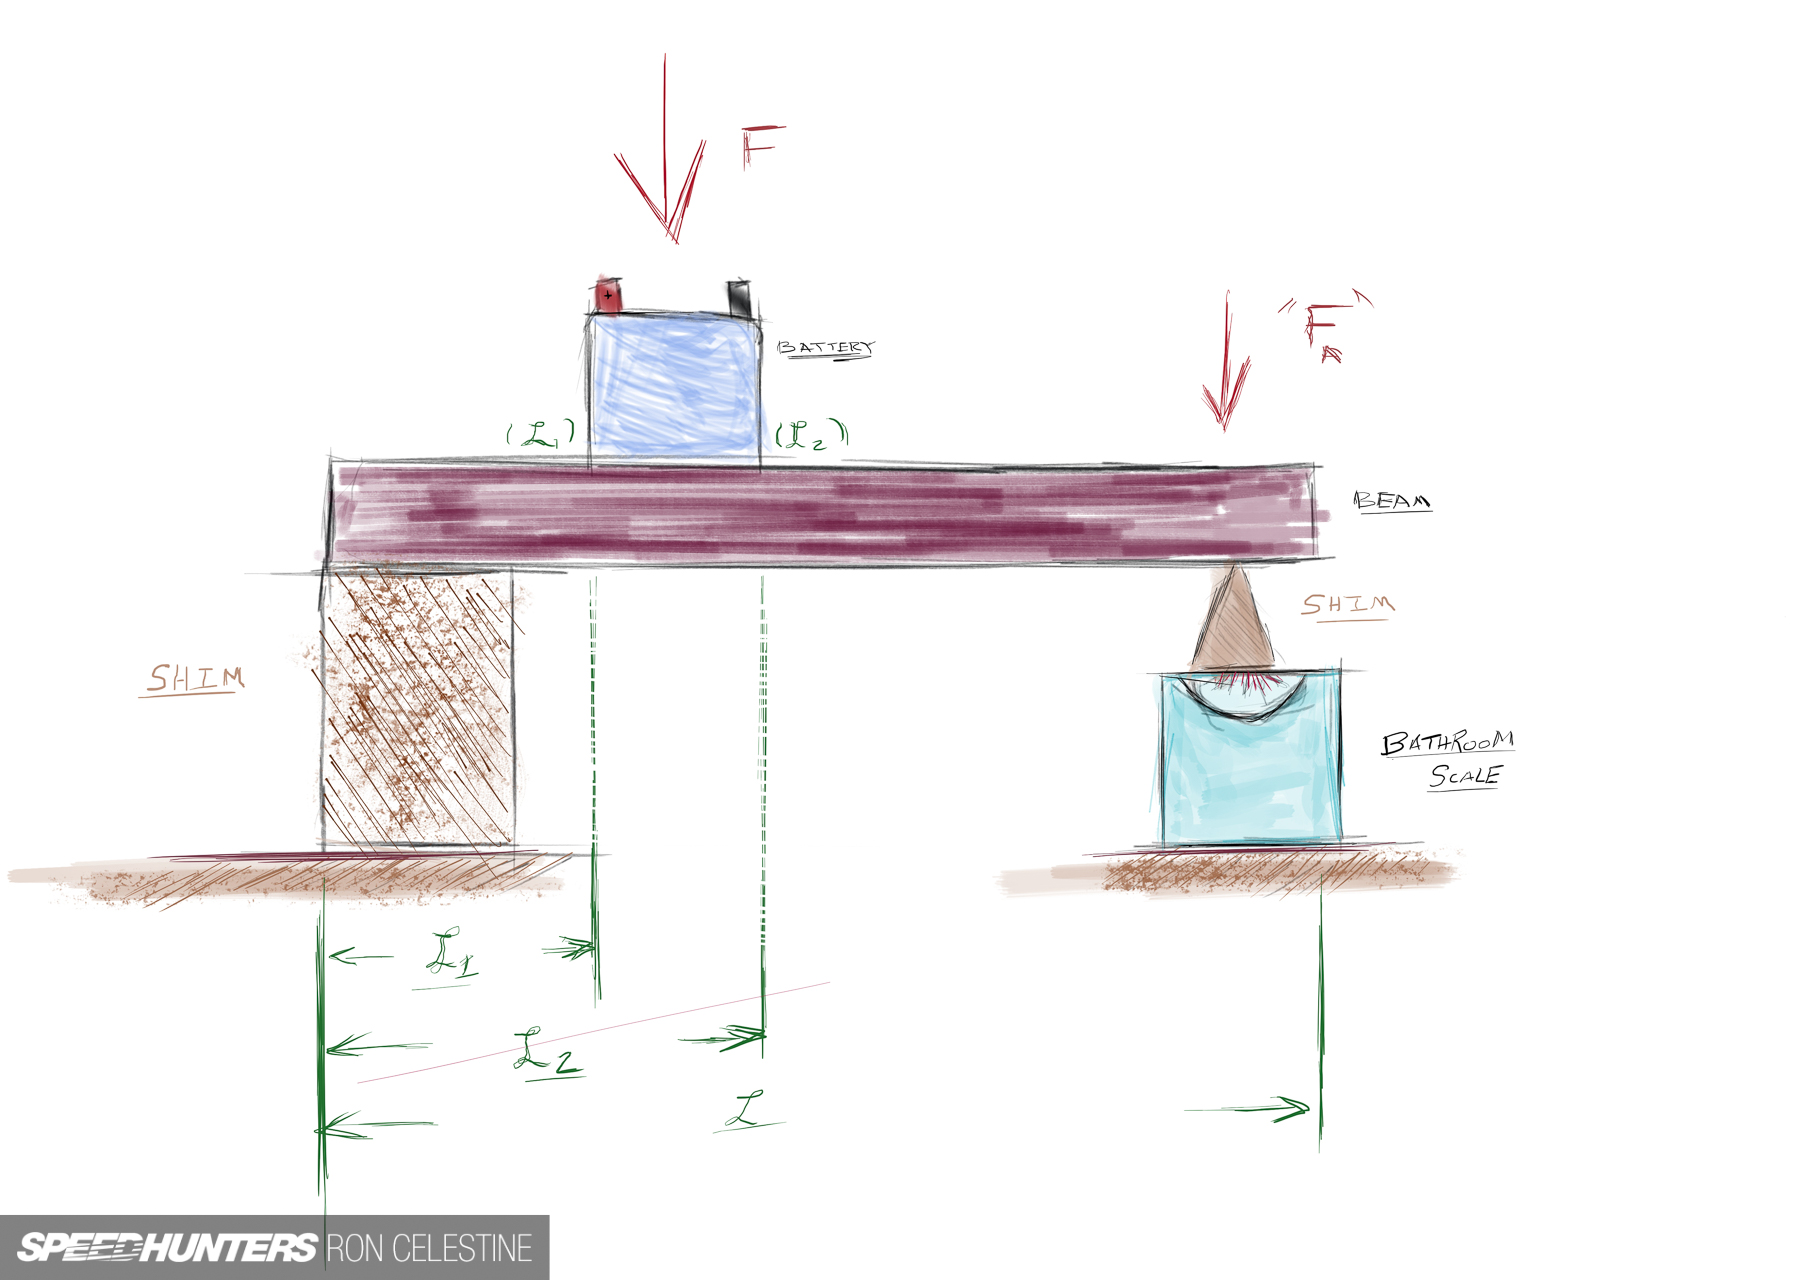
You have a supporting block in which a beam rests on. The supporting block is a ‘X’ distances away from the bathroom scale. You would then place the tire on the beam, and that weight transfers across the beam to the scale. The weight will be significantly smaller, which shouldn’t max out the scale. If you know the distance from the supporting block and the distance to the scale, you can calculate the actual weight with the value shown by the scale.


Seeing that I still had my analog scales from the first attempt and a workable platform I designed for aligning cars, I figured I’d let my inner engineer back out to play and give this a shot. Before going full send, I decided to test it on a small scale with an old battery from the family Honda Stepwgn.

I first weighed the battery to know my target— roughly 9.8kg (21.6lbs). The resolution on these scales leave a lot to desire.
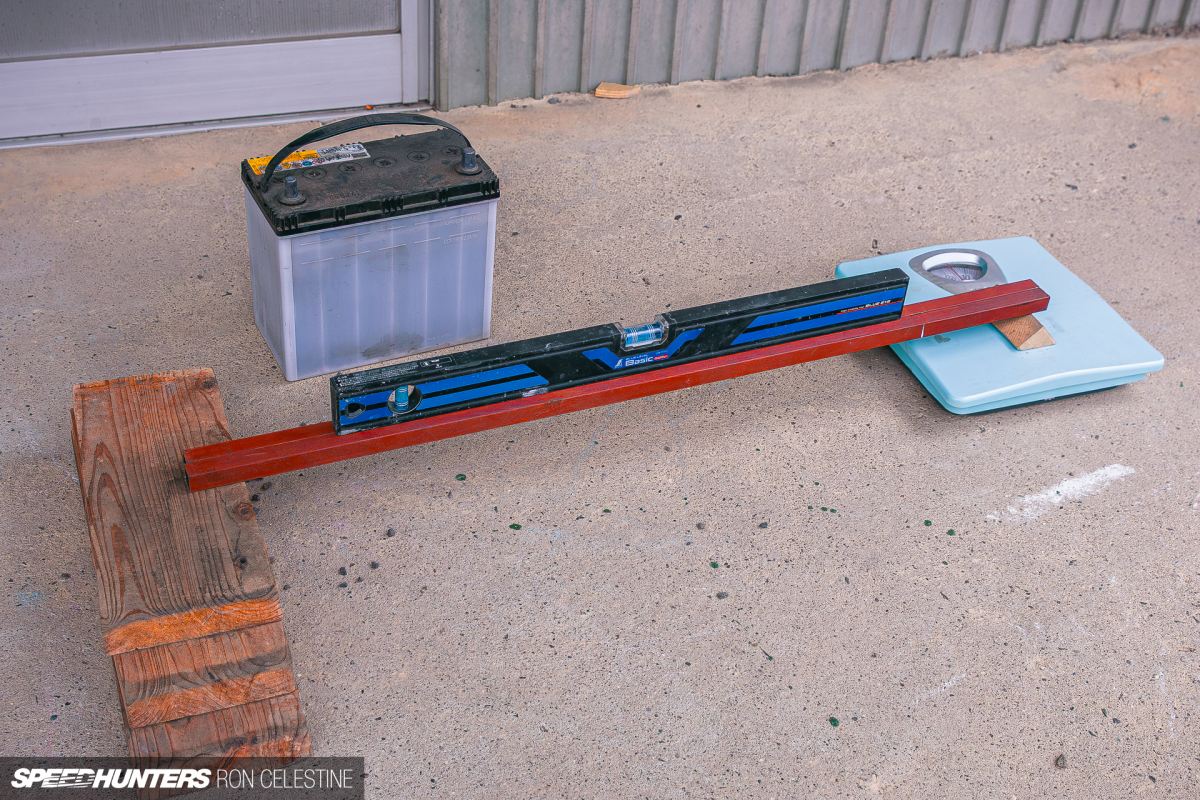


I next created a platform that would have the beam level with the bathroom scale. I recorded the length (92.2cm). We will call this ‘L’.

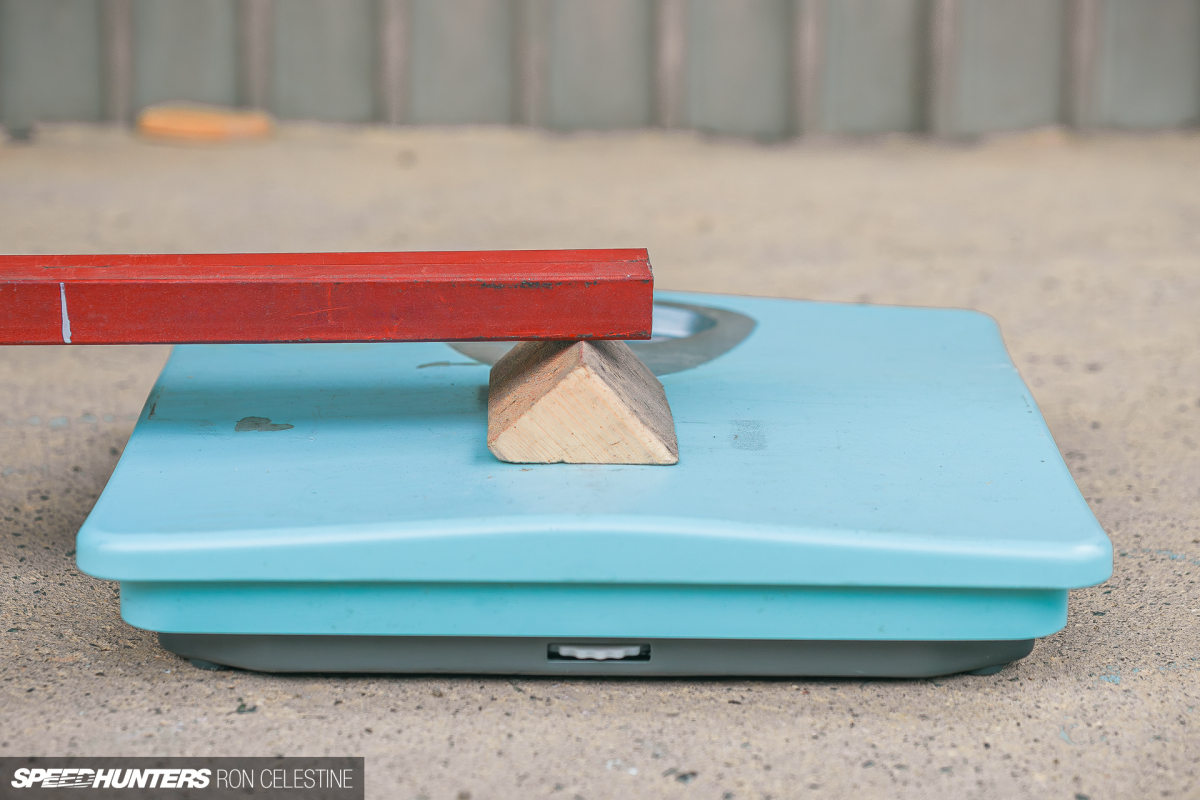
Then I placed the battery on the beam and got a reading of 2.9kg (6.4lbs). Great! I’ll call that ‘Fa’ for now. Now, to calculate the distances.

Unlike the drawing, the force of the battery isn’t a single point on the beam, thus I decided to take the average of using a distance from in front of and behind the battery – one closest to the scale (L2) and one closest to the supporting block (L1). I would subtract the two and divide it by 2.
(L2-L1) /2 = Lm
(39cm-15.5cm) / 2 = Lm
11.75cm = Lm
With what I’m calling ‘Lm’, you can subtract that number from L2 and get the battery’s ‘center’ point of force. I’ll call this value ‘Lf’.
L2-Lm= Lf
39cm-11.75cm= Lf
27.25cm= Lf
With Lf now determined, I can divide it by the total length of the beam. If you know the distance relative to the beam, you can divide that number by the weight on the scale to calculate the weight. I know it’s getting a bit wild here…
Fl=Lf /L
Fl=27.25cm / 92.2cm
Fl=.2955
I learned this on the full-size test, but I tried to keep as many numbers after the decimal place as possible to increase accuracy. It does make a difference. With Fl, we can finally calculate the weight of F.
F= Fa / Fl
F= 2.9kg. / 2955
F= 9.81kg

This is an error of 0.10%, which more than proves the accuracy of this mathematical test. With this solid proof of concept, it was time to scale up.
FINAL CHAPTER
Full Steam Ahead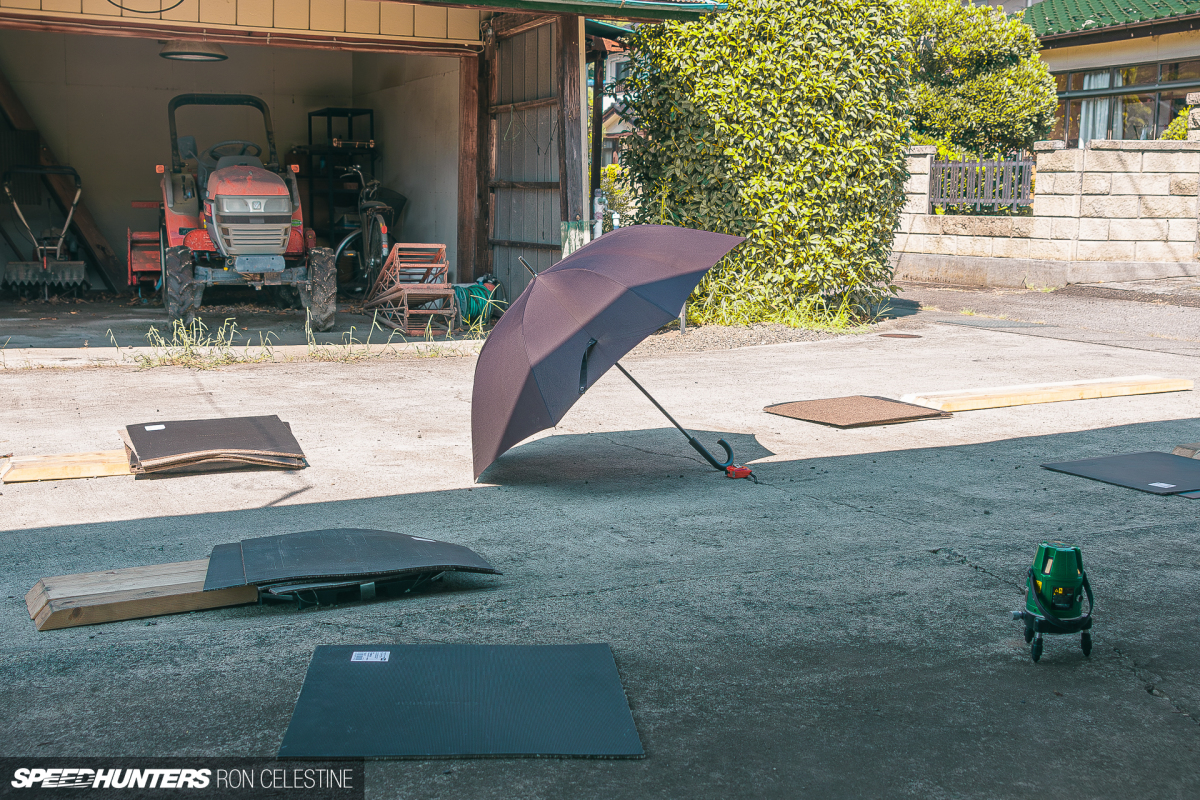
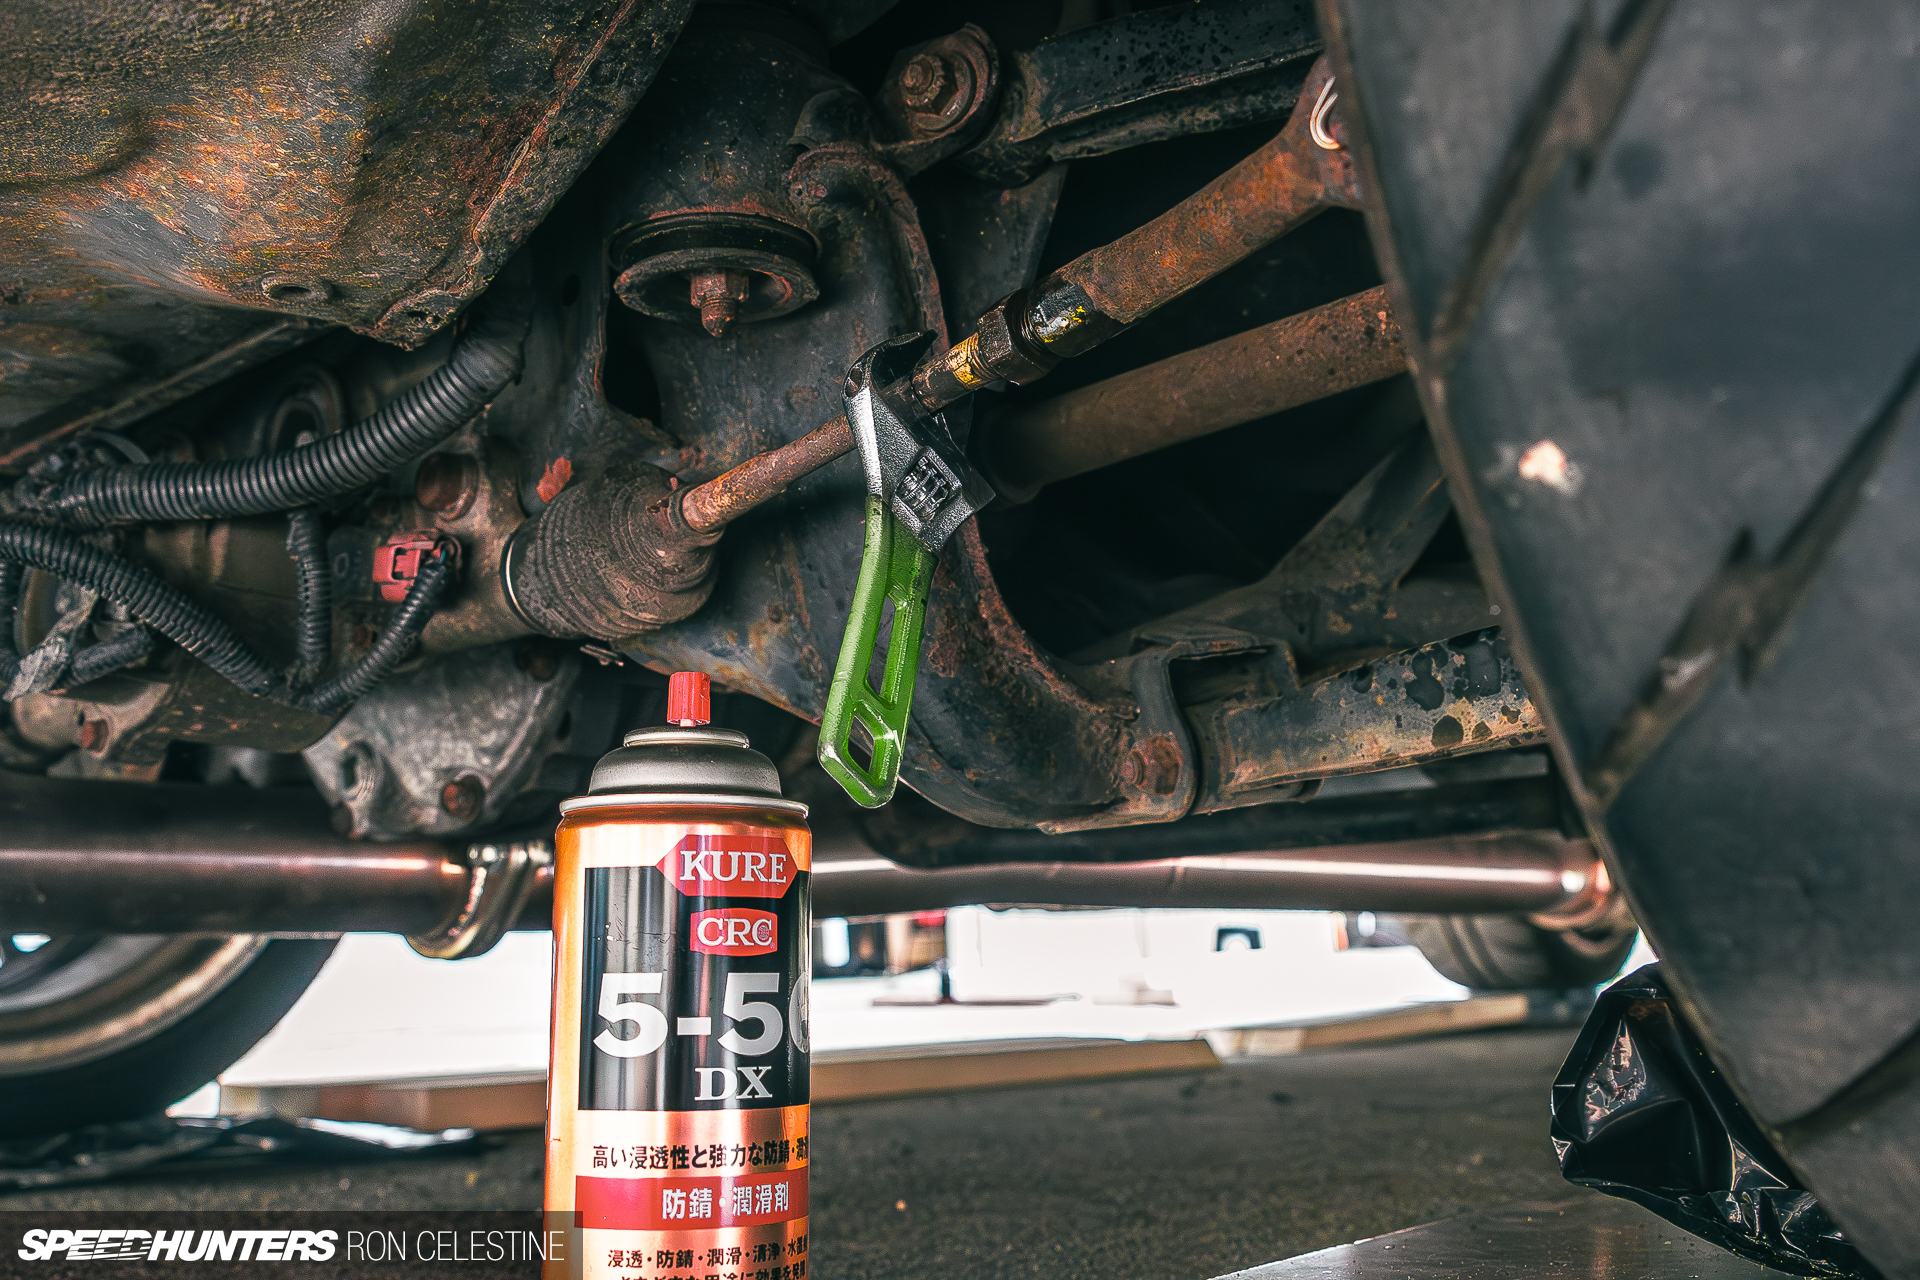
With Project Rough ready to go, I decided to do an alignment, as I would use the same platform rig for the corner balancing.
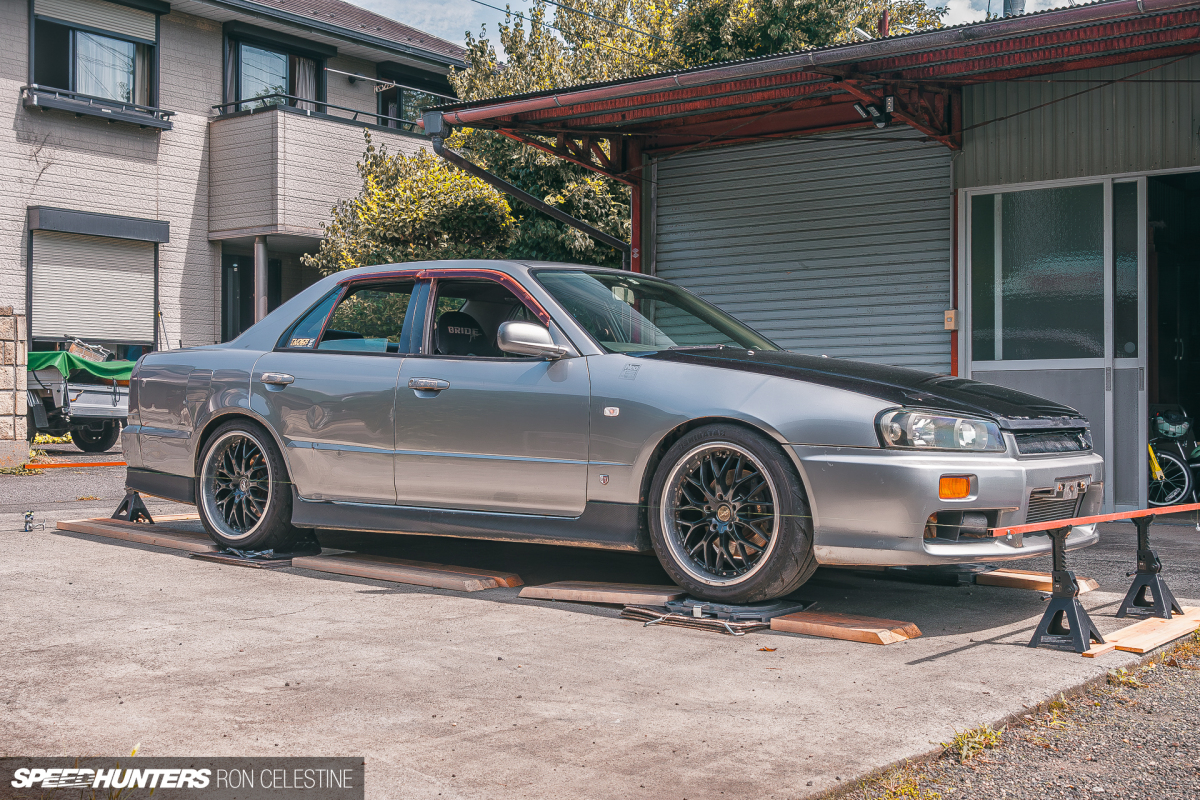

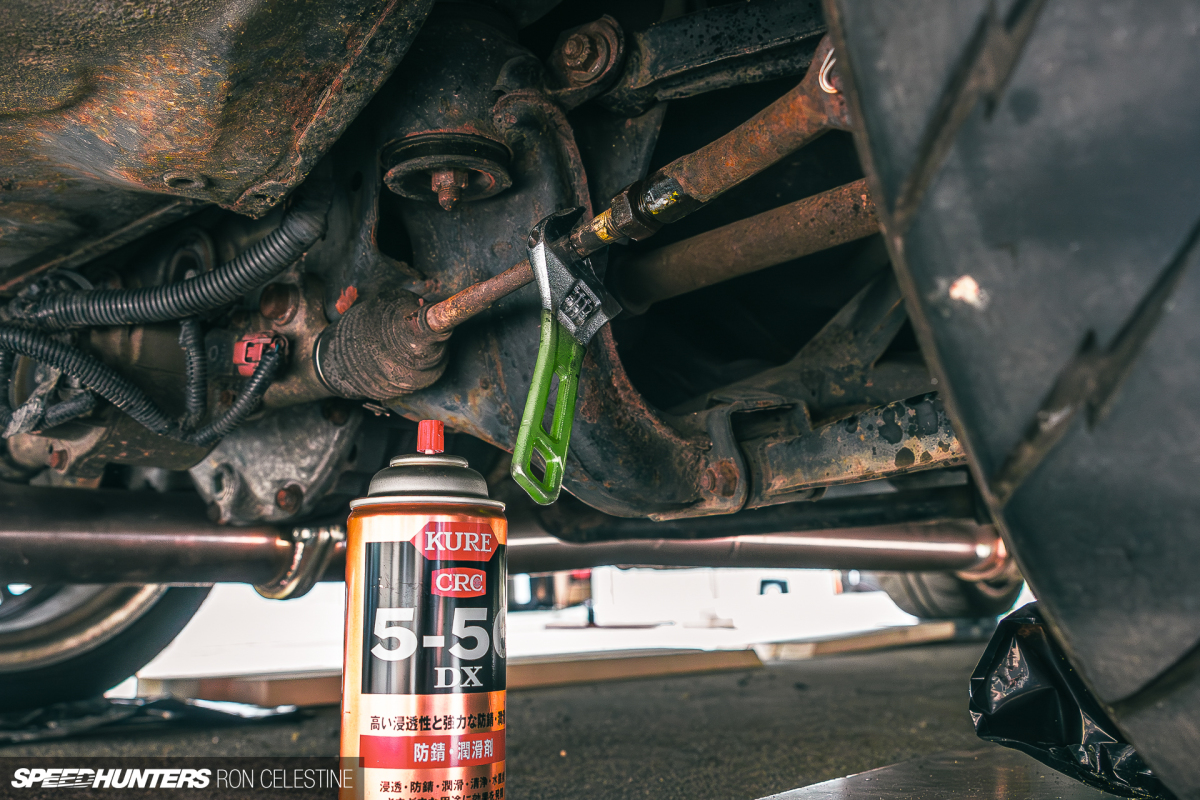
For shaken, I had to reinstall some OEM parts, which threw my alignment out of whack.

Bringing the car to my house from its storage spot was one of the sketchiest drives of my life. I adjusted my laser level to level the platform with shims.


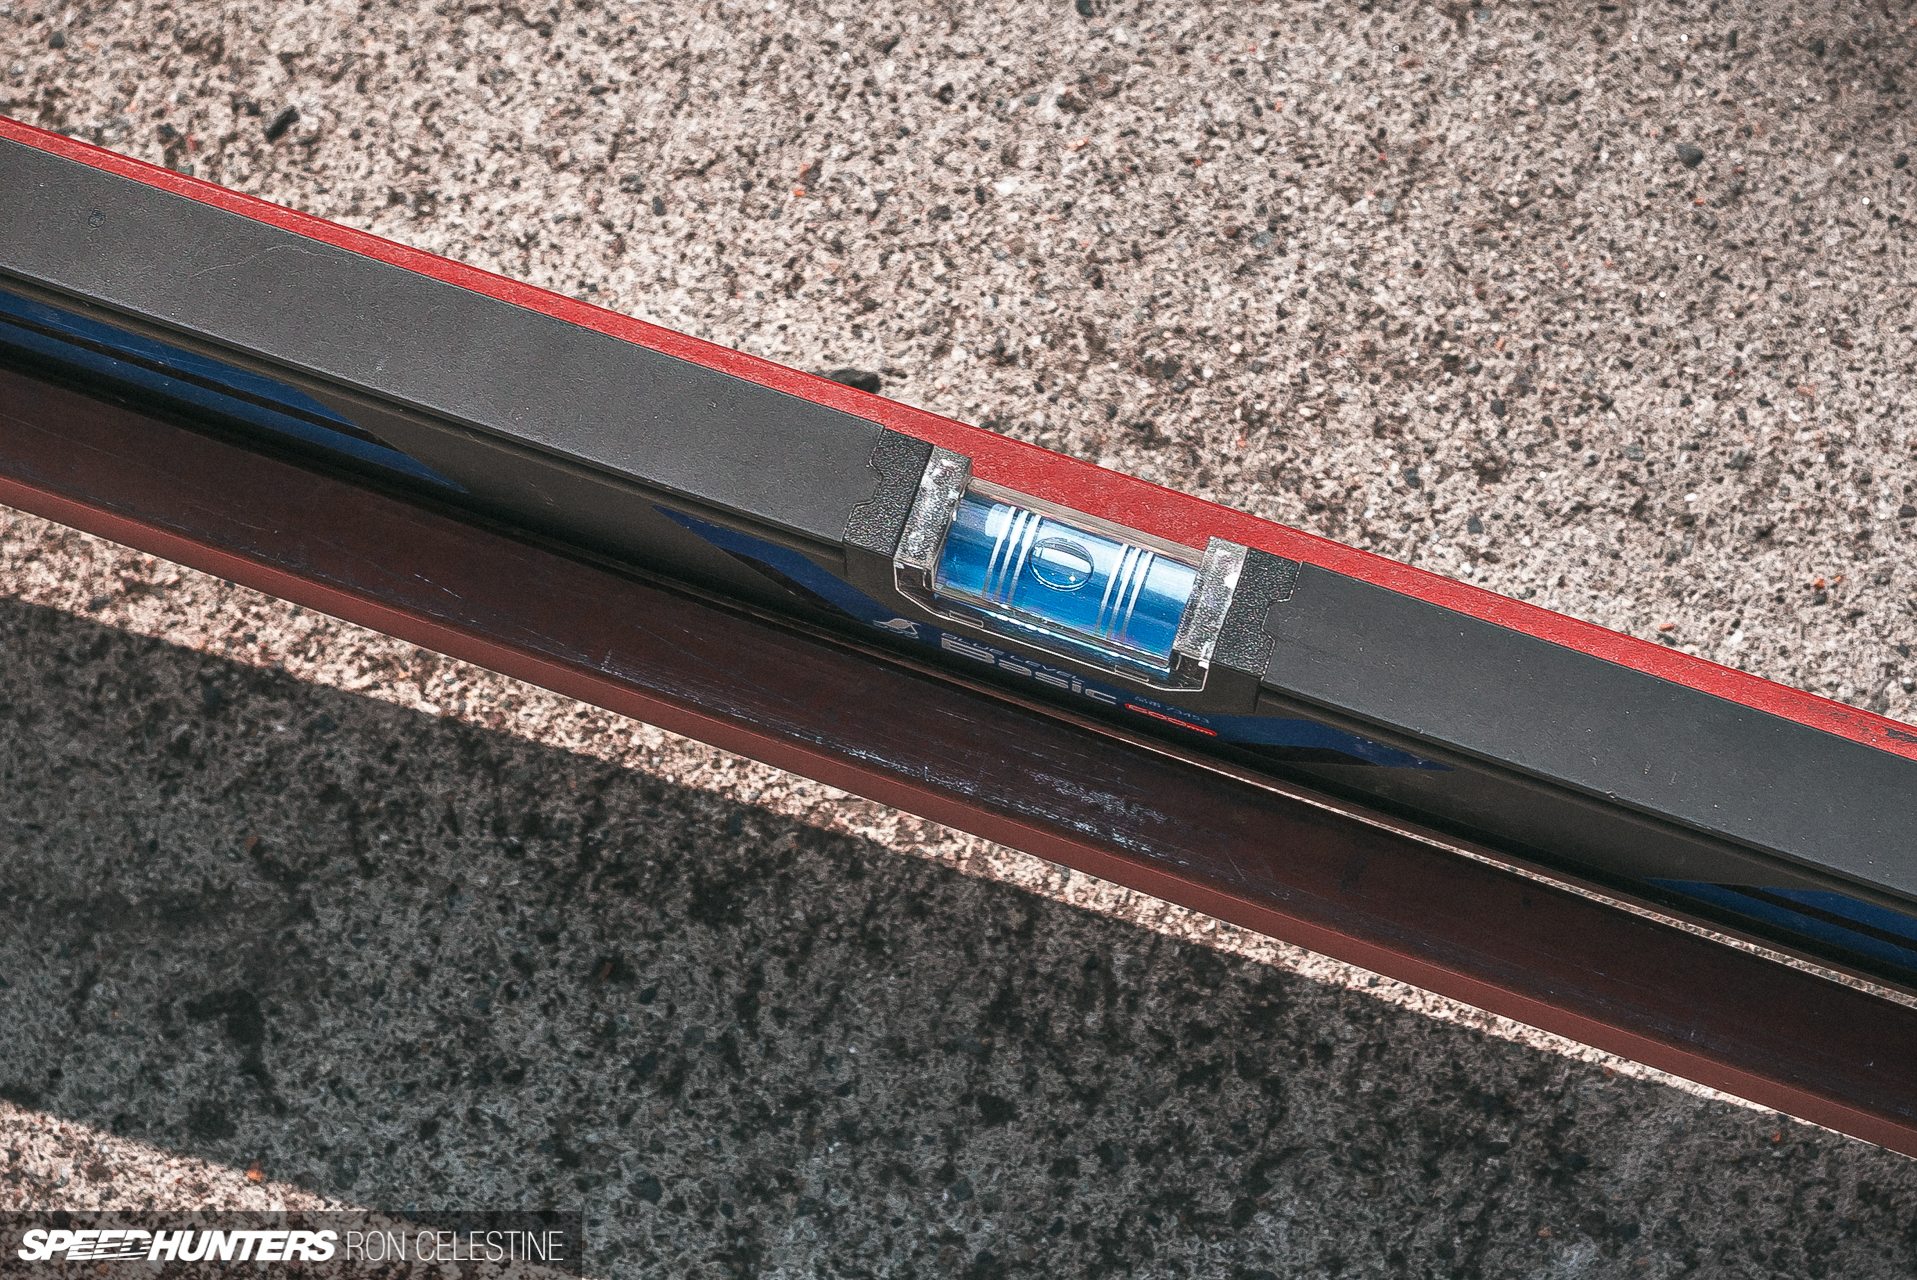
I was now ready to corner balance Project Rough. I got my bathroom scale out and ensured the beam and platform were level…


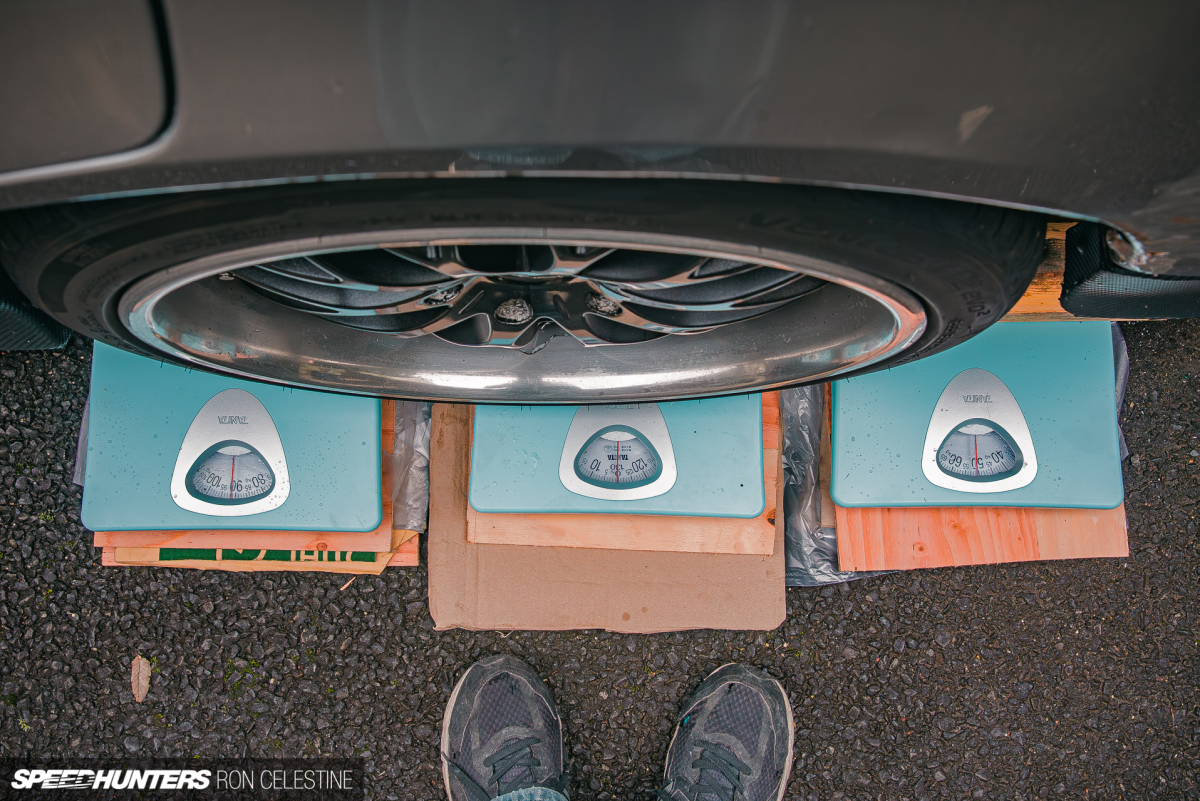
…And immediately ran into a problem. Although I had calculated that if my bar were 184cm long, I would have plenty of space to drive on the beam and not max out the bathroom scale, the weight deflected the beam so much that it touched the ground. Two extrusion bars weren’t going to work.
But how about three? Seeing that I had extra extrusions from various projects at that same 184cm length, I decided to try that before cutting the beams to a smaller size. I was still afraid that if I had cut the beams too short and driven too far on the beam, it would max out the scale, and I’d risk breaking them.

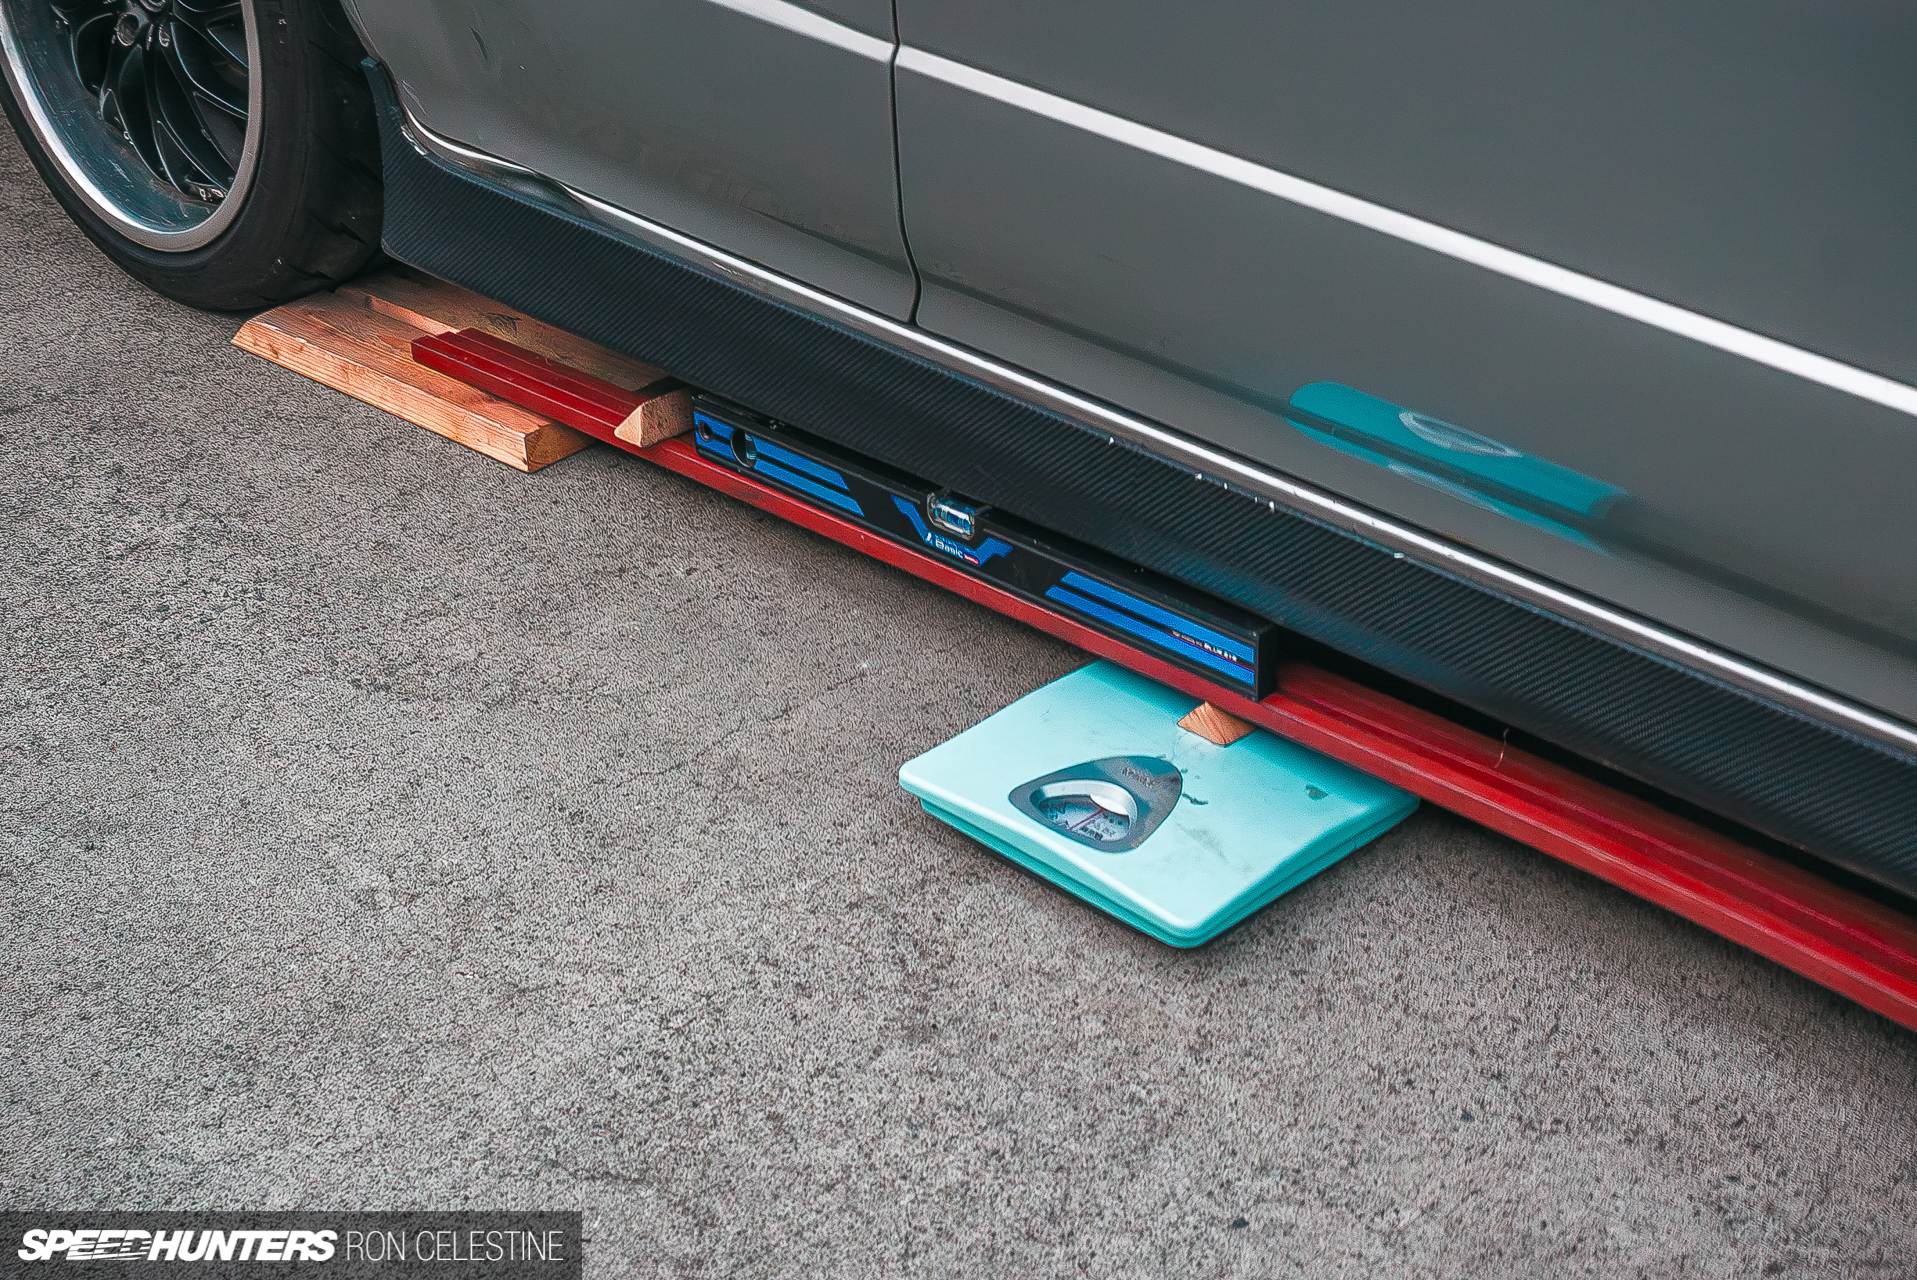
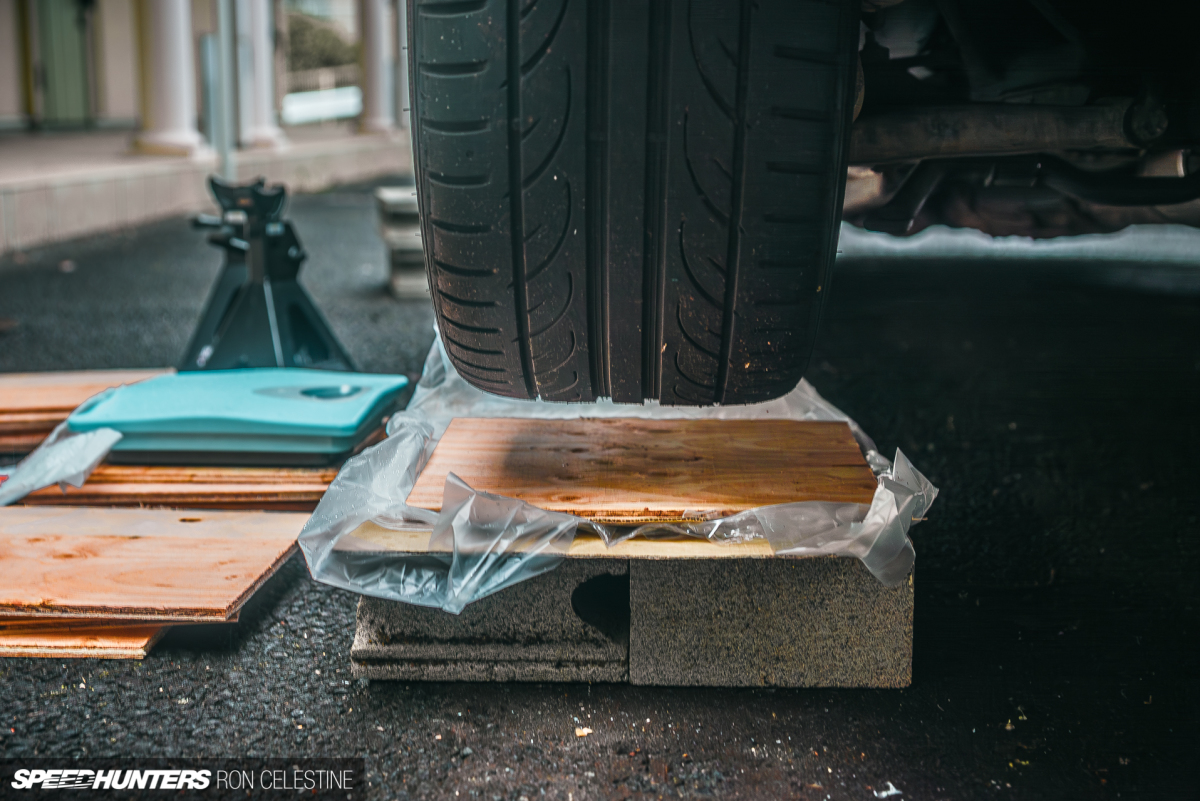
Even with three beams in place, they still bowed like crazy. This wasn’t going to work. I then remembered that I could move the scale closer to the car and use a wedge piece of wood for the beams to rest on to transfer the load, effectively shorting the length of the beams. All I needed to do was zero out my scale and try it.
With my current length (L) now shortened to 108.3cm from 184cm, the beam hardly deflected and could continue with the experiment. The reading on the scale was 42.5kg (93.7lbs) (Fa).
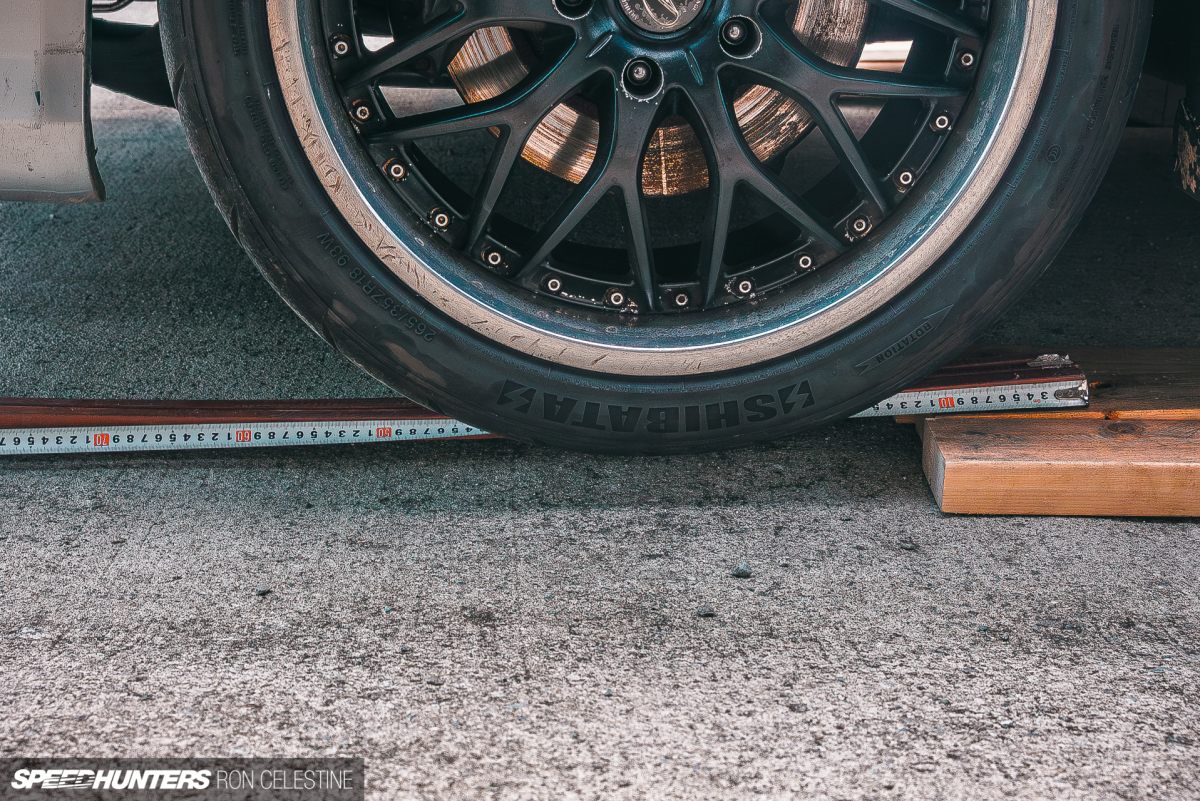
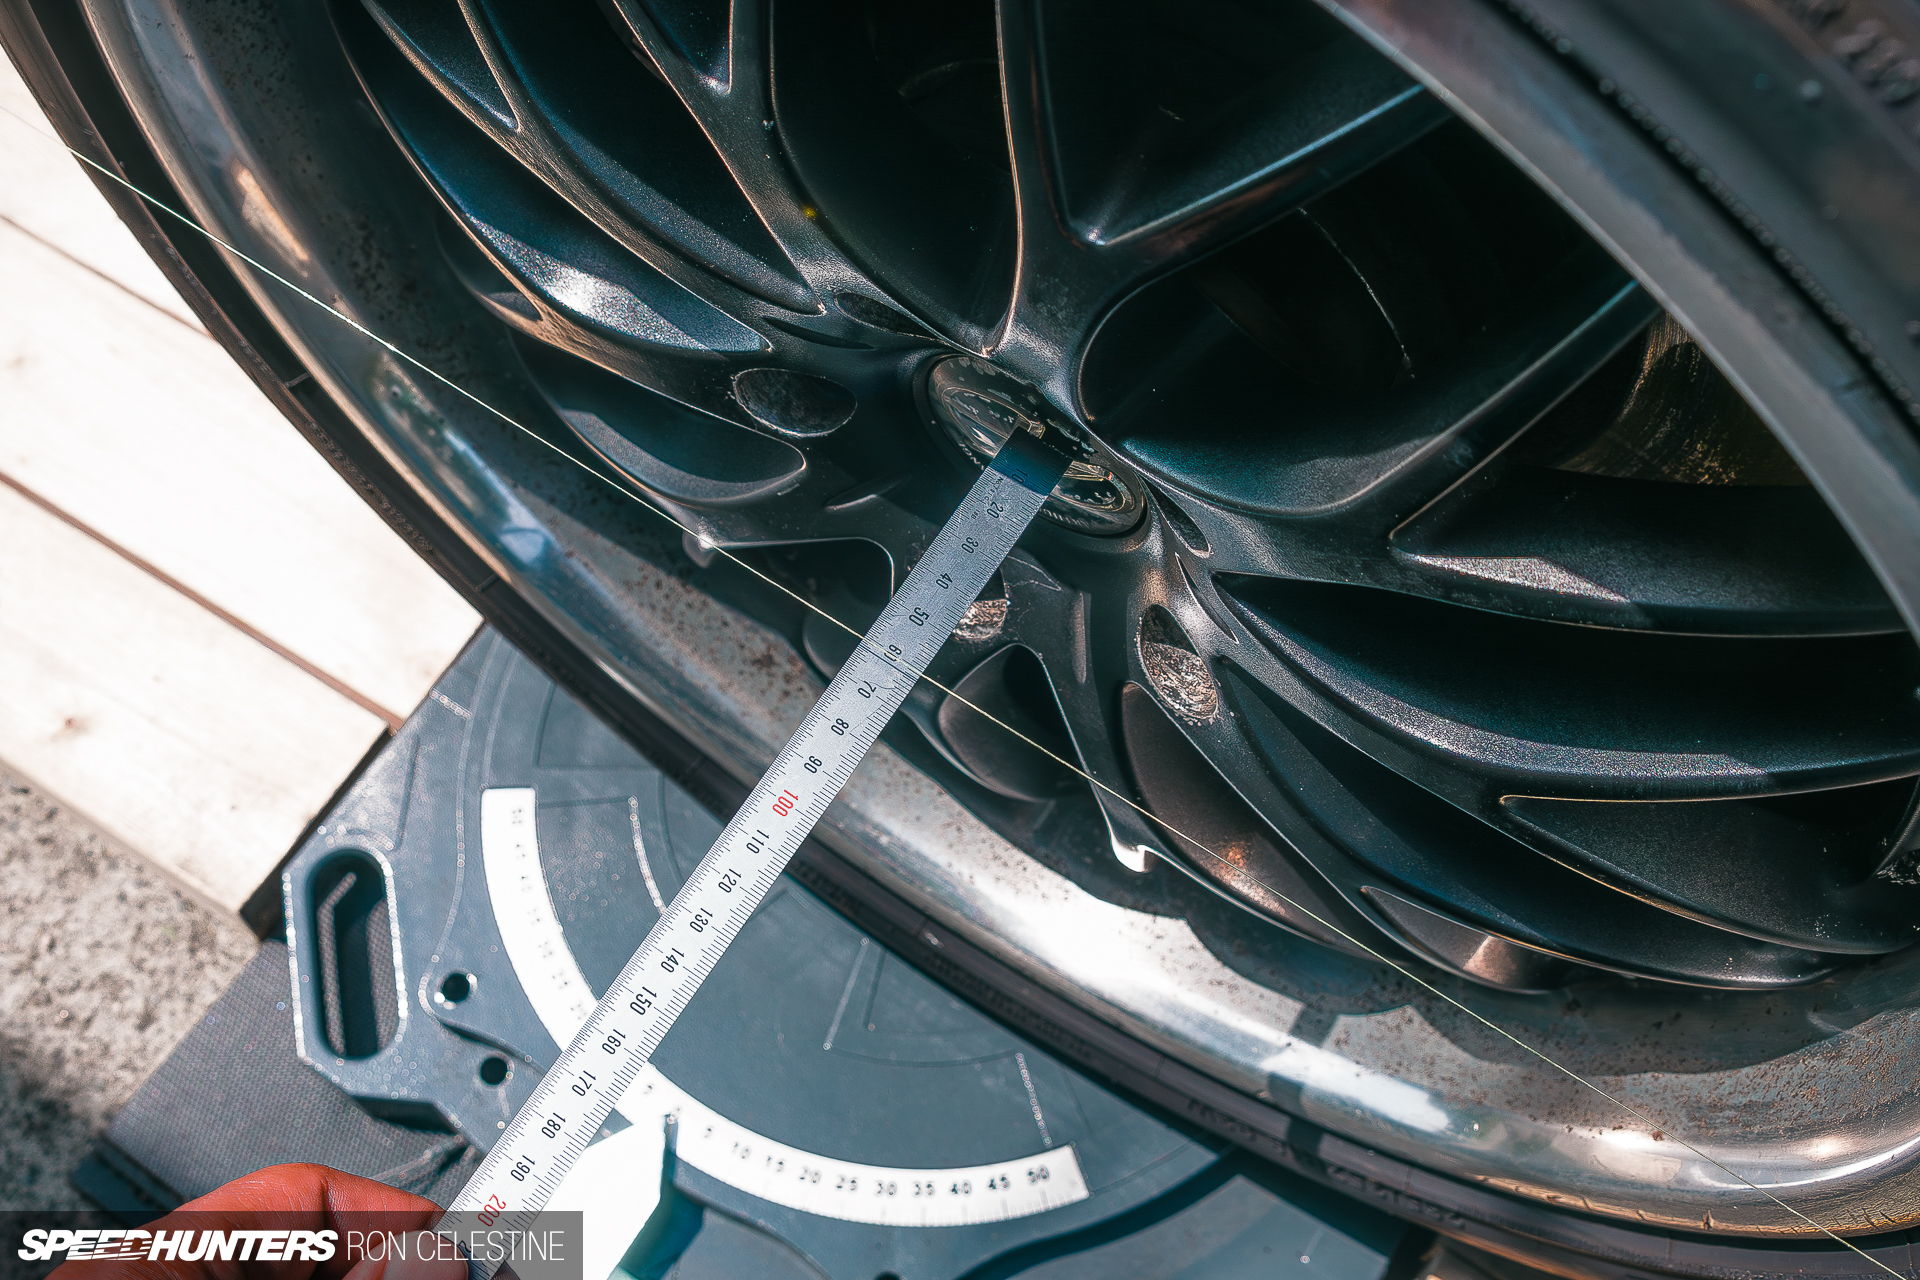
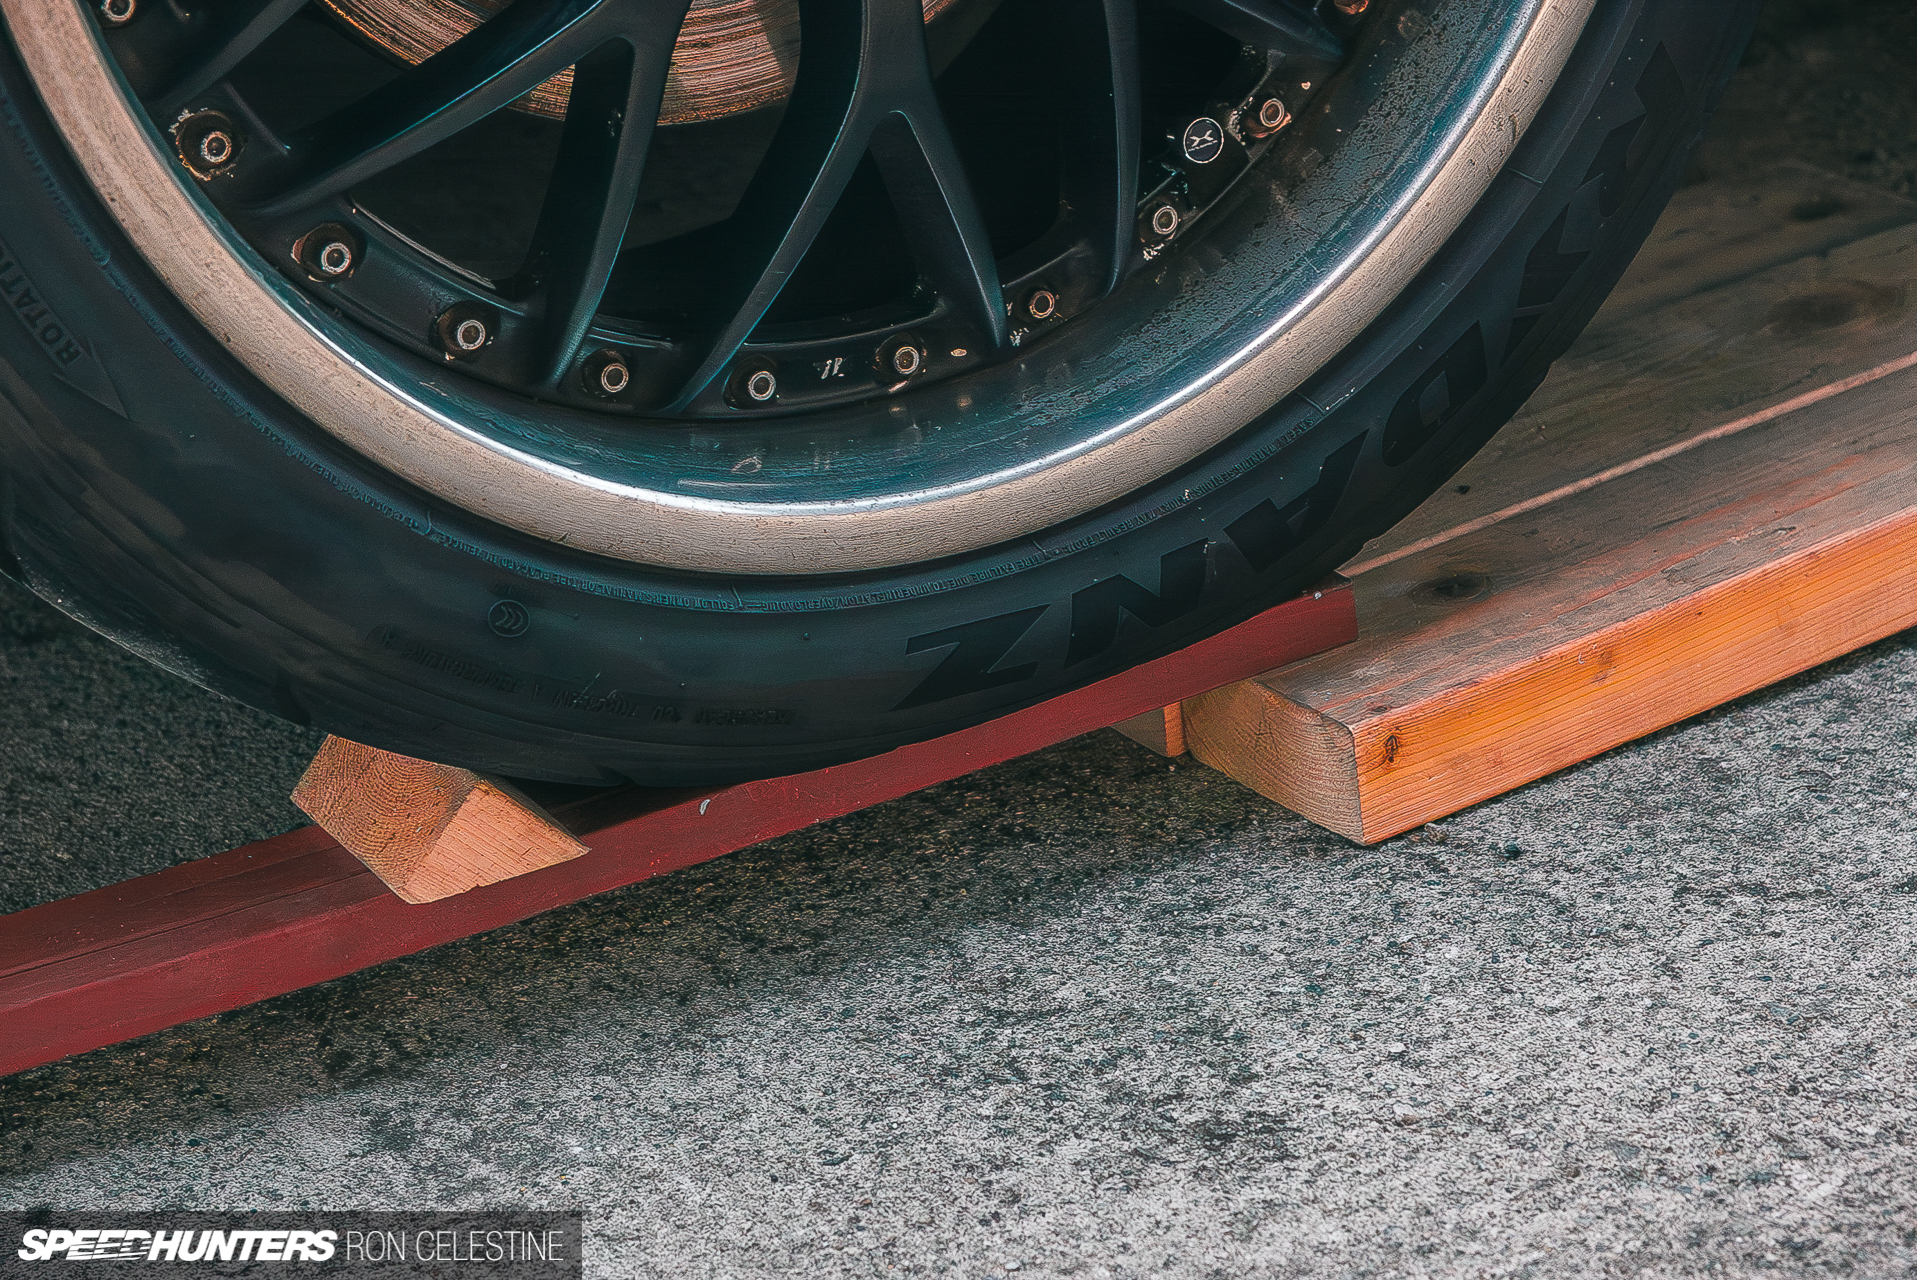
It was now time to calculate the various lengths as I had done with the battery. However, it was more difficult to tell where the contact patch was on the beam. I used a small square ruler and slid it under the tire until it couldn’t move anymore, and then marked the beam. I did this for both sides to get my L2 and L1 calculations.
(L2-L1) / 2 = Lm
(20.5cm-1.1cm) / 2 = Lm
9.7cm = Lm
It wasn’t until I finished measuring everything that I realized there was an easier way to determine the tire’s contact patch…
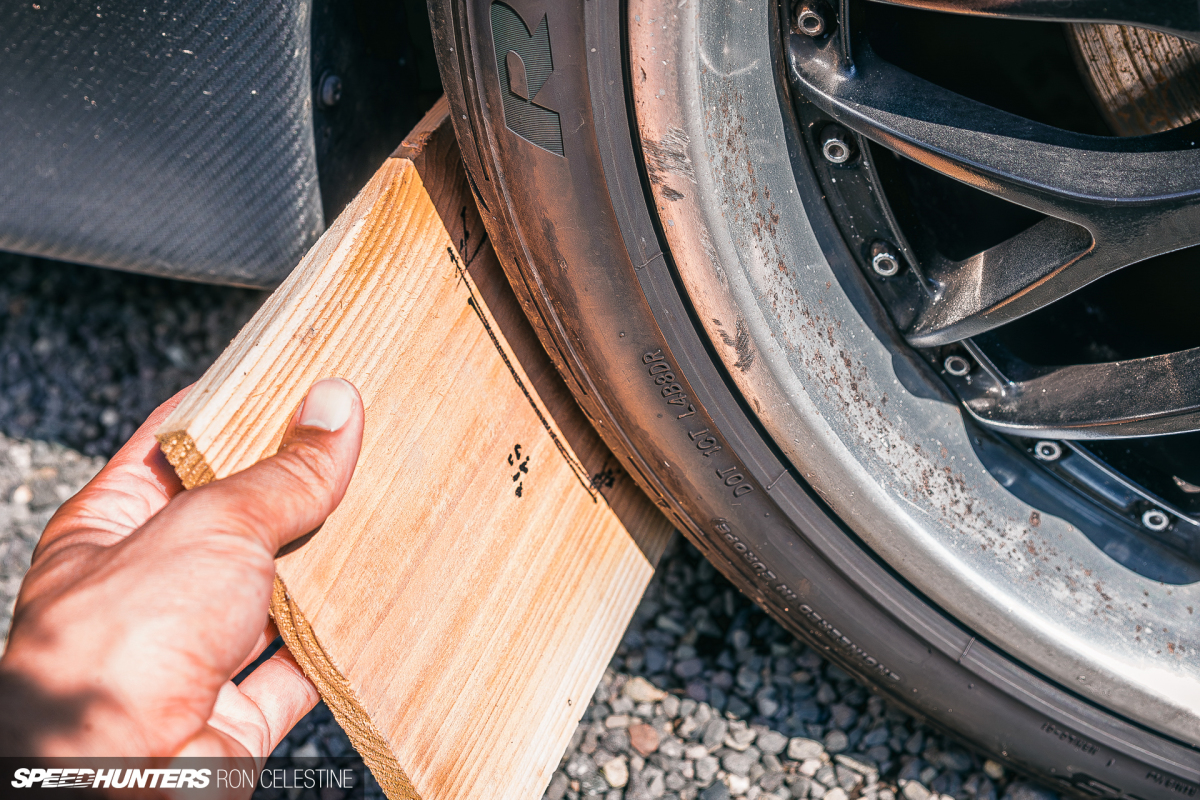

You can press a piece of flat scrap wood anywhere against the tire and mark out the L2 and L1 of the tire contact patch using the same method. Amazingly, this method matched my numbers for the front tires (9.7cm) but was slightly higher in the rear (10cm). These would be the Lm values used in the calculations.
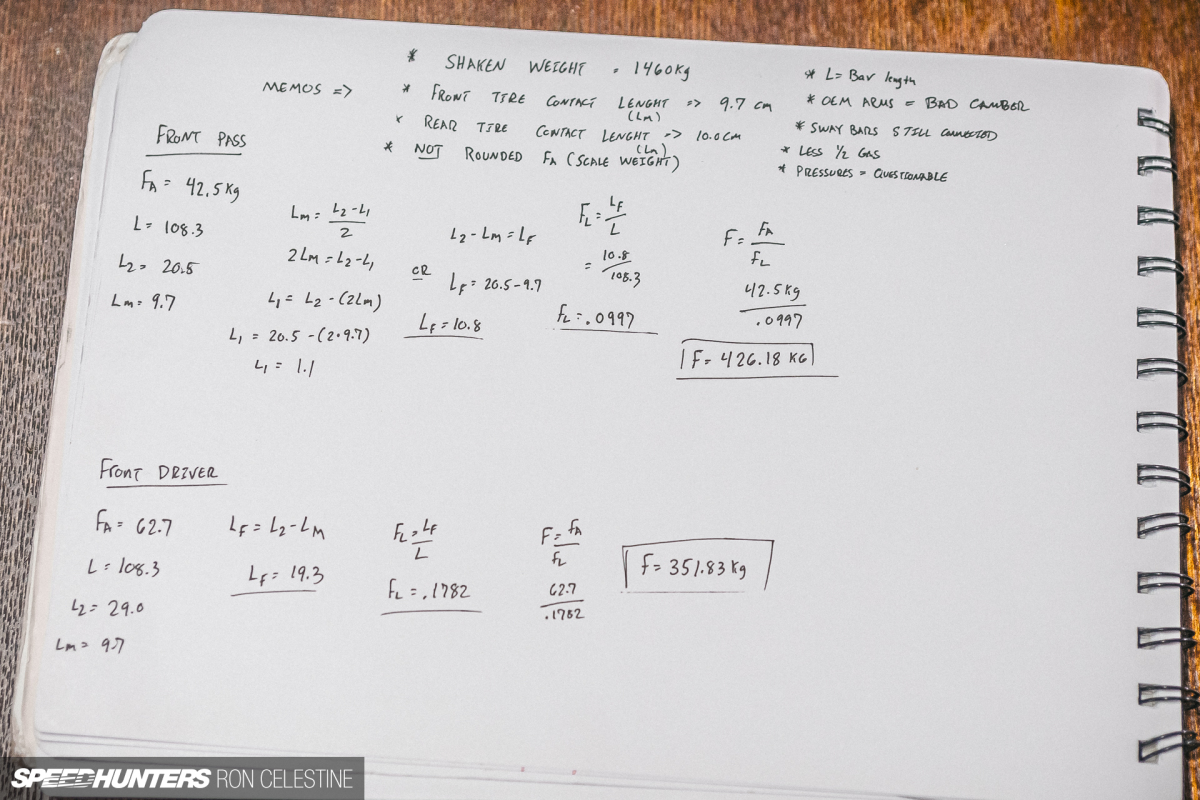
Seeing that I can directly calculate Lm from the tire contact patch, my new equation is now this.
L2-Lm = Lf
20.5cm -9.7cm = Lf
Lf = 10.8cm
We now take Lf and calculate the force relative to the distance on the beam.
Fl=Lf / L
Fl=10.8cm / 108.3cm
Fl=.0997
Again, keep as many places as possible in the calculations. I stored the entire number on my calculator (0.099722992). Then, we can calculate the force of the car at that corner.
F= Fa / Fl
F= 42.5kg.0997
F= 426.18kg
And just like that, one corner is done! Next, roll the car back a bit, move the scale to the next tire, drive up, and crunch those numbers.


Once you get the hang of it, each corner takes about five minutes. Of course, if you have multiple scales and beams (I was still cautious and decided not to get more beams to do this), you could do this whole process in one shot.
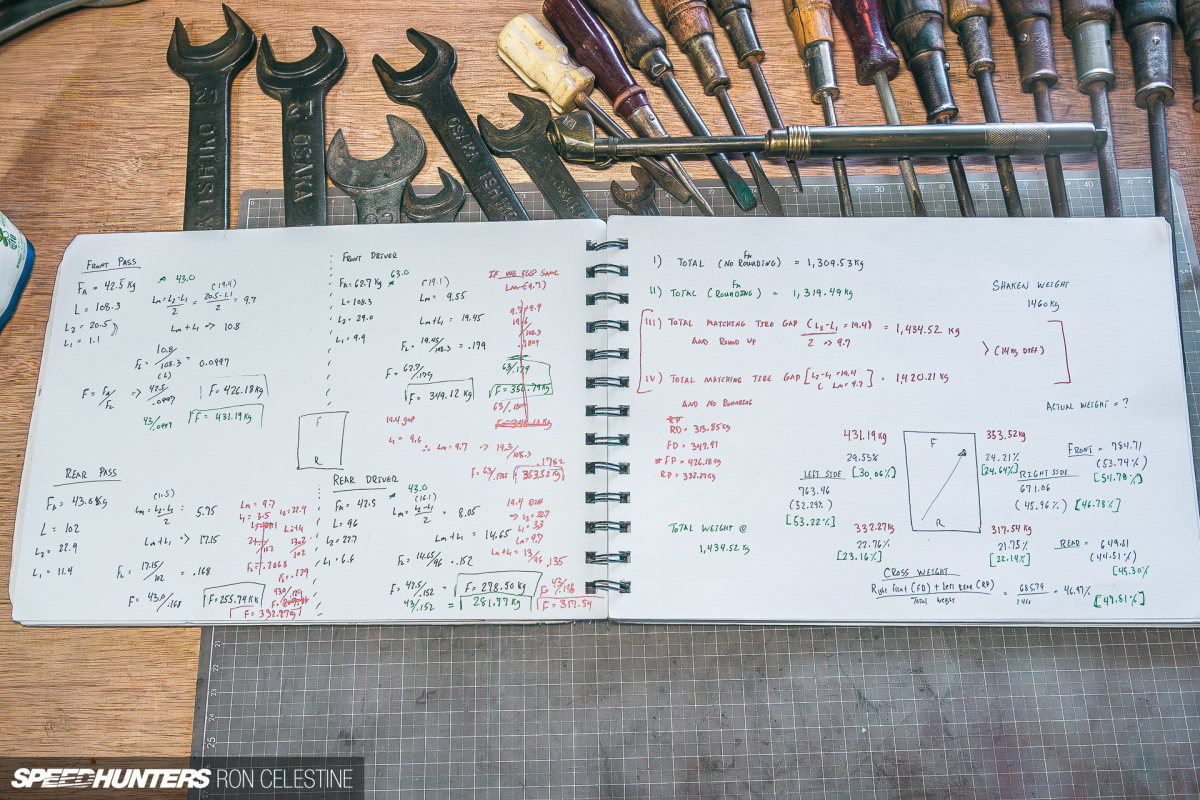
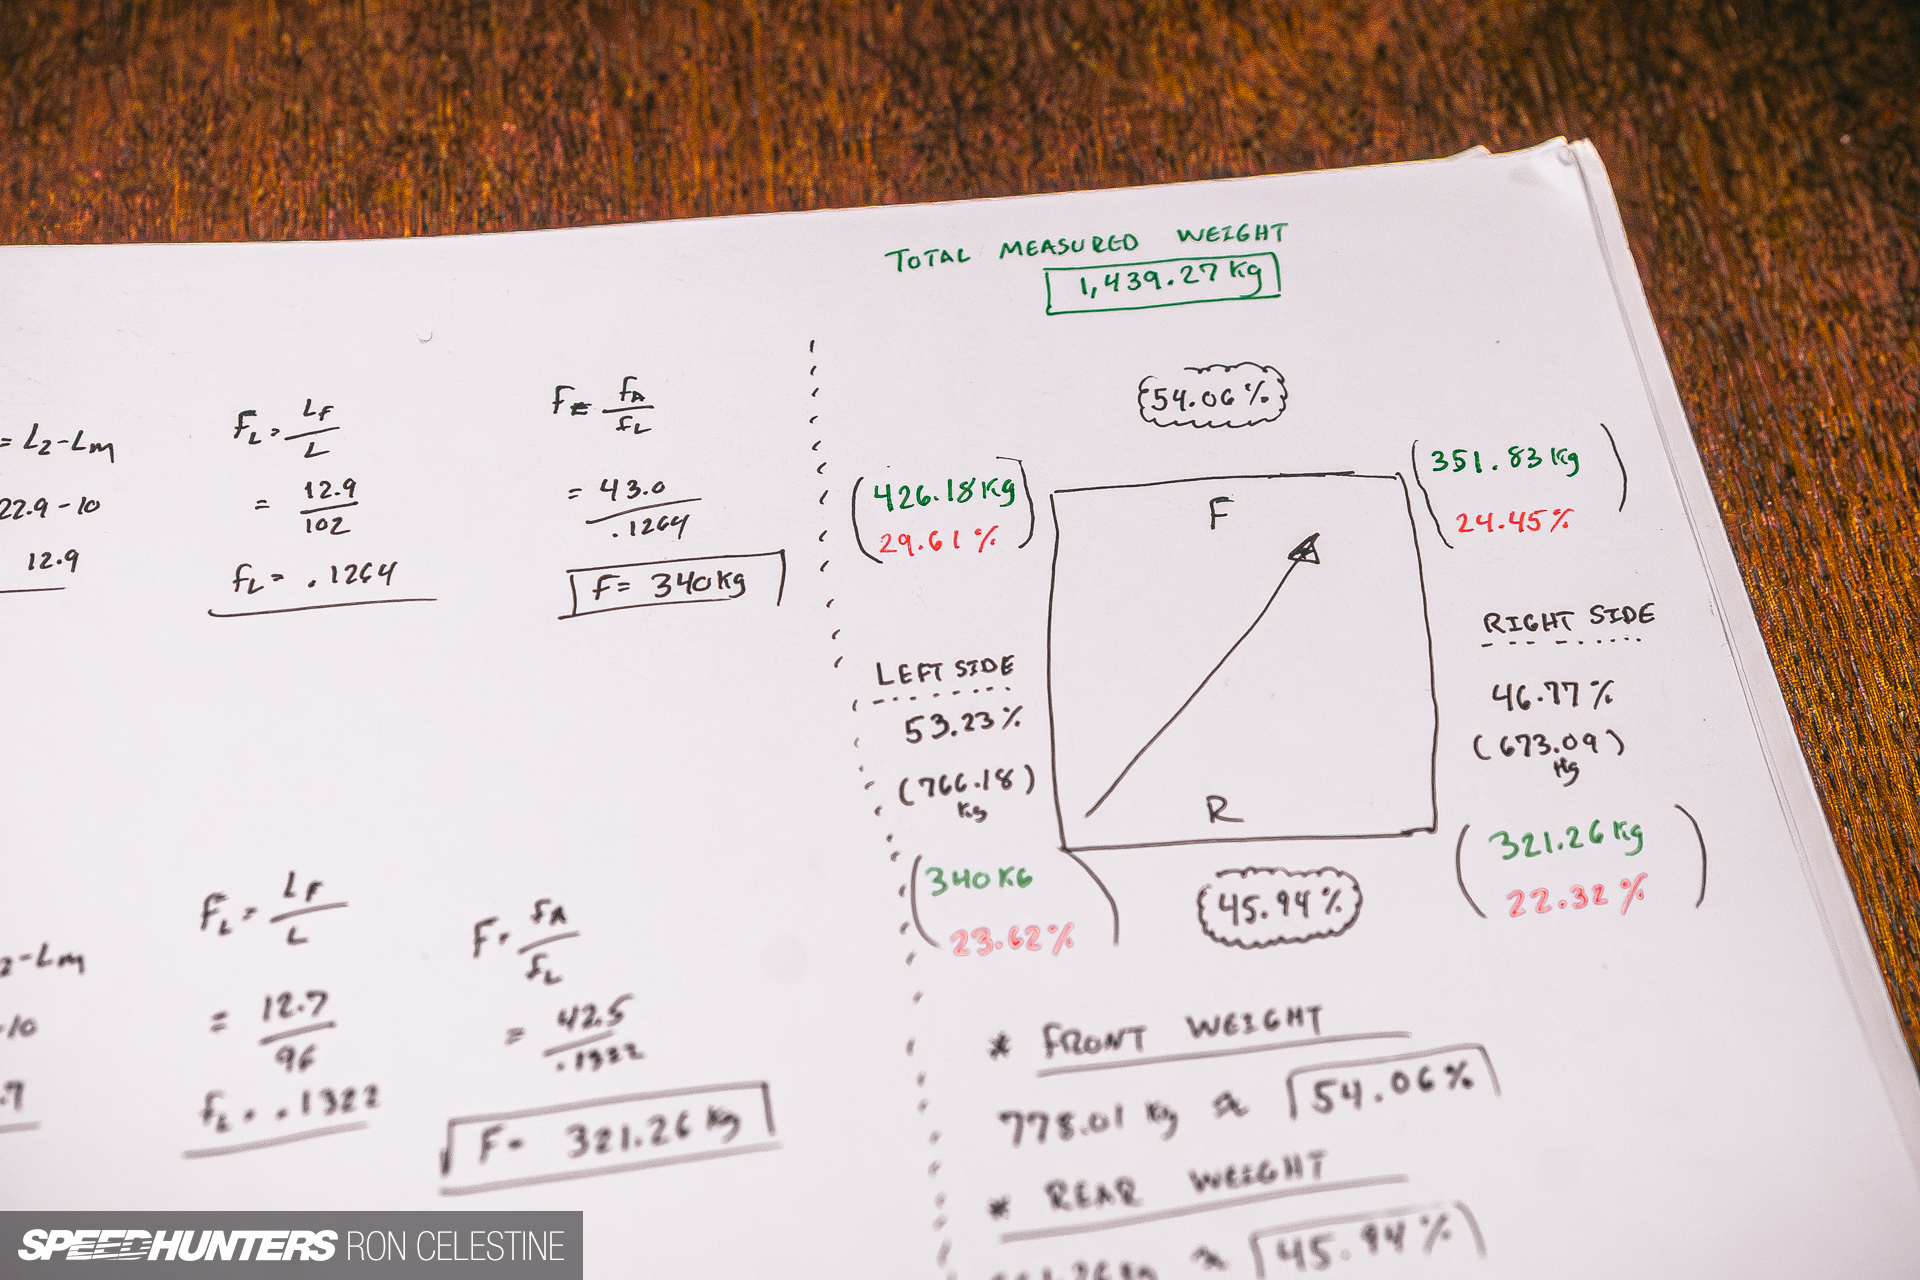
Here are the values that I came up with after all the calculations. According to the shakensho, my Skyline should weigh 1,460kg (3,218lbs). I’m not sure how they got that number (wet, dry, full tank of gas, etc.), but I shouldn’t be too far off.


Factor in a super lightweight (read: slightly flimsy) FRP front hood, no spare tire, and a few other bits here and there, and the total calculated weight is pretty damn close. Ideally, I would take Project Rough to a place where I can drive and weigh the car, but that will have to wait until it’s passed its shaken inspection.
What can we do with this newfound information about Project Rough‘s balance? A corner balance shows your vehicle’s weight distribution, which can then be manipulated to optimize handling. For those who are dead serious about getting the best lap time, you would manipulate this distribution by physically removing weight or adding ballast in strategic locations to get closer to that ‘ideal’ 50/50 distribution front to back and left to right.
We can manipulate how much weight a corner receives by raising or lowering it. However, as one action affects all the other corners at the same time, it isn’t possible to change the front, rear, left, and right weight percentages. So unless I physically remove, shift, or add weight, Project Rough will have these values.
Front Weight % =54.06%
Rear Weight % =45.95%
Left Weight % =53.23%
Right Weight % =46.77%
Note: I didn’t simulate my body weight (84kg/185lbs) or disconnect the sway bars. In good practice, you absolutely should do this when setting up a race car or a car with incredibly stiff springs. Minor tweaks will have a bigger effect, and you don’t want accidental preload in the sway bars. Although Project Rough has adjustable sway bar end links, and I have dialed them in for no preload, it isn’t a race car. We are still doing this with bathroom scales regardless of how many variables we limit.
What we can do is get our cross-weight to an ideal 50/50 situation. Currently:
(Front Right (kg) +Rear Left (kg)) / Total Weight (kg) = Cross Weight %
(351.83kg+340kg) / 1439.27kg =Cross Weight %
48.07% = Cross Weight %
Anytime you have a cross weight above 50%, you have a wedge. Anything below 50%, like Project Rough, is a reverse wedge. Knowing this, you can follow these rules to adjust the ride height to get closer to a 50/50 distribution.
RAISING any one corner will INCREASE the weight on that corner and slightly affect all other corners.
LOWERING any one corner will DECREASE the weight on that corner and slightly affect all other corners.
Cross weight ABOVE 50% = DECREASE weight (height) on FR/RL or INCREASE weight (height) on FL/RR. – Wedge
Cross weight BELOW 50% = INCREASE weight (height) on FR/RL or DECREASE weight (height) on FL/RR – Reverse Wedge

Thus, I should work on increasing the height on the Front Right – Rear Left or decreasing the height on the Front Left – Rear Right. This is where everything becomes hella-tedious. You also need to decide how set you are in the vehicle’s ride height. Again, the stiffer the springs, the stronger the impact minor adjustments will make. However, if you are dead set on how the car looks, you might have to compromise that 50/50 distribution.
And that’s for you to decide. For me, once I get Project Rough back on the road, I will do this again and aim to get that 50/50 cross weight distribution. I also want to test a few more suspension projects and experiments.
This goes to show that if you’re not afraid of a little bit of math, you can unlock potential and data that would otherwise be locked behind expensive equipment. It did take some refinement, and this still won’t be as accurate as a good set of electronic scales, but unlike my first attempt at corner balancing with scales, it was a success.
Electronic scales would still be excellent, though…
Ron Celestine
Instagram: celestinephotography


Absolutely mental, but thanks for sharing!
Hahah no problem!
can someone/shop just sponsor this guy to do the weighting and alignment??
this guy take DIY spirit to whole new level...
Hahaha! I guess DIY gets a bit out of hand when you have an engineering background
Ron could be teaching physics or working at NASA. Yet he is here, risking sanity and dropping knowledge for all of us.
Salute to you sir.
Hahah and I salute you for following along and supporting us here at Speedhunters!
This was a great read. I was, and still am a bit of a dummy when it comes to the maths but I still do like learning about how it works especially with physics.
Great write up. Fun and educational.
Thank you for reading! I'm glad that the writes up can check all of those boxes off for you
It's been a while since I browsed to the Speedhhunters front page and there's not one, but TWO articles from Ron?!
Hahah. It has been a minute huh
I had thought in your absence that perhaps some life had got in the way; but really genuinely happy and excited see some new articles here from you. The Project Rough series is a SH highlight, and I'm looking forward to the next instalments. And perhaps maybe some updates on Project Workshop?
You weren't too far off with that assumption Joel. Life was being life with my little ones and work.
I have heaps I want to share. Thank you for reminding me about Project Workshop! I suppose I should do a quick update on that as well huh
Its cool to see that math really actually helps in real life
Hahahahaha. I meaaaaaaaaannn now and days, our devices/apps/AI do all the math for us behind the scenes so we never notice. Hell, I create scripts once I make sure my math is written for projects like these. I have one for alignments now that I plug in numbers I measure and it spits out what I need to know
Hahah well it still is pretty impressive for me because I haven't really had an opportunity to use it for any good reason haha
This was wild to read. I'm really impressed by your problem-solving skills and determination, man! You are an inspiration, dude.
Cheers for that! If I can motivate/share with the community at large, then I know it's well worth getting it out there!
I would never have the patience to do something like this, would probably throw the scales against the wall after 15 min
LOOOOOOL! I believe having kids help
I did this on my uneven concrete driveway using trailer jacks, a level and some plastic wheel lifts. I was really trying to set my sway bar links so they didn't bind. I eventually got it somewhat set until I learned that your supposed to add a driver's weight in the driver's seat, otherwise it's going to be off. Ugh, not fun.
Yeaaaaahhh especially if you're going for absolute perfection. If I was going for lap time or was a customer car, then I would simulate the weight. Honestly, if I could find a used set of weights for cheap, then I'd buy them just to simulate weight lol.
You could use water tanks to simulate your weight...
Ever wonder why no one who has any credibility in performance driving, competition, or building uses this technique? Corner weighting is something you don't really need to do as an amateur driver unless the vehicle is super out of whack and exhibiting poor handling characteristics. The reality of this is anyone who is at the level of NEEDING to corner weight their car is likely an experienced racer. And experienced racers are never going to use this half baked method in any environment where performance is paramount. This is hilarious and I got a pretty good laugh out of it. Go to any race team and ask them to do this. They'll simply laugh at you. No one should follow this advice who is serious about their vehicles performance.
I'm glad you got a good laugh out of it! There is a bit more to this experience than simply getting a result.
IF I was simply after the results, or a serious race driver who needs to shave off every millisecond as possible, then you're correct - this would make no sense what so ever. You would use proper scales, which does all the math for you and saves you time.
Or pay someone
But where is the fun in that? Where is the application/testing stuff out for yourself to see how it works/affects your vehicle's performance (both good and bad)?
Think of this as more as a science class experiment trying to prove a concept and get to a decent result or conclusion at the end of it without breaking the bank. The results aren't the most important part, but the journey of trial and error and learning how tweaks can have a profound effect.
Learning WHY the tweaks affected the performance the way it does. Does it match up with my assumptions and understanding of dynamics?
I've learned so much about vehicle behavior, setup, and making adjustments because of experiments and testing. Once you have a solid foundation and understand what's going on, THEN you can use the latest and greatest technology to get to the results quicker and more effectively.
It's like why they teach you how to draft designs by hand before cutting you lose on CAD software. At least that's what to did to me back in day lol....
I respect the desire to learn. Curiosity is the first step in all of this. While things like this are fun to play with they should not ever be substituted for someone who wants actual results. As long as that is clear these kinds of articles are fun. When we start getting into the higher levels of this stuff accuracy becomes very important and actually a prerequisite to safety. Think roll cages. You better have a loooot of experience in terms of theory and practice if you’re going to crash something you built.
This is not to discourage people from doing things themselves but we should encourage proper technique first. As stated previously if you are to the point of needing to corner weight your car you are probably not using bathroom scales. Hope that makes sense. $1000 scales > chasing mystery problems / crashing.
Scales are a cheap investment. Understanding how to corner weight and when to add or subtract weight in different conditions / cars requires a lot more experience. Hard to get that experience if you spend more time correcting error or chasing your tail. Looks like you had fun and learned. Now get some real scales!
Remember how some dude on here pissed on other writers and readers when they aren't talking about that's remotely related to "performance". Now you have an article that explores things related to that and we have some pissy guy also taking offense with it. Really can't please them all huh...
Levels. Just because you put on a basketball jersey and shoot hoops in your driveway doesn’t mean I have to pretend you’re Michael Jordan. Some people are used to higher levels than you in life. What you think is technical to others is entry level. Big world out there. Try not to get lost.
I bet you're fun at parties.
No parties for me. Waste of time. Work and building cars only
Nah allat's crazy. I wouldnt do that even if i was paid
I have nothing useful to add, but this was interesting to read. I could see someone at a very grassroots level using this method to help set up a new chassis for racing purposes as they built something. Imagine corner weighting while applying body fill or welding!