Hi everyone. After the first part of my story about making the space frame chassis for the LaSupra, this time we’ll continue with the bodywork. Since I already had the old body from my previous version, I decided to continue with that one instead of making every part from scratch. Anyone who’s made parts in fiberglass knows it takes a long time and involves many extra steps.
I had already done this for my previous version and to be honest I didn’t want to make it all again until I was sure that I was finished and satisfied with the design of the LaSupra.

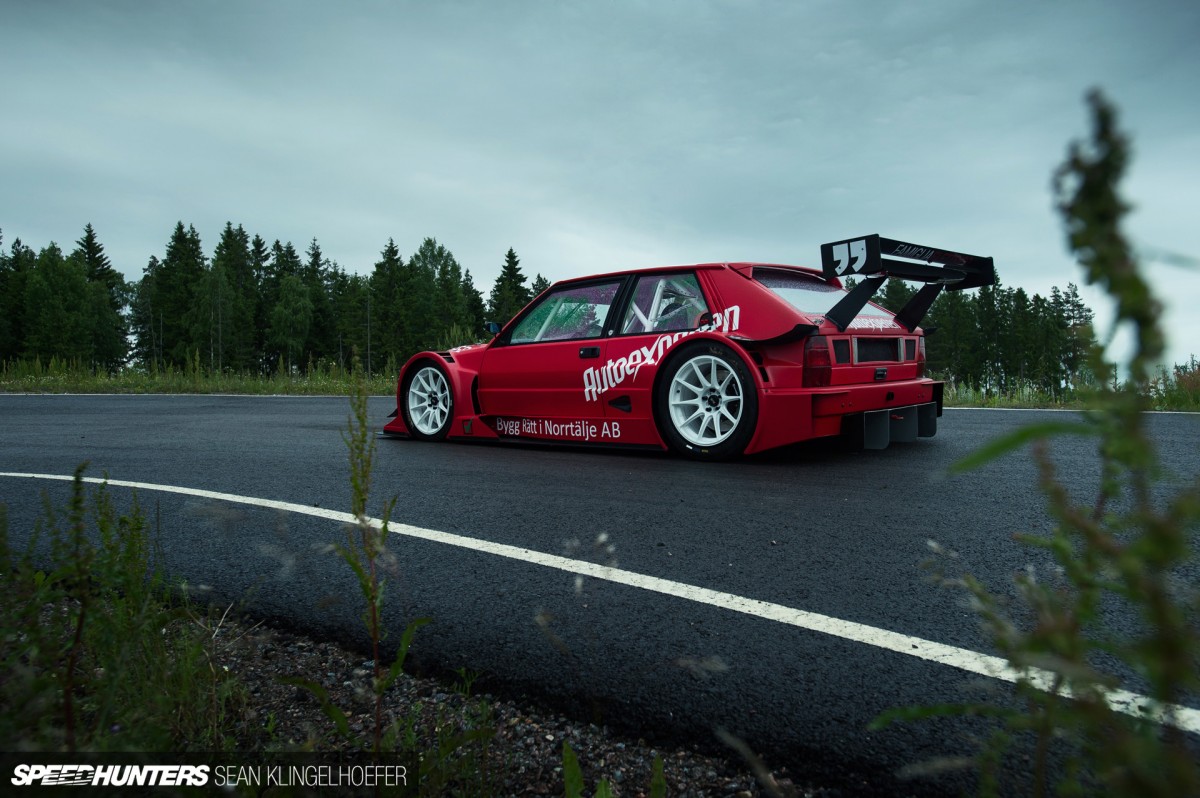
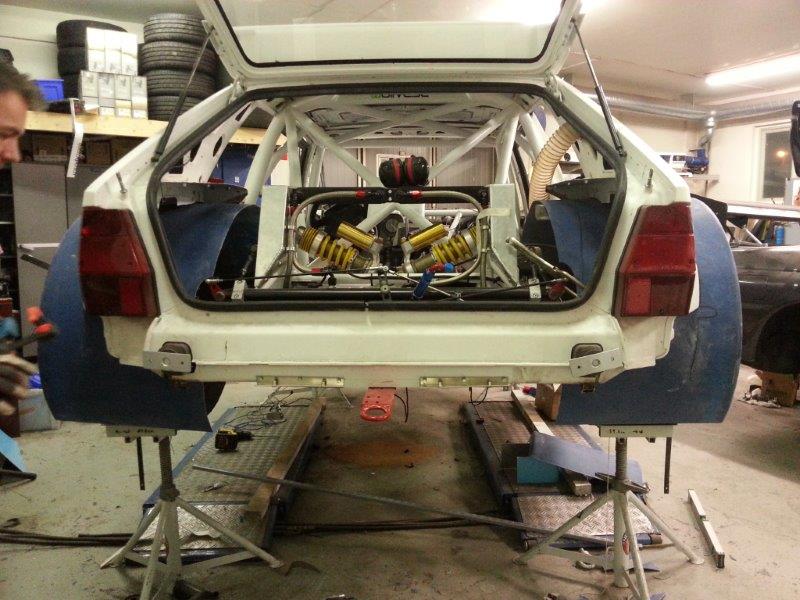
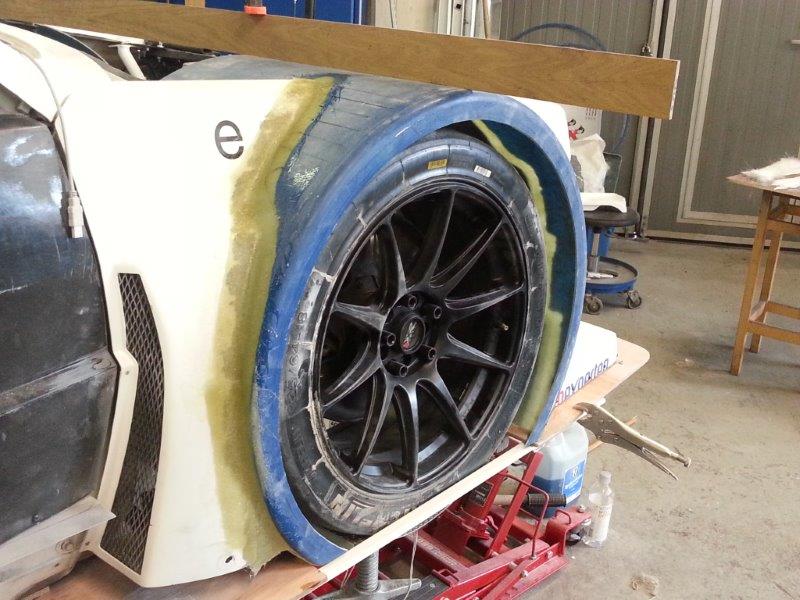
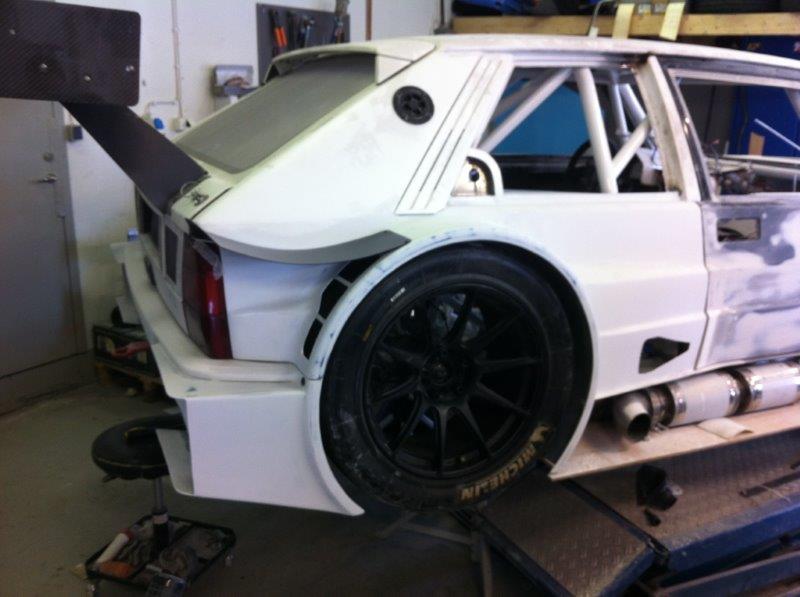
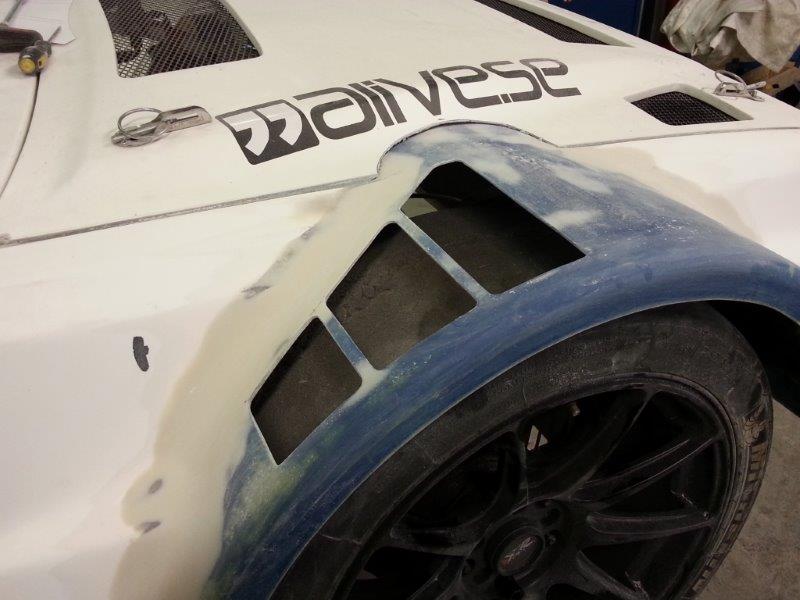
One of the big changes on the body was that, because of the new chassis I could go lower than was possible with the Lancia chassis, so I took off 75mm from the lower part of the bumper. As you see, it results in a quite high wheel arch, and together with the slick tires and a height of 640mm front and 680mm rear, it doesn’t leave too much room for the front and rear fenders.
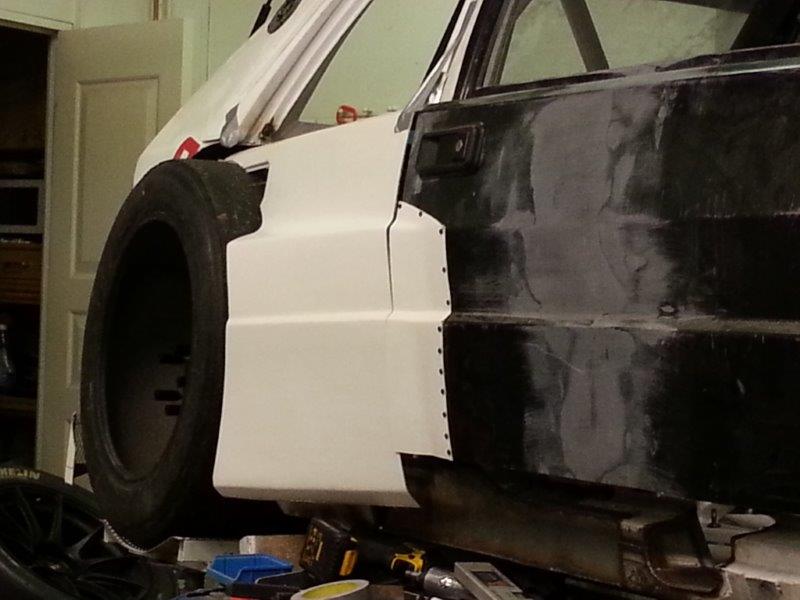
As I mentioned in the last write-up, I moved the B-pillar 150mm backwards to get better access and make it a two-door instead of four-door. Here you can see the the skin I made for the rear doors in my last version of the car. Now when its a two-door, I needed to cut off 150mm and use it on the front door, so actually the rear door became the rear fender. Because I lowered the body on the chassis, I also needed to get clearance for the exhaust system, so I made a tunnel through the side and cut off 75mm from the doors and rear fender.

To reach my vision of how the new body should look, I needed to manufacture new wheel arches that could go around the new set of tires and hopefully look as good as it did inside my head. So together with my friends Tom and Palle, we made two moulds: one for the front arches and one for the rear. We needed to make two different versions because I use two different tire sizes, but at least I could get both sides at the same time.

To save time I had some help from AJO Racing to make the parts in fiberglass. They usually manufacture race boats, so they know how to make parts light but still keep the strength.
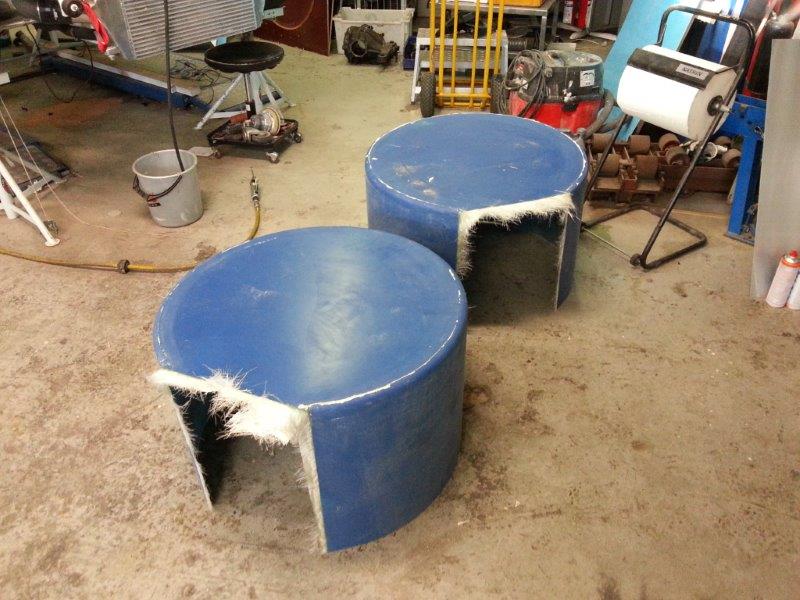
After getting them out from the mold, I cut them in half and ended up with four pieces: two front and two rear. Then the fun part started: to get them aligned in height, distance and width. Here you really need to slow down and measure not just two times but 20 times, so you don’t make any mistakes. If they don’t end up correctly measured, the car would look strange and badly built.
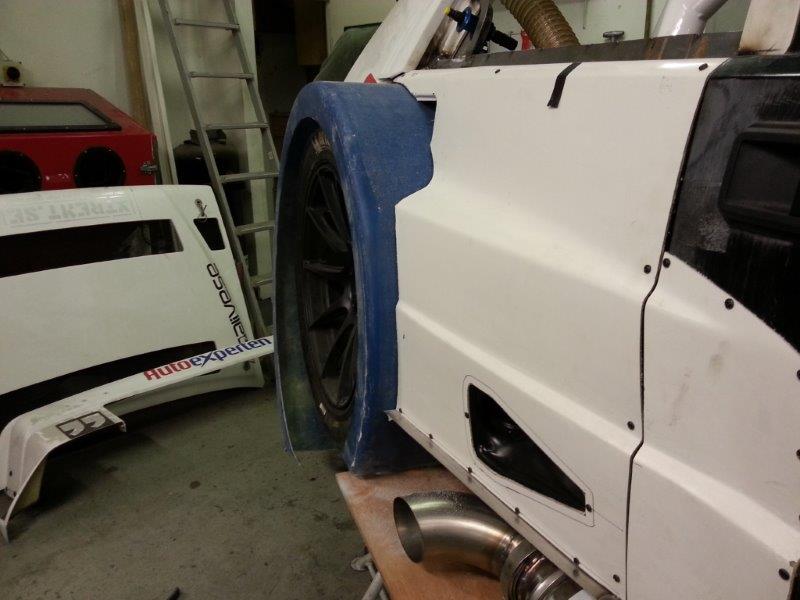
To make them as functional as possible I wanted to not only use them as edges to cover the wheels, but also the inner wheel arch so I could protect the inside from being splattered by stones and rubber. Of course it also has a big impact on the air flow inside the wheel arches.
Before I’d got this far in the bodywork phase, many people asked me if I had drawings to show how it should end up, but most of the things I build never have drawings.
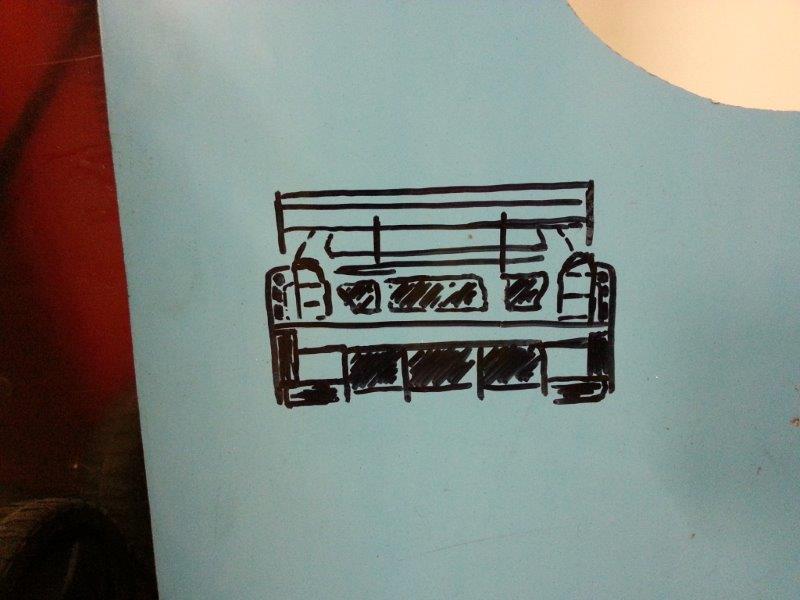
I only know in my mind how I want it to look and function, but I made a quick sketch from the rear of the car.
Looking back now, the drawing ended up being pretty similar to the real car!
The art of body design
I test-assembled more or less the complete car before we started attaching the parts for real. This is really time-consuming but can’t be rushed. So when we finally found the correct positions for everything, my brother Jonas and I went into action. Before we could start attaching them with fiberglass we needed to grind off the top coat. So what do you do? You take two angle grinders and attack one side each. Let’s just say that after five minutes, we couldn’t see each other any more and the whole workshop was white.
Both my brother and I enjoy it when we can work in a good rhythm, and aimed to get both sides on in one go. So while I was mixing the polyester residue and preparing the strips, my brother was flying around and rolling them on. First we made the rear arches, then we moved over to the front.
We made everything together with bumpers and fenders to get the correct result in the end, otherwise it’s likely that some lines wouldn’t have lined up in the end. After it has hardened you just need to cut the gap and go on to do the same work on the inside to get the strength needed. Now that the front arches were on, we could start adjusting the hood so it was possible to close it again. Luckily, the hood of a Lancia already has a nice raised area in the middle where it could blend in.

For the panels that used to be the rear doors, I made a frame and glued them on. I then used screws to fix them while they were drying.

Now when the fiberglass had hardened it was time for the next step: the fine preparation of all the points where we had attached them. This is a work that comes in two parts: the fun portion when you start to see the result of all the hours spent, but also the infinite workload of grinding and using filler. But of course you have to concentrate on the boring part to get the right result and if you start taking shortcuts here, the end result will reveal how much effort you placed into the build.
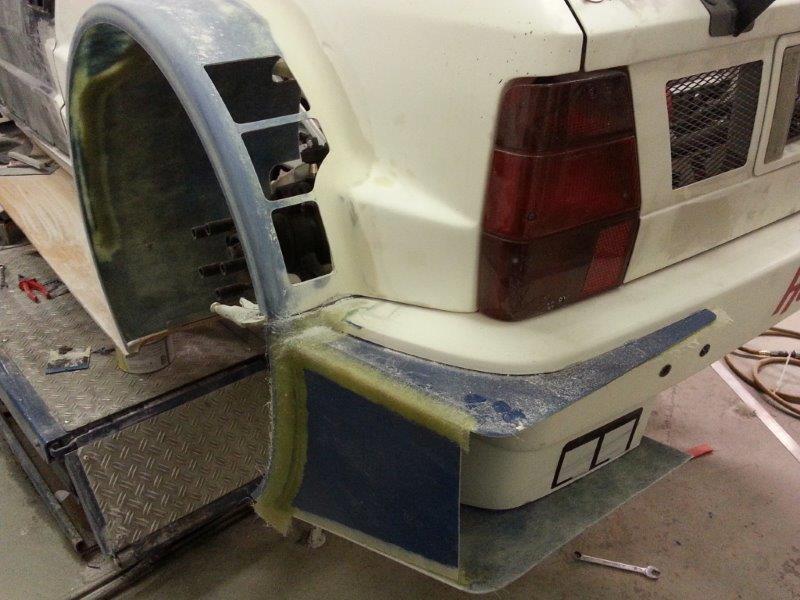
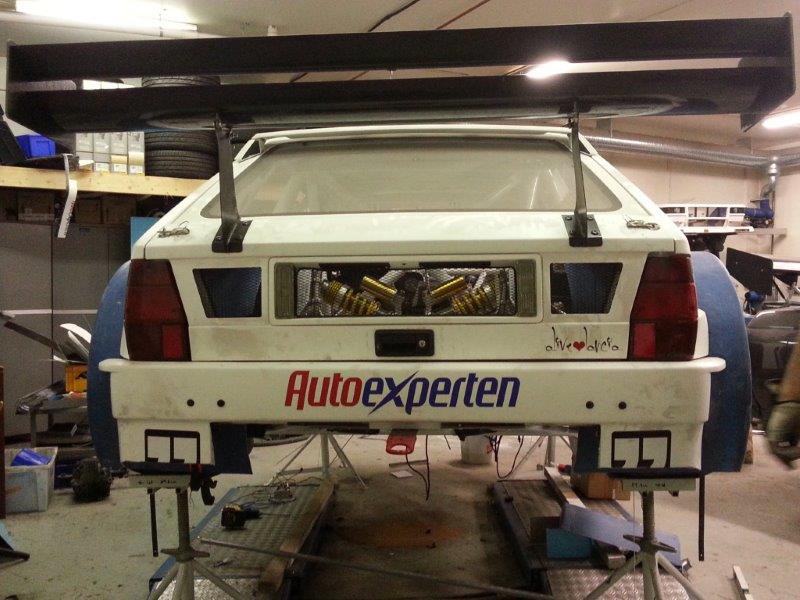
I wanted to evacuate as much air from the wheel house as possible, so I went for openings in the rear, not only in the wheel arches but also in the rear bumper. So we made a box that lets the air through easily and gives a bit of cool design also.
Shapes emerge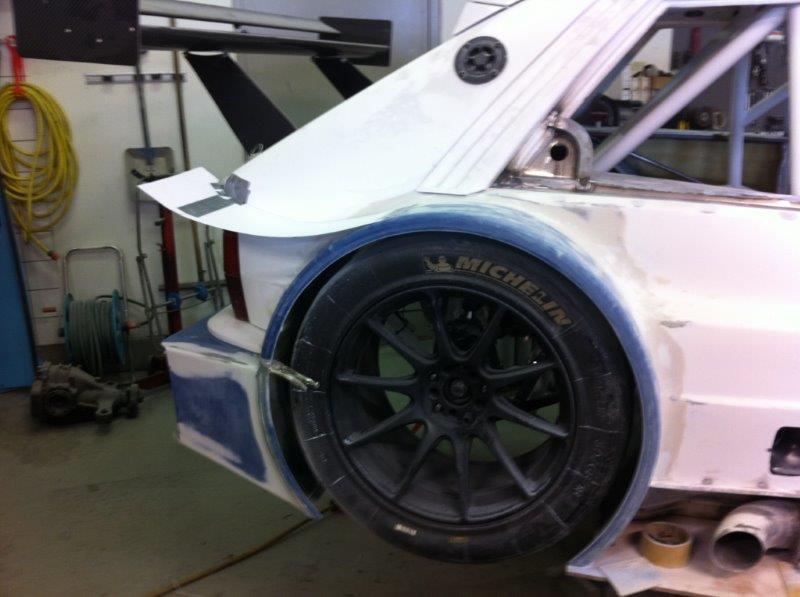
To further improve not only the design, but also downforce and aerodynamics I made wings on the sides. First I used a paper template, and when I had the shape and angle I was looking for, I used a metal sheet and formed it the same way. I then used this as a mold to make a fiberglass piece that could be divided into two, one for each side. Then, by using the paper template, I could cut it out in the correct shape.
To mount them on the sides, I taped the rear fender with glossy packing tape, then I glued them into place from the top. After this, I made strips of fiberglass and attached them on the underside of the wing towards the fender. This way you end up with an edge that has a perfect fit and makes it easy to mount later on. After it has dried out, you can easily pull it off and trim the edges. Next, after a layer of primer, the wet sanding took place. This is really the fun part when you start see all the shapes working together and you get a reward from all the time spent.
Many of the mods made on this bodywork have to do with performance. I always try to think of what could be a nice design and still have a good and functional purpose. Obviously I don’t have the possibility of placing the car in a wind tunnel to ensure the changes I made really work, but hopefully they at least don’t make things worse.
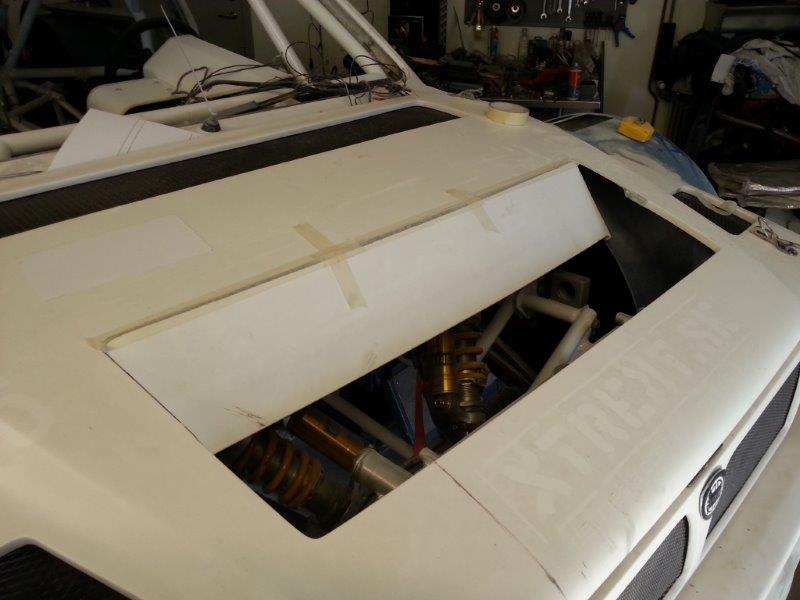
The engine bay of course gets hot like in any other car, and Lancia had already placed openings in the hood to handle that. What I did when I attacked the hood was simply to improve the air flow, because in my case I have an air duct behind the radiator to guide the air through. I dropped down the material behind the original opening to create a better evacuation point for it.

I used the original piece from the hood, so the reinforcement I had done on the old hood still worked to keep it stiff enough. Even though I’ve used fiberglass, I’ve still been able to keep the parts quite light. The hood only measured 2.48 kg when I first made it, which I think is ok. But this would be difficult without using a vacuum in the process.

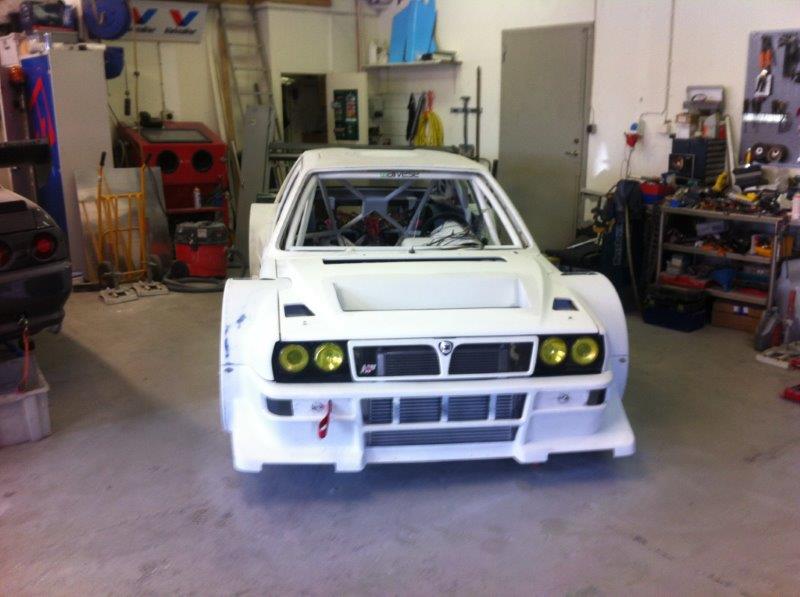
After all the parts had been trimmed and fitted together, it was time for the first real picture of how the final result might look. After that, all the new and changed body parts had a layer of filler so I could finalize the body together with the new side skirts made from 1mm aluminum. These also have a purpose. Not only do they pull the exhaust system inside, but they are used to evacuate hot air from the engine bay and front brakes.
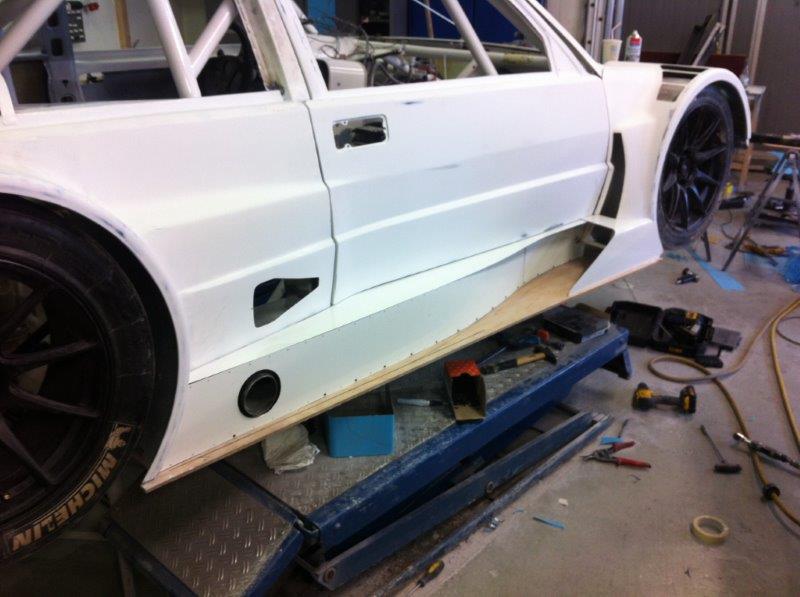
The NACA duct openings on the rear are for brake cooling. This was one of the spots that not only looked good in my eyes, but I was also quite sure that I’d get a good result because of how far back they’re located and also because of the outward angle of the wider rear fender. This together just had to be a good position for an air inlet. Earlier I tried to get air in through the rear side windows, but failed since this car develops a big low pressure zone in this area.

I started to get really excited by the end result and was really looking forward to get it off to paint. But one last small detail needed to be added for that racing look. Yellow lights!

At first we tried to use transparent yellow film, but due to the shape of the lights, the tight corners around made it impossible. I found a yellow tinting spray that people recommended online, so the next thing was to try that out.
Finally the body was ready for paint. The only thing left to do at this stage was to strip it again, lift the body from the chassis and send it off to Pe-Ge billackering, and then wait for the magic phone call to say ‘it’s all done. Come and pick it up.’ They really helped me a lot. First they put on the final layer of primer, then sanded it and painted the car.
That’s it for this time. Next time you hear from me again we will assemble the car after paint, make the interior and get it ready for the track.
Peter Pentell
OFFICIAL SPEEDHUNTERS SUPPLIERS


that is such a beautiful build... cool how
that is such a beautiful build.... its cool how he used XXRs for the wheels.
car of the year
I love the mouths on the pic of the tinted headlights. lol
Such an awesome build, I cannot wait to see the next installment!
As sick looking as this thing is (and it is!!!...) it just seems like even a purpose built track car like this would be better off having at least A FEW inches of ground clearance & suspension travel, as opposed to what looks like just... 1"... SO COOL LOOKING, though!!!...
As long as the circuit is smooth enough and there's as little suspension travel as possible the lower the better really, look how low F1 cars are =P
InnerToxicityyes but major part of F1 cars suspensions comes from the tires. If you look at mclarens front end from 2012 races, its completely stiff and has no travel. The only F1 Ive seen using their suspension to actually use their suspension is redbull.
Hence their low ride height, they don't want the car moving in relation to the road as it changes the dynamics of the aero'. With the LaSupra tho a little more clearance probably would have been ideal, depending on how much downforce it actually generates and the pliancy of the springs, but I guess in practice he's the one who knows the car and I'm sure he's made it work. Luckily for us he's also made it LOOK amazing =D
I work with fibre glass and carbon every day fibreglass is a fantastic and versatile material and you can achieve very very light and strong panels, so long as you don't mind a bit of shrinkage this project is wicked could take moulds off the whole lot..
I work with fibre glass and carbon every day fibreglass is a fantastic and versatile material and you can achieve very very light and strong panels, so long as you don't mind a bit of shrinkage this project is wicked could take moulds off the whole lot..
gbengaomi Build? Yes, very. But the rims? Not cool, not cool at all.
bezwick: Shrinkage in composite parts doesn't come from the reinforcement, it comes from the type of resin used. If you don't like shrinkage when using fiberglass, stop using polyester resin and step up to epoxy. Or at least use a better quality polyester chemistry to start in the right direction.
one of my favorite builds in years. thanks for posting all the build info and pics!
Such badassery.
I enjoy your motivation to make you ride perfect for you I truly envy your car. good job man cant wait to see more
Amazing
It's not "impossible" to wrap those headlights with film, you just need a very light touch with a torch or other significant source of heat to get them to conform to the surface.
This is unbelievably cool.
White is definitely the right color for a Lancia.
It's really starting to get on my nerves. Everytime this car gets posted someone will always comment about
1. the ride height. - newsflash, this has been proven not to be an issue, so drop your dingleberries and carry on.
2. the xxr's - this is not build by a raceteam with a bag of multibillion company sponsors. this is one man and his one leather wallet. you can't go full retard at one go. this is his first year with the car, why hurry? I'm pretty confident pentell will buy some racing wheels, but til then, just enjoy the build.
awesome build peter, it's truly a kickflipping!
It's really starting to get on my nerves. Everytime this car gets posted someone will always comment about
1. the ride height. - newsflash, this has been proven not to be an issue, so drop your dingleberries and carry on.
2. the xxr's - this is not build by a raceteam with a bag of multibillion company sponsors. this is one man and his one leather wallet. you can't go full retard at one go. this is his first year with the car, why hurry? I'm pretty confident pentell will buy some racing wheels, but til then, just enjoy the build.
awesome build peter, it's truly a kickflipping machine!
Thanks! More will come so stay tune
Well what can I say, this year I have gone with 1" clearance and it works great. I only use maximum 20mm of wheel travel
Funny things happen when using spray paint..
Well said Toasty I've spent my share of years staring and obsessing about cars either on my screen, in print or in the metal, and all things considered and all cars from the multitude of 'genres' and marques included, this is one of my all time favourites without any shadow of a doubt. Awesome, awesome car and massive respect to all involved
  Or 'epic' should I say
This was my favorite car of the year last year. The bodywork of course was one of the craziest aspects of the build. Glad you're getting several opportunities to break the build down for us. Enjoy!
I would like to tank you for all the coments and thoughts. Positive or negative , they all give me more power to push the car and the build to a new level.
So as I said earlier , stay tuned and you will get the updates done after the article in SH and some whats happening now during our dark winter.
I definitely didn't appreciate this car enough the first time I saw it featured here on Speedhunters. Having read this article (and now re-read the previous two features) I definitely appreciate it now. I do somewhat agree with the people that say it is a shame that what was once a desirable and rare car will never be the same again, but the amount of work and skill put into this makes me think it's actually not too much of a loss. It is definitely a one of a kind, and it may not be to everyone's tastes, but at the end of the day it's your car and you have done what you wanted to it. I think at the very least you should be commended for the amount of time and effort you have put into the build. I love it.