


Now you want me to point lights at this awkward box of reflections as well?!
The very thought of shooting cars with flash can be enough to make some budding automotive photographers run for the hills. Using flash in your automotive photography can be daunting, and it doesn’t always work for every shot – sometimes images can look too ‘forced’ if not lit well, and sometimes leaving areas in shadow creates more atmosphere and mood than lighting everything in sight. Heck – I know successful professional automotive photographers who rarely, if ever, use flash as part of their workflow because it doesn’t always sit with their aesthetic, so don’t feel bad if you feel like flash isn’t for you.

Sometimes the situation doesn’t lend itself to using flash, and you need to approach problems in another way to solve them. Flash, when used badly, can look terrible too. But, knowing how to use flash when needed, and being comfortable with using flash, is a great problem-solving tool to have up your sleeve.
As with the other topics covered in our Speedhunters Photography Guide series, this advice isn’t exhaustive, but rather should be used as a stepping stone into further learning. And, as ever, nothing beats seat time, as you’ll learn more from trial and error than reading any guide or book.
If this is the first of our photography guides you’ve come across, then you should catch up on the previous instalments below first:
Part I: Gear Up
Part II: The Basics
Part III: Natural Light

Primarily there are two types of ‘flash’ that photographers use; you have ‘speedlights’ and ‘strobes’.
Speedlights are small flashguns that can (but should never, see below) be placed on top of your camera. They are usually only capable of a fairly low power output, so while they’re useful for shooting in dark or low-light conditions, they’re often not that much use in bright sunlight where you’re shooting the car as a whole, and battling the ambient light. Speedlights are handy for situations whereby you’re focusing the viewer’s attention on a relatively small area, such as a detail shot, or when shooting interiors, where their small size and lower power can be effective.
A speedlight’s power is measured as a guide number, in metres (for example, GN 60m) whereby the higher the number, the more power the unit is capable of. This guide number can be used to calculate how far from a subject the flash needs to be at any given aperture to give you a correct exposure, but honestly in digital photography the method of just trying it out is far, far easier.

Speedlights are, however, far more affordable than strobes, so I’d recommend picking one up as a starting point.
You’ll find two types – TTL and manual. Through The Lens (TTL) speedlights can use your camera’s metering system to select the right power for you. This sounds great, but in automotive use they’re not much cop. They can also be used to manually select the power, but if you’re going to do that I’d recommend saving some money and just buying a manual speedlight. You’ll learn far more taking control of flash power yourself than trusting the system to do it for you and not really understanding why one photo worked and the next didn’t.

Strobes are battery-powered portable studio lights that pack a lot more power, and are the most common solution for professional photographers.
The battery packs are sometimes built into the flash units, or sometimes separate packs, attached to small flash heads via a power cable. All-in-one strobes are more convenient – no cables – but are more top heavy and heavier overall, which can lead to uncooperative assistants, as per above. Separate head-and-flash units take more setting up, and you have cables trailing, but they’re less precarious at the top of a tall light stand.

For either, power is usually measured in watts seconds (for example, 600Ws).
When it comes to power, the more the better. A higher maximum output will allow you to be more flexible with where you place your lights (more power means you can place them further away from the car), and is also important when it comes to balancing your flash with direct sunlight.
It’s worth noting that if you have more than one flash – speedlight or strobe – then you can use them both at once to give you more power. So, two 300Ws lights pointed at the same spot will give you roughly the same output as one 600Ws light.
The other term you’re likely to come across when it comes to lighting is light modifiers. These are attachments that you fit that shape, sculpt, soften and correct the light, such as soft boxes, umbrellas, reflectors, diffusers and so on.
In automotive photography you’ll get the most use out of reflector dishes (a silver dish that surrounds the flash bulb) and soft boxes (a black box with a diffused front panel to soften the light). Different modifiers create different light effects, or more specifically dictate how harsh or soft the light (and therefore shadows) are.
Once you’ve progressed in lighting cars, the next step is to experiment with modifiers to get the exact effects you’re after. Then, you can progress into experimenting with colours in your lights, either to correct colour casts or to creative effect. But, one step at a time.

Rule one of using flash in automotive – or pretty much any – photography is to take the flash off the camera. If your flash is one the same axis as the camera then all the shadows created by the flash will fall directly away from the viewer and your image will look flat.
Remember, shadows create depth and texture, so we don’t want everything that we see to be blasted head-on by ‘flat’ light. I offered some advice on the best angles for lighting a car in the previous guide to using natural light – the same applies with flash.

Using flash is incredibly good fun once you get to grips with shadow angles, as you can place the light almost anywhere, crafting shape and accentuating the car’s lines.
Obviously, taking your flash off the camera requires you to have a method of triggering the flash (or flashes), and this is usually in the form of radio triggers. Some are dumb, so just tell the flash when to fire, whereas others have built in power controls, so allow you to adjust flash power without walking back and forth to your flash units over and over again.

Before we go plonking lights down everywhere we need to cover a bit about exposure and power.
When working with flash, it’s actually easier to set your camera to manual mode rather than one of the semi-automatic modes, such as aperture priority. This is because manual mode stops the camera second guessing what exposure you want, and stops it changing the exposure between frames. Some beginners are intimidated by manual mode, but it’s actually made incredibly simple in digital photography as test shots are unlimited and free. You can even do your test shots in aperture priority mode and then simply copy the settings over into manual mode, if you like.

So, start by setting your exposure based on how much ambient light you want in the final shot – this is true for shooting during the day, or in low light or at night.
The only limitation you might have is to keep the shutter speed slower than 1/250sec . Some flashes support faster shutter speeds (something called high speed sync), but many do not, so treat this as your ceiling shutter speed – it’s known as your sync speed. If you go faster than this you may find that your flash either doesn’t show on the exposure, or you get a black band across part of the image.

Once done, it’s time to add flash.
Flash power is measured in fractions of a whole, with 1/1 being full power, 1/2 being half-power and so on. Some flashes will offer third-of-a-stop increments between these too – for example 1/2 +0.3 or 1/4 +0.7, etc. Remember, you can also adjust flash power by moving the flash closer to or further away from the car.

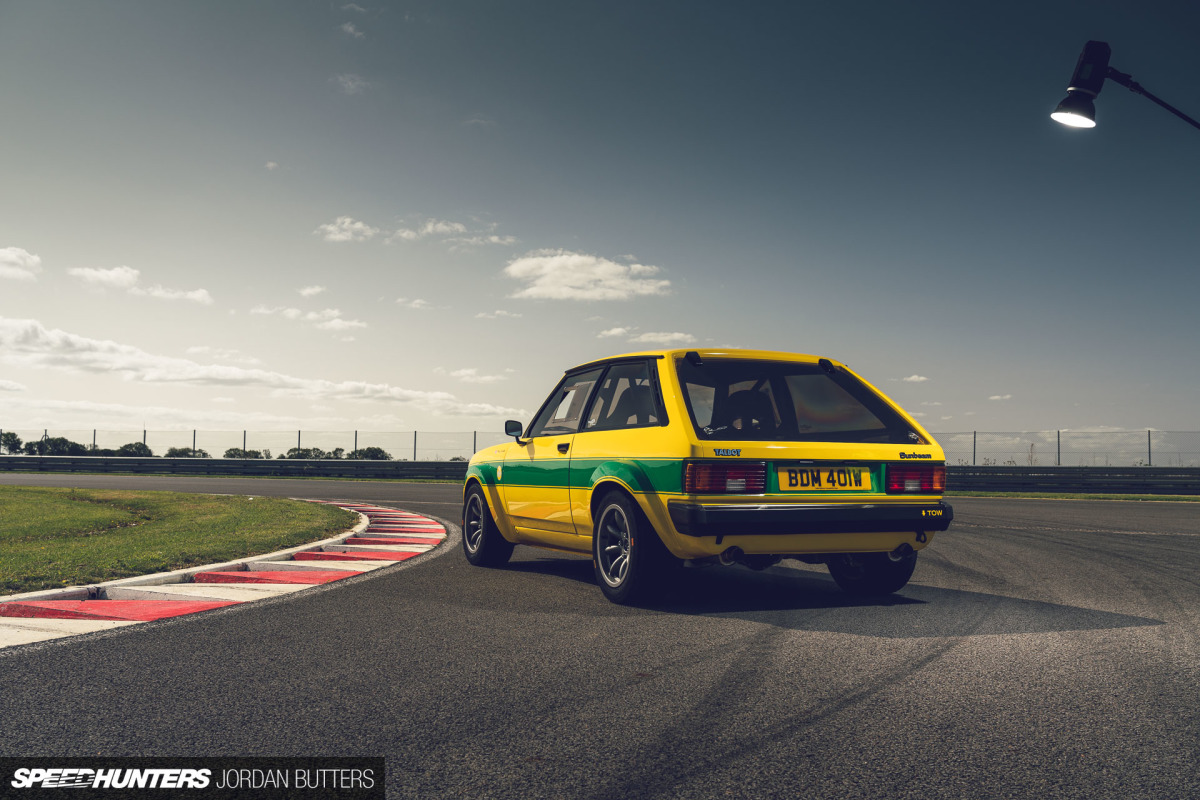
By far the easiest way to start using flash is in a situation where you already have directional, natural light. In this instance you’re essentially using the flash to fill in deep shadows created by the sun, so once you’ve angled the car correctly to work with the natural light (again, see the previous guide), it’s easy to figure out where to place the flash. The best thing is that because the sun is already doing the heavy lifting, you only really need one flash to make this work.
Again, with a powerful strobe you can play with the distance (and therefore spread) of the light, whereas with a speedlight you’ll have to be quite close to make it work (depending on how bright the sun is, car colour, etc). If you’ve got no choice but to have the flash where it’s visible in the shot, then simply use a tripod (to stop the camera from moving), take an extra exposure afterwards without the flash, and use this to ‘erase’ where you can see the flash/lightstand/assistant in image processing afterwards.

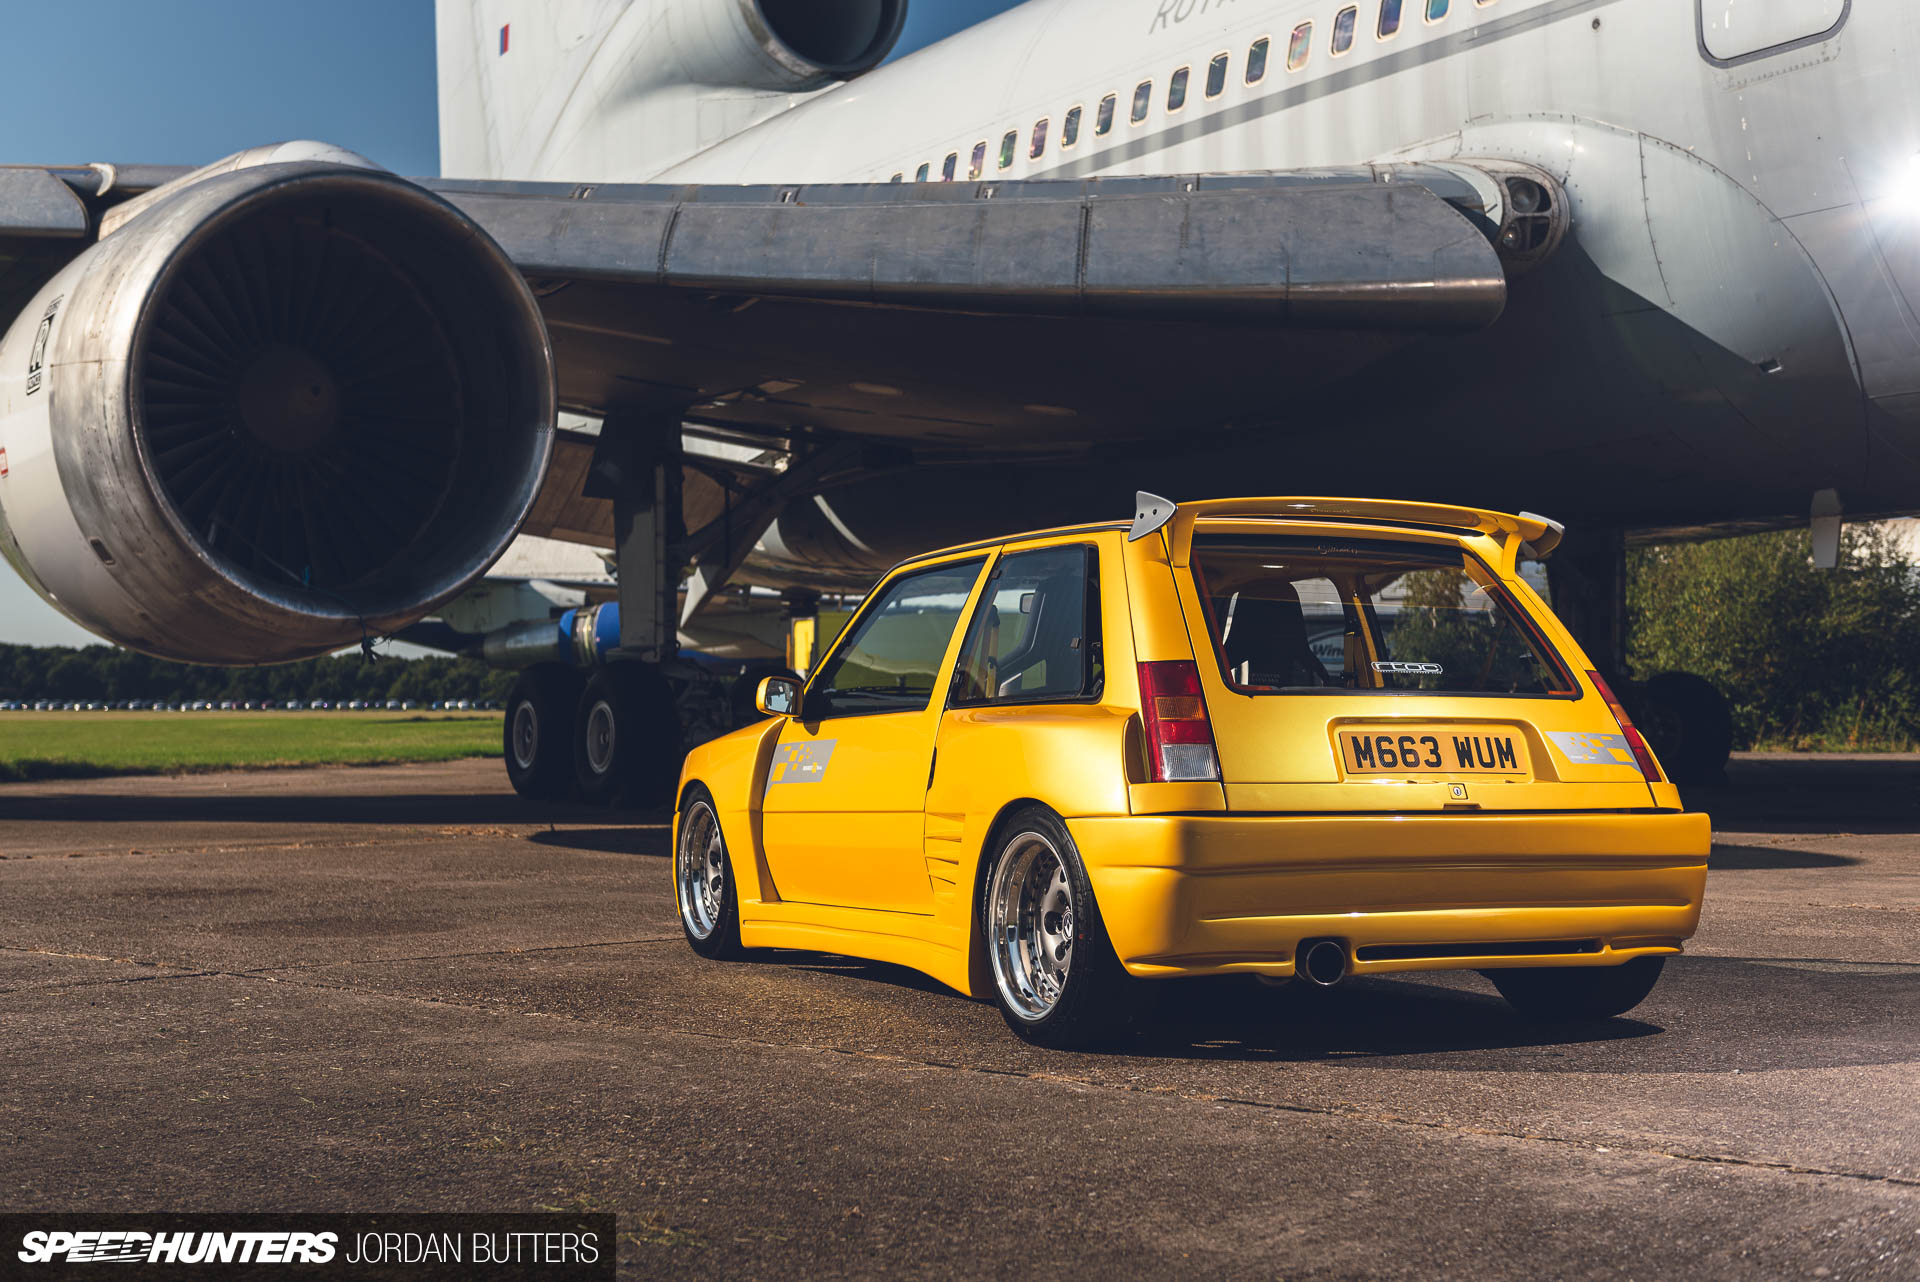
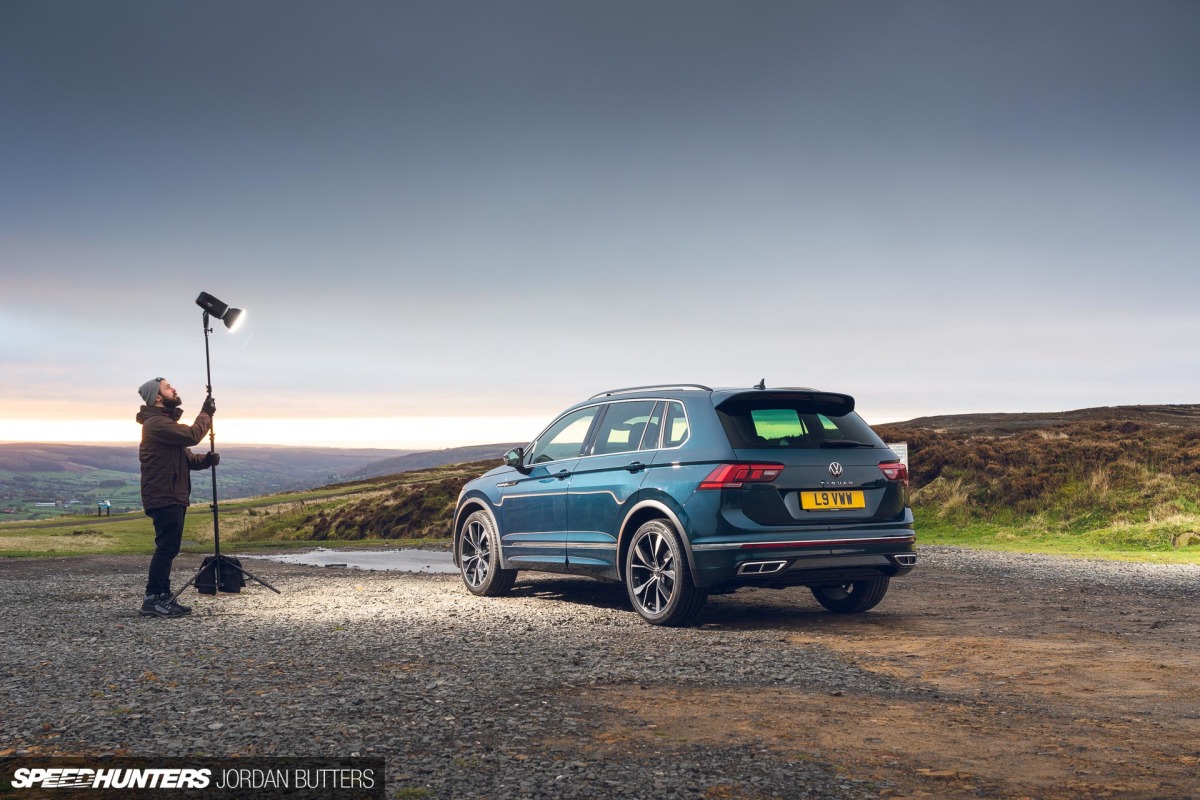
The most effective real-world example I can offer is in a shot such as this, whereby the natural light is shining down the side of the car, creating the shape of the car, however the front/back of the car is in deep shadow. A pop of flash on a boom shining down on the area in shadow fills in this area whilst keeping some nice shadow and shape to the car. One flash, one exposure – nice and easy.

Remember, when positioning your light you want to try and mimic natural light where you can. Natural light almost always comes from above, so firing the light down onto your subject will often give the most pleasing results.

I touched upon the colour of the car a minute ago, and this is an important consideration.
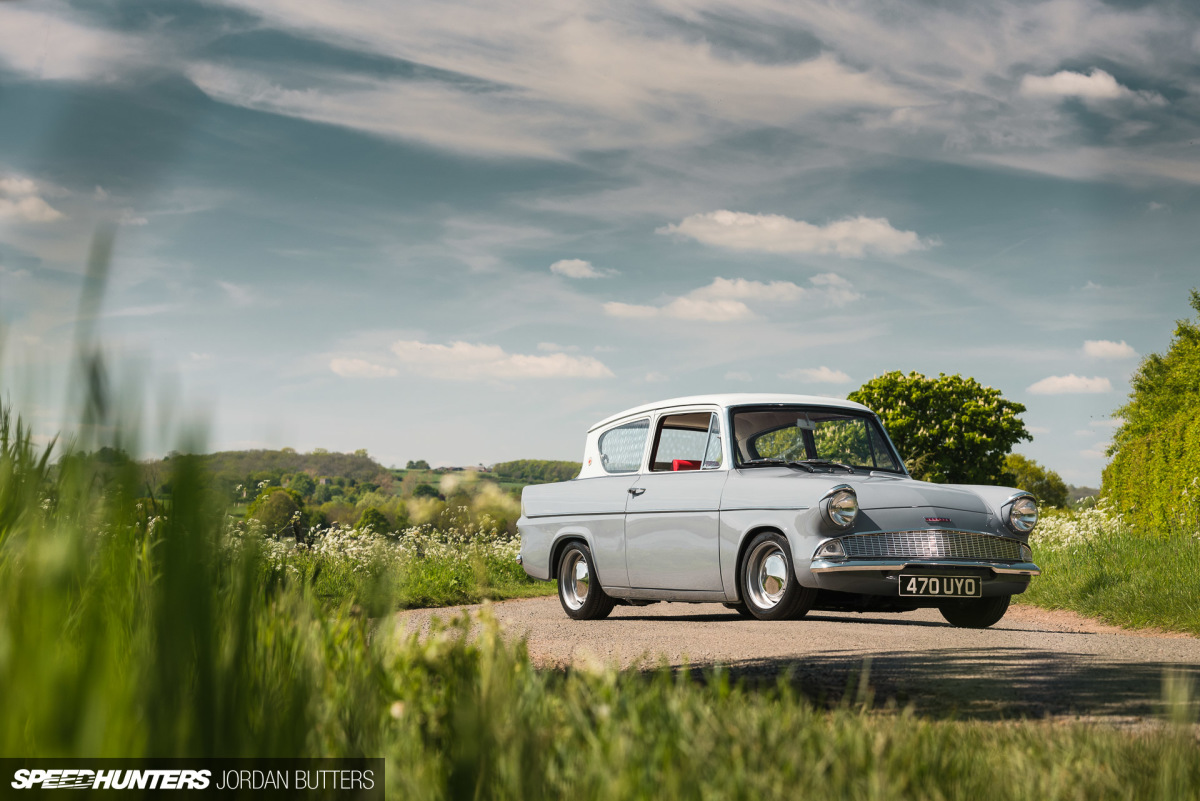
Some colours don’t always call for flash to be used – white and silver, for example – as your camera’s dynamic range should be able to handle the shadows and highlights in one exposure. Cars with a metallic or pearl effect often react well to flash, as the pop of light will bring out the colour, especially when combined with a circular polarising filter. Black cars, will absorb any and all flash, no matter how powerful it is, so it’s often best avoided. Photographing black and very dark cars could have its own chapter, to be honest.

But what happens if just one light isn’t going to cut it?
If it’s a dull day or low light and there’s no directional, natural light to work with, or if the light is in the wrong place for the angle and location, then you may find that you need more than one flash. Or do you? If you’re shooting from a tripod (which you should always when using flash, I say) then remember you can shoot multiple exposures with the flash in different places and blend these together at the processing stage.

One flash can be made into 50, or 100 flashes using this method, allowing you to pick and choose where you place light when editing in Adobe Photoshop. The editing side of this technique is slightly too complex to cover here, but there’s plenty of tutorials online if this approach takes your fancy.

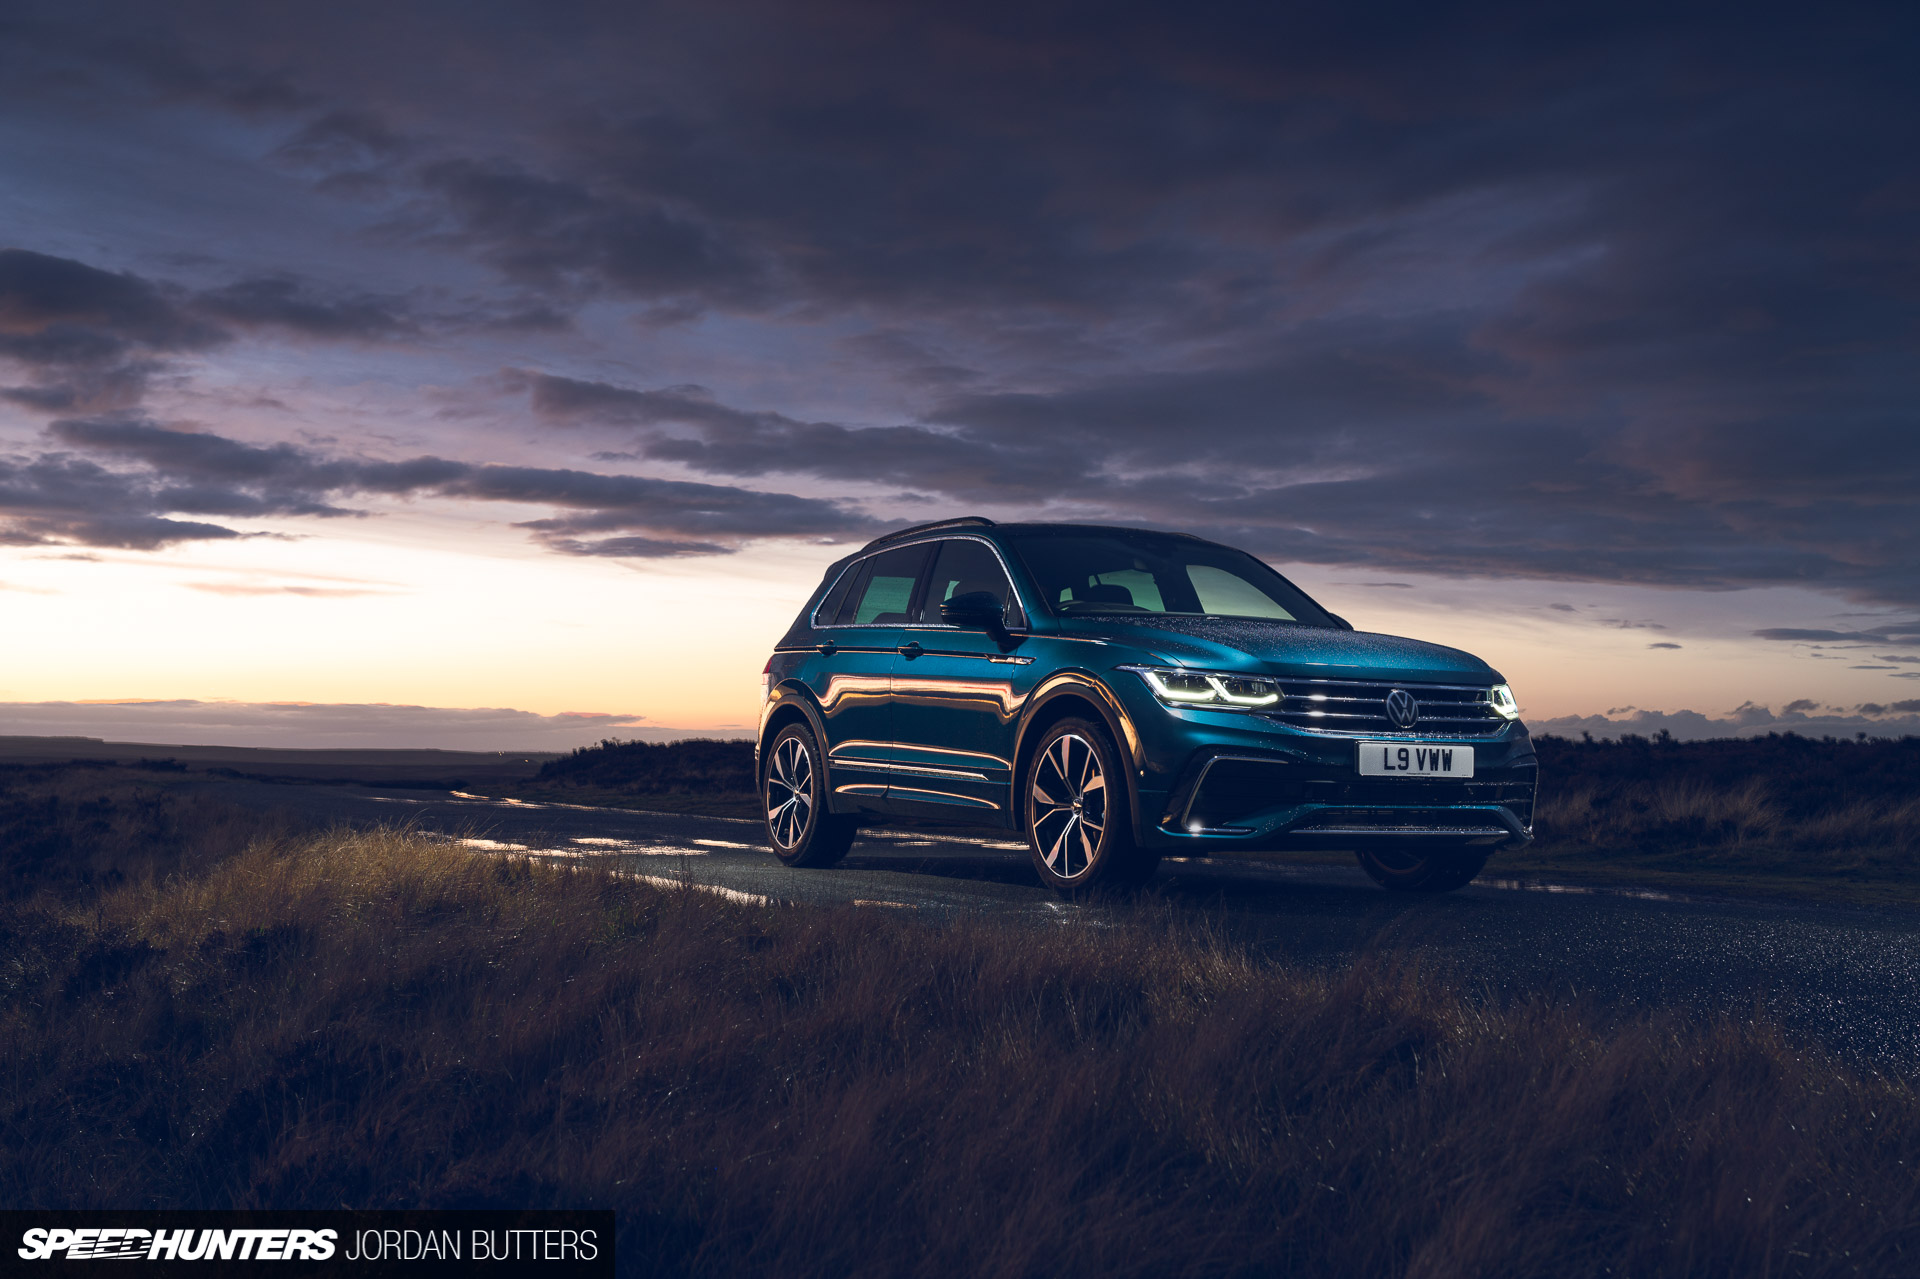
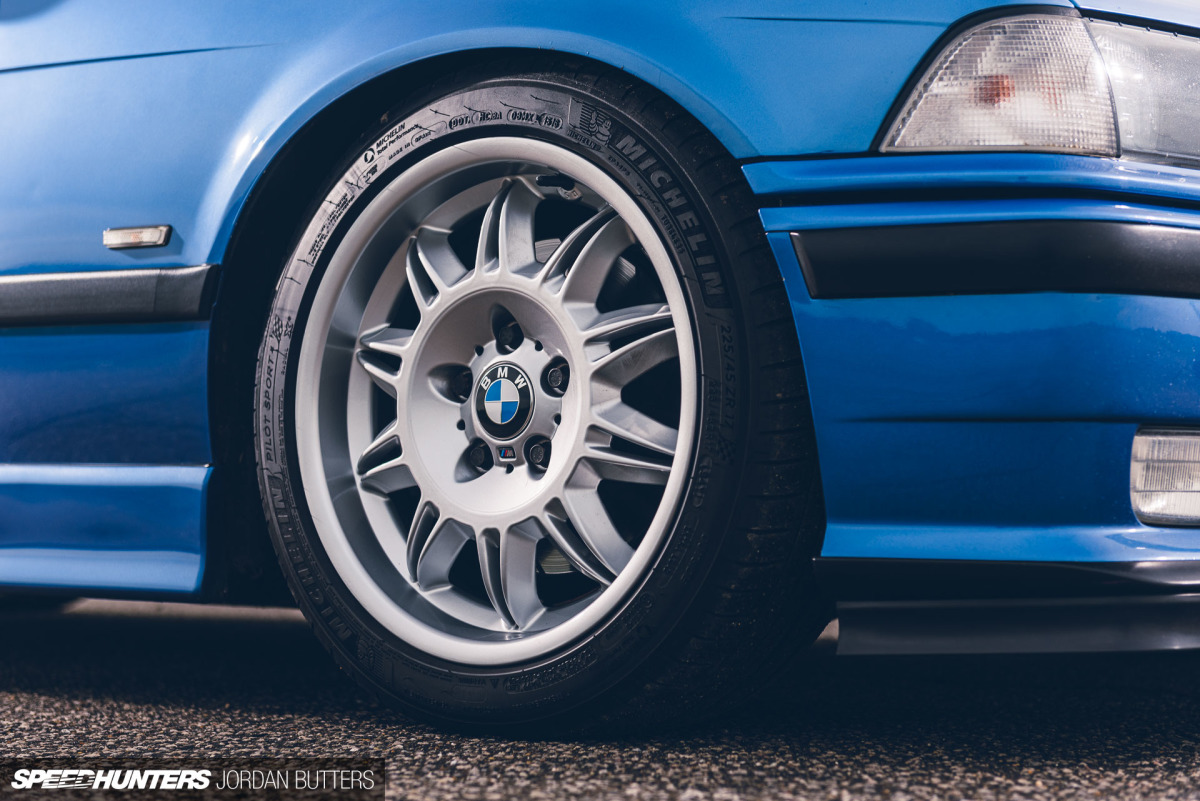
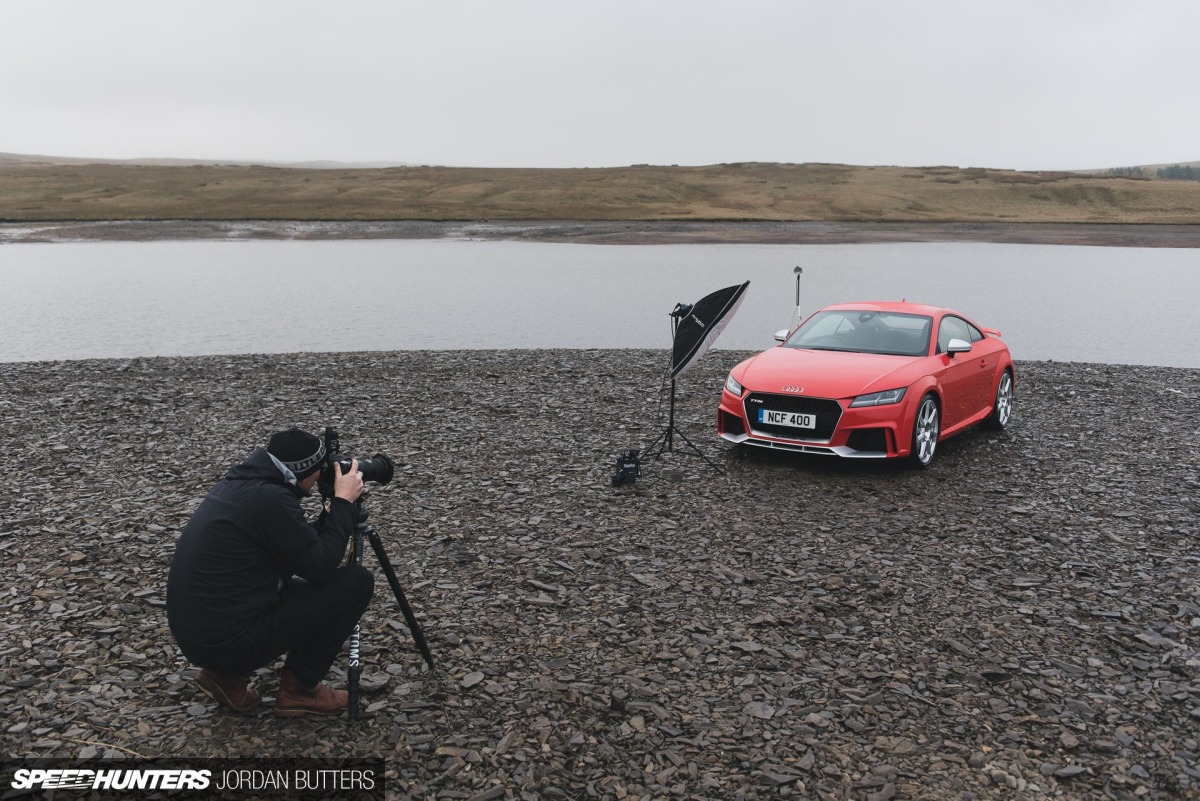
Here’s another example using one light. There wasn’t a strong directional light in this spot, so I’ve placed the light just outside of the frame to the right to light the side of the car (and catch the dark wheels) in the first frame.

And then utilised a COVID-compliant, voice-controlled lightstand to light the front of the car in the next frame. I know you weren’t prepared for a bare midriff, but please try and hold yourselves together until the end.

By combining these two exposures, and with a bit of masking and colour grading, you have this.

That’s the basics of flash covered very concisely. In the next Speedhunters Photography Guide, we’ll cover using continuous light, which is a bit easier to get to grips with. As ever, questions are welcome in the comments…
Jordan Butters
Instagram: jordanbutters
jordan@speedhunters.com


Another cracking article Jordan. I've just started using strobes more and more for shoots and noticed my photos have improved so much in quality. Its amazing what a bit of lighting can do.
love these articles...learning so much from them
"Heck – I know successful professional automotive photographers who rarely, if ever, use flash as part of their workflow because it doesn’t always sit with their aesthetic, so don’t feel bad if you feel like flash isn’t for you."
Or because these alleged professional automotive photographers are too lazy to bring them with them, even though they have everything they need sat in a convenient ready to roll Peli case. The utter effort of it all, Jord.
Thank you for making these guides Jordan!
Now that I have gotten a new phone, an iPhone XR, I can start to practice photography on different cars and see how it comes out!