


Light is vital to photography. Heck, it’s everything.
Most photographers start out using natural light only. In fact, some professionals maintain this throughout their career, so the importance of learning how to shoot in natural light should never be overestimated.

It’s true that you have more control over the light when adding flash or light-painting, however you still have a good amount of control when it comes to natural light, and learning how to use the light to your advantage can make all the difference. Put two people in the same place on the same day with the same car and the same camera, and the one that understands how to use and work with light will come away with the better images, 100% of the time.
Before we go on, if you missed Part I and Part II of our Speedhunters Photography Guide, then be sure to catch up first.
The main things that you can control when it comes to shooting in natural light is picking your day/time and picking your location and position. Every other variable is out of your control, so don’t worry about them.
Let’s cover the two main type of conditions you’ll be shooting in with natural light…
CHAPTER TWO
No Sun? No Problem
An overcast, but bright day is perhaps the easiest condition to photograph any car, of any colour, in. With the sun diffused by clouds, you can pretty much shoot in any direction you wish without fear of needing to balance light and shadows. Even when it’s raining everything else is annoying, but at least you don’t need to worry about high-contrast situations or angle of light.

An overcast day can work for cars of any colour too, but makes it especially easy to deal with monochrome subjects – blacks, greys and whites.
The downside of shooting cars with a strong hue to them in overcast conditions is that some paints need direct light to really make the colour pop; the same paint can look completely different with a moment of sunlight on it, to when it’s sat in shade. Typically, when presented with a vibrant colour and cloudy conditions, this is when I’d look to add a pop of flash to lift the colour, where possible. I’ll save that for the guide to using artificial light, however.

There aren’t really any technical pitfalls to look out for when shooting under a cloudy sky, because the lighting will be so ‘flat’ and even that there’s really not much to go wrong. A moody sky can add a ton of emphasis to the car, too.

The only caveat is to make sure that your camera is metering the scene correctly to get a good exposure. I’ll typically use aperture priority mode in these conditions, alongside evaluative metering (or full-frame metering, if available). This where the camera looks at the whole scene and finds an average exposure, and on an overcast day this will get you where you need to be, or thereabouts. You simply use exposure compensation to add, or remove a bit of exposure.
You may find that if you use centre-weighted, or spot metering that the colour of the car can influence your exposure. For example, with a white car the camera could mistake that blob of brightness for overexposure, and underexpose the whole scene. And for a dark car the opposite is true.

With your exposure set, you focus (I almost always use the numberplate as my point of focus if it’s in view), choose your aperture (f/4ish for a soft, arty look, f/8 for just the whole car sharp, f/11ish for the car and all the background sharp) and fire. Done.
FINAL CHAPTER
Time To Shine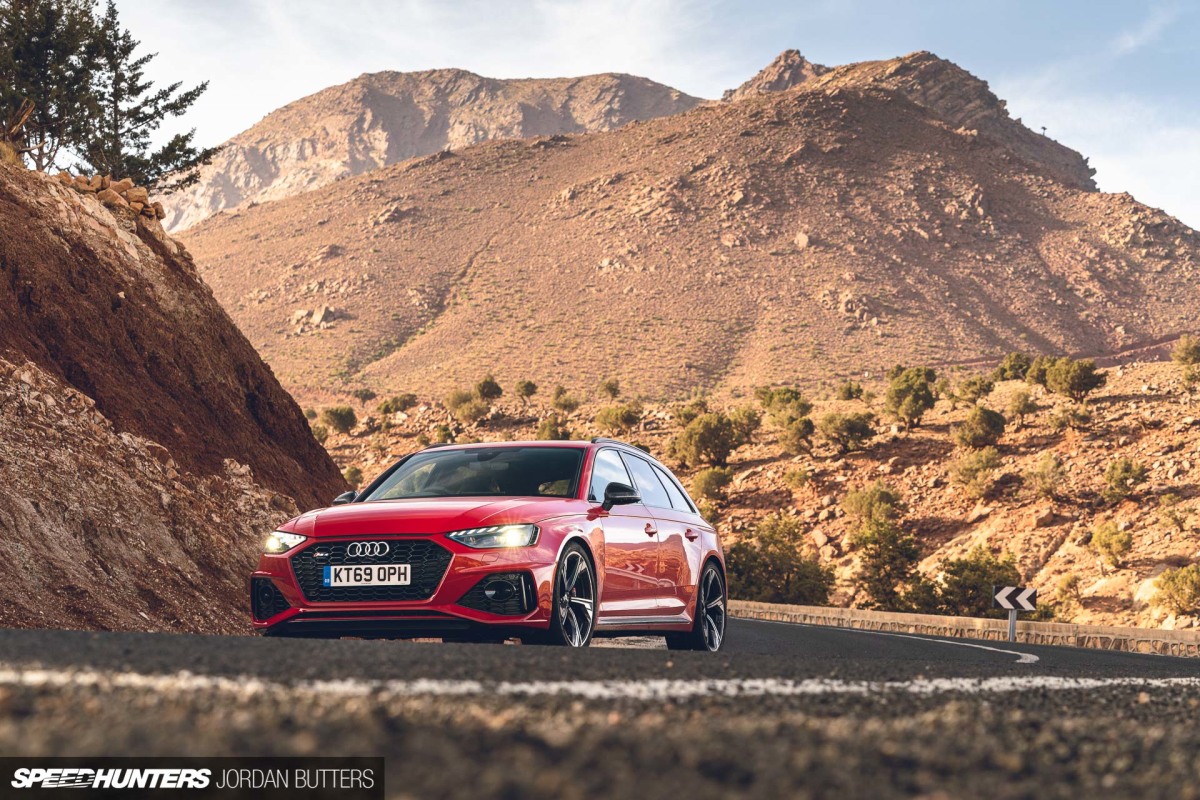
When the natural light has a direction to it, that’s when you have to start thinking a bit smarter about your angles and locations. Sure, you could just plonk the car in an area of shade and shoot away (see above), and this is actually a really valid technique for dealing with shooting certain colours – dark cars are much easier to shoot in shade than direct sun. But there’s not always a spot of shade where you want it, so learning a bit about angle of light will help.

Now there’s not one rule for all situations, and you’ll often find that your location dictates which way you point as much as the angle of light. Sometimes you’ll have to wait it out for a bit for the background that you want and the light’s angle to fall into line nicely. Sometimes you just have to pick your poison and concede a little on one or the other.

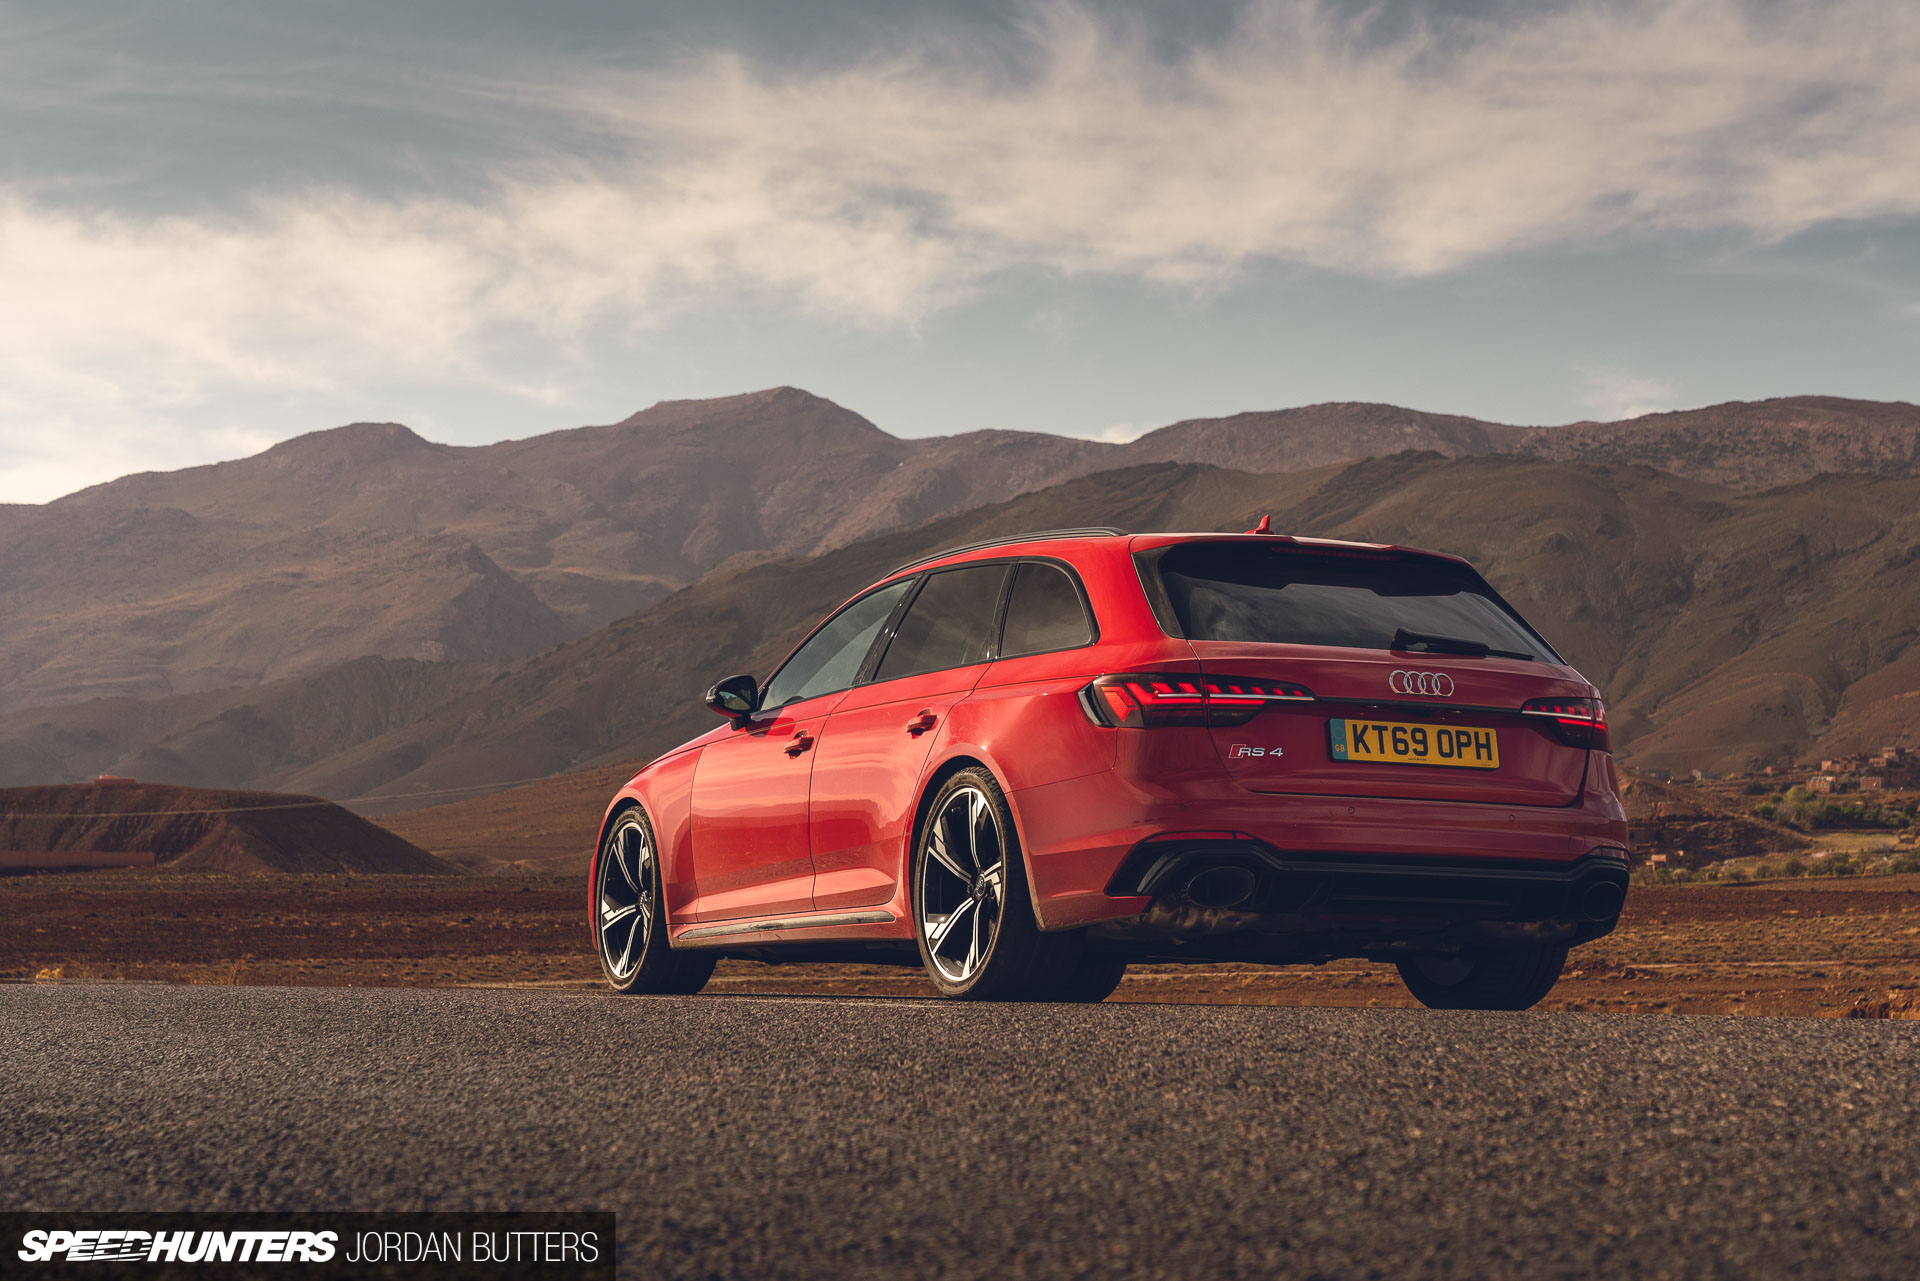
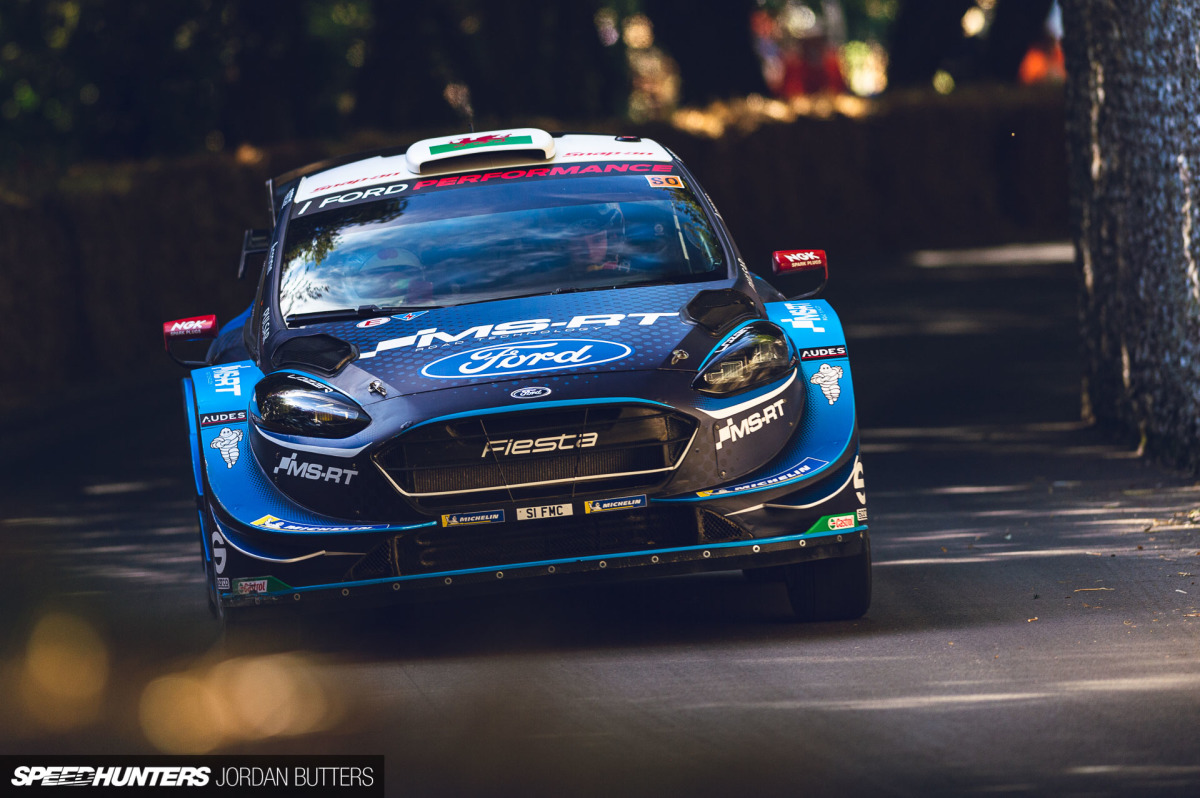
Often, when angling the car for a static image, I’ll look for the sun to do the work of creating shape down the side of the car for me. With a sharp angle between the sun and the side of the car, the body lines create shadows which give the car its shape. In the image above, take a note of the angle of the shadows and how they carve out the angle of the fenders. It’s especially easy to ‘lose’ the shape of a red car, speaking from experience.

Whereas when the sun strikes the side of the car dead-on, the shape is lost and you lose all the lines as there are no real shadows cast towards the camera. You can see this in the two images above: the top image is lit well, where as the bottom image isn’t. Although the locations are different, they were shot at a similar time of day, and the difference that the angle of light makes to the lines of the car and the shape of the wheel arches is huge.

Of course, you don’t have to do it this way at all; you can allow the sun to strike the front (or back) of the car at a similar acute angle and allow the side to fall to shade. The important point here is that it’s shadow that gives the car depth and shape. Use it to your advantage; move the car and yourself around to find where it looks best.

If I’m shooting a head-on, rear-on, or side-on image I’ll apply the same approach, angling the car so that the light falls across it rather than straight-on. I think this is especially important with these types of shot, because there’s less depth to the subject already because of the angle you’re shooting at.

For that reason, I’ll hardly even shoot with the sun behind me. In this scenario you’ll typically end up with a very flat and lifeless image as the shadows all fall away from the camera, and you have to contend with issues such as avoiding your own shadow in the frame.

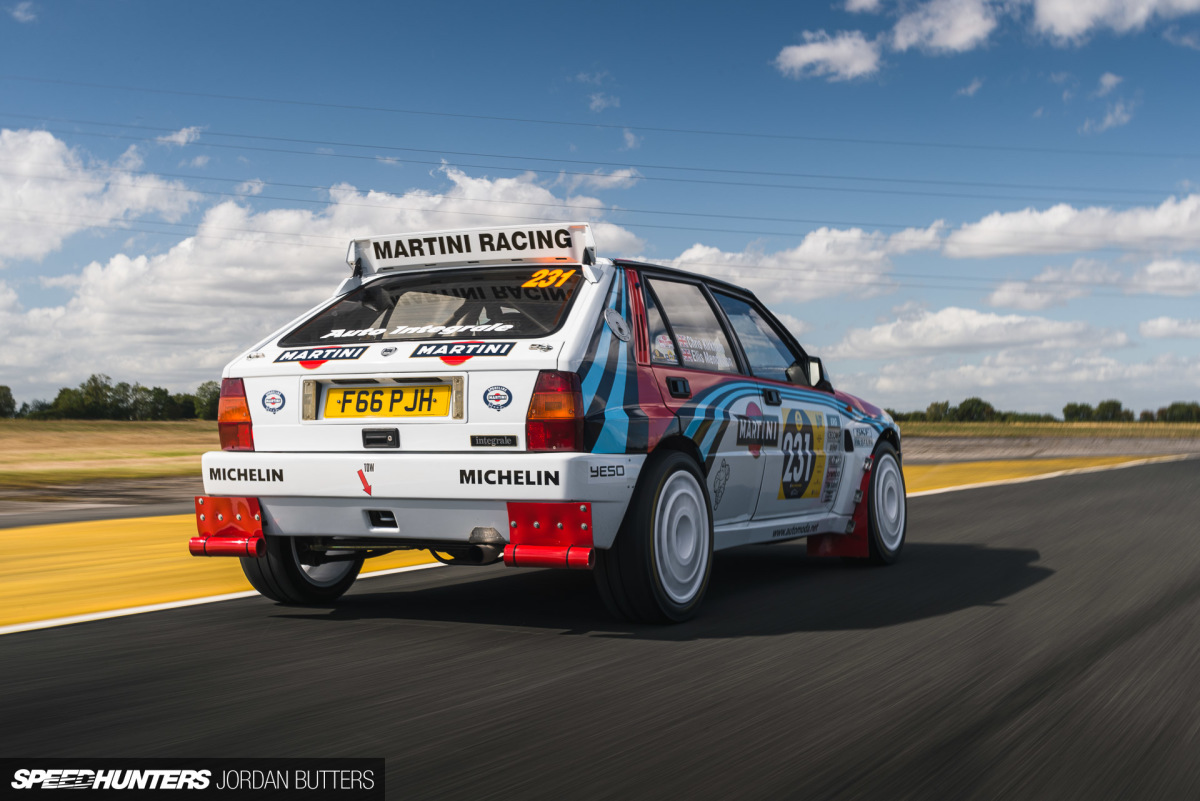
This advice applies to both static images and moving shots. Although you can’t always choose the right section of road to correspond to where the light is, if you do get the two to align you instantly make your job so much easier, and the images just look nicer.

The higher the sun gets in the sky, the trickier this becomes, but unless you’re shooting cars on the equator in the dead middle of the day there’s always at least some direction to the light, so work with what you have. You can also use harsh shadows to your advantage, to cut shapes with the light and highlight points of interest.

One really useful tip I will offer is to look out for what I call ‘pings’ when positioning a car. This is where body panels reflect the sun right back towards the camera, creating a messy-looking sharp highlight. Sometimes they can be hard to avoid, but if you keep rotating the car – or change the camera’s position in relation to the car – you can often ‘hide’ the ping in a bit of bodywork, such as a door handle, a bit of trim or panel edge. It’s definitely something easier done when a car is static than when it’s moving, though. In the frame above the ‘ping’ is right at the edge of the rear 3/4 panel, but it’s forgivable. Every frame earlier in the corner was unusable due to the heavy highlights in the side of the car.

The image above is a good example of getting it wrong – the big ‘ping’ on the rear fender is ugly, as is the reflection from the canopy above on the rear quarter, and the reflections down the side. But sometimes you just have to work with the location you have, and accept some concessions.

As with all photography, stuff just looks better at the start or at the end of the day. We’ve all heard of the ‘golden hour'; with the sun lower in the sky, the light is warmer and softer, contrast is lower, and it’s easier to use the light to define a car’s shapes and lines. It’s really not just an hour either, and depends on where you are in the world and what time of year it is.

Just bear in mind that your time at golden hour is limited, so it’s good to be set up and ready to shoot in plenty of time. If you shoot at dawn, the light progressively gets worse as time goes on, and if you shoot at sunset it progressively gets better.

When the sun is low in the sky you’ve more flexibility with how you angle a car to the light – you can even shoot straight into the sun and just let the glow and flare create atmosphere for you. Again, watch for pings; they can be really hard to hide when the sun is so low.
After the sun disappears (or before it appears) you can still keep shooting. Directional light will be no more, but as long as there’s light on the horizon you can create stunning images. Again, this is a great time of day to shoot dark cars, as any colour in the sky will be present in the reflection.

Which brings us nicely onto the final point for this instalment: reflections. Always keep an eye on what’s being reflected in panels. Although it’s possible to remove some unsightly objects during editing, it’s far easier to just get it right while you have the flexibility to move the car and yourself.
Full disclosure: the image above has a flash added over the boot lid, but the light down the side is all natural.

A circular polarising filter can be used to remove reflections along one axis of the car, usually either an upward-facing panel, or a side-facing panel (there’s a technique you can use to combine two exposures here which I’ll cover in another guide), so use it wisely.

After you’ve got your car in position just take a moment to look along the sides of the car and in the curves of the bumpers to see if there are any reflections that look messy and can be moved (often you’ll find it’s the owner or driver of the car standing by on their phone.). The ideal scenario is a clean horizon line along the side of the car, but unless you’ve found the perfect location on a high plateau that’s often difficult to achieve.

I’ve only just scratched the surface here, and as always there’s only so much advice you can give without being out there and actually doing it. As ever, seat time is better than anything.
In the next instalment we’ll cover using flash, however we’ll be keeping it simple with the addition of just one or two lights. To be honest, the advice on natural light above will be just as important in that chapter too.
Jordan Butters
Instagram: jordanbutters
jordan@speedhunters.com


Very good article, I thank you for it even though I'm not a really good photographer. BTW, when did you ever photograph an Aston Martin DBX? I'm not particularly fond of it, but if it saves the Aston Martin brand from almost certain death, I'll accept it. It looks good in orange anyway. Thanks again!
I shot the DBX earlier this year for Car magazine - it wasn’t featured here on the site.
Love these articles....only just started shooting with my little bridge camera but love the tips and tricks
Glad you enjoyed it - it should apply to anything even phones!
Really helpful article, I don't suppose you could name the locations for the photos would love to recreate some of those shots with my own car if they are in the UK.
Thanks Mark! Any in particular? There’s quite a lot there!
Thanks for replying!! Im really interested in the photo with the Century and the Red RS4 (older one). Curious about the other RS4 certainly doesn't look like the UK where is that one? Cheers, M
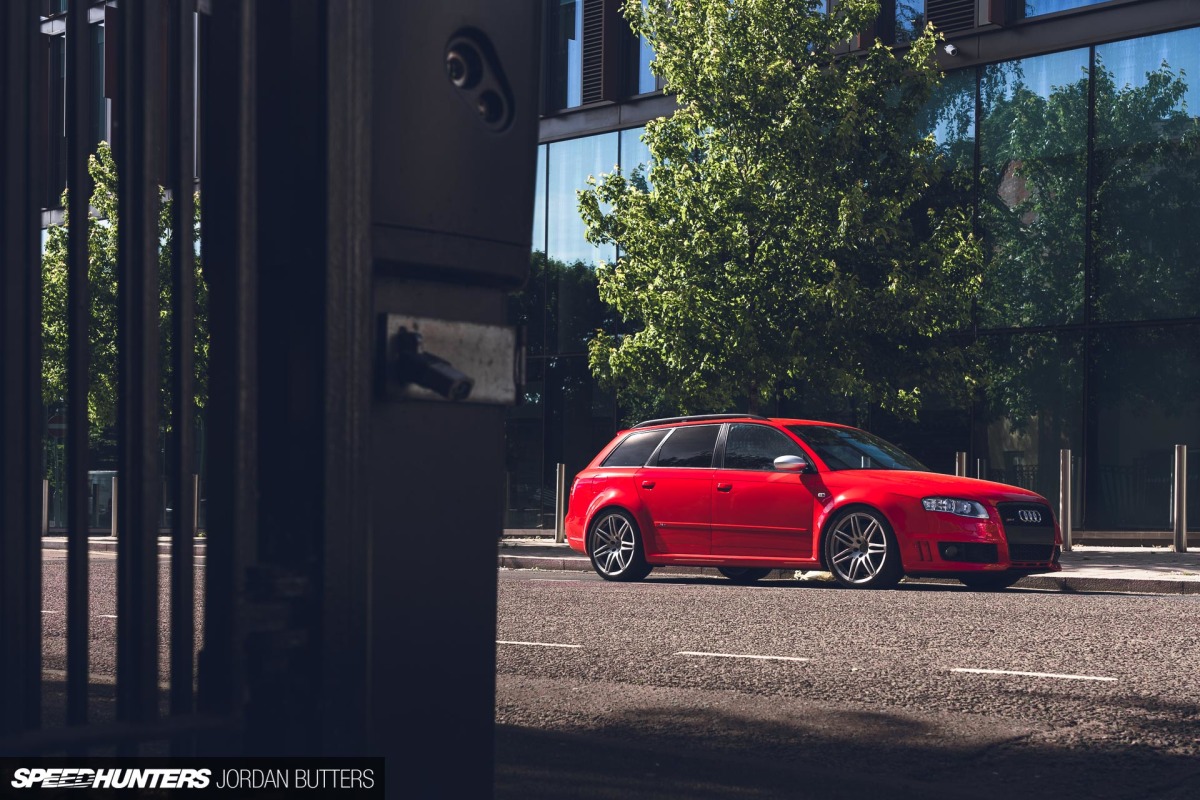
The Century was a random carpark in the Peak District that I found, and the older RS4 was outside the council offices in Northampton and a random country lane.
The newer RS4 was shot in the Atlas Mountains just outside Marrakech in Morocco.
Superb article. Bookmarked and will go back to this in the future, for sure.
I like the technical articles
I wish i knew what camera and glass you used ;w;
I want to upgrade so i can take nice photos in all conditions and my D3300 is really getting old and noisy.
A mixture here of Nikon D750 and D4S as well as Sony A7Riii and A9.
Awesome stuff, Awaiting flash but also Awaiting location and using the environment to impact your subject using lines etc
https://mudanzasandreu.es/
[ STAY AT HOME & WORK AT HOME ] Start making money this time... Spend more time with your family&relative by doing jobs that only require for you to have a computer and an internet access and you can have that at your home. Start bringing up to $65o to $7oo a month. I've started this job and earn handsome income and now i am exchange it with you, so you can do it too. You can check it out here........ http://www.online103.com
Thanks for sharing. The Speedhunters photos are always top notch.