
‘All the gear and no idea.’
No doubt you’ve heard this idiom before, and it’s something that’s very much prevalent in photography too. Am I prefacing the opening part of the Speedhunters Photography Guide by telling you not to pay too much attention to what I’m about to say? No, and yes.
The kit that you use both matters and doesn’t at the same time. For example, a good photographer will produce good photographs no matter what kit they’re using, whereas a complete novice handed the best kit in the world will still fall at the early hurdles. Having said that, choosing the right kit for the job will eventually help you take better photographs when paired with both experience and knowledge.

Better cameras offer faster burst speeds, increasing the odds of getting the shot, and feature better sensors which create crisper, higher-resolution images with a greater dynamic range (more on the jargon of photography to come). Better lenses resolve images at a greater fidelity and deal with problems such as ghosting, chromatic aberration, and flare more efficiently.
You see my point? The kit that you own isn’t essential, but following the mantra of ‘buy once, buy well’, if you choose the right kit for what you’ll be doing it’ll last you for years to come.
Of course, this has to be carefully balanced with budget too. If you go out and buy the best one of everything you’ll need, then you’ll find yourself in a pretty deep financial hole.

Photography is not a cheap hobby, unfortunately, however it is something that you can get into progressively. You don’t need everything when you start out; with just a camera, a lens and a couple of accessories you can start shooting.
Choosing A Camera
There’s an oft-used, or maybe overused saying in photography that ‘the best camera is the one that’s with you’. Rarely has a truer word been said, and if there’s something worth capturing unfolding in front of you – be it sudden action, great light or a special moment – then capturing it with your phone because it’s what you have in your hand is far, far better than missing it because you were running back to the car for your ‘proper’ camera. In fact, much of the advice in this guide will apply even if you stick to using your phone, just not this opening chapter.

To take things one step further, making sure that the camera that you have with you is a good one will help. The chances are that if you’re interested in photographing cars, then you possibly already own a camera to do so with. Even so, at some point down the line you’ll most likely want to upgrade it, so this part could still be useful to you.
For those of you shopping for your first camera for shooting cars, then there’s a handful of initial decisions that you need to make before diving in. The first is to decide whether you want to use a larger DSLR camera, or a smaller mirrorless model, or indeed an even smaller still compact camera.
Compact cameras have mostly been made obsolete by the smartphone, but there are still some excellent premium options out there if you don’t fancy swapping lenses, such as the Sony RX100 and Fuji X100 series. You’ll find many pros keep a compact camera with them for when they want to take photos without using their ‘work’ cameras.

DSLRs (Digital Single Reflex Lens) are interchangeable lens bodies which offer an optical viewfinder that, thanks to a mirror inside the camera, allows you to see through the lens before you take the shot. This mirror flips out of the way when you take the shot (that click-clack noise that you hear), allowing the light to travel through the lens and reach the sensor behind the mirror.
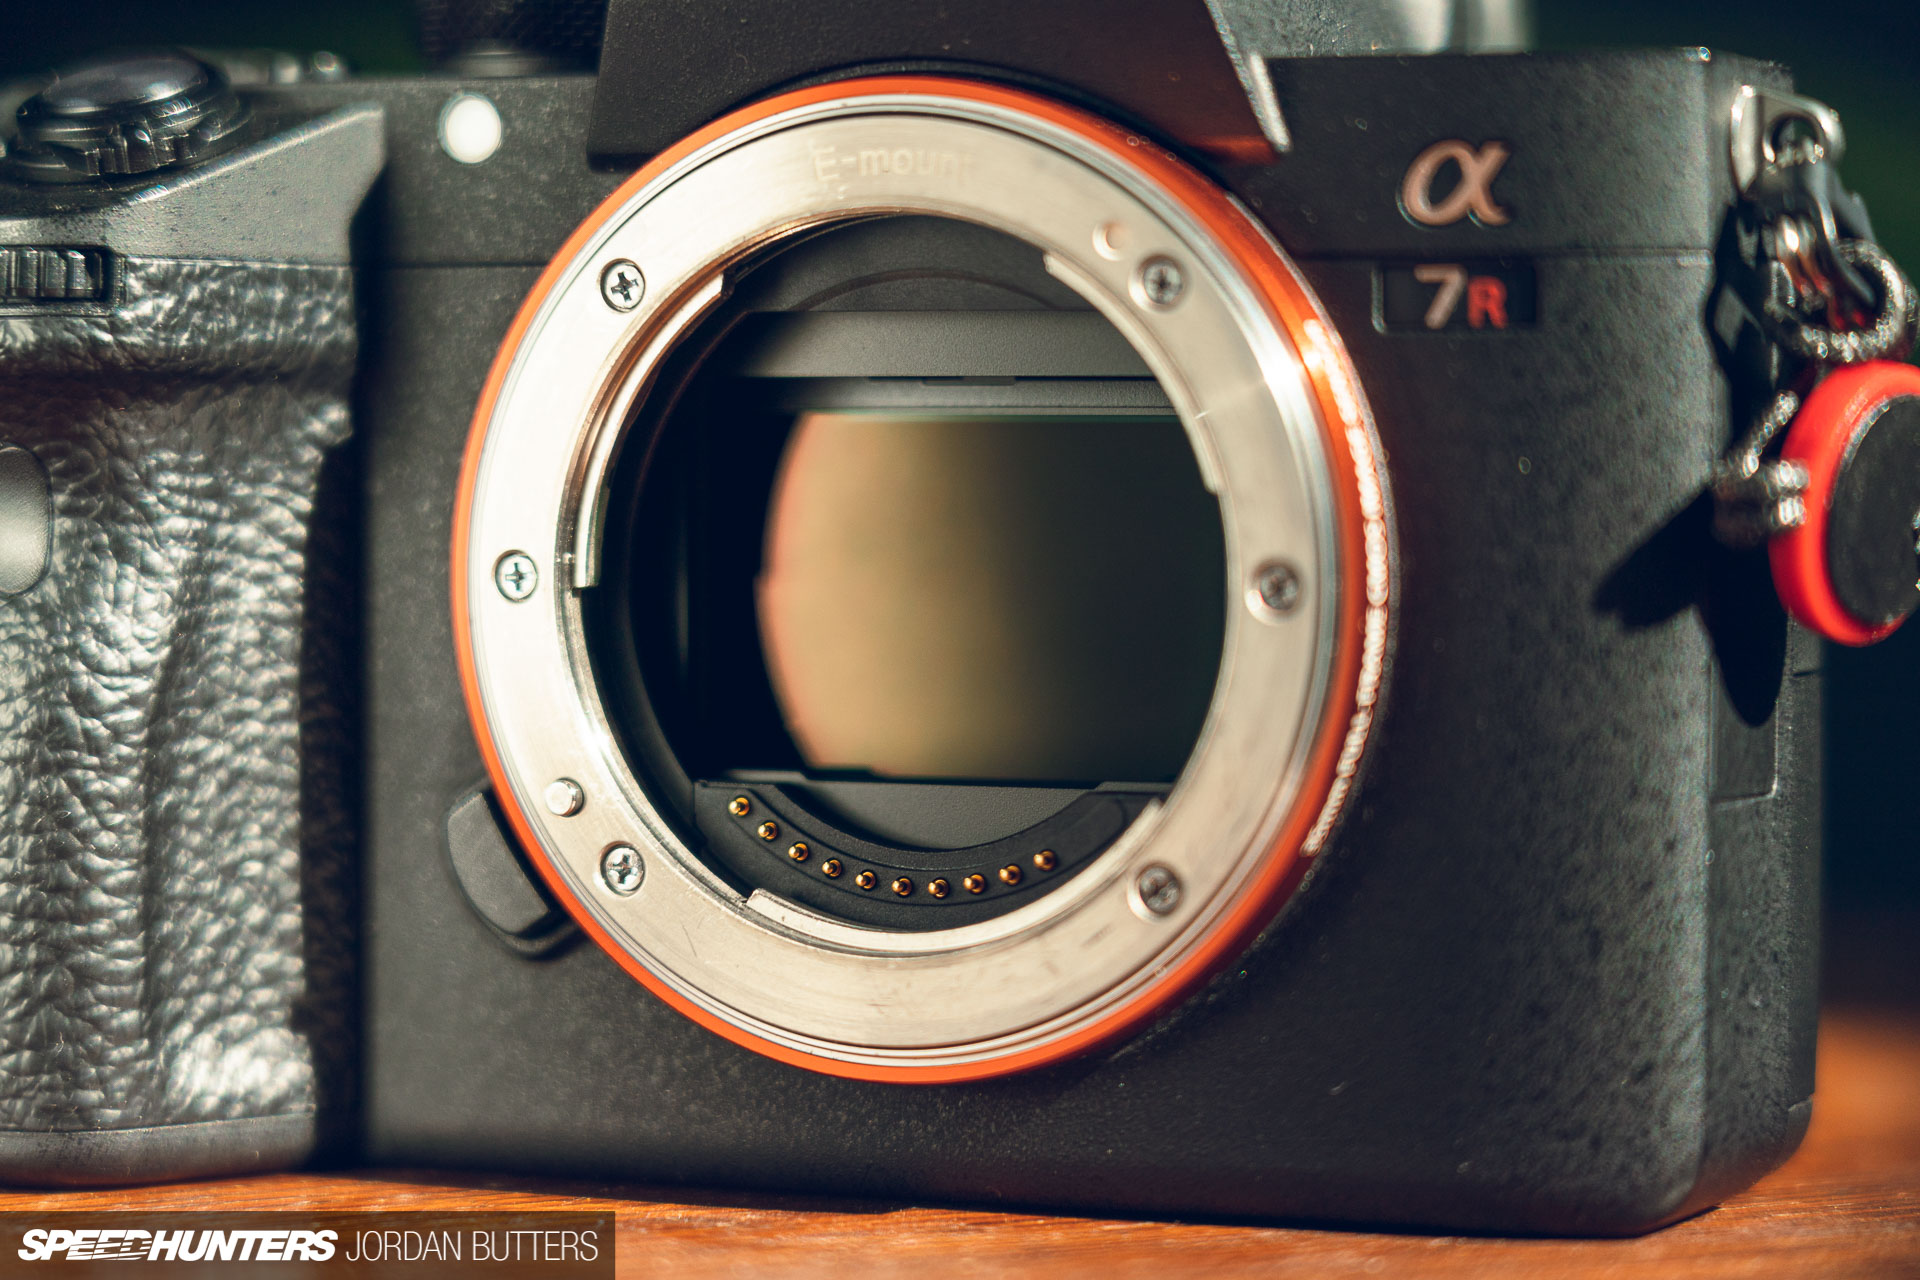
Mirrorless models, as their name suggests, don’t have mirrors inside, so instead of an optical viewfinder they offer electronic viewfinders – this is basically a small screen inside the eyepiece that relays a live feed from the sensor. You can tell if a camera is mirrorless or a DSLR simply by looking into the lens mount – if you can see the sensor, then it’s mirrorless.

Both options have their pros and cons – mirrorless models are smaller and lighter, and feature newer technology too. However, the ergonomics on larger DSLR bodies suits some people better, battery life on mirrorless cameras is notably less, although improving, and mirrorless autofocus systems aren’t always up to par with comparable DSLR autofocus. And some of the comparison falls down to preference – some people just like an optical viewfinder above all else.
Personally, I’ve long been a huge fan of large, professional DSLRs, having shot on both Canon and Nikon systems over the years. However recently, following progressions in technology, I’ve made the switch to a smaller Sony mirrorless setup. My advice is to try and get hands-on with a few different systems and see which works best for you. Some people like the weight in hand of a DSLR, whereas others like the smaller form factor of a mirrorless body.

DSLRs can be big and bulky, especially pro bodies, and while this tends to make them more robust, they have technical limitations inside too. The maximum frames-per-second that a DSLR can shoot at is always going to be limited by the mirror being able to move out of the way quick enough, so mirrorless models often offer burst-fire rates far above what any DSLR could achieve. The physical mirror mechanism of a DSLR also has a lifespan, whereas with less moving parts a mirrorless model should, in theory, go on forever.
Modern pro-level mirrorless models offer further speed-based advantages. For example, the Sony A9 and A9 II offer no viewfinder blackout when shooting fast bursts of images. With a DSLR, you lose vision through the viewfinder while the mirror moves up and down, whereas on these models you retain full sight through the viewfinder while shooting. This is a big deal when shooting moving action.
Whichever way you go, there are a couple of features that you want to look out for when choosing a camera.
The camera’s burst rate (measured in frames-per-second) is important if you want to shoot action. In this case, the more the better, as you’ll gift yourself better odds of capturing a split-second moment of interest. Buffer speed is crucial too. This is how many exposures the camera can store in its RAM whilst writing to the card; once the RAM is full the camera will slow down until it’s finished writing (card speed is therefore also important). Finally, consider if you want to shoot video now or in the future. Most modern cameras offer this, but some are more angled towards stills than others.

The second big decision to make is whether you want to shoot on a crop-sensor, or full-frame.
Let’s get a bit nerdy: A full frame sensor measures 36x24mm, which is around the same size as a 35mm film frame, whereas crop sensors are smaller. The most common sizes of crop sensor are APS-C (22.2×14.8 mm on Canon and 23.5-23.7×15.6mm for most others) or Micro 4/3 (17.3 x 13 mm).
Full-frame and crop both have their pros and cons. Full-frame cameras tend to have a larger dynamic range (the range of tones that they can record between bright highlights and dark shadows), better performance at high ISO (which is good in low-light), offer a shallower depth-of-field and often render higher image quality. The downside? Full-frame cameras are more expensive.

Most beginner and enthusiast-level cameras tend to boast APS-C sensors, but there’s an advantage to that too and it affects the lenses that you use.
Firstly, lenses designed for APS-C cameras tend to be cheaper, but secondly, an APS-C sensor gives you greater reach like-for-like on the same lens used on a full-frame camera. For example, a 200mm lens attached to an APS-C camera will have the same field-of-view as a 300mm lens on a full-frame camera. This means that shorter, and therefore less expensive lenses reach further on APS-C models.
Most photographers tend to start with an APS-C model and then move on to full-frame once they feel they’ve outgrown their camera. The important thing here is if you plan on doing this then make sure you buy full-frame lenses from the start. A full-frame lens will work on both full-frame and crop-sensor cameras, whereas a lens designed for APS-C cameras won’t work on a full-frame body. This moves us nicely on to…
Let’s Talk Lenses
Most amateurs will obsess over what camera a photographer uses, however lenses are arguably more important than the camera in use. When setting out your budget you should always allow for better lenses and a more basic camera, rather than the other way around. A good lens will long outlive the camera it’s attached to, and you’ll probably find yourself updating your camera far more often than the lenses you use. Once again, the advice here with lenses really is to buy once and buy well.
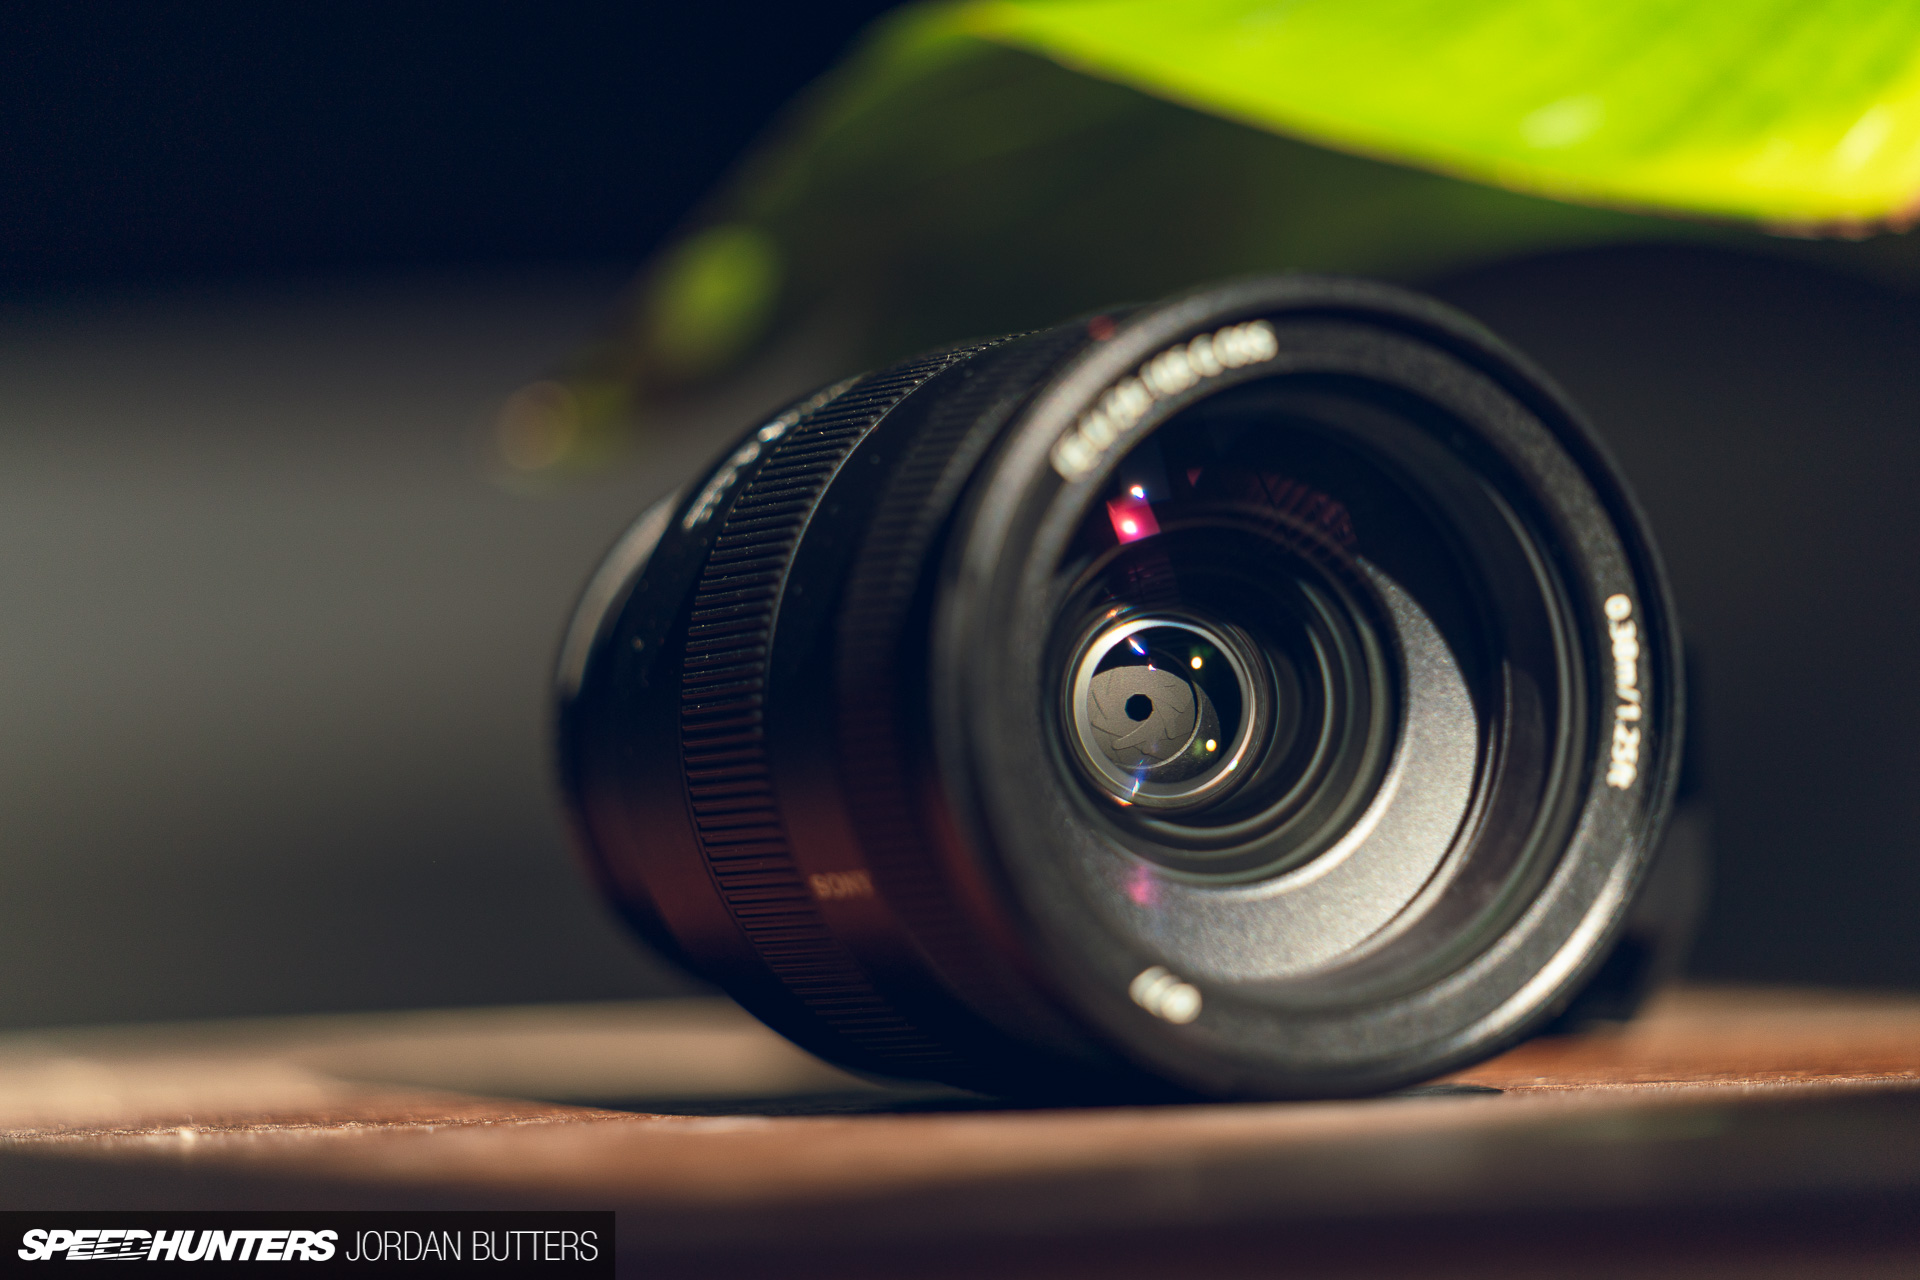
There are many technical elements to consider when buying lenses – enough to fill a book – so let’s just concentrate on the two most important factors: focal lengths and apertures.
Lenses are named according to the focal length that they offer and the maximum aperture that they can achieve. So using a 24-70mm f/2.8 means that you can’t shoot wider than an aperture f/2.8. The lower the number after the f/, the shallower depth-of-field you can capture, and the better the lens is able to perform in low light. If these numbers confuse you, don’t worry, we’ll cover apertures in more detail soon.
You’ll likely also see a bunch of letters or acronyms in the lens’s title too. These often refer to the lens’s specification, such as the coating that the optics have, whether the lens is weather-sealed, or if it offers image stabilisation. The last bit is actually important when shooting cars. Image stabilisation helps combat camera shake, which is important at longer focal lengths (the longer the length, the more shake is amplified), and they allow you to use slower shutter speeds when shooting hand-held.
Lenses come in two main flavours – primes and zooms. Prime lenses offer just one fixed focal length, whereas zooms… well, they allow you to zoom through a range of focal lengths. That sounds pretty convenient, so why would anyone restrict themselves by using a prime? Some photographers prefer primes to zoom simple because they force the photographer to ‘zoom with their feet’ and consider compositions more. What’s more, using a prime lens for a set of images can also help give the set a consistent feel throughout. I like using a 35mm and 50mm as they both offer pleasing angles of view that feel quite ‘natural’. Prime lenses are also often cheaper and lighter than zooms, and because prime lenses are far more simple in their construction they often offer better image quality. The downside of primes, and the upshot of using zooms is purely convenience. A zoom, like a 24-105mm, can take the place of several prime lenses, and across one or two zooms you can cover pretty much every focal length you’ll need. They also save a lot of lens-swapping.
An ultra-wide zoom, in the region of 16-35mm on a full-frame body (10-22mm on APS-C) is a worthy addition to any automotive photographer’s kit bag. I don’t tend to use ultra-wides much, as I’m not a fan of the distortion that you get when zoomed right out, but they are useful for interior or engine bay shots where you need to get everything in, or shots of someone driving from inside the cabin, or small-car-big-scenery panning shots at a motorsport event. For me, ultra-wides are almost always too wide to shoot exterior static images.
A ‘standard’ zoom (so roughly a 24-70mm on full frame or 18-55mm on APS-C) is the staple of most automotive photographers. You can go wide enough to shoot in small spaces, or include more of the environment, or zoom in for more intimate compositions. If I were to go through my entire catalogue of work, I would say that I’ve shot more feature car images on this lens than any other. However, I rarely use it when shooting action or motorsport, curiously.

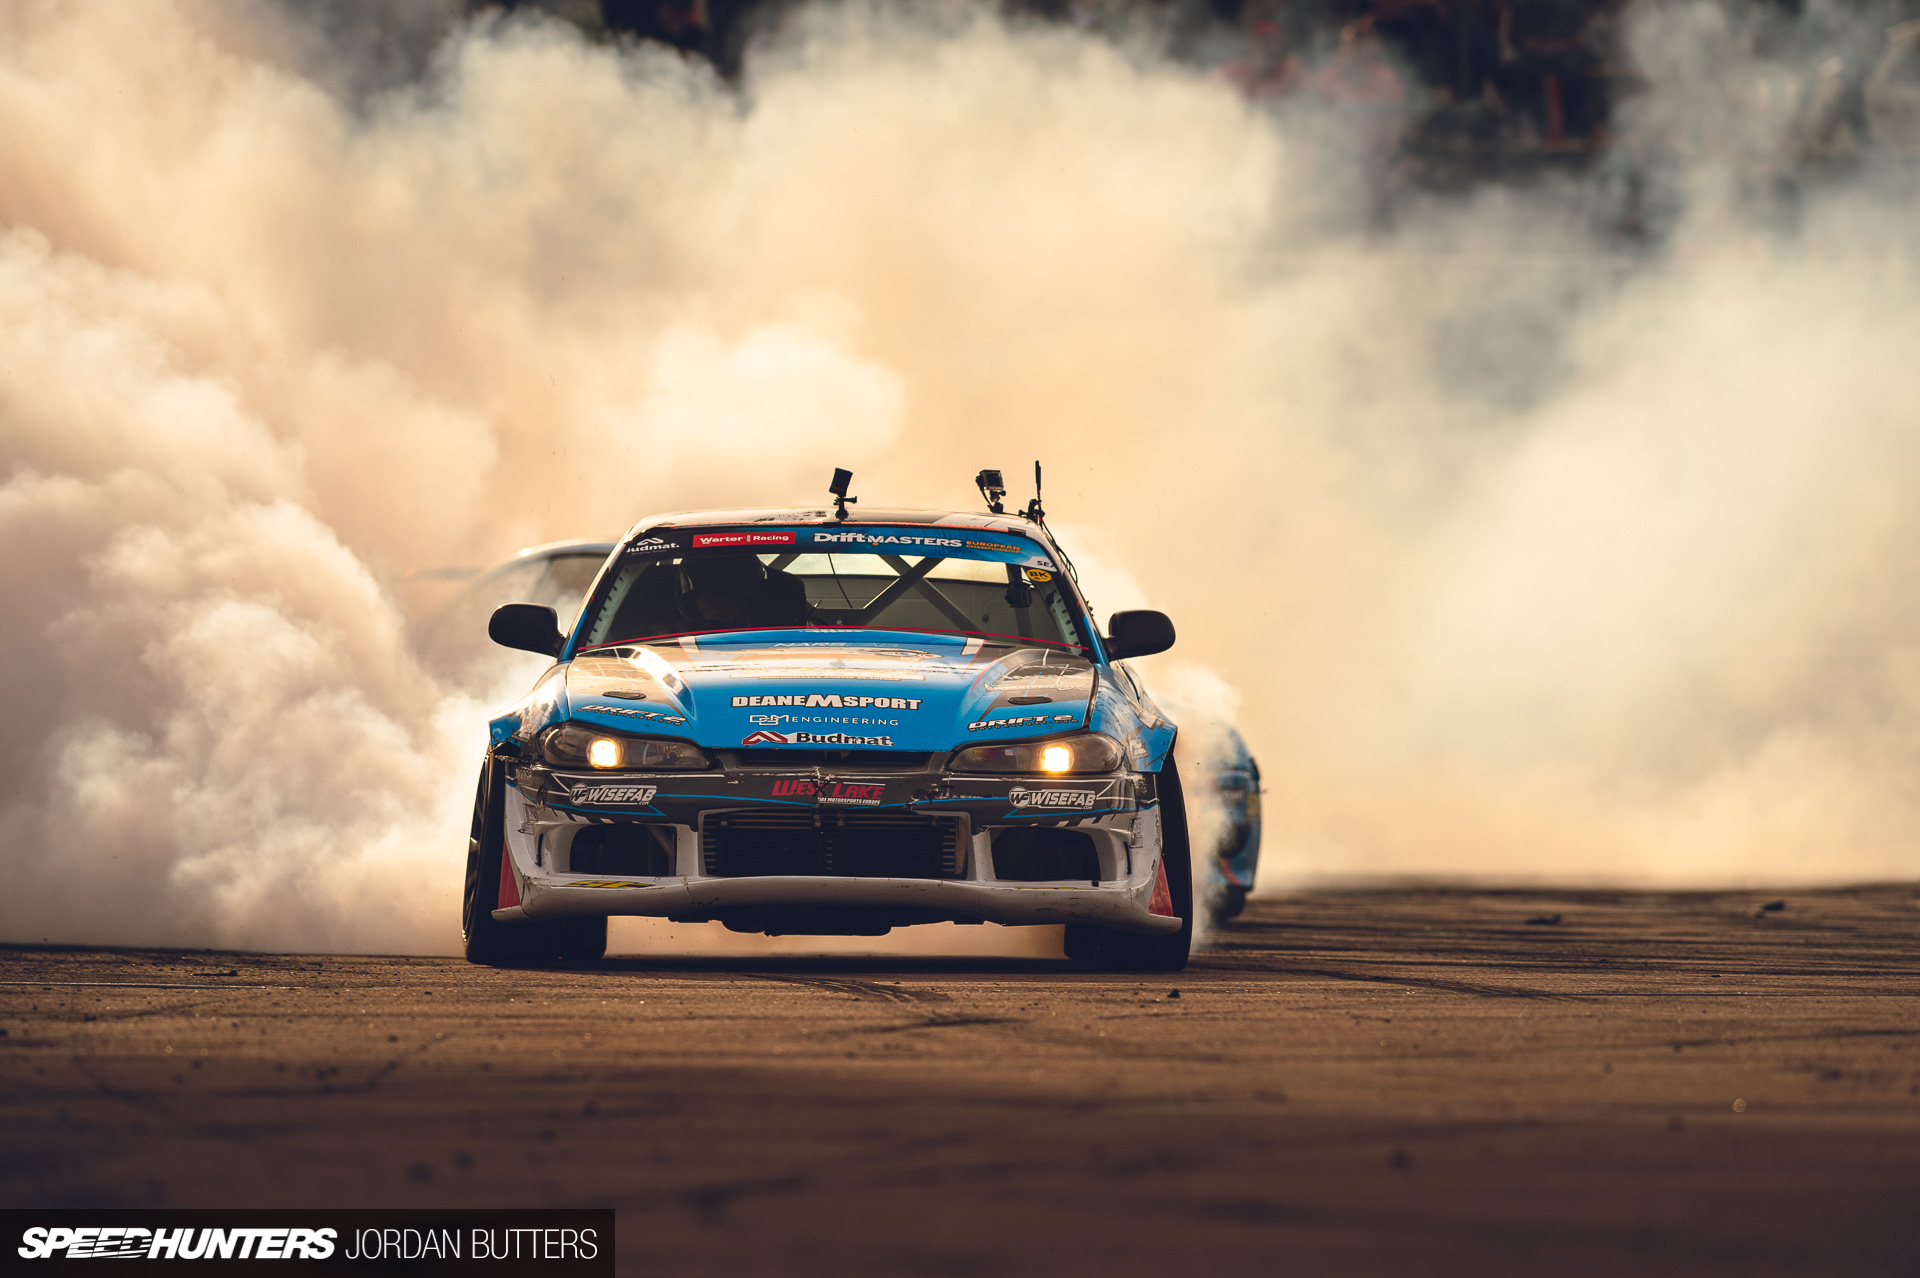
The telephoto zoom is the workhorse when it comes to motorsport photography. A 70-200mm is ideal for both full-frame and APS-C users, and you’ll often find them available in f/2.8 and f/4 varieties. At the wide end, at most tracks or circuits, you can include plenty of environment, whereas zoomed in will offer plenty of reach at all but the largest venues. Remember that 200mm on an APS-C body is the equivalent of 300mm on a full-frame body too.
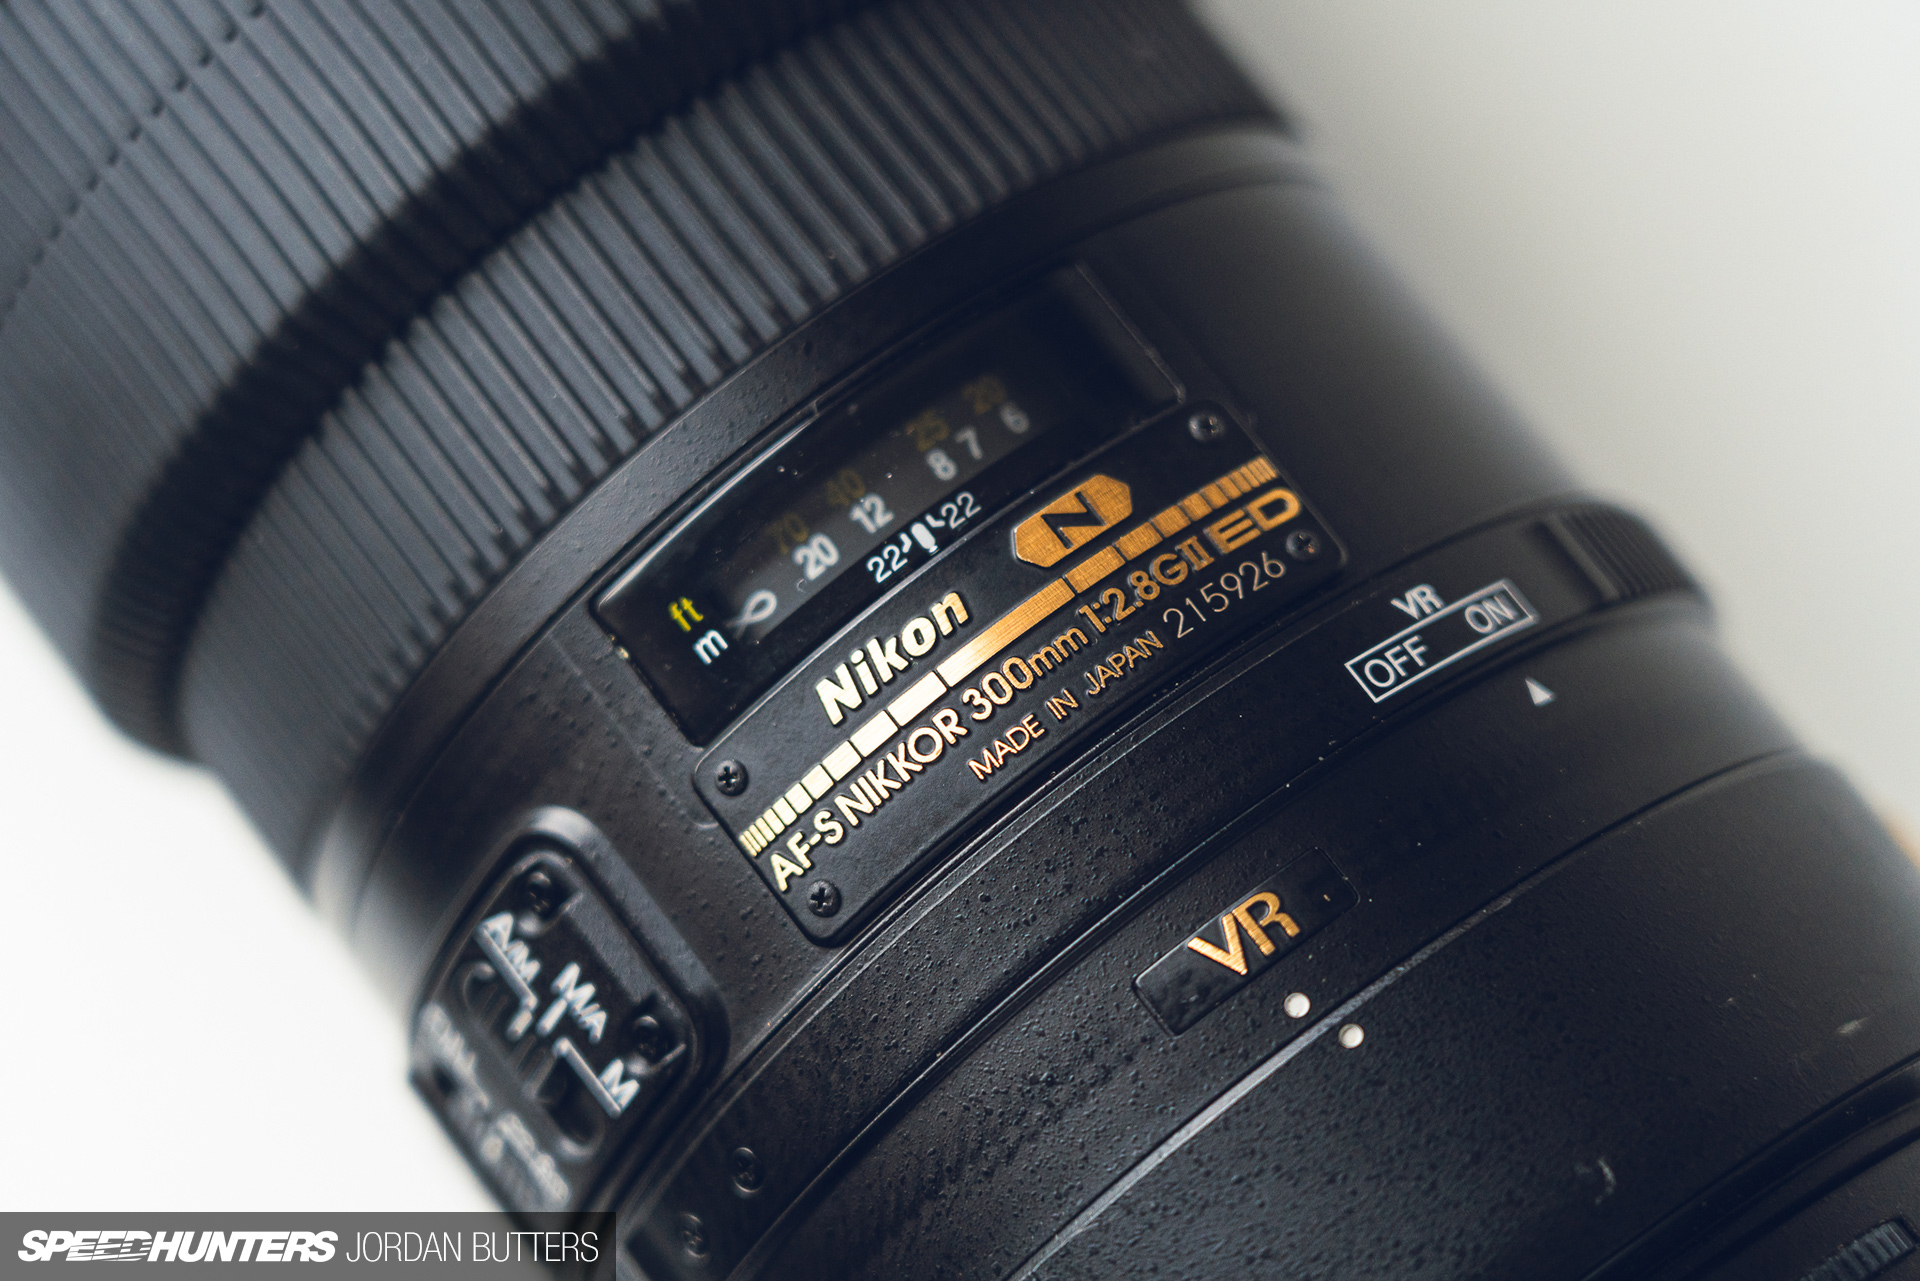
For most people, a telephoto prime is an expensive luxury, but it’s certainly worth renting one to see if you’d get use out of owning eventually. Longer telephoto primes are fantastic for motorsport. On my previous Nikon system I used a 300mm f/2.8 and it was pretty much always on one of my bodies at events, or when I’m shooting action and want a bit more of a safety buffer (read: time to GTFO if it starts to go wrong!) between myself and the car.
There are other more specialised optics and cameras to consider, such as macro lenses for details, drones for aerial views, or teleconverters for adding reach to your lenses, but let’s leave that there.
Accessorise For Success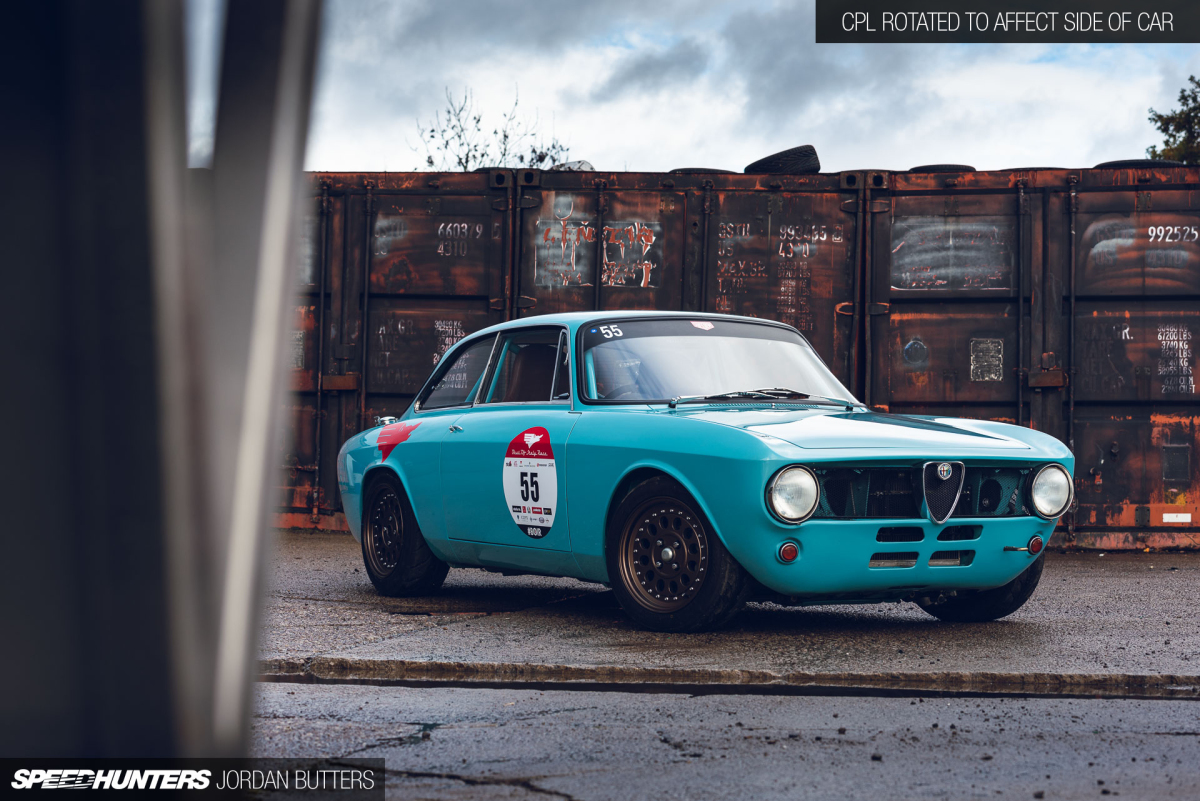
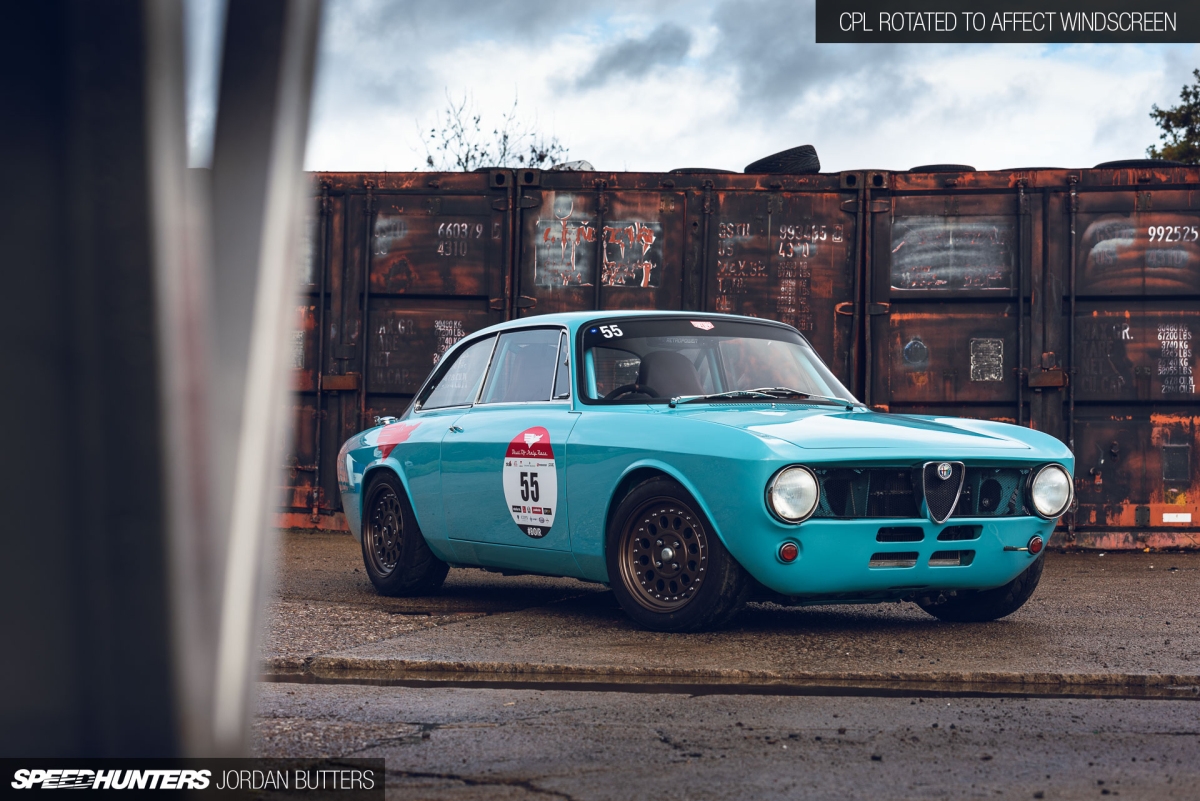
There are a handful of accessories that will make life easier when shooting cars. The first, and more important in my opinion, is a circular polarising (CPL) filter. You should have one on your lens at all times unless it’s so dark that you don’t need one.
A CPL screws onto the front of your lens and can remove or reduce glare and reflections on paintwork and glass. It allows you to see through windscreens rather than them reflecting the sky. It also boosts saturation and makes paintwork, foliage and blue skies really pop. Rotating the CPL changes the angle of polarisation, and when shooting cars this usually means removing reflections from either the windscreen or the sides. There are techniques that we’ll cover in another guide for combining two polarised exposures to do both at once, but if you’re shooting a single frame then I’d recommend focusing on removing windscreen glare using the CPL, and angling the car to minimise any reflections in the sides.

The downside is that you might find that many of your lenses have different thread sizes, and buying a CPL for each one can get expensive. The solution is to buy the largest size CPL that you’ll need, and they purchase some affordable ‘step up’ rings to adapt the larger filter to fit your smaller lenses. Larger filters can fit smaller filter threads, but smaller filters will show in the image on larger lenses.
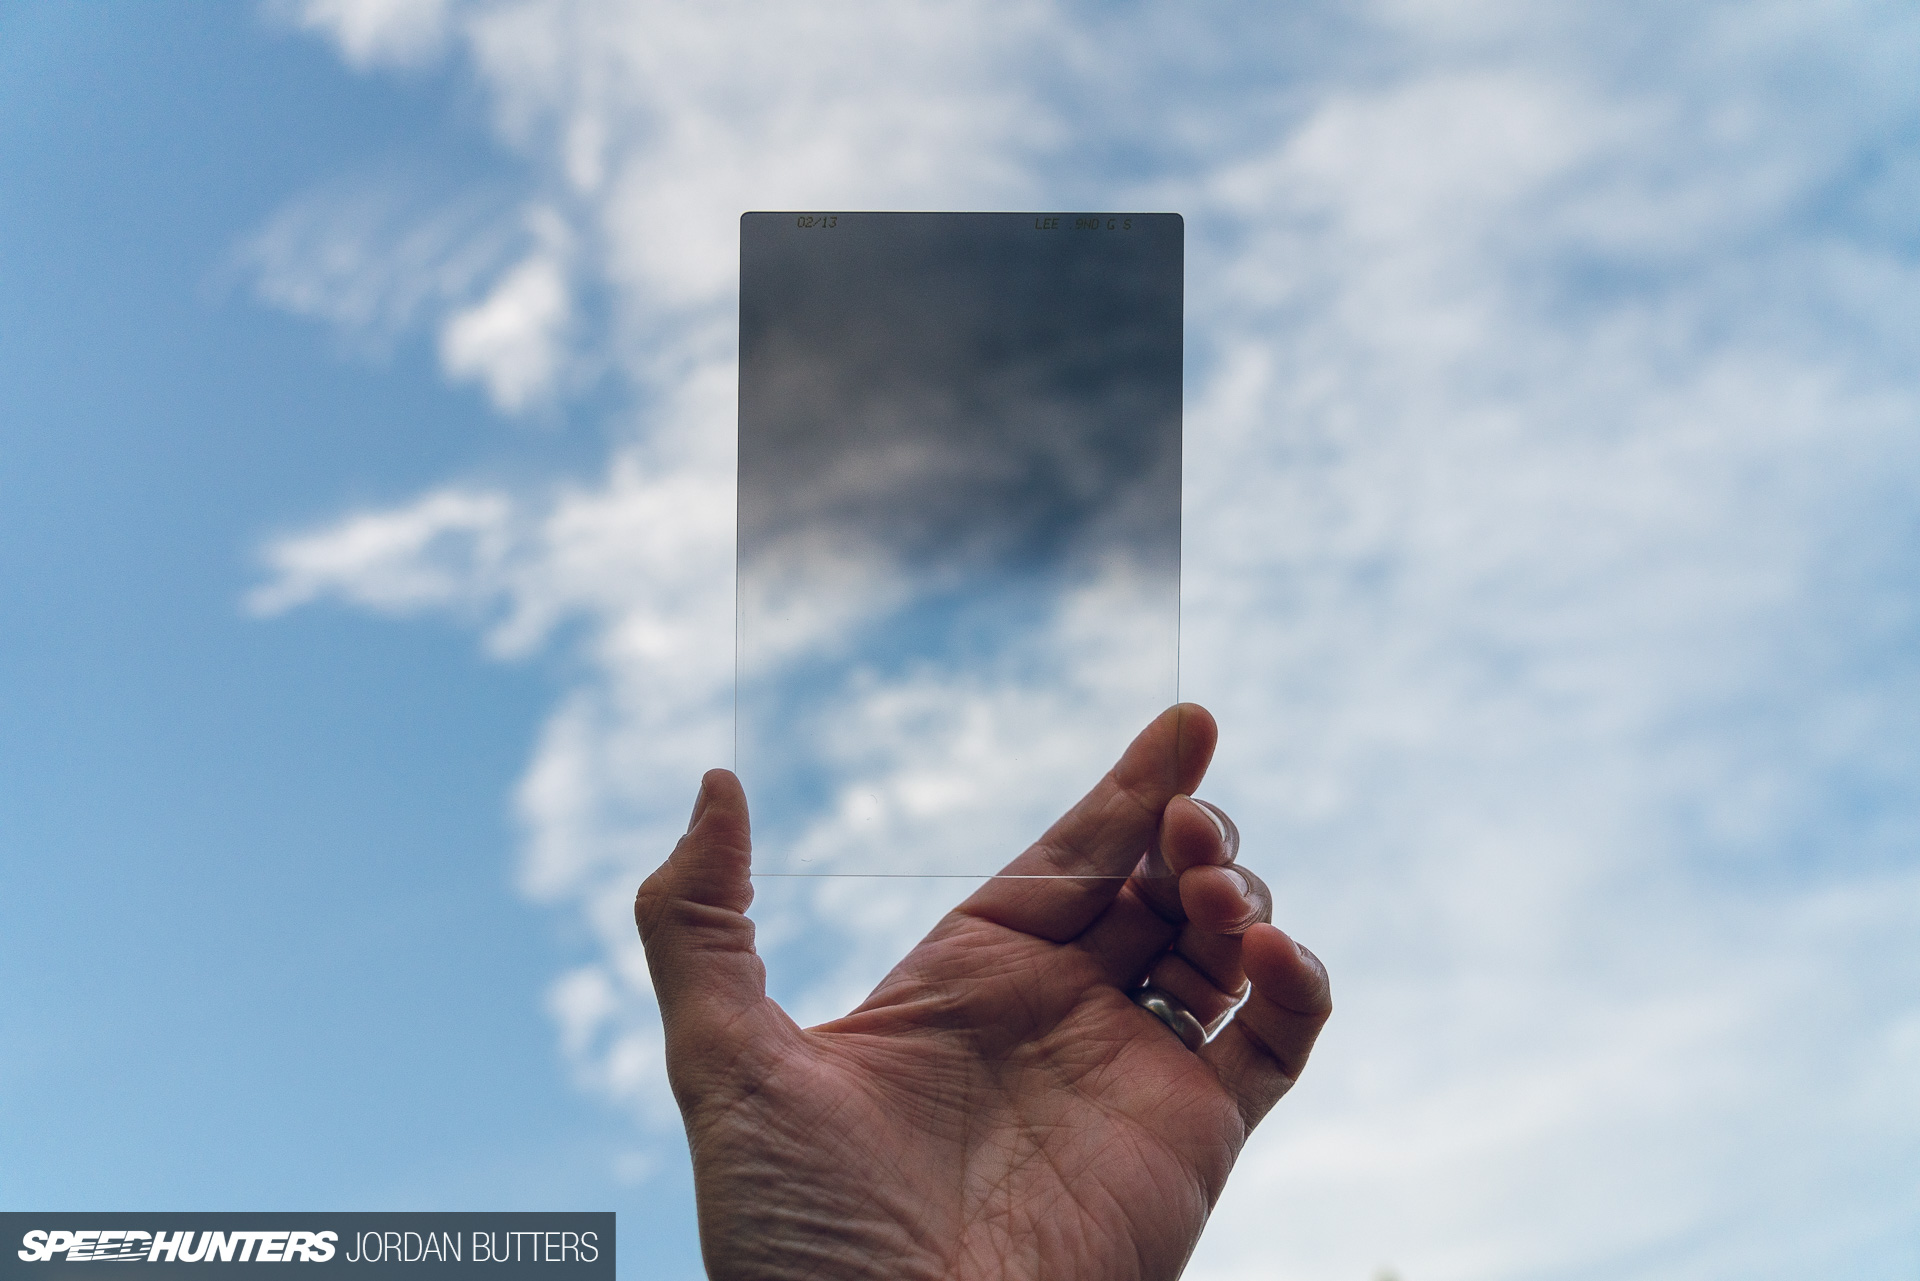
Other filters that might come in hand are neutral density, or NDs.
These reduce the amount of light reaching the sensor and come in two forms – graduated NDs or solid NDs. Solid NDs are used to extend exposure times and are useful when shooting slow shutter speeds in bright light, such as when using rigs or doing really slow panning shots. Graduated NDs are rectangular filters that feature a filtered section at the top that gradually fades to clear, and by aligning the filtered part they allow you to darken the sky, retaining detail or making it easier to recover during processing. It’s something that you can often do in processing alone now without filters, to a certain degree, however I always follow the ethos that it’s best to get as much right before importing your photos. It means more time spent using a camera and less time using a computer.
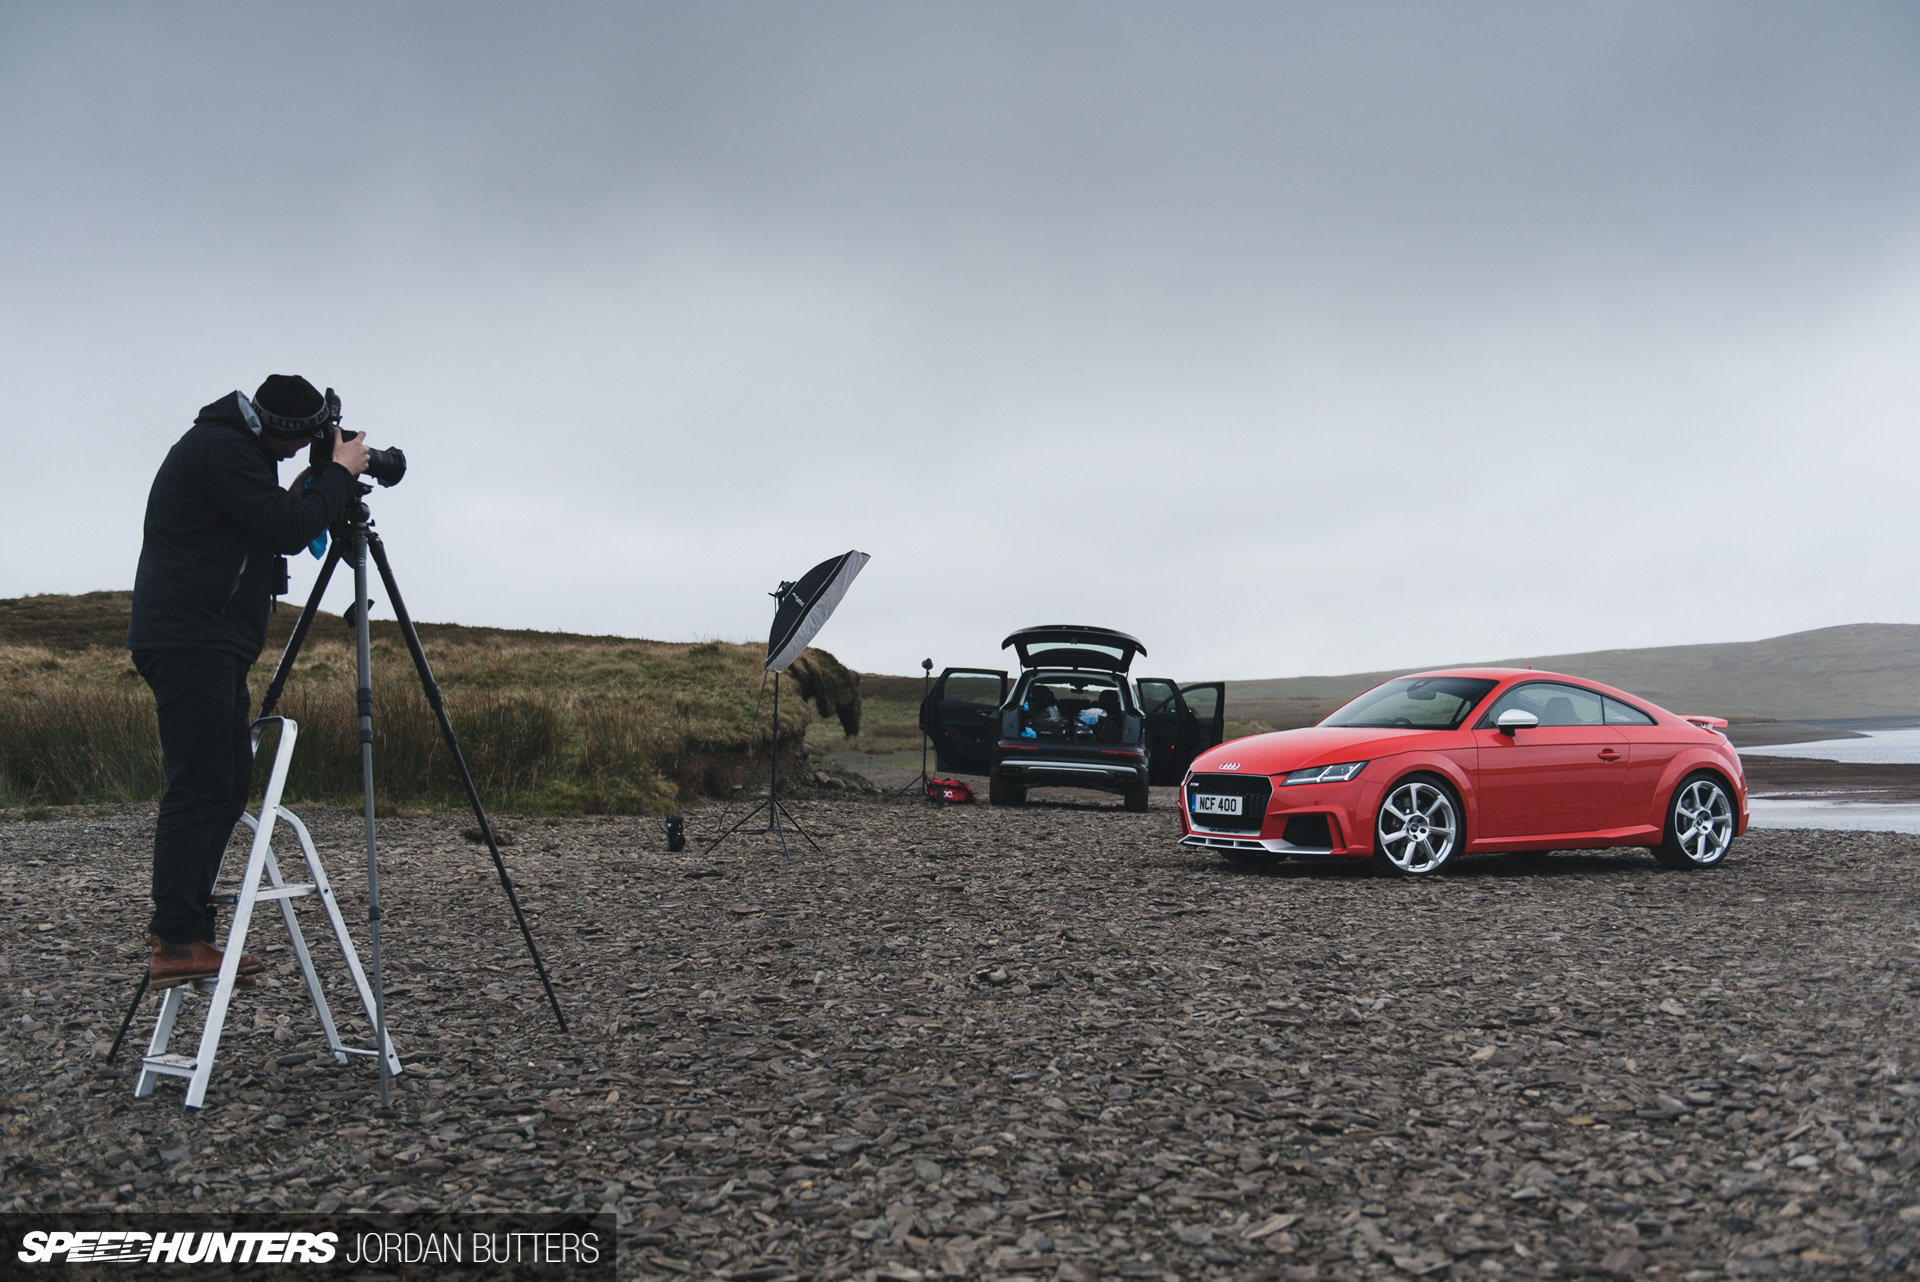
A good tripod is worth its weight in gold. I know a lot of photographers who rarely use a tripod, but I find it essential to the way that I work, and for a number of reasons.
Firstly, using a tripod will slow you down. This sounds like a negative, but it really isn’t. Setting up, adjusting the height and angling a tripod will force you to think further about your compositions more than simply squatting down and pressing the shutter. In doing so you notice things that you can easily fix at the time of capture, rather than seeing them for the first time when editing. Tripods also allow you to shoot using smaller apertures, for sharper and better quality images. Yes, some things look better at f/2.8, but you’ll often find that your lens performs best at around f/8, plus smaller apertures allow you to get the car in focus front-to-back. However, smaller apertures mean slower shutter speeds, which can lead to blur if you don’t use a tripod, and that’s without mentioning shooting in low light. There are also certain lighting techniques that require use of a tripod too, which we’ll cover in a future guide.

When it comes to memory cards, my advice is don’t put all your eggs in one basket. With solid-state memory getting cheaper and cheaper the temptation is to buy the largest capacity card that you can, however what happens if that card corrupts, or you lose it during a shoot? That’s everything that you shot gone, and now you don’t have a spare card. It’s far better to have several smaller capacity cards and spread each shoot across them. That way if you lose the data on one the entire shoot isn’t wasted. Always buy the fastest cards you can afford too, as these will allow your camera to write to them quicker, avoiding buffering and slow down. You want Class 10 cards at a minimum, but U1 class are faster and U3 even faster still. Use a reputable brand to reduce your chances of cards corrupting, but bear in mind it can still happen to even top end cards. Once a card corrupts on me it goes into the bin; it’s just not worth the risk of it happening again on an important shoot.
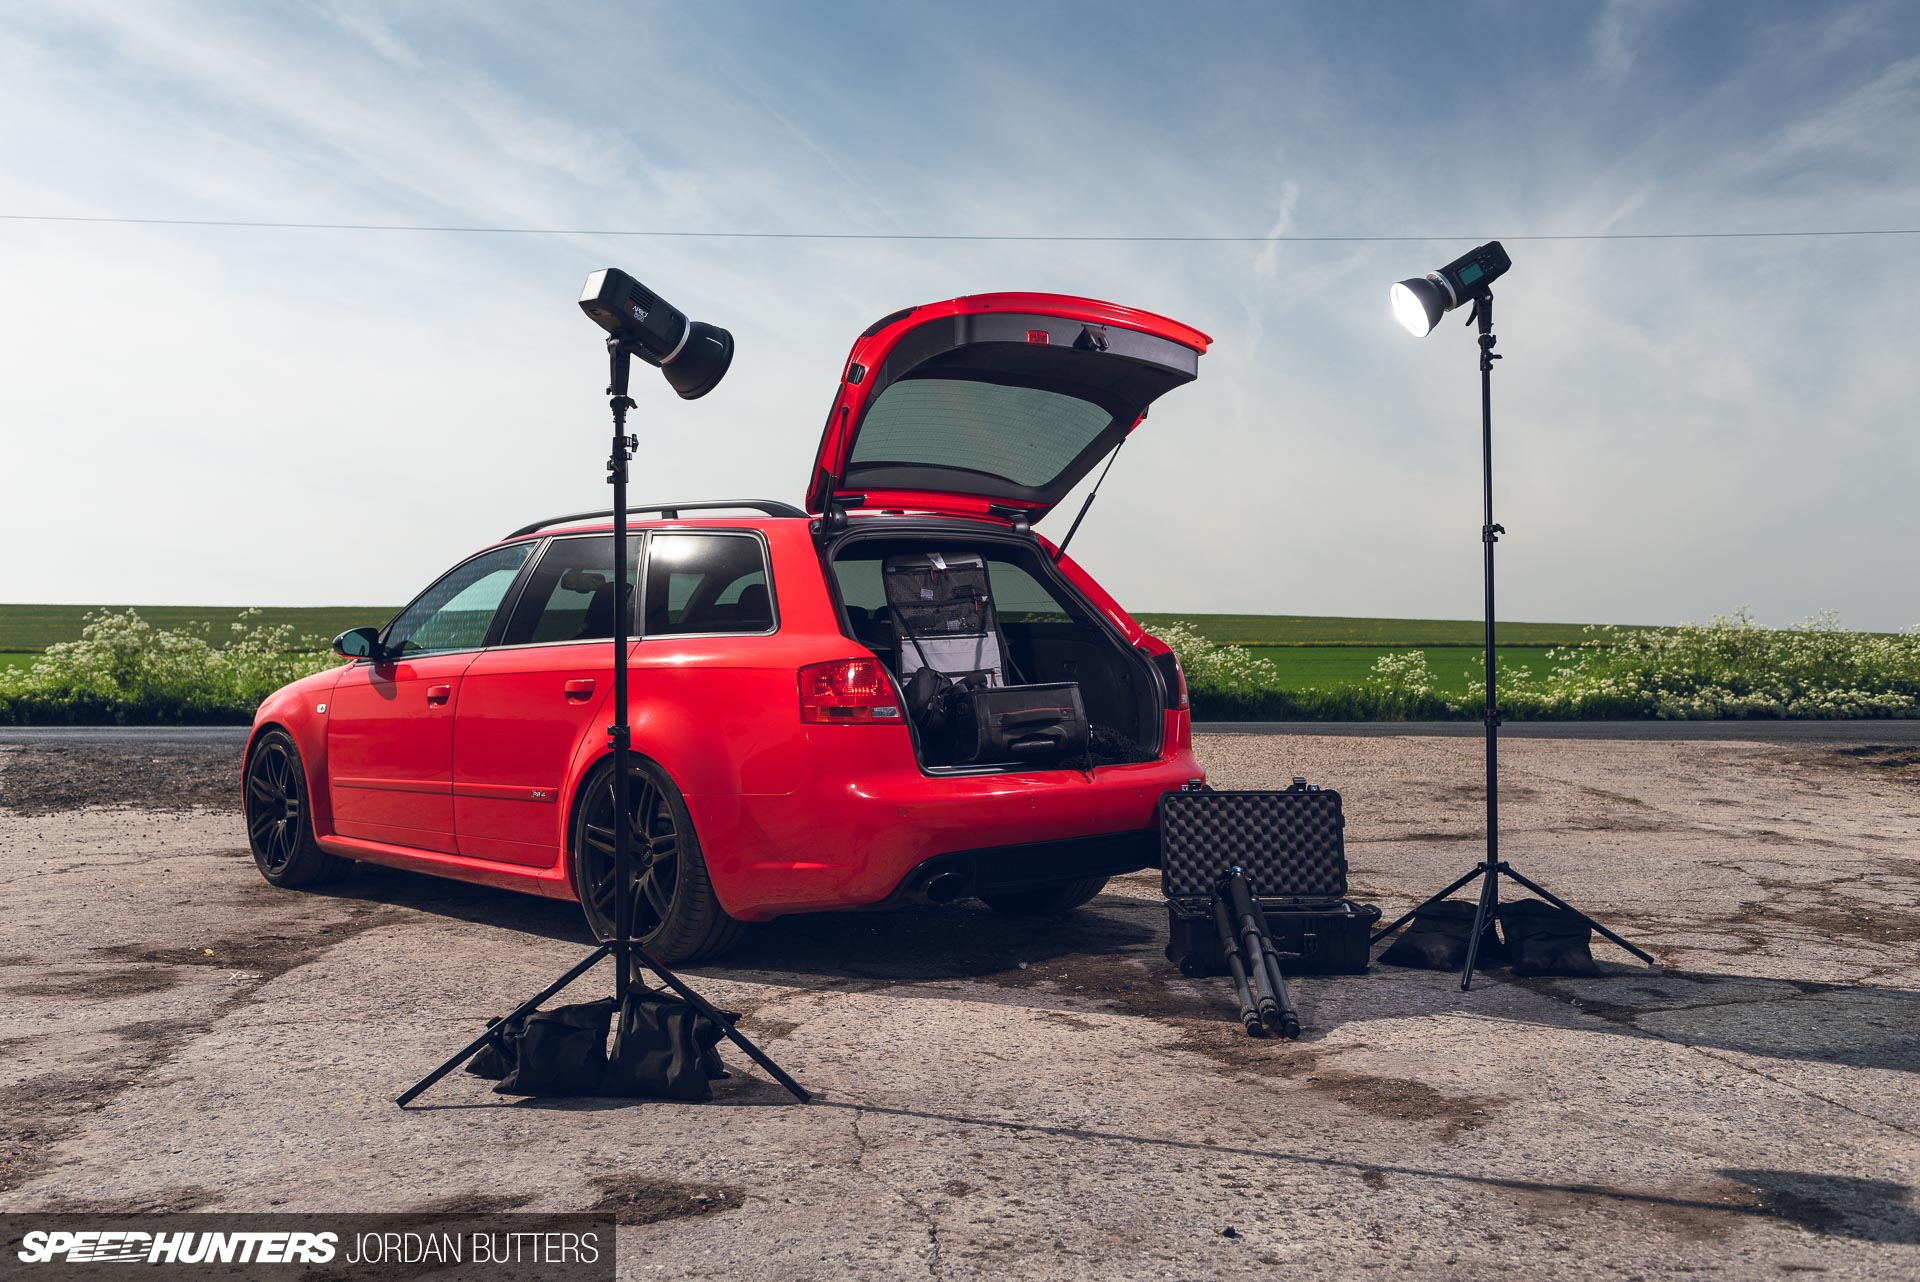
A big part of progressing in your photography is learning how to add, subtract and control light. Again, we’ll get more into the technicalities of lighting in another episode, but in terms of lighting kit you have two choices – flash or continuous light.
Flash comes in the form of either portable studio heads, which are expensive and bulky, but offer enough punch to overpower the sun on a bright day, or speed lights, which are cheaper, lighter and smaller, but won’t have enough oomph to light an entire car in bright sun. Speed lights are good, however, for accentuating daylight, lighting interiors, or adding a bit of pop to close-up details. The key is to never use them on-camera – the light will be harsh and flat. A cheap set of radio receivers will allow you to take your flash off the camera and position it for the most flattering lighting.

Thanks to LED technology, continuous lighting has become cheaper and more accessible in the past few years. The benefits of using continuous light is that you can see the results before you press the shutter, and they can be moved over a long exposure to create a larger light source. However, LED lights aren’t much use in bright conditions, so they’re best reserved for low-light shoots, or interior details. You needn’t break the bank with these; prices start at around GBP£40 (USD$50) for a decent LED light stick.
There are a whole host of other accessories that fill your average pro automotive photographer’s kit bag. These are often acquired over time when experience teaches you that you really should bring X, Y and Z on the next shoot, because you could’ve really done with it today. For example, I rarely leave home without camera cleaning kit, duct tape, Black Tack (adhesive putty), and a multi-tool is always useful too. A small stool or stepladder can be invaluable for gaining some elevation – both on feature shoots and when shooting events. Two-way radios are handy when coordinating a feature car too, especially when lining up the right angle for a static, or when shooting action.
As you progress you’ll soon learn all the odd little trinkets to keep in your camera bag (or car) that make your life easier.

It sounds like a big shopping list, doesn’t it? Well, the truth is that most photographers don’t buy everything in one hit. With just the basics of a camera, lens, memory card and polarising filter you can start creating images right away – the rest you’ll gradually pick up over time, or when you see a need for it.
GAS, or gear acquisition syndrome, is a very real thing with photographers, and it’s easy to get carried away shopping for new goodies. The truth is that no one piece of kit will see an improvement in your photography more than good old seat time will. The more you shoot, the more you’ll improve, so in the next instalment we’ll start to cover some of the technicalities of shooting cars.
Jordan Butters
Instagram: jordanbutters
jordan@speedhunters.com
OFFICIAL SPEEDHUNTERS SUPPLIERS


Yeah ive been waiting to move into FX frames up from my CMOS D3300. But it is true that you dont need to spend 5grand on a really expensive camera. but the amount of megapixels you have really does add to image quality as the pixel grouping is closer. almost like going from a 1080p to a 4k tv, the up in resolution makes a difference. I highly reccomend spluring on an FX frame cameras vs a CMOS crop sensor. you will have less frustration and have to do less adjusting and working around your crop sensor. Always get a nice set of glass too and a good monitor to edit on, 4k is really the industry standard right now and something with good adobe/ RGB colour space will make a difference. Sure photography is expensive but i bought my camera years ago for 380 and was the best investment I've ever made. Still using a kit lense to take all my photos, and while its limited me, its also made me more selective of what type of shots I take. I would love to upgrade to a longer lense set with a higher quality piece of glass, so i can stop throwing my camera at longer shots and then cropping and editing in post.
-Tofu
Can't wait for car season to open up again!
Been waiting for more how tos for a while...thankyou Jordan
“capturing it with your phone because it’s what you have in your hand is far, far better than missing it because you were running back to the car for your ‘proper’ camera.“
So true so true! This is what made me end up getting a point and shoot again. It wasn’t running back to the car to get the camera but taking the lens cap off, adjusting settings plus the weight and bulkiness of the DSLR + lens that made me miss lots of candid moments with family and friends.
Now I use the G7X II for daily pictures and videos and only bring out the DSLR when I know I am going somewhere to specifically shoot. I also keep a filter on the lens so I can keep the cap off and not worry about the lens getting scratched.
That little 55mm Zeiss is the best/favourite lens I've ever used. I'd happily shoot with nothing else forever more.
poor tips: find the brightest flashlight, get a buddy to tag along or spare tripod/bamboo stick, and roll of duct tape can be used. foam core sheet and a can of spray paint can be a good reflector. if step up rings are hard to find for your lens, a tube of rubber glue can fix the problem. get a tripod with hooks, so you can hang weights to get better stability.
I would say this only belongs to part 1 if you plan to do action and nighttime shots.
For daylights stills ? Gear matter waaaaaaaaaay less.
Love your work! I was sure you were shooting film a bunch in these posts so I was looking to see your films of choice. No mention of it here, just editing? Doesn't matter really but I'm getting tempted to pull out my film gear to shoot more of my bmw02. Thanks for sharing! Great stuff.
Love this Jordan, thank you!
I've always liked the "Photography 101" posts. Obviously a lot of us are here because you have such a deadly gang of photographers.
APS-C is not just for enthusiasts. People using Sony a6xxx, Fuji anything, and the phenomenal D500 would argue that their shots placed against the same taken with a full frame are anything less because they are smaller frame. There are plenty of small frame cameras that will never leave a user feeling like they are missing out.