
If you’re a very long-time Speedhunters reader – we’re talking over a decade here – you’ll surely remember Nigel Petrie‘s Engineered To Slide Toyota Hilux. But even if you haven’t been reading for that long, there’s still a very good chance you’ll know of Nigel’s build, because there was nothing else like it at the time it was created and it’s still an epic machine today.
Given the depth of our archives, we thought it would be fun to start revisiting some previous Speedhunters features, and where better to begin than the ETS Hilux, which was featured exactly 10 years ago in October 2013. Shot by Dino in Sydney, Australia during the 2013 World Time Attack Challenge and written by Nigel himself, this story wrapped the Hilux build series on Speedhunters. You’ll find a link to all the stories in that series at the bottom of the page, so you can enjoy them again or learn for the first time how this amazing project came together.
Let’s wind the clock back to 2013…
Good things come to those who wait, or in Nigel Petrie’s case, they come to those that dedicate every last minute of their spare time to a dream, to a vision of creating something bespoke. We’ve come across some pretty inspiring builds over the years here at Speedhunters but the ‘Drift Ute’ is unlike anything out there. Thanks to Nigel keeping us updated with the progress of his build over the years, we’ve seen this project materialise, getting a glimpse at the amount of work and sheer commitment required to take an idea from one’s head, and turn it into reality. Now that the Engineered To Slide Hilux is all completed, it’s finally time to indulge in its details and appreciate the years of work that have been poured into it. We’ll let Nigel take over from here:
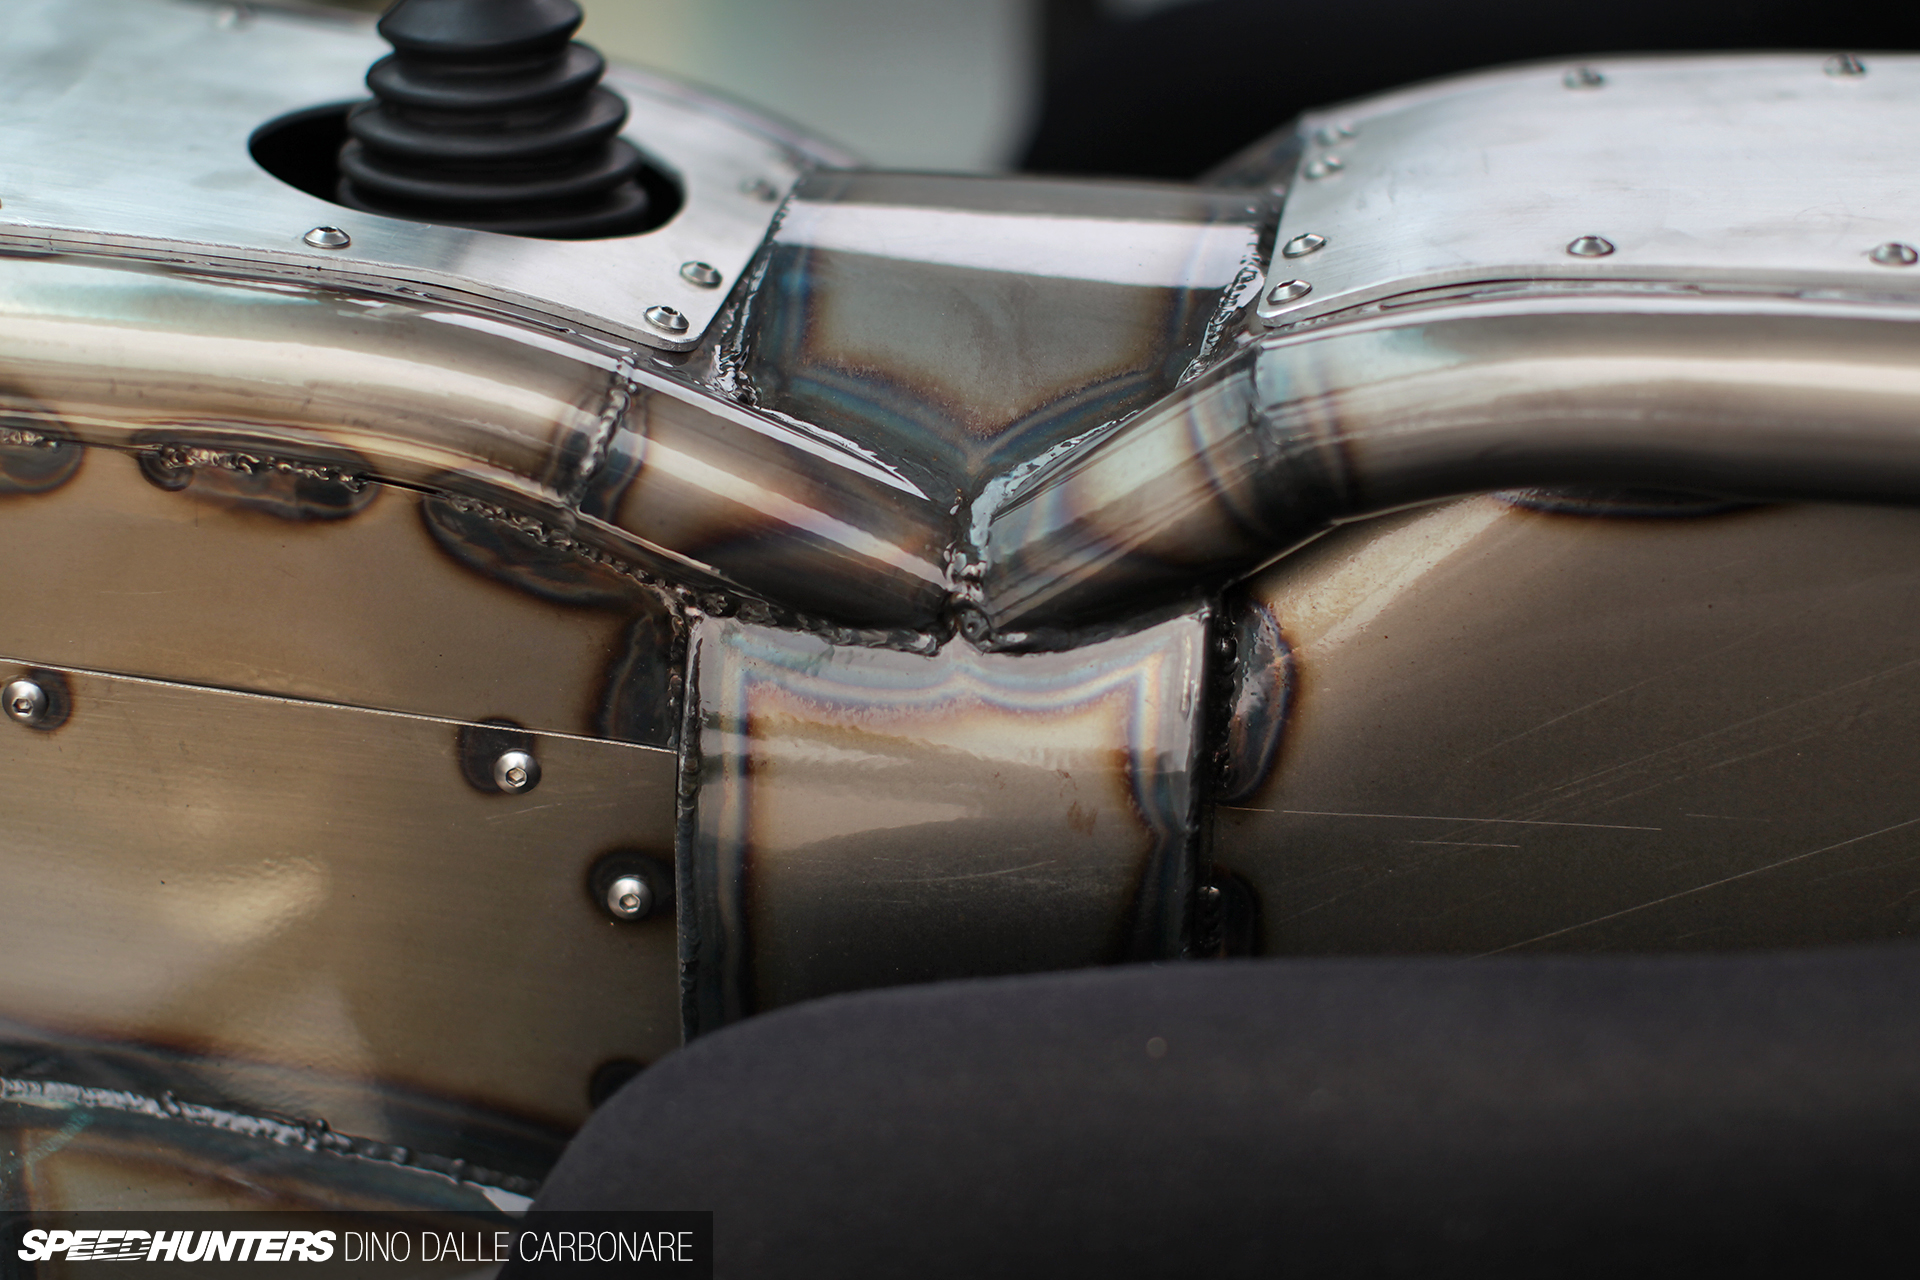
Welcome back, Speedhunters! It’s been nearly three months since the last build update and I am delighted to bring you the finished product. I want to give you some insight into what’s been happening in the last months since that very first test drive. Constructing a car from nothing has its challenges; most of these challenges are extremely hard to overcome but I think that’s the fuel to my fire, that intense headache that just won’t go away until the issue is resolved, gives me the passion to continue. I took a little break after the build was complete but not finished; by that I mean it was running, driving, and aesthetically together but I needed to make sure everything was ready for paint and powder-coat. I started to think about the chassis and how I wanted it to be finished. Every time I wipe the tube down with thinners I admire the steel’s brilliant colours, but as the moisture of the thinners disappears so does the colour. I started to think about how I could harness that deep clear look as the finished product.
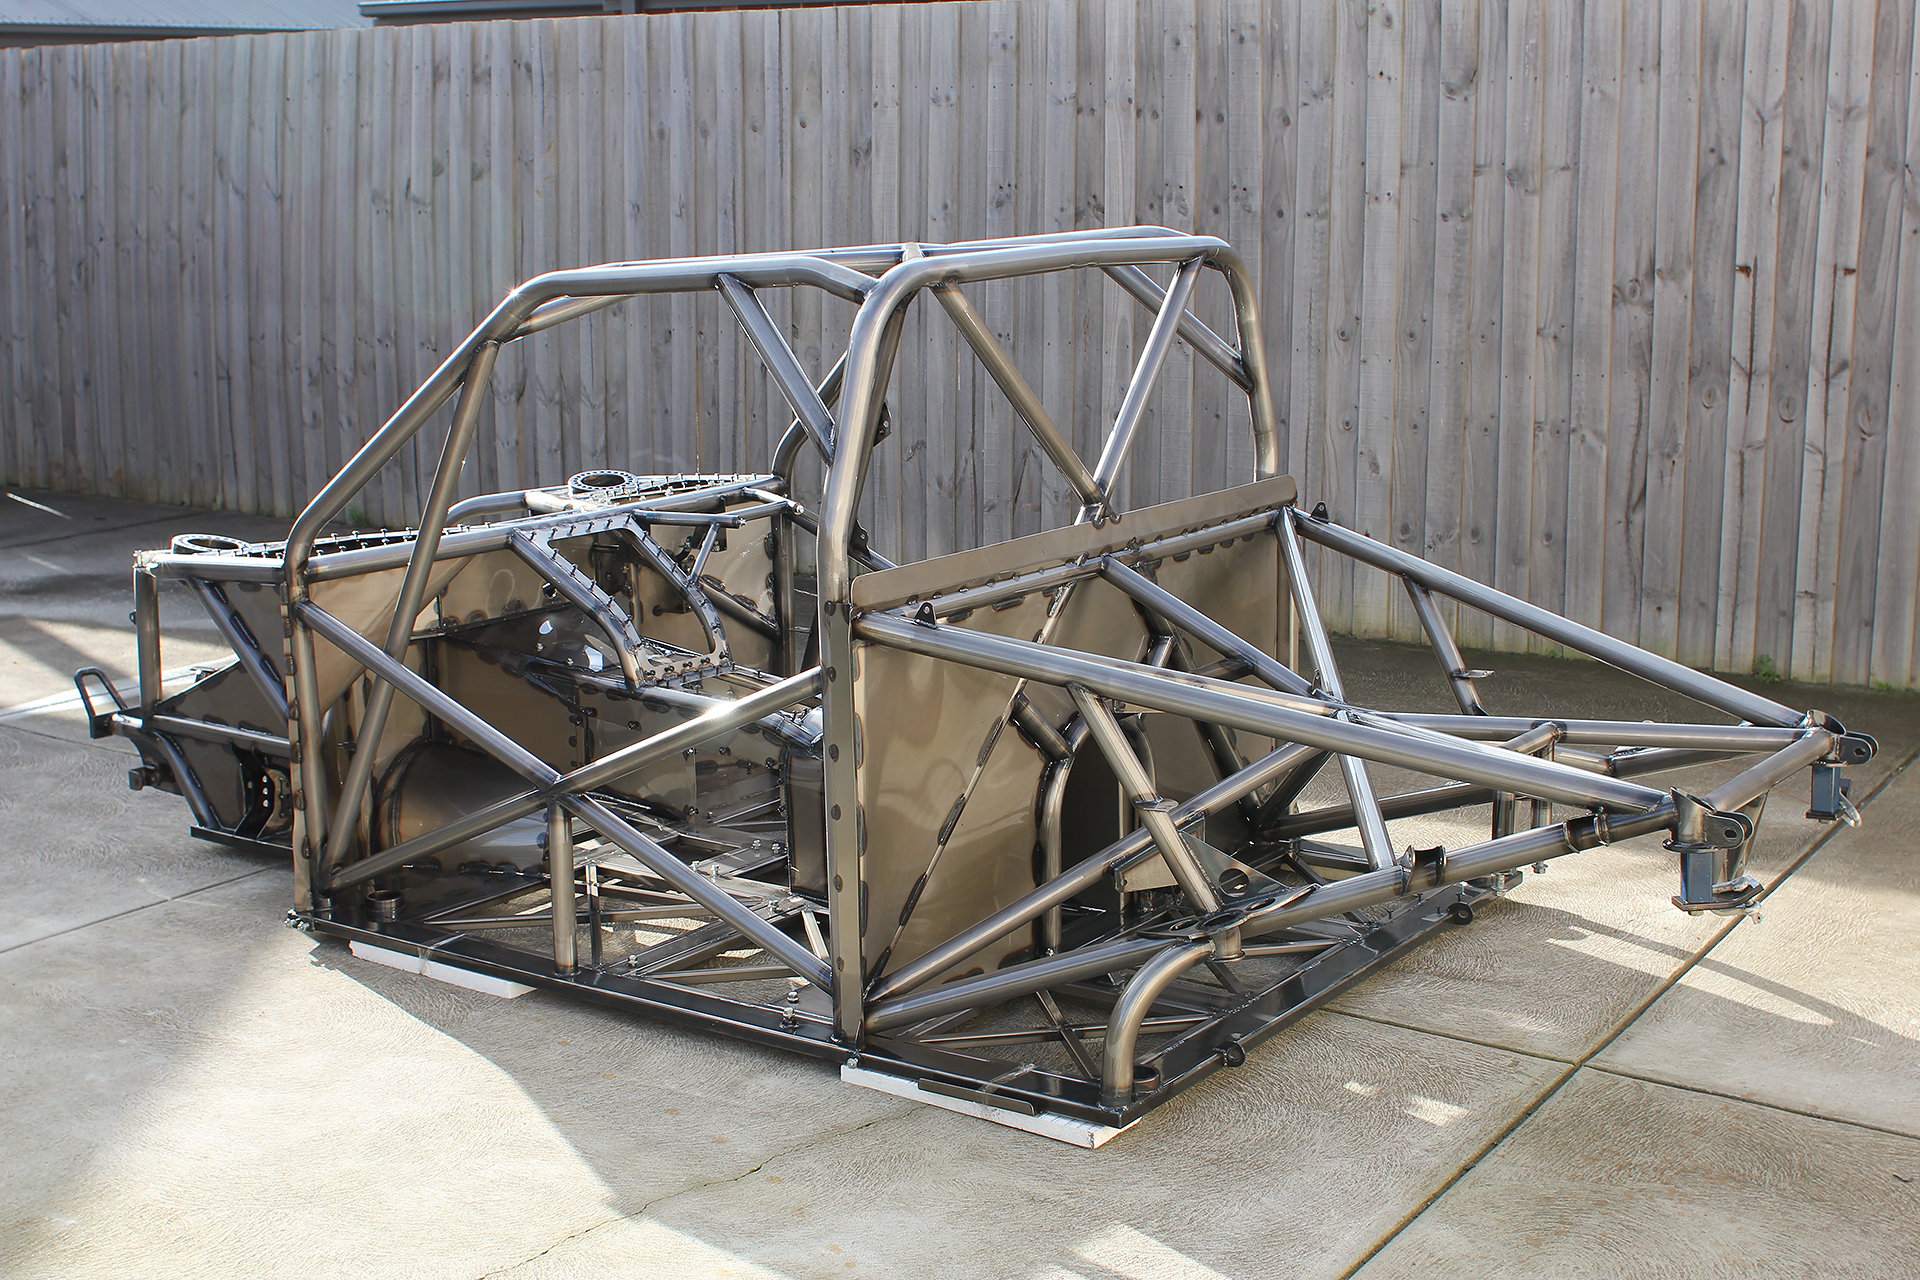
It was this challenge that took me to Colourtech Powdercoating Geelong. Firstly I asked the guys if they had clear powdercoat. They did but they had reservations about how it would work. I decided to give it a go and after getting home I stripped my BMX down to raw steel and returned it to them ready to coat. When I returned to pick up the frame, I was blown away: the steel had the deepest shine, the welds had the most beautiful contrast to them and the way the heat marks blended in with the steel had to be seen to be believed. I quickly reassembled the BMX and started testing its durability. It held up extremely well and I was so glad to have a final chassis finish locked in. A few days later I would return to a sight I had been dreaming of for two and a half years: before me was the finished chassis in all its clear-coated glory. Not only the chassis, but the steering column, dash mount, suspension arms, subframe and many other hand fabricated pieces. The powder is electrostatically charged onto the parts allowing every little area to be covered.
Later on, Tim from Breakwater Panels called me and said the bodywork was ready to pick up. I was like a kid on Christmas morning. I arrived to pick up the perfectly flow-coated Toyota Super White body and I couldn’t be happier. It was better than I ever imagined.
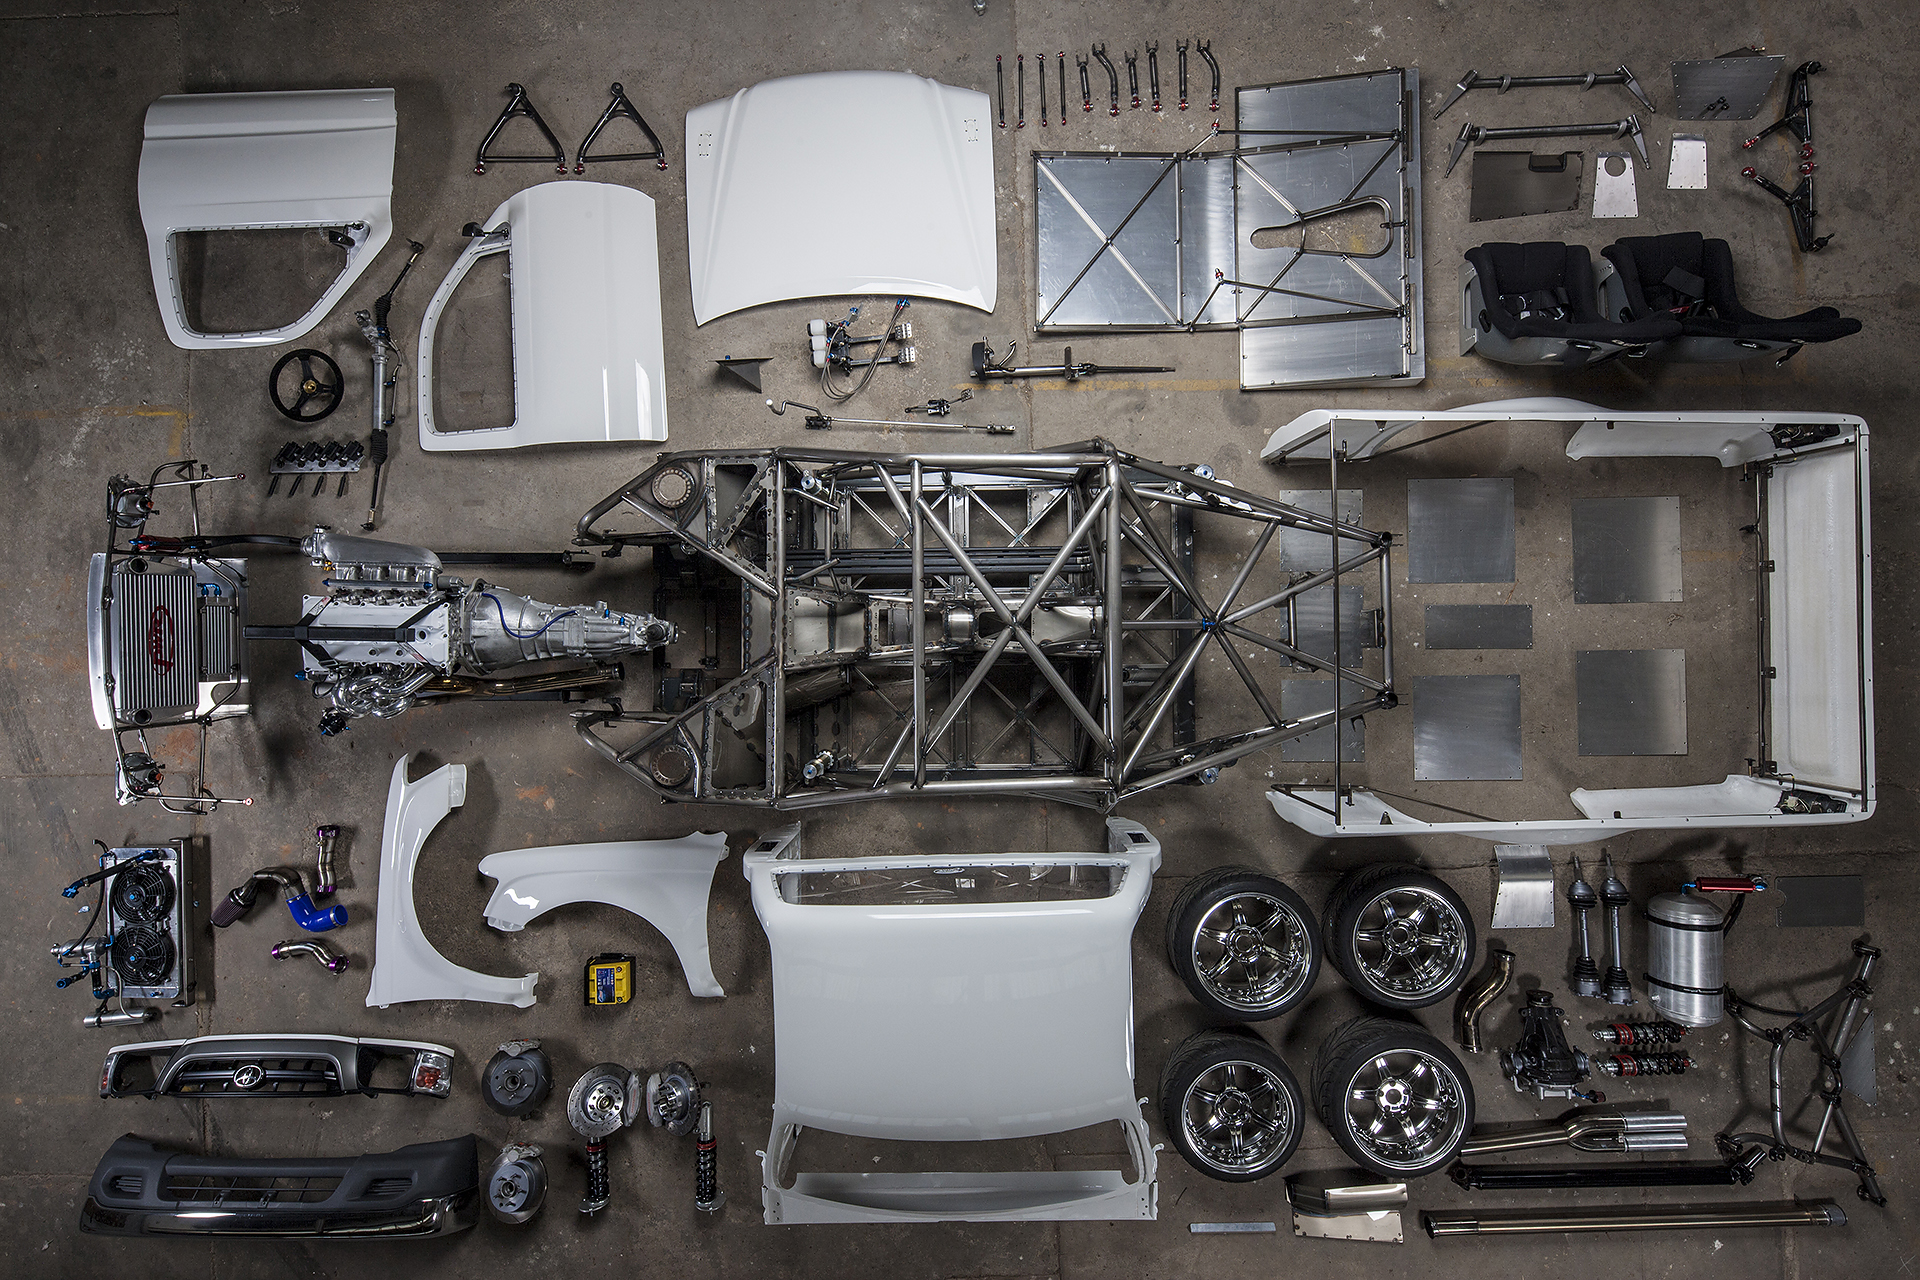
The next few nights I put together the sub assemblies, making sure that everything was complete and ready to go. It was at this point I reflected on what I had been through. Handling each part and seeing it in its finished state gave me flashbacks; the amount of time and effort gone into each one will never be understood by anyone but myself.
My friend Dean and I came up with this brilliantly stupid plan to assemble the car in an abandoned factory with a roof mounted camera tethered to a laptop and lit with some studio lights. What’s stupid about this you ask? It was a ridiculous amount of work and to do it without bumping any other parts was a nightmare. The results were insane though and I can’t thank Dean enough for his help. After bringing the Hilux back home it was done. It took a few nights to really kick in that it was finished. A quick flick of the ignition and a press on the start button confirmed that the electronics went back in as they should. I had just built the most complex automotive puzzle and it all went together like clockwork. Let’s take a little detailed look at it…
Completion Achieved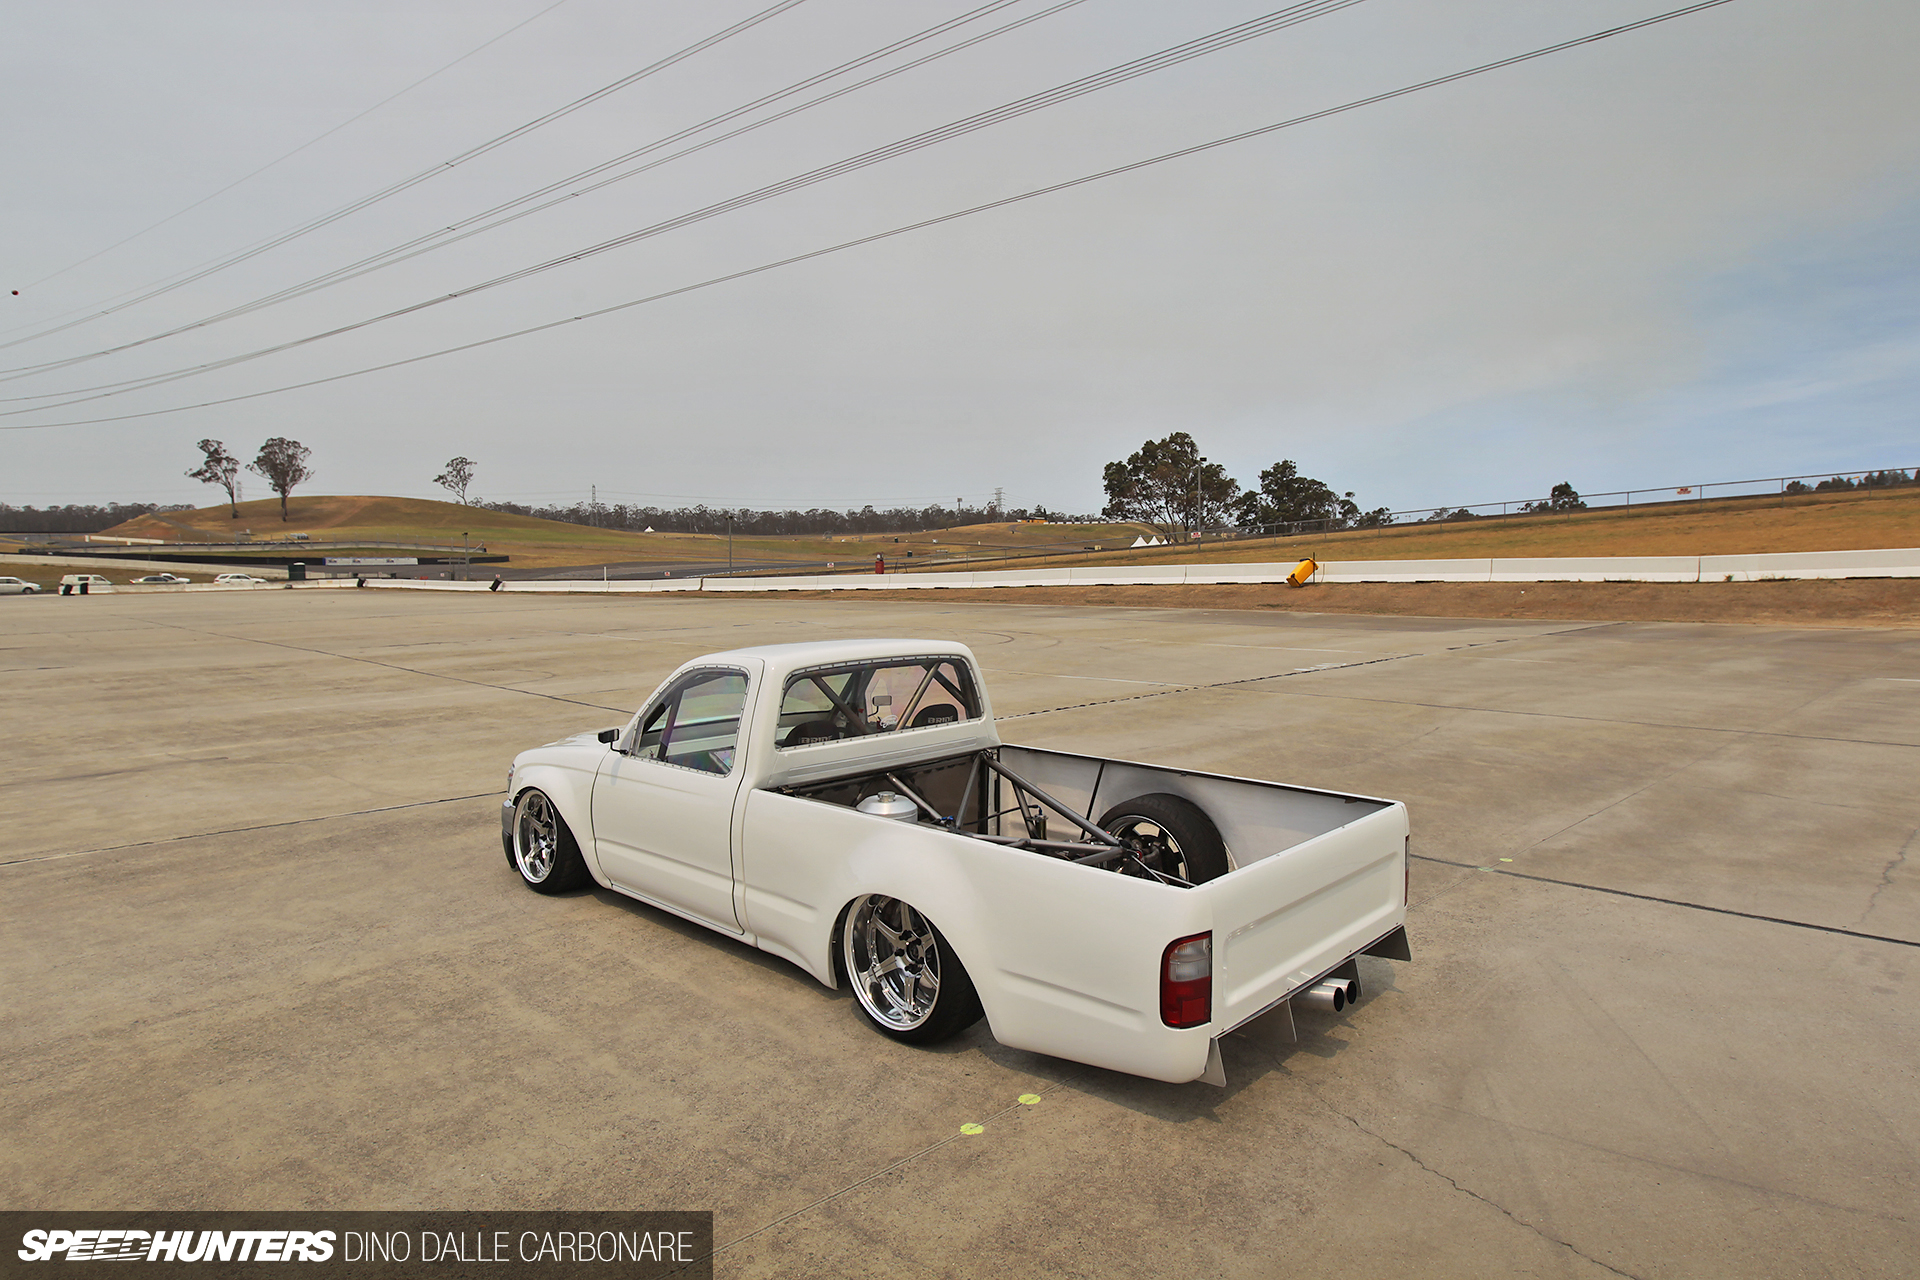
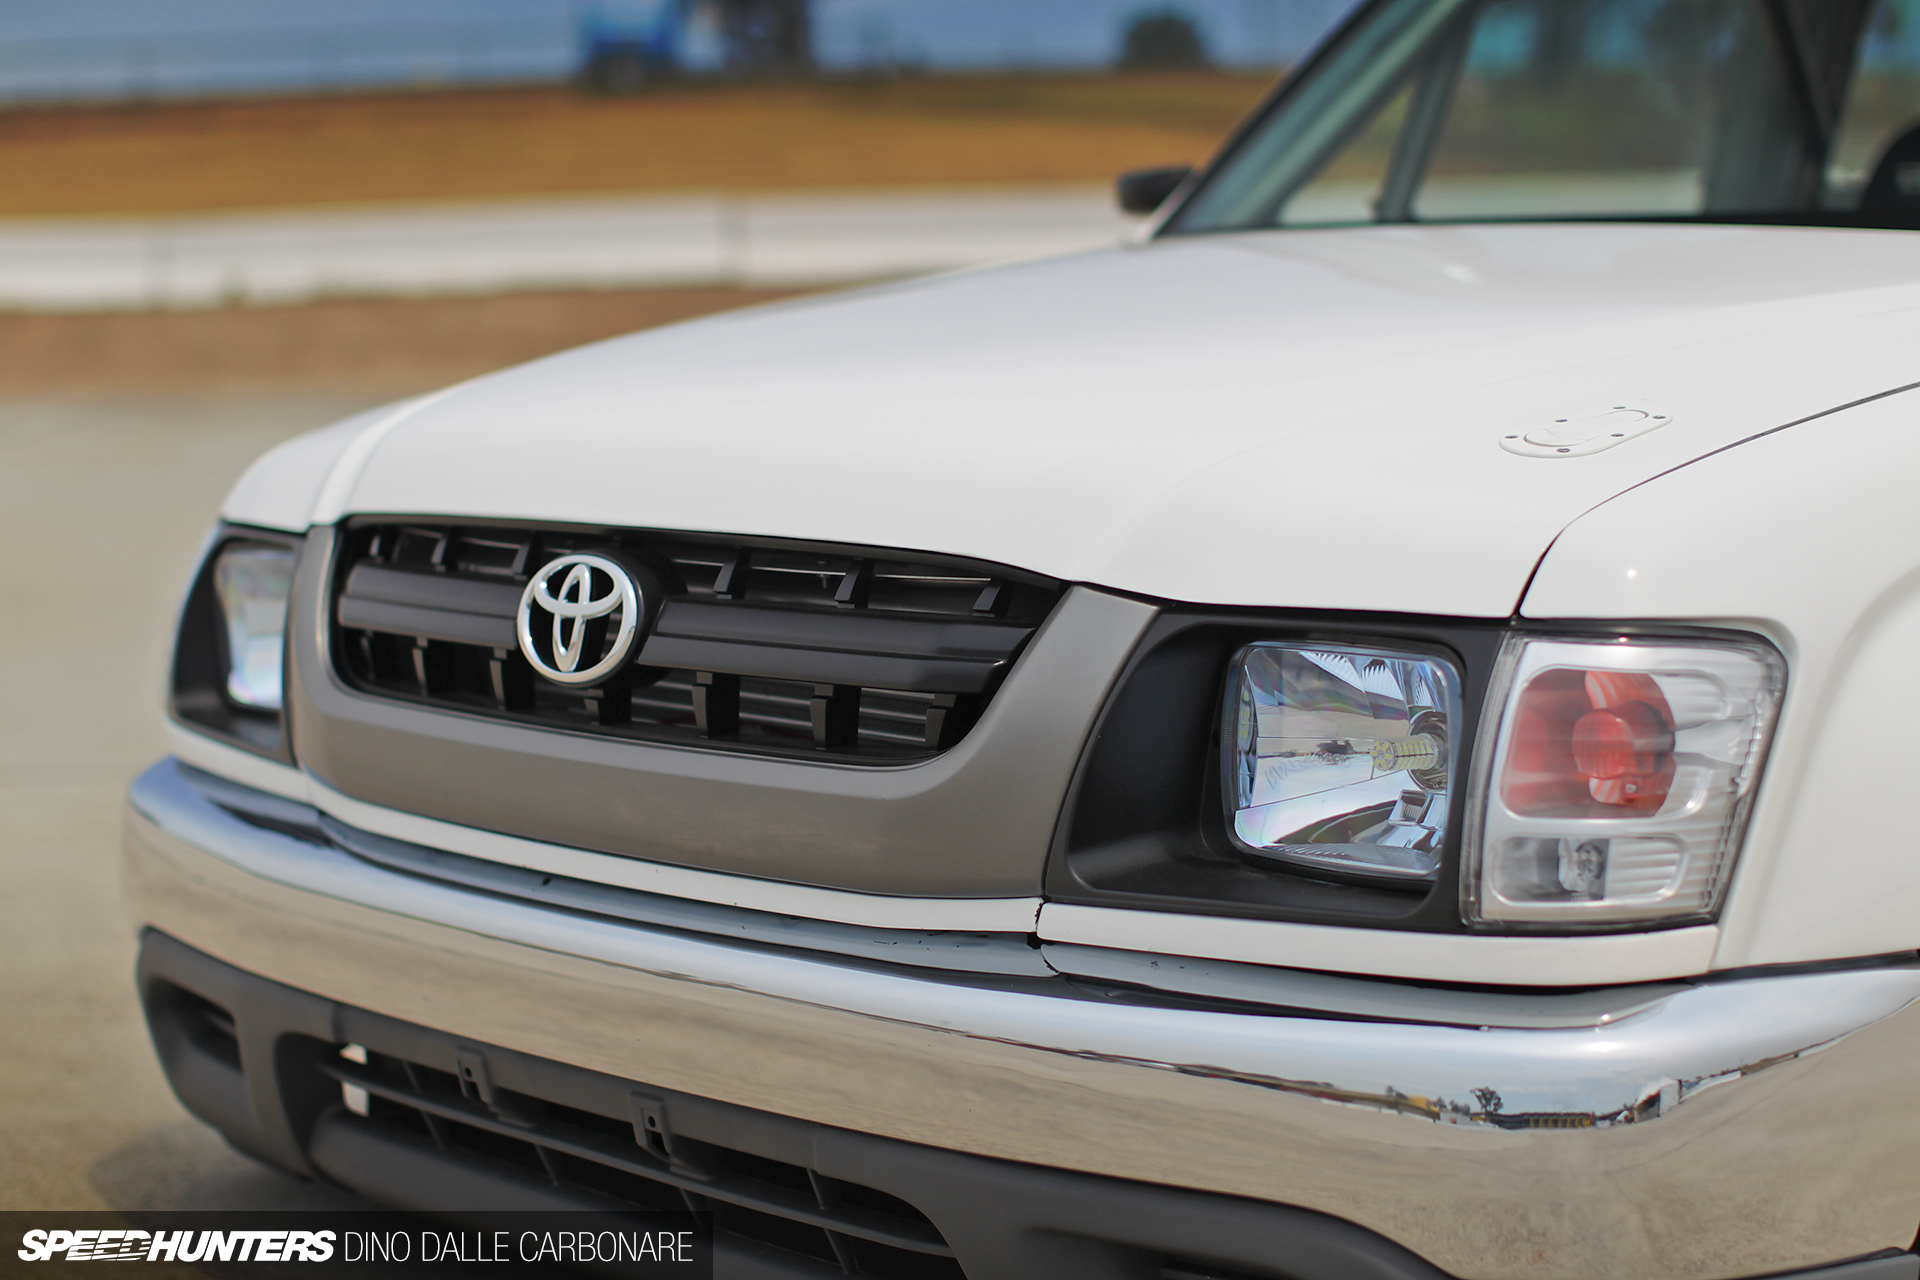
The plan from the beginning was to keep the body as stock as possible: this includes the stock Super White Toyota paint work.
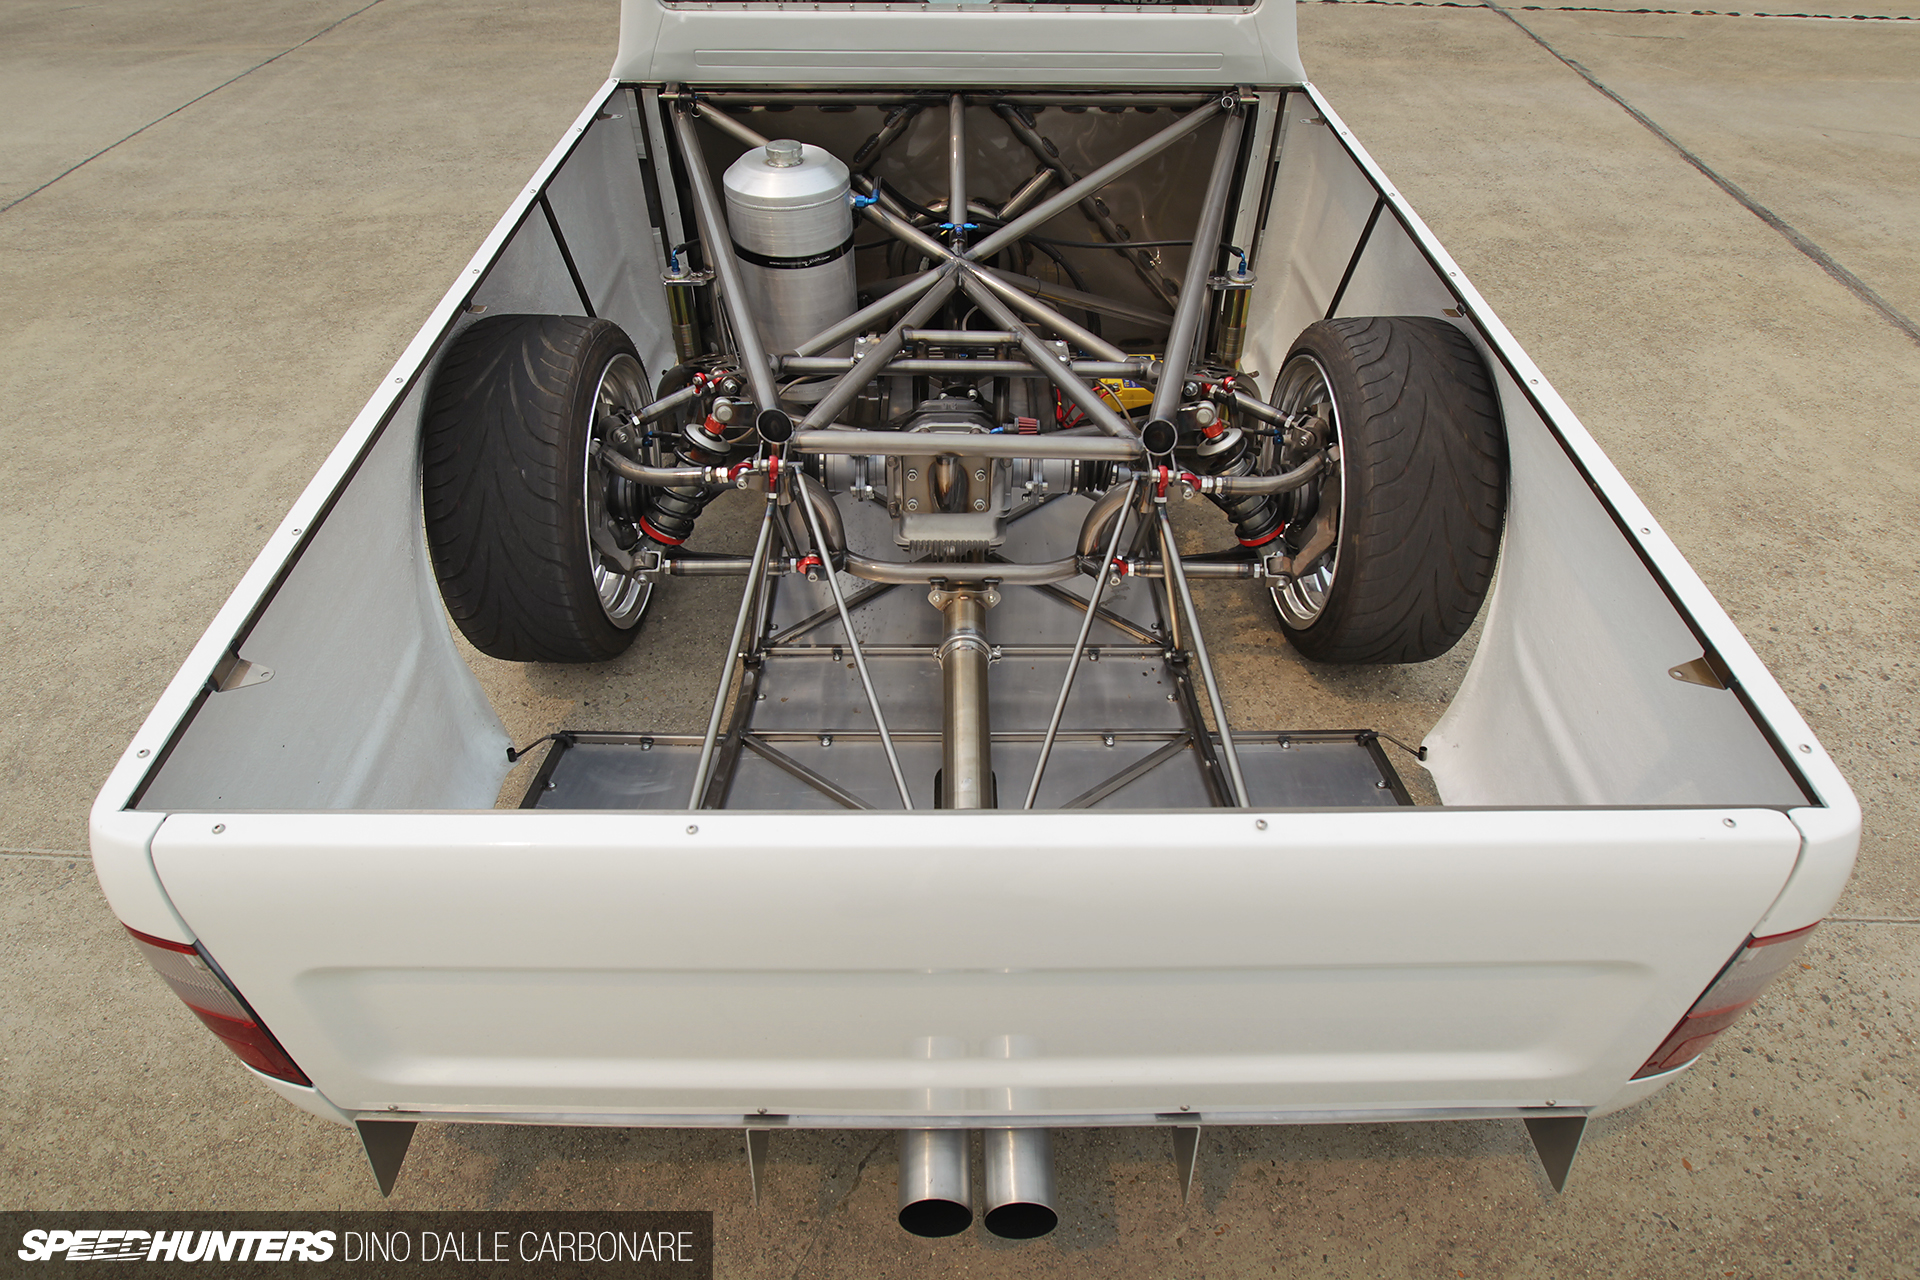
Surrounded by the FRP shell and alloy under-tray, the steel structure is the most visible and admired aspect of the build.

The suspension itself uses MCA shocks…
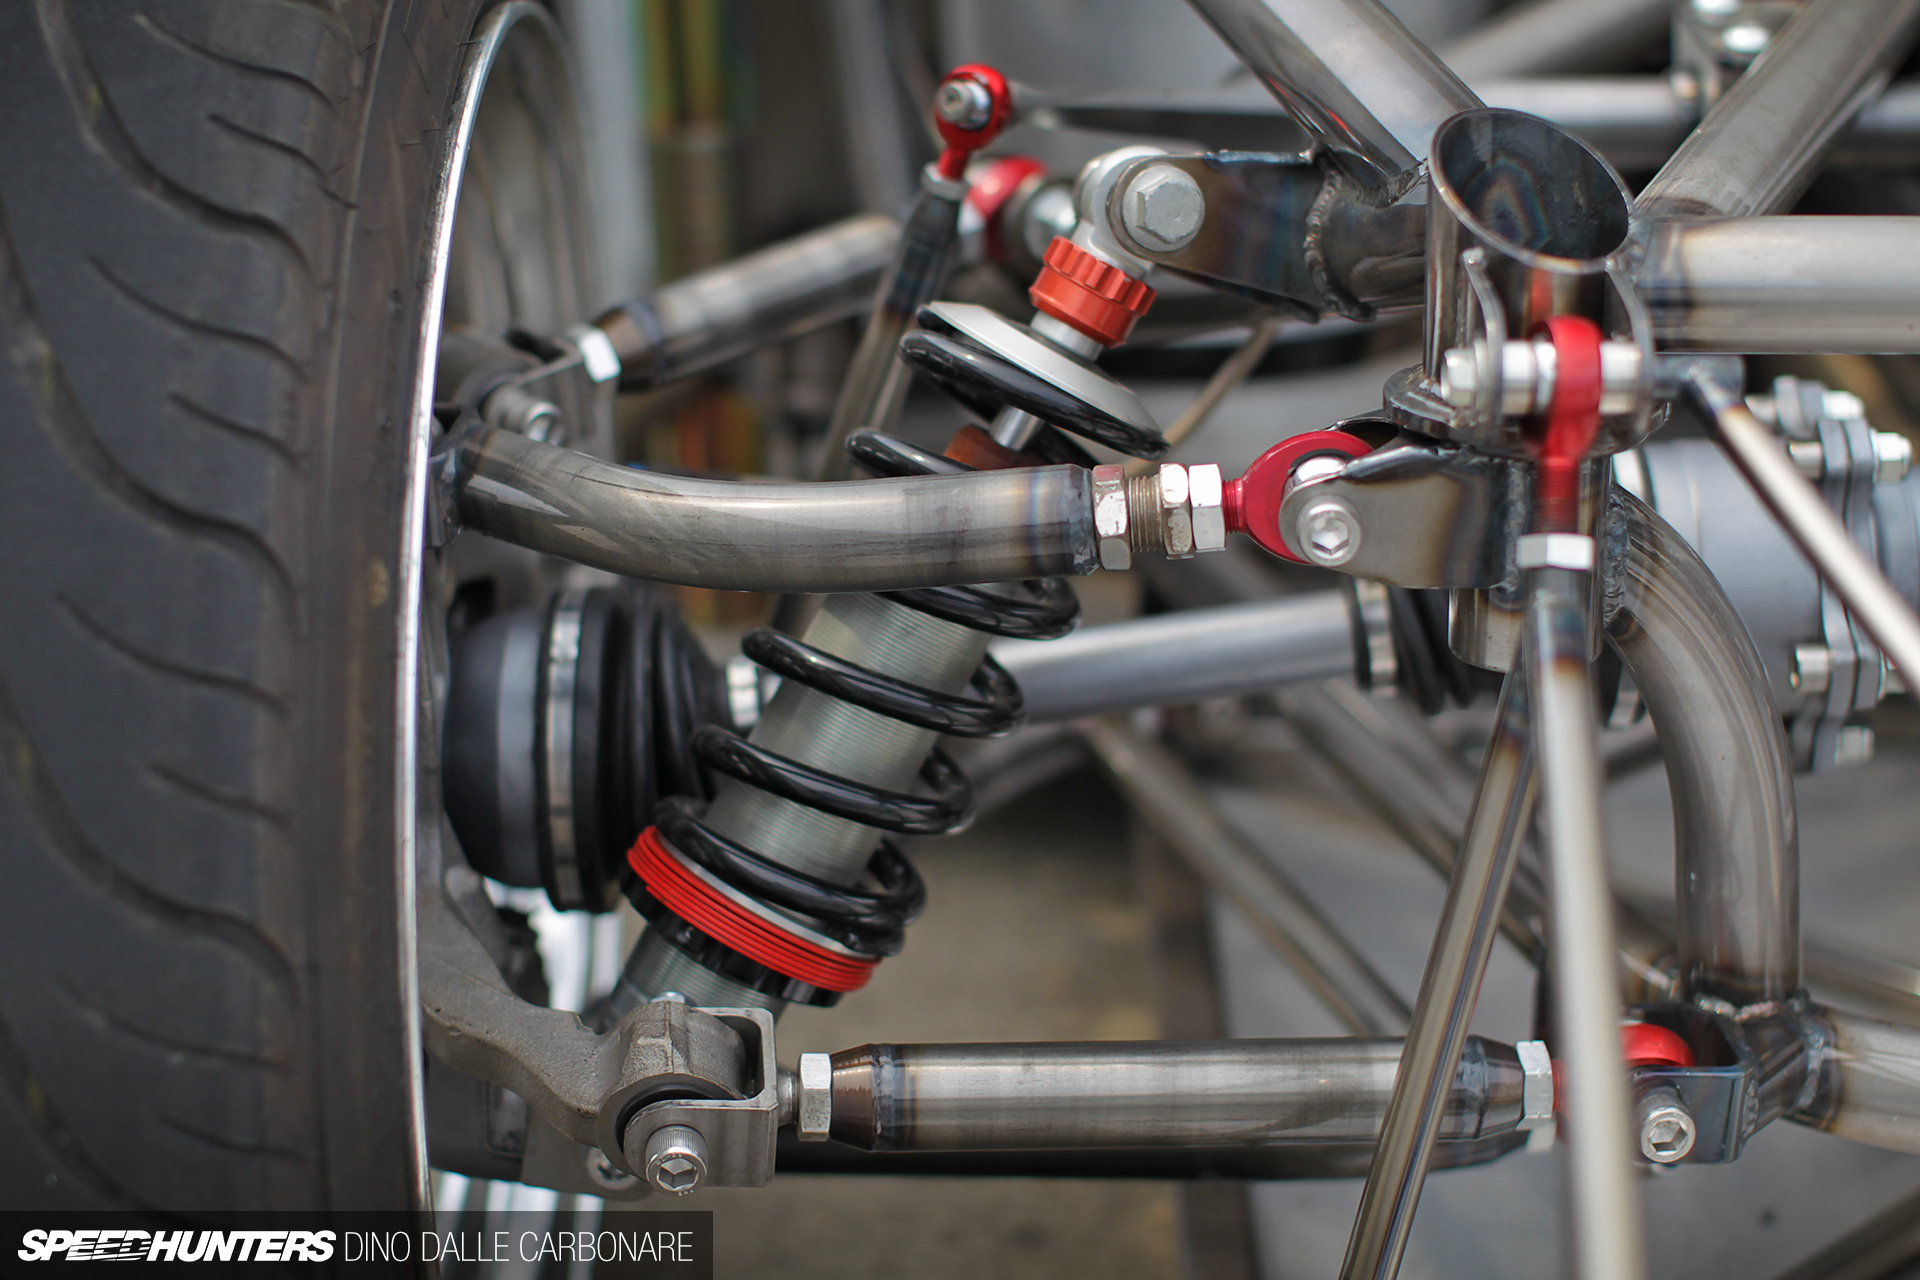
… chromoly arms and QA1 rose joints. The layout is similar to that of a Nissan S15 multi-link rear end.

The plan at the start was to use a factory S15 cradle, but after building the chassis, this idea was ditched in favour of something better-looking. I improved the geometry, solid mounted the diff, then made up the arms.

The rear sway bar is similar to the front with V8 supercar blade adjustable ends tied together with 1.25-inch chromoly tube and brass bushes. Like the front, these blade ends will be remade to a softer rate to reflect the chassis weight.
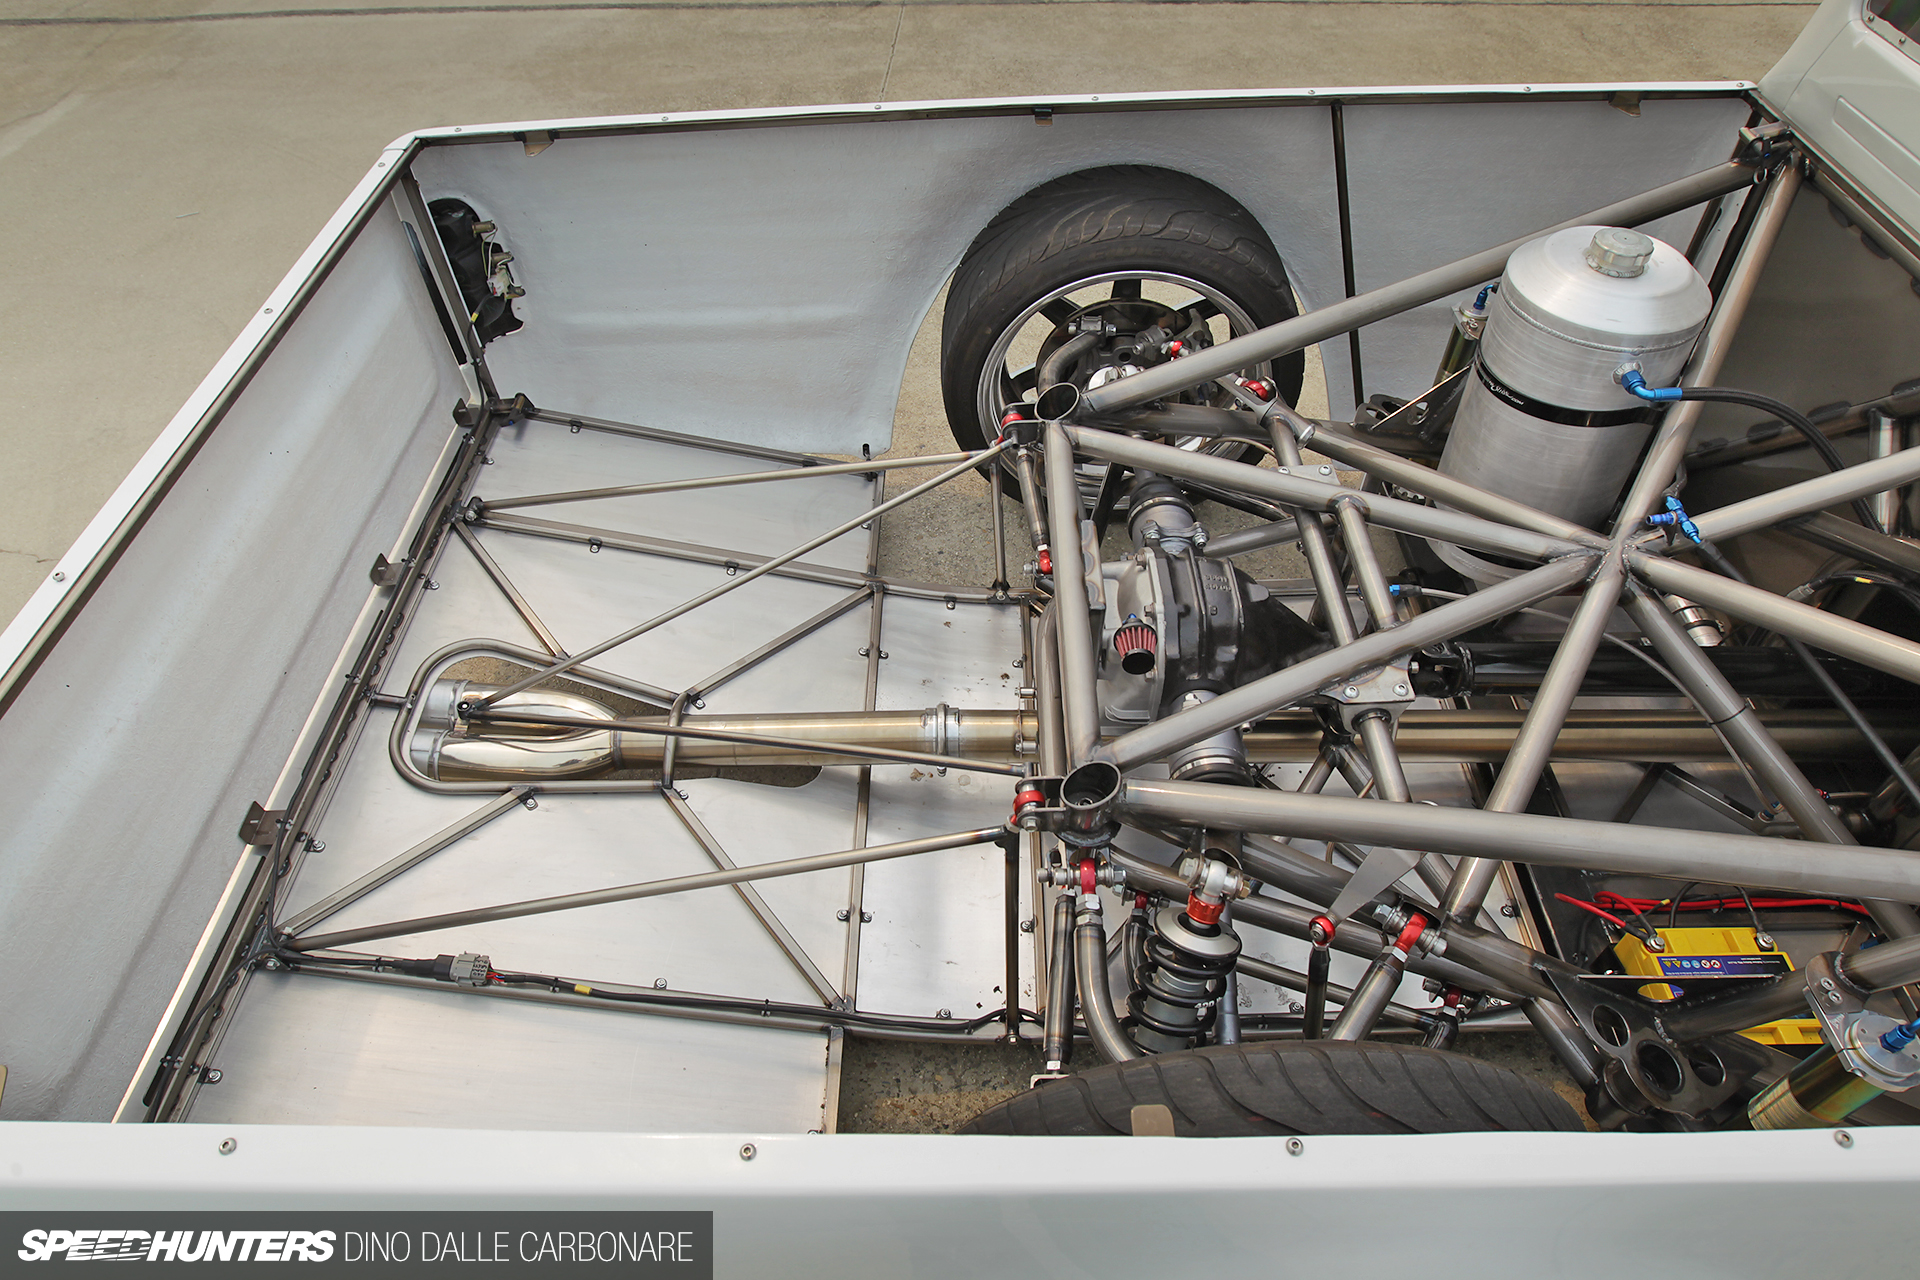
The diff is an R200 with a mechanical two-way LSD inside it. The shafts are your usual S-series five-bolts and the knuckles are S15 items.
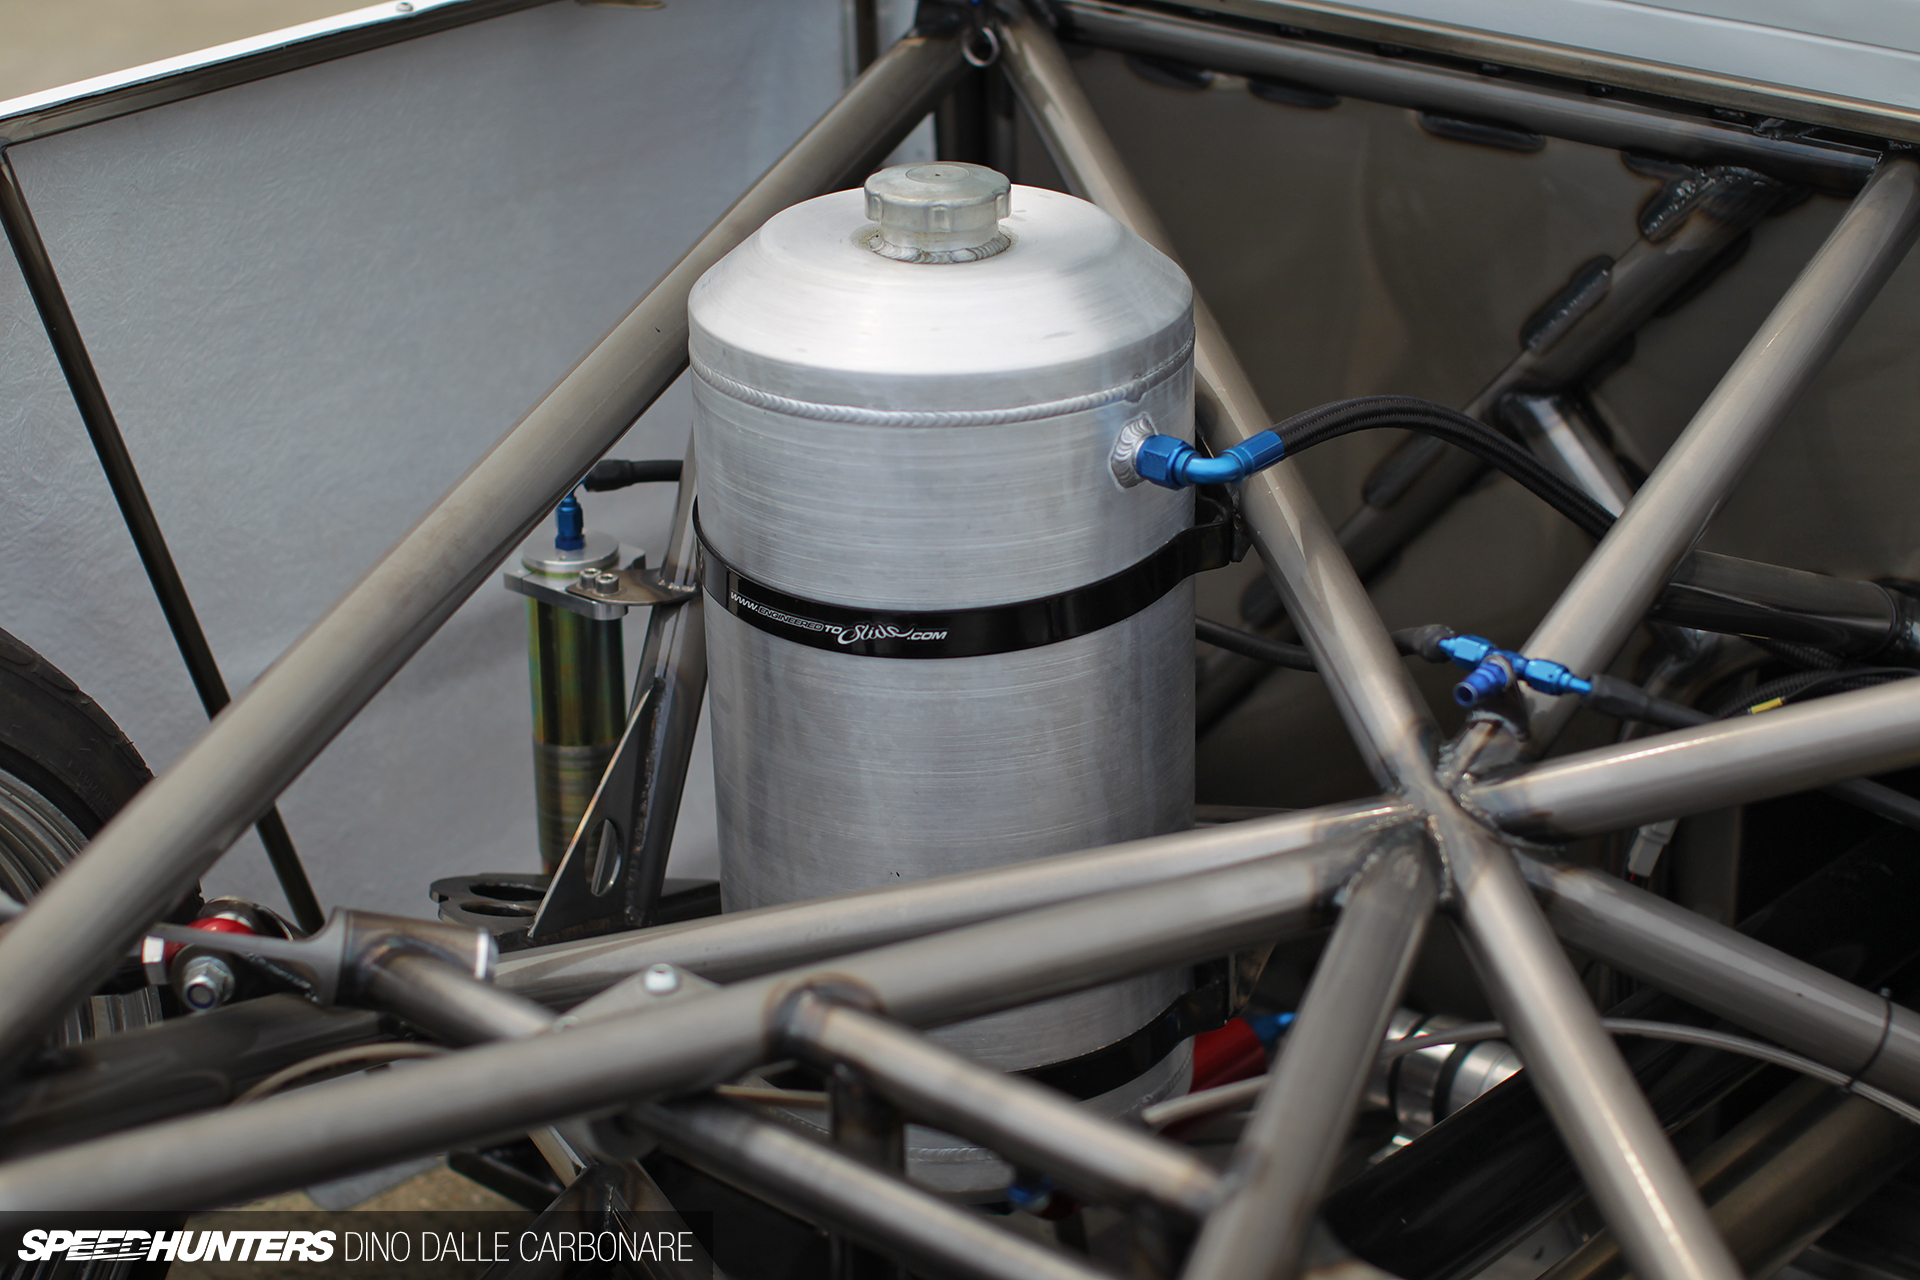
Having all the freedom in the world with a ground up build gives you many options. When it came time to select a fuel tank, I did things a little different and selected a spun alloy upright tank that eliminates a lot of the fuel surge a flat tank would have.
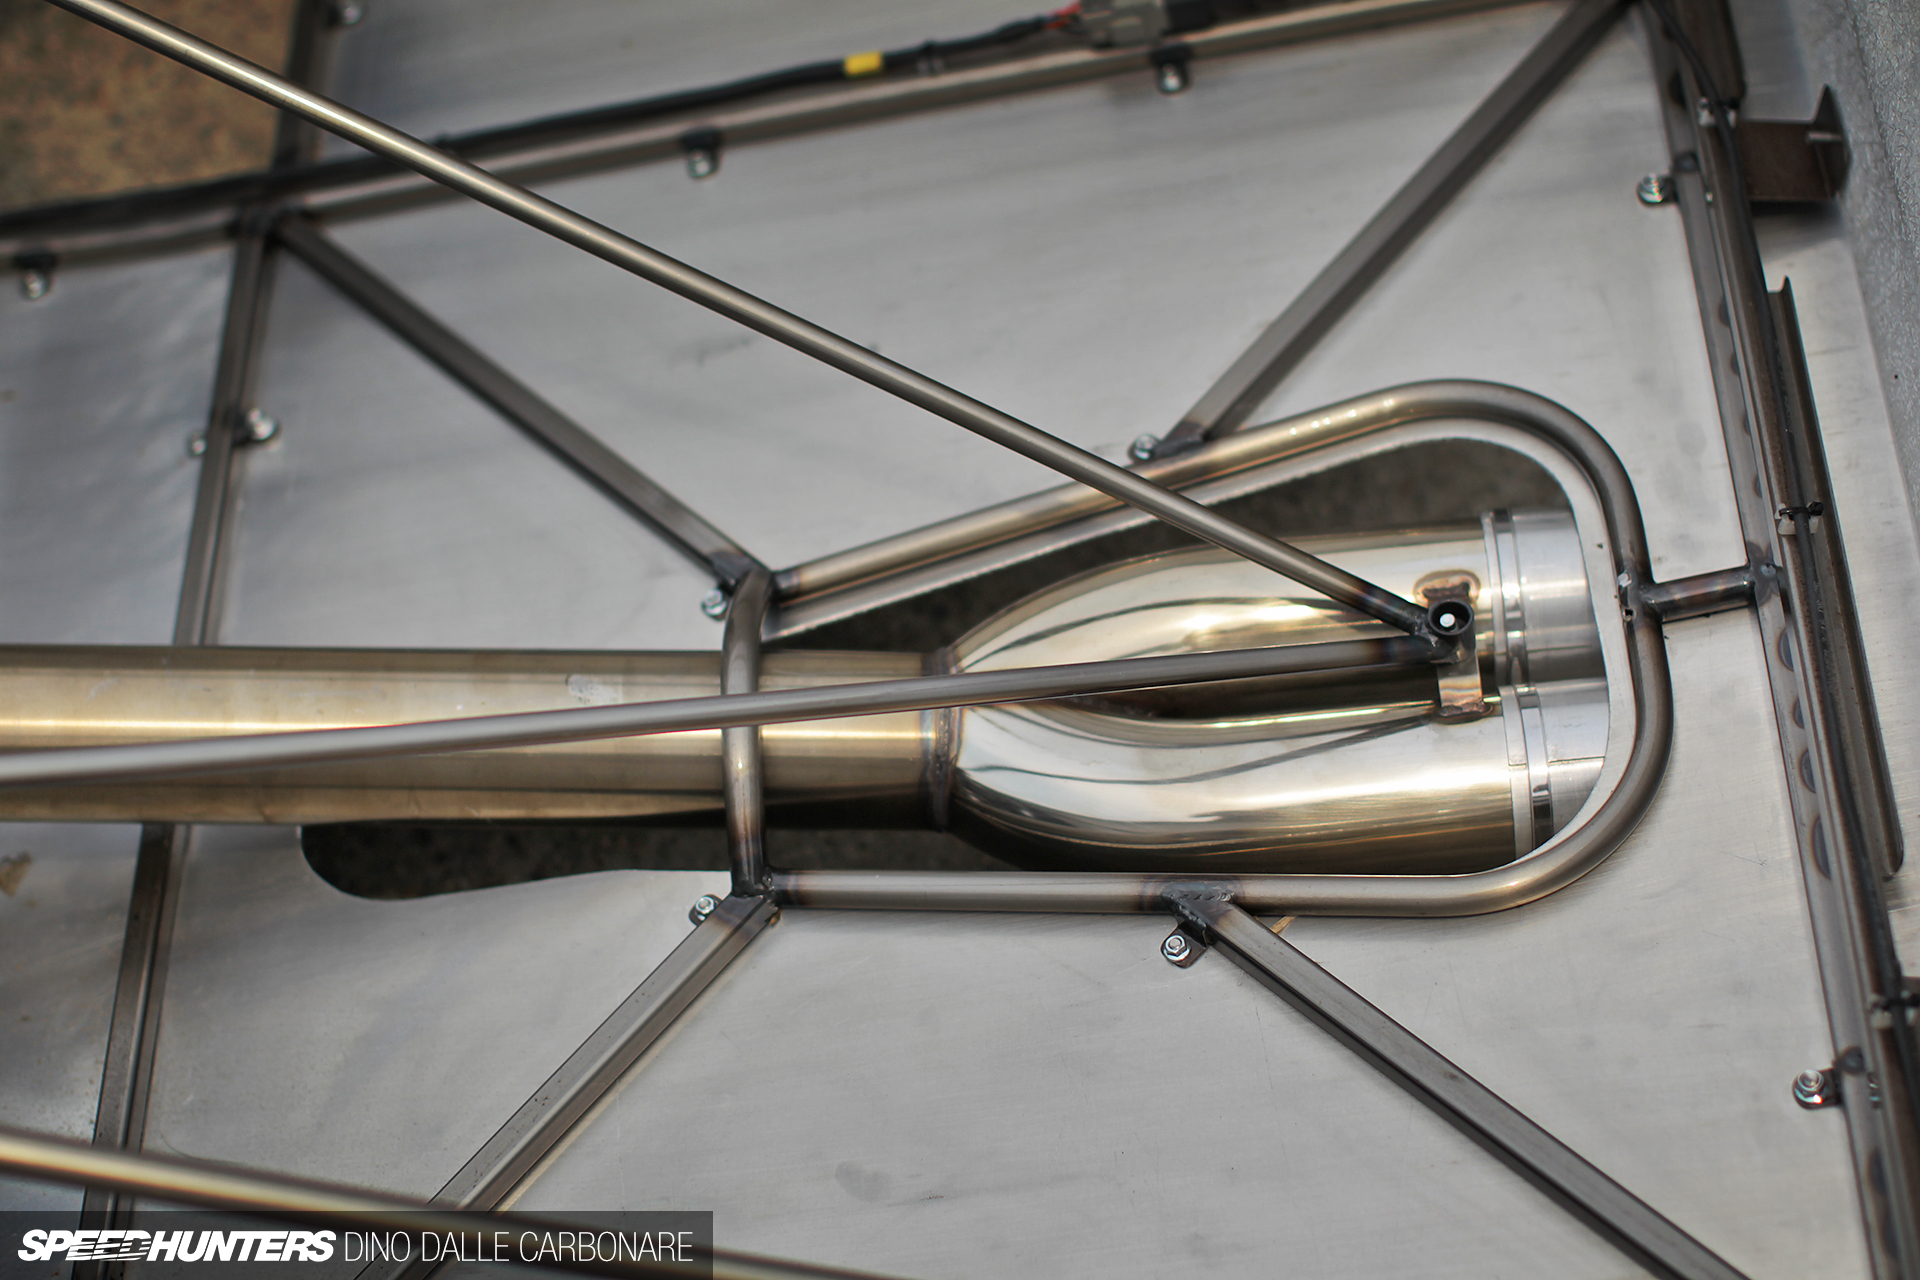
The exhaust exits the diffuser and is finished with twin 80mm alloy tips, with the equal length manifold and TD06 turbo…
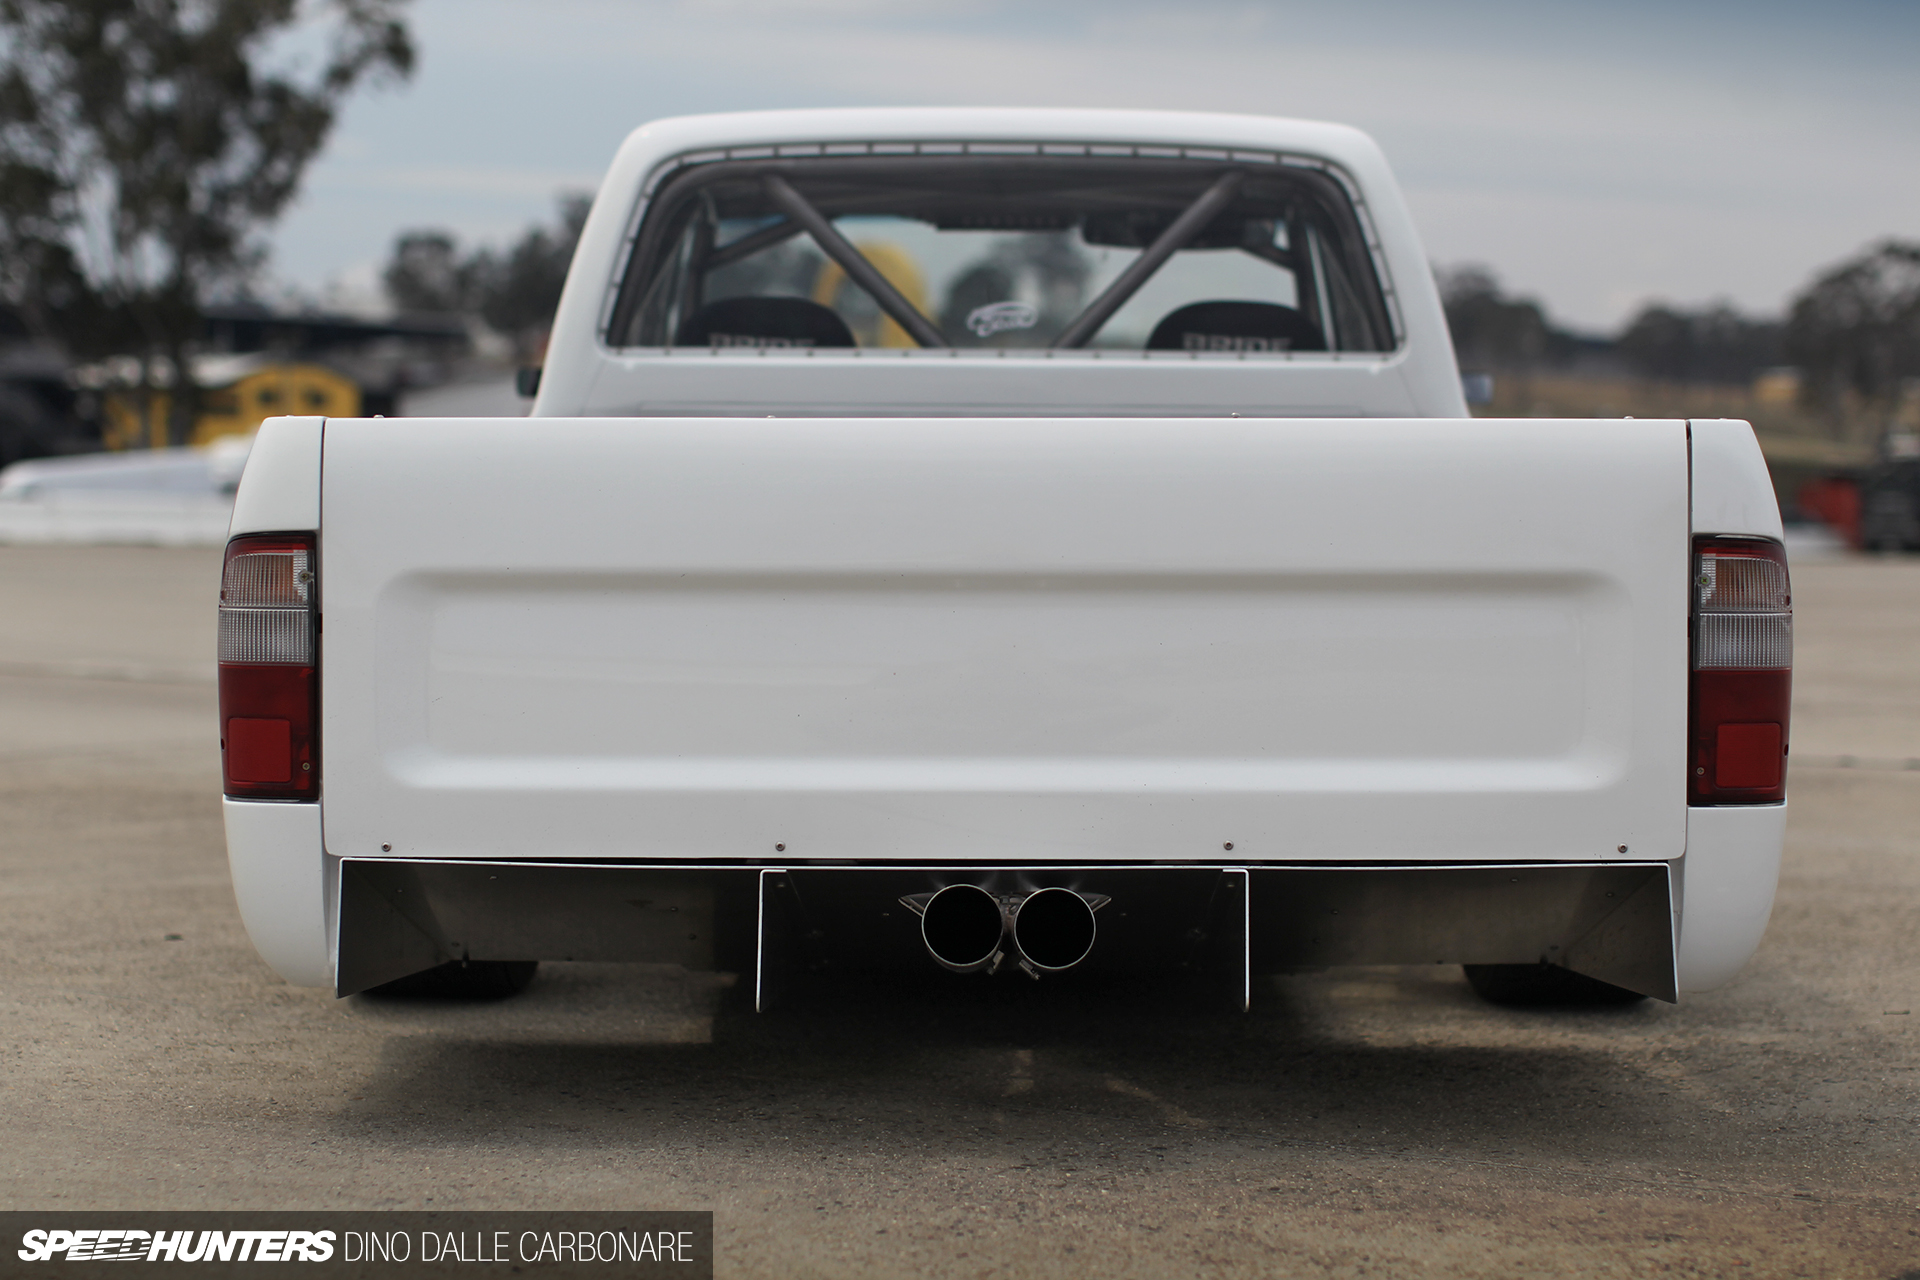
… it equips the SR20 with that mid-mount rasp that would be at home on Meihan Sportsland circuit.
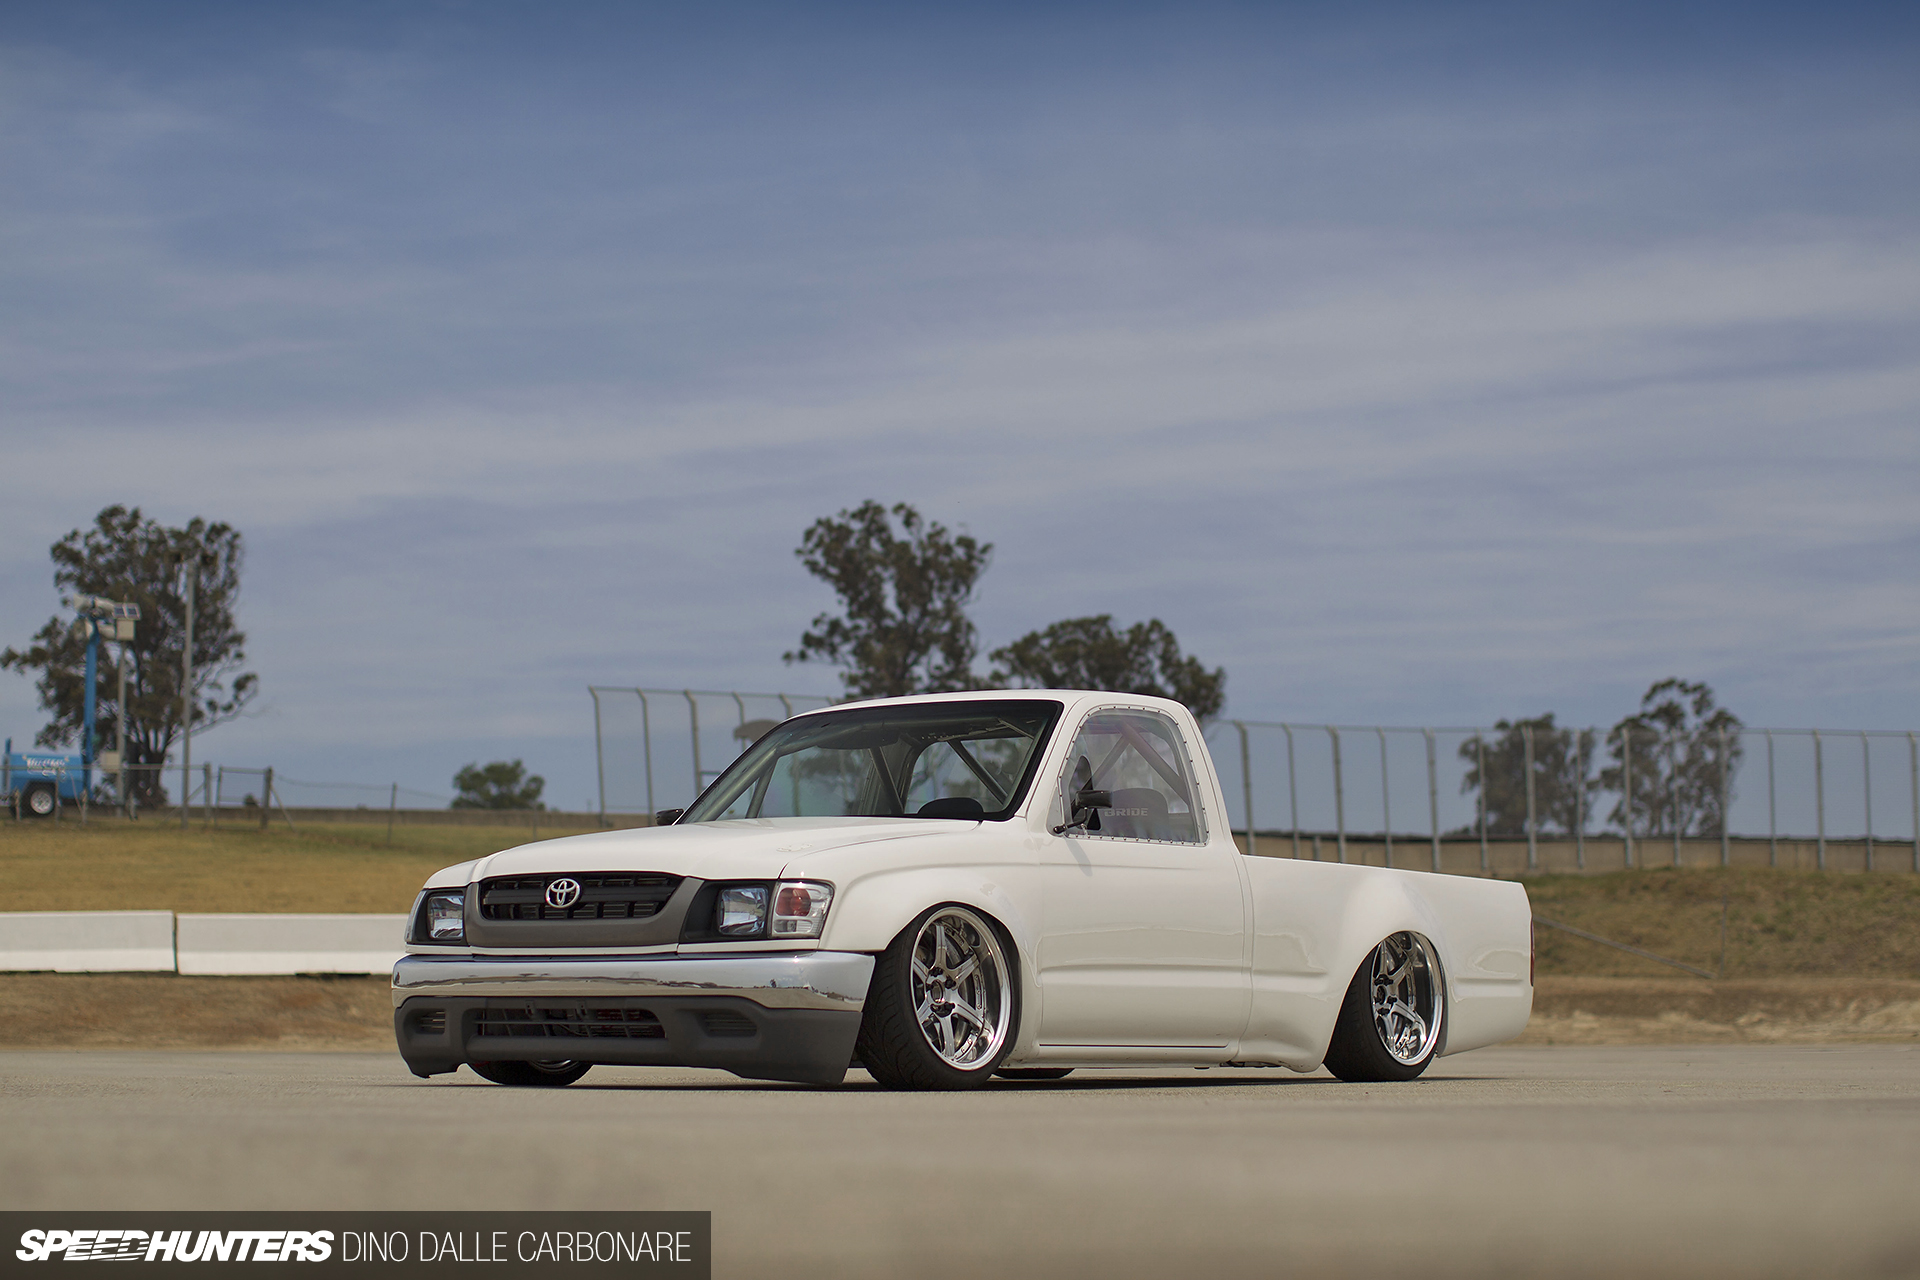
Driven By A Unique Style
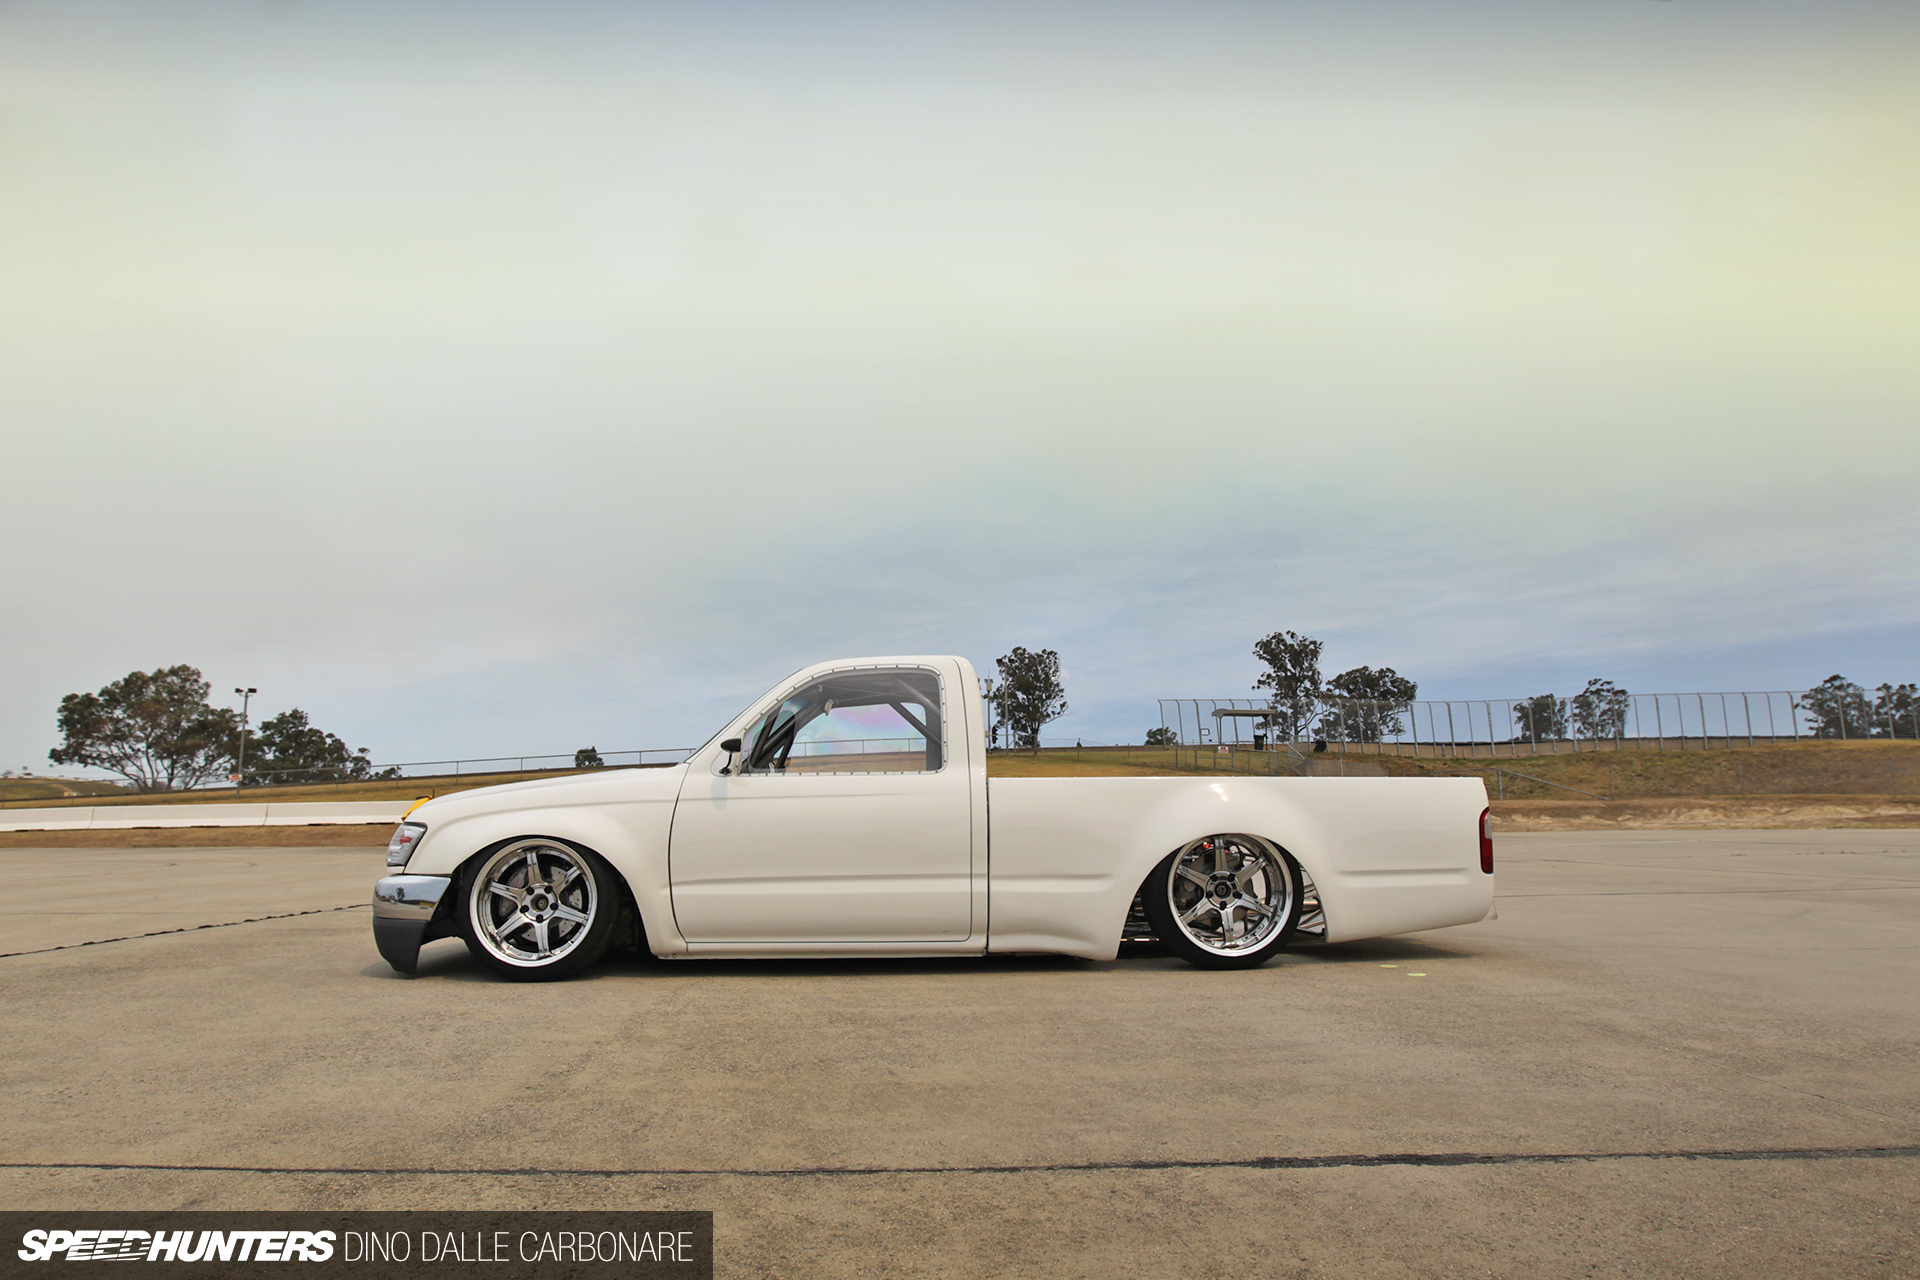
This is my intended ride height. With a ground-to-floor clearance of 70mm all around, it’s quite high. There are low points but these are all easily replaceable and will wear themselves in over time. The Bridgestone Driftmaster wheels were made in 2002; the body style is from a 2002 Hilux and it all ties in with that theme. I grew up dreaming about drift cars from this era of Japanese drifting and I wanted to encase this in the most unlikely of body choices. The front wheels are 17×8.5-inch and the rears are 18×9.5-inch, 0-offset all round.
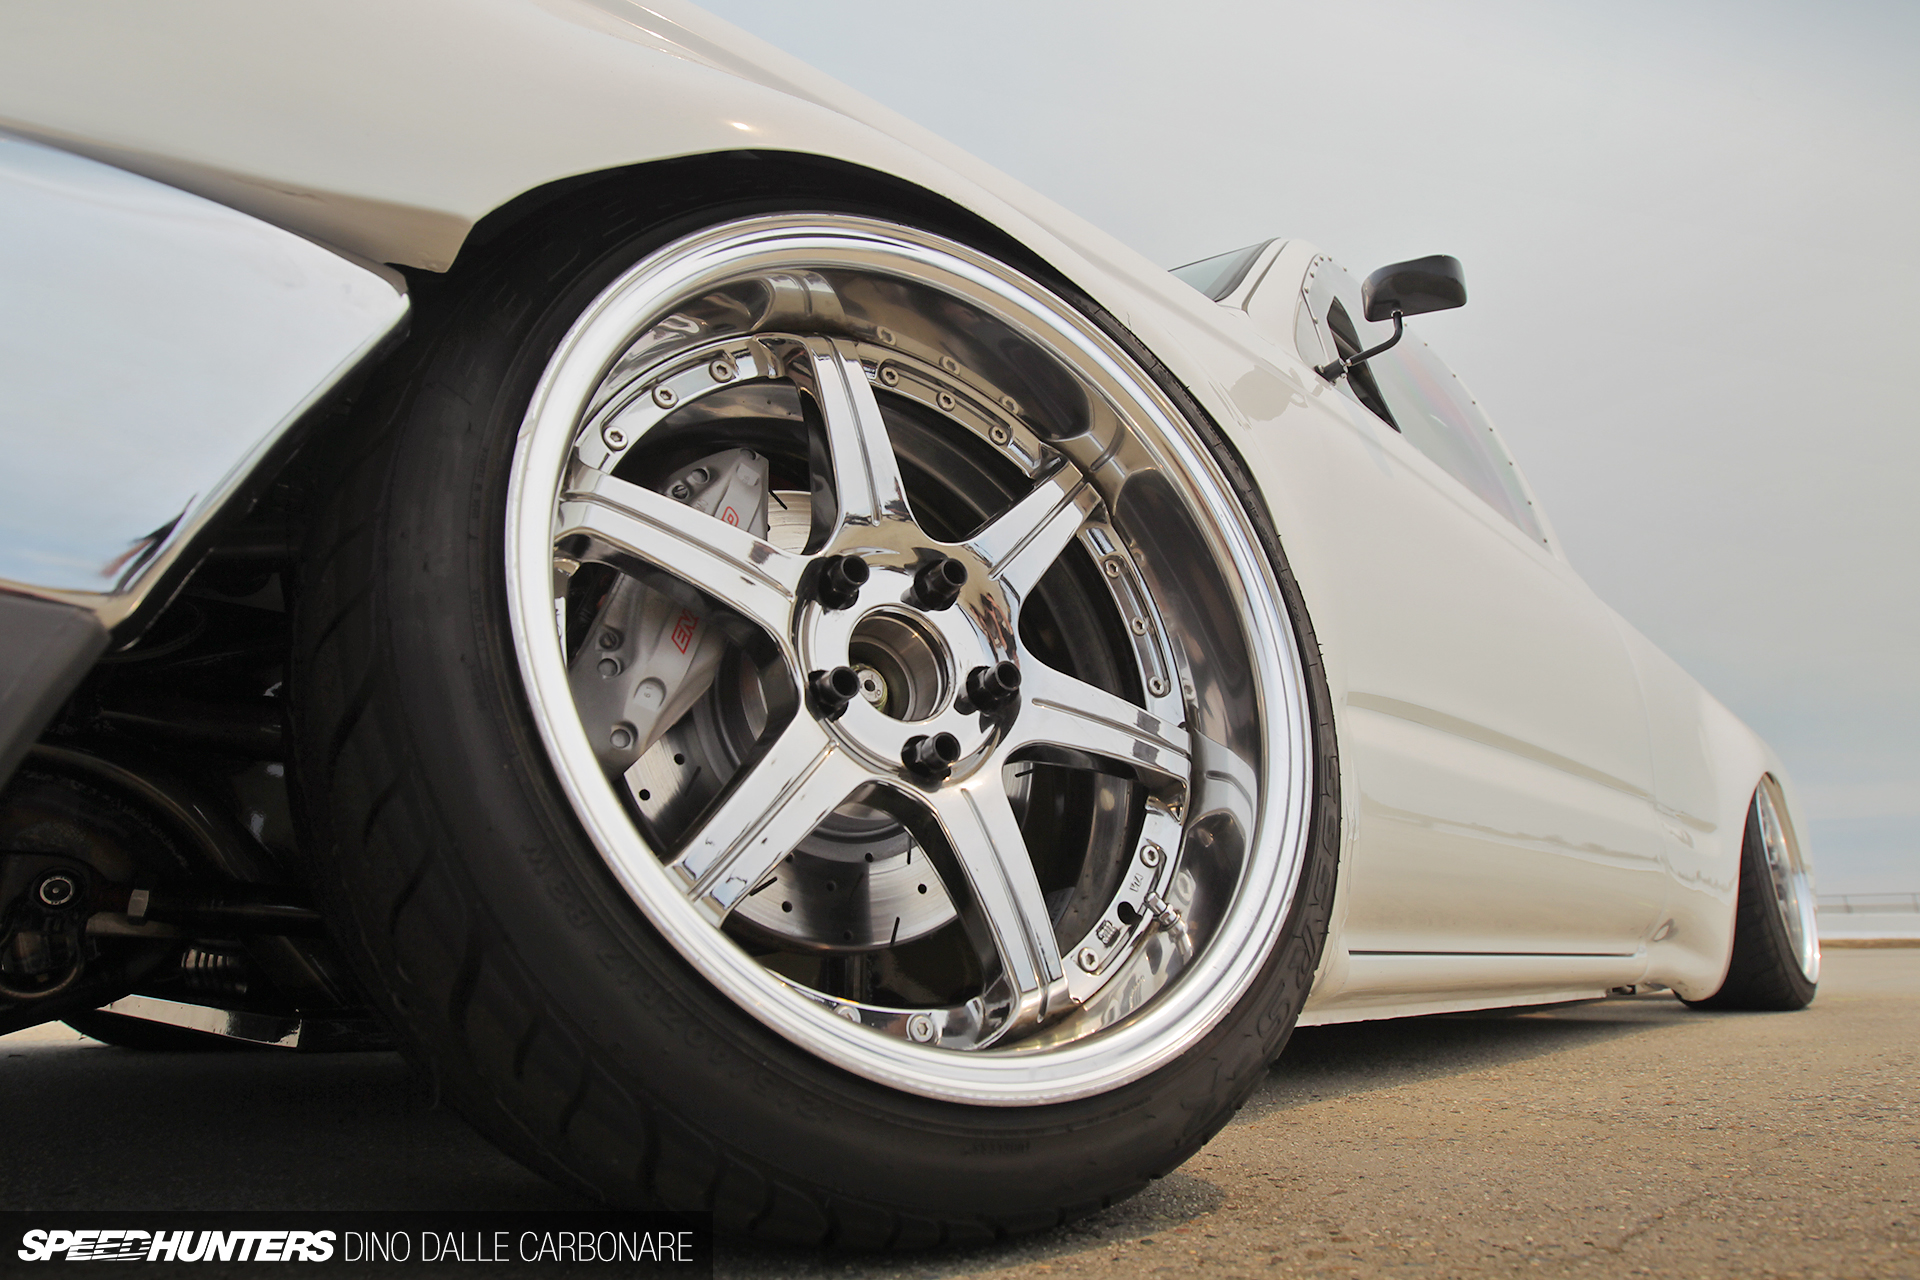
I run a 17/18 stagger on all my cars: I use 17-inch up front to get maximum steering lock and guard clearance while the 18-inch rims in the rear achieve maximum tuck. The brakes are a simple mix of Wilwood pedal box, manual rear lockout valve, Earls lines and Z32 callipers. In a lightweight car like this it’s ample braking power on a budget.
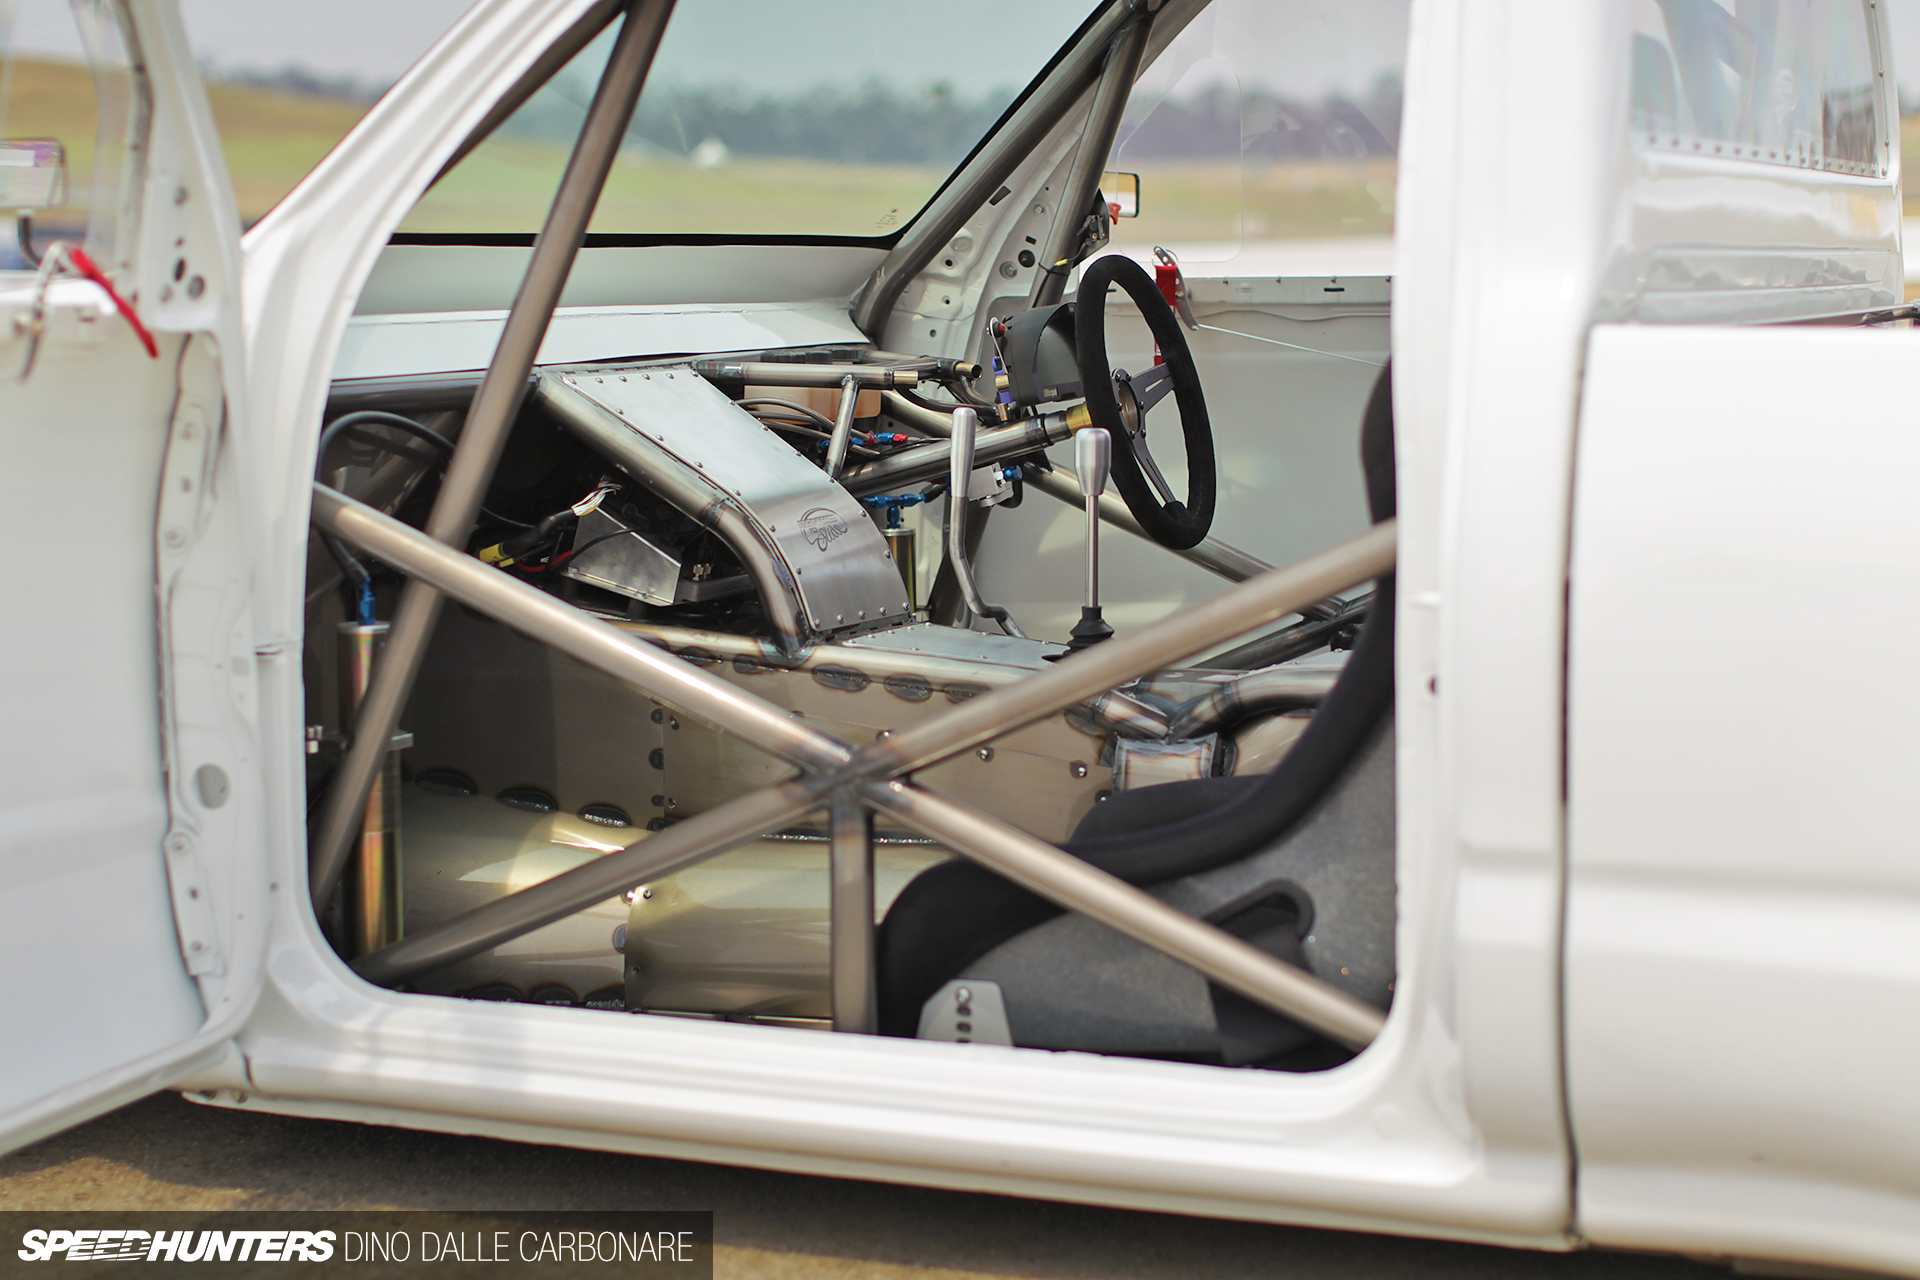
Things are pretty simple inside…
… I wanted to leave as much of the chassis and the powder-coated finish as visible as I could.
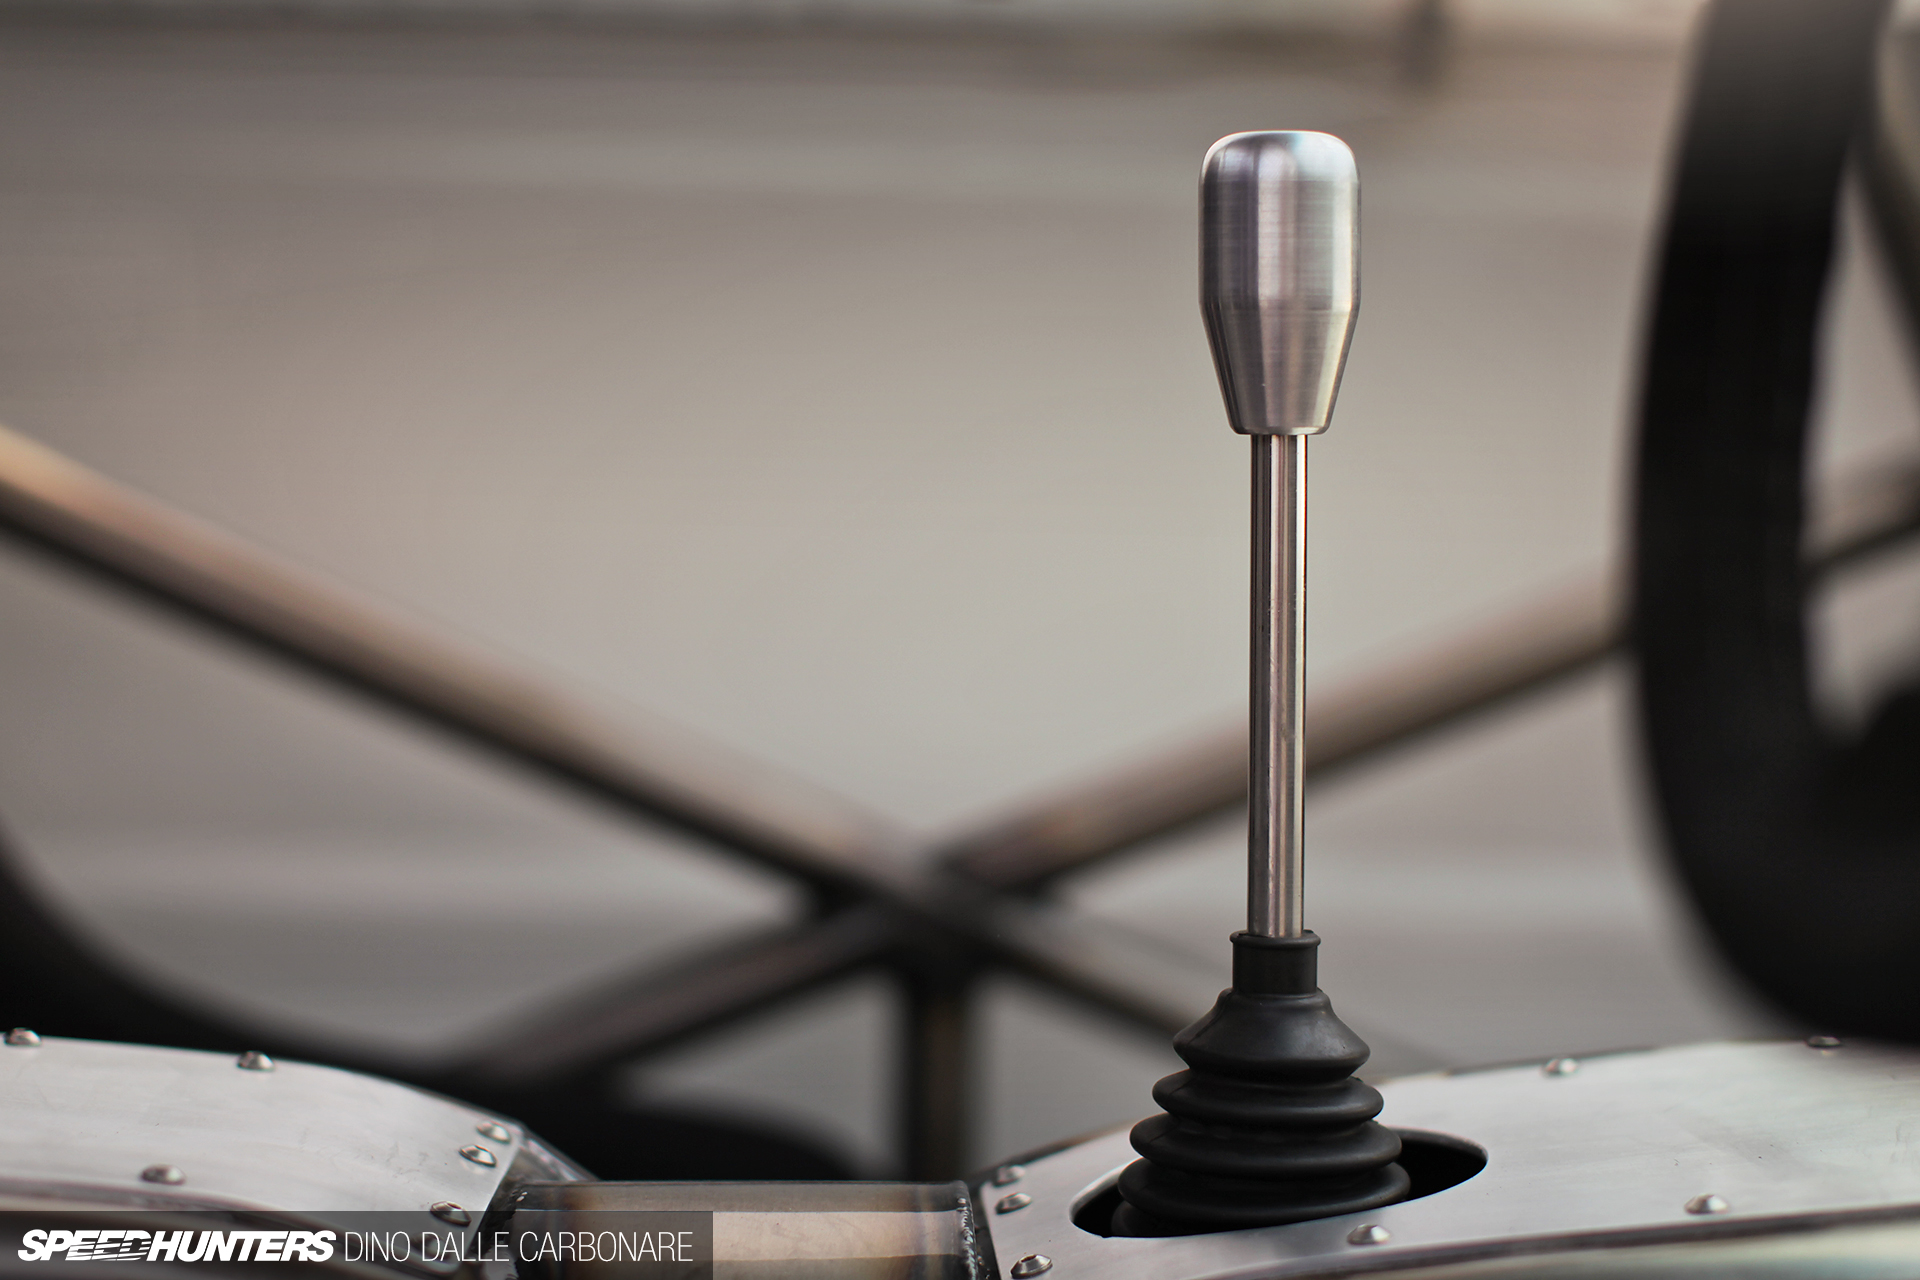
The RB25 gearbox that broke in the WTAC Tectaloy Drift practice session is now out and will be replaced with a 6-speed sequential transmission.
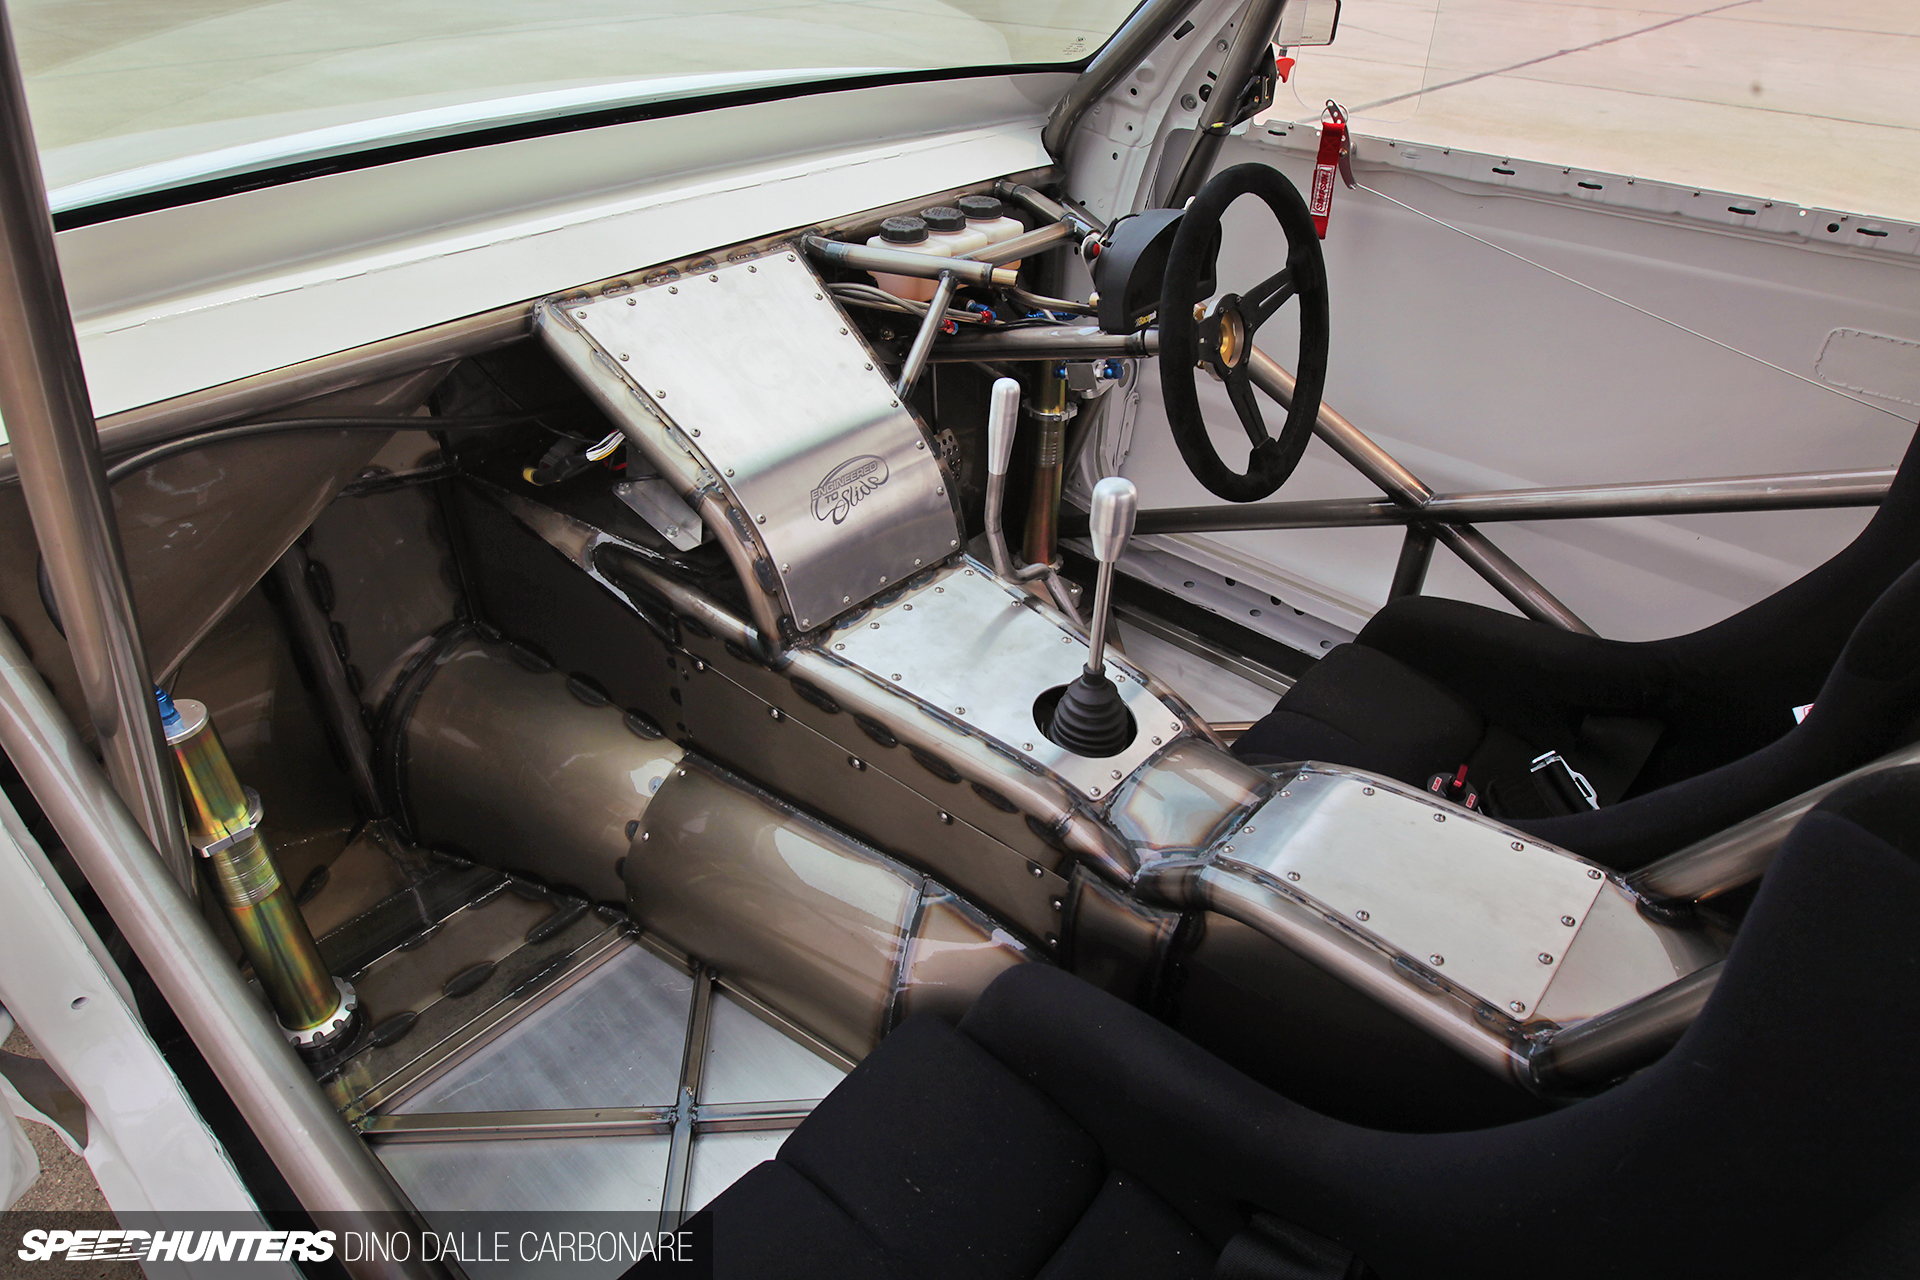
Access to the gearbox and exhaust is gained through the removable sheet metal panels while the Racepak IQ3 dash supplies me with all the information and alerts from both the Smartwire and Link ECU.
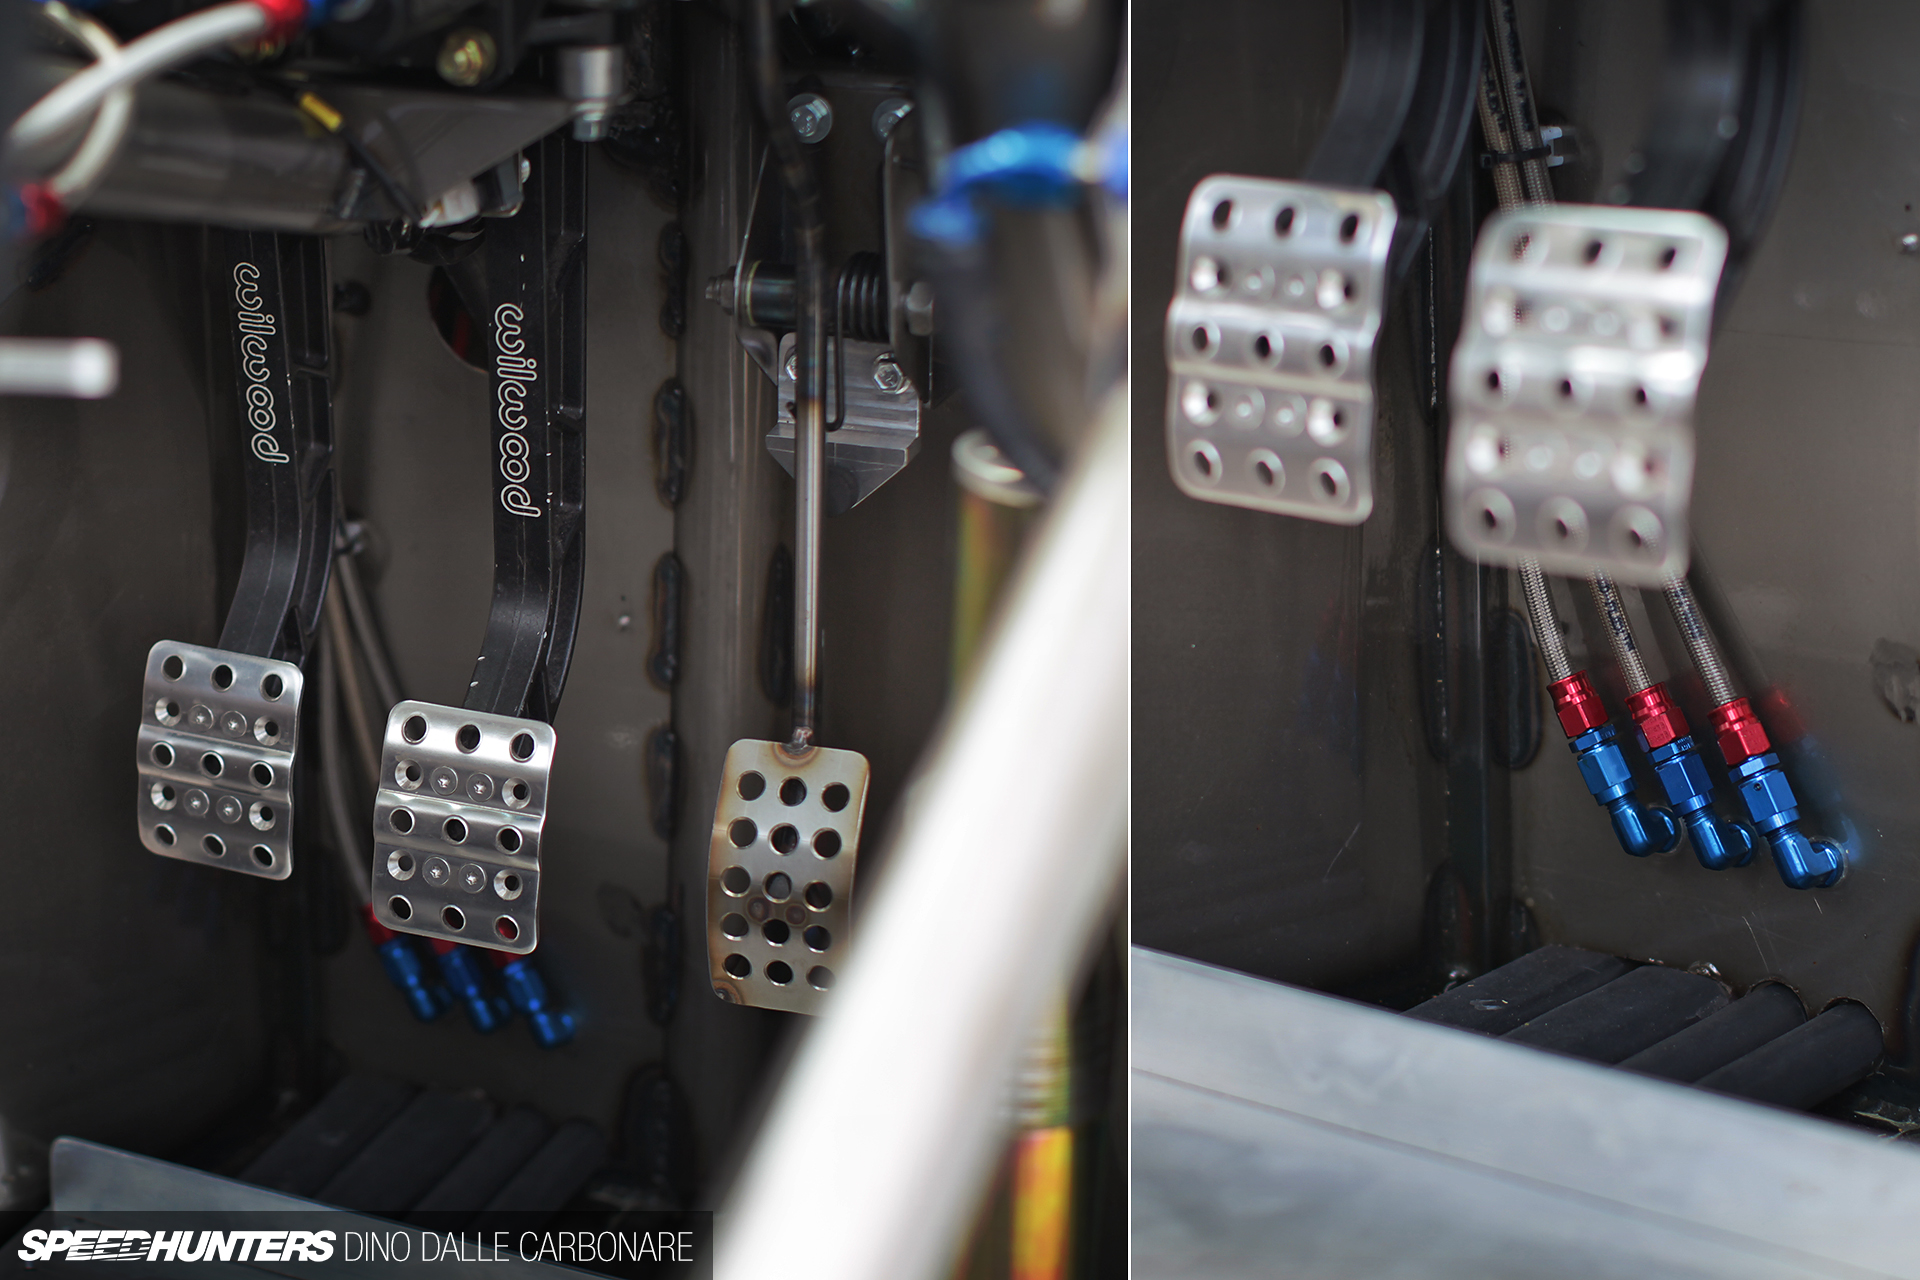
A quick look at the Wilwood pedal box and the braided hoses and Earl’s fittings that I laid out through the firewall.

The seats are only temporary as they are out of my PS13. When funds permit I’ll replace these with Bride Vios 3 Japan Edition Type R seats with higher thigh support.
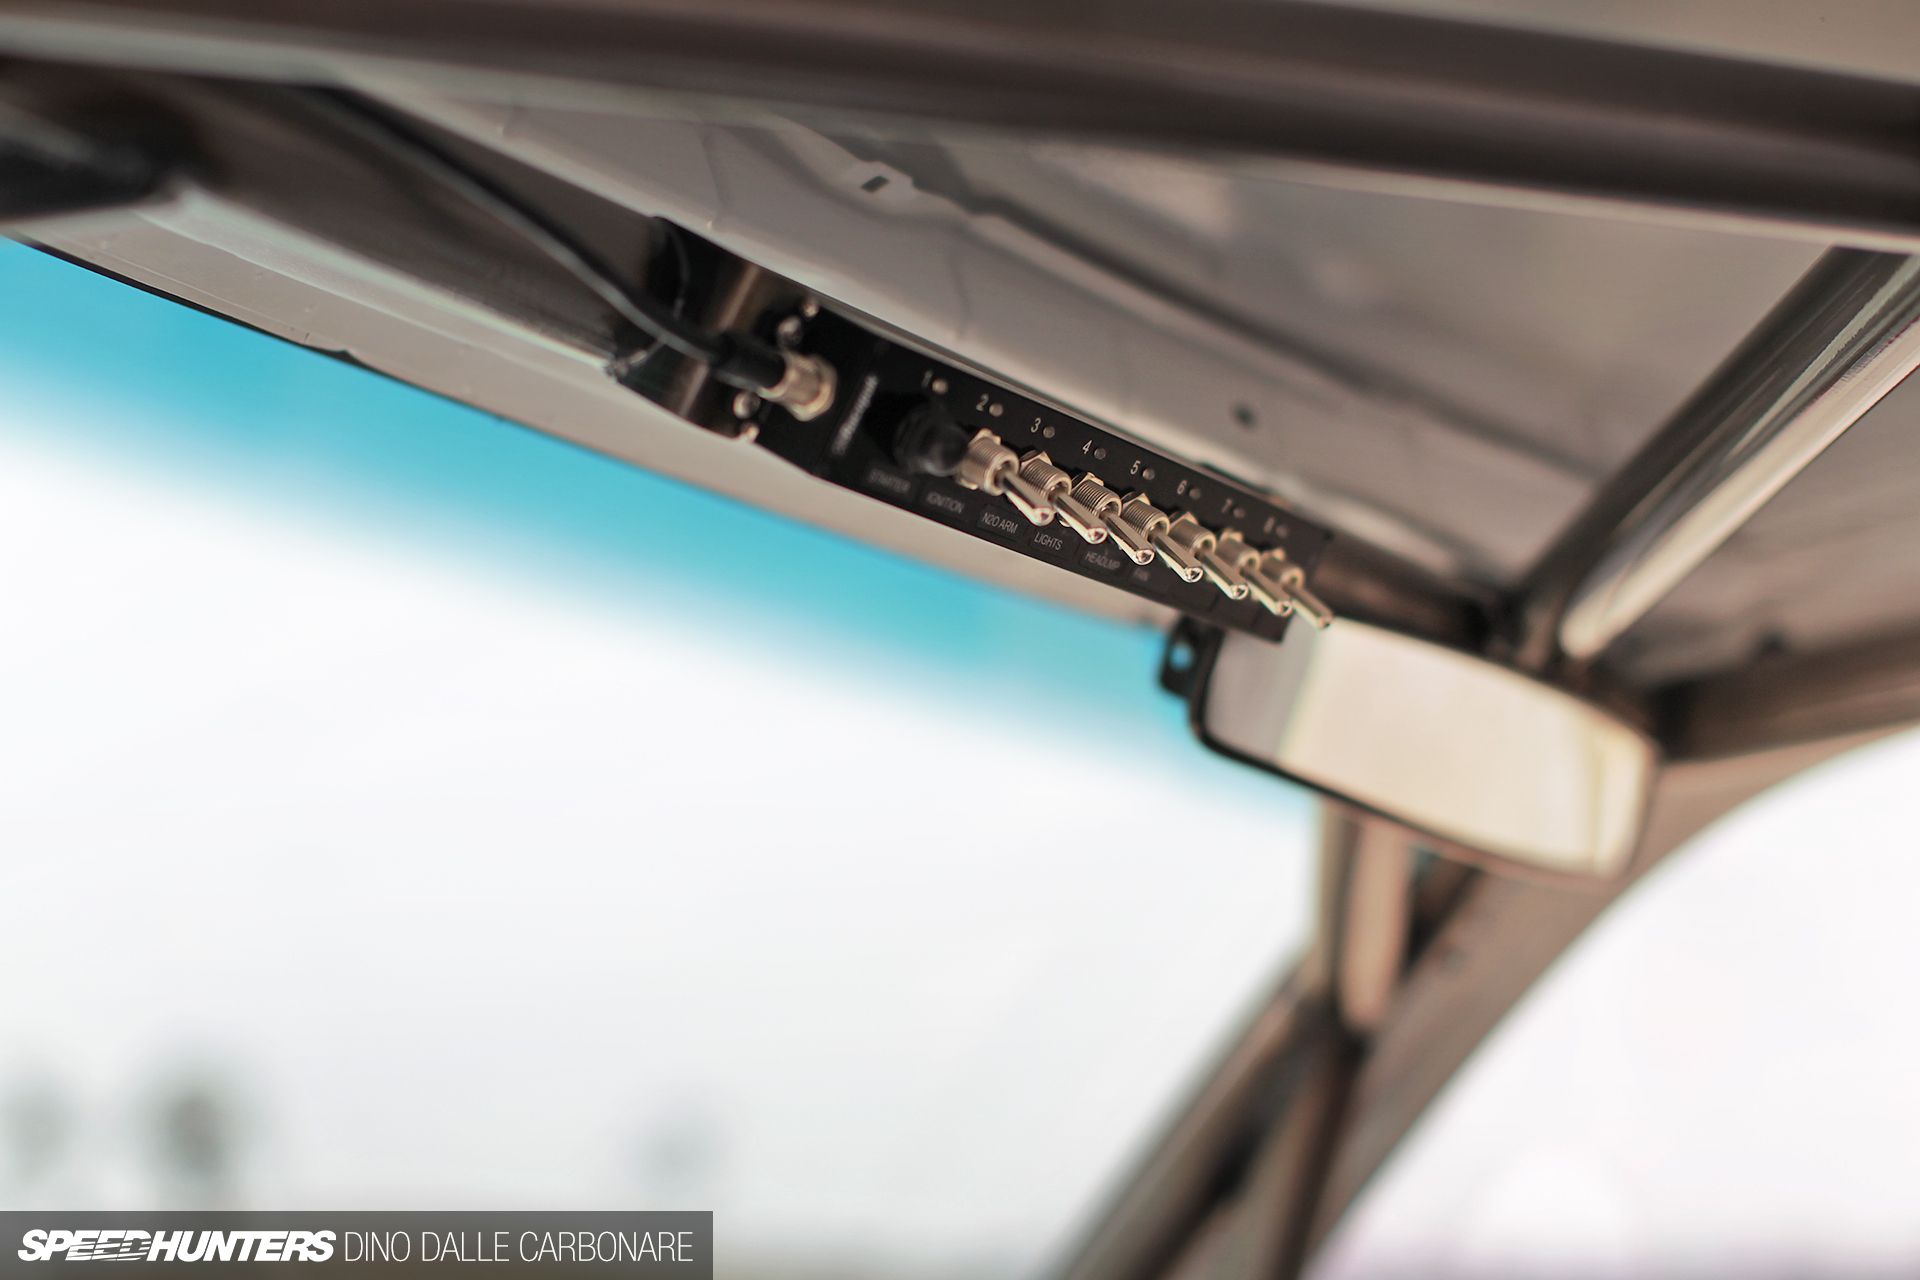
There are minimal electronics inside the cabin due to the simple single wire Smartwire switch panel handling all of the controls.
The finished Hilux is a sight I could, and will, look at forever. It’s almost understated on the outside and invites you to look under its skin where all is revealed.
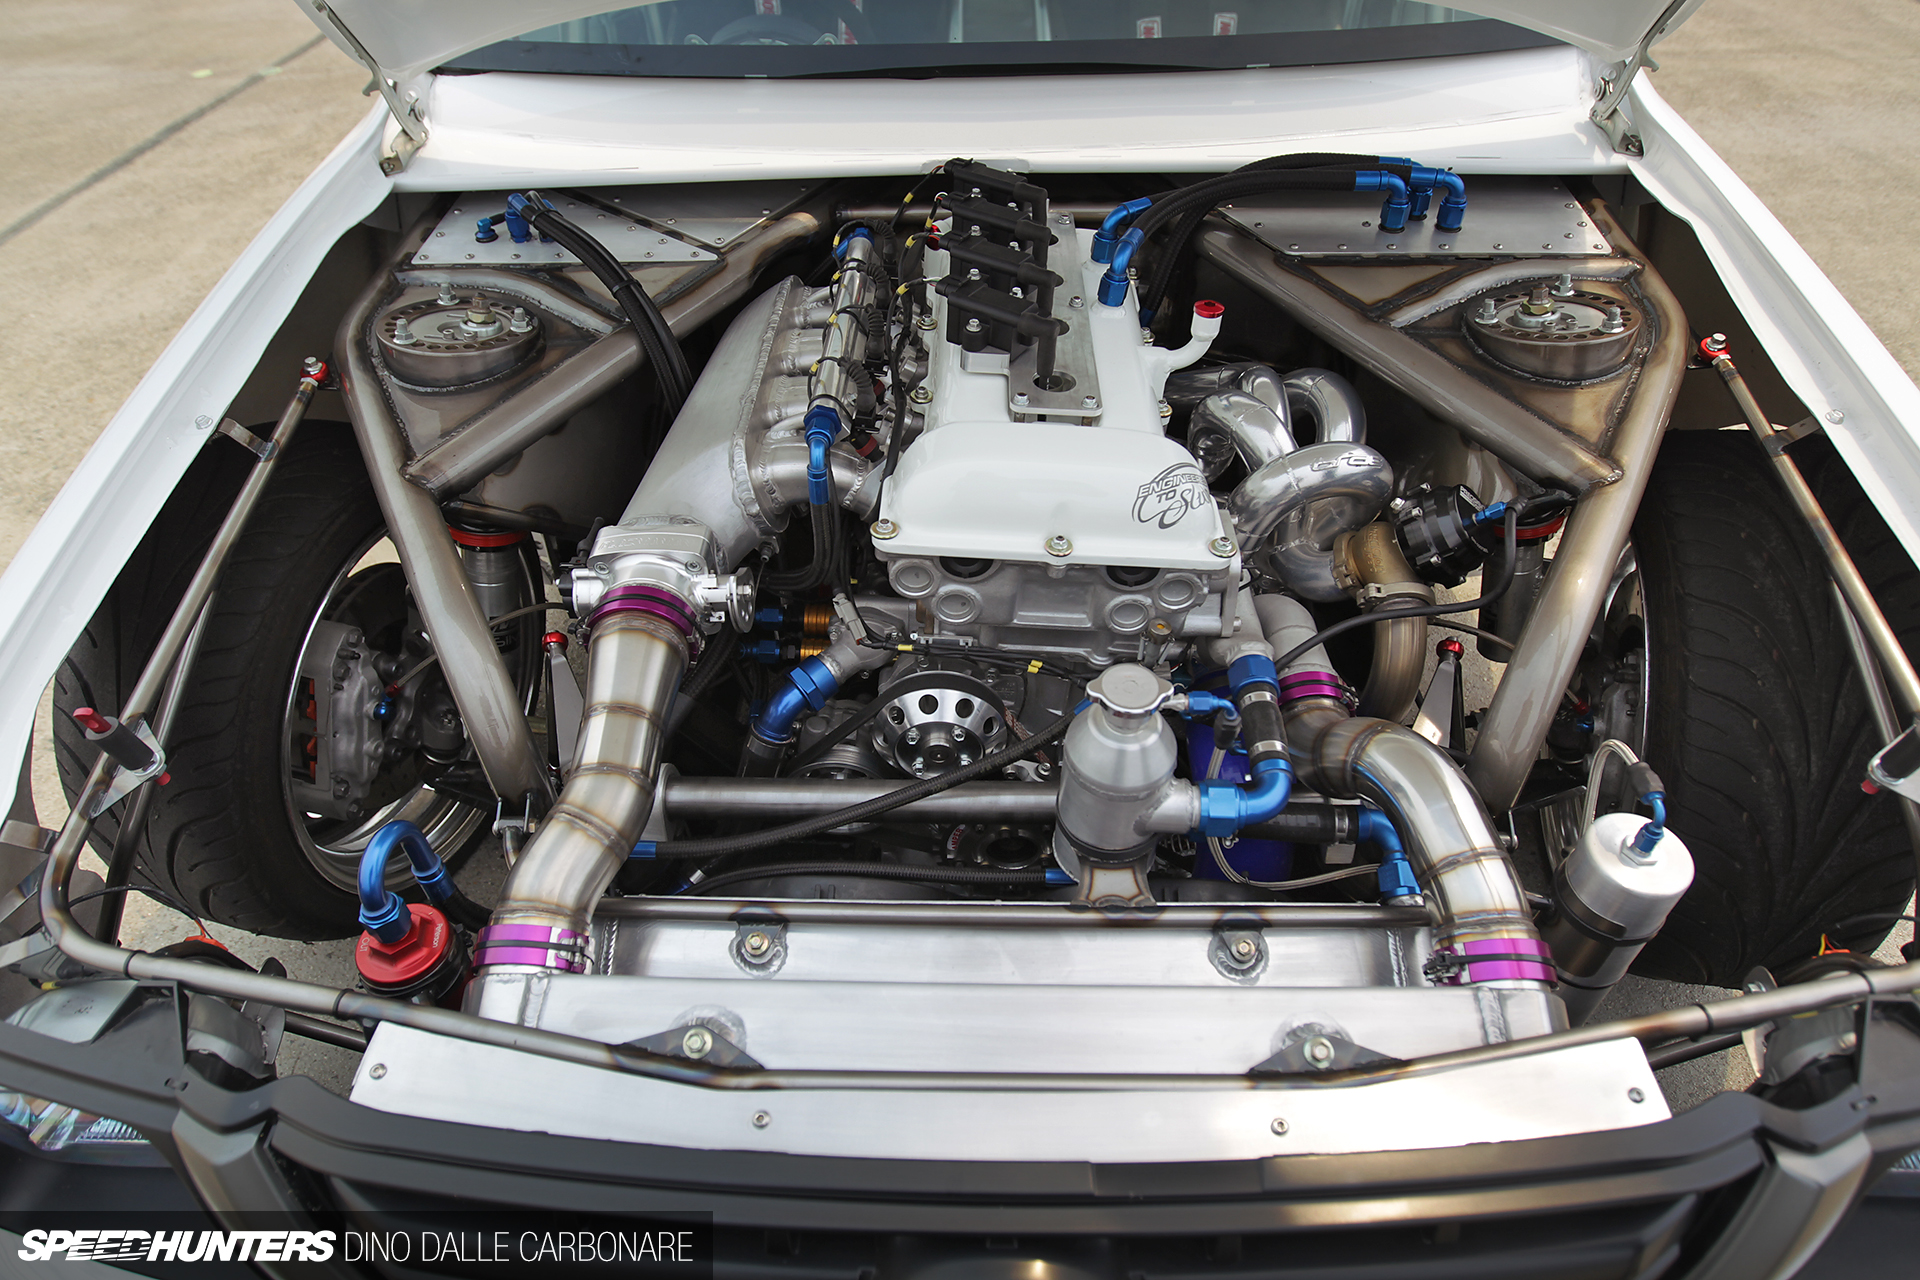
SR20 Power
The engine is the SR20DET out of my PS13. It has a built bottom end with some upgraded cams and valve springs.
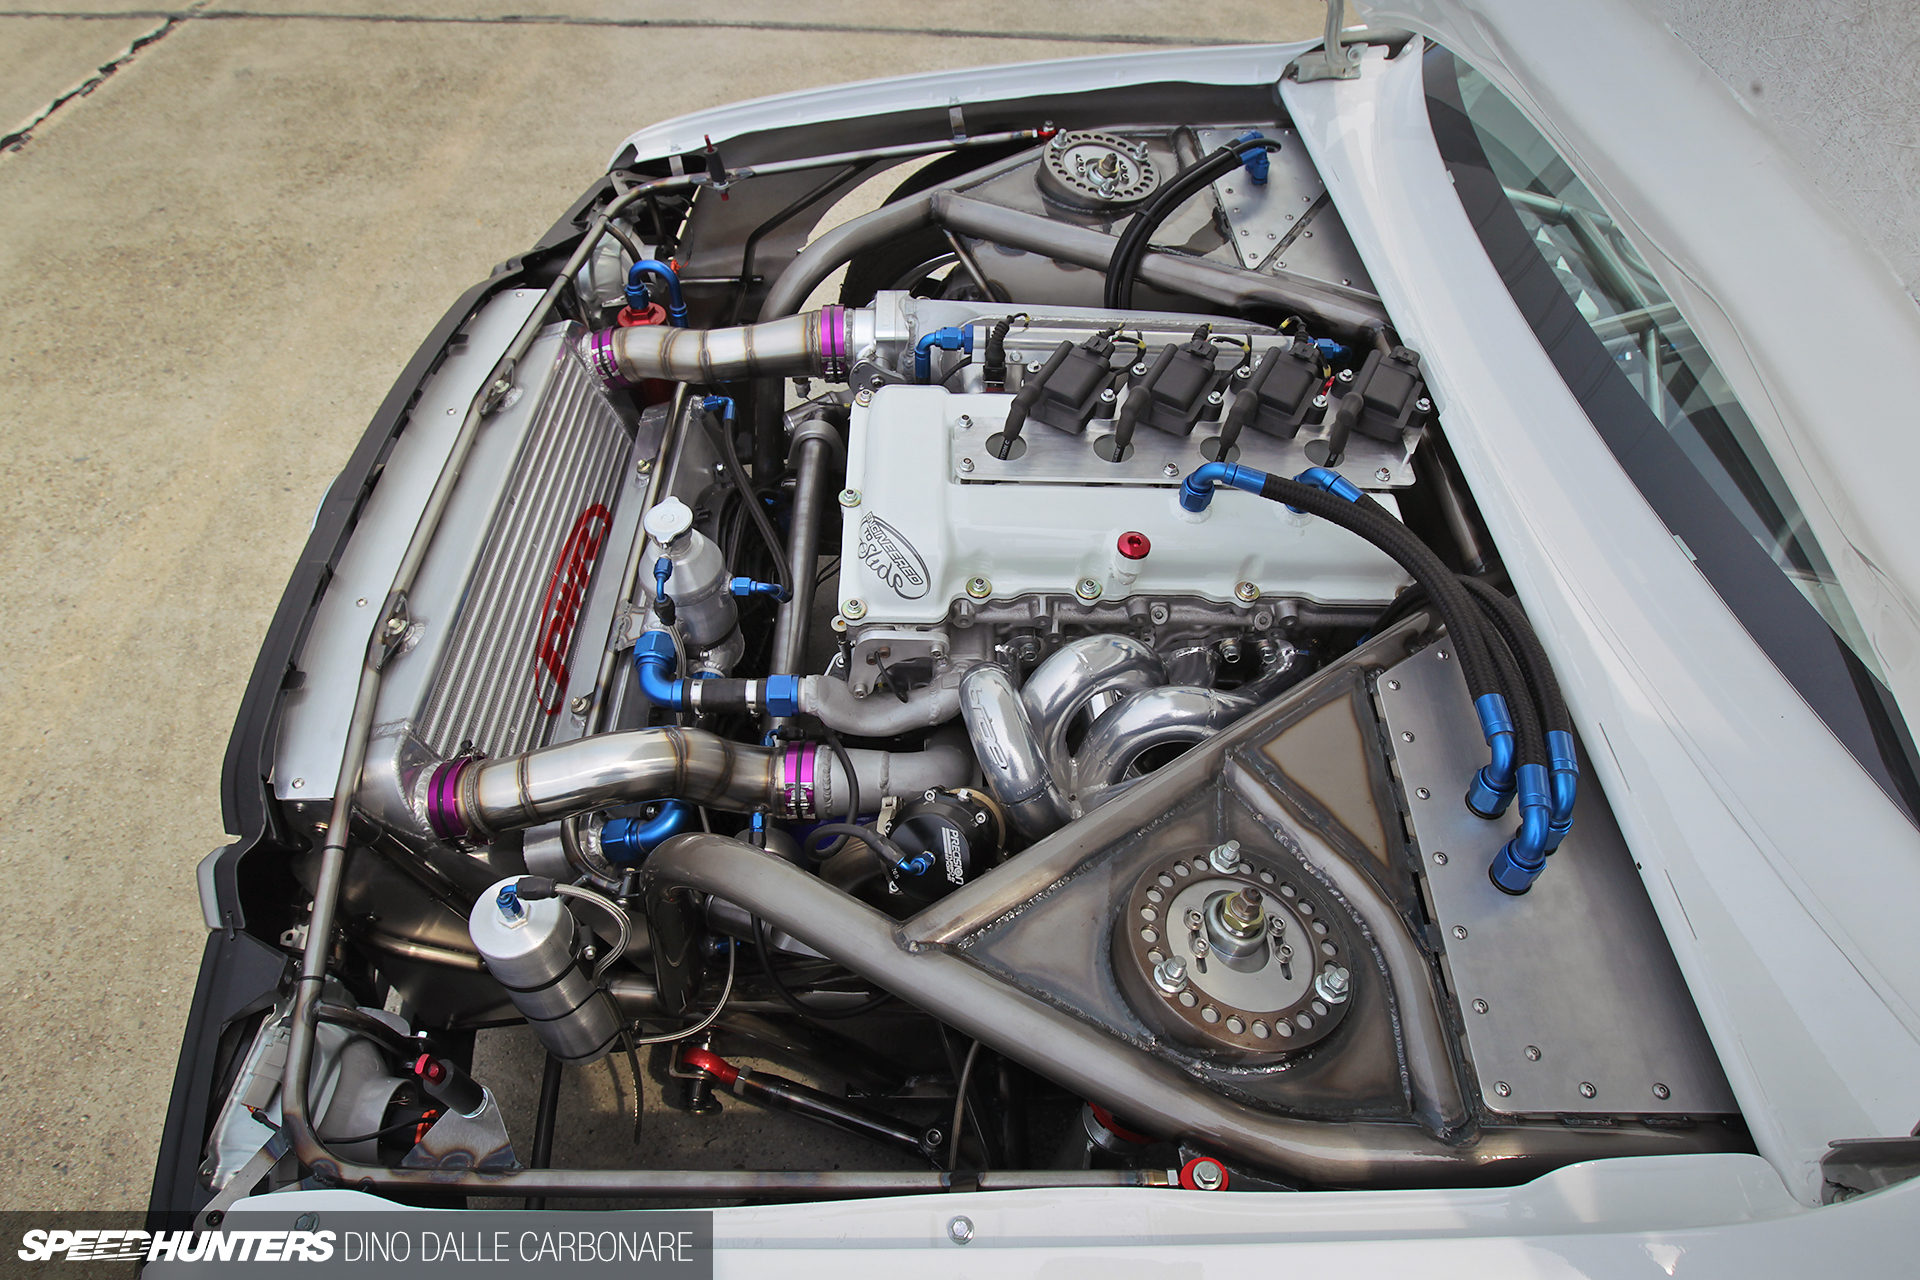
It wasn’t what was inside the engine that I spent most of my time on, it was what was hanging off it.
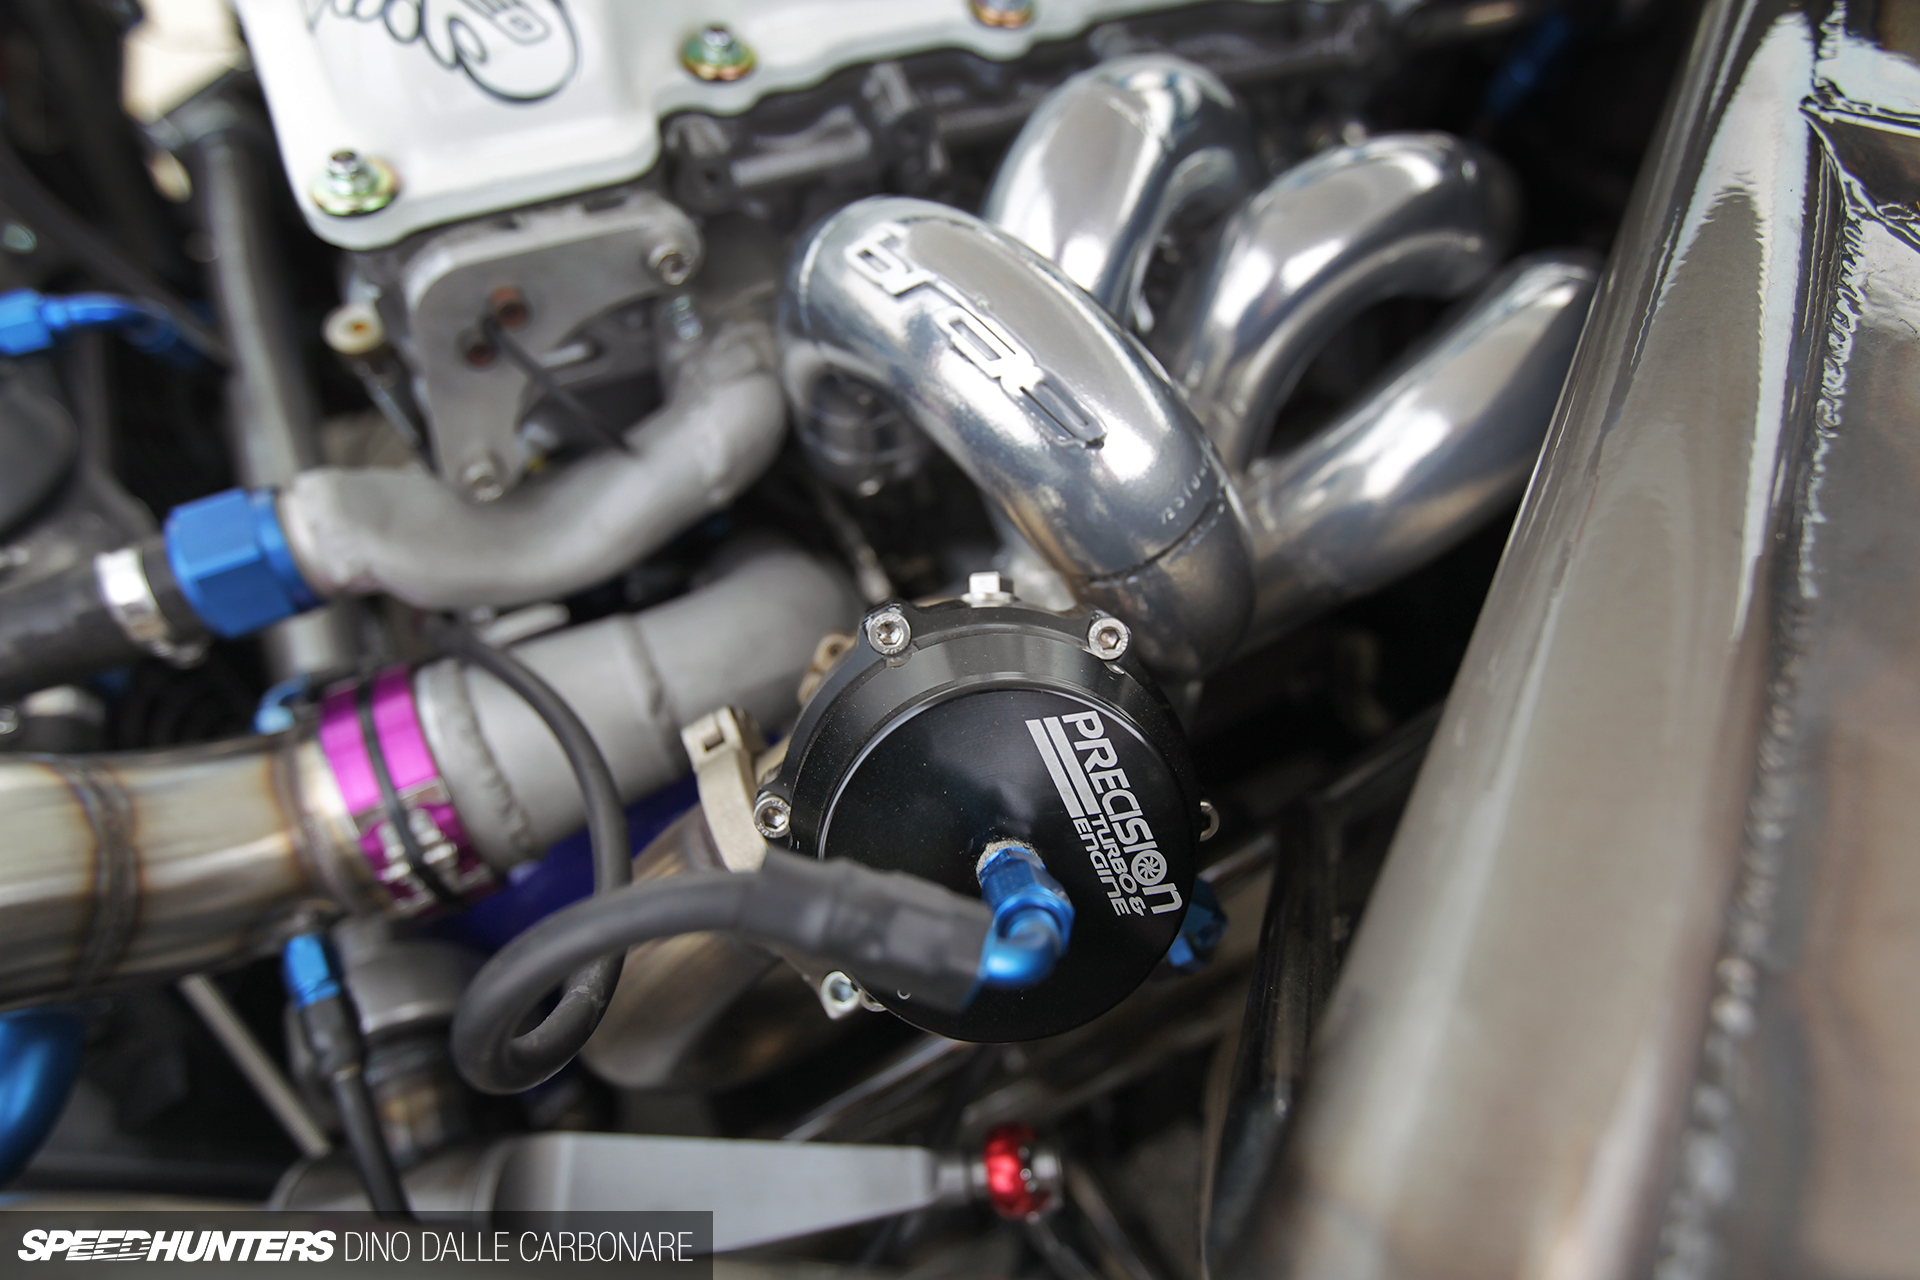
The hot side is an intricate mix of parts to fit the chassis both physically and aesthetically. My goal with all the components was for them to look good, work good and be easy to service.
The only thing that wasn’t majorly modified was the long motor itself. I reworked the rocker cover to feed the integrated oil catch tank…
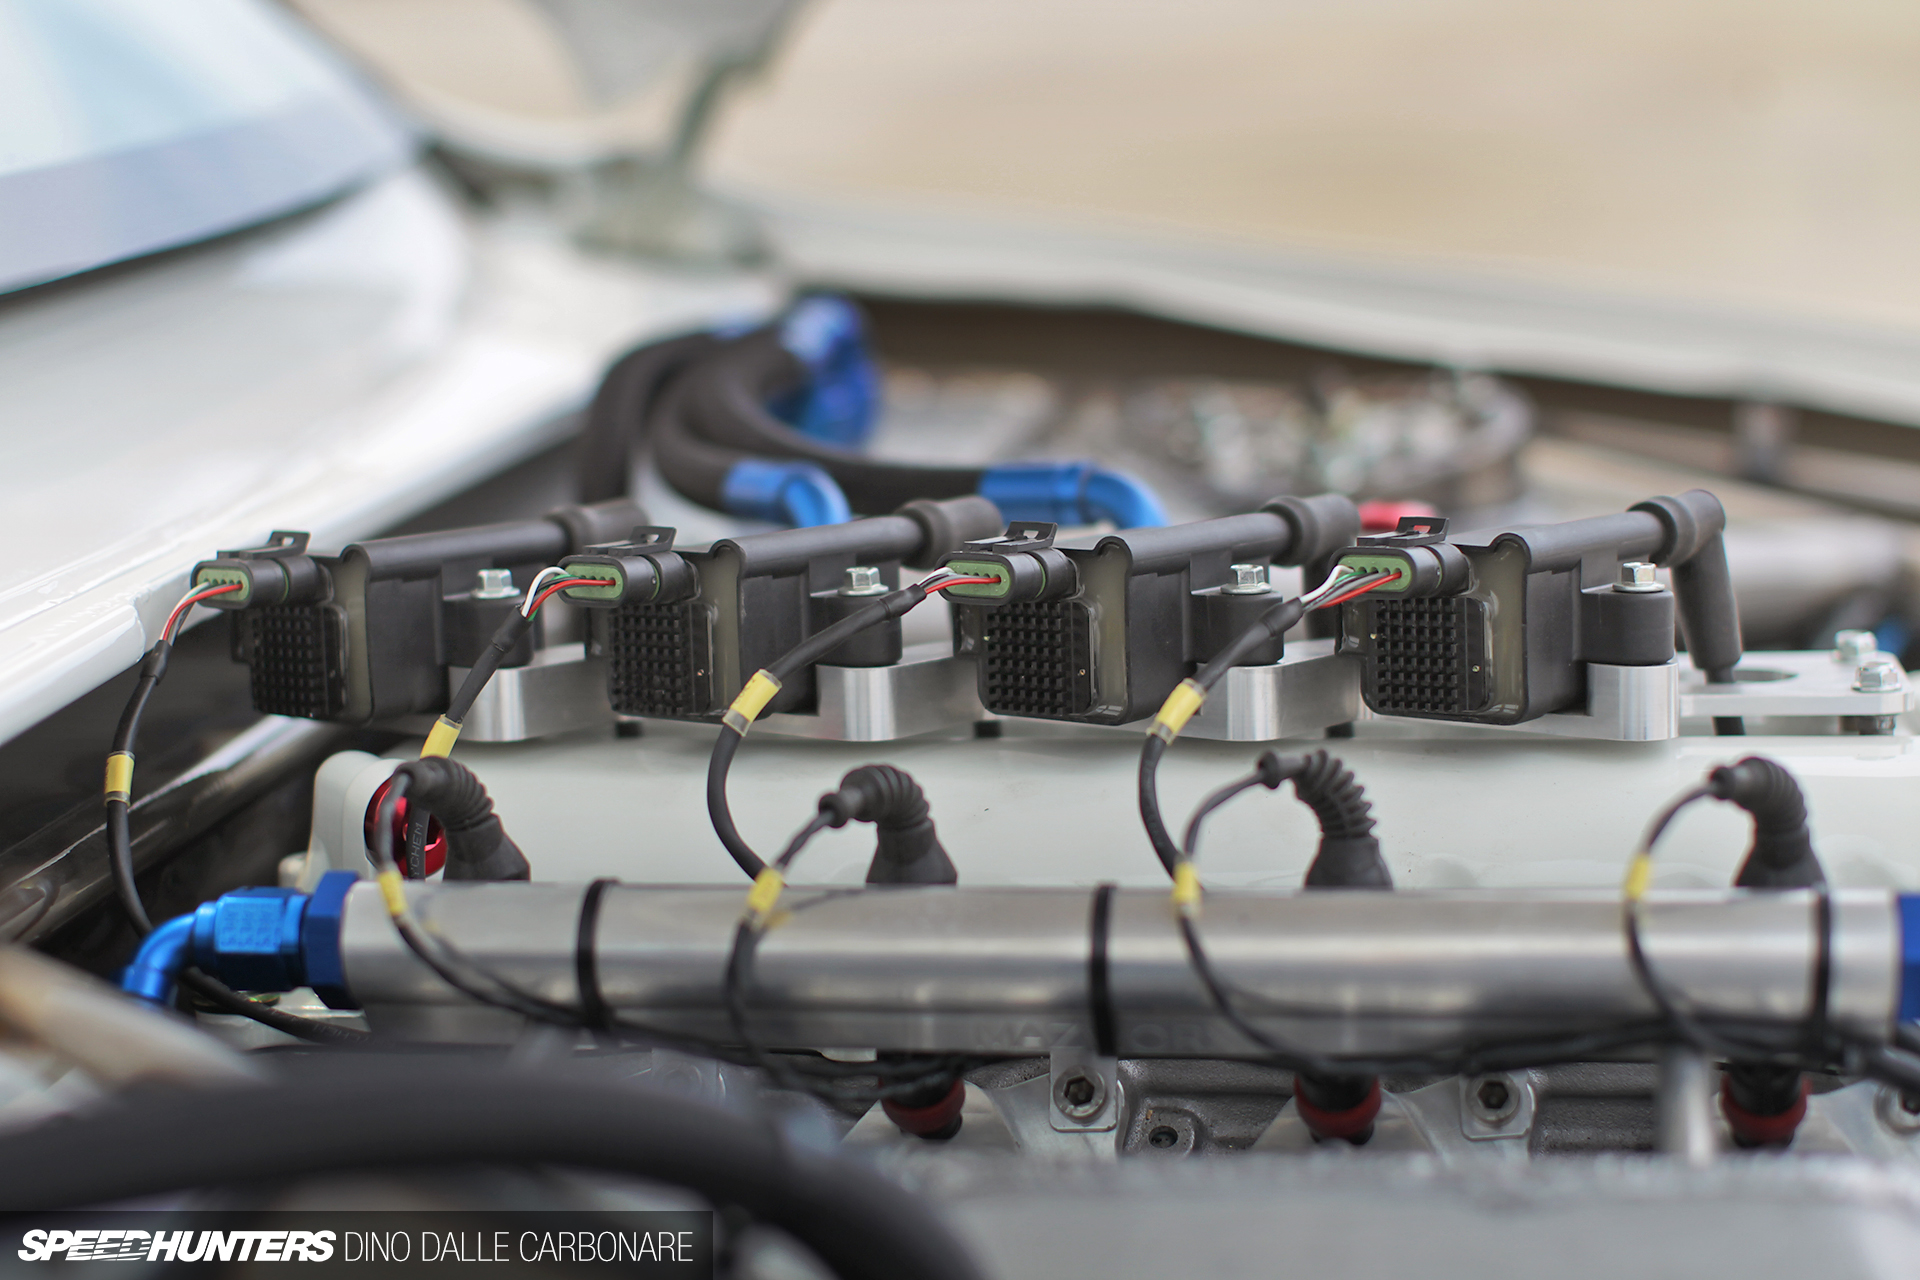
… house the new coil mount and allow me to fill it with oil from a different position. The timing side of things was also upgraded, with a custom trigger wheel on the ATI balancer and a GT101 telling the Link ECU the engine speed. The ECU is also told about cam reference with a custom inbuilt GT101 reading off the exhaust cam.
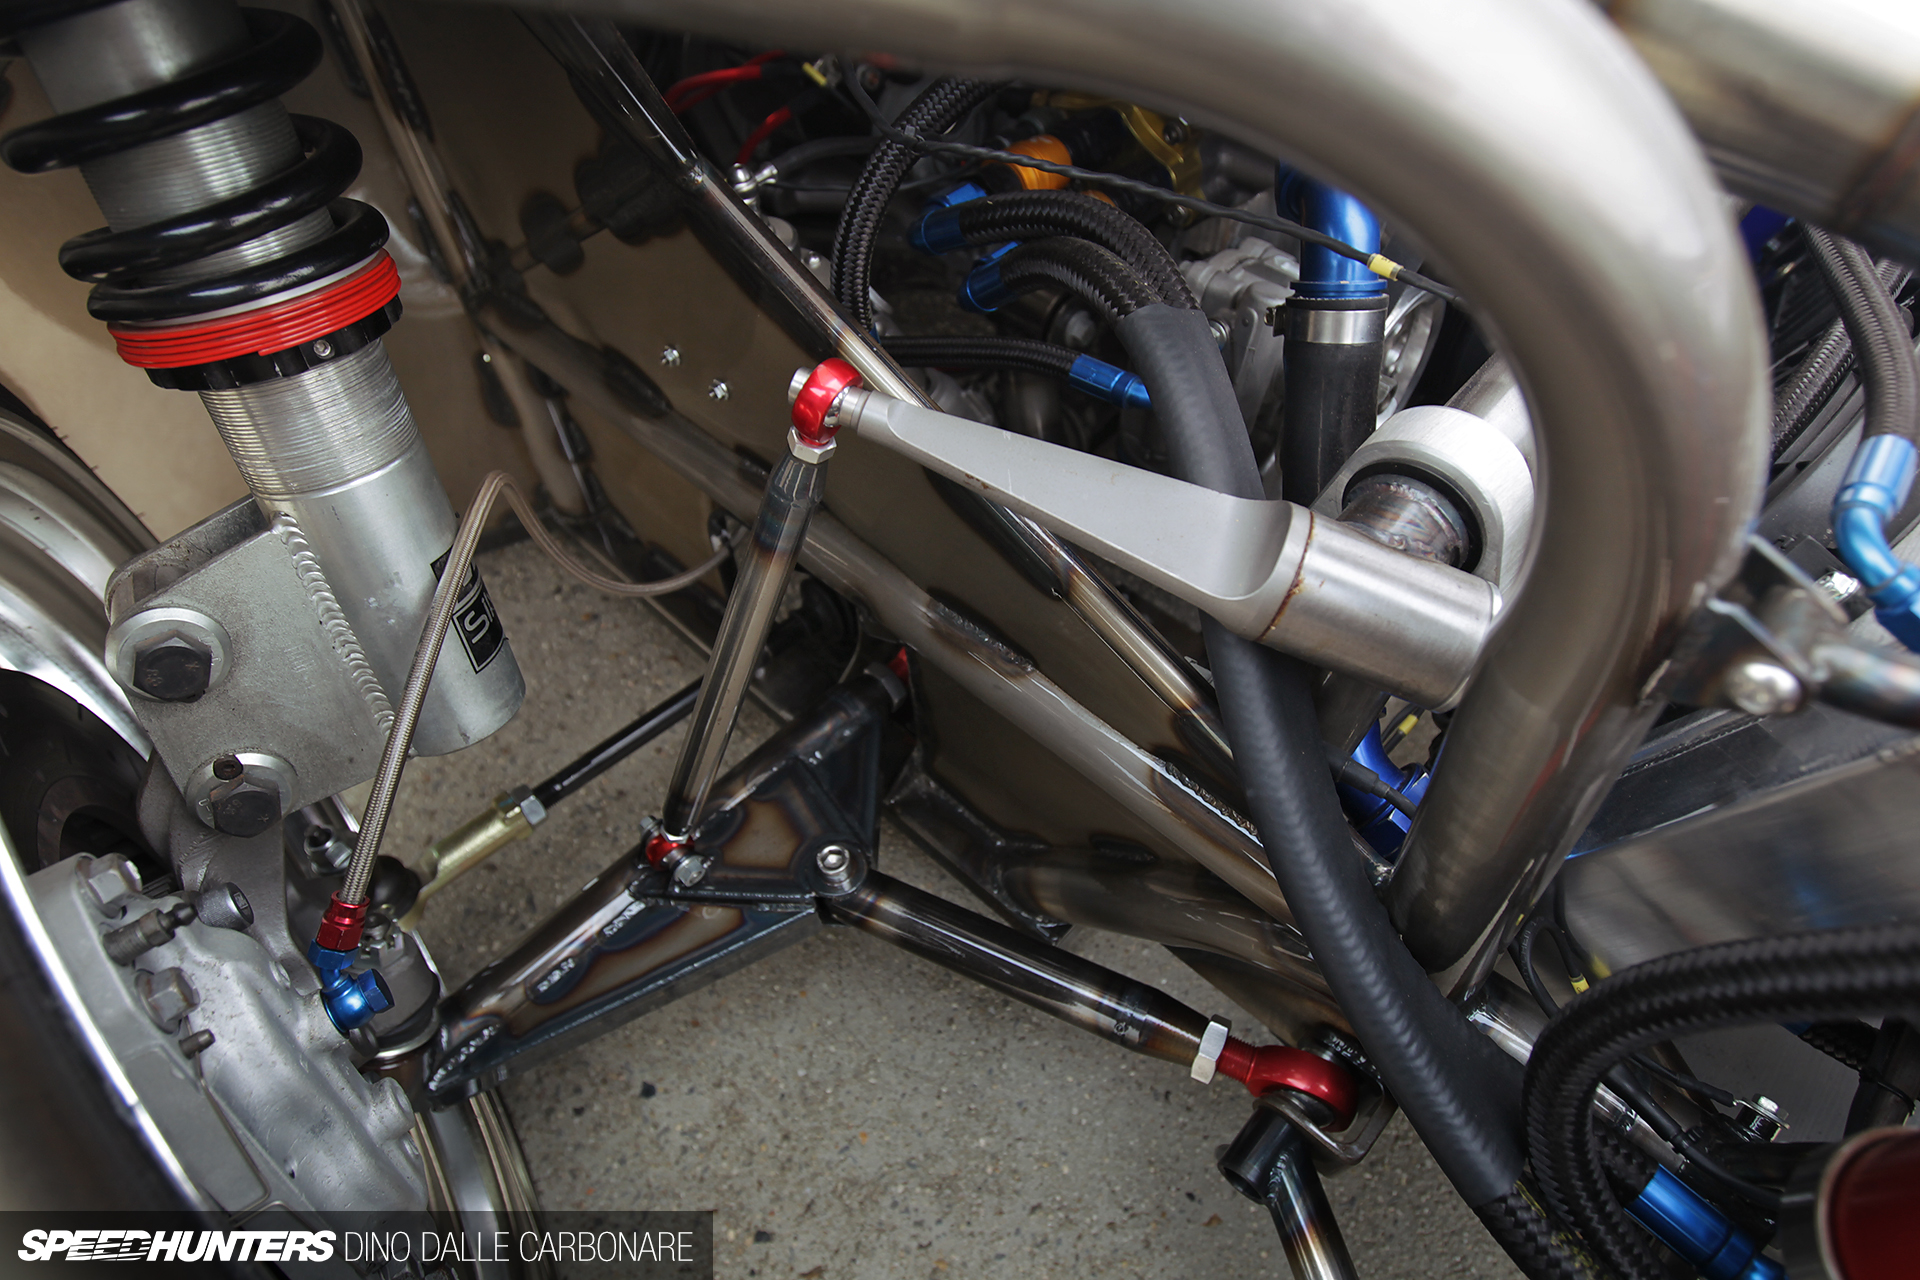
As you look through the engine bay and into the front suspension, you will notice custom chromoly lower control arms, caster arms and MCA uprights; it’s all bolted to the chassis via QA1 rose joints. The knuckles are S15 items I modified to optimise the steering lock within the chassis. The front sway bar uses V8 Supercar blade adjustable ends and connects to the chassis via 1.5-inch chromoly tube and bronze bushings.

A little detail of the front strut towers.
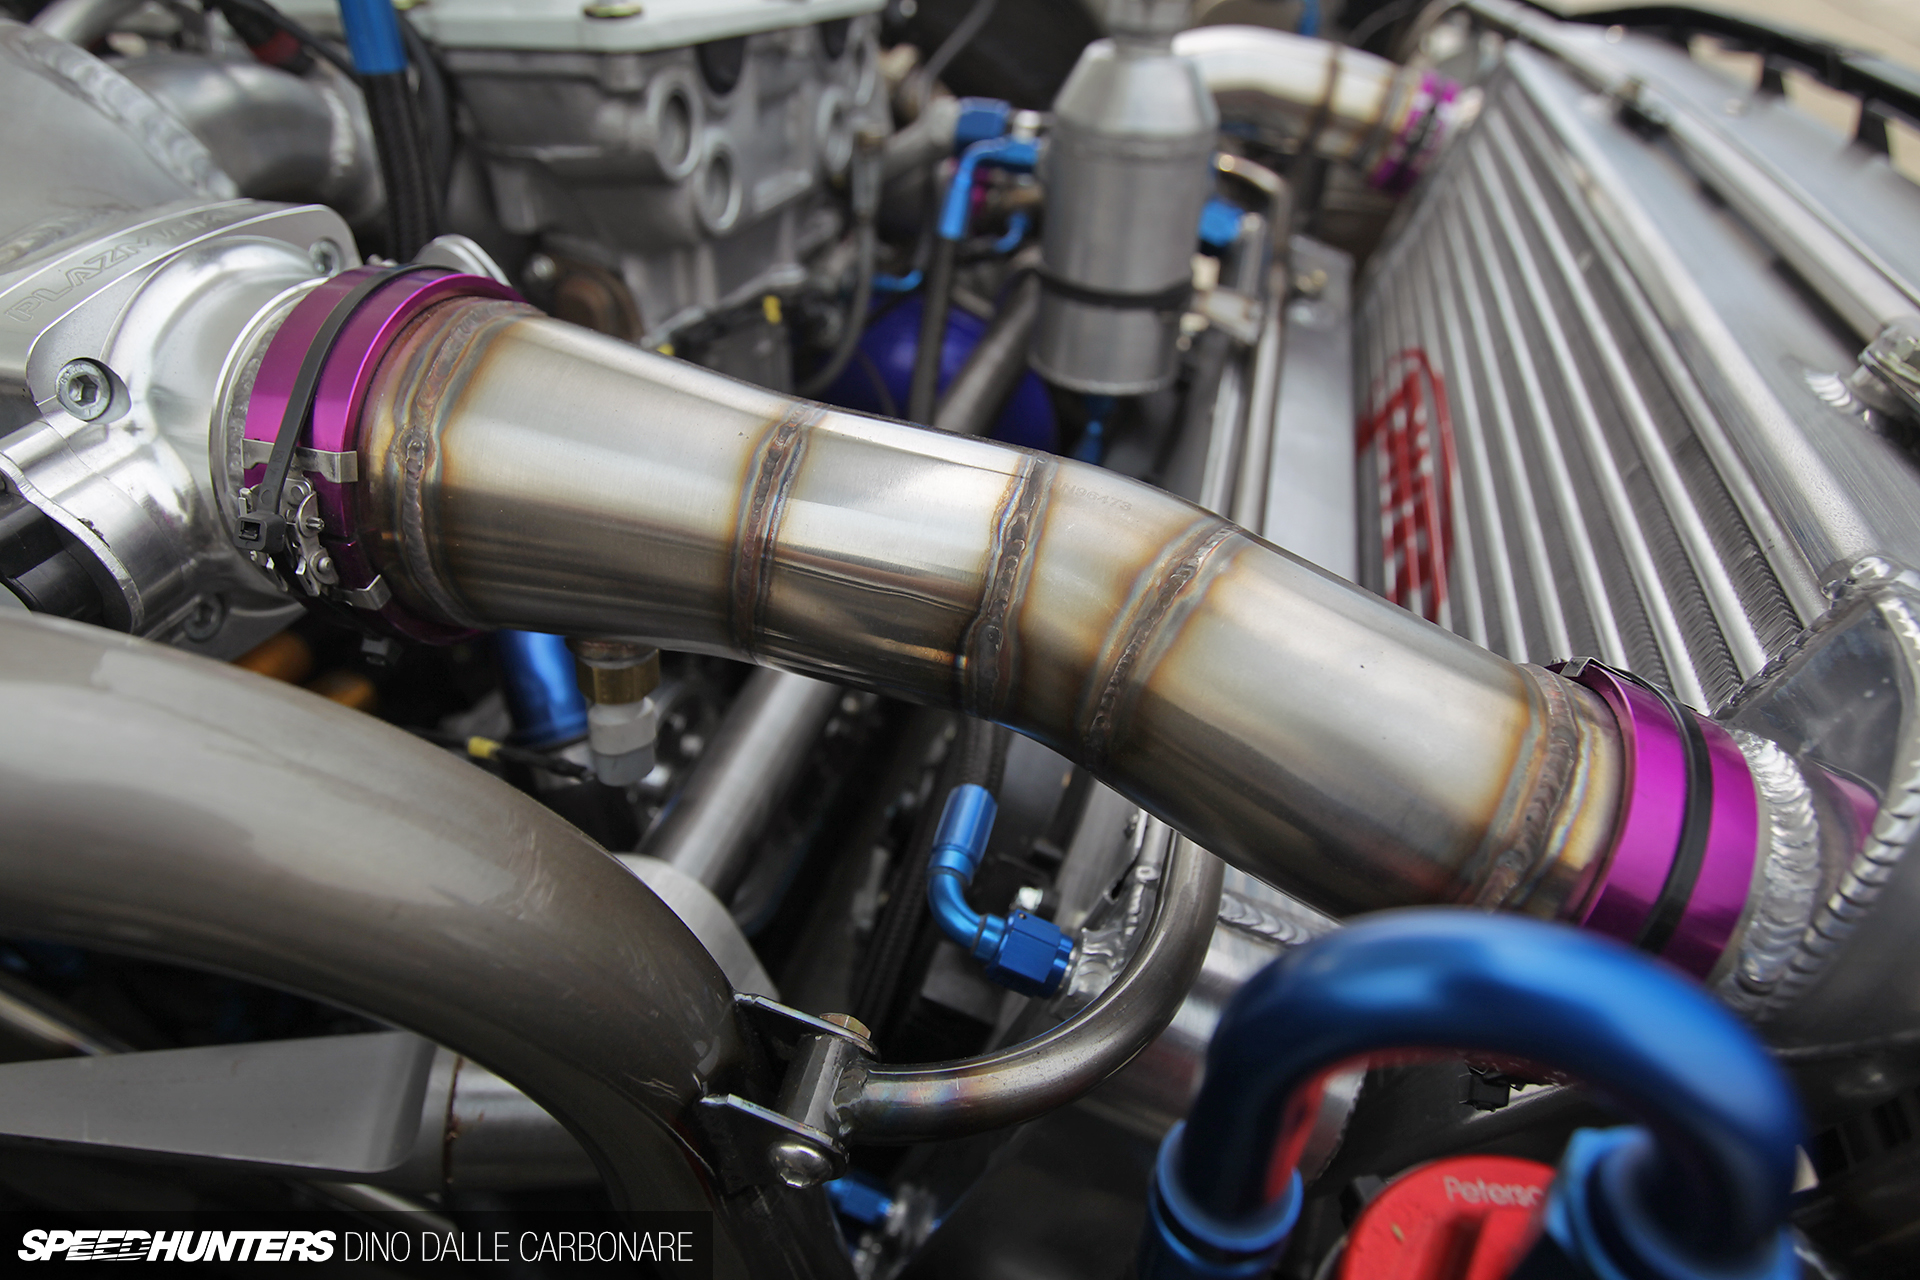
The cooling was left up to PWR: the Queensland factory took all my drawings and made me a custom solution for air and water temperature control, all plumbed together with custom stainless steel piping.
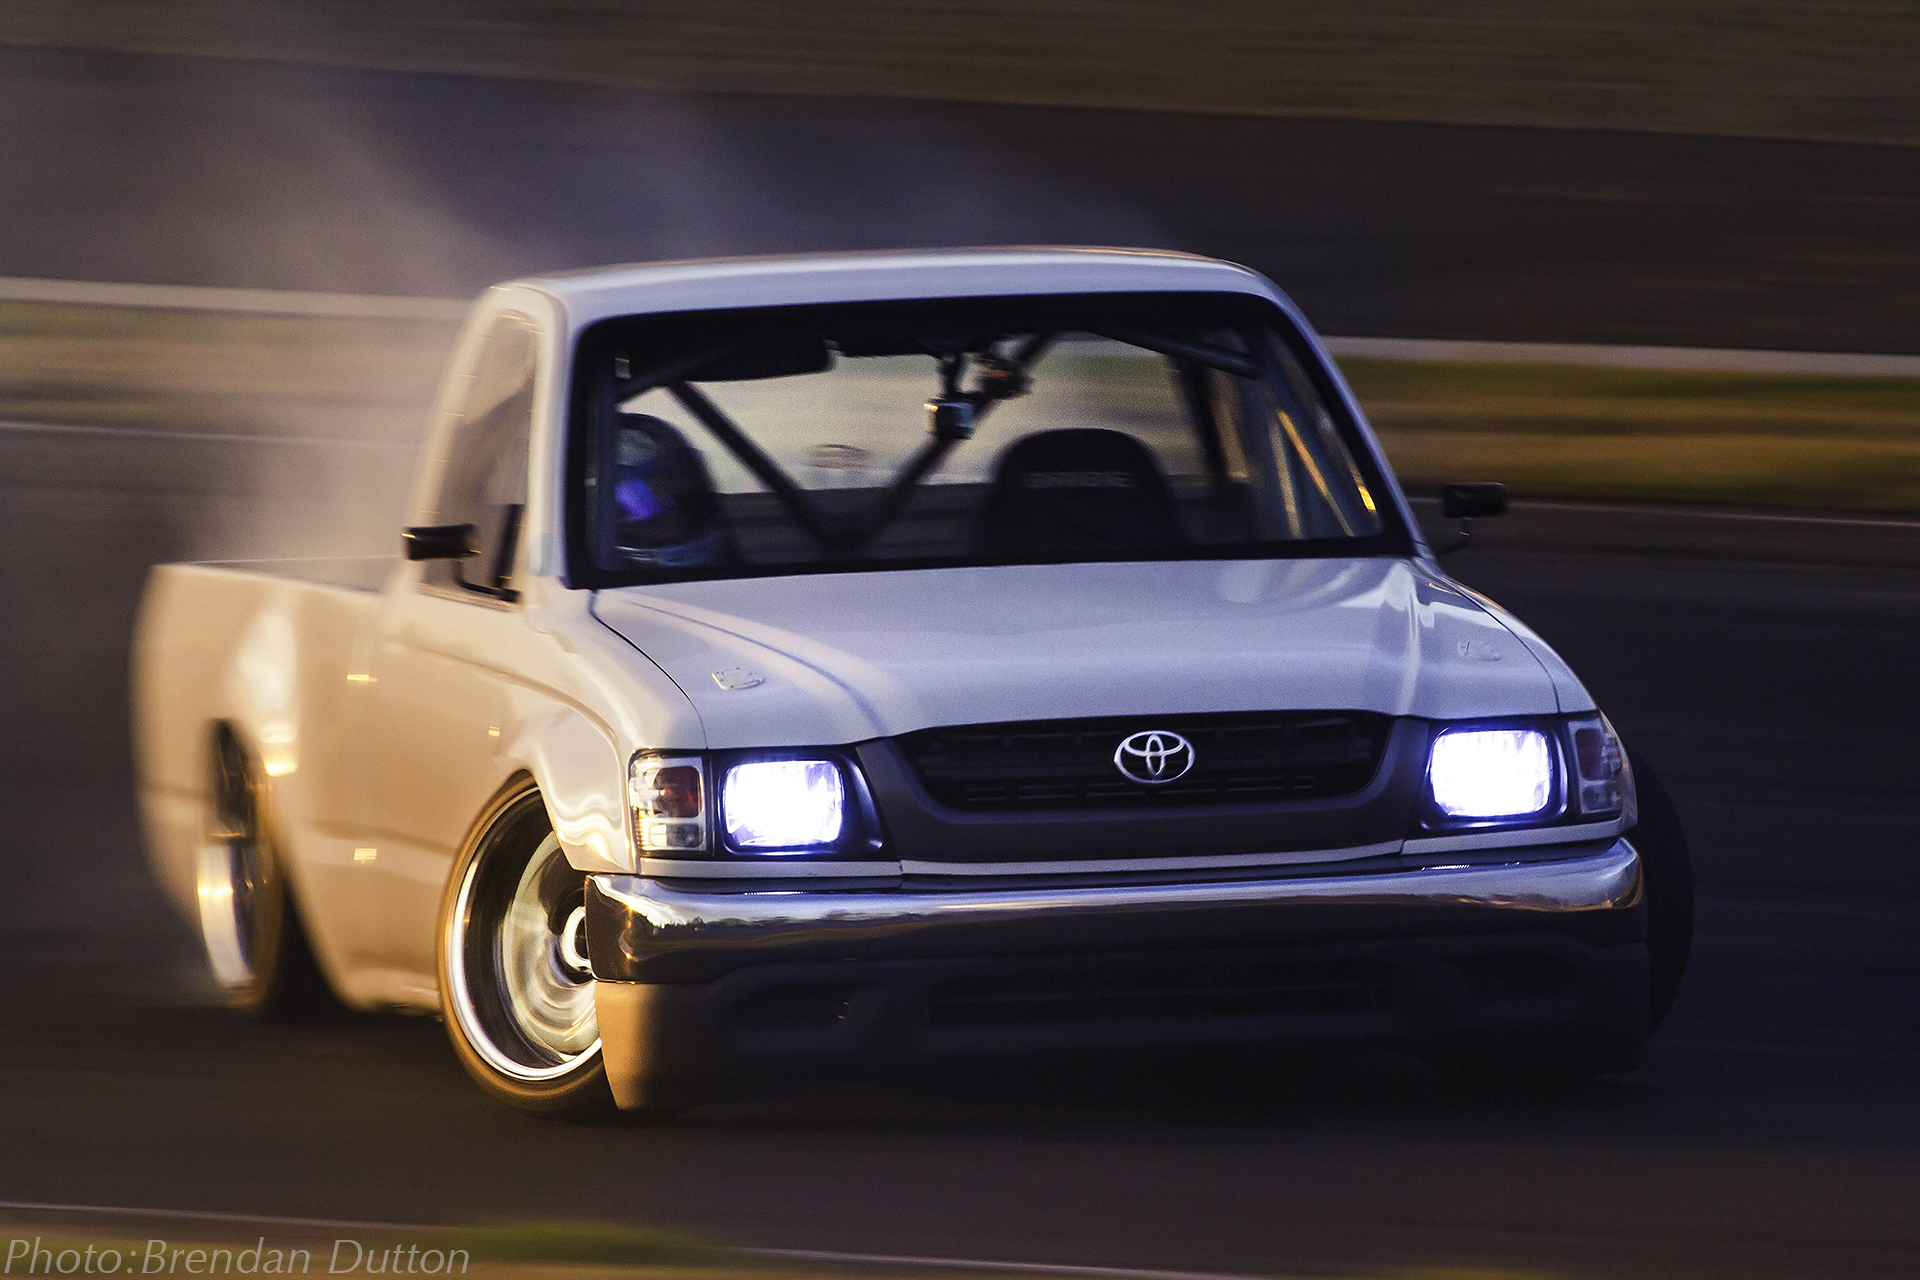
I’d be lying if I said I wasn’t the least bit apprehensive about taking the Hilux out on track with 30 of the world’s best drifters at the Tectaloy event during the World Time Attack Challenge the other week. Lining up on the start line and staring down the straightaway, I tightened my belts and took a deep breath inside my helmet. A ridiculous amount of hours over the past 2.5 years had come down to this. I strung together about eight laps before coming in to swap to my RPS13. In those eight laps I started to get a real feeling for the way the Hilux behaves. It’s unlike anything I have ever driven, and the amount of mechanical feel I received through the steering wheel was insane. You hear people talk about a stiff chassis but you never fully understand the impact until you drive something like this. It was far too short-lived though and a couple of laps later, I sheared third gear in the RB25 gearbox with a very harsh unloaded over-rev that broke two rockers in the head. As I write this, I’m planning on upgrading to a sequential dog engagement gearbox and getting back out on track ASAP. This car was not built to compete or comply with anything; it’s simply a vision that I wanted to turn into a reality. In the two and a half years from conception to completion, I’ve learnt an amazing amount. I wouldn’t change a single thing, but I would do things a lot differently if I had a chance.
I want to thank everyone for their support and I hope that one day they can see this in the flesh to get a real feel for the amount of heart and effort I poured into this build. I can’t wait to cover everything in molten rubber!
Nigel Petrie
Instagram: engineeredtoslide
Engineered to Slide
Photos by Dino Dalle Carbonare
Instagram: dino_dalle_carbonare
dino@speedhunters.com
Engineered To Slide Toyota Hilux
Numbers: 900kg, 287rwkw (385whp), 22psi of boost
Engine: Nissan S13 SR20DET, ARP head stud kit, CP 86. mm forged pistons, 9.0:1 compression ratio, Eagle connecting rods, Tomei Powered rocker arm stoppers, Trust 264-deg/11.5mm intake cam, Trust 272-deg/11.5mm exhaust cam, GReddy valve springs, HKS 1.2mm head gasket, Mazworx lower CNC intake runners with cast plenum welded on, 75mm Plazmaman throttle body, GReddy TD06L2-20G turbo with custom elbow on the compressor cover, custom-built BRAE steam pipe manifold, Precision Turbo 46mm external wastegate, custom 3-inch 304 stainless straight-through exhaust with twin 80mm alloy tips, 35L spun alloy fuel tank, Peterson fuel filter, Bosch 044 fuel pump, Aeroflow Regulator, Ansu 1000 cc/min injectors, -8 Earl’s Prolite hose and Earl’s Autofit crimp hose ends, high energy coils, custom 8mm spark plug leads, PWR custom-made radiator AN20 bottom and AN16 top hoses, twin 10-inch thermo, fans custom alloy header/swirl pot, custom alloy overflow tank., Link ECU G4 Storm, Autosport firewall mill-spec connector, custom mill-spec labelled and concentrically twisted loom, MAC boost solenoid, custom shaved rocker cover with twin AN10 breathers, custom 3L catch can with external drain & filter, Denso mini alternator with custom pulley, ATI balancer, custom GT101 hall sensor reading a 24-tooth crank trigger wheel, custom GT101 hall sensor reading the exhaust cam for reference, custom alloy pulleys, custom sensor plates, custom engine mounts using rubber bushes, integrated power steering reservoir into the chassis, stock S13 power steering pump mounted upside down on a billet mount
Driveline: Nissan RB25 5-speed gearbox, Z32 bell housing with custom adapter, custom shifter, Exedy Compe-D twin-plate clutch, ATS carbon 2-way R200 diff with 4.1:1 gears, custom one-piece propellor shaft, S13 half shafts rebuilt
Suspension/Brakes: MCA S13 front uprights, custom MCA rear shocks, ex-FPR Racing V8 Supercar blade adjustable sway bar ends with custom chromoly bars, custom suspension arms built from chromoly and QA1 aluminium rose joints, cut and shut S15 knuckles to suit the power & length of the Hilux, Nissan Z32 callipers, DBA rotors, DBA pads, custom hydraulic inline handbrake, Earl’s AN3 brake fittings and lines
Wheels/Tyres: B.I.M Driftmasters 17×8.5-inch ET0 (front), 18×9.5-inch ET0 (rear), Federal 595 RS-R 215/40R17 (front), 225/40R18 (rear)
Exterior: Custom-moulded rear FRP quarter panels, custom FRP tailgate, factory doors, 3mm polycarbonate windows, factory steel cabin, stock glass windscreen, custom moulded front FRP fenders, FRP hood, stock front bumper, stock grille, Raybrig LED headlights, stock 2002 Toyota Superwhite paint
Chassis/Interior: Mild steel TIG-welded hand-constructed full space frame, Bride Vios 3 FRP seats, Nardi Classic 330mm suede steering wheel, Racepak IQ3 dash, Racepak Smartwire with switch-panel
OFFICIAL SPEEDHUNTERS SUPPLIERS


Nigel ist a truely unique person. I've been following his adventures since around 2009/2010.
I started producing pixelcarart around that time and was on the lookout for inspiration. Thats when his blog, among others, caught my eye. He and some others had a huge influx on the transfer of my interests from beeing passive to beeing actively modifying cars and bikes and fabricating my own stuff. Not on his level or scale but still.
While not everything he does, as of right now, fits my taste i still appreciate his craftmanship and ideas.
I can't thank him enough and he is a greatly appreciated story among car and bike enthusiasts i meet.
[^S]rep
First off, this "truck" is one of my favorite features on SH ever. The big question is, where is it now? After seeing this truck a decade ago I set out to do a similar thing with my D21 Nissan Hardbody. It started as a stock truck and is now a chromoly tube chassis with R32 rear/S14 front suspension/steering/brakes. Its going to be done this winter with LS power, but I am genuinely curious where the truck that inspir is and if it has evolved over the years.
I used to follow Nigels builds very closely.
Laughed at some of his failures and took inspiration from some of his ideas.
But the minute he started asking for financial hand outs he was dead to me.
This is one of the coolest cars i have ever seen.