
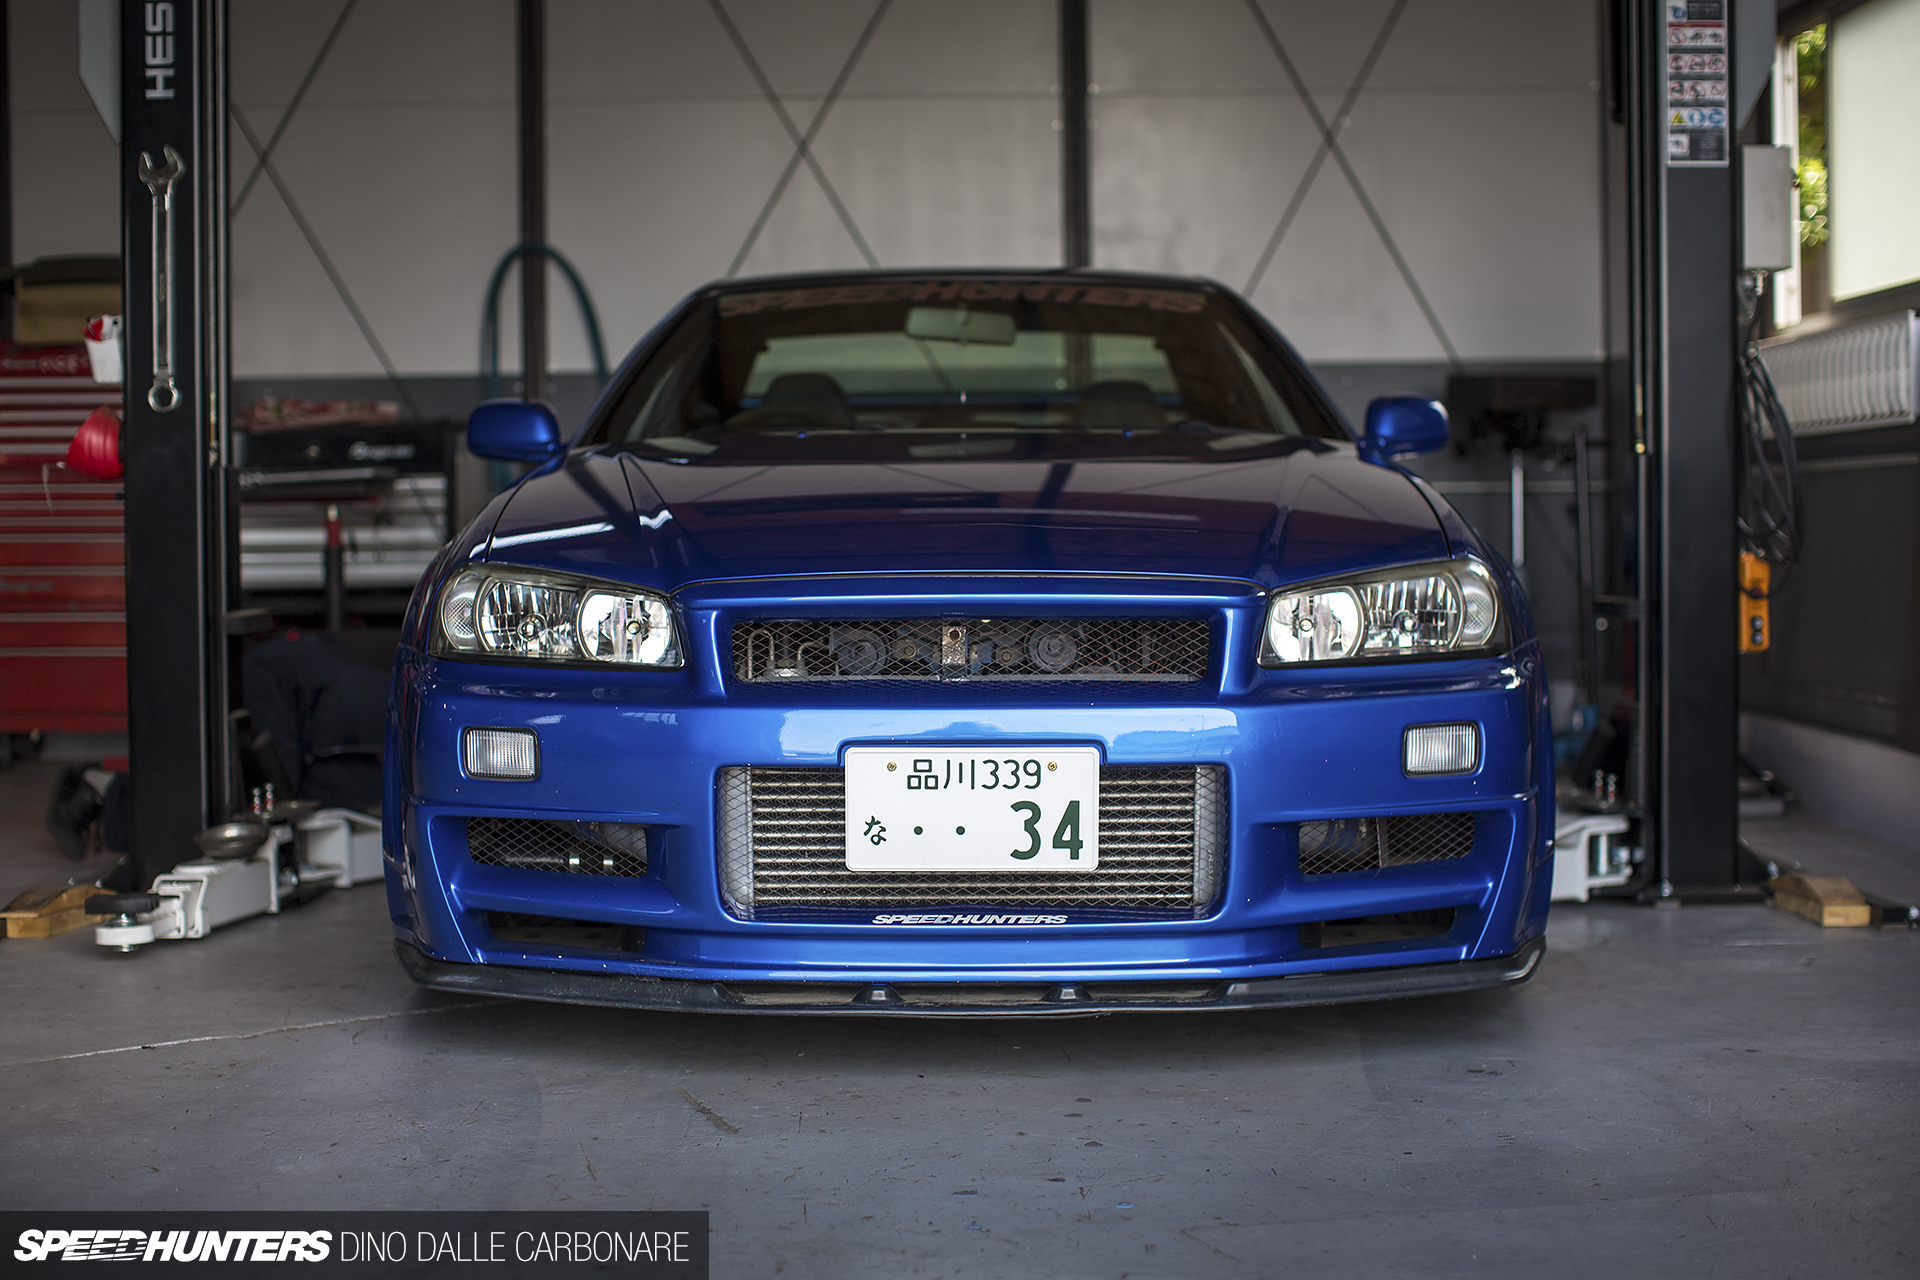
You’ll be glad to hear that despite some delays, Project GT-R has been progressing behind the scenes. It’s been an exercise in patience to get the car to where it is right now, but it’s all beginning to come together.
The next few months should see the Skyline pretty much where I’ve wanted it to be for close to a year. The whole project has been sitting in limbo for so long that I’ve also not bothered to renew the shaken, which means it’s currently not legal to drive on the road. Any time I’ve needed to move the R34 has meant picking up a pair of temporary plates (the famed JDM red slash plates) or borrowing transporters from kind tuners. While the whole engine portion of the project will be addressed in July, this past month has been about one thing, and one thing only – the handling.

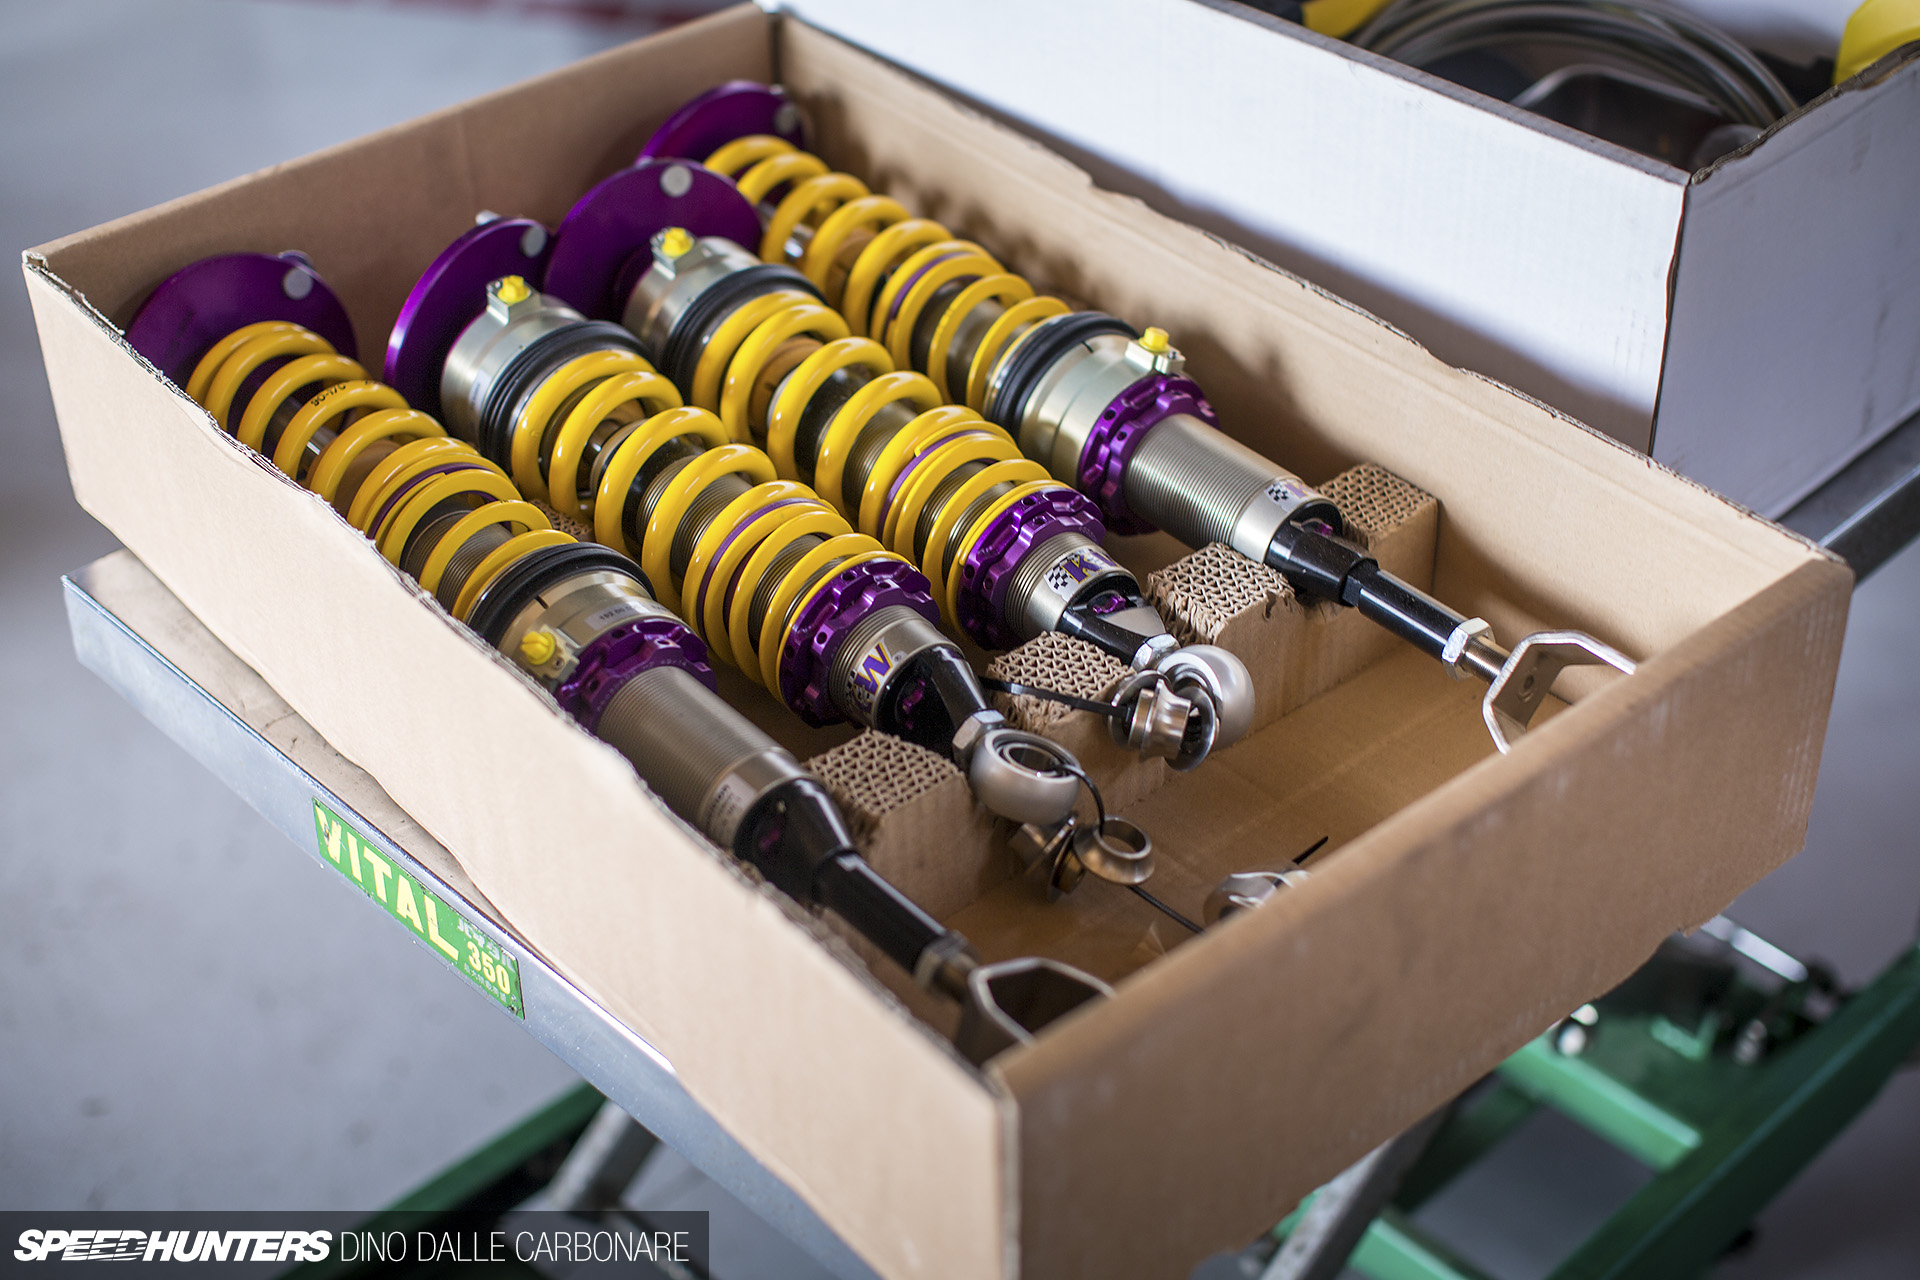
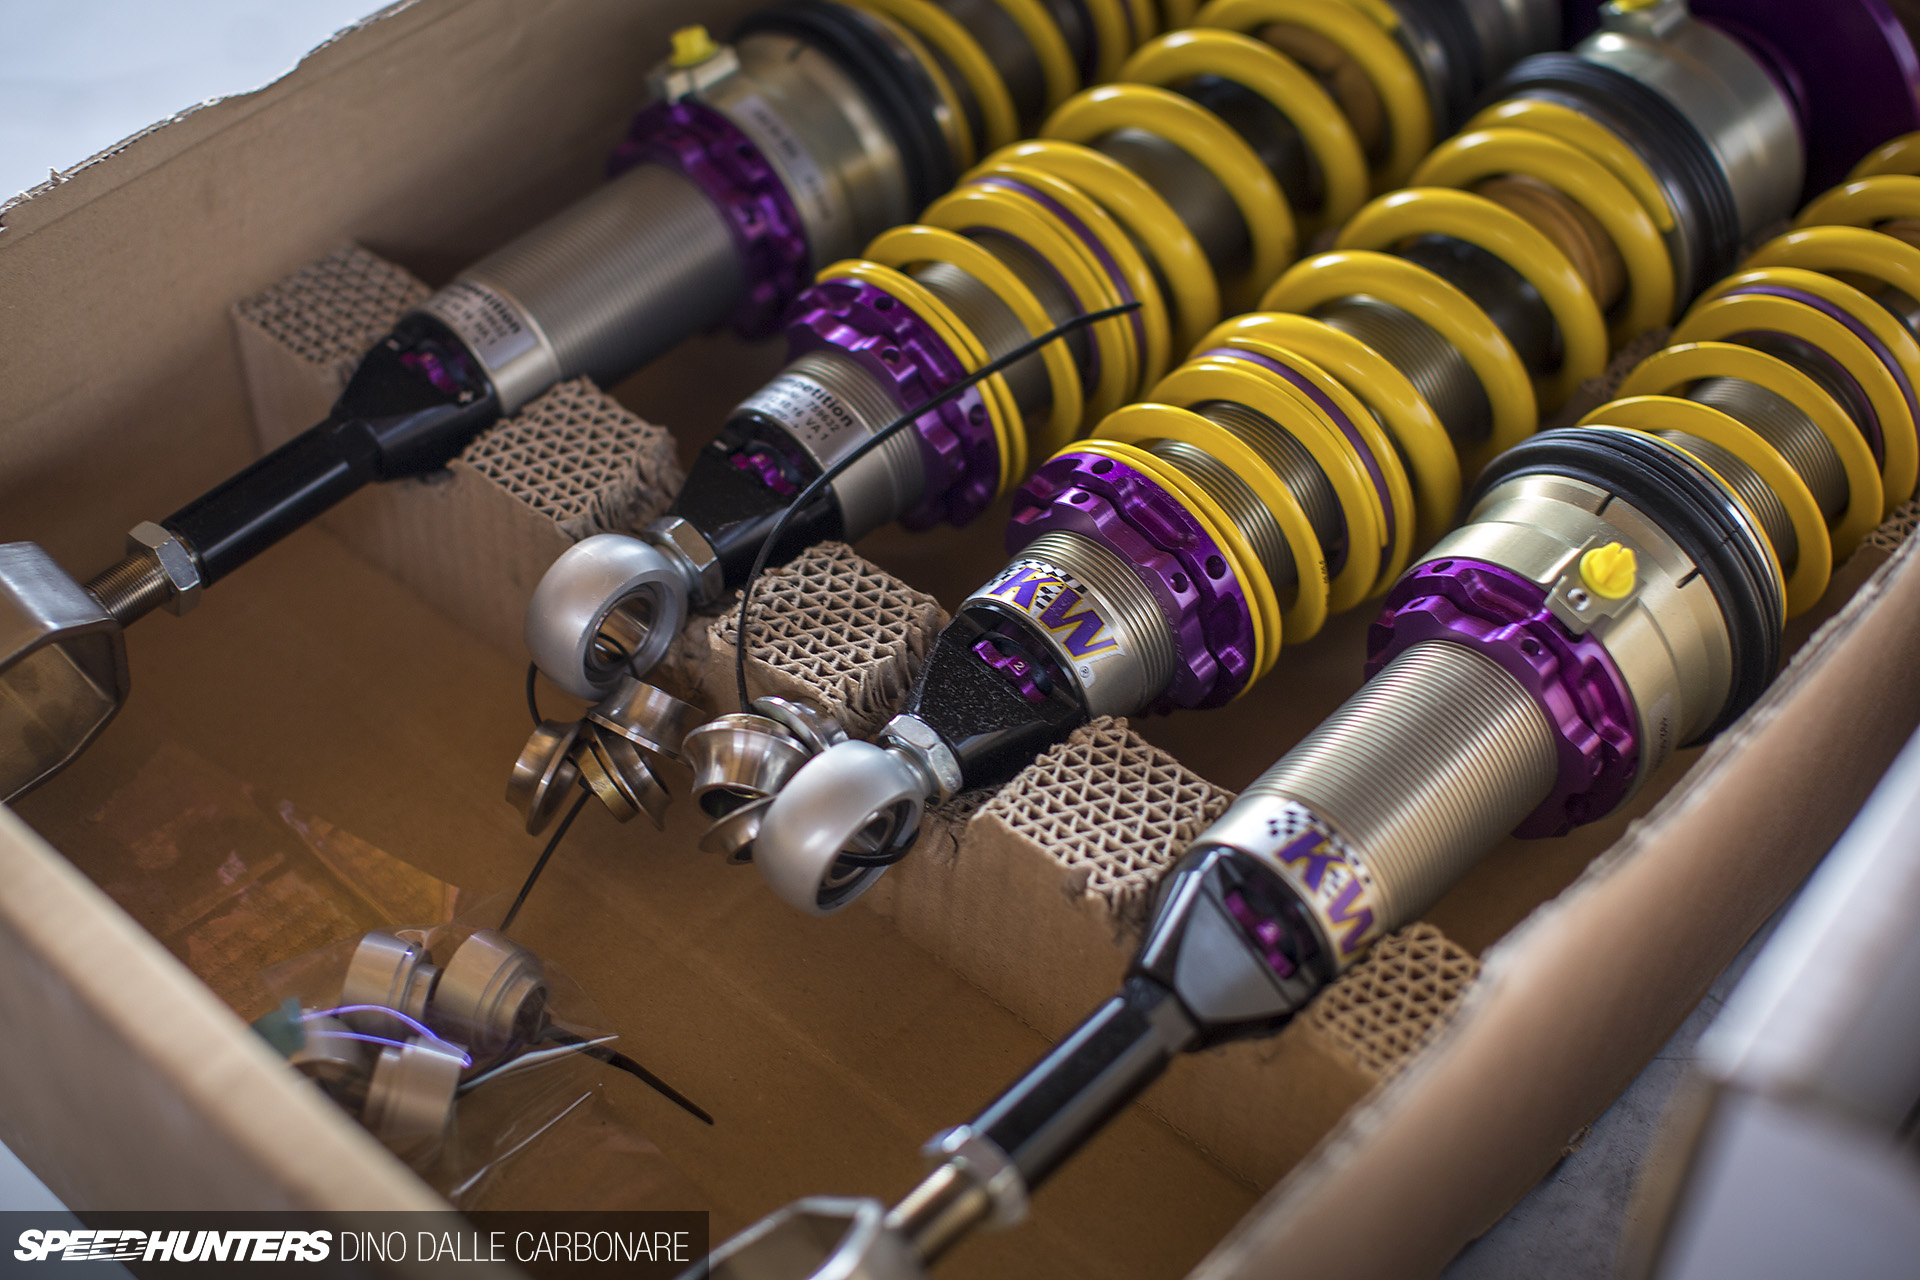
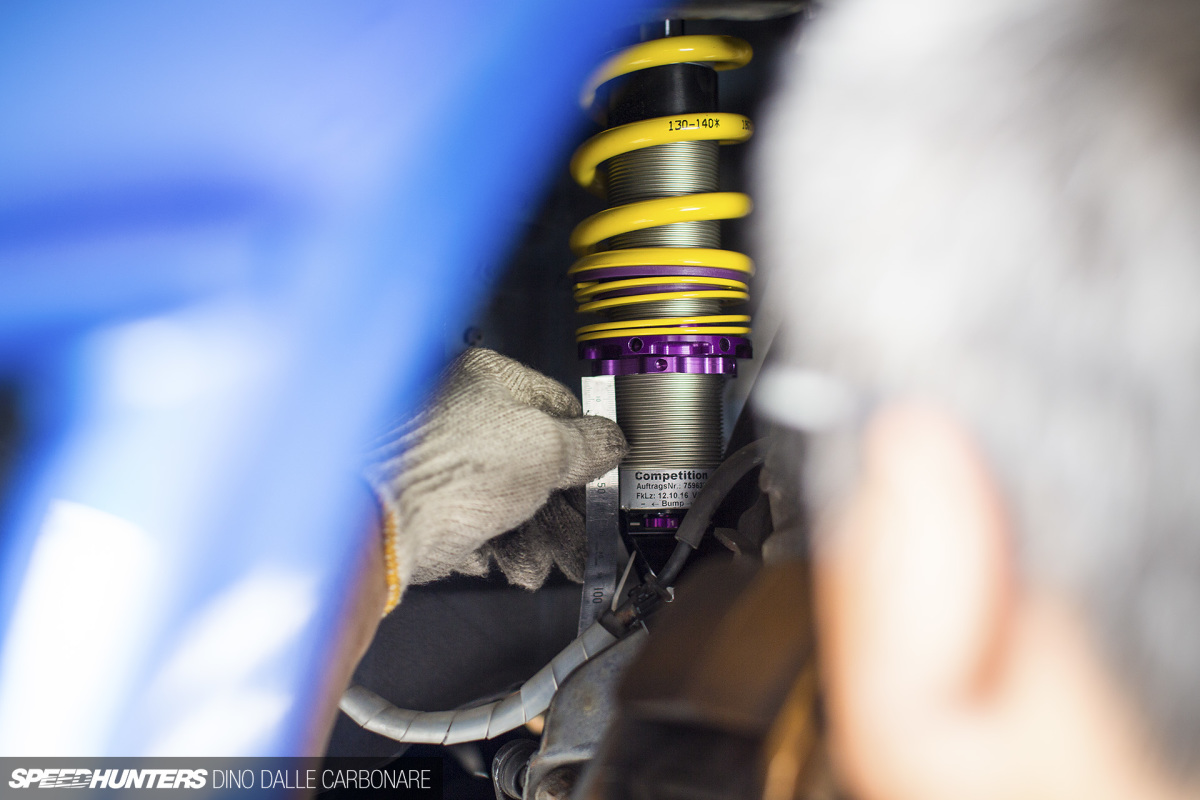
You might remember that KW built up a custom set of Competition coilovers made of aluminum and featuring fully adjustable racing dampers (independent in rebound and compression damping forces) and the company’s proprietary Hydraulic Lift System (HLS) at each corner. The latter is so that the car can get away with having a slightly lower driving height to get the most out of the setup, yet still be able to deal with ramps and speed bumps.
The whole fitting procedure started late last month after slight modifications were made to the coilover’s top and lower mounts following a test fit we did back at the beginning of the year. That’s what often happens when you make a high-end, custom-built kit for a car that is halfway around the world and was never officially sold in KW’s home country of Germany; sometimes a custom kit like this will require refining and tweaking until everything fits like a glove. Of course, this is something you would never have to do with KW’s model-specific kits, like the V3s that have transformed the handling on Project Drop-Top.
So with parts in hand it was a short trip down to Yokohama to meet with Kawanishi-san at Kawanishi-ya, a suspension specialist long associated with KW and its products. This was the first time Kawanishi-san worked on an R34 as his customer base is mostly made up of import (Euro car) owners, but it was a challenge he was looking forward to taking up.


The first thing was to grab ride height measurements at each corner with the existing Nismo S-tune suspension fitted. This way we’d know how much to lower the car at the very end of the fitting exercise.
Kawanishi-san is a perfectionist and it was actually a very educational few days I spent at his shop while I watched him work through the install. To make things easier to follow, I will chronicle the HLS install in a separate post as it’s something that’s worth seeing in more detail. It’s another process and addition to Project GT-R that has indeed added to the whole ‘modernizing’ theme that I’ve been trying to follow for years. Trust me, the result is so cool, and I’m super-excited to be sharing it all.
For now though, let’s get back to these beauties. I was actually quite sad that they’d be disappearing deep inside the wheel wells of the car as I’d no longer be able to admire their beauty.
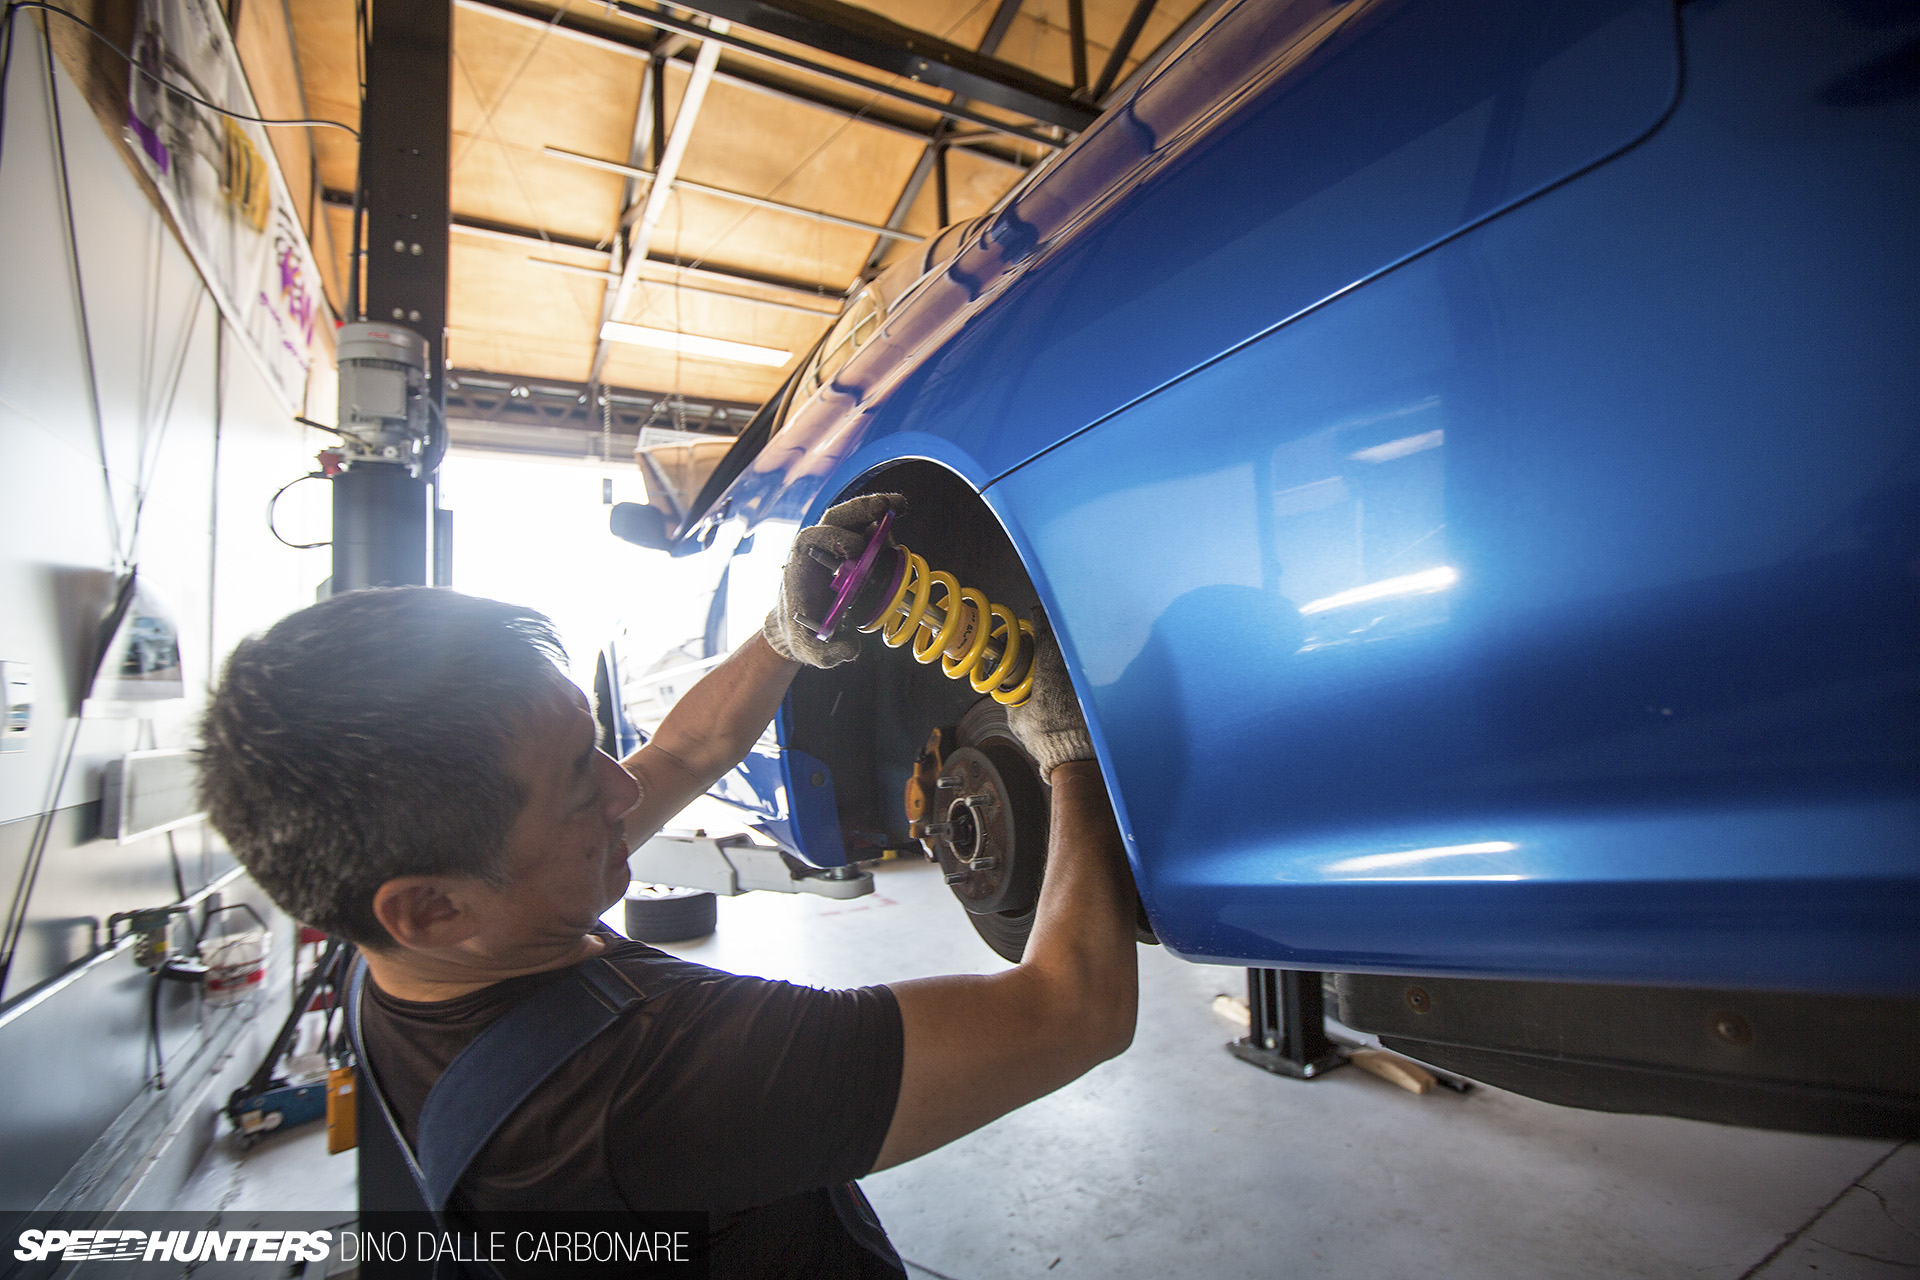
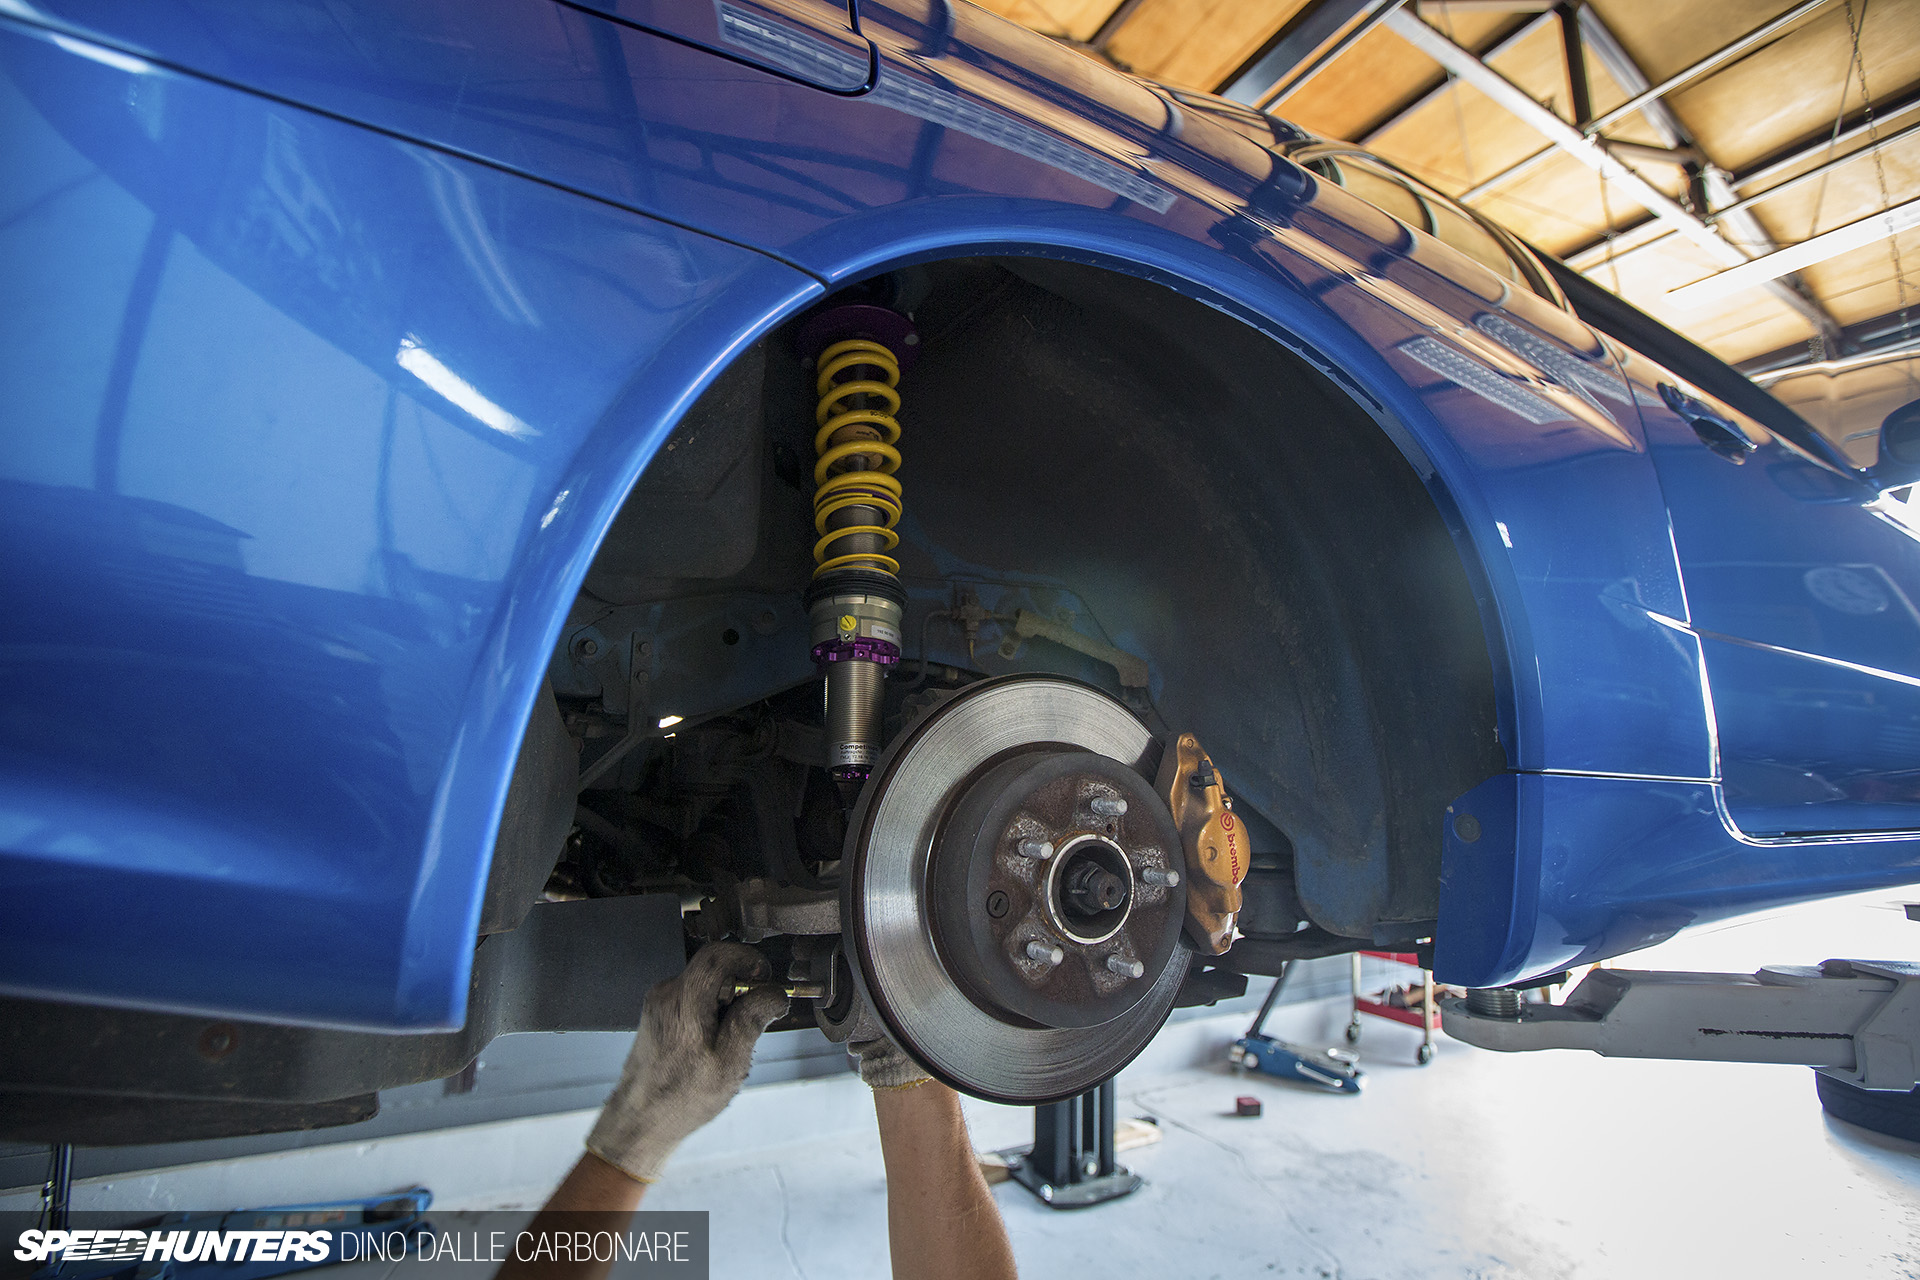
But of course, I’d have a whole new dimension of handling to explore once installed and set up. You’ll notice that compared to the unboxing post, the HLS cups of the front (shorter) shocks have been moved to the top of the dampers. It doesn’t matter where these are positioned, it’s more to do with clearance issues, which is what we had up front due to the shape of the spindles.

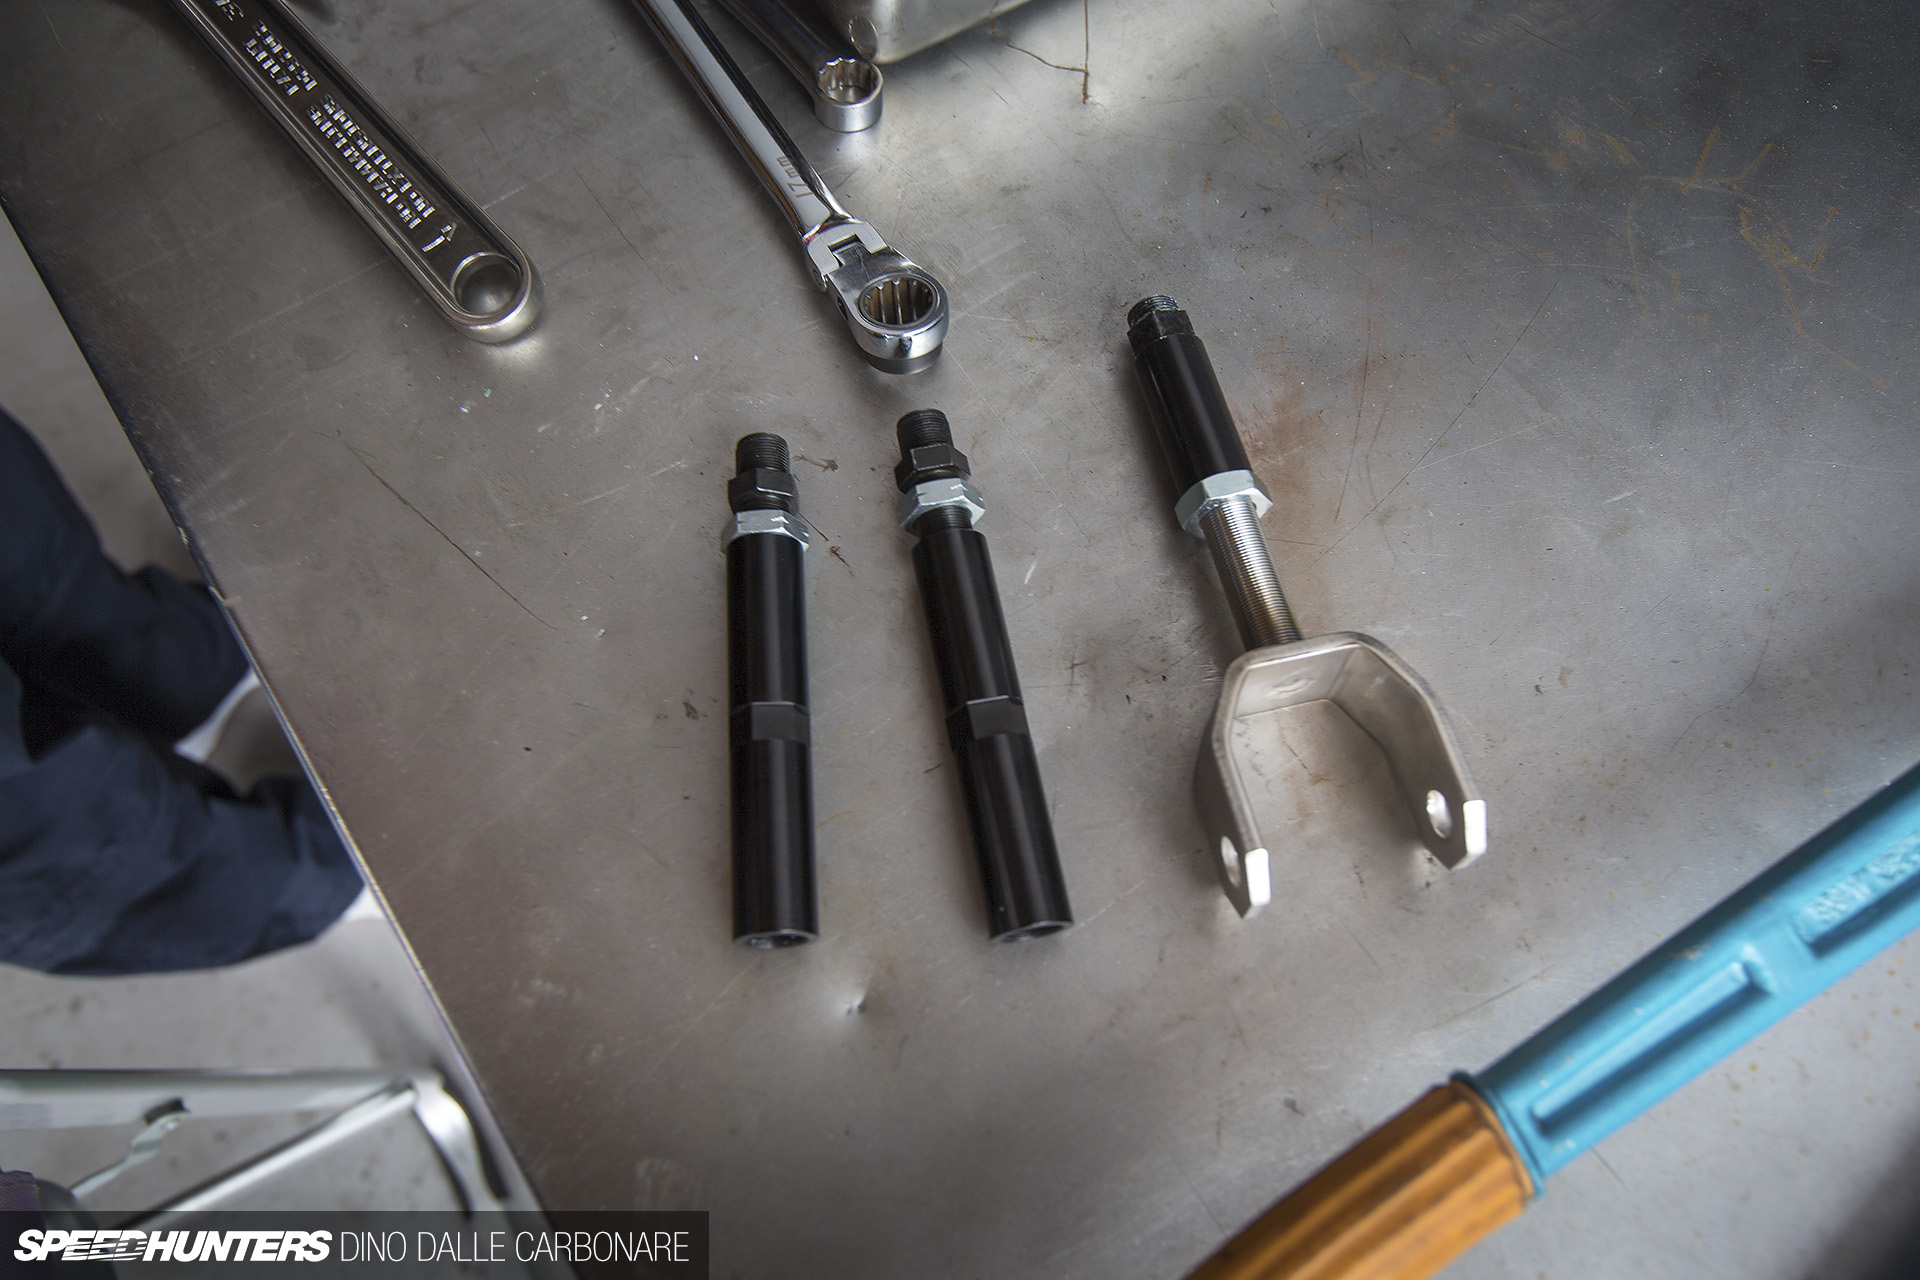
The lower mounts were also changed for a set with larger bushings and tapered spacers to lock in the caster setting. You can also see an extension in rod length to the lower mounts of the rears, but I’ll get into that later on.
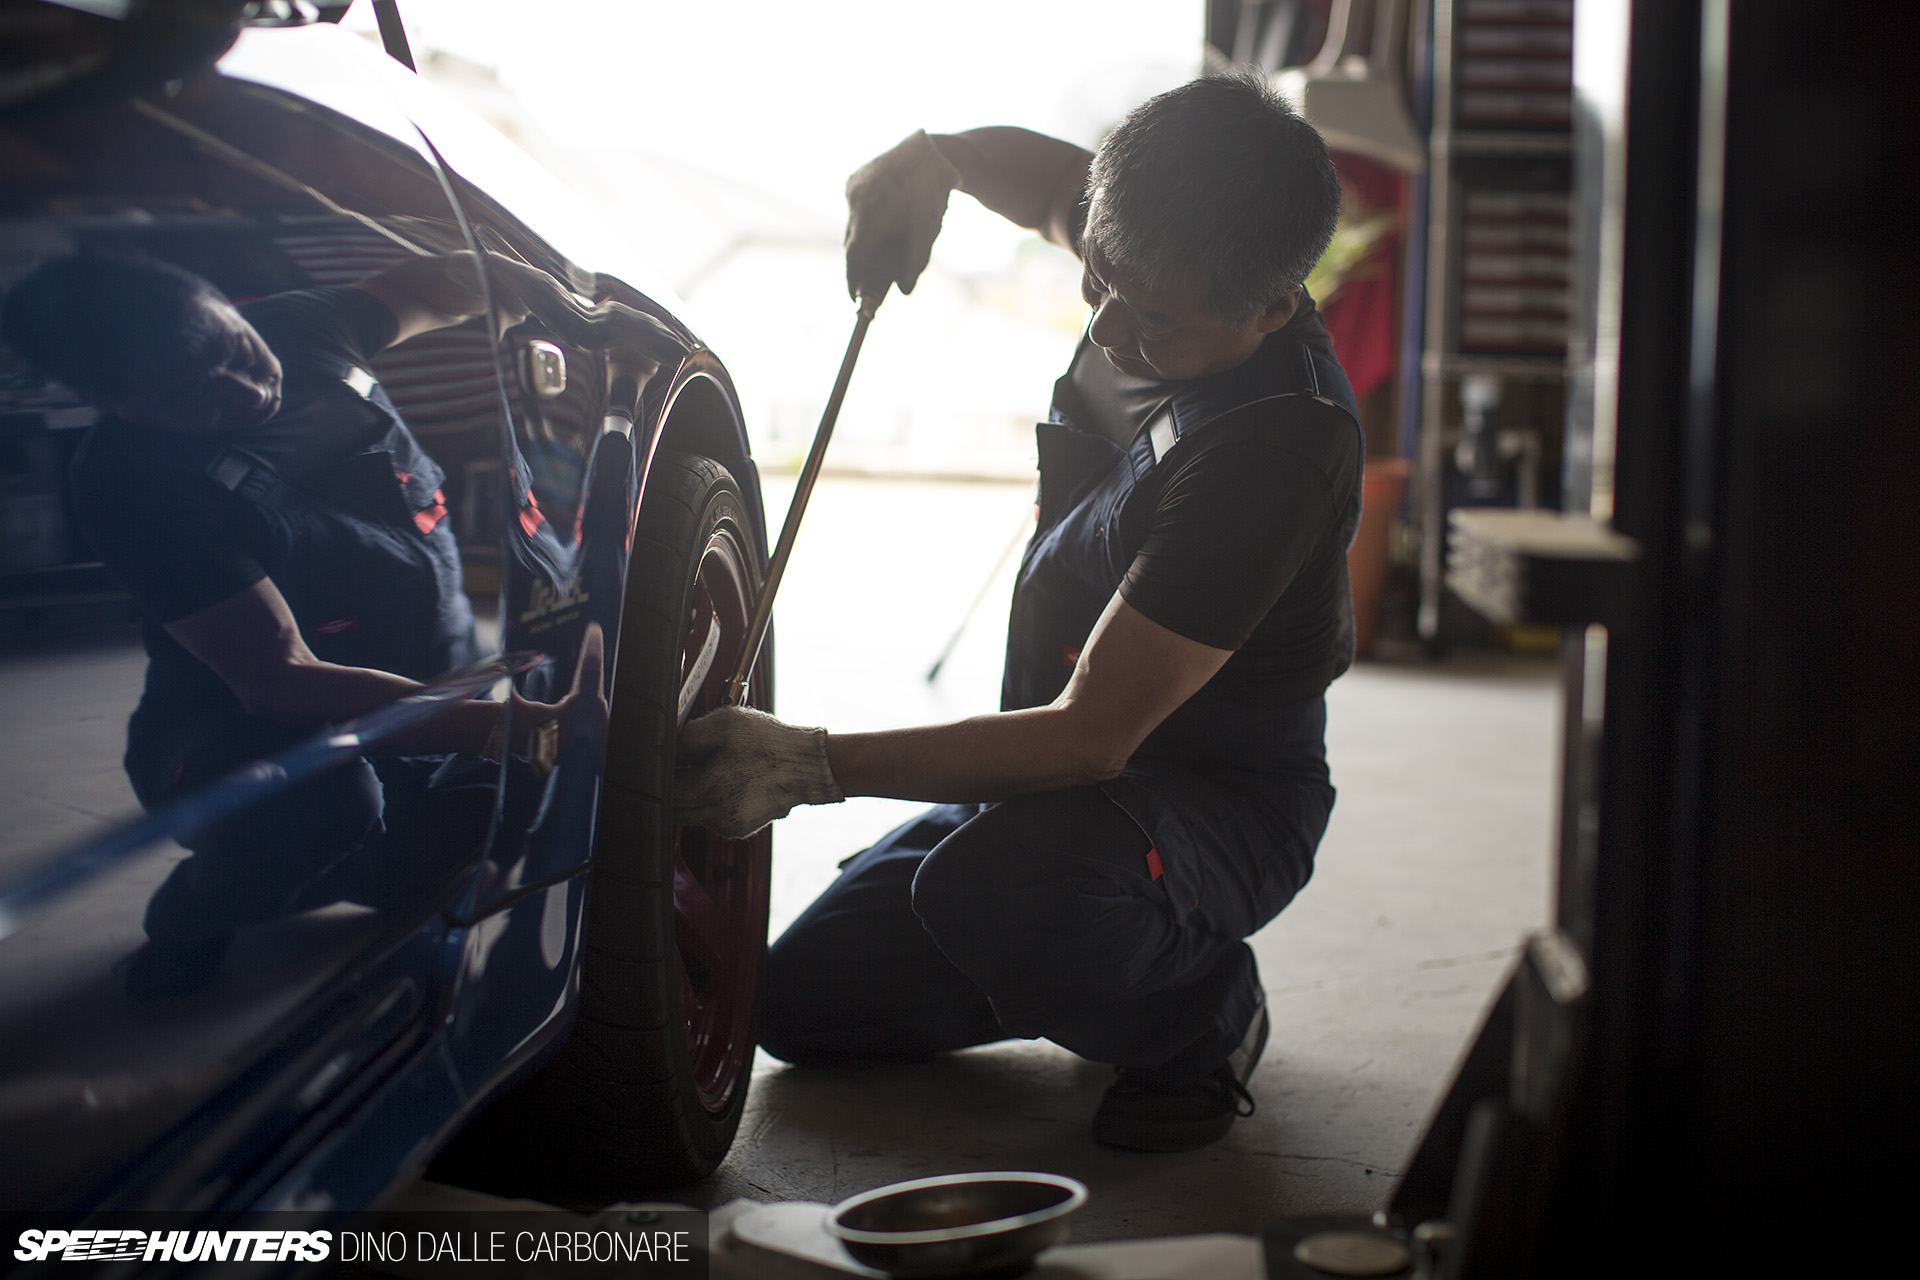
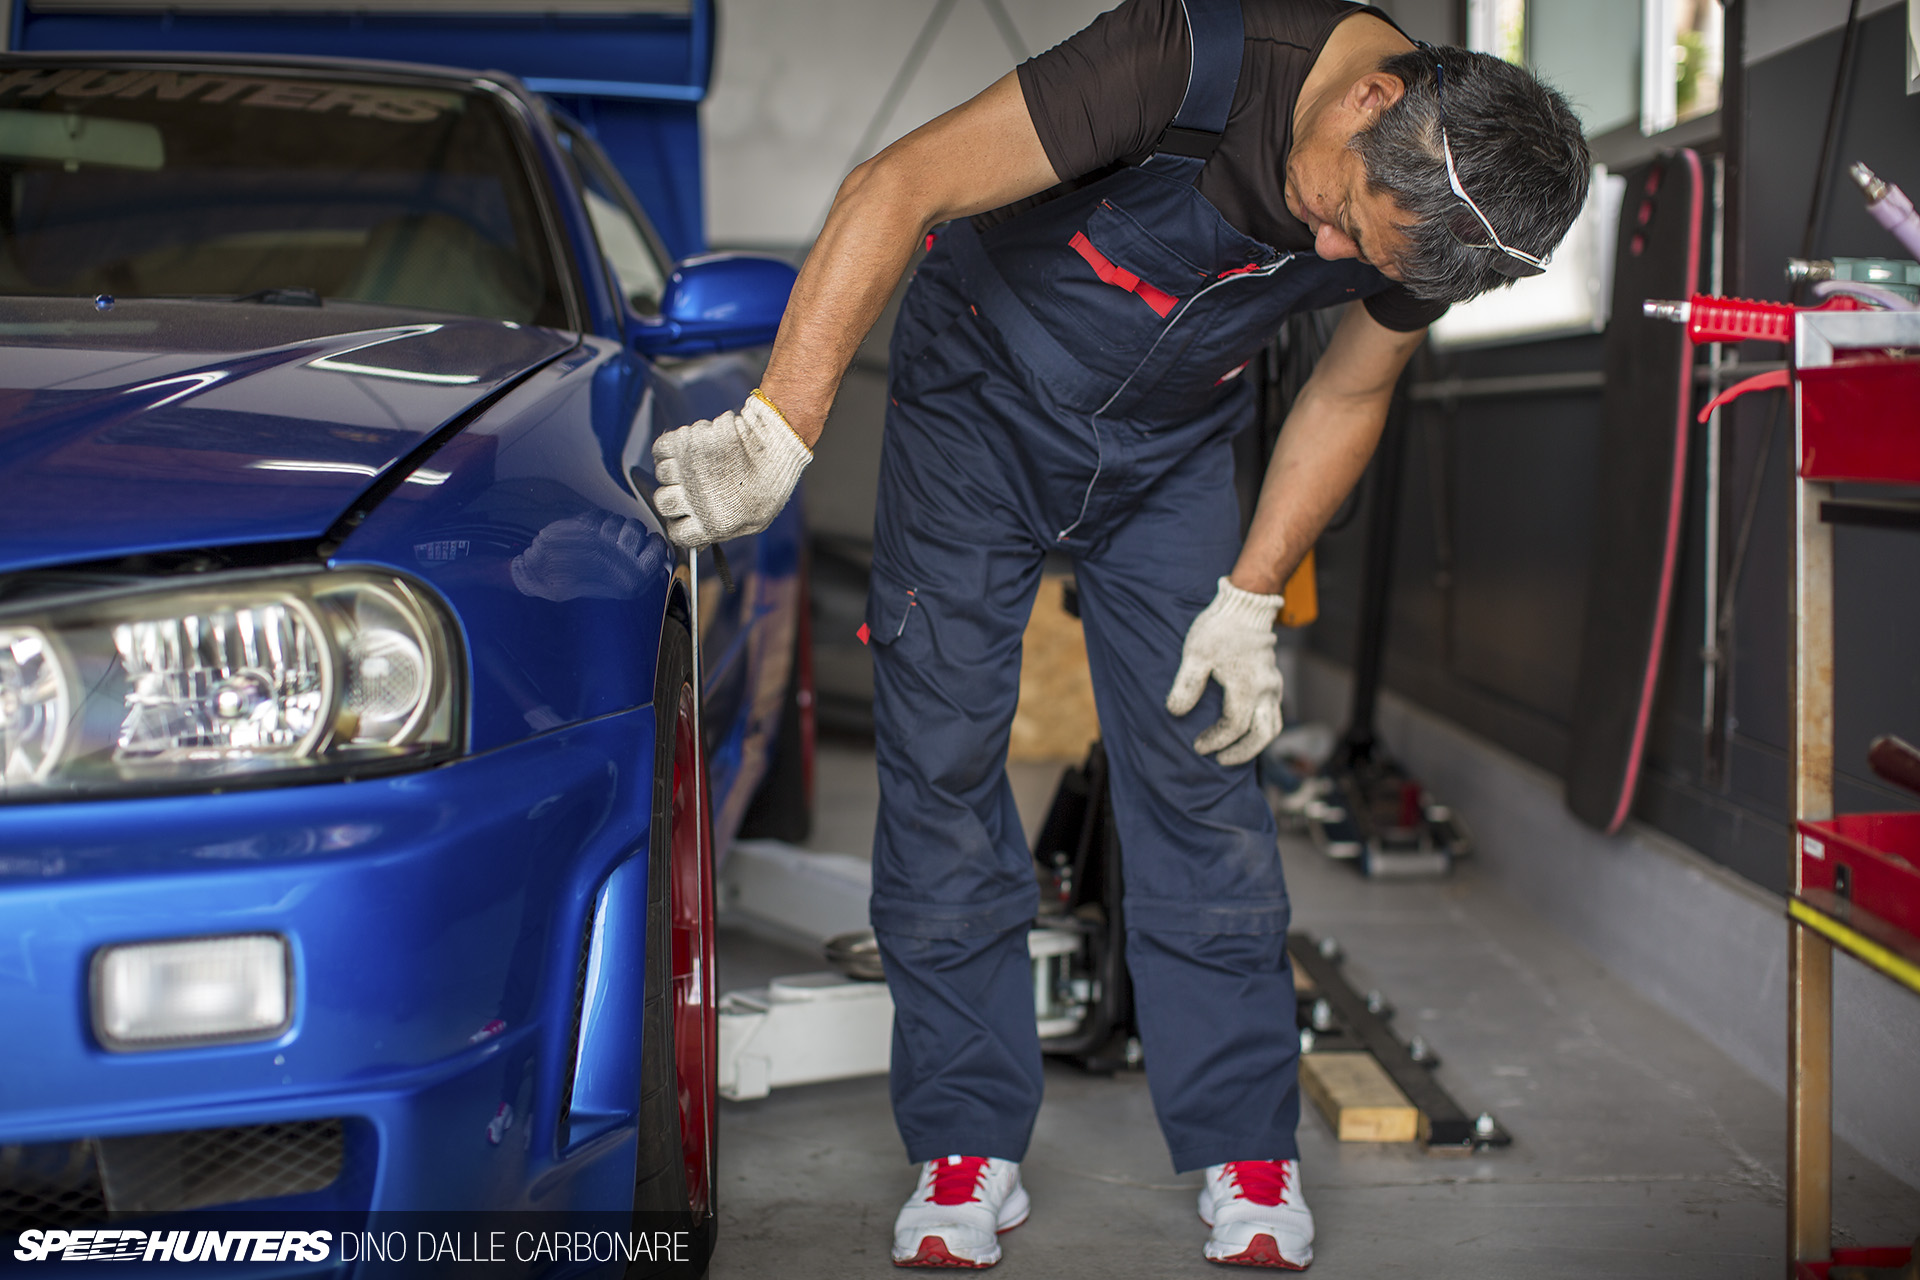
To get the ball rolling, Kawanishi-san began by setting up the car on the lift, removing all the wheel nuts and then the wheels themselves.
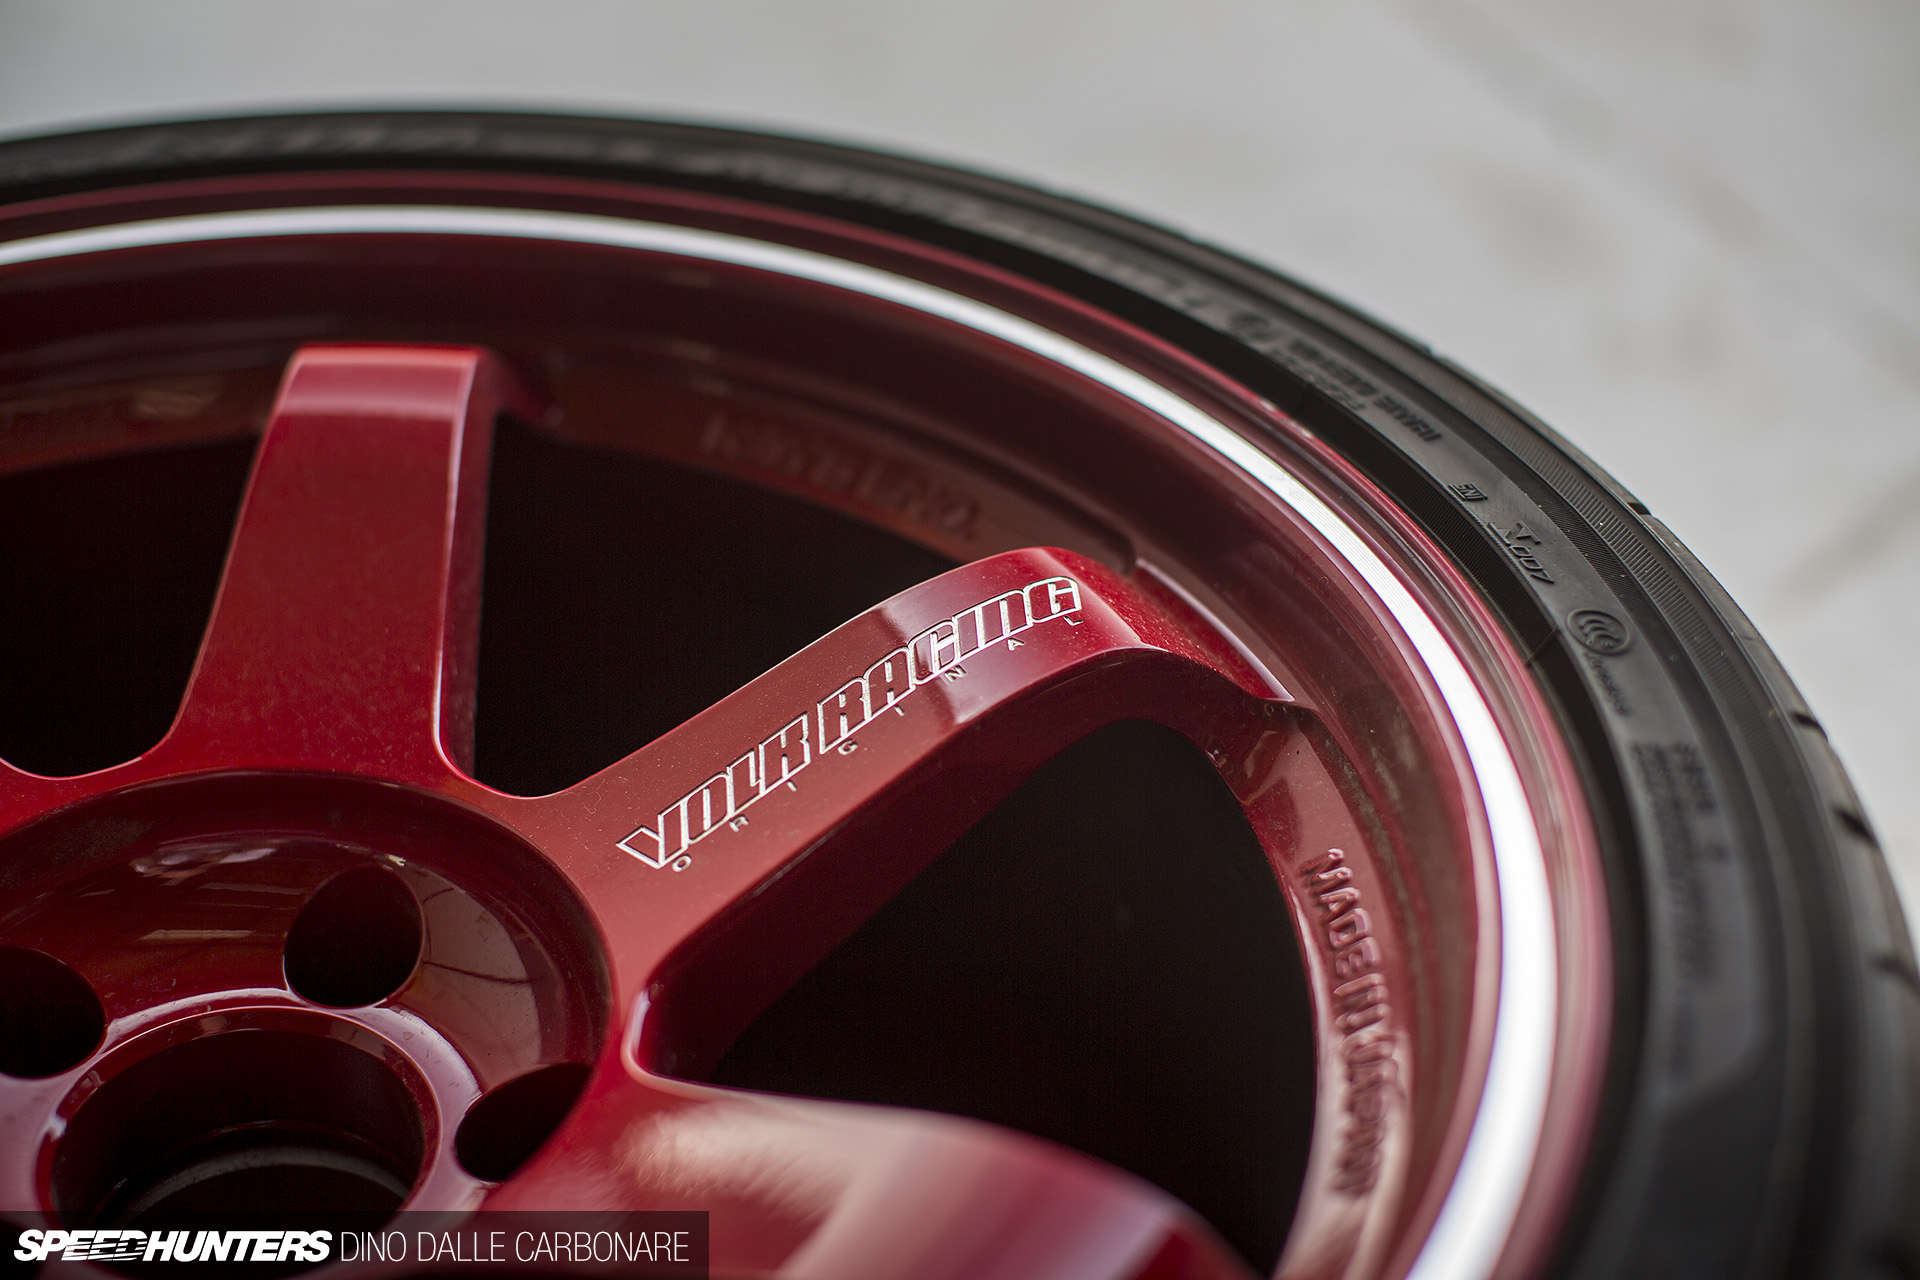
Seeing as my 18-inch RAYS Volk Racing TE37RTs are the wheels I use for proper driving, it was these and their fitted 295-section Yokohama Advan Neova AD08Rs that the set up would be done with. The idea was to get everything squared up, lock down a rough alignment and then test the car on the Hakone Turnpike before trying out my 19-inch Volk Racing CE28Ns which are more of a street setup primarily for looks.
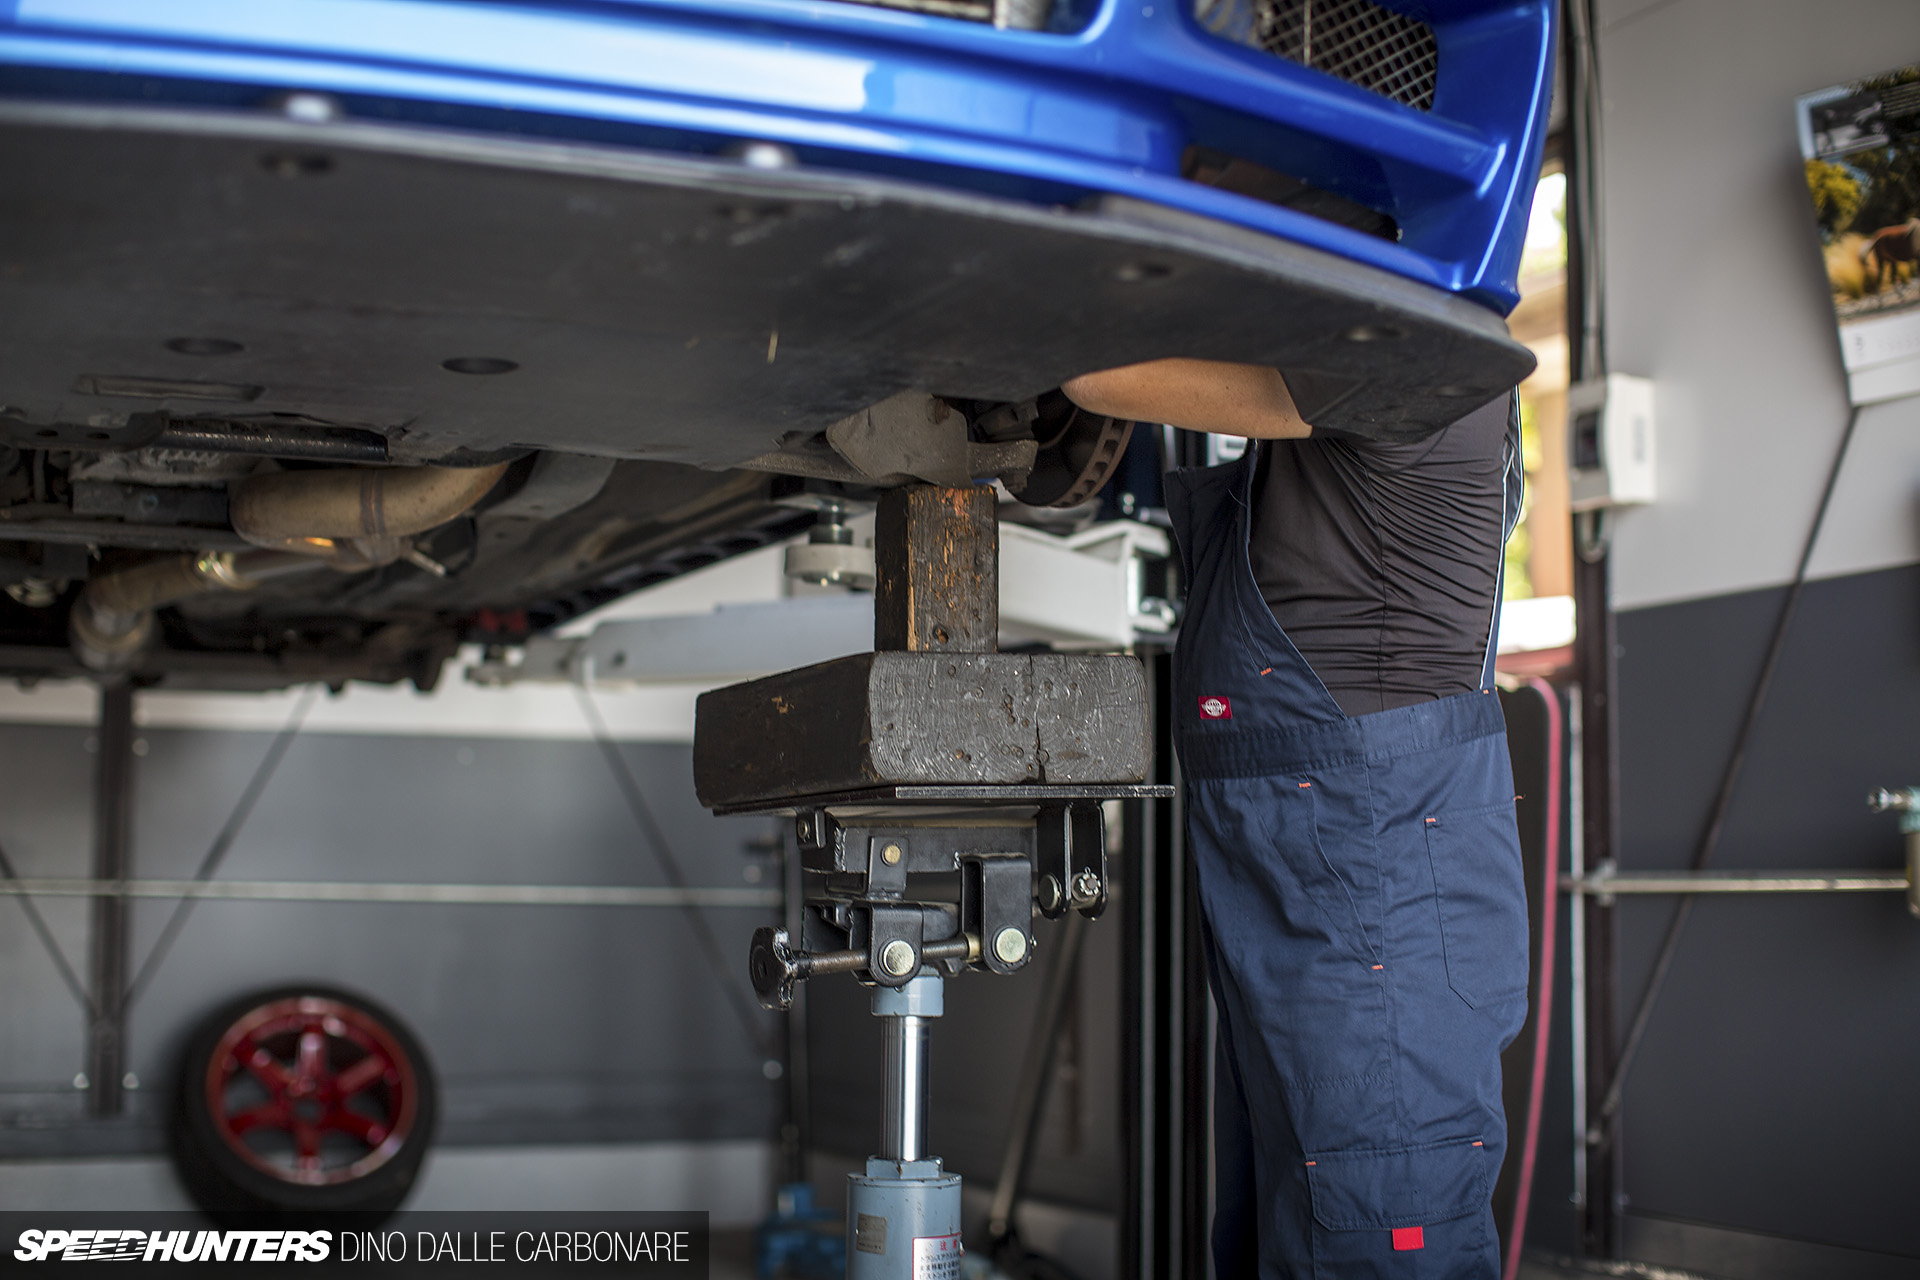
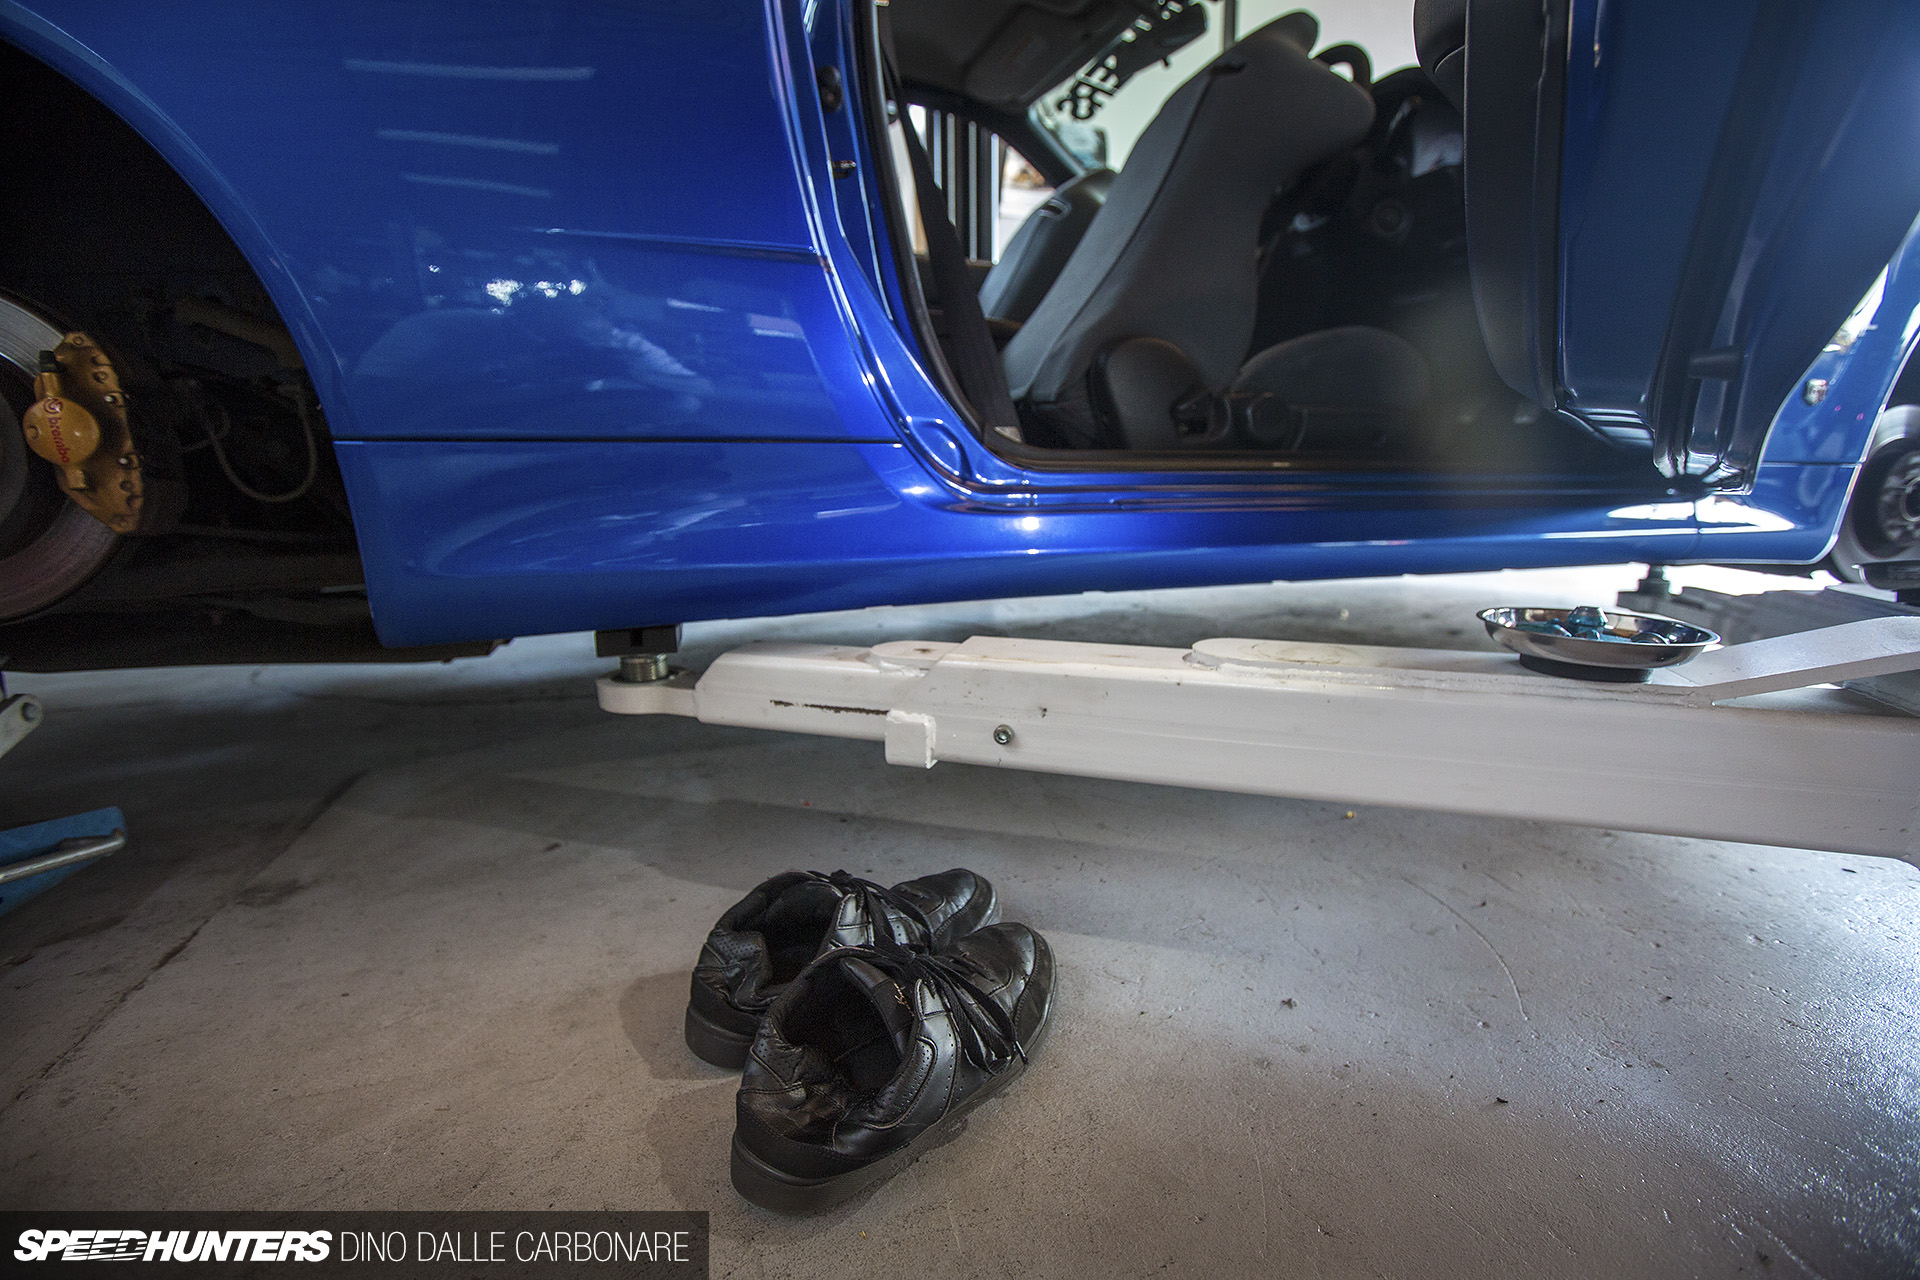
Once all wheels were removed, the GT-R was lifted up and a hydraulic jack set up with a couple of wooden blocks to compress the dampers enough to take adequate pressure off of the lower mounts. This was done at both ends and all bolts were removed prior to the car being dropped down.
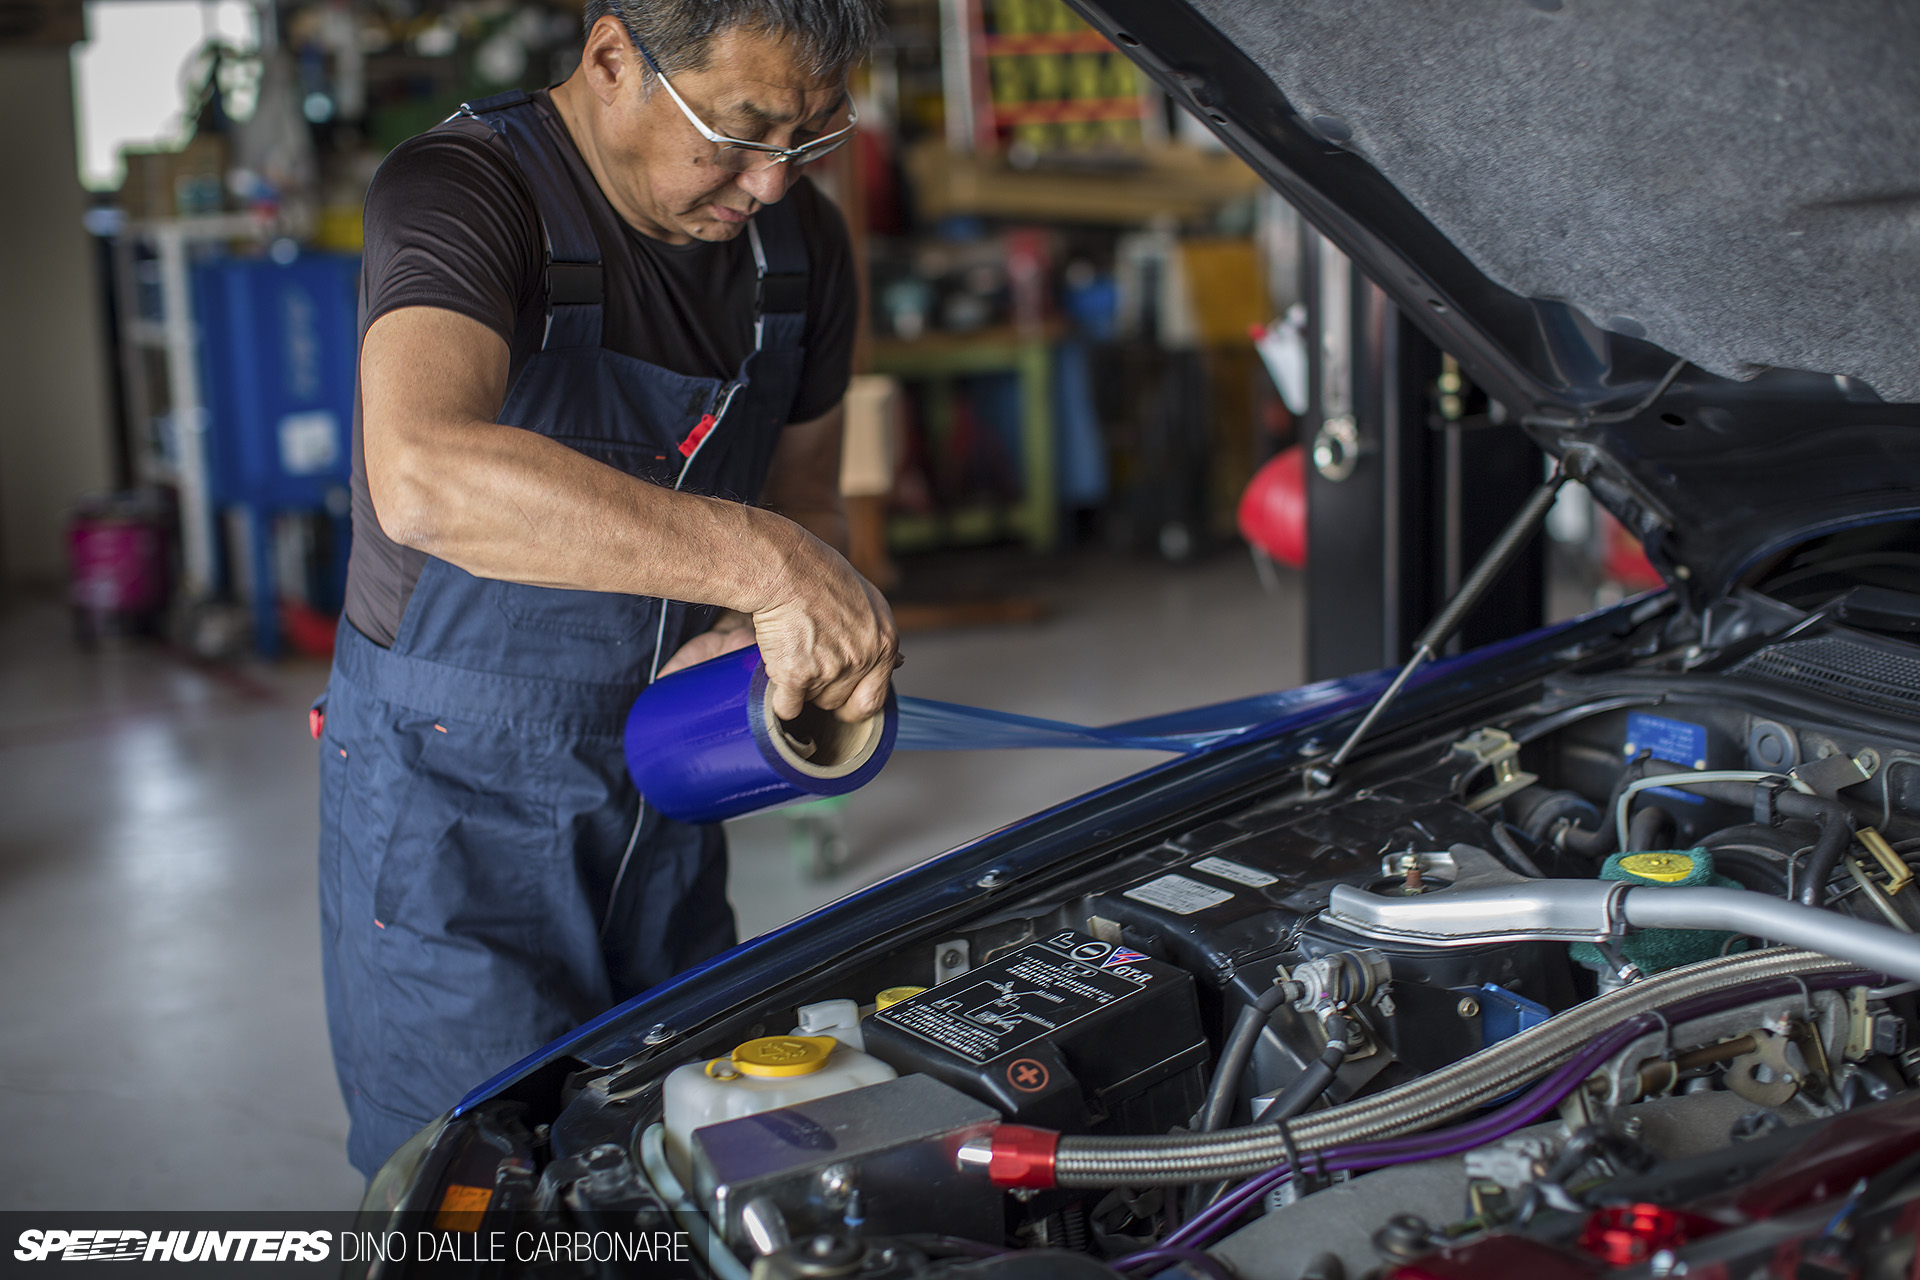
Before any wrenching started, Kawanishi-san laid down a protective strip of self-adhering plastic along the fenders. Again, I was loving the attention to detail in his process.
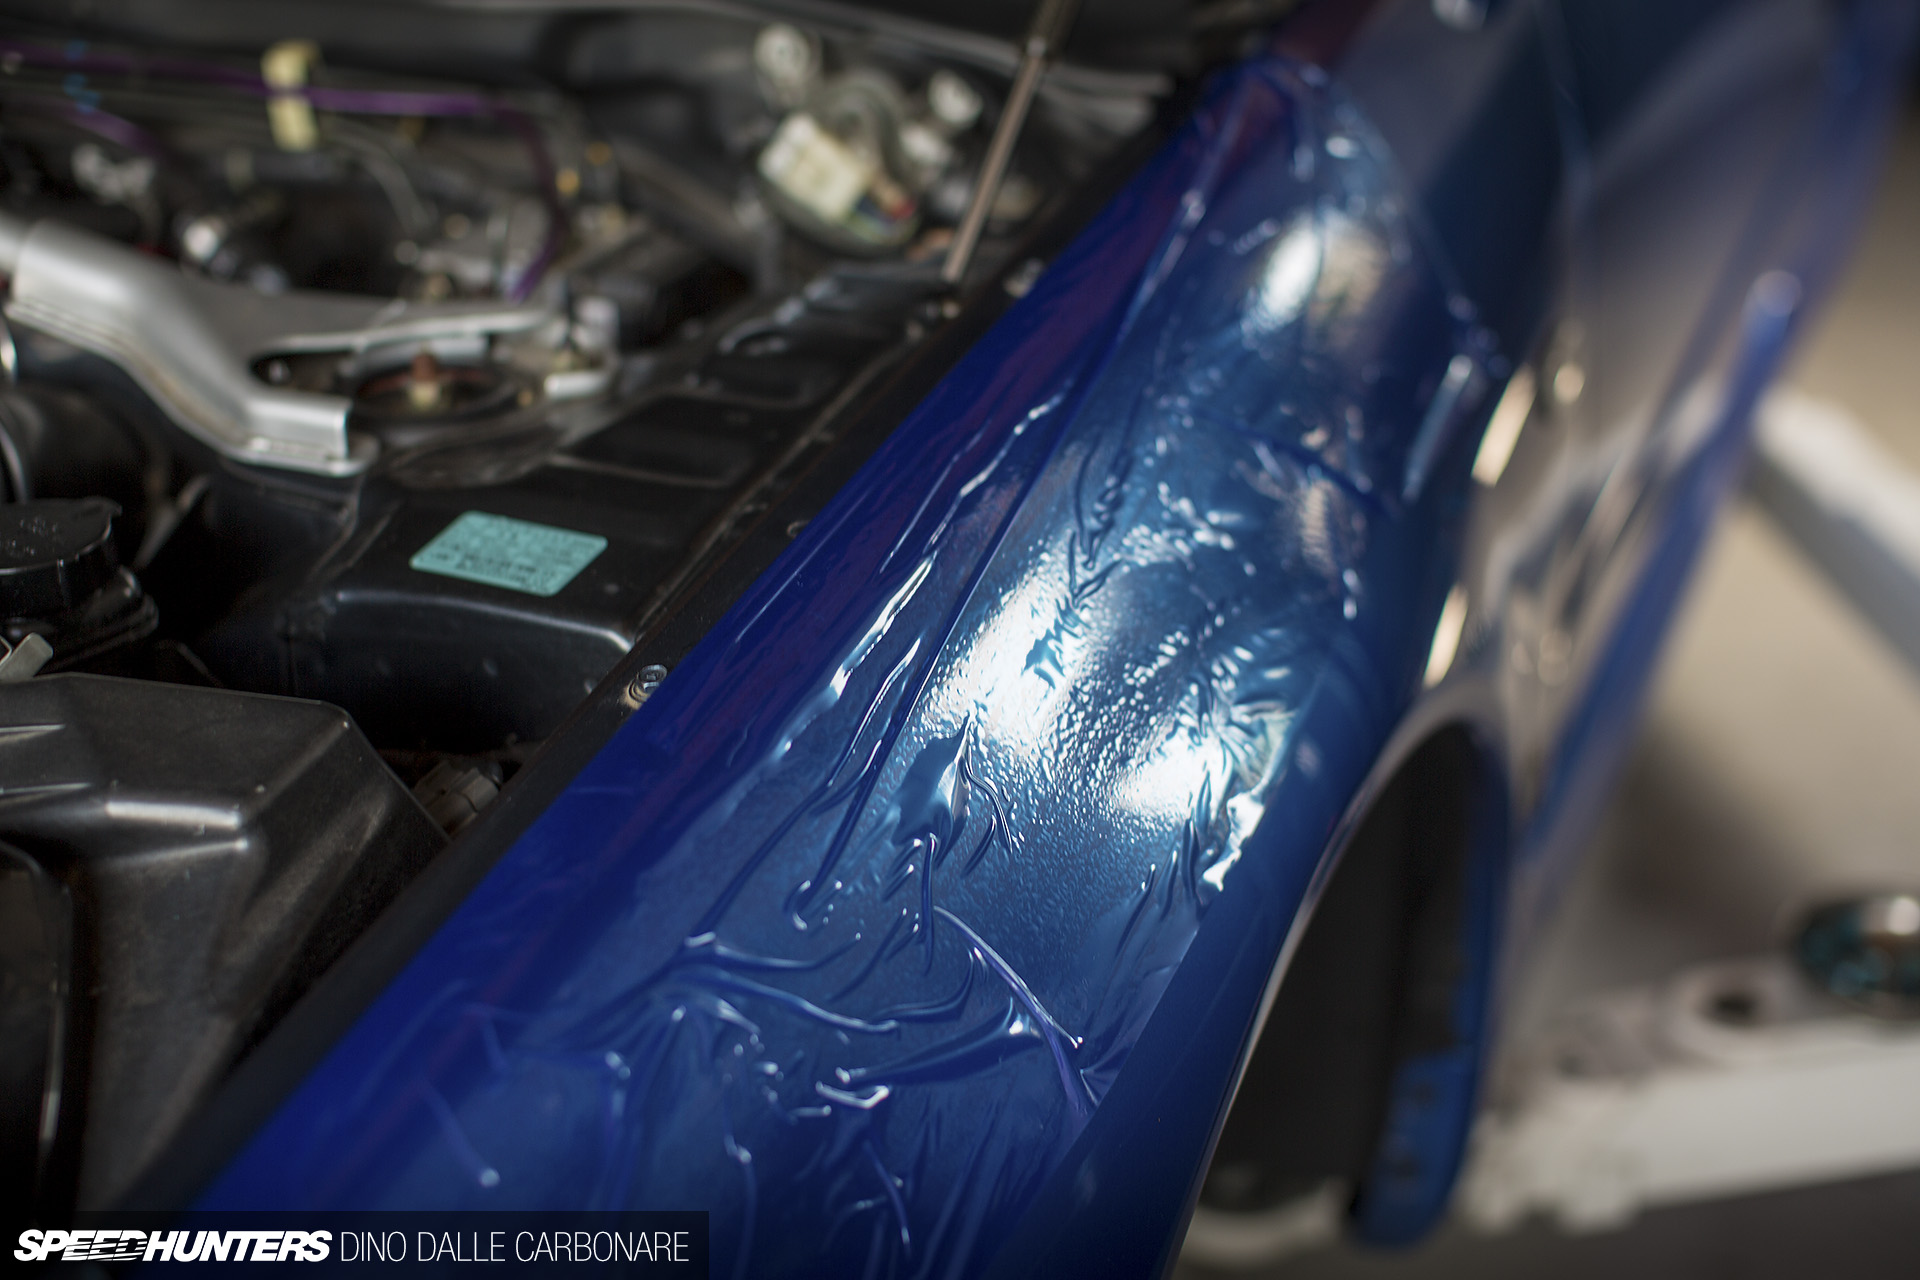
I actually prefer to see this type of protection used over the blanket covers often draped over fenders. With the latter, any dirt or dust on the paint surface can cause minute scratches, even with slight pressure or movement.

The two bolts on the top mounts were then loosened and unwound before lifting the car up again and sliding the Nismo strut assemblies out.
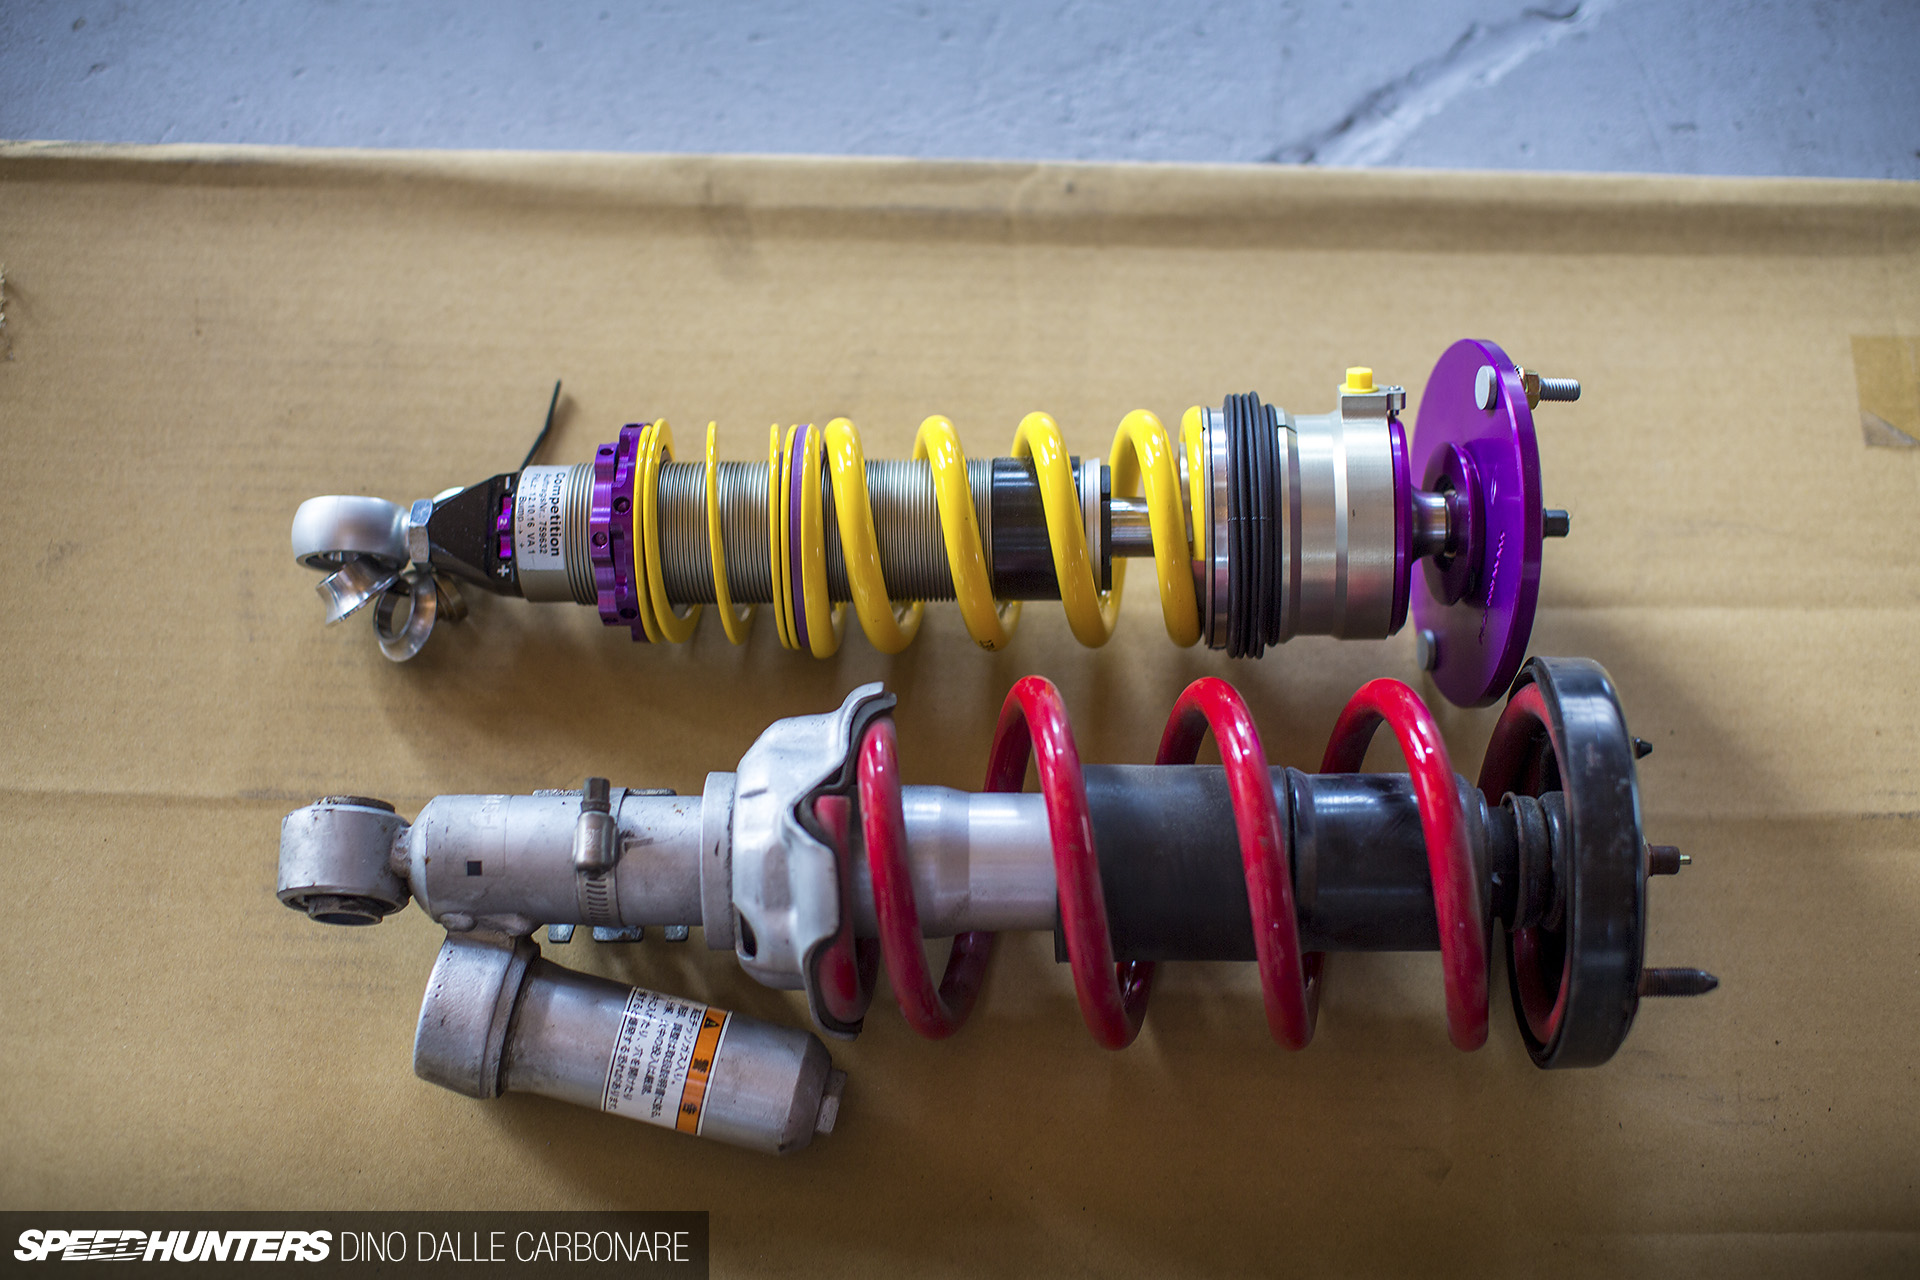
Here’s a side-by-side look at the KWs next to the Nismo S-tune fronts.
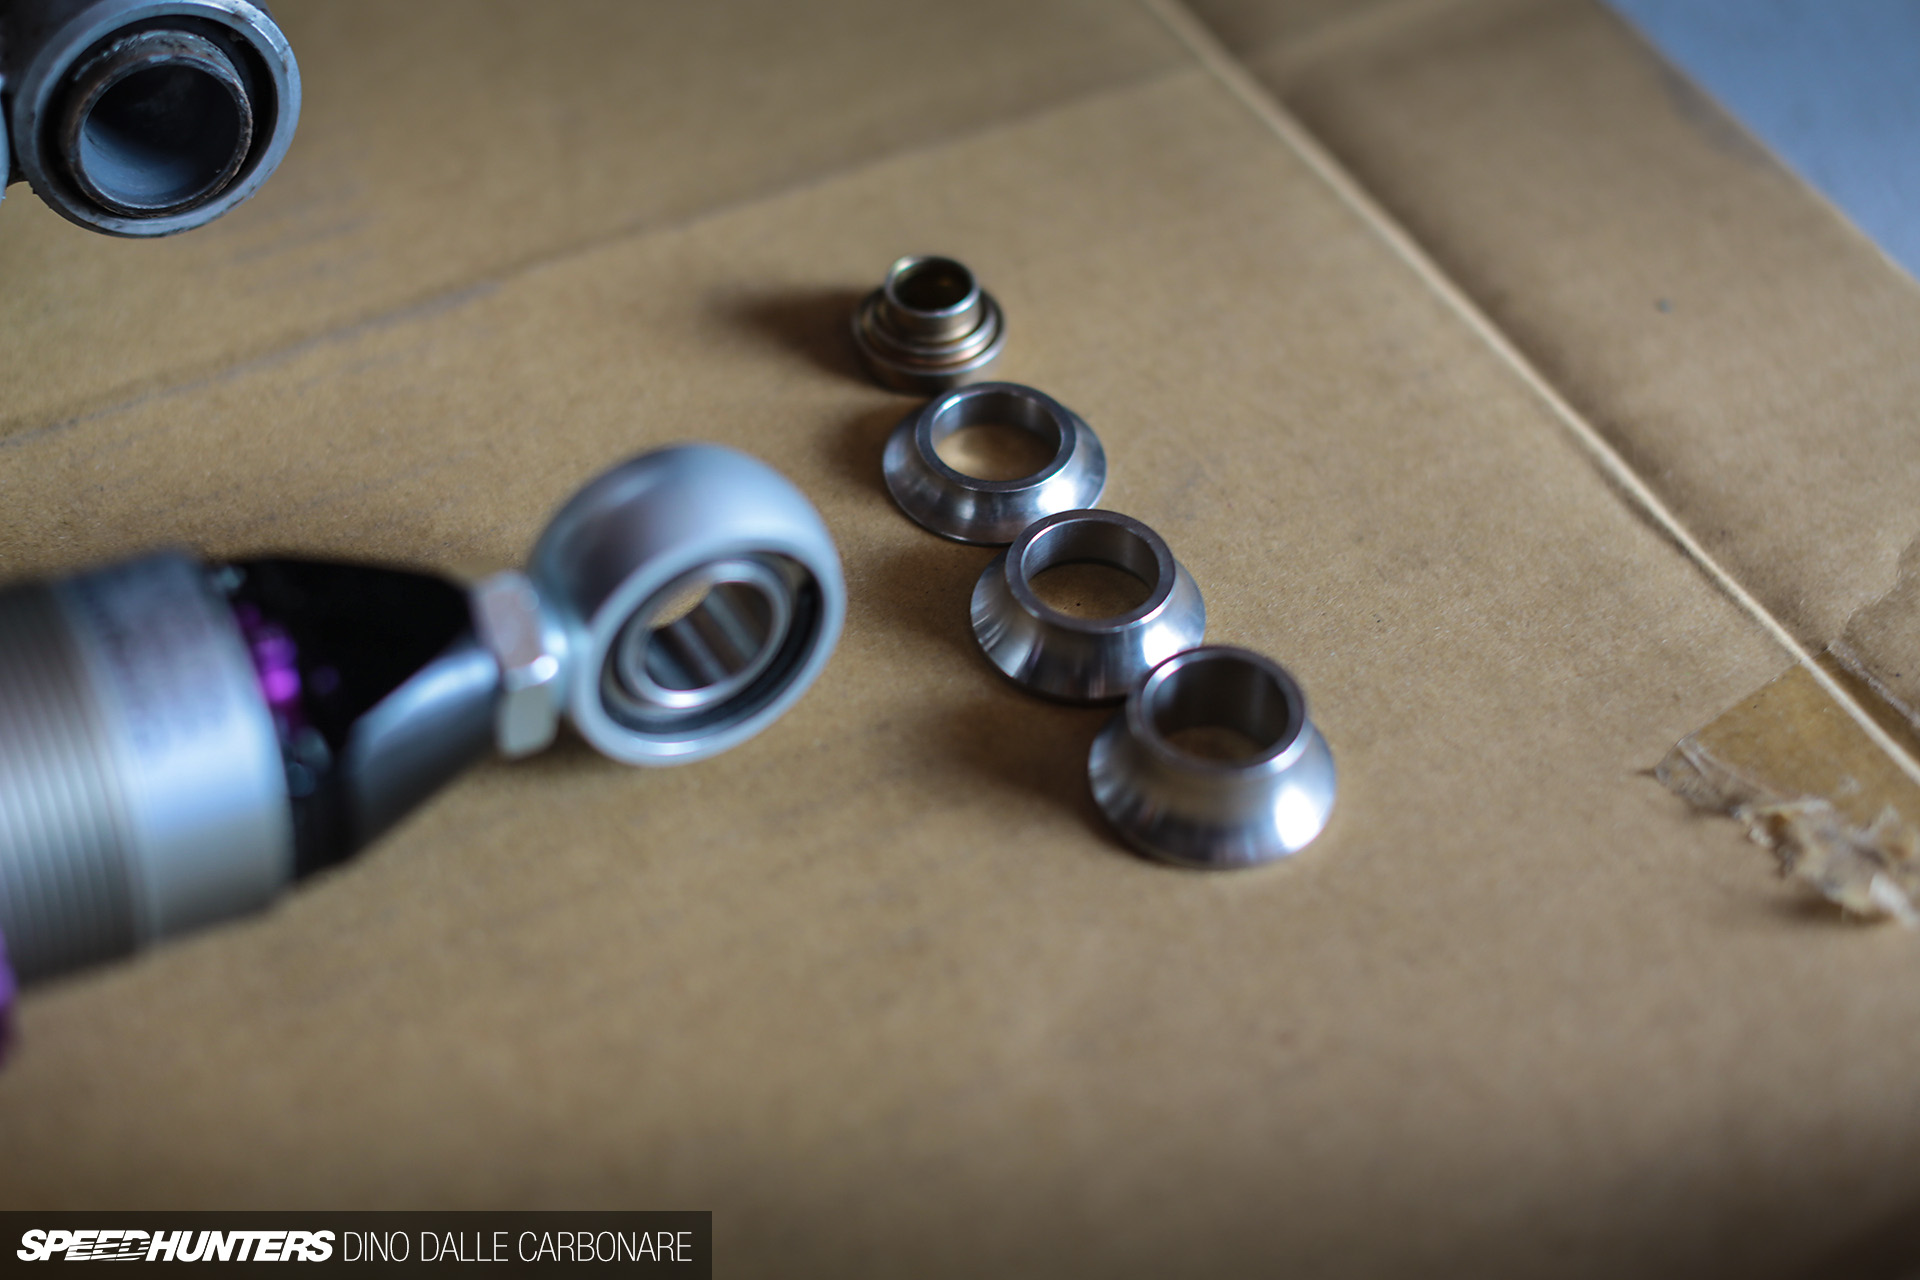
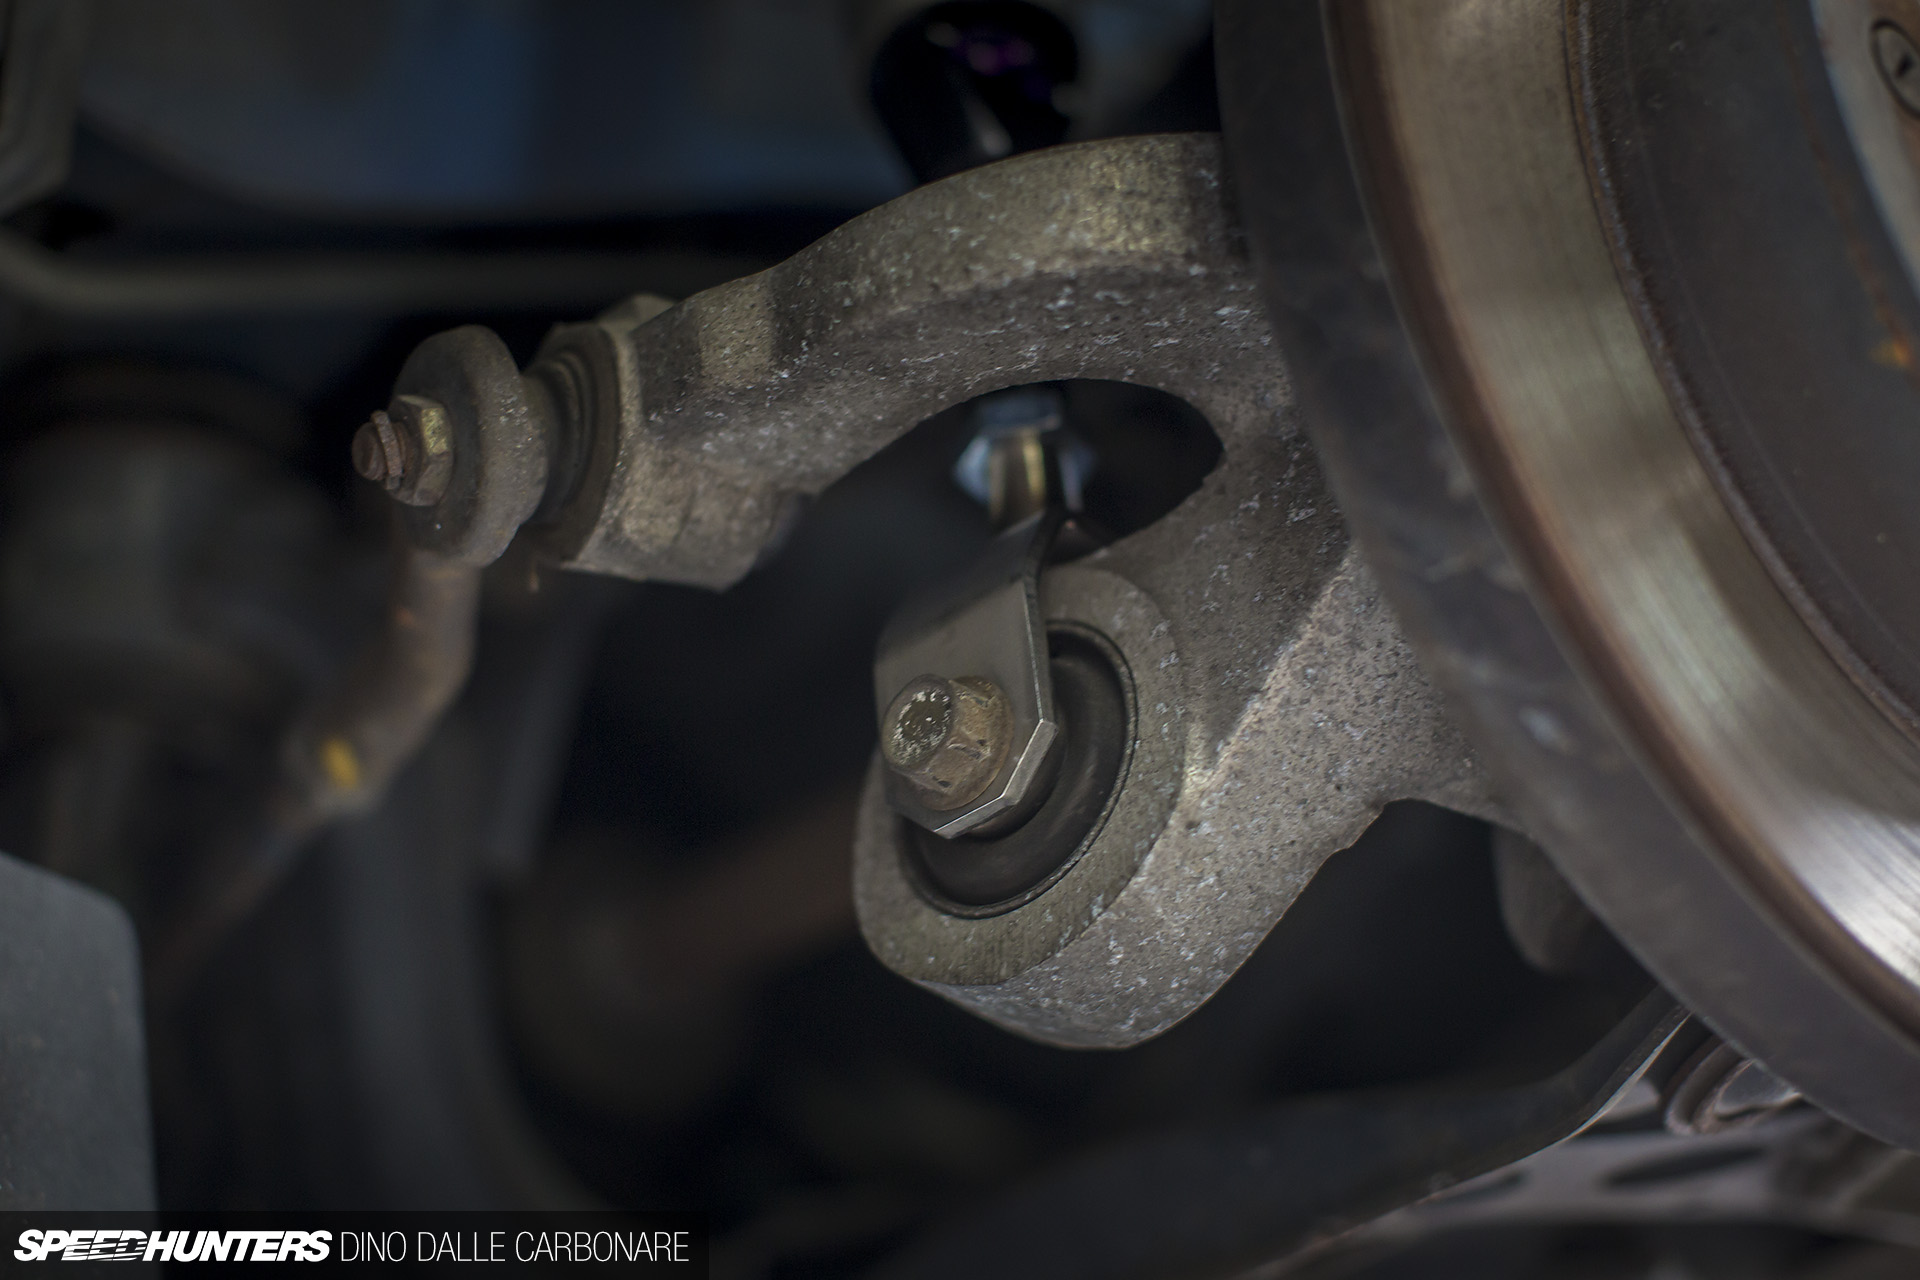
And here are the spacers to secure the lower bushed joint in place. I’m assuming the actual stiffness of the bushing itself is a little harder on the KWs, helping to completely eliminate any slack out of the handling very much like the pillow-ball upper mounts do.


With everything fitted and bolted into place, here’s how the lower mount looks like from both sides.
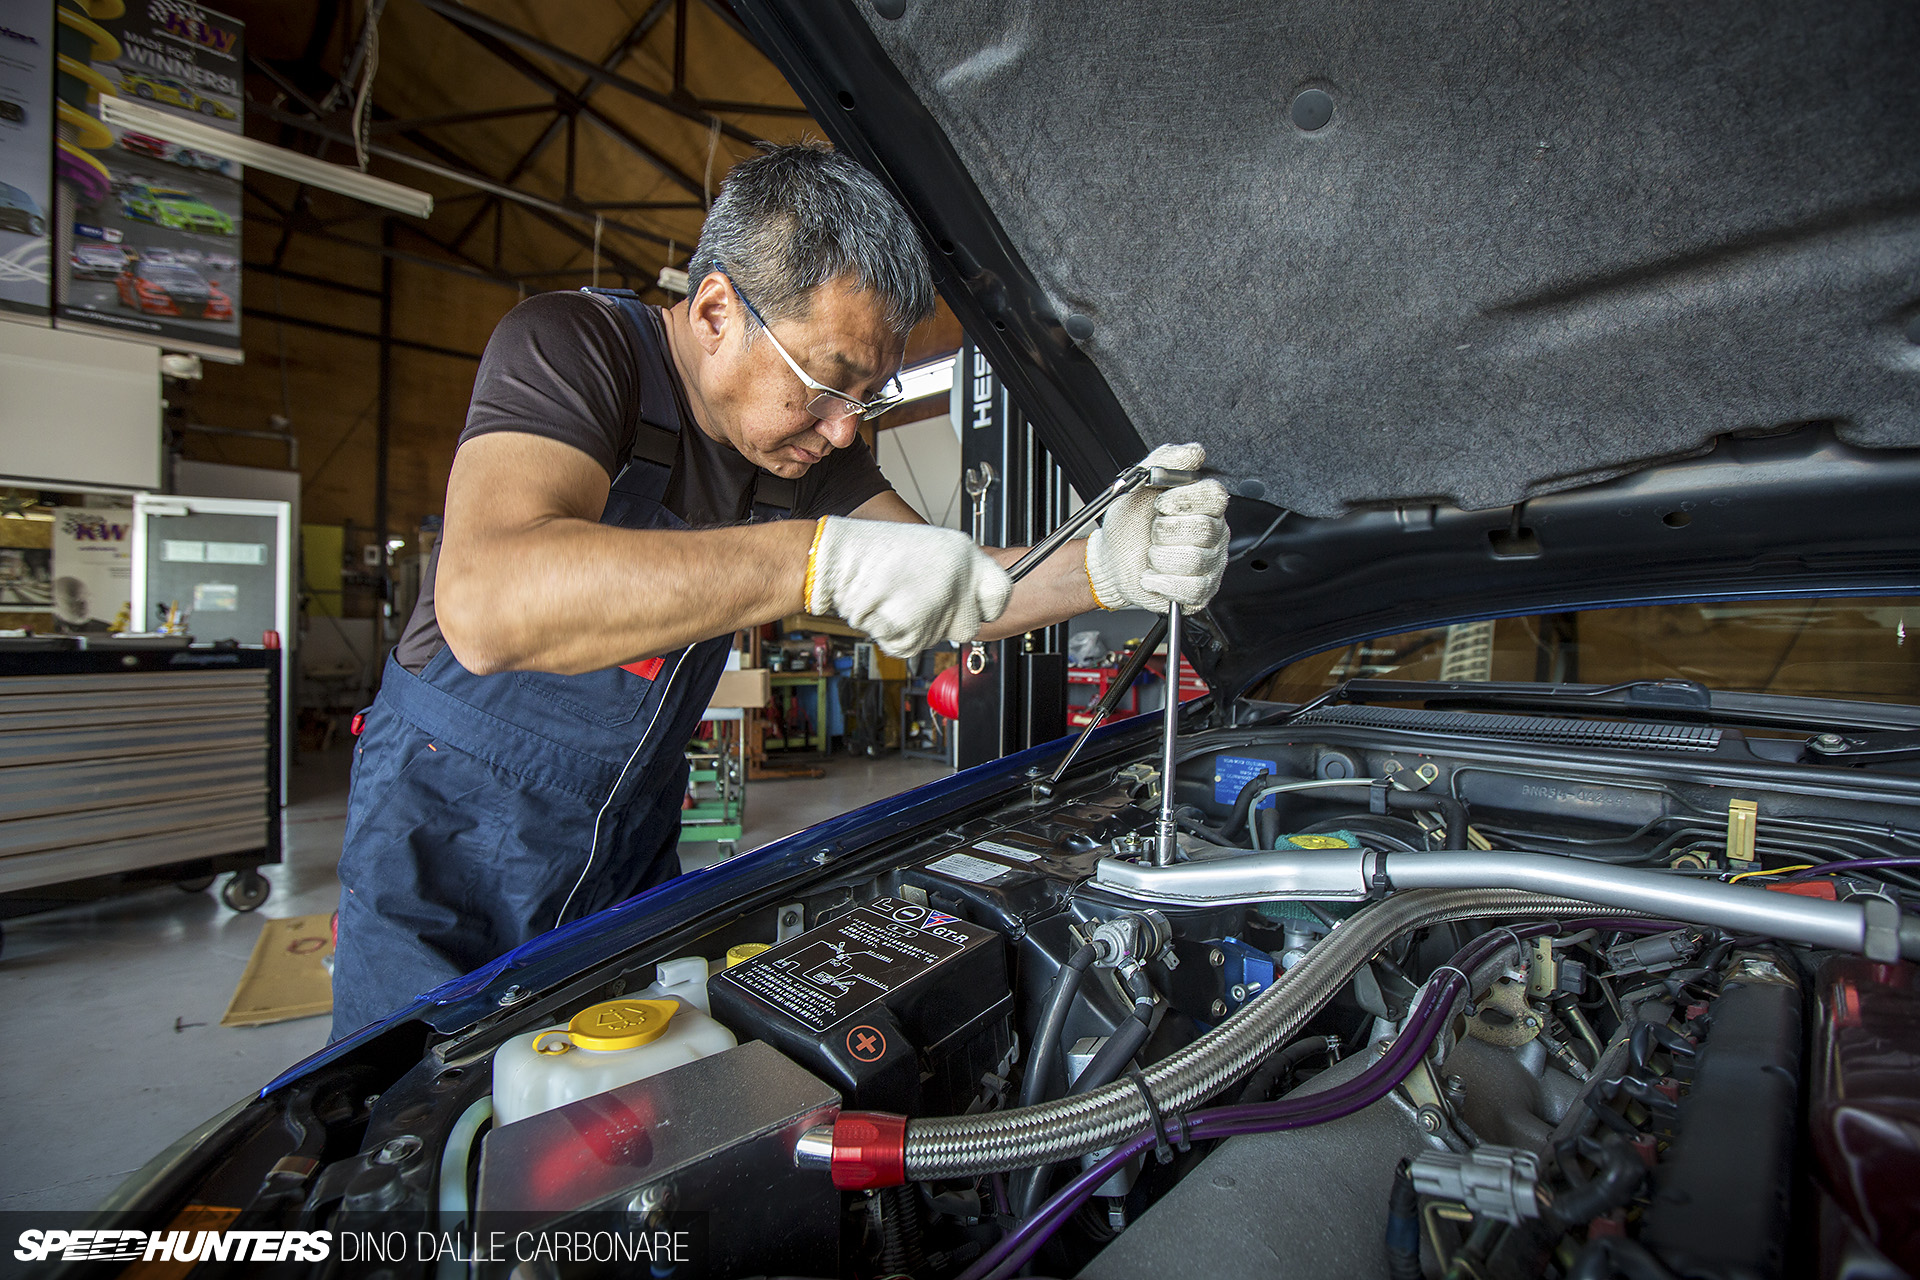
The two top bolts were then wound down in position, sandwiching the stock strut tower brace I’m still using.
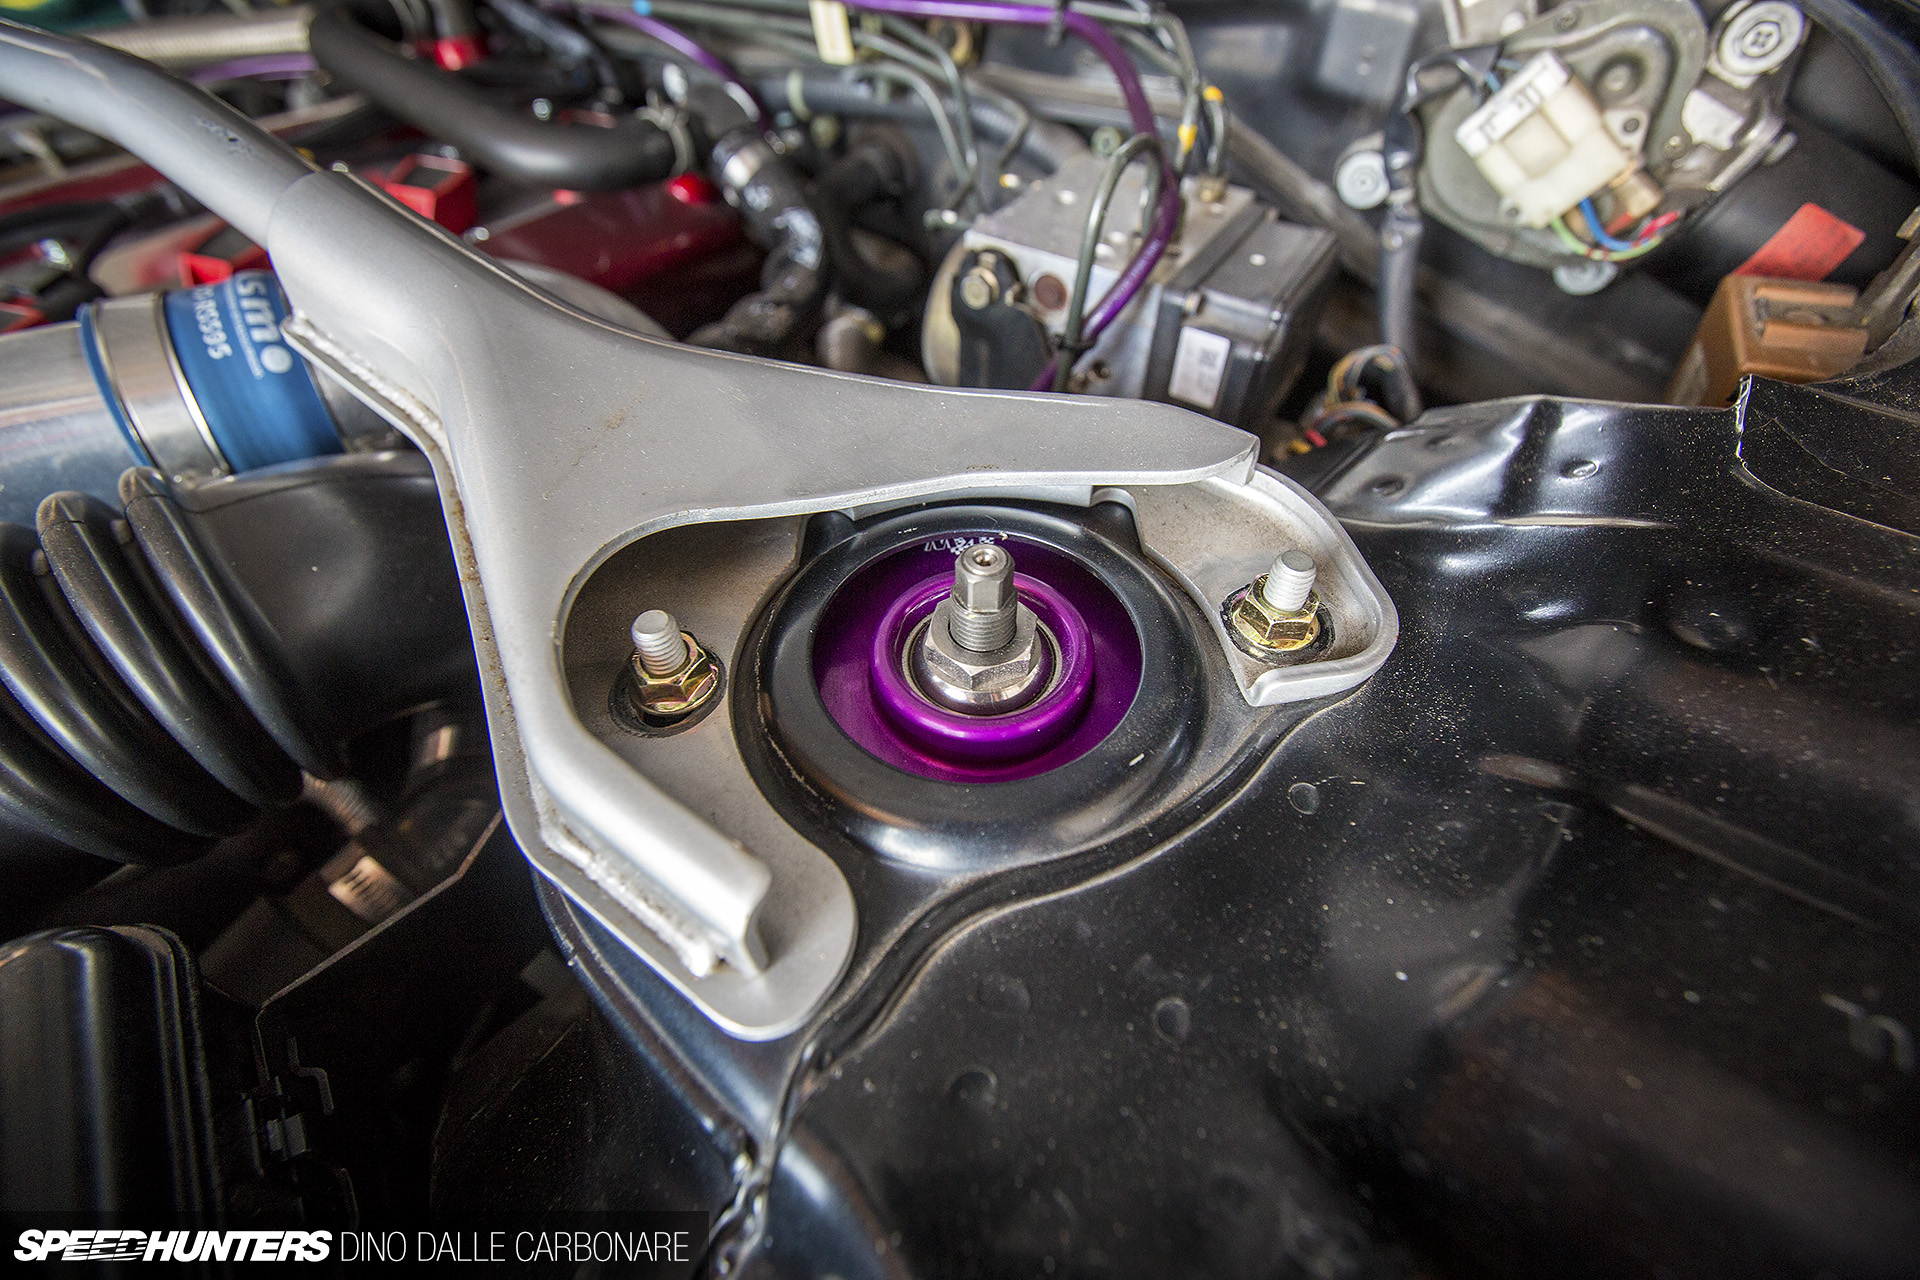
This is another part I will be looking at replacing in the near future.
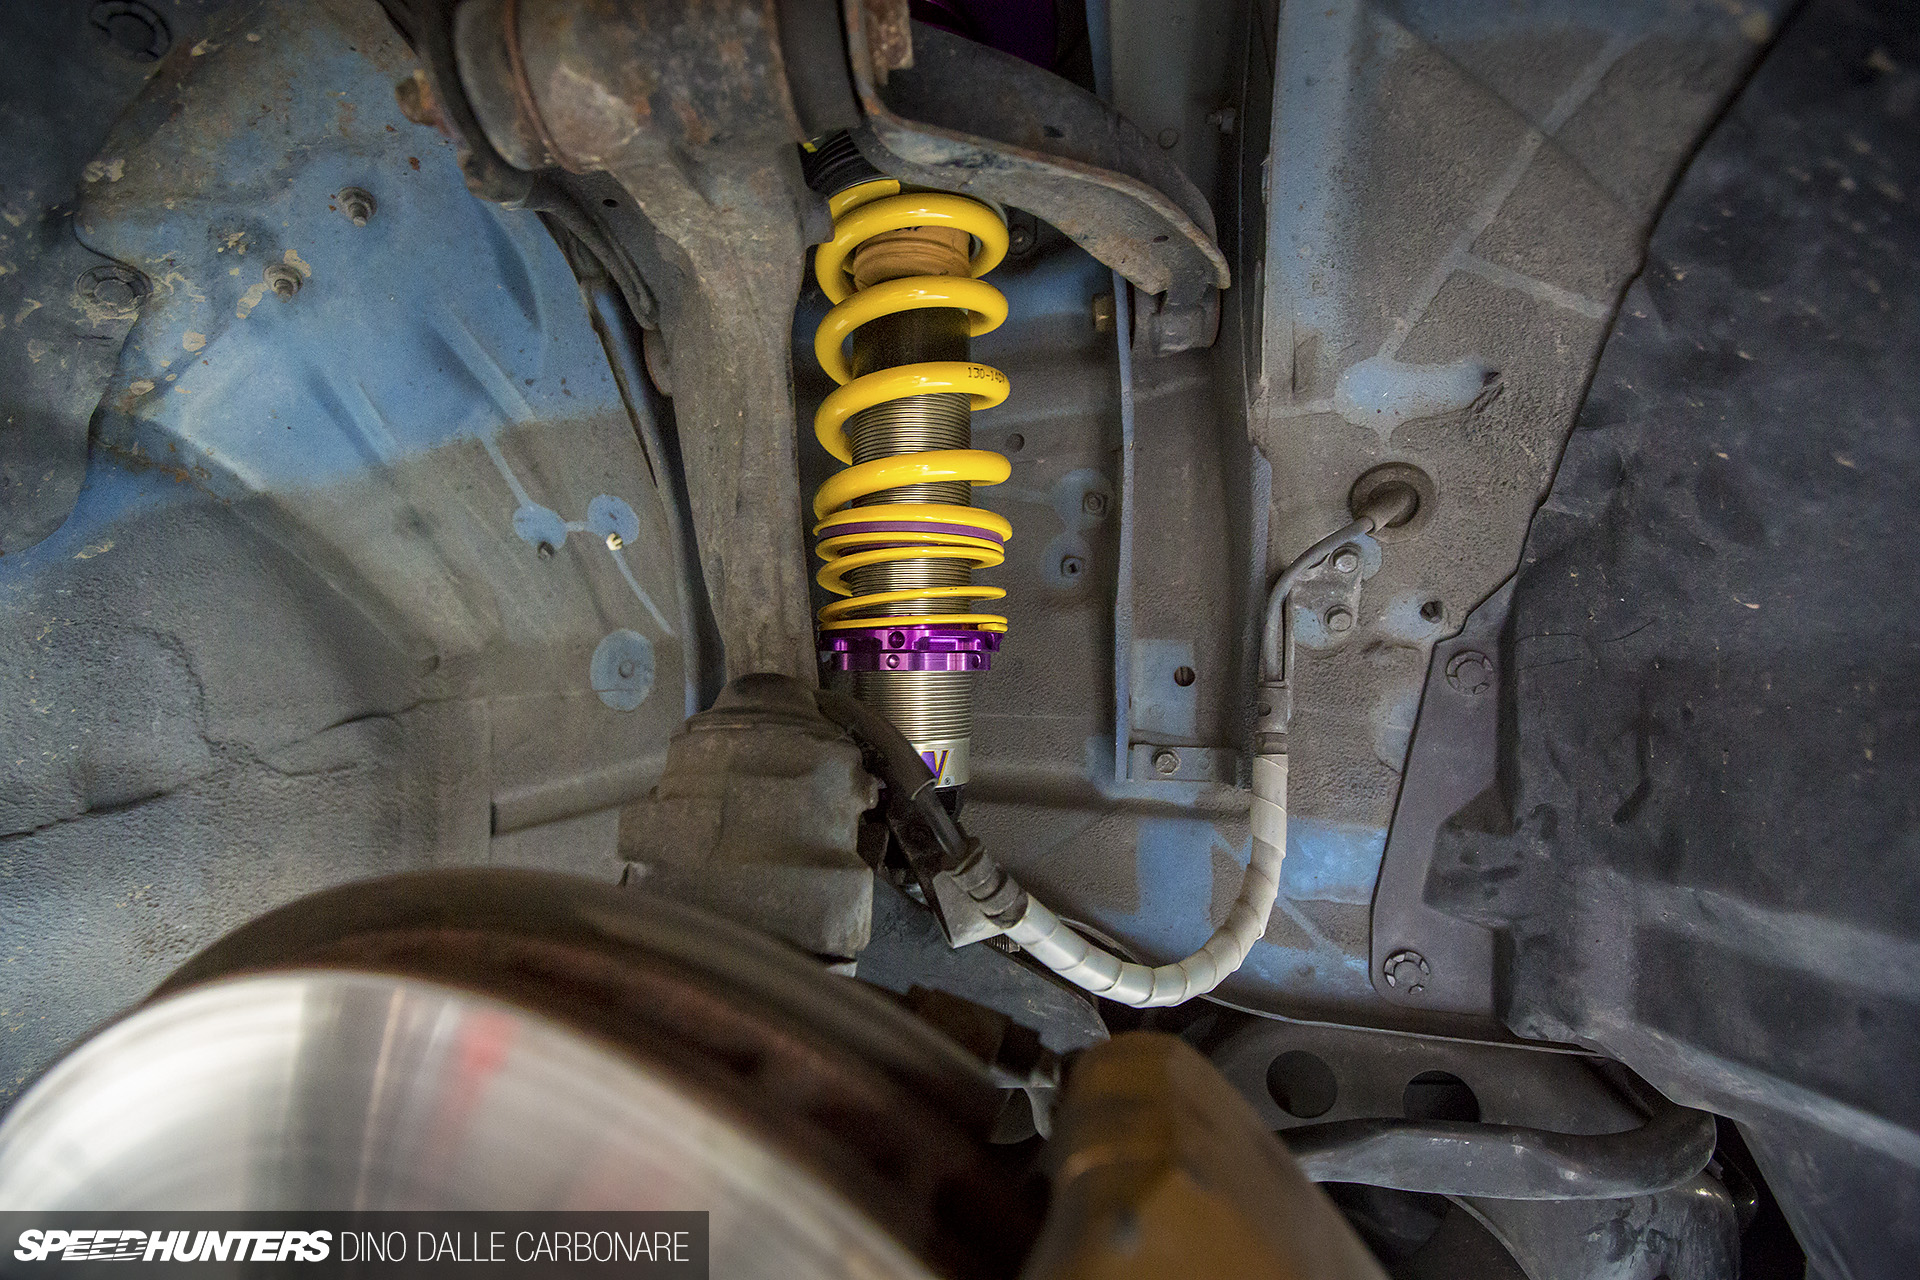
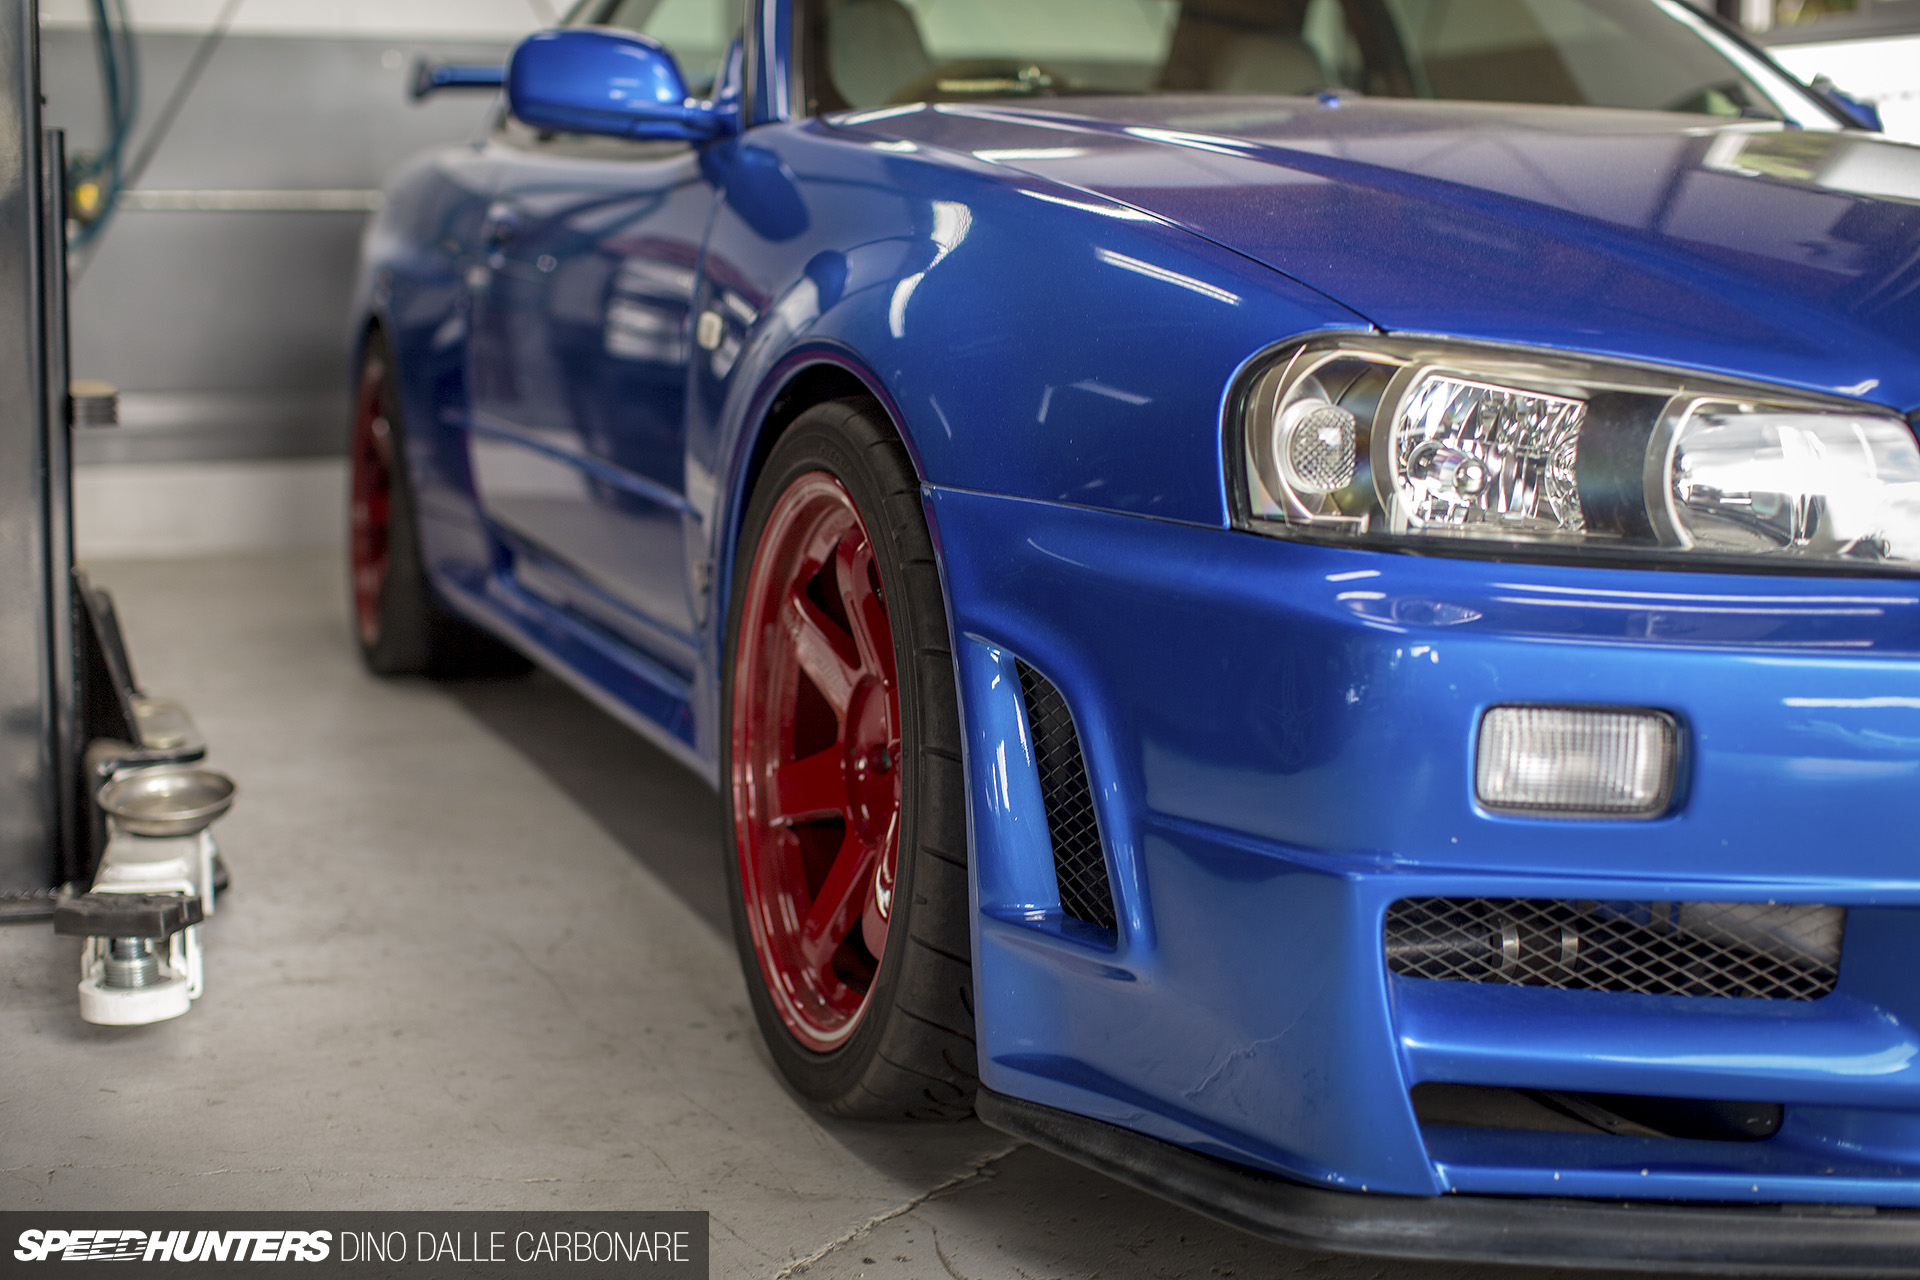
And voilà, the KWs in position looking just as beautiful as they did in the box, but a lot more purposeful now.
One thing that we didn’t think about was the brake hose support, which on the Nismo S-tunes is rather crudely tied down with a hose clamp around the lower potion of the damper. We could have moved that over, but it wouldn’t have been a good look. Not to worry though, as Kawanishi-san knew exactly what to do; he’s encountered this problem many times before.
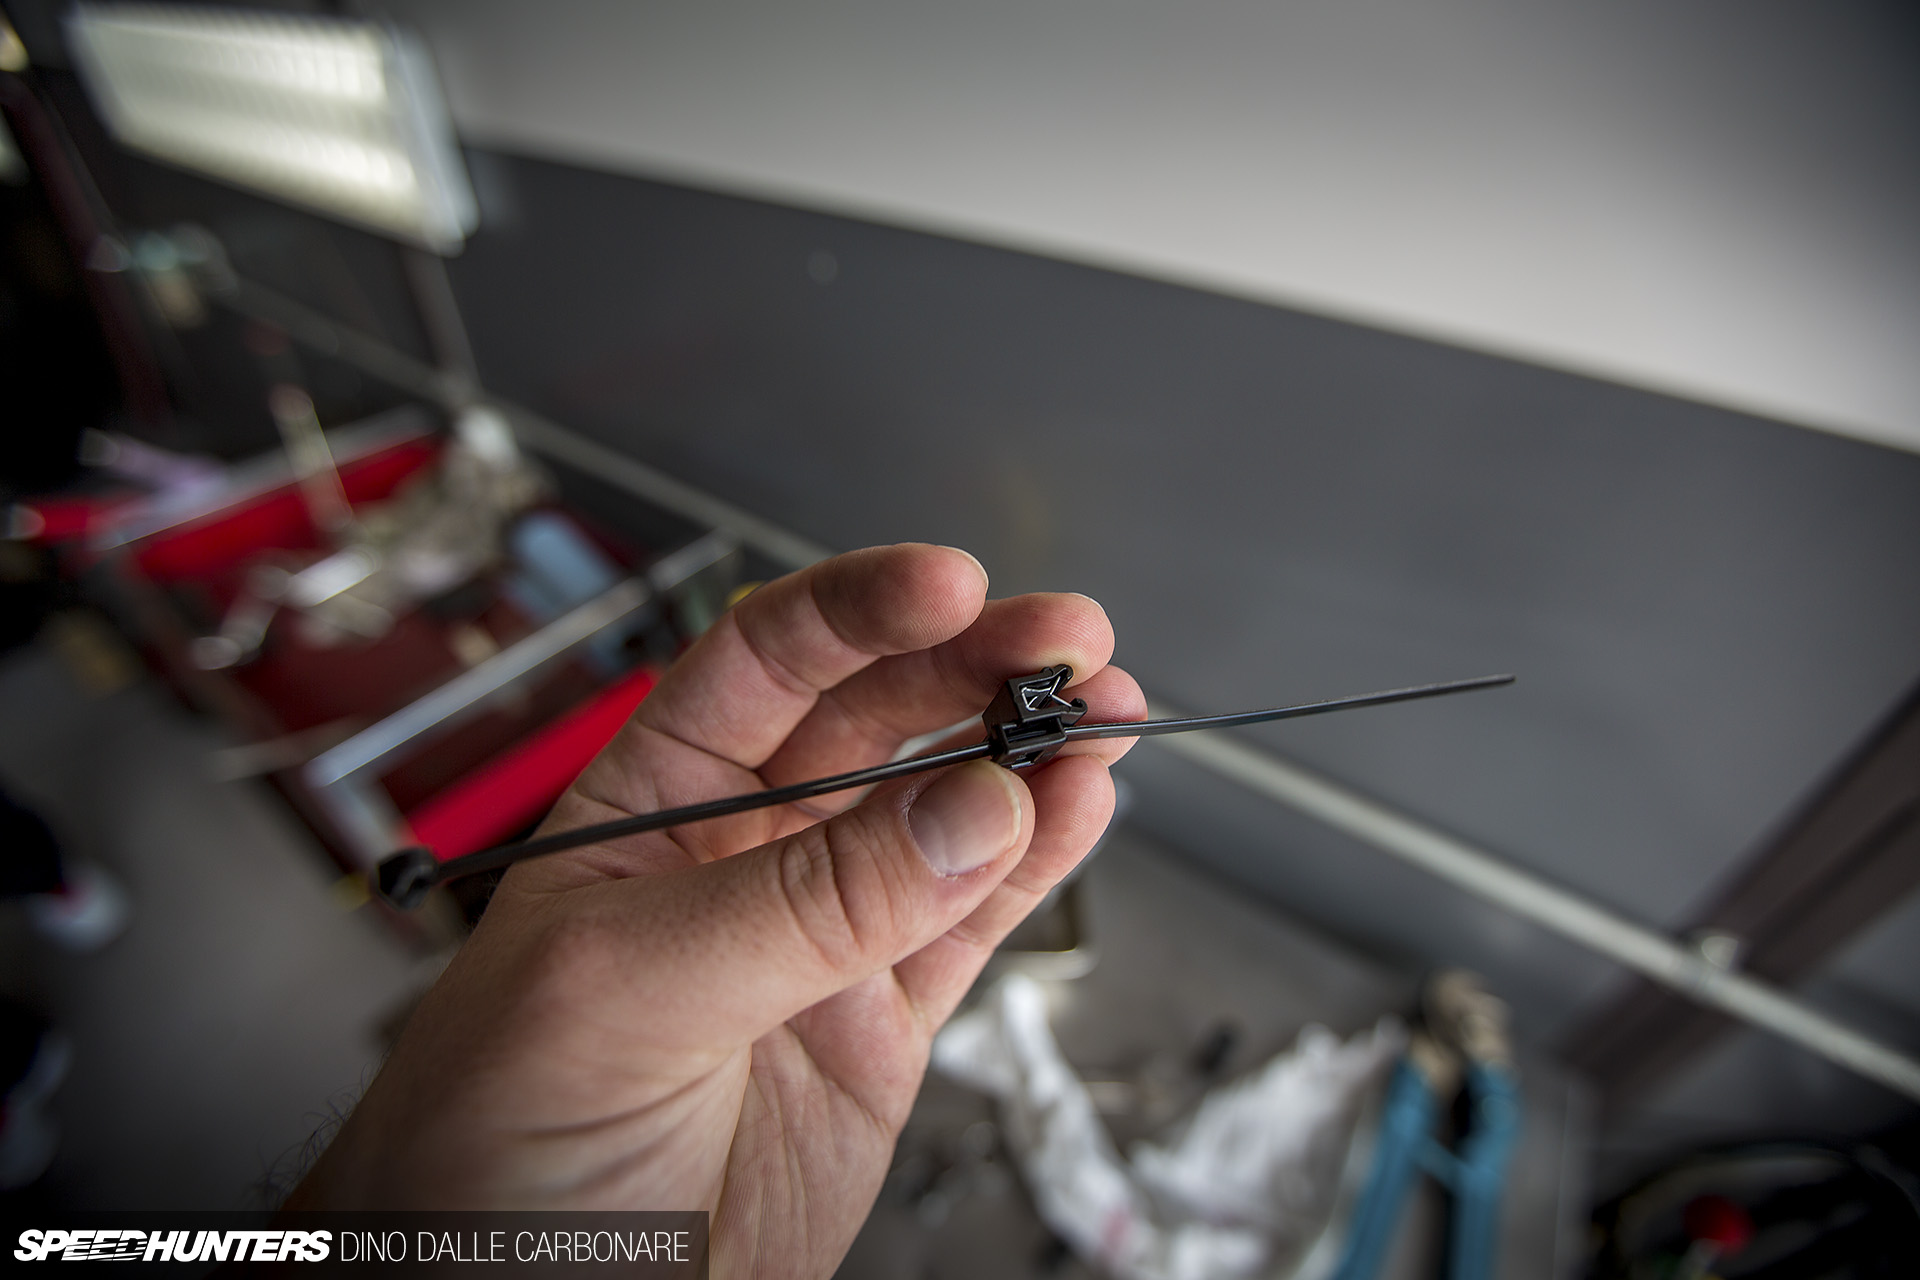
The dilemma was simply solved by these ingenious zip-ties which have a metal clamp at their centers. These also come with the HLS kit and are an easy and reliable way to secure the hoses in place.
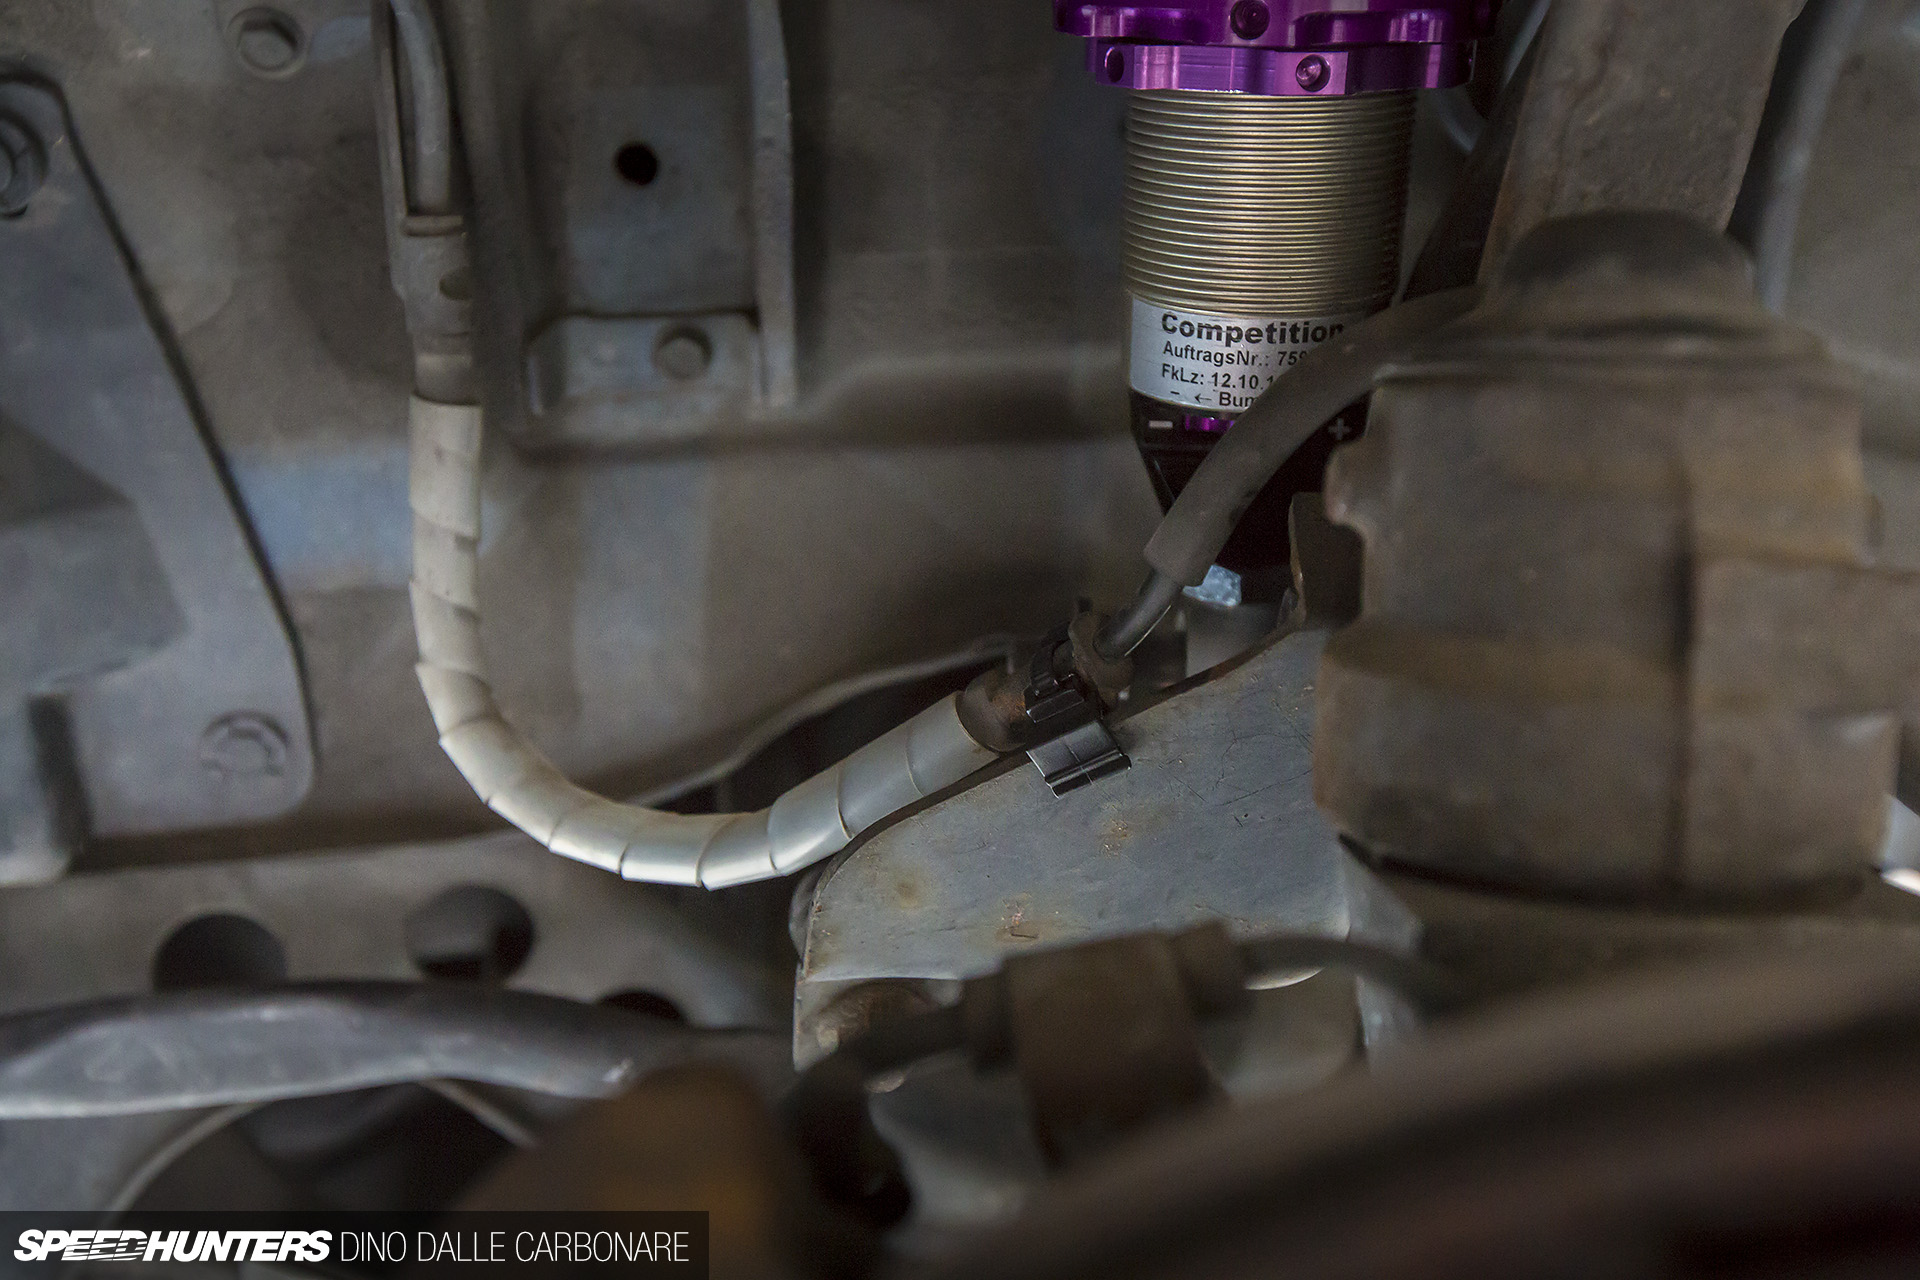
Kawanishi-san simply tied them around the same metal support area that was used with the Nismo dampers, and then pushed the metal clamp down along the edge of the metal shield that protects the lower damper mount. Job done!
The Rear Dilemma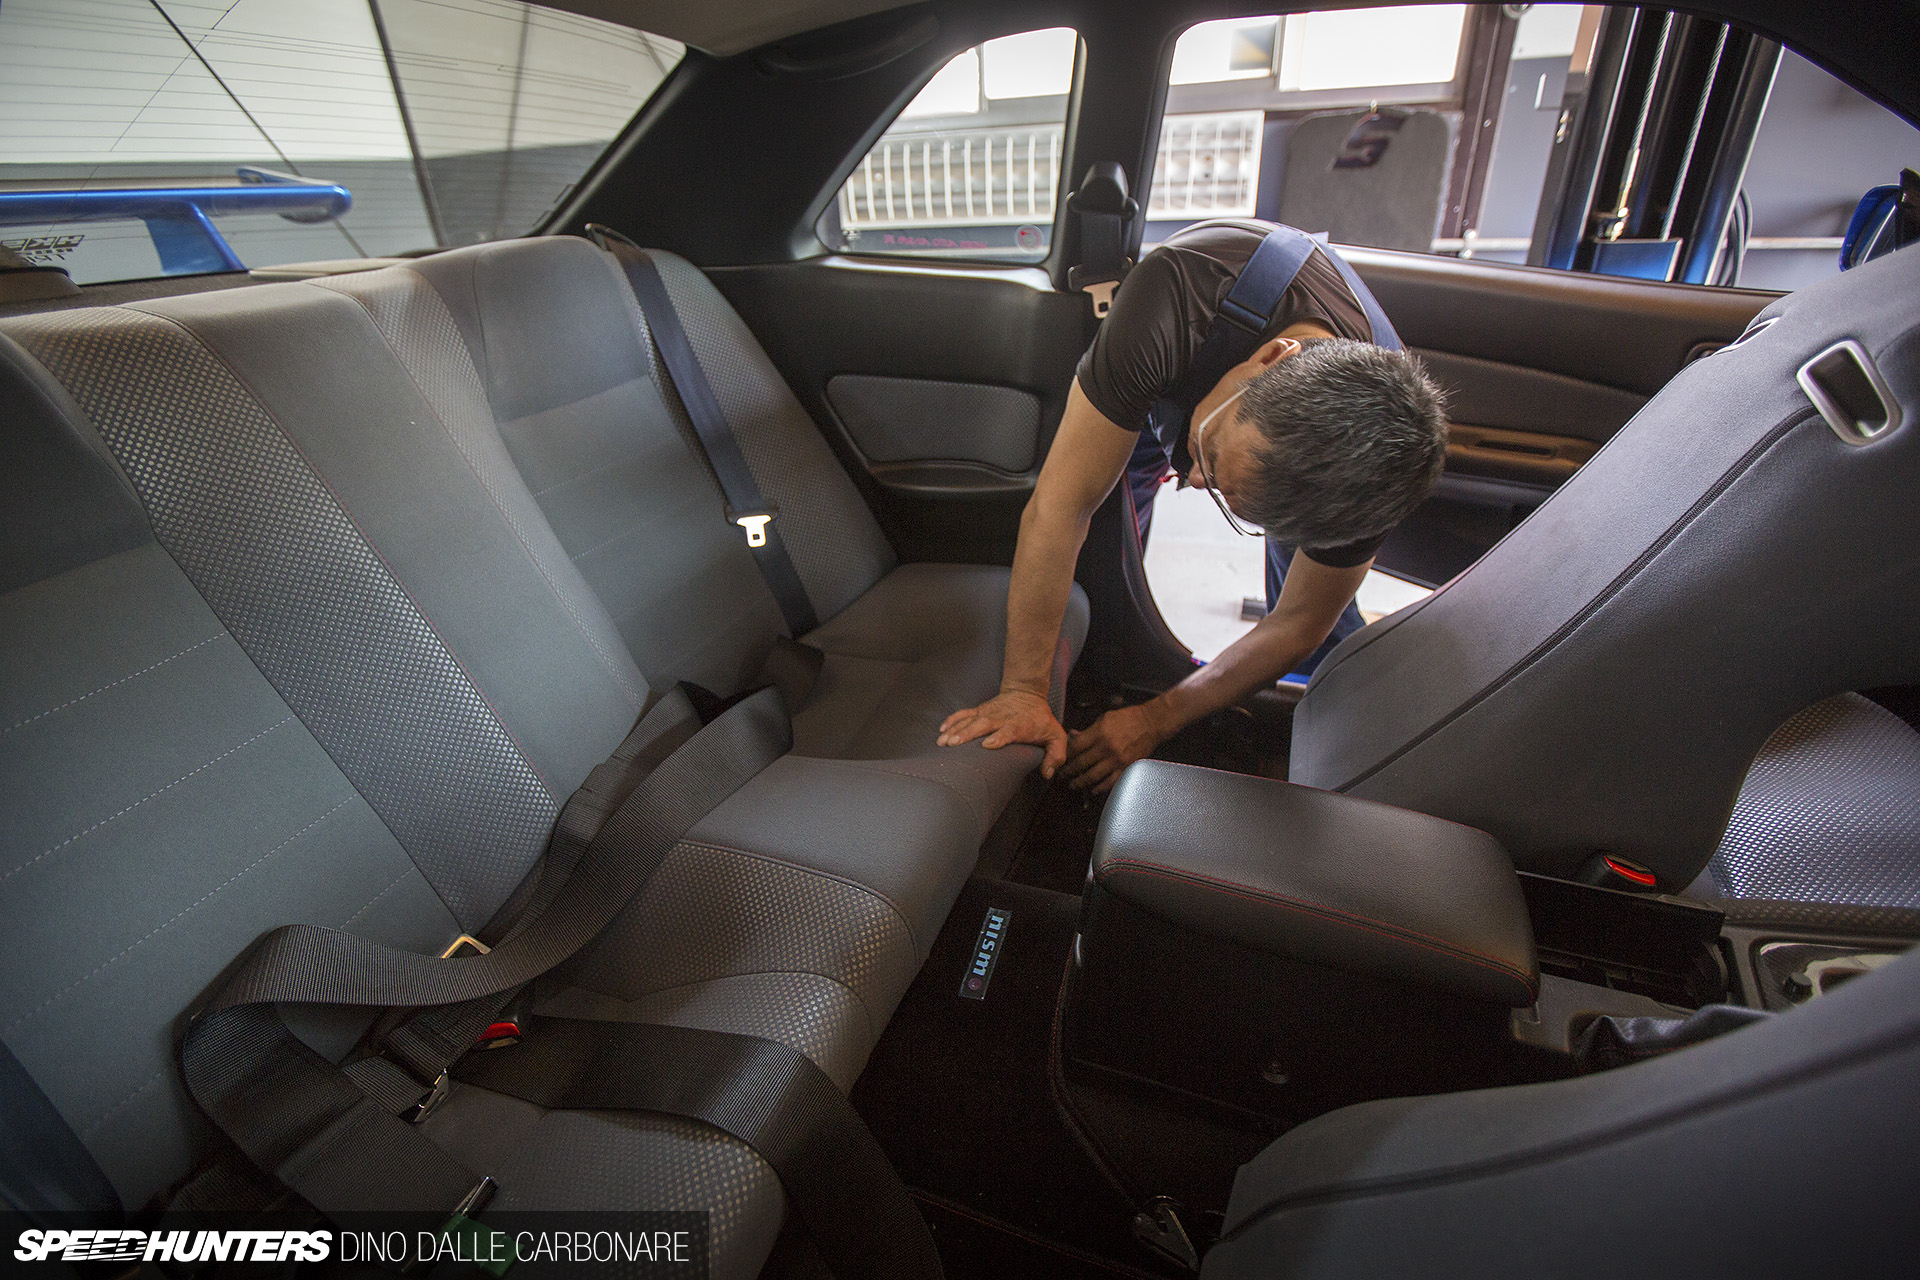
Next up was addressing the rear dampers, and this is where things got a tad more complicated. In order to get to the two bolts that hold the top mounts of the rear struts in place, the rear seat and seat back has to be removed.
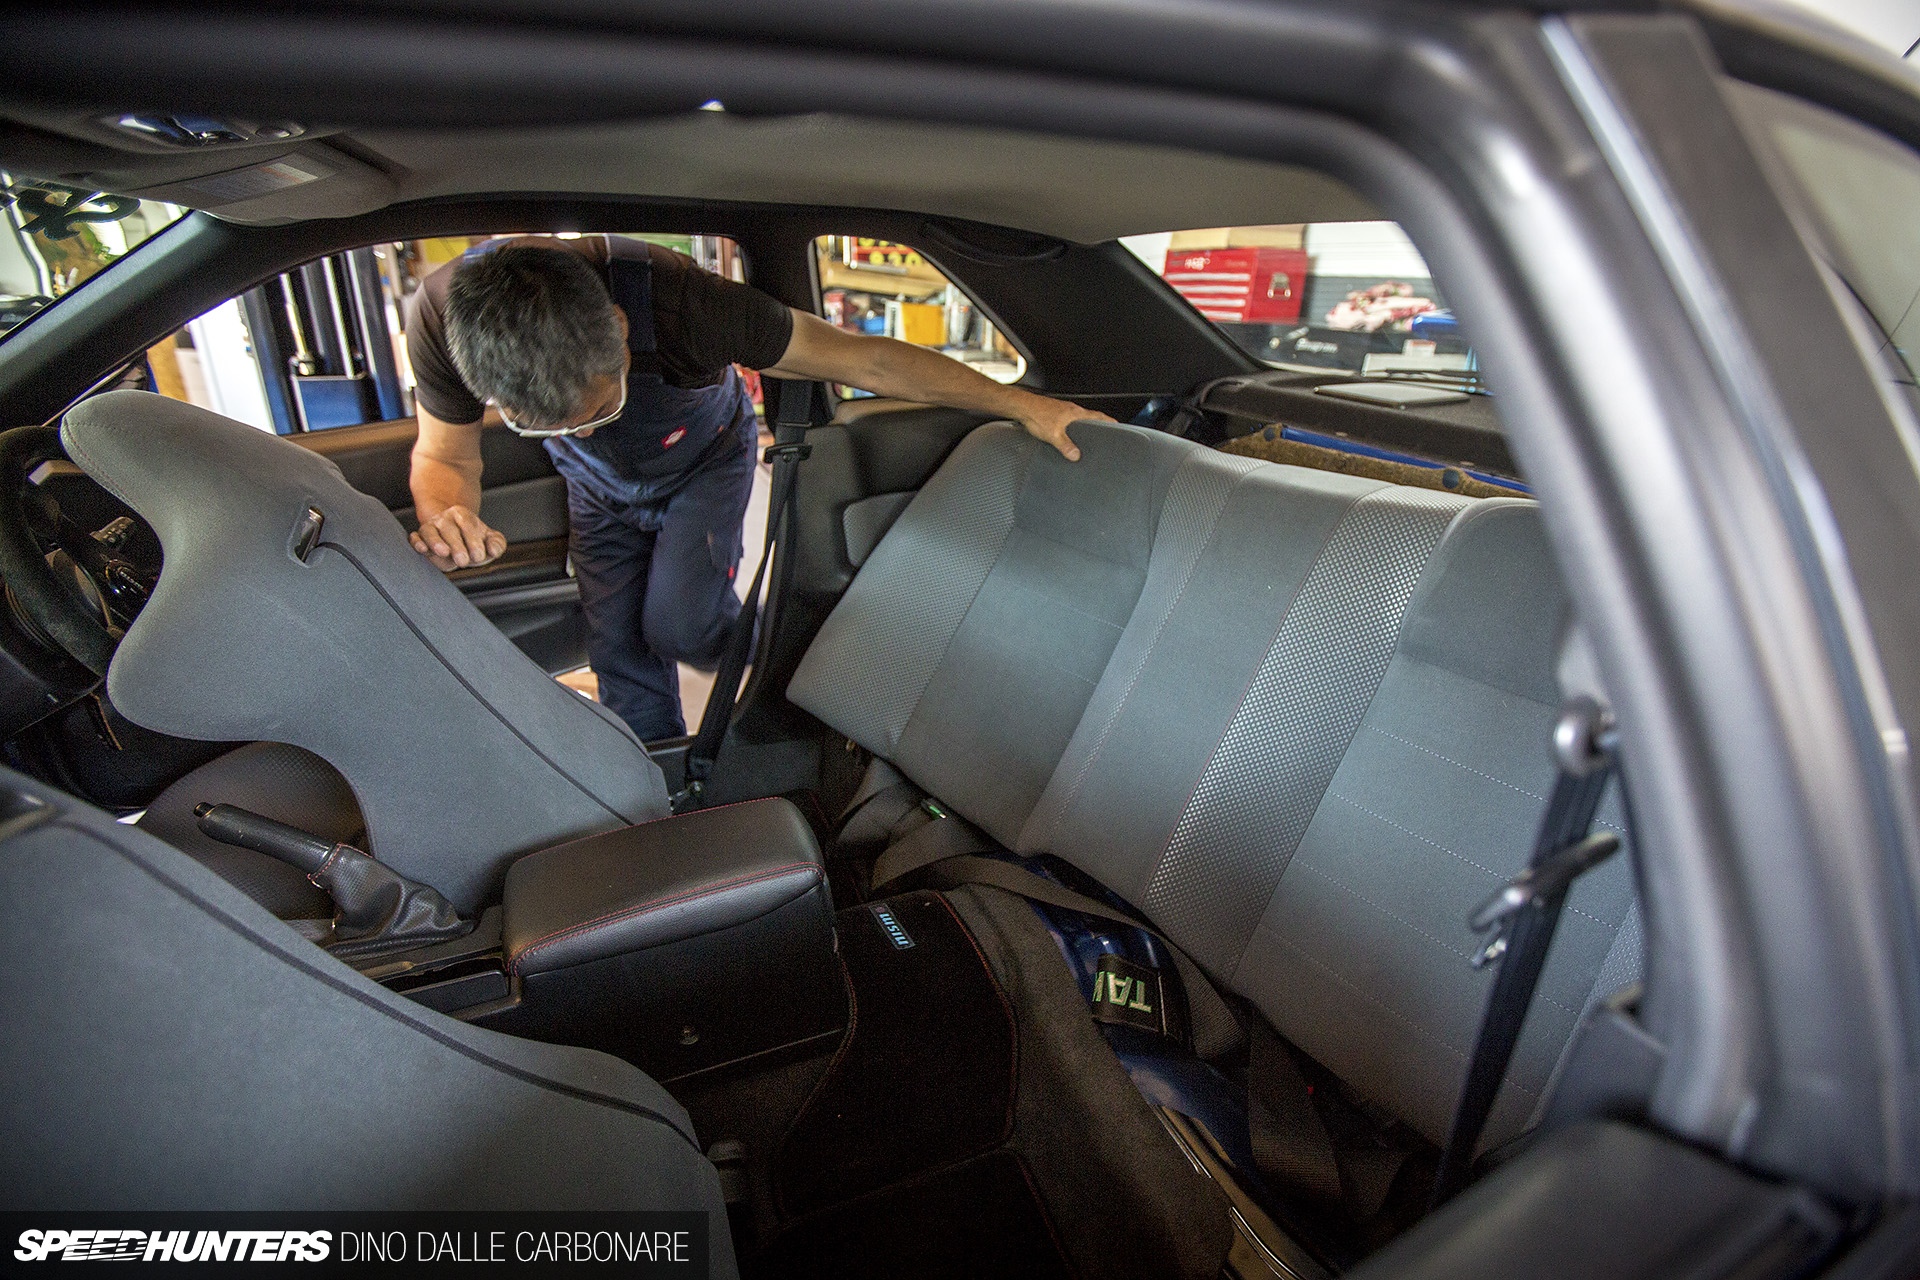
With the R34 it’s a simple enough job; you undo two bolts that hold down the seat section and then you can pull the back portion off its supports.
Every time Kawanishi-san stepped inside the car he would remove his shoes so as not to bring in dirt or risk getting any of the trim dirty. It’s this sort of professionalism that you often see in a lot of pro shops in Japan, and for me at least it makes a massive difference in judging the quality of an installer.
With the seat back out you can reach and remove the square sponge sections that shield and absorb noise from the top mounts, and get to the bolts.
With these undone it’s only a matter of removing the single bolt that locks the damper onto the lower bushed mount.
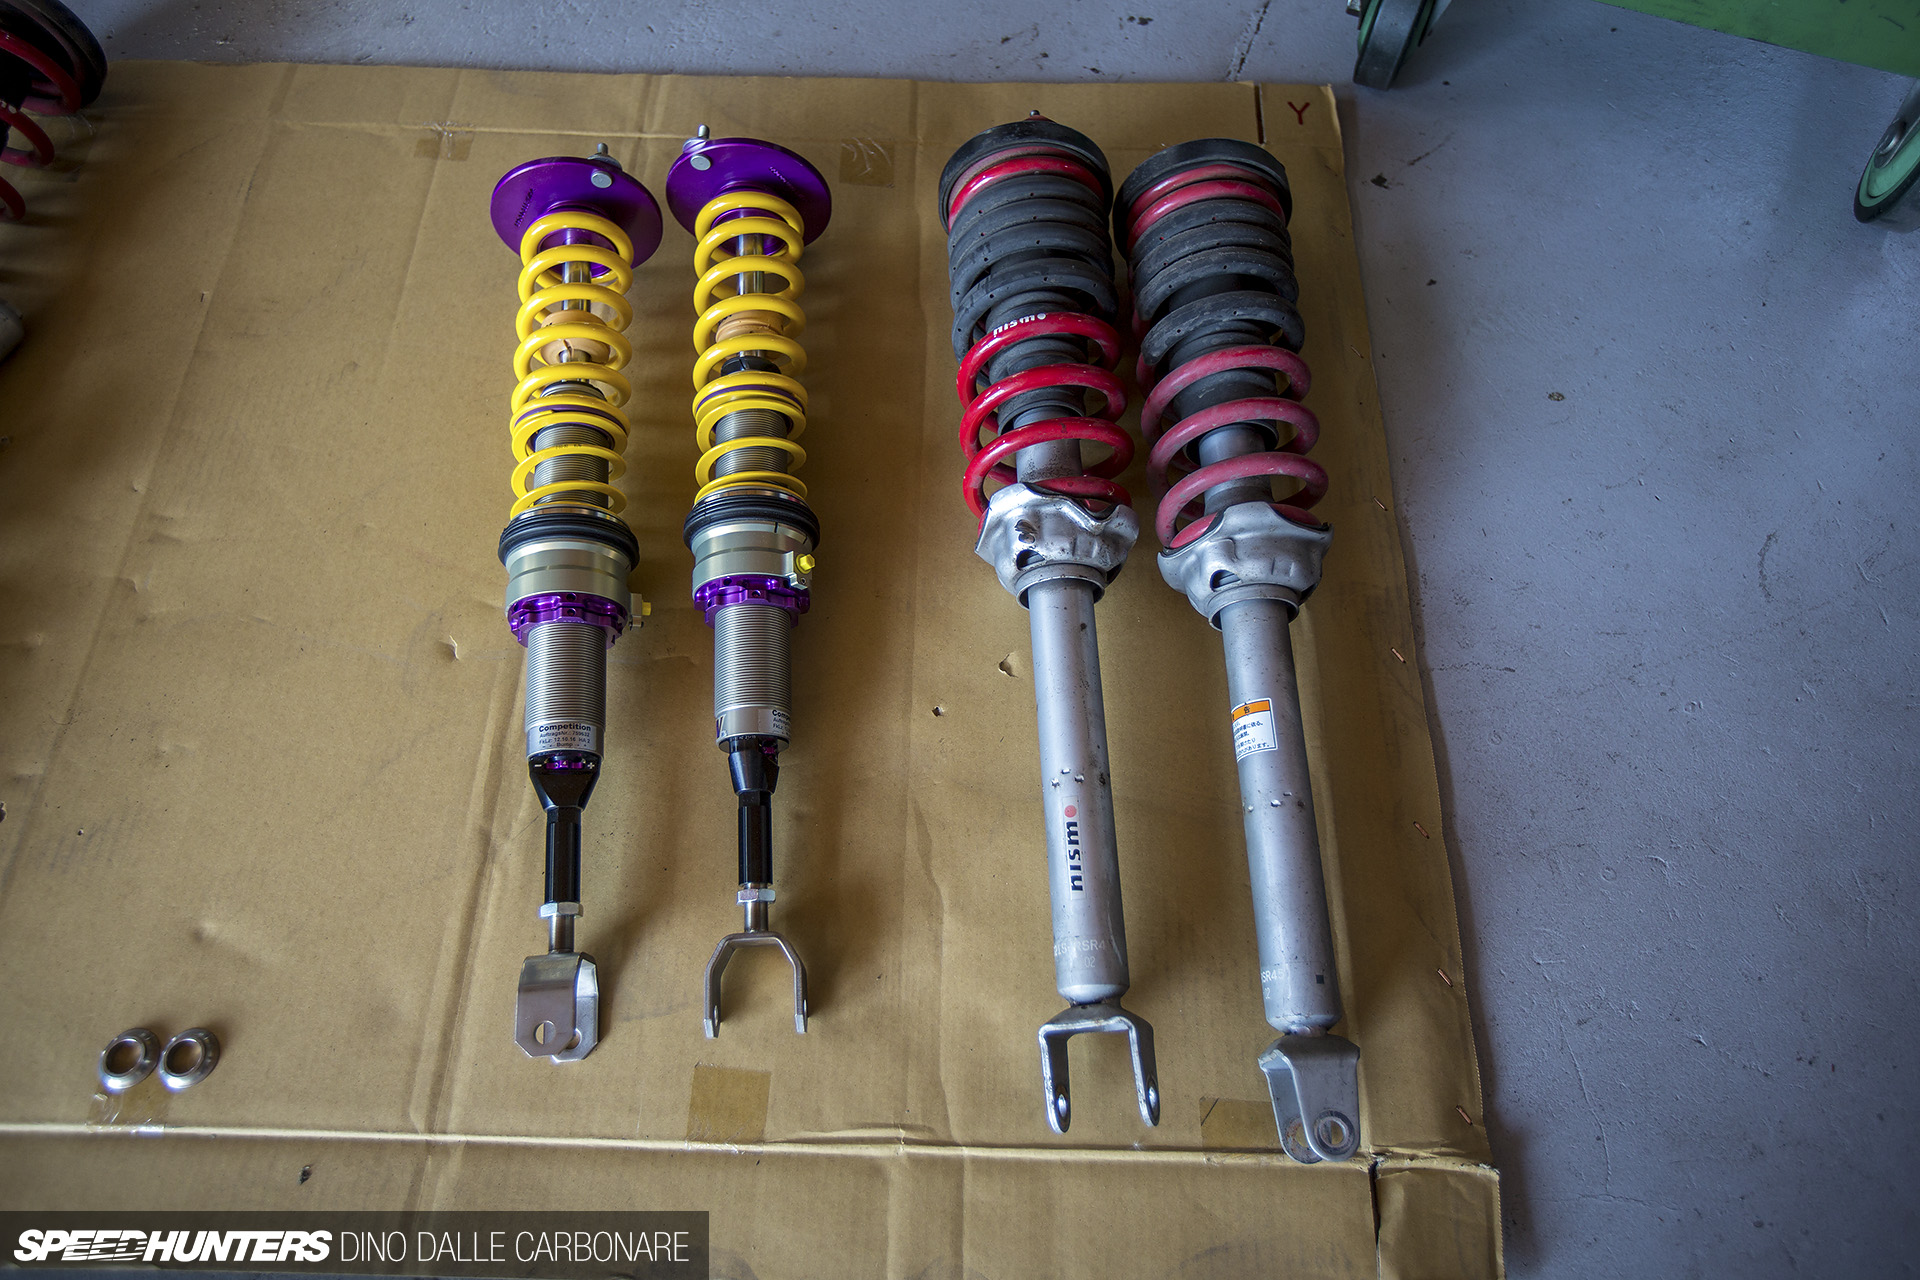
Here’s a comparison of the rear S-tunes next to the KWs. You can see that the lower mounts are wound all the way up, making the new dampers look quite a lot shorter than the Nismos. But winding them all the way out will get them up to length, or would it?
We first needed to check, because as I mentioned to Kawanishi-san, I did actually want the car to sit lower than before and the rear to drop down a little more to eliminate the raked stance the fixed-height Nismos provided. After all, the S-tunes were street-oriented and needed to factor in a bit of extra compression when the car is fully loaded with four occupants and a trunk full of shopping.
That said, we did wind it all out, and it was looking good with just enough ride height. But there was a little concern that there wasn’t that much threaded metal left inside the female portion of the lower damper mount to guarantee a safe enough setup.
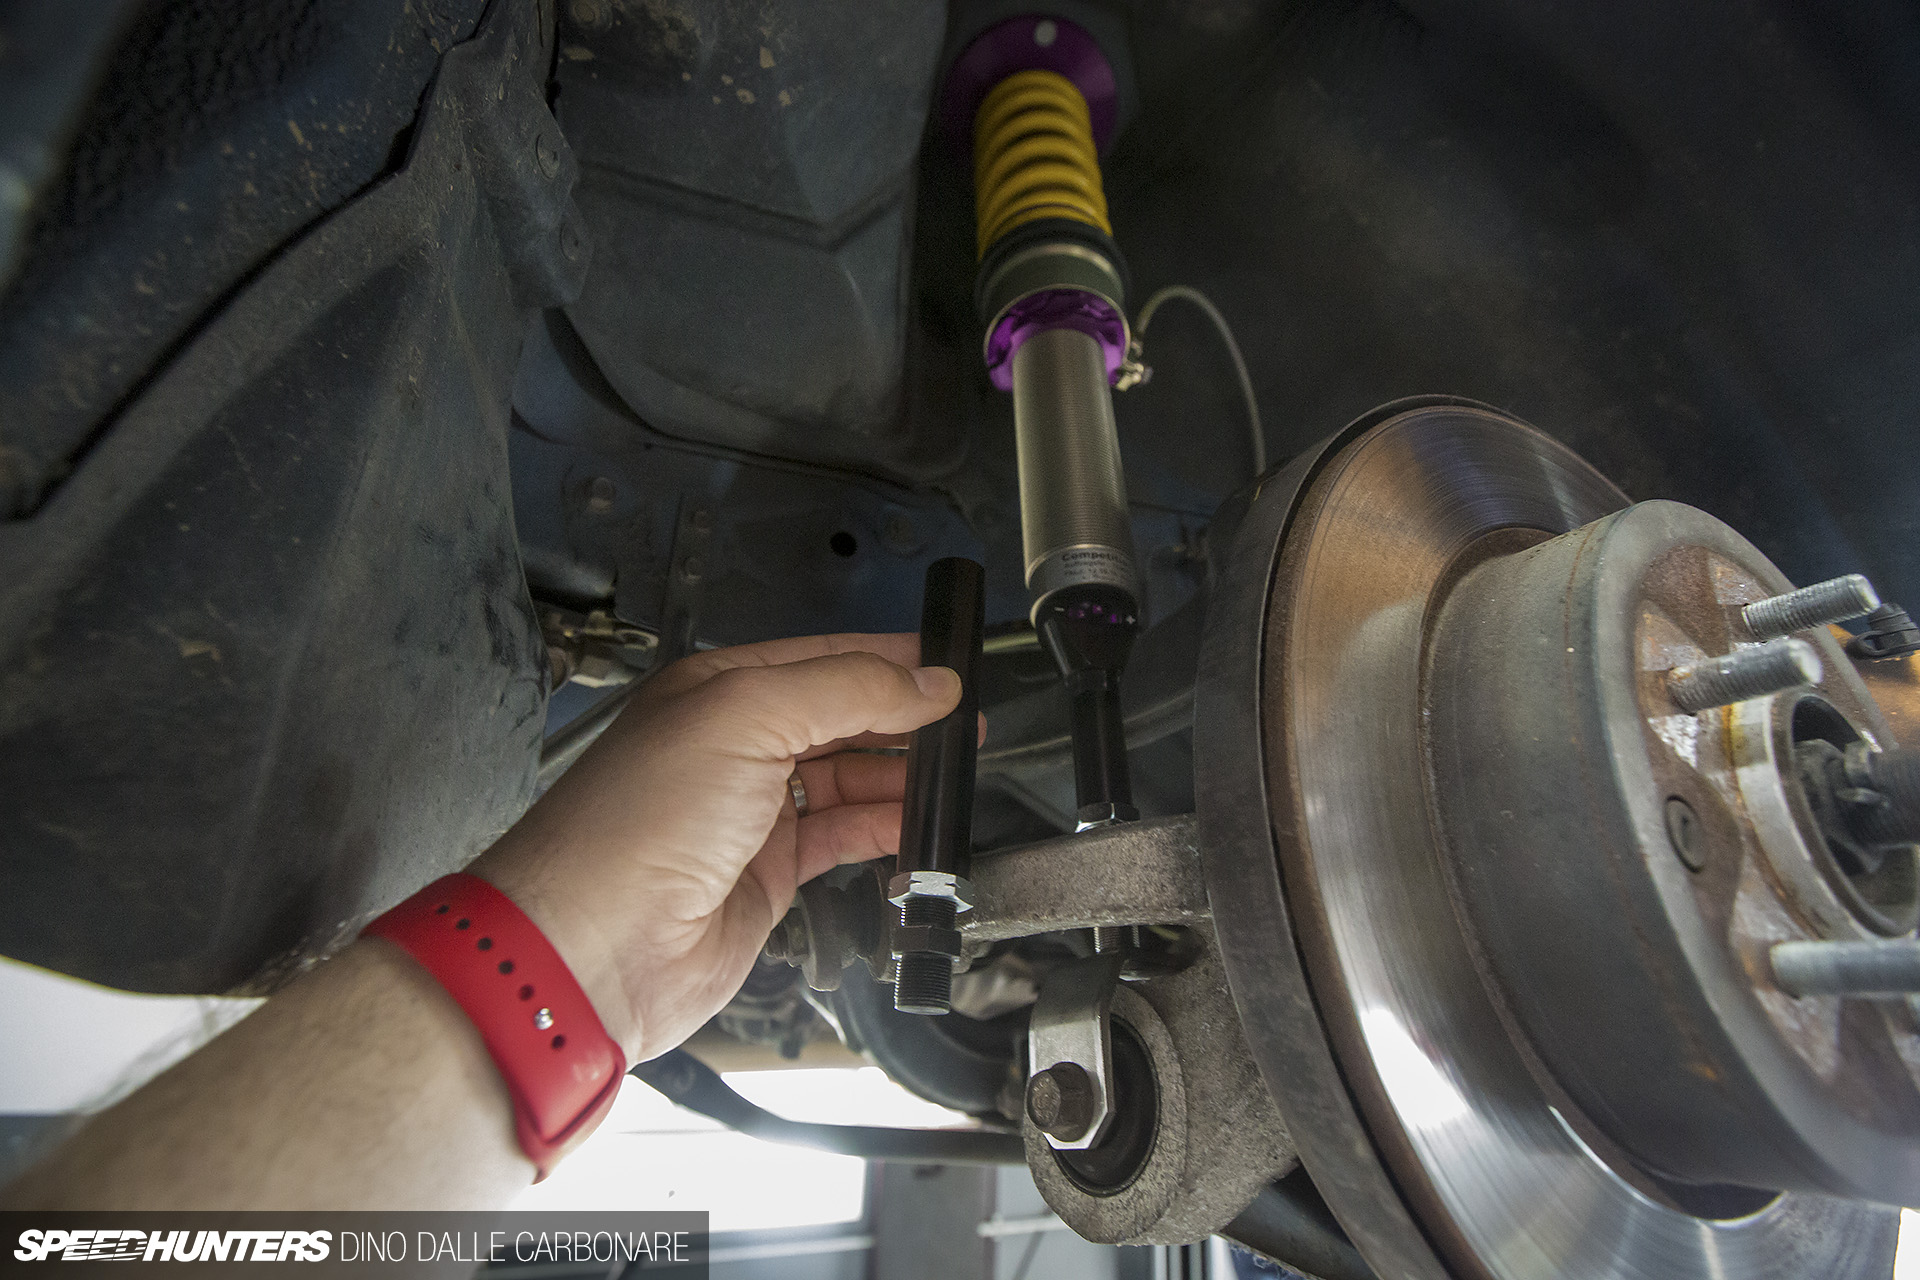
And this is where the guys at KW in Germany shined for their service. I got into contact with them the same night and by the next day they were machining new and extended lower mounts. They were sent out shortly after that and less than a week later were in my hands at Kawanishi-ya in Yokohama.
KW Service Wins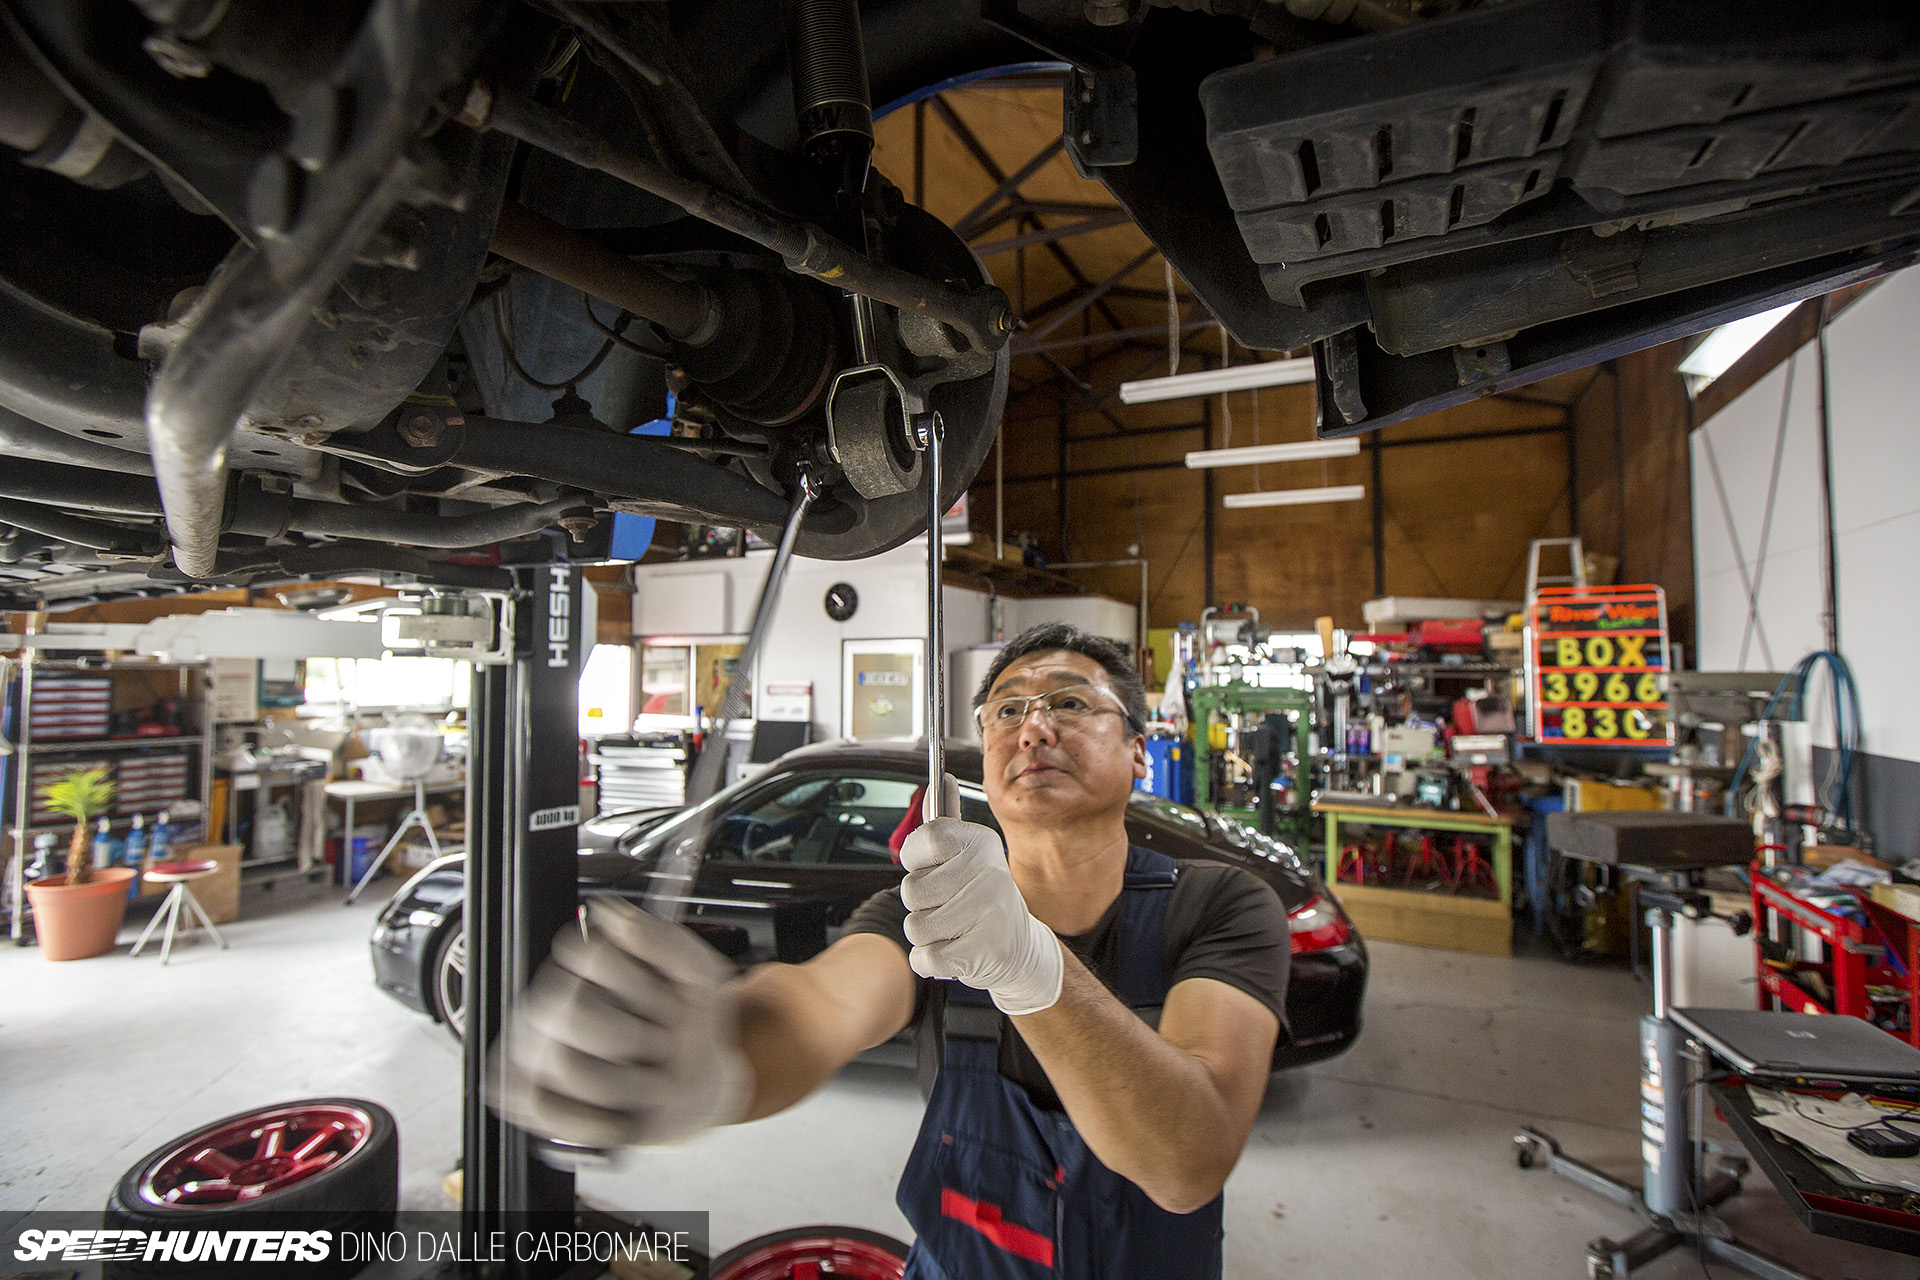
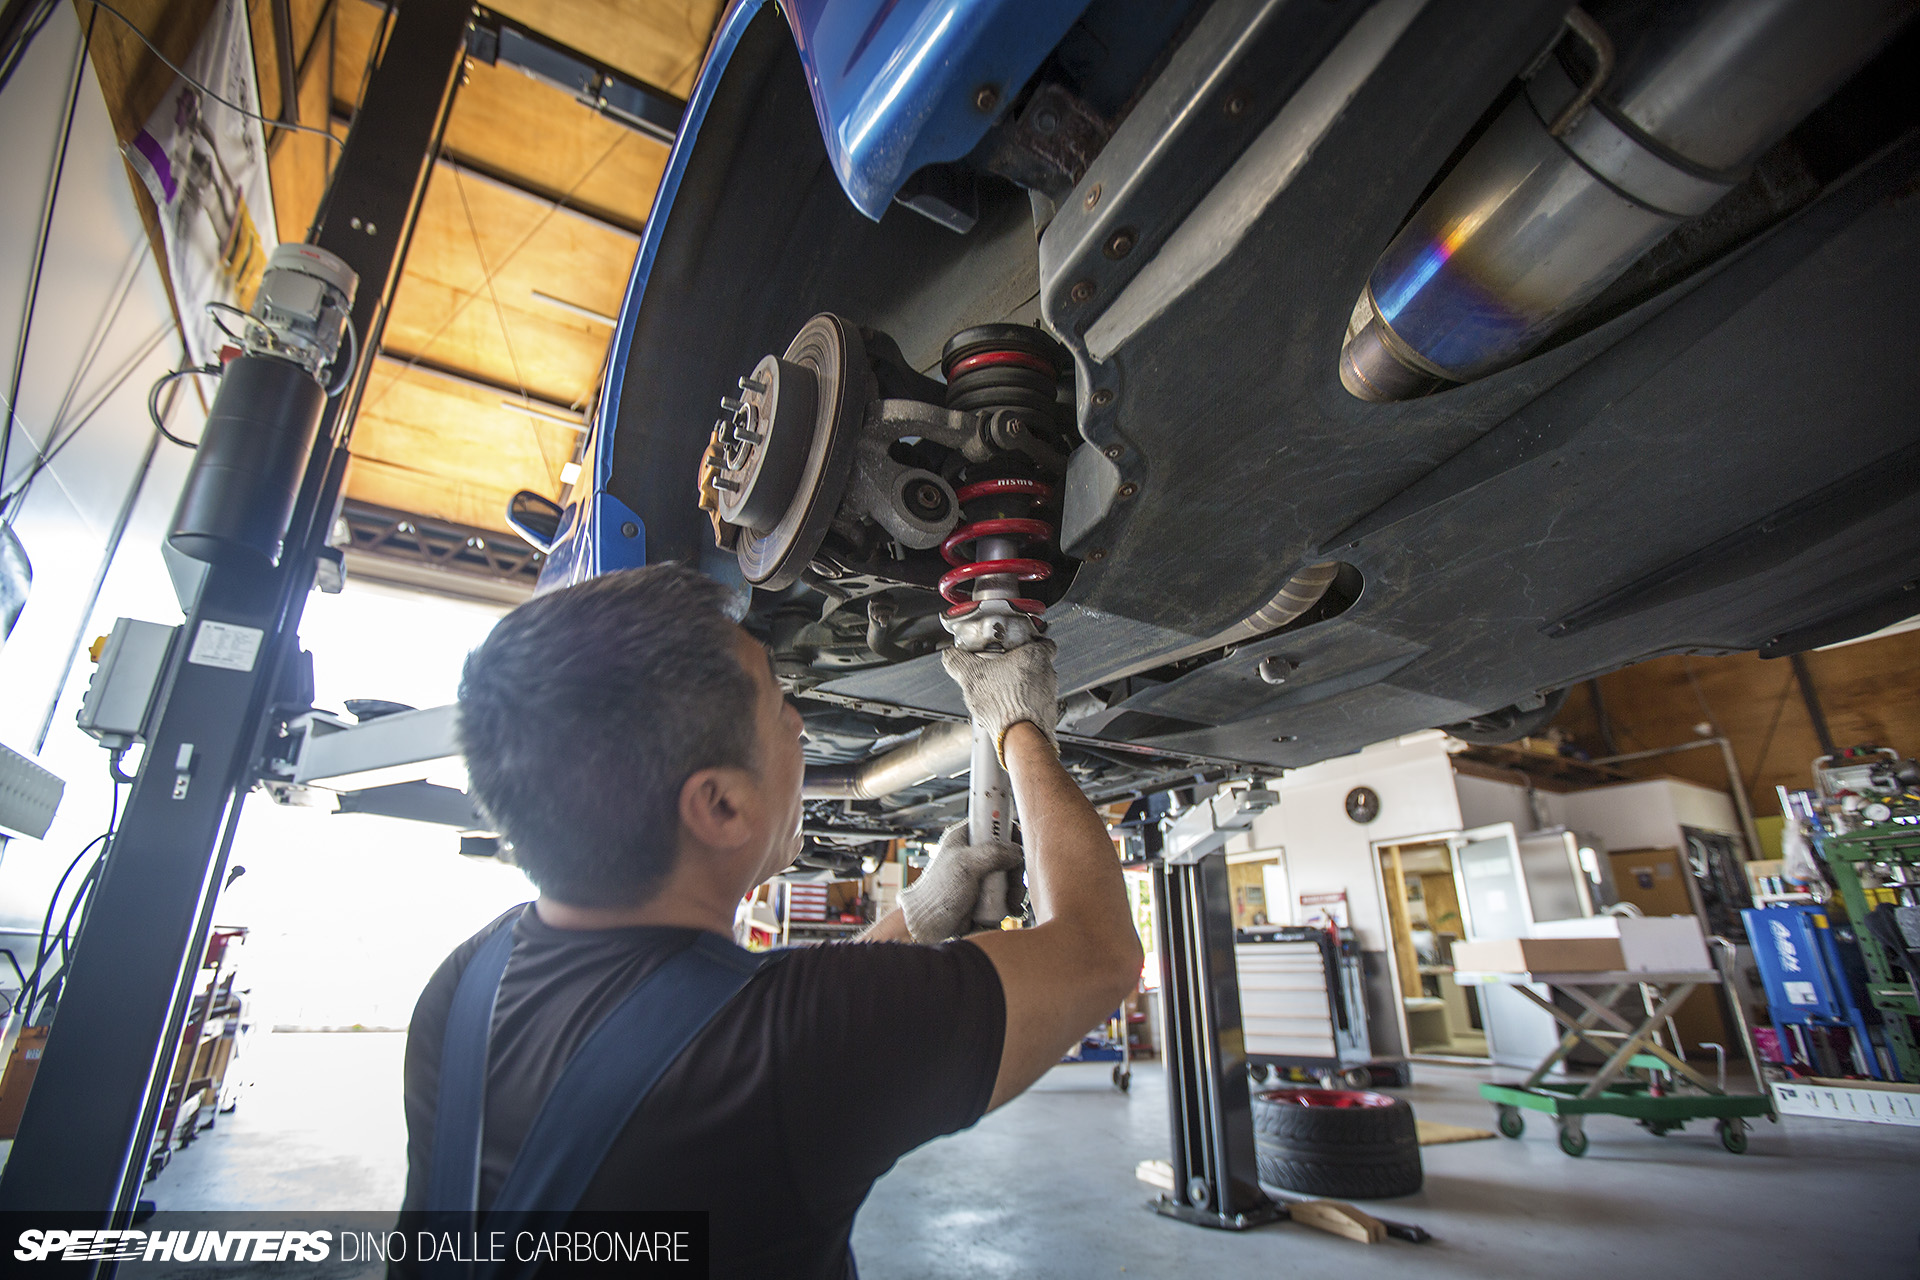
The massive bolts that hold the lower portion of the rear dampers in place were then removed and Kawanishi-san decided to swap the new rods in with the dampers still installed.
It was just a question of swapping over the lower U-mount and bolting everything in place.

Of course, it was a little but more complex as there was a lot of measuring that was going on while I fumbled around with my camera and updated my IG feed.
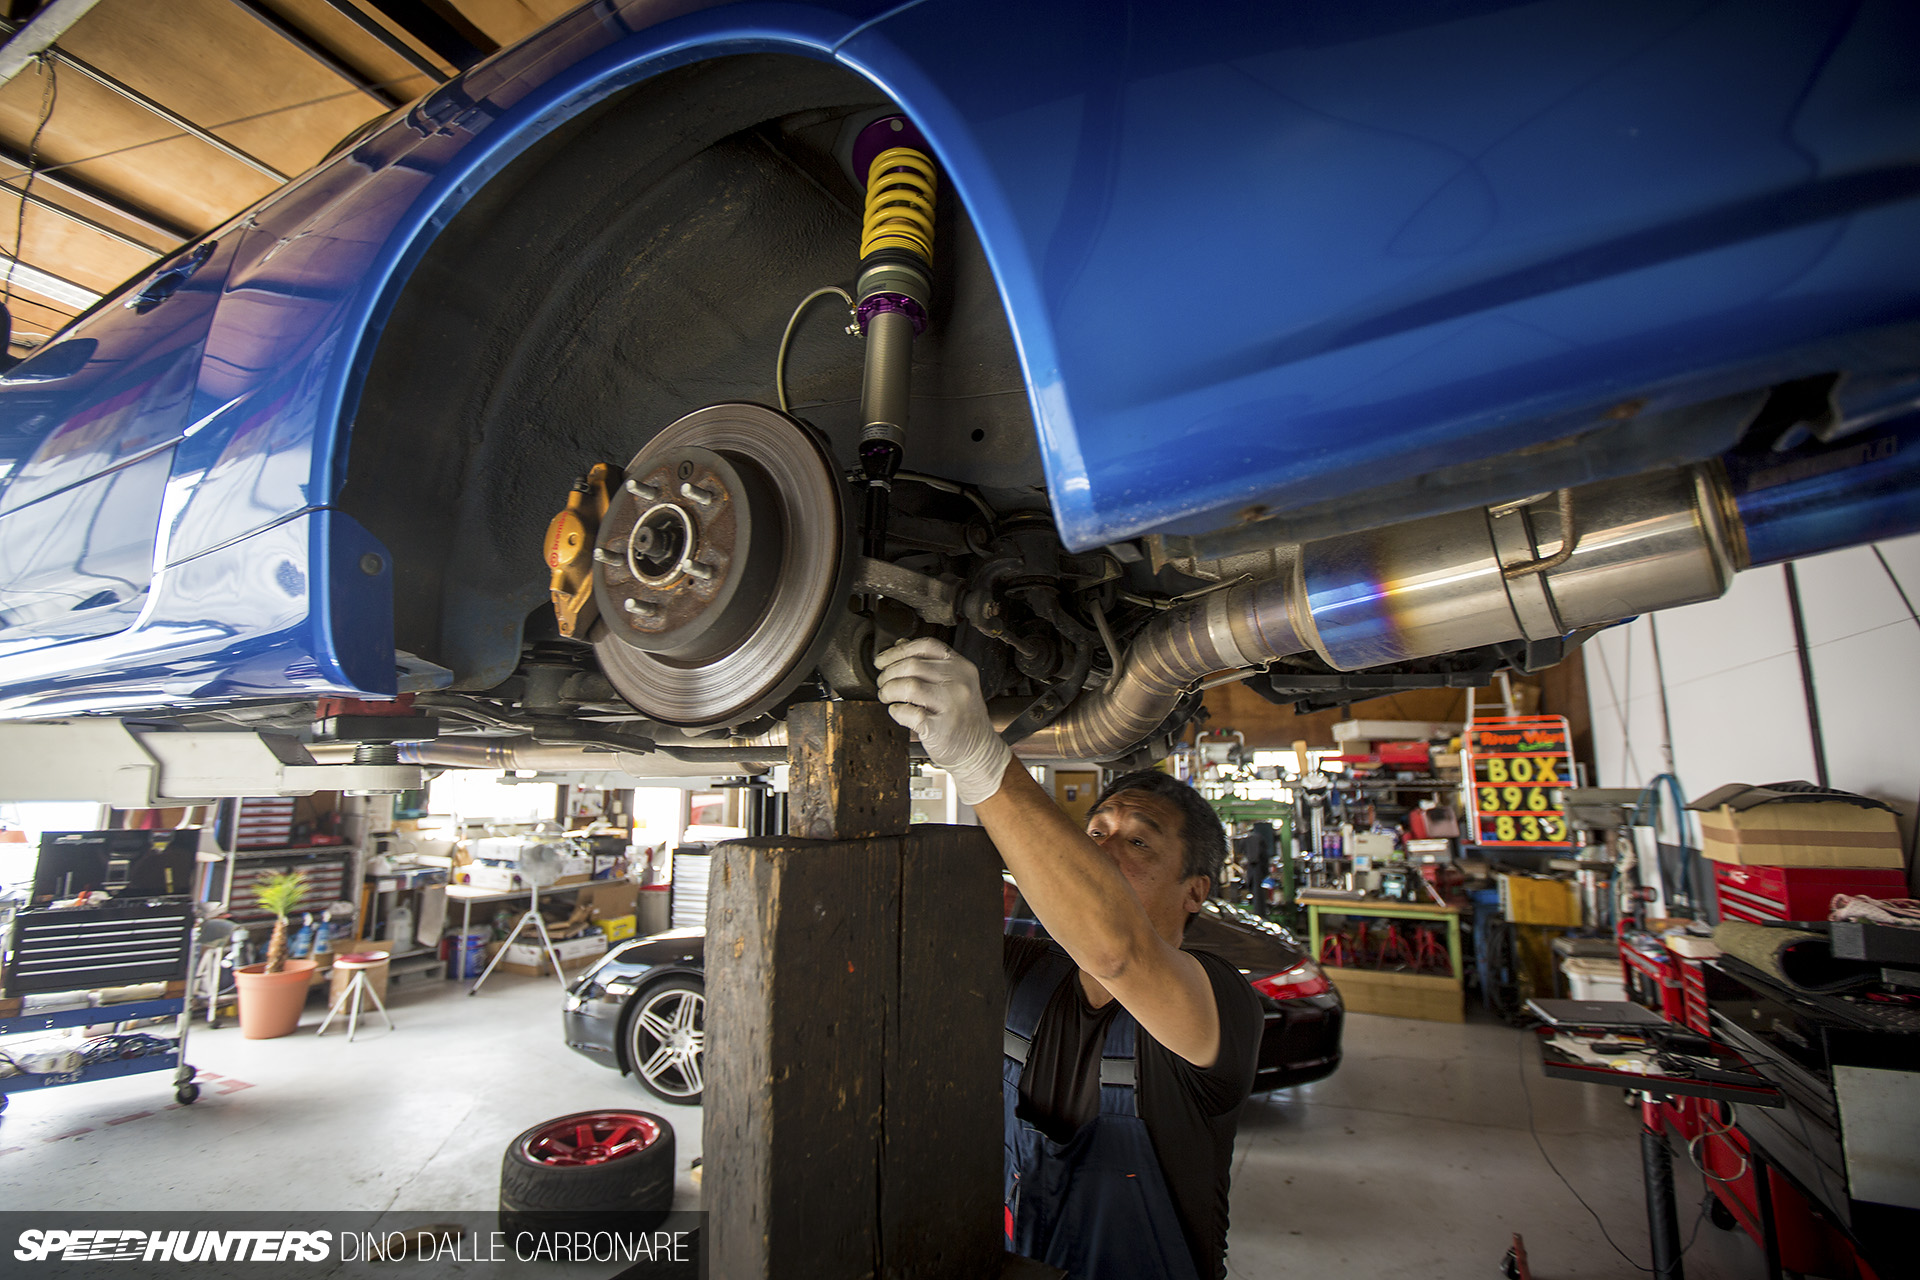
The dampers were then compressed and the bolt slid in again.
Finally, everything was torqued up and rechecked with typical Japanese precision.


The wheels were then refitted and the car dropped onto the new suspension to ensure that everything would bed in properly. Then, the wheels came off again and the car was lifted for another remeasure to get the ride height spot on. We measured for a 12mm lowering at the front and a 17mm drop at the rear as a start point.

The TE37RTs were refitted for one last time, and then the car was ready for a test drive.
I took it out for a short drive on the roads surrounding the shop to get things bedded in a bit more, then brought it back inside for a final measure.
Aside from the fact that it now sits a little tighter with the wheels and looks way better, it was that initial drive that was a true realization. Even at slow speeds and around narrow streets the car felt transformed; everything is more direct, sharper and reactive, right down to how precise the steering feels a millimeter off center. Yes, the racing springs and motorsport dampers are harder and there is more noise and vibration from the tarmac getting into the cabin, but it just feels a little rawer, in a rather welcome kind of way. After all, it’s a brutally functional racing setup, and what race car drivers out there care about noise? It’s precisely what I wanted. Impressively enough, the stiffer ride doesn’t seem to be intrusive; the dampers still deal with imperfections in a compliant way which is all down to KW’s signature blow-off features of the compression valves. I guess that’s also something you unexpectedly get from high-end, custom-built racing suspension like this.
But that’s where the impressions end. The test drive was short and there was still the HLS system to get to, so as excited as I was, the san-yon had another day’s worth of work waiting to be done. You can read all about that in my next post.
Dino Dalle Carbonare
Instagram: speedhunters_dino
dino@speedhunters.com
OFFICIAL SPEEDHUNTERS SUPPLIERS


This was an awesome article, I'm excited about hearing about the HLS in part two. (I've also got my fingers crossed that you'll cover the test drive on Hakone in depth.)
Thanks! It will all be done properly, like everything on this car I take my time to get stuff done perfect from the get go. I will need help setting it all up so might need to call upon someone with far more driving knowledge than myself....
Finally, an update! Those KWs look mega. Looking forward to the next post.
Will KW produce ready made coilovers for the Skyline GT-R range after making this custom-made set for you?
And which front strut tower bar are you looking to use? Nismo's titanium one?
When I last enquired they stated that they had no interest or current plans to produce them for the R32 chassis.
Ask Dino, he know who is the contact person for a custom kit.
I wouldn't be surprised if they do eventually. I'd love the Nismo titanium one. I missed out on buying one back in the day when it was selling for 69,000 Yen. Now you'd be lucky to find one second had for less that triple that! Maybe in the mean time some more exciting options have become available, I'll have to research
Been a long time since you put that unboxing article! Custom suspension must be expensive tho...
Took a while yes, but it was worth the wait!
Get it for free since KW is an SH sponsor.
It would be nice to get them for free!!
The car needs desperately some Ikeya Formula suspension bits. Do an overhaul and get rid of that junky-rusted control arms with shot bushings.
This is what i wanted to highlight - some chassis love is needed.
But nevertheless good job!
Yes, I do plan to address that too, and also clean up the rest of the stock links. There are some very interesting bits from an australian company I'm looking at
Dino, what camera lens are you using?
Here, either a 50 f1.2 or 16-35 II
Looks fantastic. Did you have to use spacers to get that offset so perfect?
No spacers:)
I wanna see some video of this on the touge. Looks more like a beauty queen than something that is going to be pushed to its limits.
Haha, beauty queen. So I can't drive a car hard and actually even wash it?
Driving a car hard is having scratches and dents. So no, you obviously do not drive the car hard. Stop pretending you're some awesome driver, you just said you'd have to get somebody else to setup the dampers.
" I will need help setting it all up so might need to call upon someone with far more driving knowledge than myself...."
Driving hard means scratches and dings? No, sir. City driving means scratches and dings. My supra had plenty of scratches and dings. But they where all from living in a city, where it got hit by a taxi, hit by shopping trolleys, and even had a dent in the roof from some drunk bastard who decided to go down the street and put everyones waste bins on top of their cars.
Guess what though. I've never damaged any car driving it hard, be it on track, or on backroads. Sure, I've cracked my brake discs from repeated abuse, I've endured more frequent oil changes, and flat spotting tires when trying to avoid other cars crashing in front of me. But I've never damaged a car by driving it hard.
You damaging your car driving it hard only tells me one thing: you don't know your own limits. In other words: You sir, are a bad driver.
What a giant, erect, throbbing dick you are dude. The dumb misconceptions you state are so monumentally assumptive and wrong, it buggers the mind. Not even worth correcting.
Hands down one of the worst and stupidest posts ever made on this site.
"Driving a car hard is having scratches and dents."
What utter, utter, nonsense. Jesus wept.
My Nismo bumper has a ton of stone chips if you look closely. That said though, I know many people that drive hard and their cars have no dents. Why do I need to hit shit? Also I clean the car, like wash it, that's what keep it clean lol I do love the variety of comments we get
KW's look awesome! And the omotenashi from Kawanishi-san - wow. Always good to get another look at that exhaust, too...
Yeah you don't often see it as the nicer parts are hidden away by the rear diffuser. Welding art!
is there a lot of salt in Japan? the bottom of you car is pretty rusty
personally, I would of went with Ohlins, unless you got a pretty good discount with KW.
I've seen cars infinitely worse than that in the UK. That's pretty amazing condition for a car knocking on 20 years old.
@paddy thanks man. And I've not touched or cleaned anything up underneath. There is a lot of work to be done however. Once the little monsters grow up a bit and give me some time I'll put the car on the lift, drop everything and clean it/paint it all up. Can't believe she's 18 years old!
Salt? In Japan? Um, it's an island surrounded by saltwater. Humidity and seabreezes aren't easy on anything metal. But if you want salt and rust, come to Chicago.
Yeah but I live in the capital, they don't salt the roads here. In the mountains they do and if you live by the coast you'd have more rust obviously
Not much salt but it's humid so I guess that's had its impact on the steel bits. One more thing to get sorted eventually.
From the New Devil's Dictionary:
Shaken: (noun, Japanese) - Collusion between state and industry, for purpose of making automobile ownership expensive and inconvenient to force purchase of new cars by public. Industry gets money, state gets power, public gets run through ringer at three-year intervals and perfectly good vehicles get deported.
On the bright side, this article inspired me to finally replace the upper strut mounts the wonderful roads of the American Upper Midwest broke.
I really should file a reimbursement claim with the state DOT...
Two year intervals actually, the 3 year thing is only the first time, right after buying a new car. Shaken is also a synonym for "farce" lol
How nice of KW to work with you on these, when I inquired about having a set made for my R32 GT-R they told me to pound sand
Yeah I was blown away at the way these guys work. No wonder they've had so much success in motorsport, they define efficiency. Not to mention how well the V3s perform in Project GT-R. One of the BMW dealer guys that came to pick up my car was impressed, said that they should come with them as stock lol. He could't believed I run 20-inch wheels yet it's all so compliant. (yeah, that's what happens when you chuck the run flats in the bin)
That's obviously not what OC meant.
We get it, KW is a sponsor. They make great products. They support motorsport and this site that makes me more inclined to buy their products over their competitors. I assume their service is generally going to be great, but let's not pretend that the service they gave you is the kind of service they give everyone.
You say that but I'm pretty sure any Motorsport outfit would need to work this fast and efficiently since time is such a precious thing in competitive racing. Maybe what I meant to say is that it's nice to get a taste of the type of service a race outfit would experience if they dealt with a pro suspension maker.
"let's not pretend that the service they gave you is the kind of service they give everyone."
Ah, but it is. I've dealt with both KW UK and the German head office and they're both tremendously helpful. Really good service for the "man in the street" so I can only imagine how good it would be for pro, if there is any difference.
Hi, they have a custom kit for R32. Problem I guess it's the budget. Custom kits costs more as the ordinary stuff. Even my "ordinary" V3 for my Brick costs 2.000 € and it isn't a custom kit.
Always a good day whenever there's a Project GT-R update. Thank you Dino. More coming soon I hope.
Very soon. More detail on the HLS this week and then hopefully Do-Luck sorts my engine out
Dino now this is a thorough assembly and excellent article in detail. I love to see the status of your build. Keep us posted.
Thanks for following it!
Looking good with those wheels.
Just wondering what did you paid for a custom-built suspension like this?
I really loved the coverage of the human element and not just the technical bits. Your photos are an inspiration to me. Sweet car too, I envy you!