When I got the memo asking whether I could start putting together a project story for the site every month, I got pretty excited. Why? Because many years ago (at least six or seven at a guess) I took a chance on a rather sorry-looking ’83 AE86 hatch. The Toyota had been exported from Japan to New Zealand in the early ’90s and since then had changed hands multiple times and racked up hundreds of thousands of kilometers. Although I already had a couple more AE86s in my garage at the time (call me greedy!), they were both JDM import Levins GT-Vs, and I had always longed for a JDM pop-up headlight Trueno in GT Apex spec.

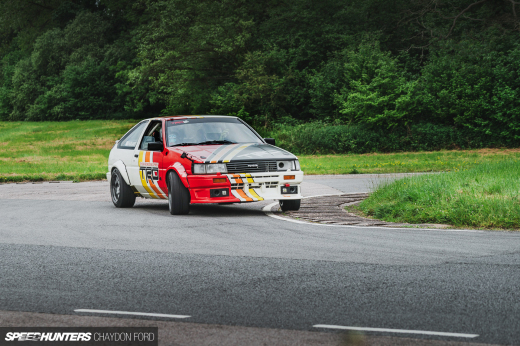
My original idea was to build an Initial D-style car – not so much an inch-perfect replica like the car that Mike showed us the other day – but simply a stock-bodied AE86 finished in panda paint scheme and sitting on a set of gunmetal Watanabe wheels. The classic AE86 combo, if you like.

Of course, there were plans for modifications too. I wasn’t interested in building a drift car, but more of a fun street car that was set up to go, turn and stop equally well. Right from the start I resigned myself to using as many Japan-sourced aftermarket parts as I could, and where possible encompassing trends from my favourite era of Japanese performance tuning: the early-to-mid ’90s.

I got a little way down the road with the project but then other stuff called, like paying a mortgage, and appeasing my long-suffering missus by remodeling our home. Turns out there’s only so long you can store your collection of 114.3mm old school wheels in the bath tub! But if I thought restoring a 30-year old was an expensive enough challenge, my 80-something-year-old house well and truly taught me otherwise!

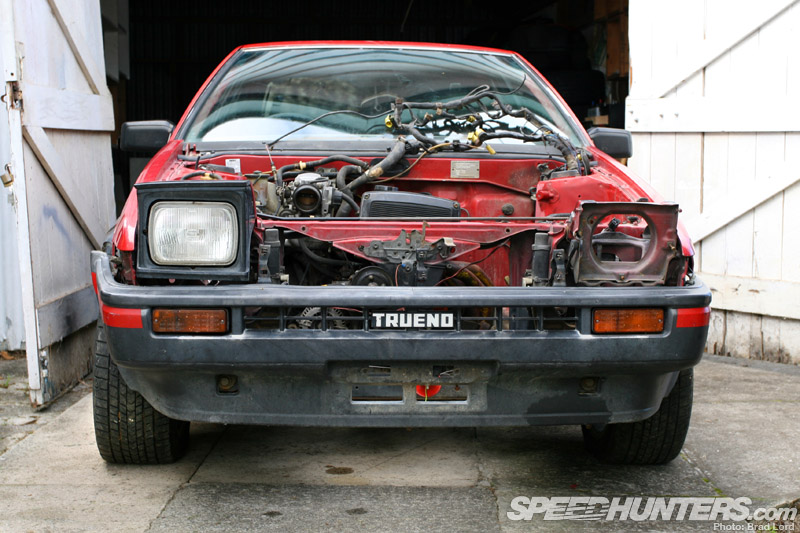
Suffice to say, up until a couple a months ago when we finally pulled the covers back off the car, the Trueno had been sitting idle for a long time. But given that the car is exactly 30 years old this year, now is time to right that wrong and get the car finished and back on the road where it belongs. But before I delve into the work that’s been completed thus far, I thought it would be a good idea to show you exactly what I’m working with. As I’m sure you can tell from the pictures above, which were taken when I first picked up the car after purchasing it sight unseen, the exterior wasn’t in a very good way at all. In keeping with that, neither was any other aspect of the car…

Apparently the 86’s factory engine had been just rebuilt and only run for a few hours, but I’m not so sure. The condition of the 4A-GE didn’t really matter though as I had already planned on piecing together another one based on a latter AE92-spec small-port head/seven-rib block engine. I’ll have more on that build in an upcoming post.

It’s often said that less is more, but I really wish that the previous owner hadn’t done this to the interior. He told me that he was planning to rally the car (hence the rally ride height and tyres), and therefore set about stripping and binning the interior in preparation for a roll cage which never eventuated. The good news is, I’ve been able to find all the bits needed to get the front part of the interior back up to its oh-so-’80s burnt red and chocolate brown factory spec, including a pair of the correct door cards without aftermarket speakers holes hacked into them. Believe me, that’s not been easy!

While the car obviously never saw a proper rally stage, it was thrashed up and down a hedge-lined gravel driveway, which goes some way to explaining the multiple scuffs and scrapes that ran the length of the bodywork. As dirty as it looked though, once all the dust and mud was washed away, I was very pleased to find a rust-free boot cavity and no signs of any previous rear-enders. Surprisingly, it still had its original wheel jack intact too!

As I thought it might – or at least hoped it might – although the AE86 looked rough on the outside (and inside), beneath its dulled and oxidized red paint, dents and scratches seemed to be a pretty honest car with no previous real damage. That’s something that we were able to confirm later at the body shop, where digital tools were used to accurately check all of its underbody measurements. The perfect starting point for a restoration? Well, not quite, but for the money I paid it was definitely close enough for me to bite the bullet and get the project under way.

And so a gratuitous spending frenzy ensued. It started off innocently enough with a phone call to Toyota New Zealand to see what new parts were still available for the AE86 ex-Japan. Turns out there was quite a lot…

Of course, it all added up quite quickly and before I knew it I had spent more of my savings on new OE parts than I had on buying the car in the first place! But that’s okay though. When the project is finally finished I think it’ll be the little details, like brand new lights on every corner, that’ll really make the car.

Not everything I’ve purchased has been new though. I was pretty to happy to find this hard-to-find little device along the way too, and in New Zealand even. A’PEXi never made a Power FC specifically for the AE86’s 4A-GE, but its specialist offshoot AP Engineering did.

Body-wise, Toyota New Zealand was able to supply me with every bolt-on panel except the two front fenders. However, a couple months spent scouring Yahoo Auctions turned up a mint example for each side, which were fitted up to the body (along with the new hood, new doors and new rear hatch) to make sure everything lined up nicely. As you’ll be able to tell from this shot, outer rear three-quarter panels were also on Toyota’s inventory, so I made the call to have both outers replaced. I was happy I did too, because removing the outer fender revealed a bit of rust on the edge of the inner fender, which was able to be taken care of before the panel was welded back on, along with a new rear tail light panel too.

Immediately the car went from looking all beat up and bent like this…

… to this, courtesy of Auckland body shop Westside Panelbeaters.

Before any welding happened though, I decided to paint the inside of the fenders. Why? Because rather than try and piece back the original interior in the rear of the car, I’ve decided to keep this end stripped bare. In keeping with the ’90s Japanese street theme, a Safety 21 bolt-in roll bar – which I’m well aware holds no real safety merit – will fill some of the void. It should look pretty clean in here once it’s all white and shiny.

Even though getting the bodywork back in shape wasn’t a cheap exercise, I definitely feel that it was money well spent. Japanese cars from the early ’80s aren’t renowned for their resistance to rust – at least where I live anyway – so knowing that there’ll be no horrible surprises in that department any time soon is good peace of mind.

So this is what I’m working with, or at least it was a month or so back. Although I think the Trueno will end up largely the way that I first envisaged it would, some of my ideas have changed along the way, and some details are still yet to be decided. So I’m kind of excited to see how it all pans out in the end. What would you do if you were in my shoes?

There’s a bit more primer to lay and some final prep work to be done before I drop out the front crossmember and suspension, and detach the entire rear end. Then it’ll be off into the booth. I know it’ll be a good feeling to finally have it back home and wearing a brand new coat of paint. But more on that next month!
Brad Lord
brad@dev.speedhunters.com


