


Man has idea to go very fast. Man spends too much time and money. Man goes a little bit fast.
That’s how these update stories for Project NSX usually play out. It’s a sports car and I want to do sporty driving in it, so that’s where I’ve focused on honing the car up to this point. As we discussed in the last update, however, my NA1 is approaching a completion point – it is equal parts fast, fun, reliable and useable.

Yes, the best feels behind the wheel are on an empty alpine road or a racetrack, but for most of us the journey to those places is a solid slug of slow city roads and boring highways, often for hours at a time. A good podcast or playlist can be the difference between that being a road trip and a chore.
Listening to some contemporary high-end OE systems made Project NSX’s speakers sound like an iPhone with a toilet roll taped to the bottom in comparison. Deleting the system could save about 6kg (13.2lb), but once that was ruled out it was decided that if I was going to have a sound system it had to at least be up to standard with the rest of the car. Time for lockdown project #2…
A previous owner had already ‘upgraded’ the factory head unit to a 2DIN Carozzeria which was packed with a hidden CD drive, TV tuner and GPS, the latter two not working outside of Japan. Apparently it also had a feature called ‘air gesture’ which seems to let you change songs just by swiping your hand through the air, although I never attempted to verify this. Even if the Carozzeria unit was capable of providing good beats, the lack of amplifier meant the speakers would ‘clip’ (run out of power) at even moderate volumes and it sounded as if the driver’s side door speaker had given up completely.
Now as you read this it will probably seem like all the work happened quickly and to plan, but the reality was that each component install was its own distinct sub-project, often with weeks between each part being finalised. I’ve swapped out old stock speakers and head units for aftermarket bits in previous project cars, but this was the first time I’d really put an effort in to ensuring that each piece worked together to create a powerful but well-integrated end product.
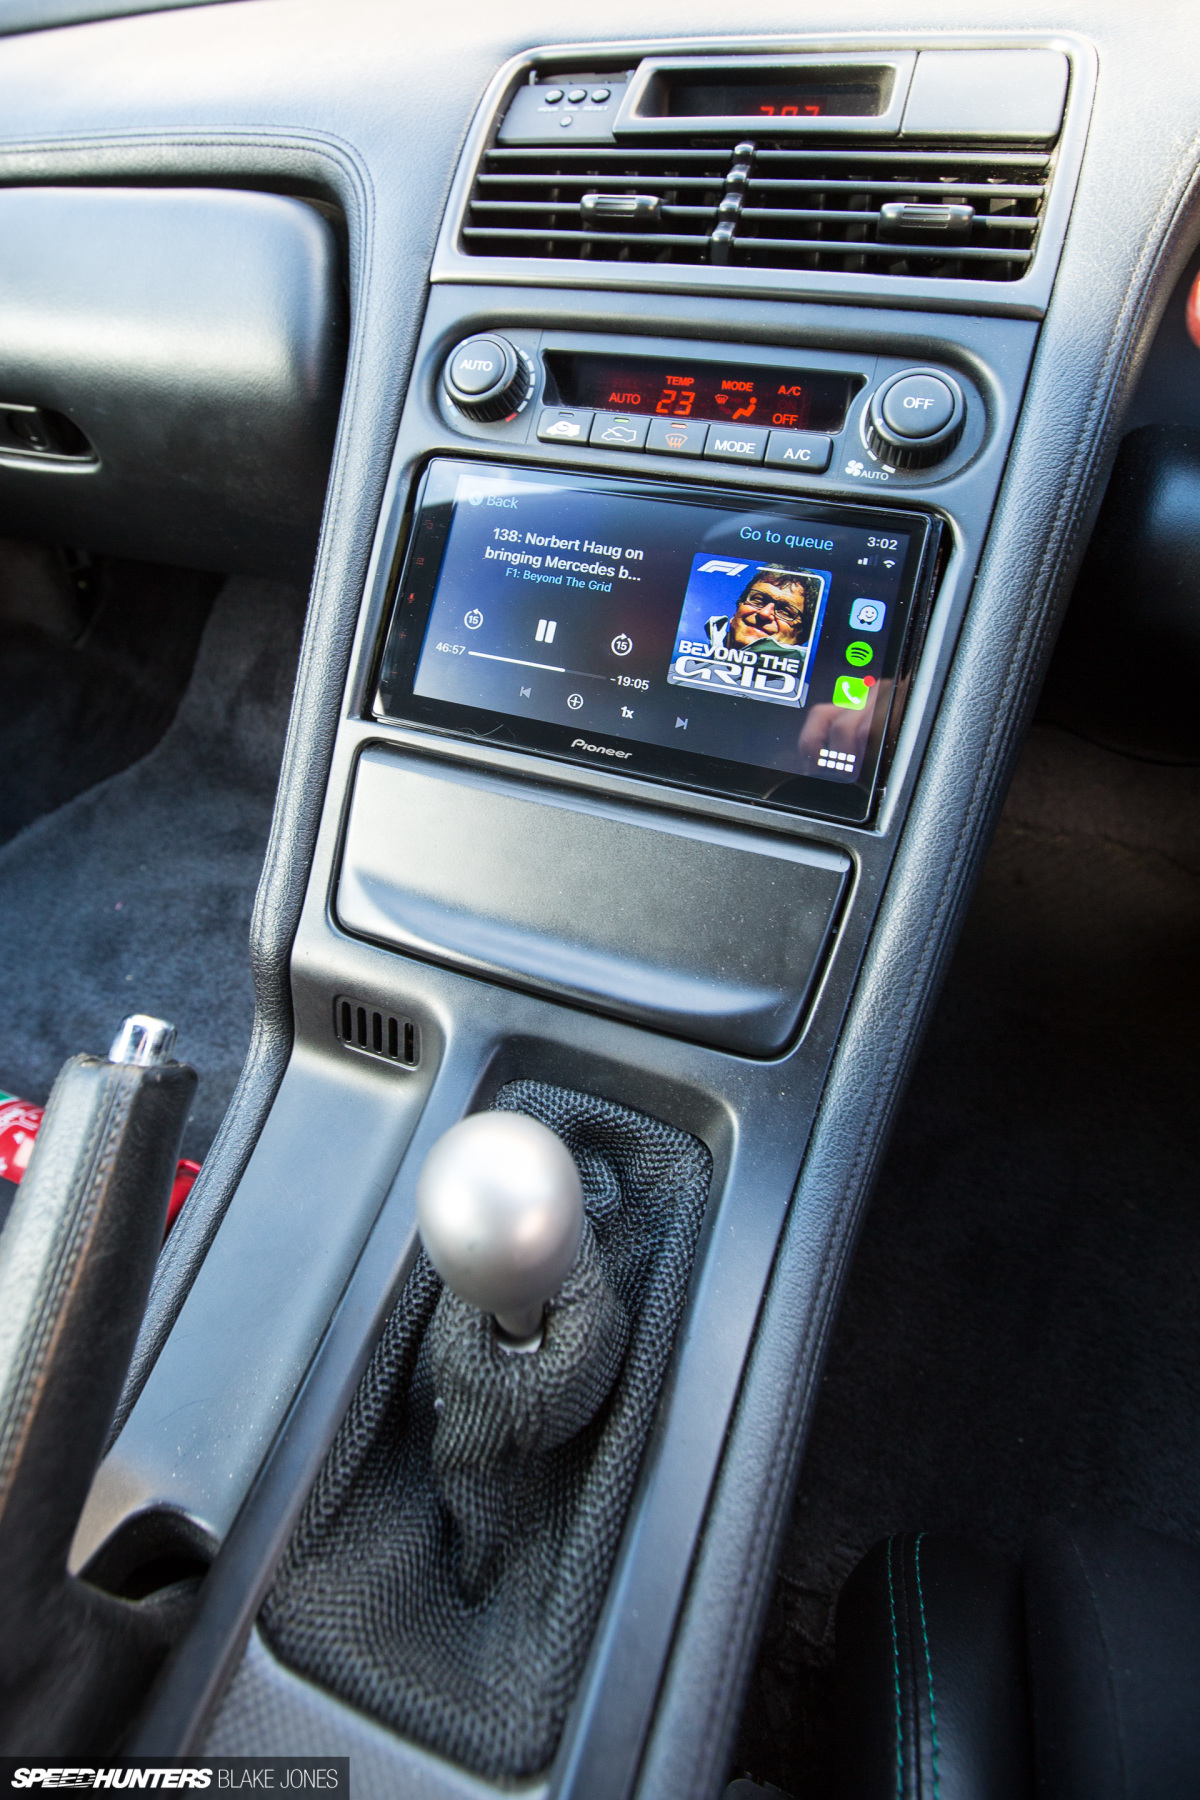
The head unit is the heart of a system and today’s units are packed with more technology than ever before. Once you’ve gone Apple CarPlay you can never go back.
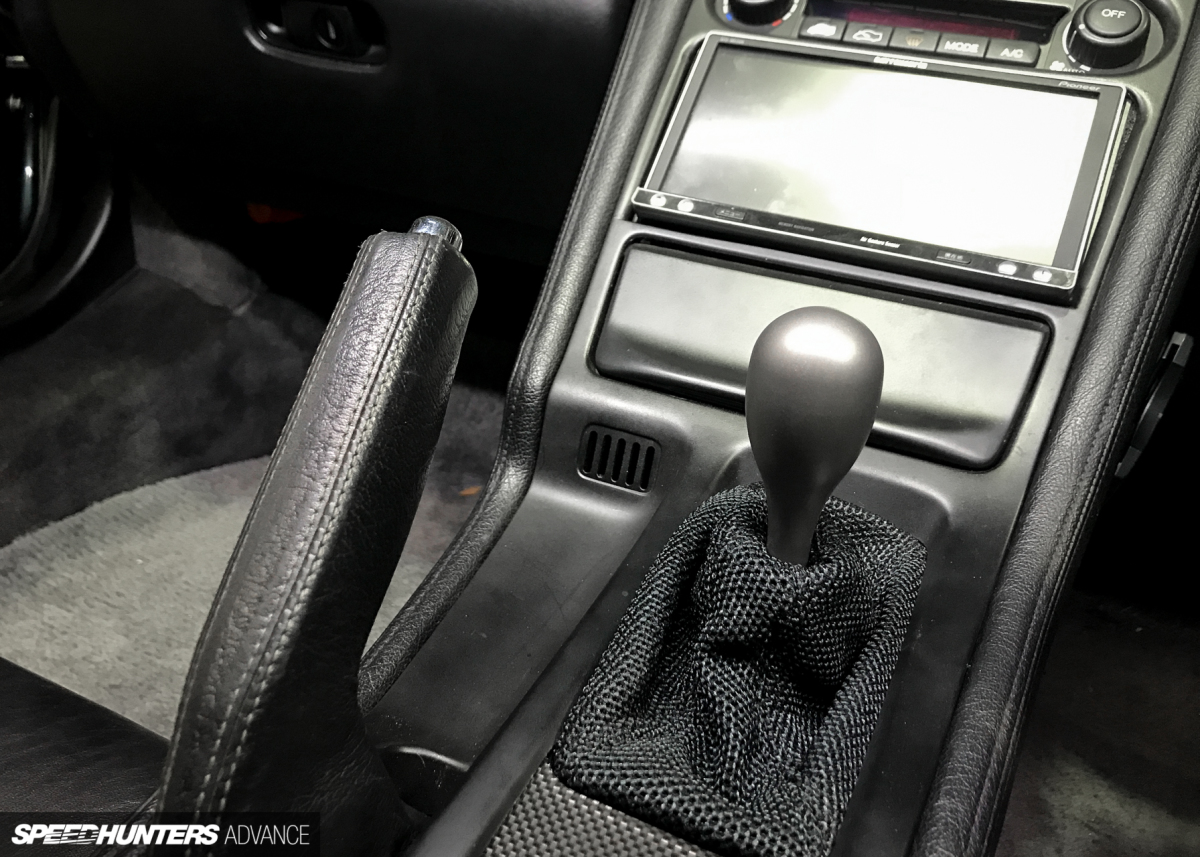
I’d spent a few months plugged in to the ecosystem in my new daily driver and quickly decided the NSX needed an upgrade soon. Other head unit criteria? High-powered pre-amp outputs (4 or 5V), good equaliser software and customisable unit lighting (to match the NSX’s stock red/orange displays). It’s been a decade since I’d bought a CD, so I’d also be opting for a unit without a disc drive to save money and weight. There were plenty of suitable options from different brands, but a good deal came up on the Pioneer DMH-Z5350BT so I picked one up.

The head unit was the easiest install – since I was replacing an aftermarket 2DIN with another 2DIN, the physical fitment was easy – and lucky for me the old Carozzeria is actually a Pioneer product, so even the existing ISO adaptor harness plugged straight in. Losing all those unnecessary features actually meant the new head unit weighed 1.4kg (3.0lb) less than the old – who says a sound system isn’t a performance mod?!
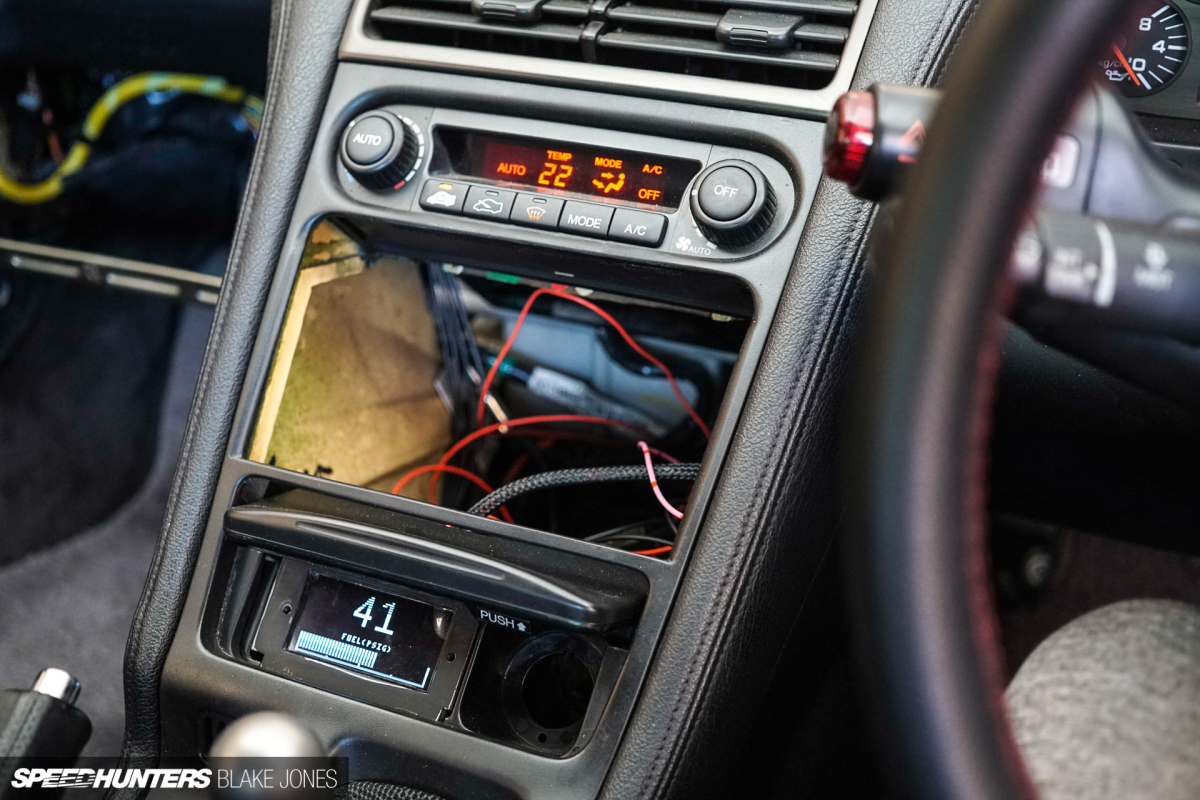
All the cables that ran from the centre console through the A-pillar associated with the TV and GPS antennas were stripped out while I was in there.

Next, the subwoofer: JVC’s CW-DRA8 was my choice here. The 8-inch woofer is driven by an integrated amp so I could simply run RCA cables to the head unit. At 250W it has more than enough power for the small cabin, and the efficient Class D amplifier can be powered from a nearby fused supply rather than direct from the battery. With a little bit of persuasion I mounted it in the stock (passenger footwell) location using steel clamps coated in heat-shrink to minimise unwanted vibrations. I’ve seen plenty of subs enclosures just left to ‘float’ or secured by velcro – an easy installation but a huge injury risk in the case of an accident. It is invisible under the carpet, but being a different shape to the standard Bose sub feels a bit odd for the passenger’s feet. I will probably shape some foam around the CW-DRA8 to try and improve this.

Just out of shot above the subwoofer is the amplifier – a Focal Impulse 4.320. The tiny size was core to my overall install being as simple and lightweight (only 545g (1.20lb) as possible – it was compact enough to fit in the computer rack behind the glovebox, in the empty spot left by the removal of the ABS computer. It thus has the shortest possible distance to run cables from both the head unit and battery. The amp is switchable between 2/3/4 channel, which was an important feature for this install that I’ll discuss later.

The amplifier was the first Focal product I’d ever bought, but the quality of both the product and supplied documentation made an impression. When it came to deciding on a door speaker solution – probably the most important contributor to in-car sound quality – I thought I’d see what the French brand had to offer.
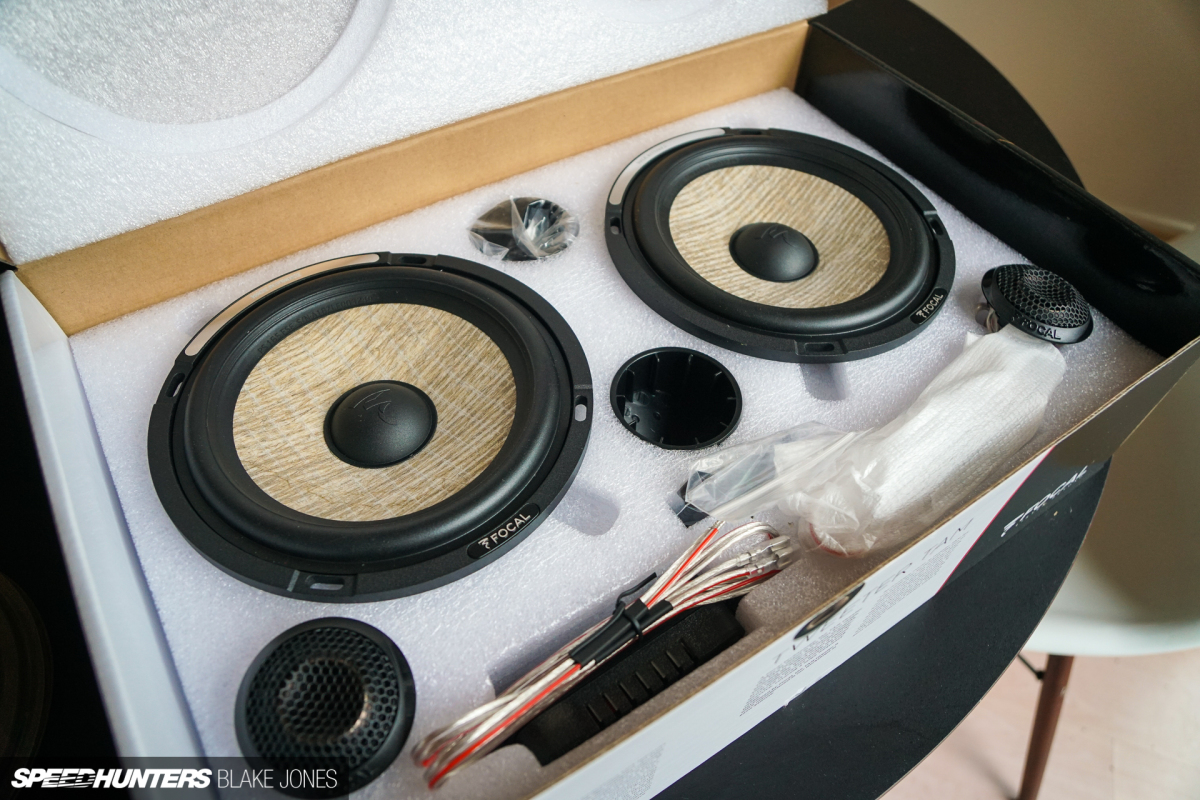
Even within one brand’s line-up there’s a paralysing amount of choice when it comes to speakers. Focal’s range stretches from ‘affordable quality’ into ‘baller audiophile’ territory, with price tags to match. Where I settled was somewhere in the middle – the Flax Evo PS 165 FSE component speaker kit.

The Flax name comes from the unique use of organic flax (linseed) in the speaker cone. Apparently France is a hub of flax production in Europe, and the Focal engineers identified the light weight, rigidity and damping properties as ideal for a speaker cone. It certainly looks interesting.

The overall quality of the speakers was very impressive – sturdy terminal mounts and an attractive powder-coated aluminium frame holding it all together.
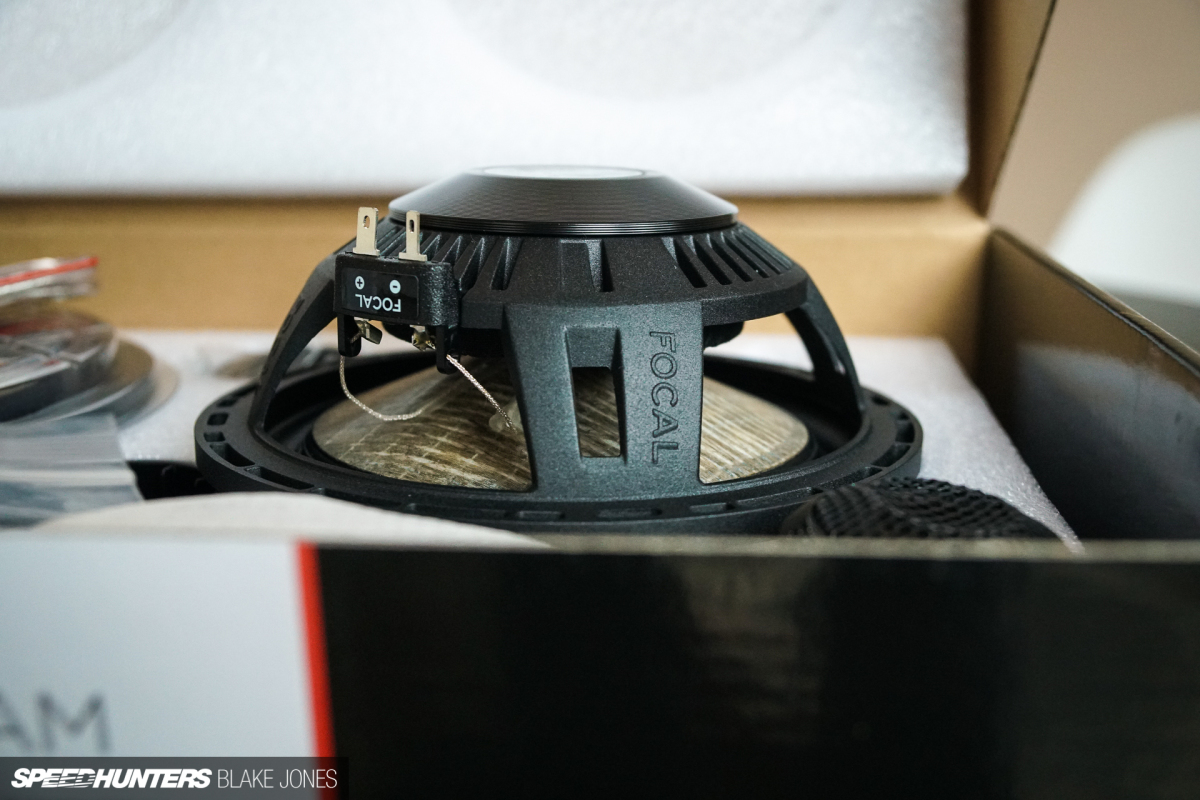
Speakers typically use a large iron-based magnet to generate sound, but the ‘FSE’ variant of the Flax speaker trades it for a relatively tiny neodymium magnet. This allows the speaker to be slimmer in profile and weigh 40% less than the same design with a typical Ferrite speaker magnet. I won’t pretend this fact makes these race car parts, but it does help to nicely offset some of the weight added by other parts of the system.

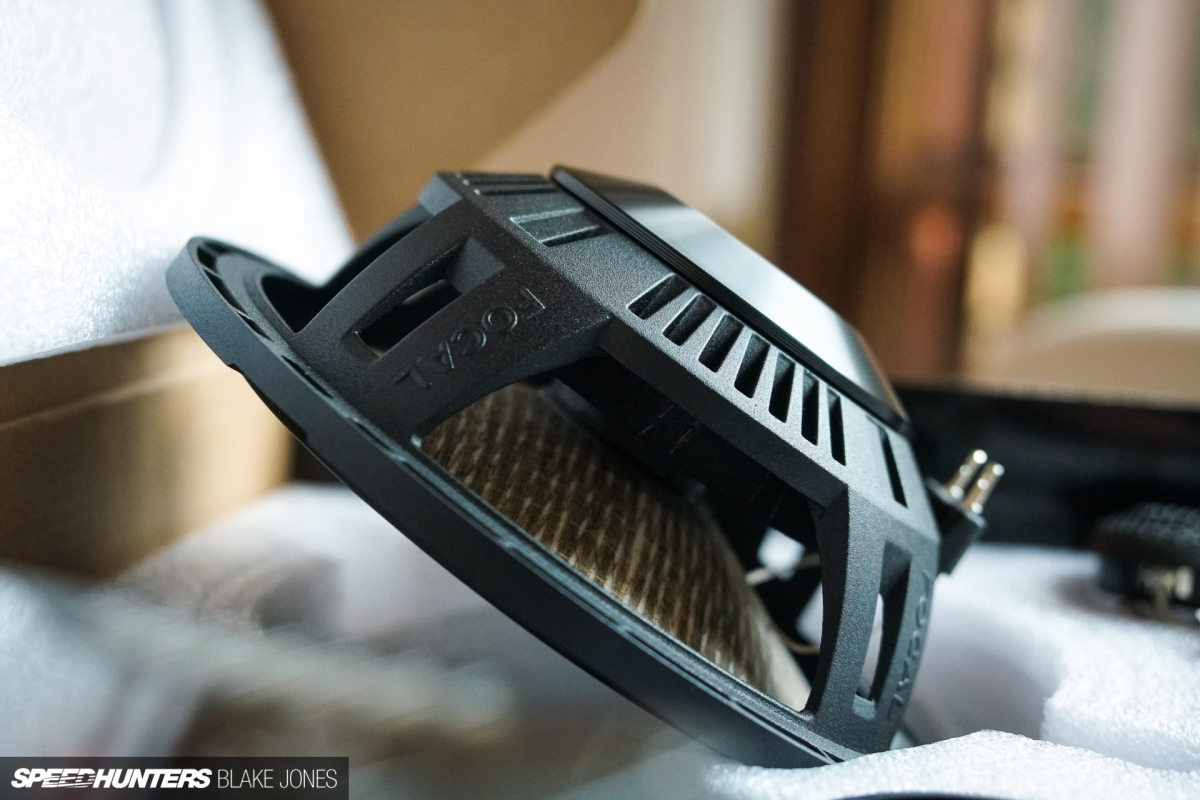
Compared to a more common coaxial speaker, a component speaker kit divides the speaker into different components – the main driver handles the mid and mid-bass frequencies, while a seperate tweeter is dedicated to the higher frequencies. This passive crossover unit separates the frequencies from the source into a seperate mid and high, meaning each speaker is only requested to play the frequencies that it excels at.

The main driver measures in at 6.5-inch, a decent step up from the stock 4-inch and the 5-inch coaxial speakers the car’s previous owner installed.
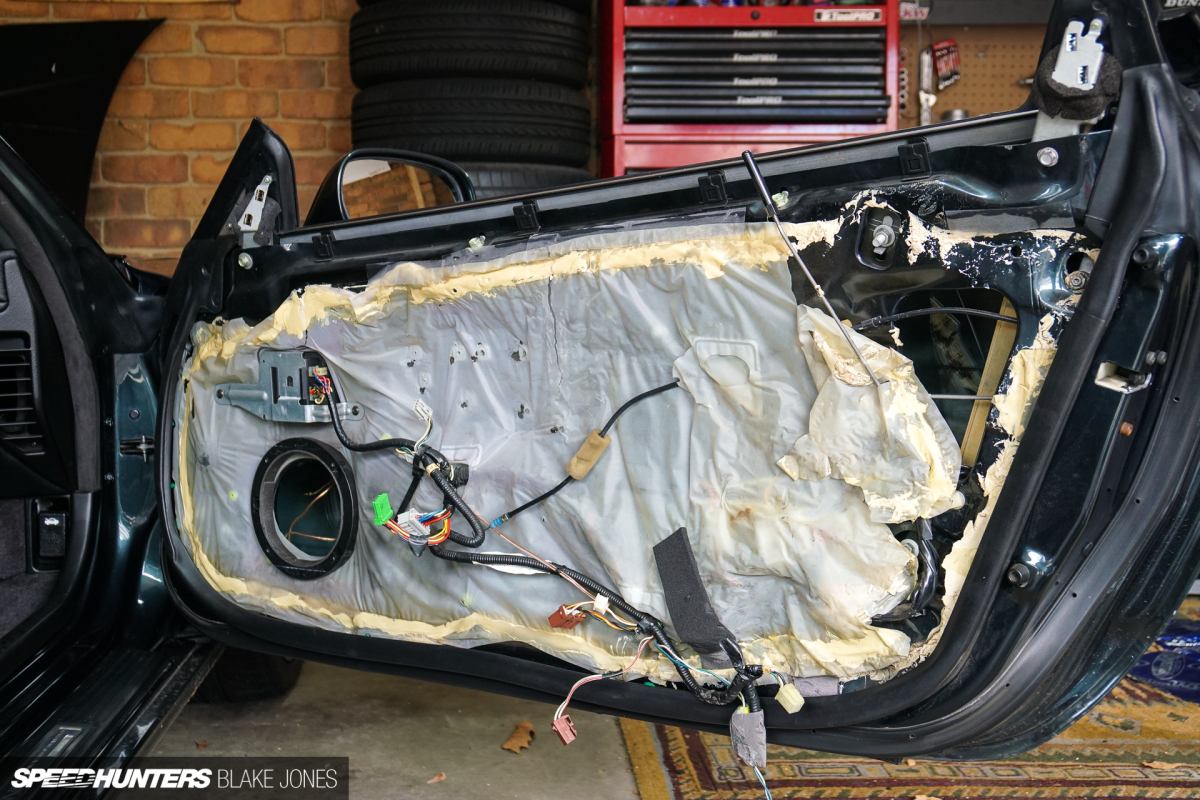
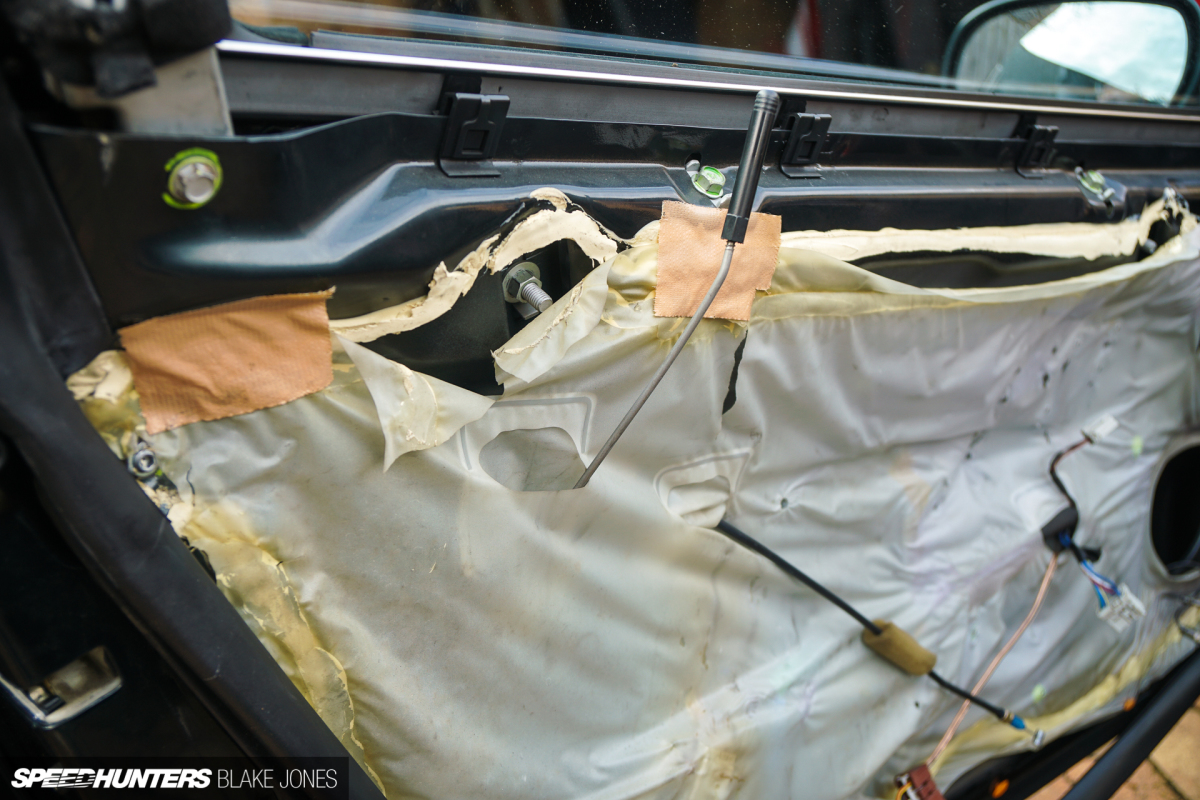
Waiting for me behind the door trim was this sorry sight. The factory moisture barrier had been partially removed to service the window regulators a few years back and was effectively destroyed in the process. One reason for the horrible sound quality also became apparent – the old driver’s side speaker had been installed in such a way that the positive wire would be pulled out of the terminal by the window glass when lowered completely. A slightly longer speaker cable would’ve solved the problem, so I just hope the previous owner didn’t pay top yen for this shoddy workmanship.

I got to work with a plastic scraper and some methylated spirits to remove the thick glue with which the barrier had been installed. One of those tedious jobs that is both time-consuming yet satisfying to work through.
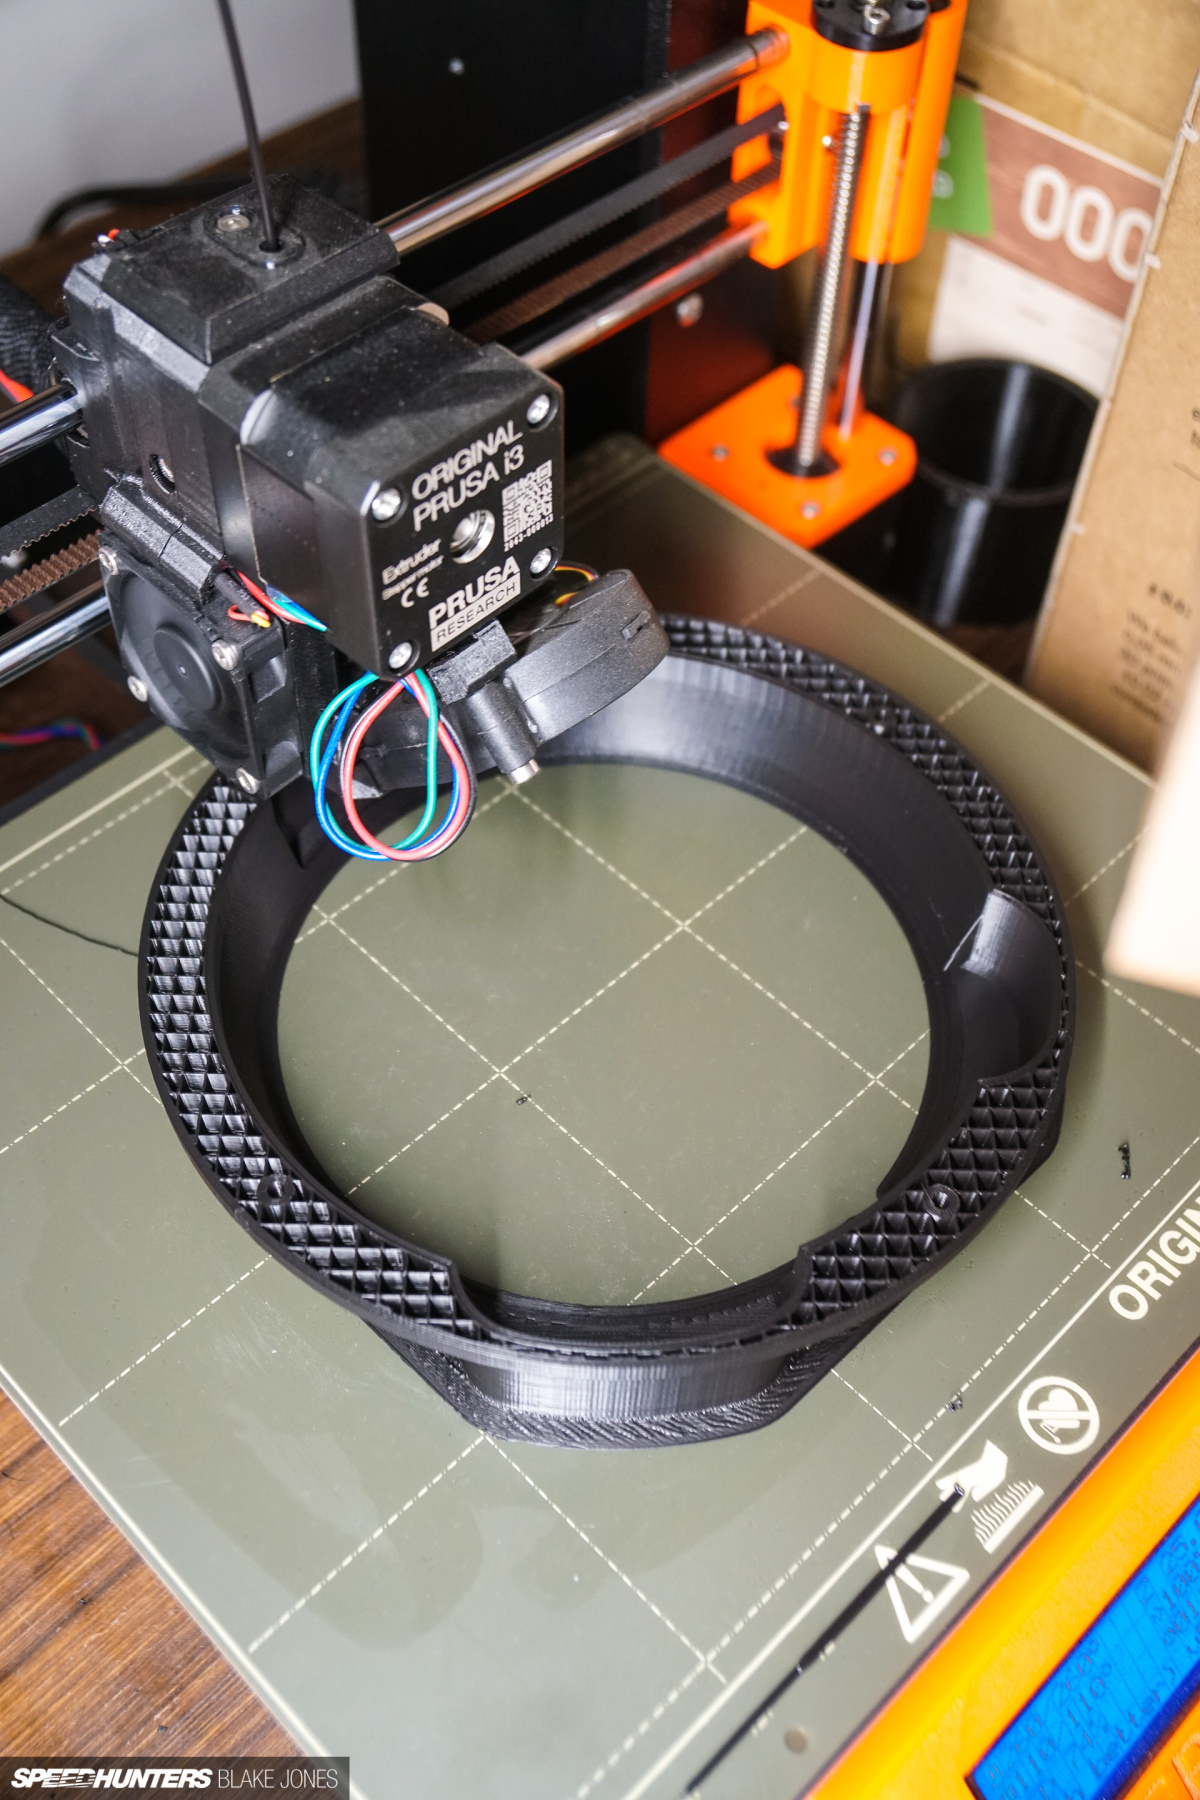
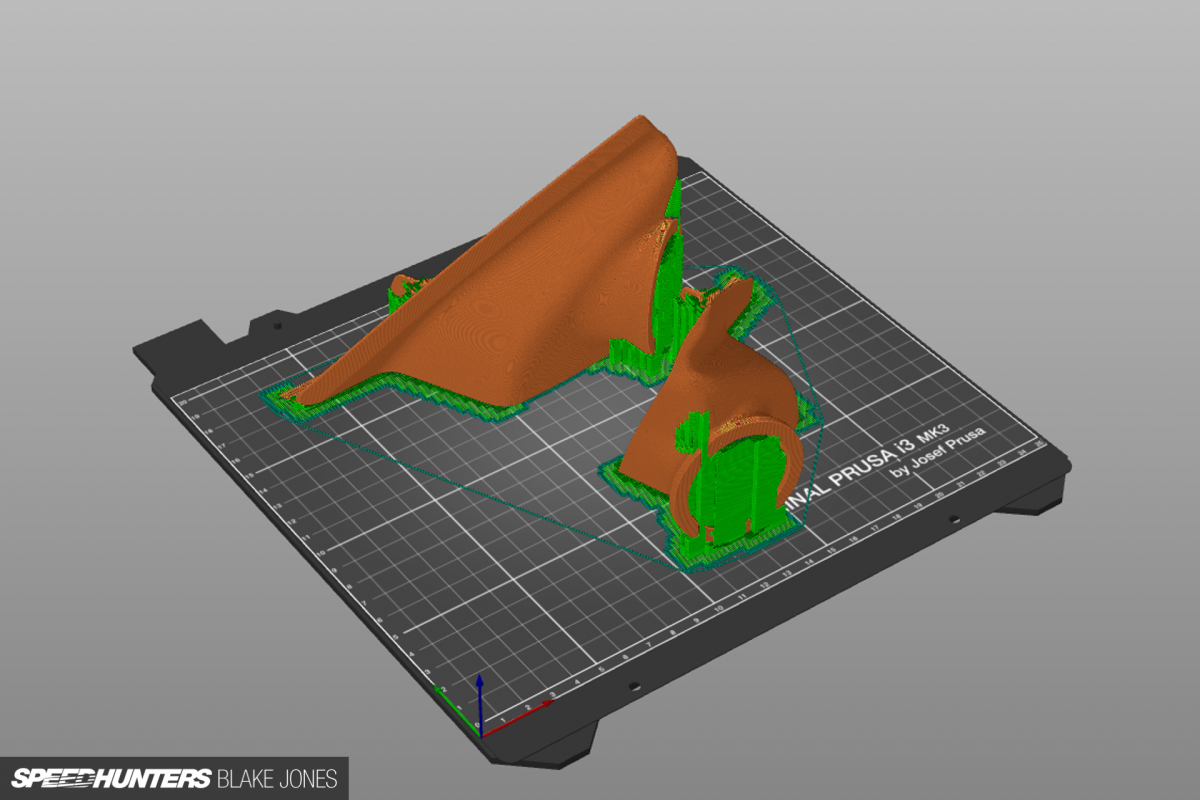
Getting a 6.5-inch speaker to fit a hole made for a 4-inch means either cutting a bigger hole, or making an adapter. There’s plenty of free space in the door trim to house a larger speaker, so I loaded up Fusion360 and designed an adaptor to space the speaker out from the aluminium door panel. I could’ve taken a Dremel to an off-the-shelf speaker ring to make it fit, but I’d prefer to invest the time into designing a proper solution than quickly hacking something up which will only annoy me further down the track.

The plastic part would be ready in about eight hours, so I returned to the garage while the 3D printer did its thing.
A good home speaker box is usually enclosed (or ported with a specific audio purpose) and made of a vibration-absorbing material like wood so as to be as ‘dead’ – resonance free – as possible. The thin sheet metal of a car door is none of these things, which makes it a terrible place to install a speaker from an acoustic point of view. Ben had been feeding me tips as I worked through this upgrade, and top of his list was good sound deadening treatment on the doors. Even a cheap speaker in a well-deadened door should sound better than a high-end one left to shake an un-deadened door panel. I got to work cutting the sheets of Dynamat Super Lite to size and carefully applying it to the panel.

Et voila: the finished speaker mount: solid, light and fit-for-purpose. The NSX inner door skin is not flat, so it took careful placement of different features to ensure the mount could sit flat against the limited mounting surface space.
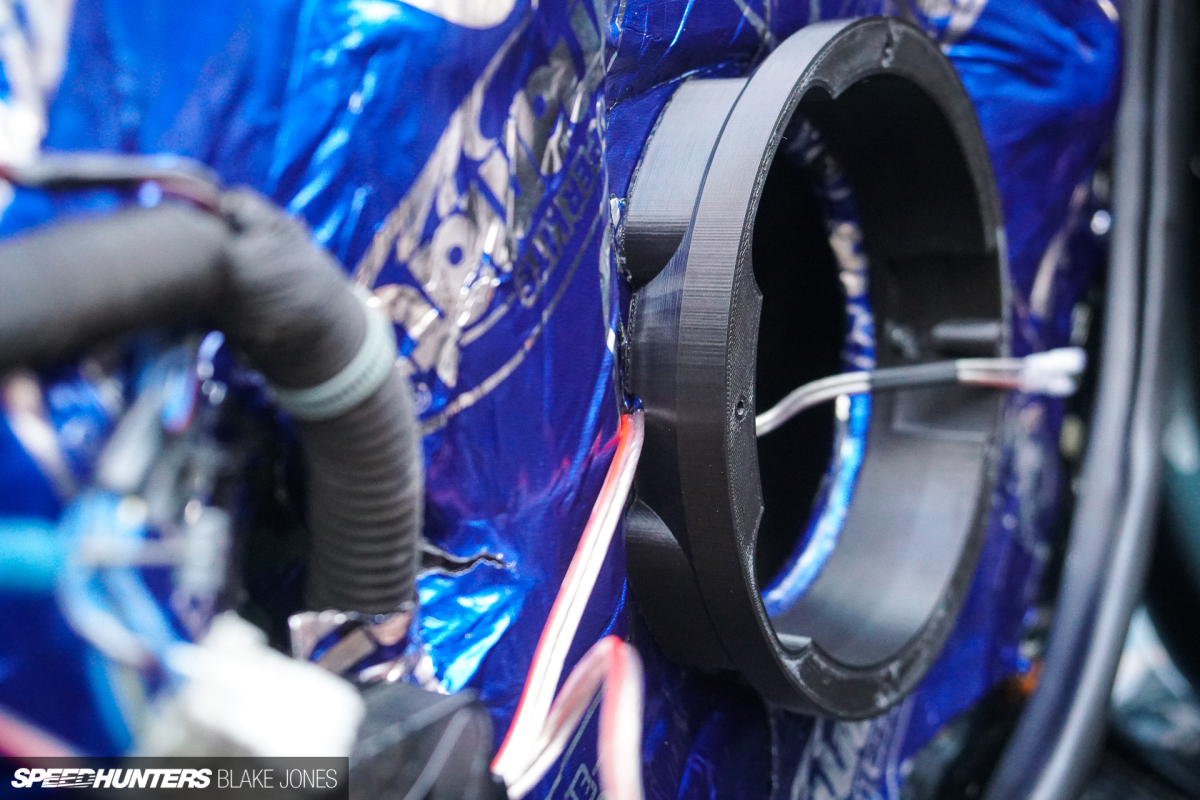
It was designed with a small channel for the cables to pass through and connect to the rear of the speaker. The ‘Tri Pack’ of Dynamat was just enough to cover the two door skins with a little left over to place inside the door cavity behind the speaker driver. It added a moderate 1.05kg (2.31lb) of extra weight per door.

Speaker mounted, it was time for a quick test to make sure everything worked before refitting the door trim.

One last job was to grease the power window mechanism which was making a pop-pop-pop sound on the way up (a common problem for the NSX). Then the remaining service hole for the door internals was sealed with clear plastic before the trim was replaced. At this point it would be job done for a coaxial speaker install, but the tweeters still needed to be mounted.
An advantage of the component speaker design is being able to place the tweeter in a better location than a coaxial, which usually sits in the lower door panel. High frequencies are much more directional, so getting them closer to the driver’s ear height and angled towards the centre of the cabin is important.
I consulted with Marc Perez of MITA Motorsports, who specialises in parts for the NSX and S2000. Marc is currently working on producing replacement interior trim pieces for the NSX to support the market where Honda’s own parts department has unfortunately started to falter.

The ‘front sash covers’ are easily misplaced or broken when the door trim is removed, so this is one of Marc’s first replacement interior products and it also happens to be an ideal location to mount a tweeter. Once again I plugged myself into Fusion360 so Marc’s original design could now house a tweeter and still clip into place as the factory intended.
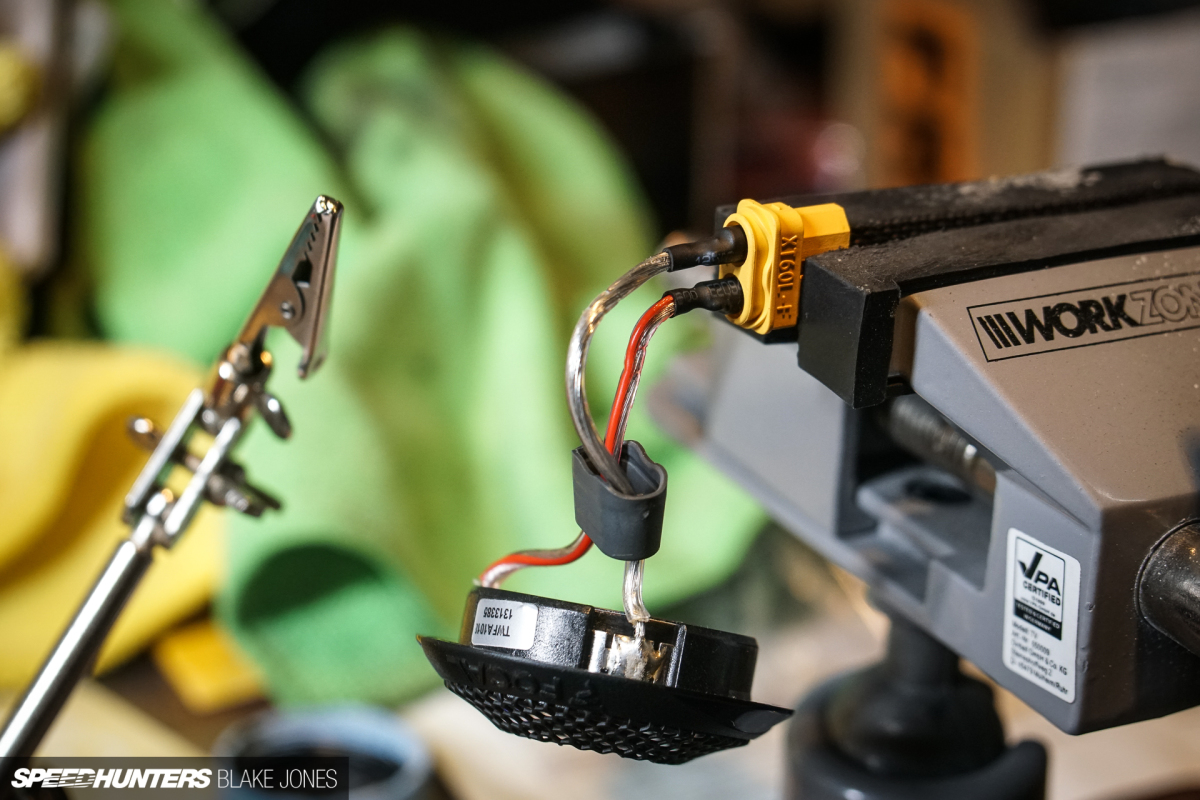
I used these XT-style connectors popular in the R/C world as a reliable joiner to enable removal of the tweeter and mount if required for future servicing.
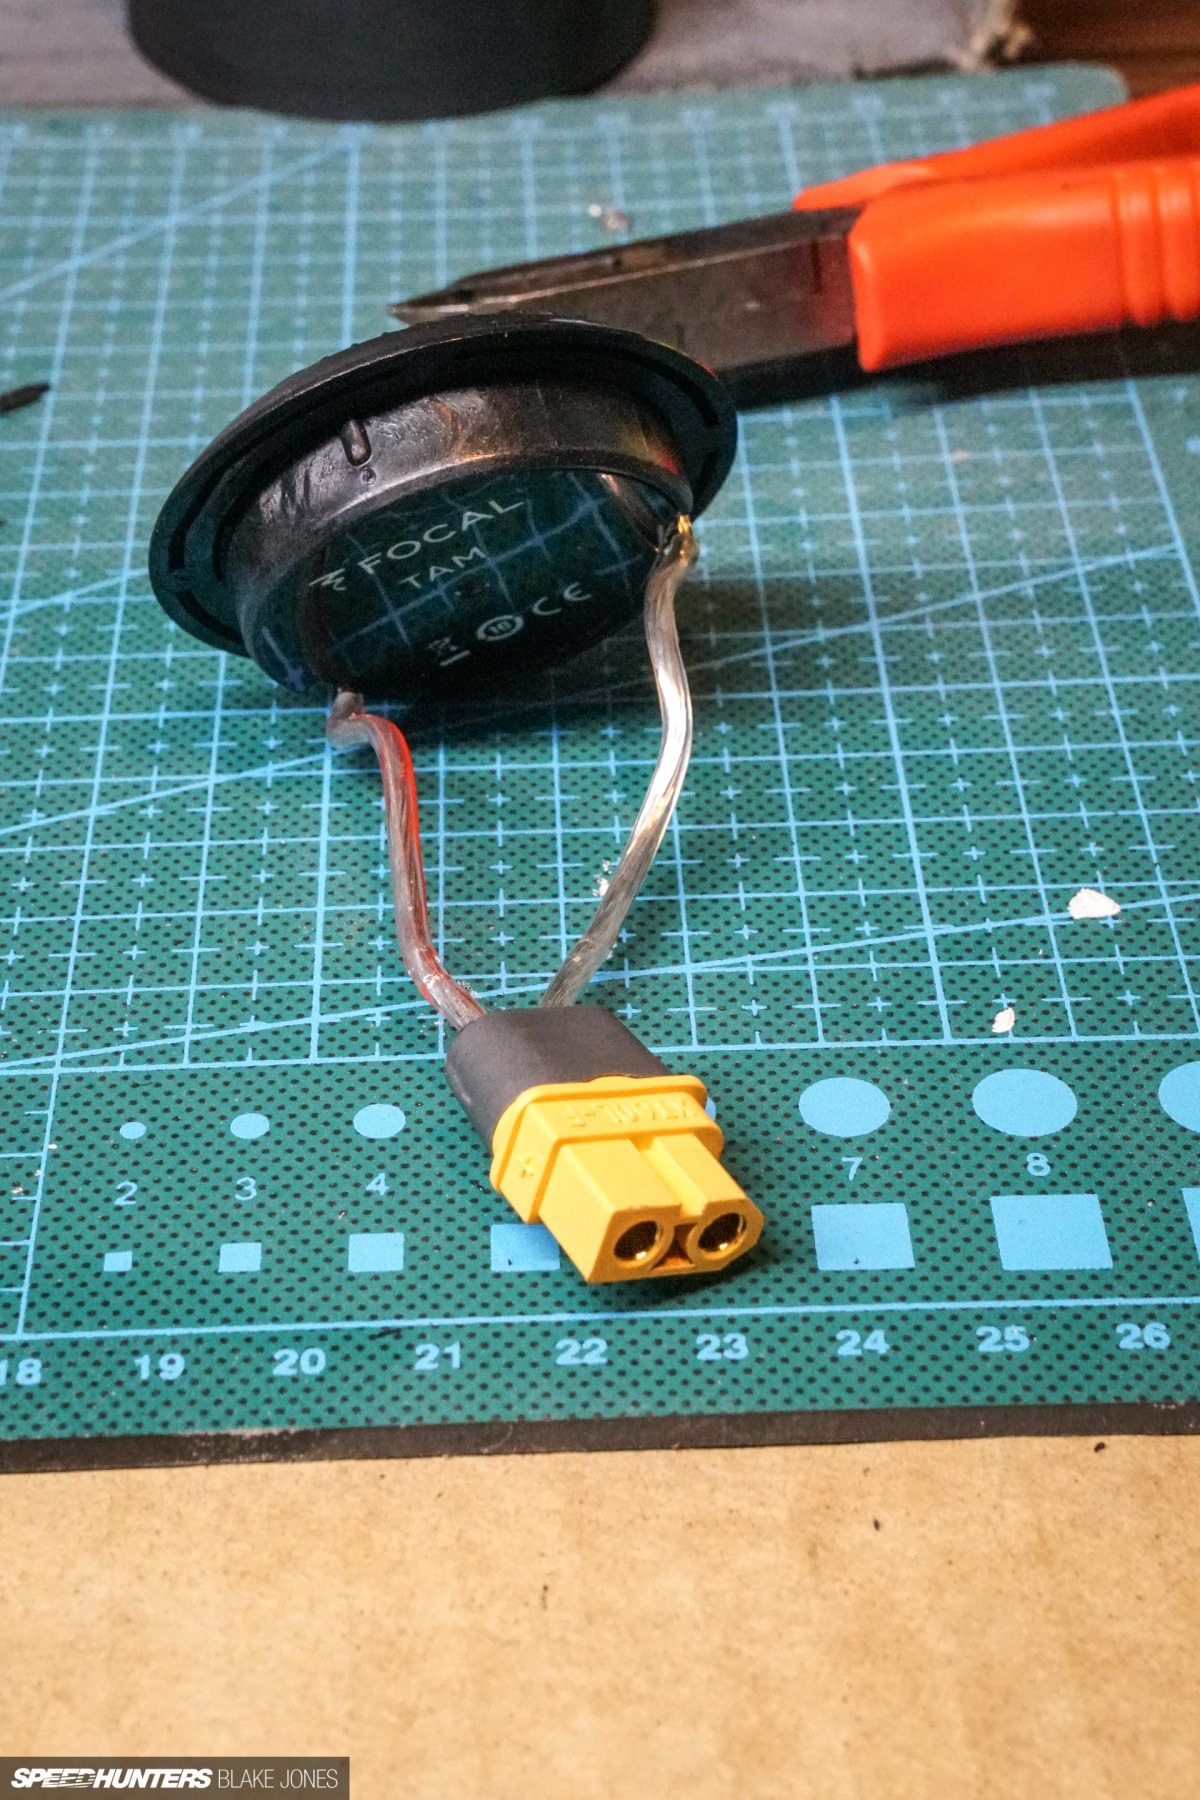
They have a dedicated positive and negative meaning it’s impossible to plug it in backwards.

These parts are printed from ASA filament, an evolution of ABS plastic which is prevalent in vehicle interiors across the world – including the NSX. It is UV and temperature stable for this application so I expect it to last forever.
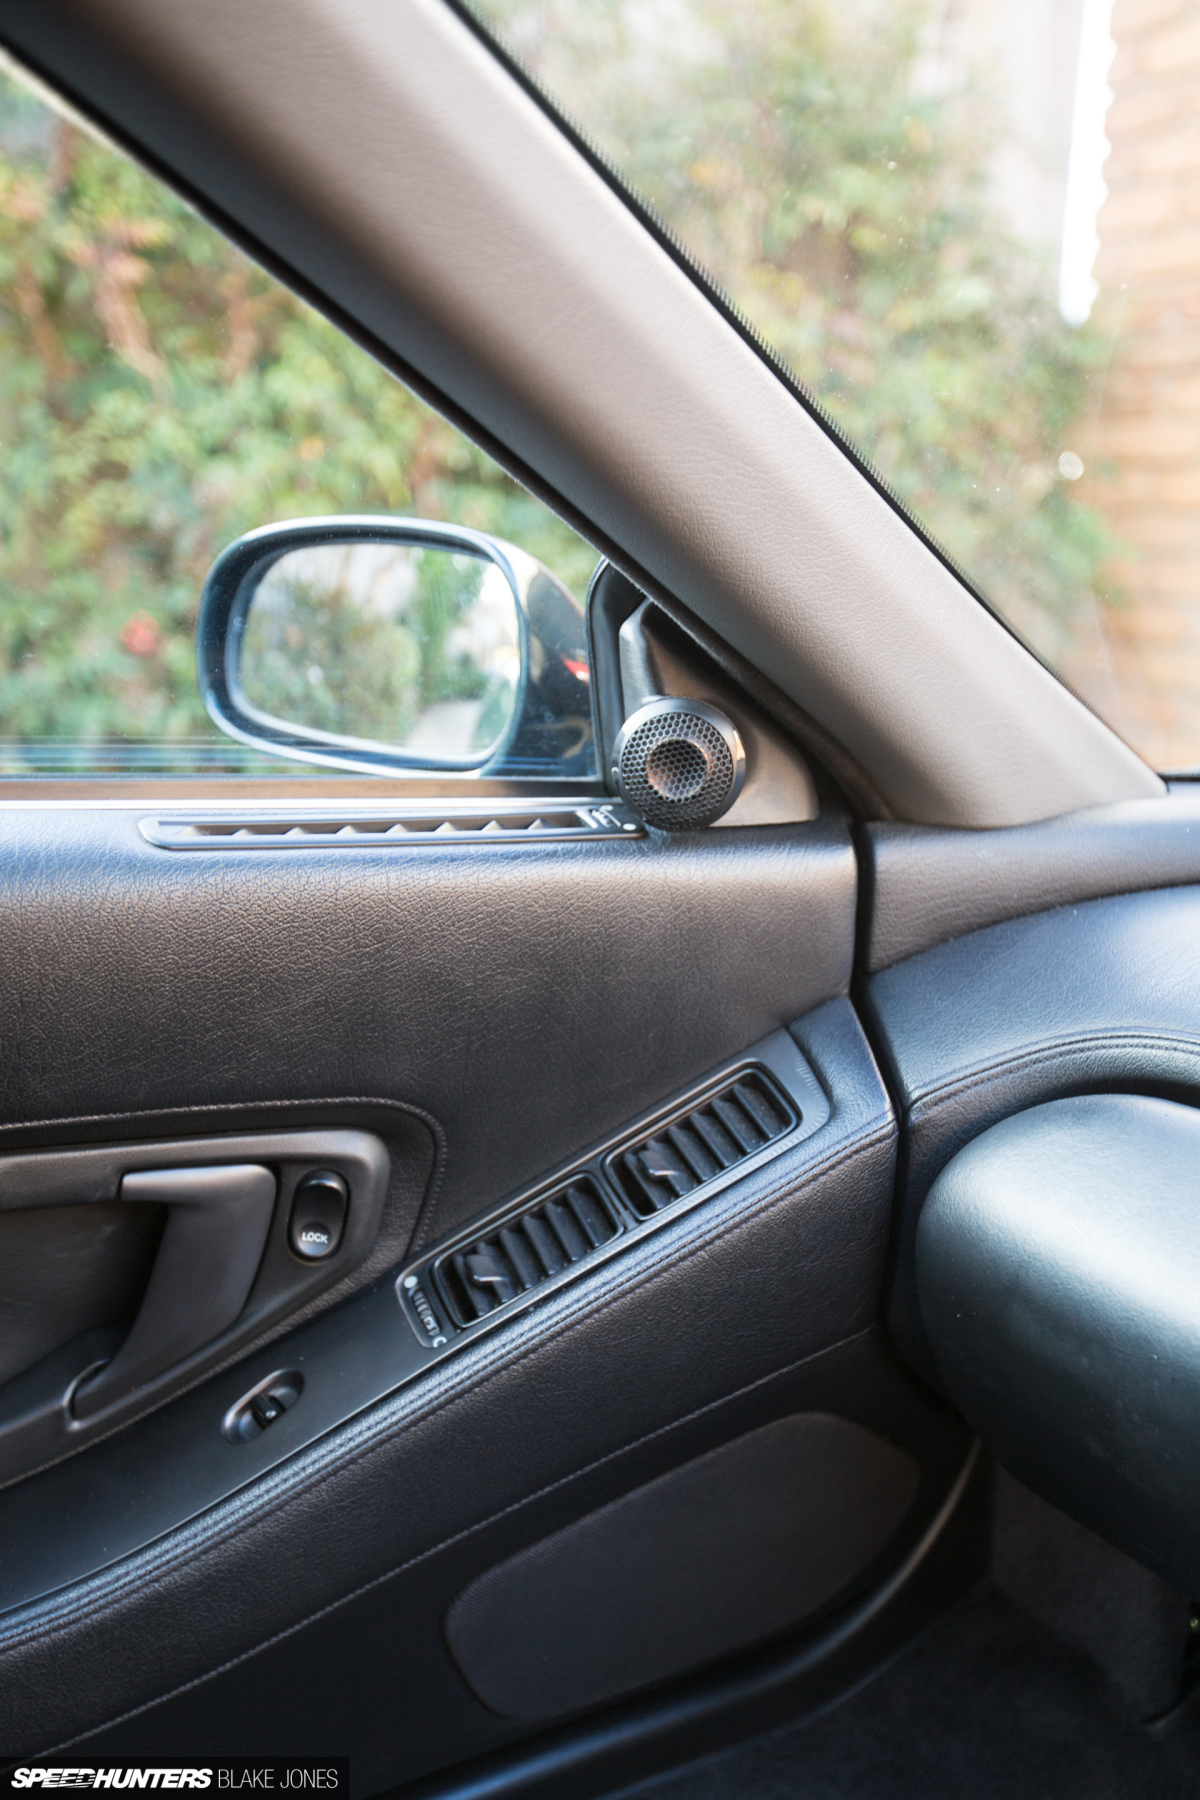
The only disappointment is that the 3D-printed surface (characterised by faint horizontal lines) does not match the ‘faux leather’ imprint of the original Honda part – but not to fear, Marc is working on nailing that for his reproduction pieces. Now I just need to slip one of my tweeter mods into his production line!
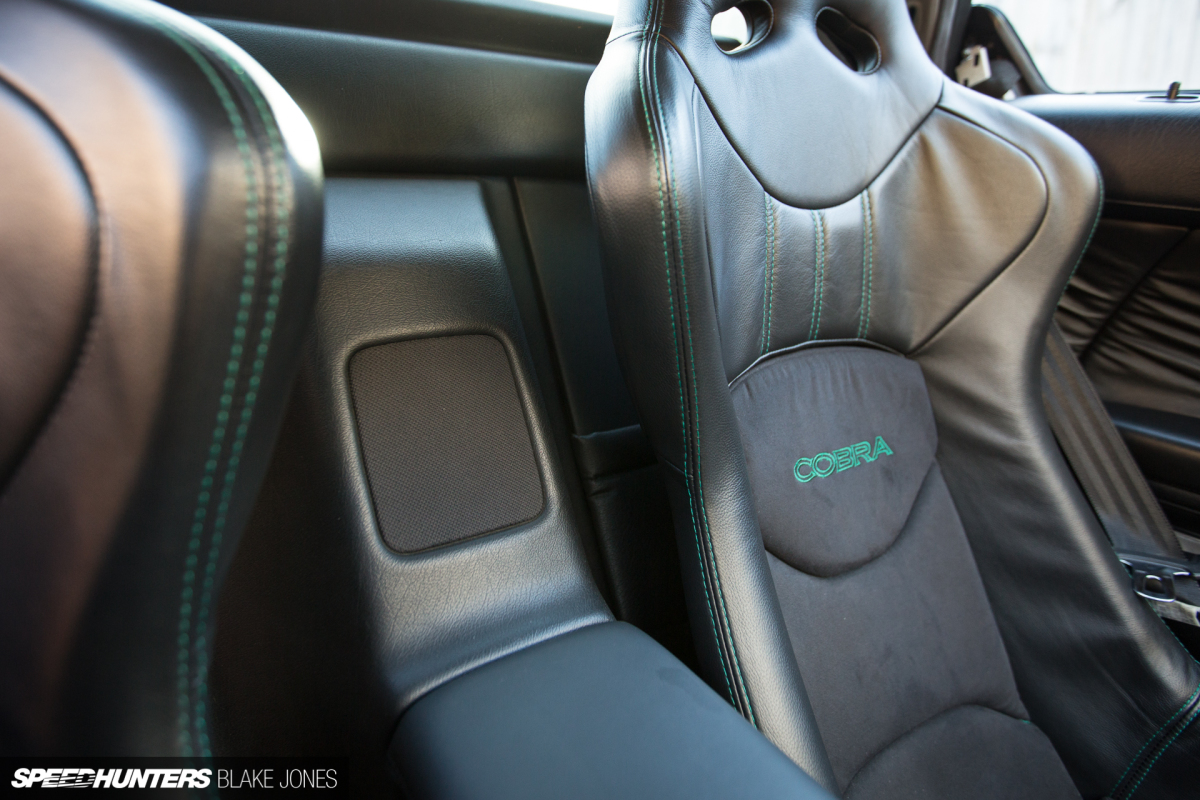
I’d almost forgot this one – from factory the NSX is a four-speaker system (two door speakers, one centre speaker and one subwoofer). After my upgrades I was left with the centre speaker, which sits between the passenger and driver as seen here. Most people ditch this small speaker in a custom setup because of the difficulty of getting a good, volume-controlled centre channel (L+R). After a bit of problem solving, I decided to run the Focal amp in 3-channel mode and direct the mono signal (which would typically drive a subwoofer) with a full frequency range to the centre speaker. The stock paper-cone driver was swapped out for a Dayton Audio PS95-8 3.5-inch full range speaker. I selected a higher-resistance 8ohm speaker to lower the volume relative to a 4ohm, but the setup also has gain and frequency control via the amplifier.

While I had the interior disassembled I took the opportunity to run a USB cable from the rear of the head unit to the centre console storage. From here it can be hidden away but still charge and supply the music, GPS etc.
So after the time, money and 3.7kg (8.1lb) extra weight, was it all worth it? I’m relieved to say yes, absolutely.
Aside from the obvious convenience of finally having CarPlay (and an English-language head unit) the sound quality has really impressed me. It’s well balanced throughout the frequencies, goes loud enough to make my eyes water, and honestly transforms long drives in the car into something to look forward to. I’ll admit that at lower volume the quality is just short of a very good OEM system (i.e. modern Lexus), but we’re talking something with at least 10 speakers and a cabin quiet enough to hear a fly fart. Once the outputs get loud and bass-heavy, however, the new NSX setup punches much harder. I’d heard that new speakers do require some running in (just like a new engine) and that has certainly proven to be true for the Focals – they are getting better and better as time goes on.
CHAPTER TWO
Rose-tinted GaugeArts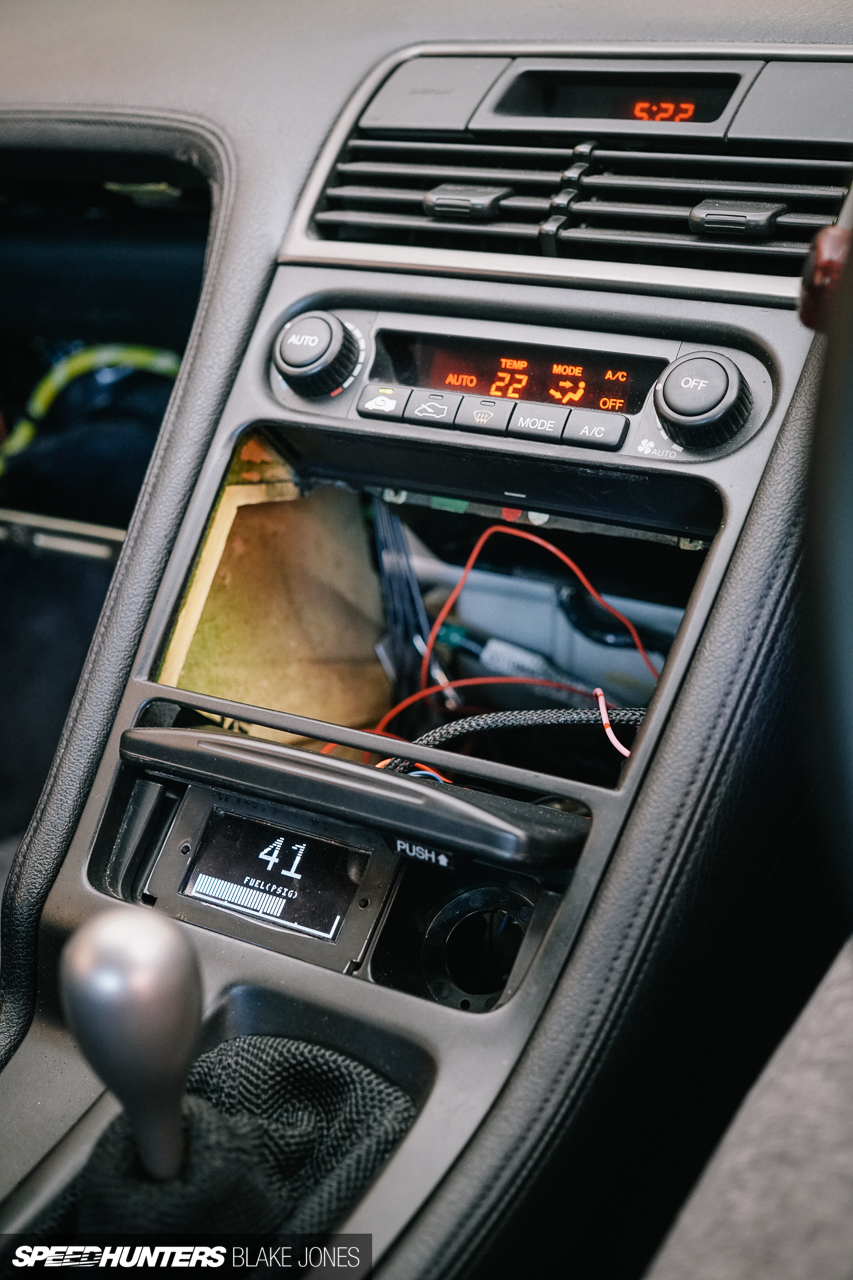
You may recall the prototype 3D-printed mount for the GaugeArt screen from the last progress update story. The functionality of the screen was great, but once the ashtray lid was opened the appearance left a little to be desired.

A redesigned, printed and painted mount tidies things up nicely. I also managed to source an orange LCD screen to the same specs as the original GaugeArt unit, so swapped out the white screen. A layer of red tint was required over the screen to get the colour to be an almost-match to the stock digital displays and lamps. A small detail, but one I think helps with the overall ‘integrated’ feel I’m going for.
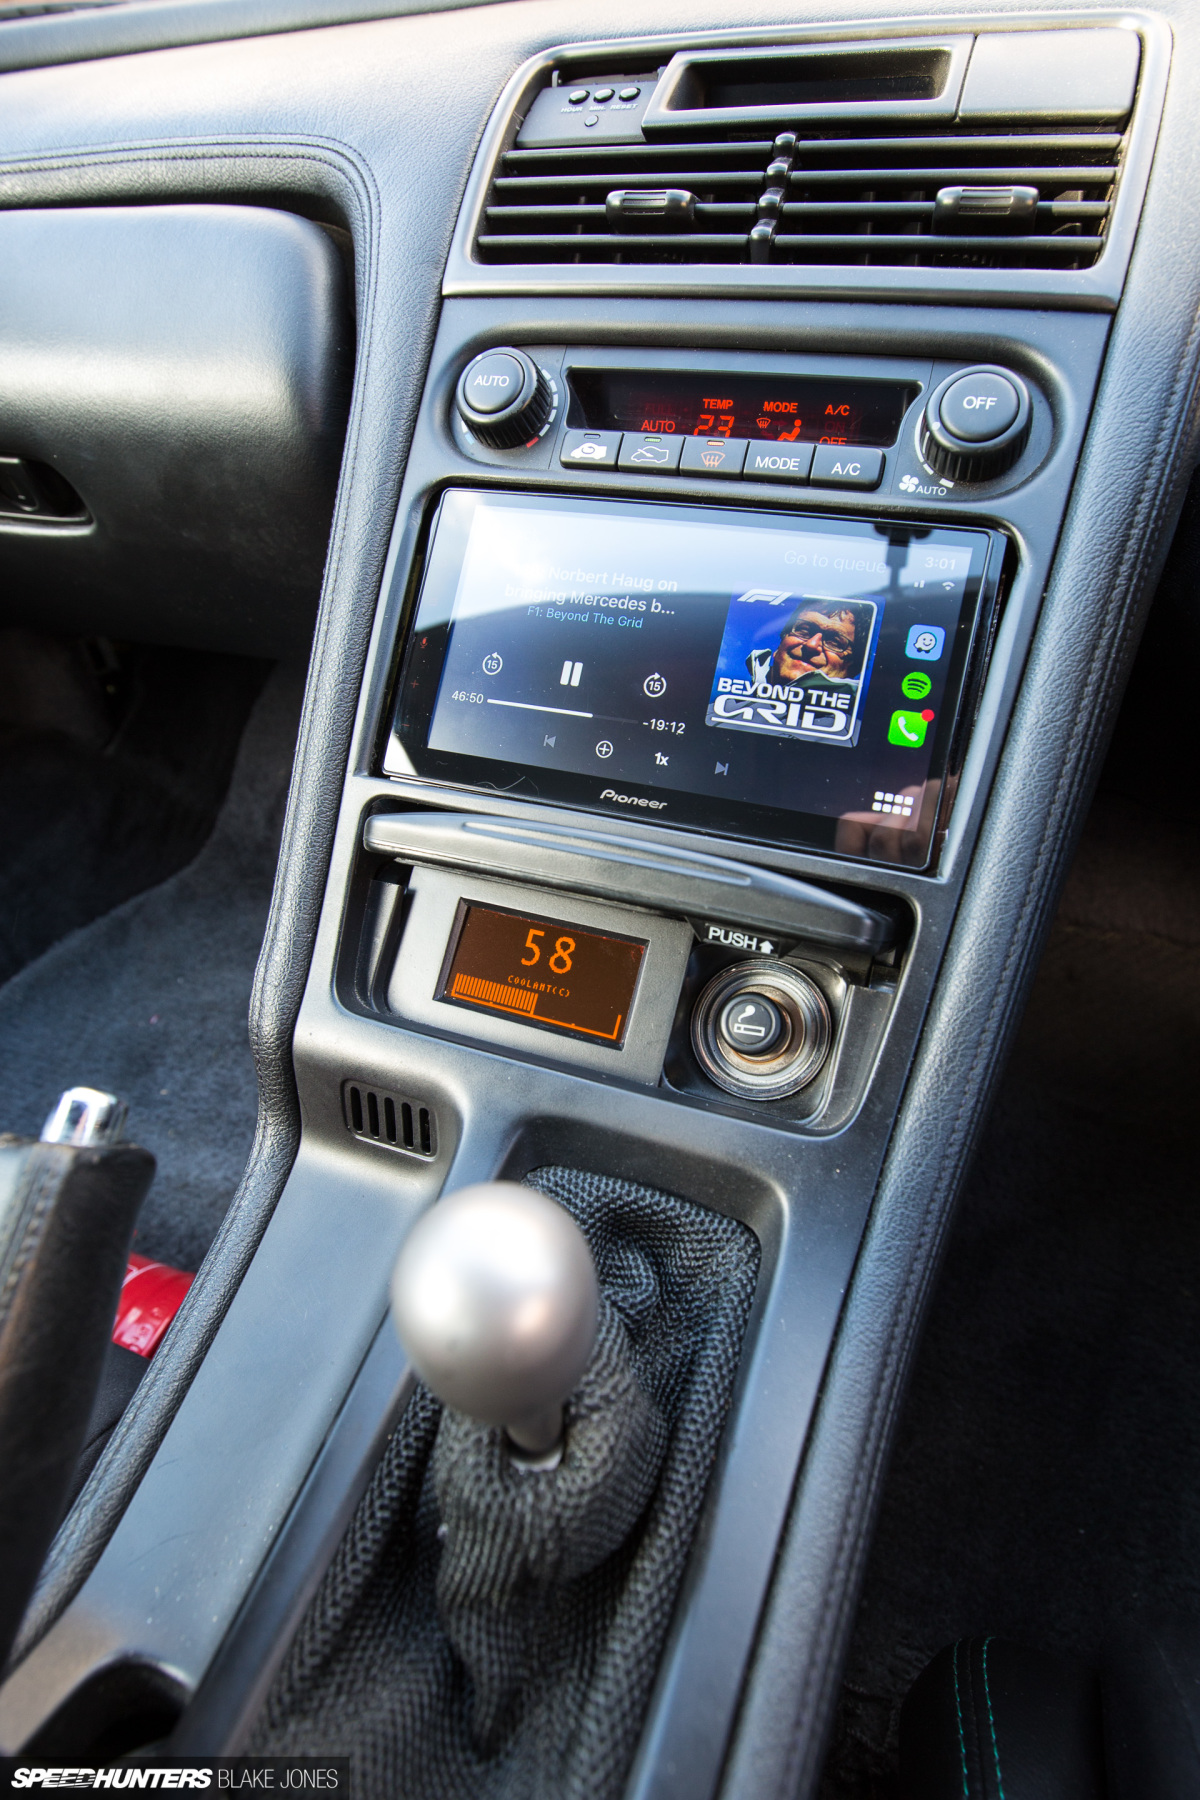
Truth be told, I rarely close the lid now that the install is properly finished. The display doesn’t look out of place in the stock-ish interior and being able to keep an eye on pressures and temps is reassuring.
FINAL CHAPTER
Cool Story, Bro
Even before these finishing touches were applied, the GaugeArt unit had already paid for itself by bringing my attention to a concerning coolant temperature creep at a hot Winton Motor Raceway track day. I’d resolved to do something about the situation before the next trip so I could worry less about engine temps and more about putting together a clean and fast lap.

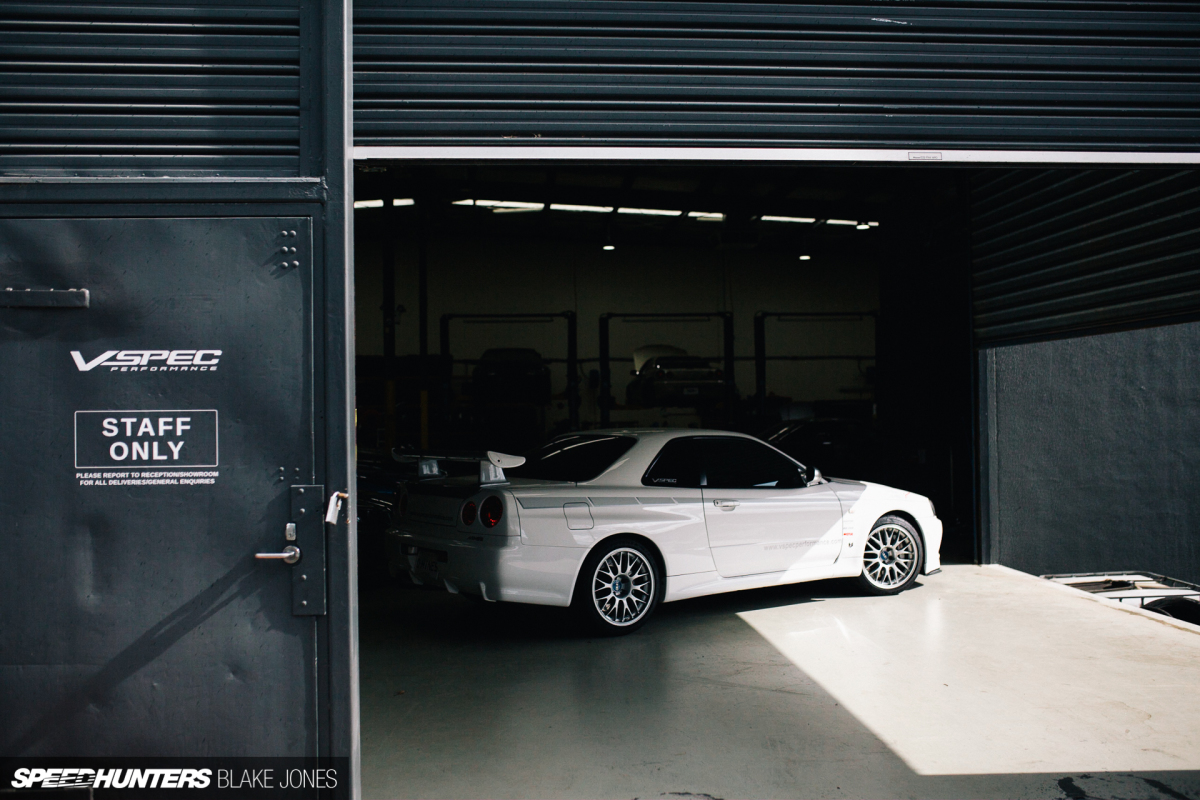
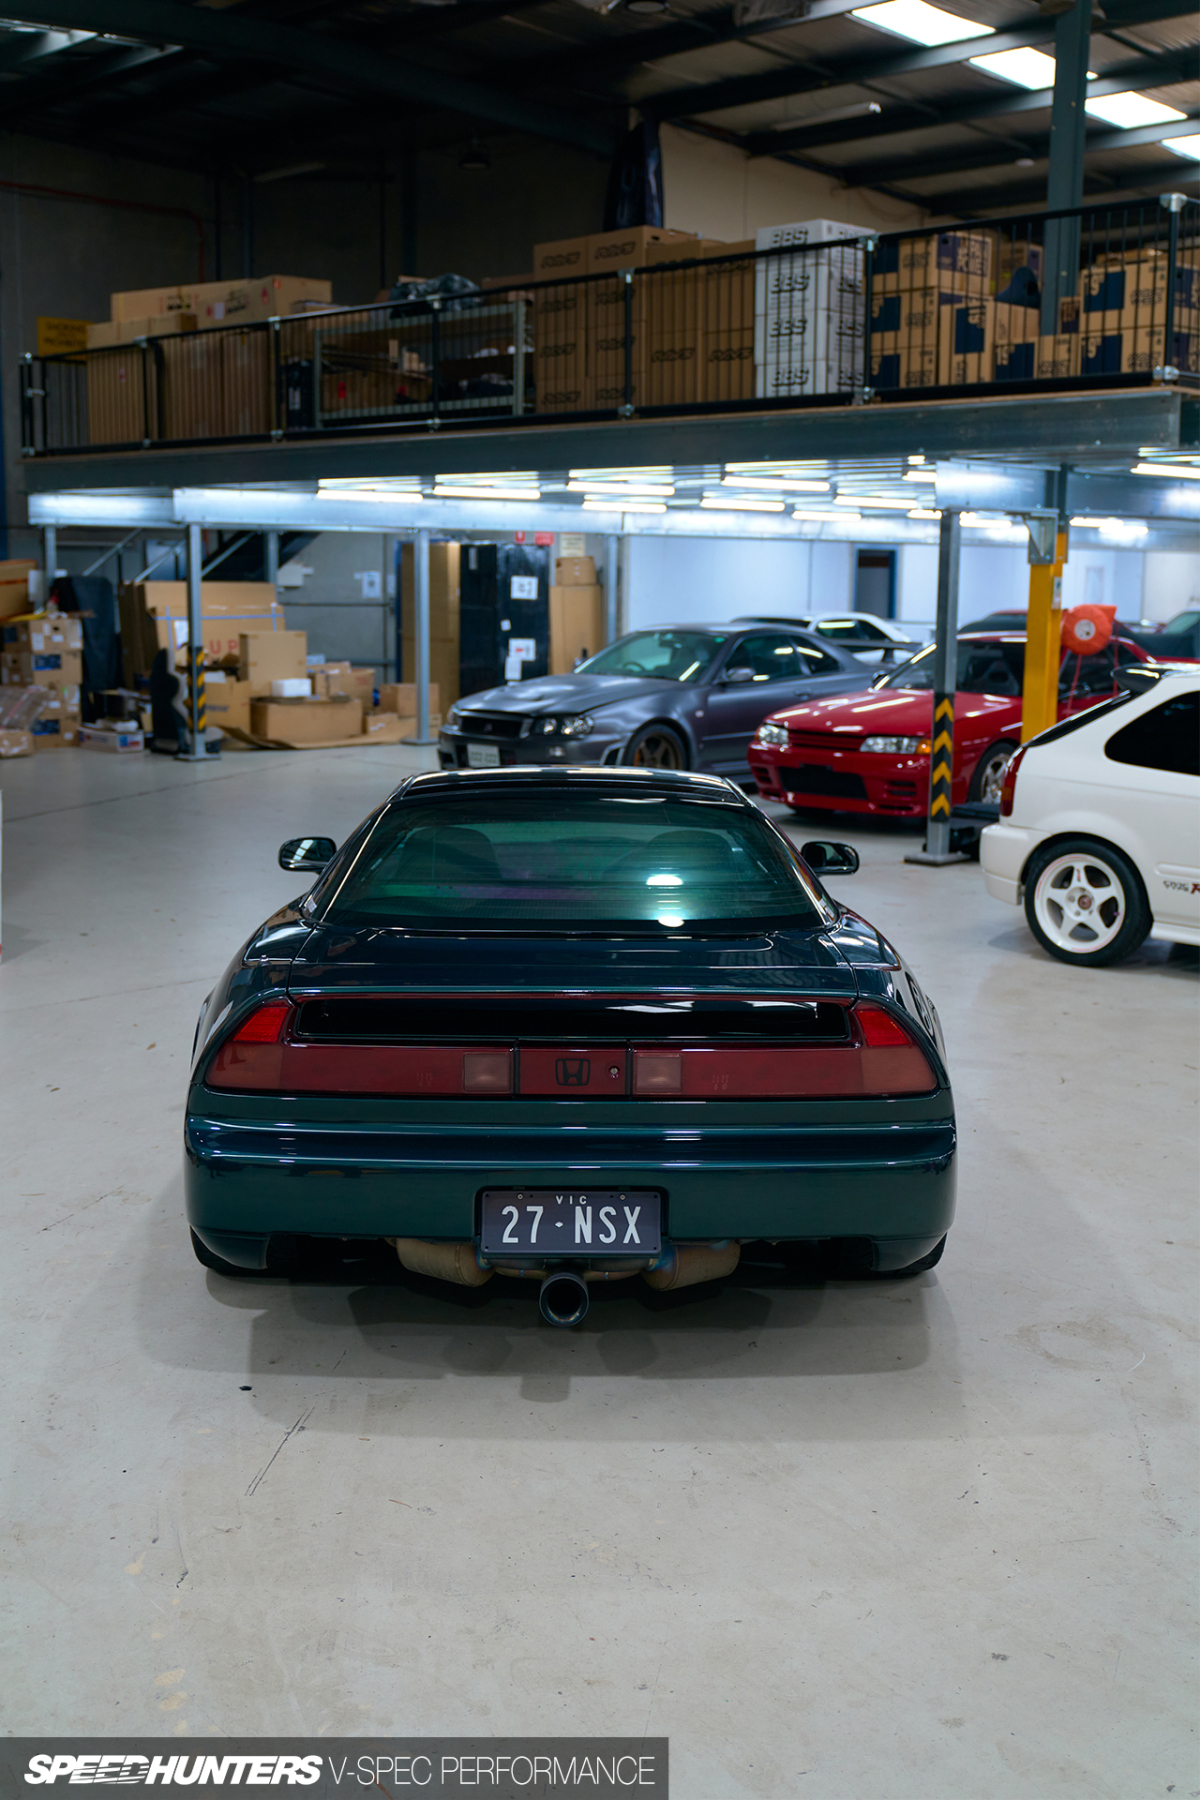
Like most mid-engined cars, the NSX has a fairly complicated cooling system with five drain bolts and four bleed points, so I entrusted the job to the mechanics at V-Spec Performance, who maintain a few customer NSX’s as well as the shop’s own NSX-R. While the guys got started on draining the coolant, I went for a wander to see what goodies I could find around the shop.
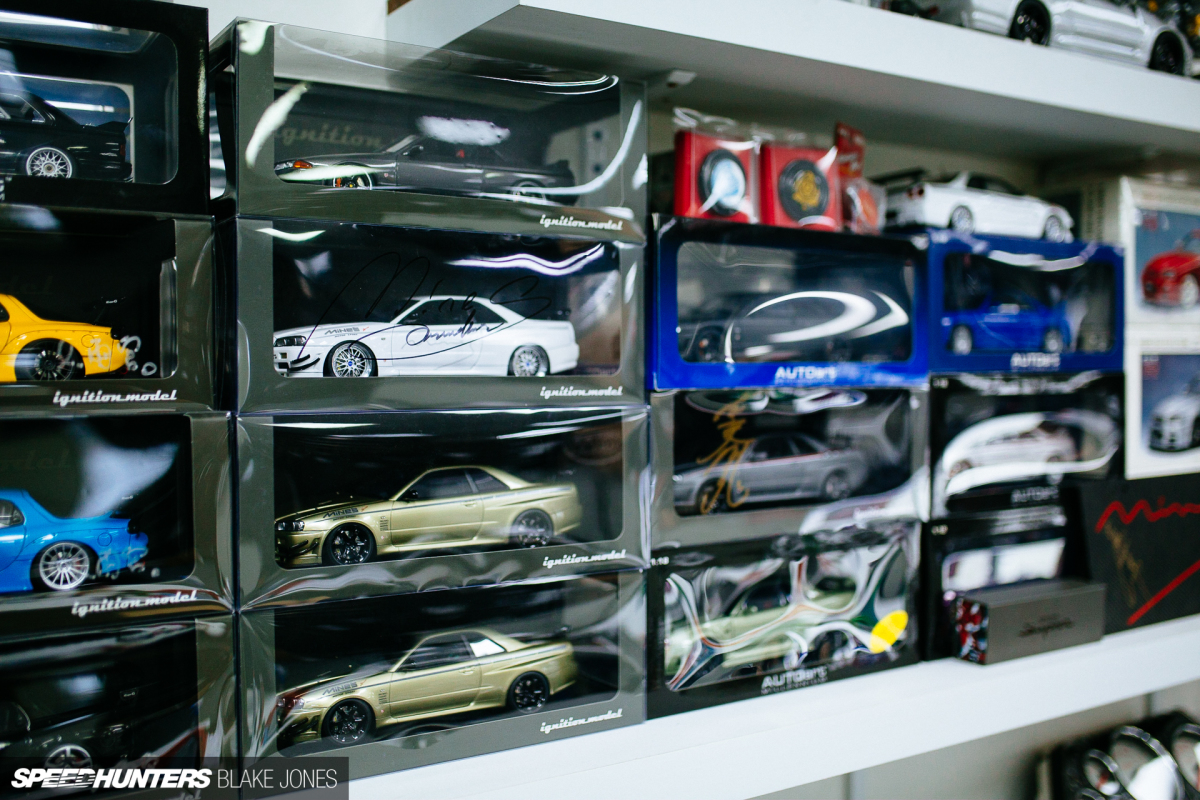
A few collectors can claim to have a scale Mine’s R34 GT-R on their shelf, but not many can say the real thing is downstairs.
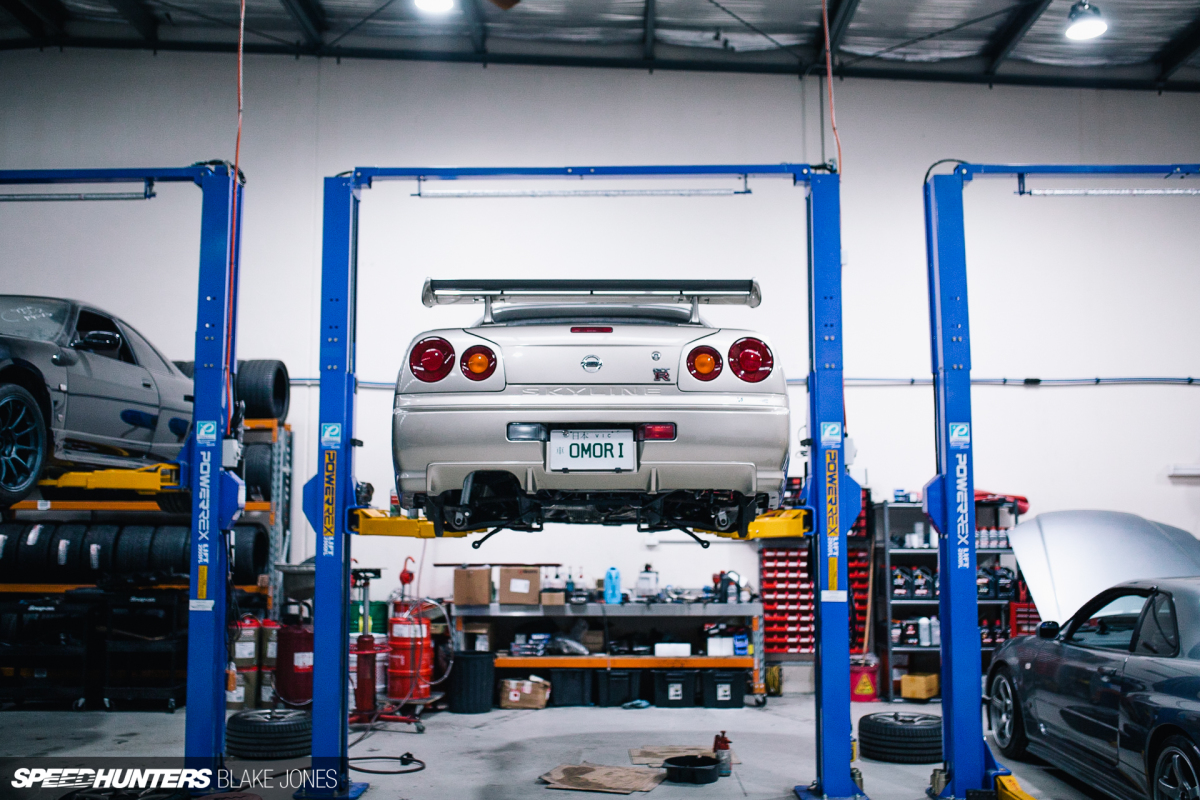
These days V-Spec houses a wide variety of machinery but is still known primarily for specialisation in GT-R maintenance and modification.

Old, new or in between.

I don’t know enough about Nissan ECUs, but I’m sure Dino could tell us all about these Nismo ‘Sports Resetting’ computers.
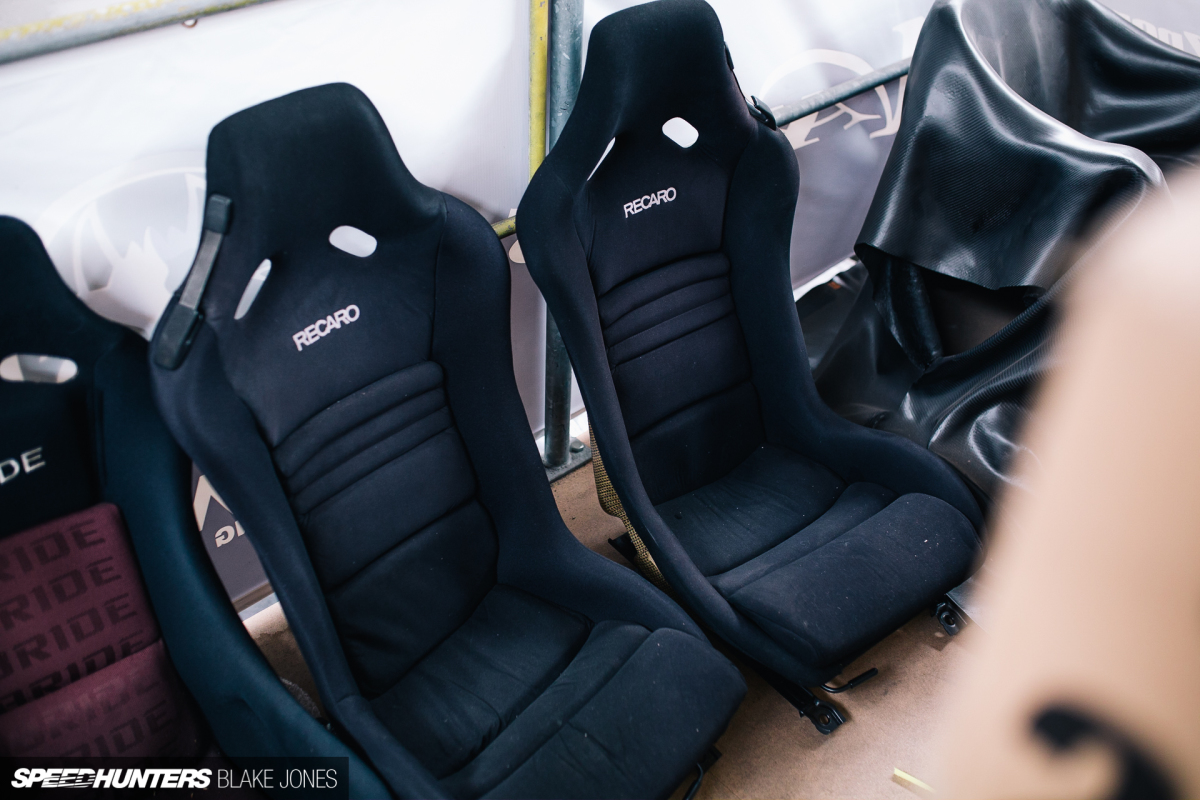
These carbon-Kevlar Recaro seats are from an RX-7 Spirit R, and share the same shell as the NSX-R. Whether Mazda or Honda, these original seats command crazy money from collectors (seems like that’s true for almost everything original these days).

More Nismo bits – these really nicely designed integrated gauges – who can guess what model these belong to?

As more and more of these JDM specials get de-modified (in my opinion, a disappointing trend) stock bits are getting harder and harder to find, unless you’re V-Spec.


Several hours later… and the radiator had been replaced, and the system filled & bled with 13L of Honda’s Type 2 coolant mix.

The removed radiator showed its age (I’d guess it to be the original from the ’92 build) but didn’t display any signs of being close to failure which is a nice indicator of health for the rest of the vehicles coolant pipes and passages. The rubber hoses were replaced when the engine was dropped two years ago, so they were all fine. I think some of these bent fins on the bottom were from me getting a bit overenthusiastic with the pressure-washer, so I’ll need to be more careful with the new one.
I haven’t had a chance to push the cooling system on track with high ambient temperatures yet, but have seen a 3-degree drop in the normal cruising temp (from 86°C to 83°C) which bodes well. The Honda Nationals event later in the year will be a good test – and hey, if temperatures do still nudge up it’s a great justification for the NSX-R-style vented bonnet I’ve been dreaming about.
So there you have it, the first Project NSX update where the car is absolutely no ‘faster’ at the end. And I’m surprised to say that doesn’t bother me one bit.
Blake Jones
Instagram: blaketjones
blake@speedhunters.com


Awesome update. I love the direction you're taking with this ride. Everything is so well thought out.
Thanks for coming on the journey with me, Bill!
I'm not mad about the better sound system either, since the weight penalty is as little as it could be for what sounds like a pretty solid setup. It's a very good trade-off if you are constantly going on long distance drives.
And I'm surprised to learn that Carrozzeria's system is by Pioneer. I learn something new today!
Thanks Jay, yeah, being able to save weight where possible (with the lighter head unit, tiny amp and speaker magnets) definitely made it an easier mental hurdle to jump over. Every extra kg makes a sound system harder to justify but 3.1kg seemed a fair price to pay for such a massive improvement in sound quality & experience. If I'd left out the subwoofer, I would've saved weight!
Great update! Also, for those reading and that are sensitive about adding weight to their car. Using Dynamat (or similar) has real tangible improvement. I undertook a similar audio upgrade in my 98 CRV, and it made significant difference. However, you only need to cover about a third of the metal of a panel that you're looking to deaden the sound through the reduction of resonance. This means both less weight, and less material are required than one might think. Extra certainly wont hurt, and will act as a heat barrier which may help with A/C performance, but if you're hoping to be thrifty and still get a good outcome it's possible.
Also, if you're looking to upgrade audio and want something that could be almost period correct, I utilized a Sony DSX-G900 which is double-DIN (I think there's a single DIN variation, too), I was able to color code it to match the factory Honda amber lighting, and the unit is high-output with 100Wx4 RMS output (yes, RMS, not max). This meant I did not need an amplifier for my speakers, as it was handled by the headunit. I did have to run a dedicated, fused, power supply to the headunit from the battery, but this was no big challenge. For components, I used Polk DB652's which offer great performance for the money. I utilized a powered enclosure sub just as you did Blake, but opted for the Rockford Fosgate P300-8P, which is a just bit bigger than that JVC unit (which I also had considered) but offers a bit more punch for the buck (pun intended), offering the best overall power and range for the budget, considering that I had an open area in the back which to install and so size wasn't as much of an issue. A close second was the kicker 11HS8.
We're forgetting one of the other big Dynamat benefits for doors - the door close 'clunk' sounds so much more clean and solid! A little detail but really makes the car feel premium.
45W RMS is perfect for a nice 4x speaker system. I'm surprised there aren't more 'integrated amp' options on the market, especially now the non-CD drive head units are getting more popular - plenty of space to install one in the 2DIN body.
Sorry, I misspoke on the RMS output - it's 45Wx4 RMS. Most headunits are 45Wx4 Max and actually around 10-15W RMS.
Well, you say that, but the cooling system service could absolutely make you faster, through not worrying about it as a failure point. And the increased relaxation cruising to a track event can put you in a better mood and mode for faster lap times.
While the car didn't get any lighter, the weight difference here is negligible for the perspective gain in peace of mind and overall comfort. I wouldn't be surprised at all if both result in faster times.
I like that logic! And if I play Eurobeat on the track, surely my late braking will improve.
If you put those anime speed lines around the edge of your helmet visor, you'll feel faster all the time!
TEAM PRUSA IN THE HOUSE!!!
Love my Prusa - hanging out for the XL release!
Cool update. Don't really talk about audio much here. But it's important for cars that get driven in commuter environments more often than not.
Yeah, in-car audio went from being the 'must-have' car modification to barely a blip on the radar. I guess due to a combination of OEM audio getting quite good (and simultaneously difficult to upgrade) and tuning trends focusing more on track performance (or the appearance of performance). There's still a great ICE industry and plenty of good info online to build a capable DIY setup.
Not what I was expecting after I read the first paragraph. Love the car, looks like a great build, but I do think it goes against the ethos of what the NSX is meant to be. Not trying to bash on you or talk crap--your car do whatever you want with it.
Having said that, you're adding the 1 thing that is most important to a cars performance: weight. Nothing matters more when it comes to every aspect of performance driving. For me this is something I would never do to a sports car and the second you do you are diluting the entire experience.
It's just a big contradiction to your opening paragraph. To each their own but people should understand how detrimental this is to a vehicle designed for the track. It also goes to show if you build a car for fun as opposed to competition or developing a platform truthfully--nothing really matters which I've always said.
Funny to think how much time the engineers are Honda put into their products in terms of weight reduction just to have customers throw subwoofers in them. Good thing they put in all those hours at the lab, right?
At the end of the day I don't really care because I race cars and I don't build street stuff anymore. Nice paint choice though and I bet it's still a fun car to drive around in.
5-10kg of extra stereo weight will do basically nothing, especially since the majority of people can stand to lose that weight just on their body (me certainly included).
It's a registered street car. It doesn't matter. Relax habib.
Econti - like I said. Doesn't matter much in a road car but this author said he wants to track the car. Reading comprehension matters. Durrr. 10kg is also a lot and depending on where it is can be even more detrimental to the car's performance. Add 10kg in unsprung weight and tell me it doesn't matter.
Incredible to read the amount of uneducated people who chime in on this stuff. You're simply wrong for a number of reasons lol. Call me Khabib cause you just got choked out!
Tracking the car doesn't make it a race car. It's still a road car. He added 3,7 kg pretty low down in the middle of the car. Doesn't make much of a difference. Suddenly you are talking about unsprung mass. Have you installed lot's of sound systems inside wheels? You are just an ass trying to sound clever and totally missing the point
I kinda get where you're coming from (especially with a name like ultimate racing tips!) but you've missed the mark on the NSX, it was always more of a grand tourer than a racecar - that's what the (significantly - 10%!) lighter NSX-R was for. Remember that half of these cars were sold as autos from factory. The stock car had a subwoofer and amplified speakers, just not great ones!
The second and third paragraphs really address that though, and surely are right on what the NSX is meant to be - a performance car with supercar-humbling talent (at the time), and yet as useable and reliable everyday as any other Honda. A dedicated race car it isn't, and arguably never was.
I never knew that's what it was marketed as. Interesting.
"A dedicated race car it never was" is exactly why I got out of road cars on a separate topic. You're always better off buying a purpose built race car if you want to go racing. That's why I segment my vehicles. I have a daily, I have a kart. I don't try to get a Civic anymore or an NSX and build a race car out of it. Will never perform as well as something purpose built which is why I said the subwoofer doesn't really matter per this build.
Turning a road car into a "race car" is always going to be a waste of money for the speed you get back. Hence my comment: do whatever you want lol.
Great update here Blake, and great to see after all the work you did to improve the sound system (and keep weight in check!) you're running the music output through USB and not Bluetooth, which will really allow you to take advantage of the extra dynamic range and clarity. 3D printed parts really bump up the finish quality too. Was nice to see this thing and meet you at Highball last month!
Thanks Lachlan, was great meeting you too. Good point re: cable. To me it seems the transfer of music data is still a difficult element to optimize especially in car audio. I'm using TIDAL high res files for music via USB, but have no idea what compression happens between the App to iphone to CarPlay to Head Unit output process...
Honestly, it is a difficult element to optimise and it is a black box, as you mention. I'm still a bit old-school and make frequent use of the CD player to give the best results, as I've noticed if I play anything loudly that needs dynamic range to sound its best, Bluetooth streaming results in a clipped, crackly high end and strangled midrange. That could be due to the age of my car's Bluetooth tech though, and a potential need to convert one format to another while streaming, so with a brand new head unit and Apple CarPlay, you'll likely be better off.
I guess the only way to find out is to play something dynamic, turn it up, and listen in!
I myself have recently upgraded the audio in my own car, however opting for a Pioneer system all round (excluding sub, that is a Kenwood 12-inch which I got for free including the box and amp, though I can't remember what brand the amp is). I'm super impressed with how much better it sounds and feels in my Bugeye wagon, however one thing I have neglected to do is put sound deadener in which I should do sooner rather than later.
Awesome update though and keen to see where Project NSX goes next!
Thanks mate! The sound deadener will be a cheap and easy win in the bug eye now that you’ve already invested in a good system.
When I replaced the radiator on my S2000, the Koyorad felt a lot lighter than the OEM rad with plastic end tanks. I didn't weigh them, but it might offset some of the added audio weight.
By the way I replaced the original speakers with entry level Focals two years ago, and after some running in they sound amazing already. And that is with the appalling OEM headunit, so I can only imagine how awesome this setup is. I will look into the Focal amplifier you are using here for when I will be upgrading some more. Great project, keep it going!
I couldn’t feel much weight difference between the rads but this one is a bit thicker than stock so you’re probably right if the core size is the same.
You won’t be disappointed with the Focal amp!
Don't mind me, just here taking note of your podcast choices for future things to listen to.
Hey Paddy,
You guys should remove the Google + link from the site since G+ has been down for a while, otw thanks for all the good content!
I nervously checked the photos to make sure nothing inappropriate snuck through! Haha Beyond The Grid is bloody fantastic though, definitely give it a listen if you haven’t already.
Can't wait for the next project that you're going to come up with
Was a pleasure working with you on this one Marc.
You wasted a lot of potential by not going the fully active way and getting rid of the passive crossovers. Your Headunit seems to have everything on board and you installed a 4 channel amp. So everything you need to get the best out of the system.
Yeah that was an option I strongly considered. It would’ve knocked out my centre-speaker solution and required running new wiring to the doors for the tweeters. If the balance was lacking I was prepared to pull it apart and go fully active but I’ve been really impressed with the performance with a passive split.
I also thought thet dynamat (or equivalent) should be place on the metal sheet behind the speaker (inner side of the exterior panel).
Didn't know that it's also effective your way (which anyway seems to be the only one practical to do given the shape of the doors ).
Top one is for a R33 GTR.
I guess the lower one is for a 32 may be?
Although the photos don’t show it, I did apply some dynamat to the inside of the door skin (behind the speaker) too, as well as a tiny bit on the actual door trim. It’s all about controlling unwanted vibrations and helping to seal the door cavity.
I've been following speedhunters for about ten years now. I think this is my favorite staff project in all of that time. Certainly Keith impressed me with his fabrication/skill/vision, and Larry started buying some really cool stuff at the end of his tenure, but this is absolutely the one I would want to put in my garage. Kudos to you for making big improvements with subtle execution.
Really appreciate the kind words Mike, we’ve been lucky to have some fantastic projects over the years, many of which still provide inspiration for this build.
Nice work! I sold my R32 Nismo center gauges for $400 from memory (have Mine's oil temp/boost). Who knows what they go for these days.
I love designing parts and printing them but I have all sorts of trouble with ASA adhering. Any tips?
Not a sexy solution but a bit of gluestick on the print bed and a small skirt did wonders for me. Enclosure helps a ton too.
I think I've already said this in a previous NSX update, but I have to say it again.
You are such a nerd. I like you.
Lol
Nerds unite.
Notice where those cars were parked in the middle of the road. It definitely sets a bad example. Yes the article is about stereo component but still when people look at the picture they can't help noticing that parking the cars at the wrong spot is selfish and arrogant. Given it is RHD is it in England?
That was the side of the road, the lane to the left of picture is a (closed) ticket booth lane.
Nahh, Australia mate
Oh man, you need to switch to apple music to really wake that all the upgrades you’ve done!!
Glad to see you mentioned closing up that extra hole in the door. Those flimsy plastic sheets are more critical than one would think - the one in my '98 Chevy truck was removed by the PO, probably when they replaced the interior door handle. It resulted in water being able to drain out between the interior door panel and the door itself, which would then pool in the door sill and be soaked up by the carpet. Eventually, a large hole formed in the inner rocker and outer floor. It wasn't pretty.
Nice work on the audio upgrade!