
It’s tradition to open an SH Garage update story with an apology about how long it has been since the last one, which either means we’re all terrible time managers or these project cars are more trouble than we’d like to admit.
I squeezed in an update about the ABS upgrade to Project NSX in July, but there was still unfinished business from November 2019, where we ended the dyno tune at Chequered Tuning on a cliffhanger – the stock injectors were running out of steam at the top of the rev range, meaning the car had been cruising around Melbourne with a temporarily lowered rev limit for almost 12 months.


Let me rephrase… There was the occasional cruise around Melbourne, but Project NSX has been racking up fewer kilometres than ever before thanks to COVID and a severe (but ultimately successful) lockdown in my home state. At least there was less guilt about leaving the car in pieces while I tinkered with a few new electronics projects.
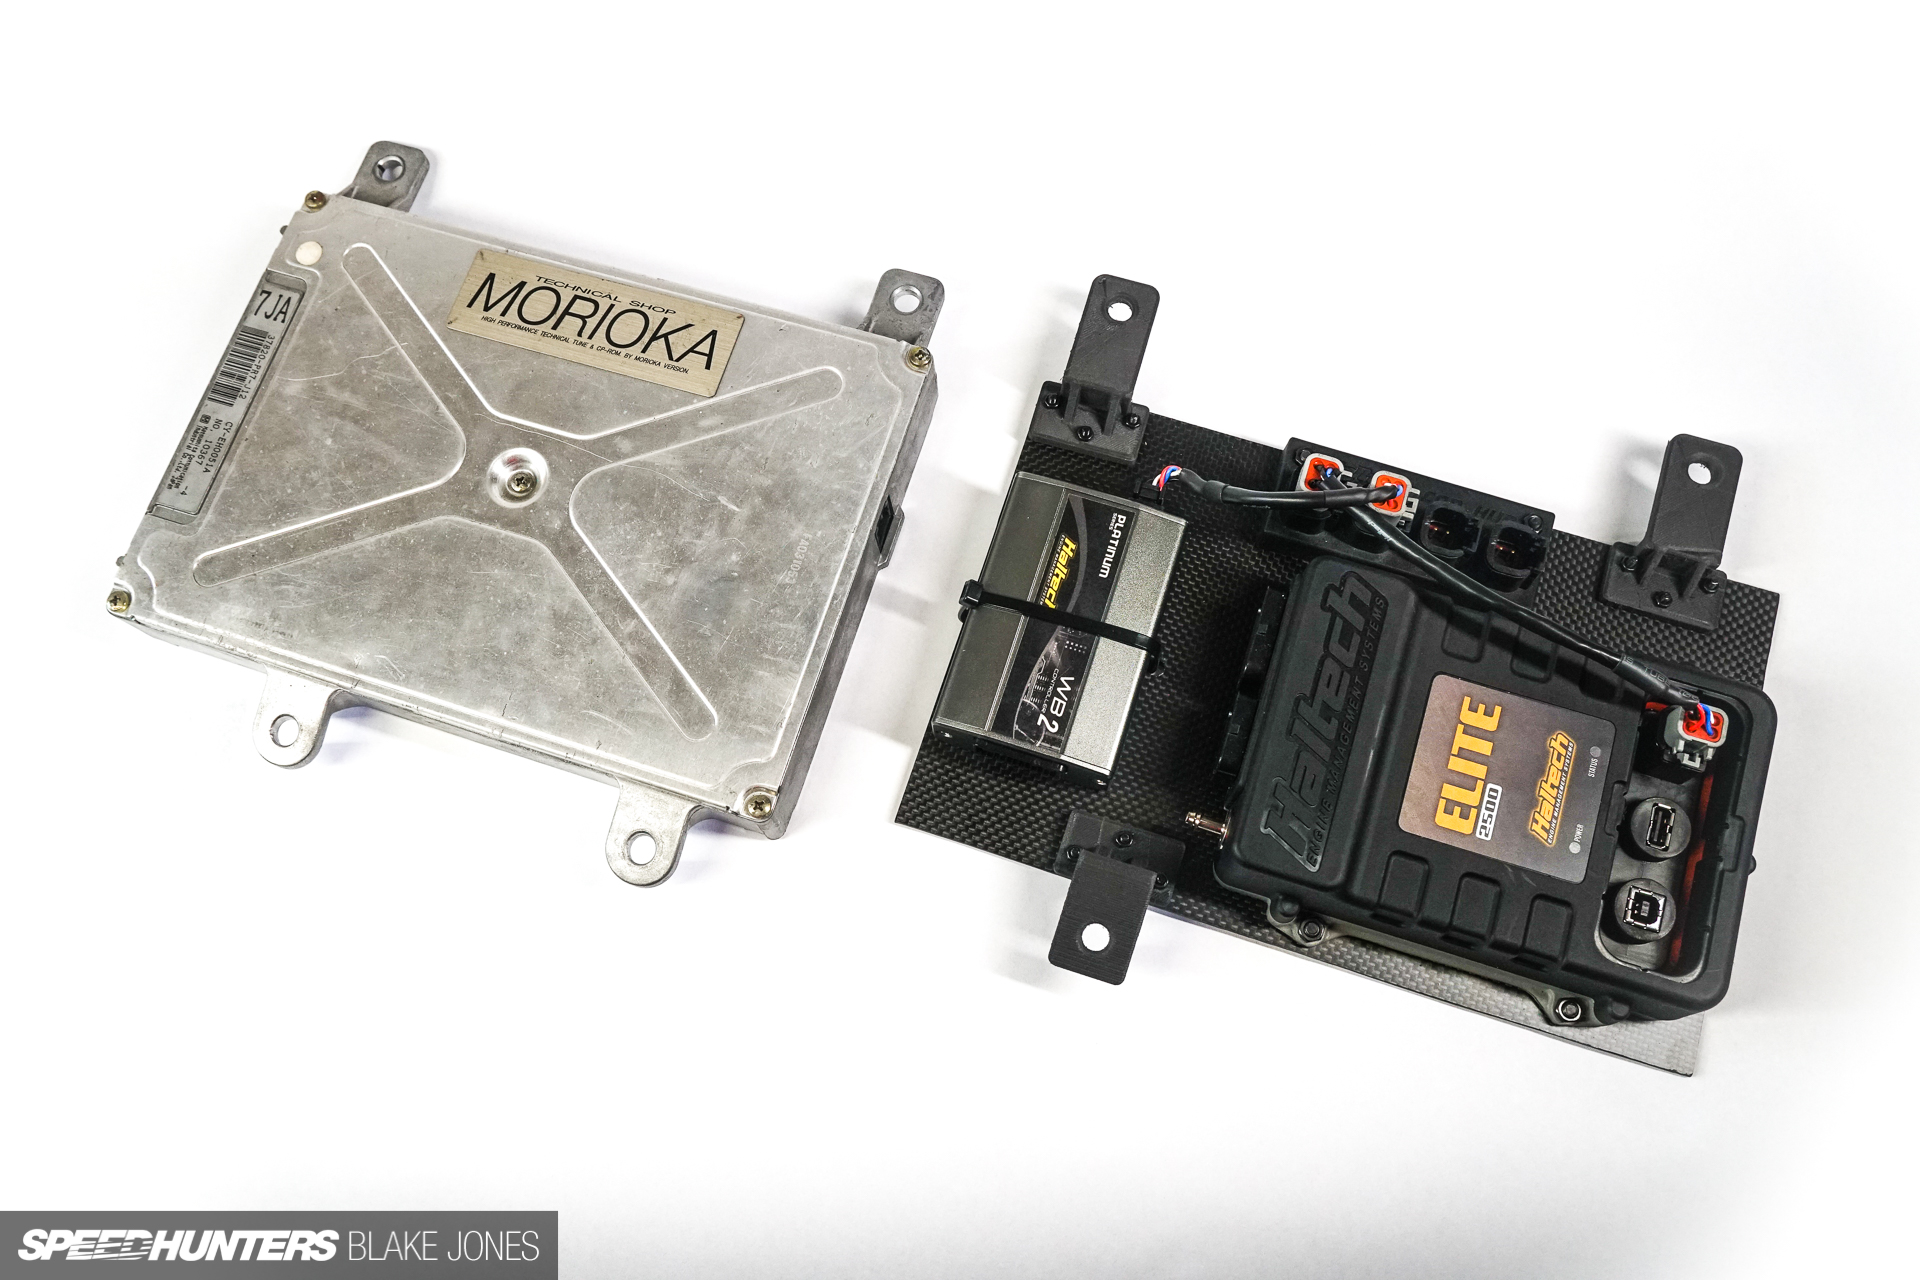
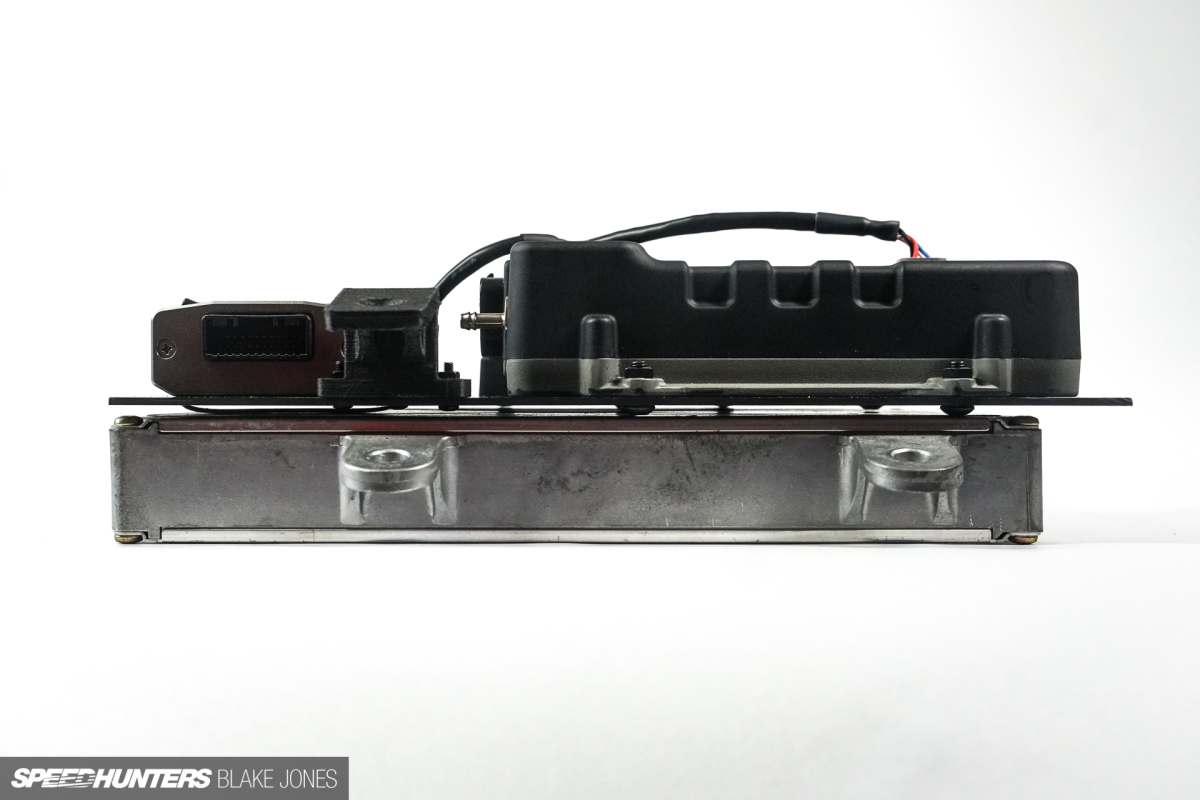
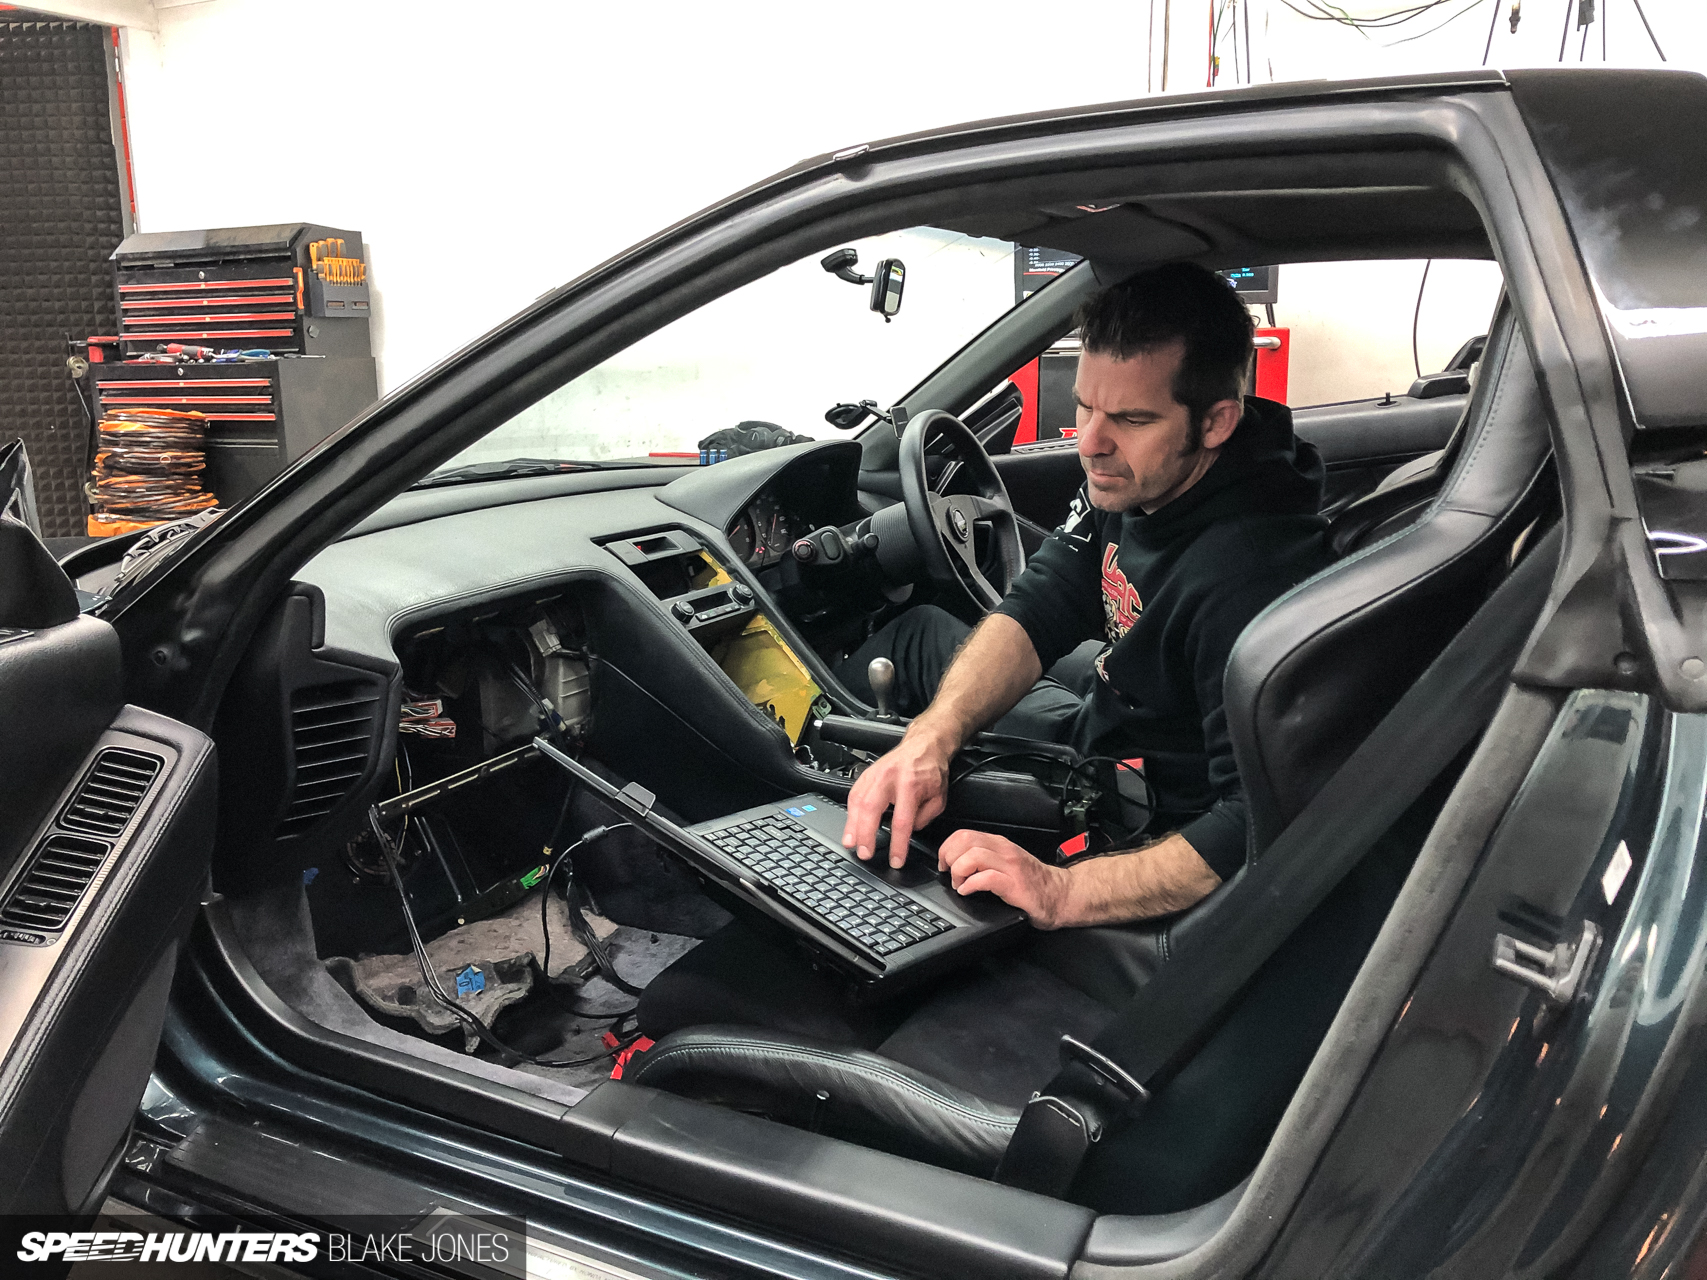
One of the most fundamental changes made to Project NSX has been the installation of a standalone ECU. Switching from the standard Honda computer to a Haltech Elite 2500 was akin to a brain transplant where the surgeon throws in a bunch of Terminator T-800 spec enhancements at the same time. Somewhat embarrassingly the new brain had just been ‘floating’ behind the driver’s seat, held in place by a combination of the Boomslang harness and an interior panel clipped over the top. This seemed like a problem to solve with my new best friend – the 3D printer.
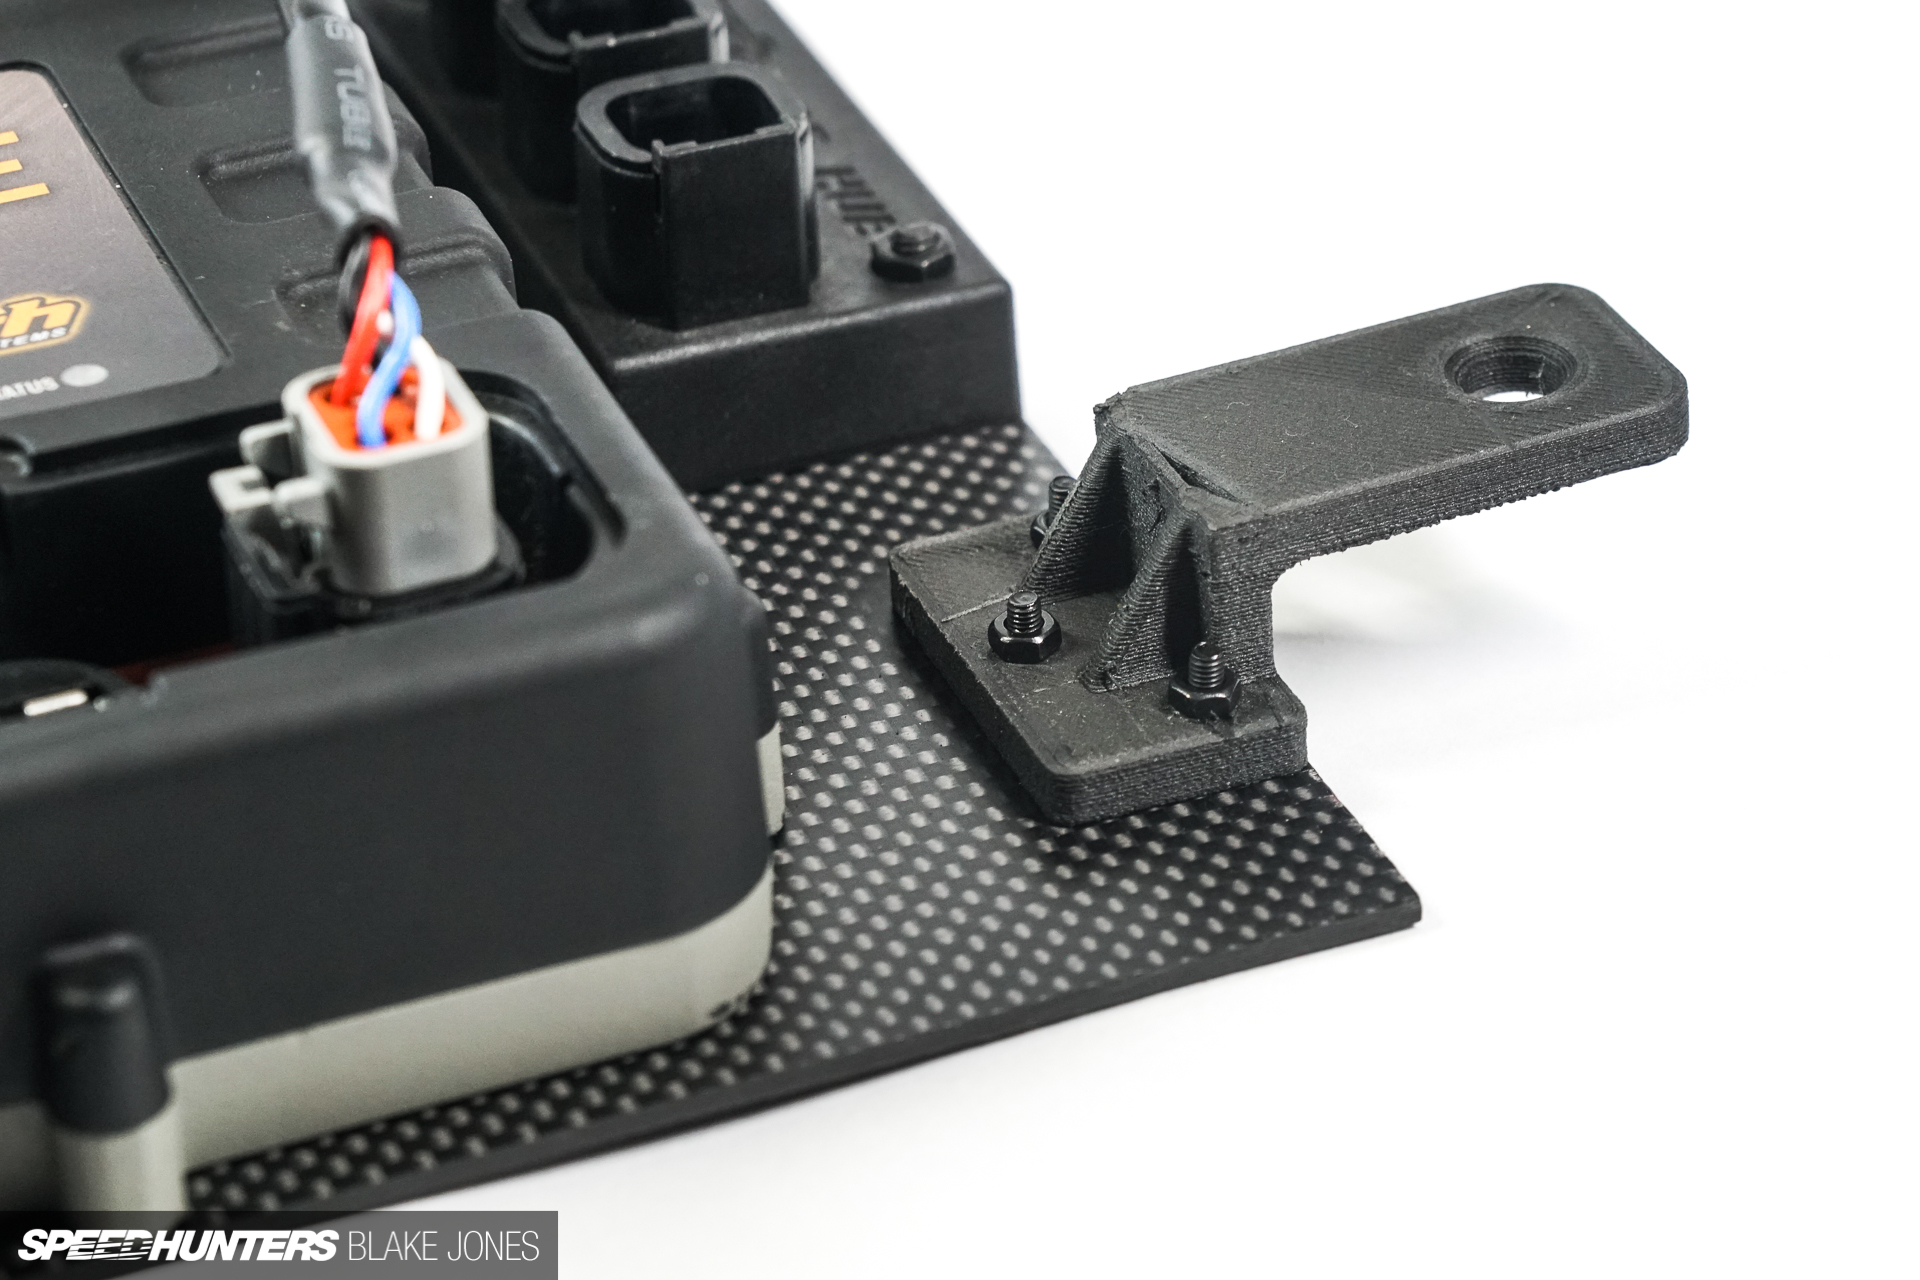
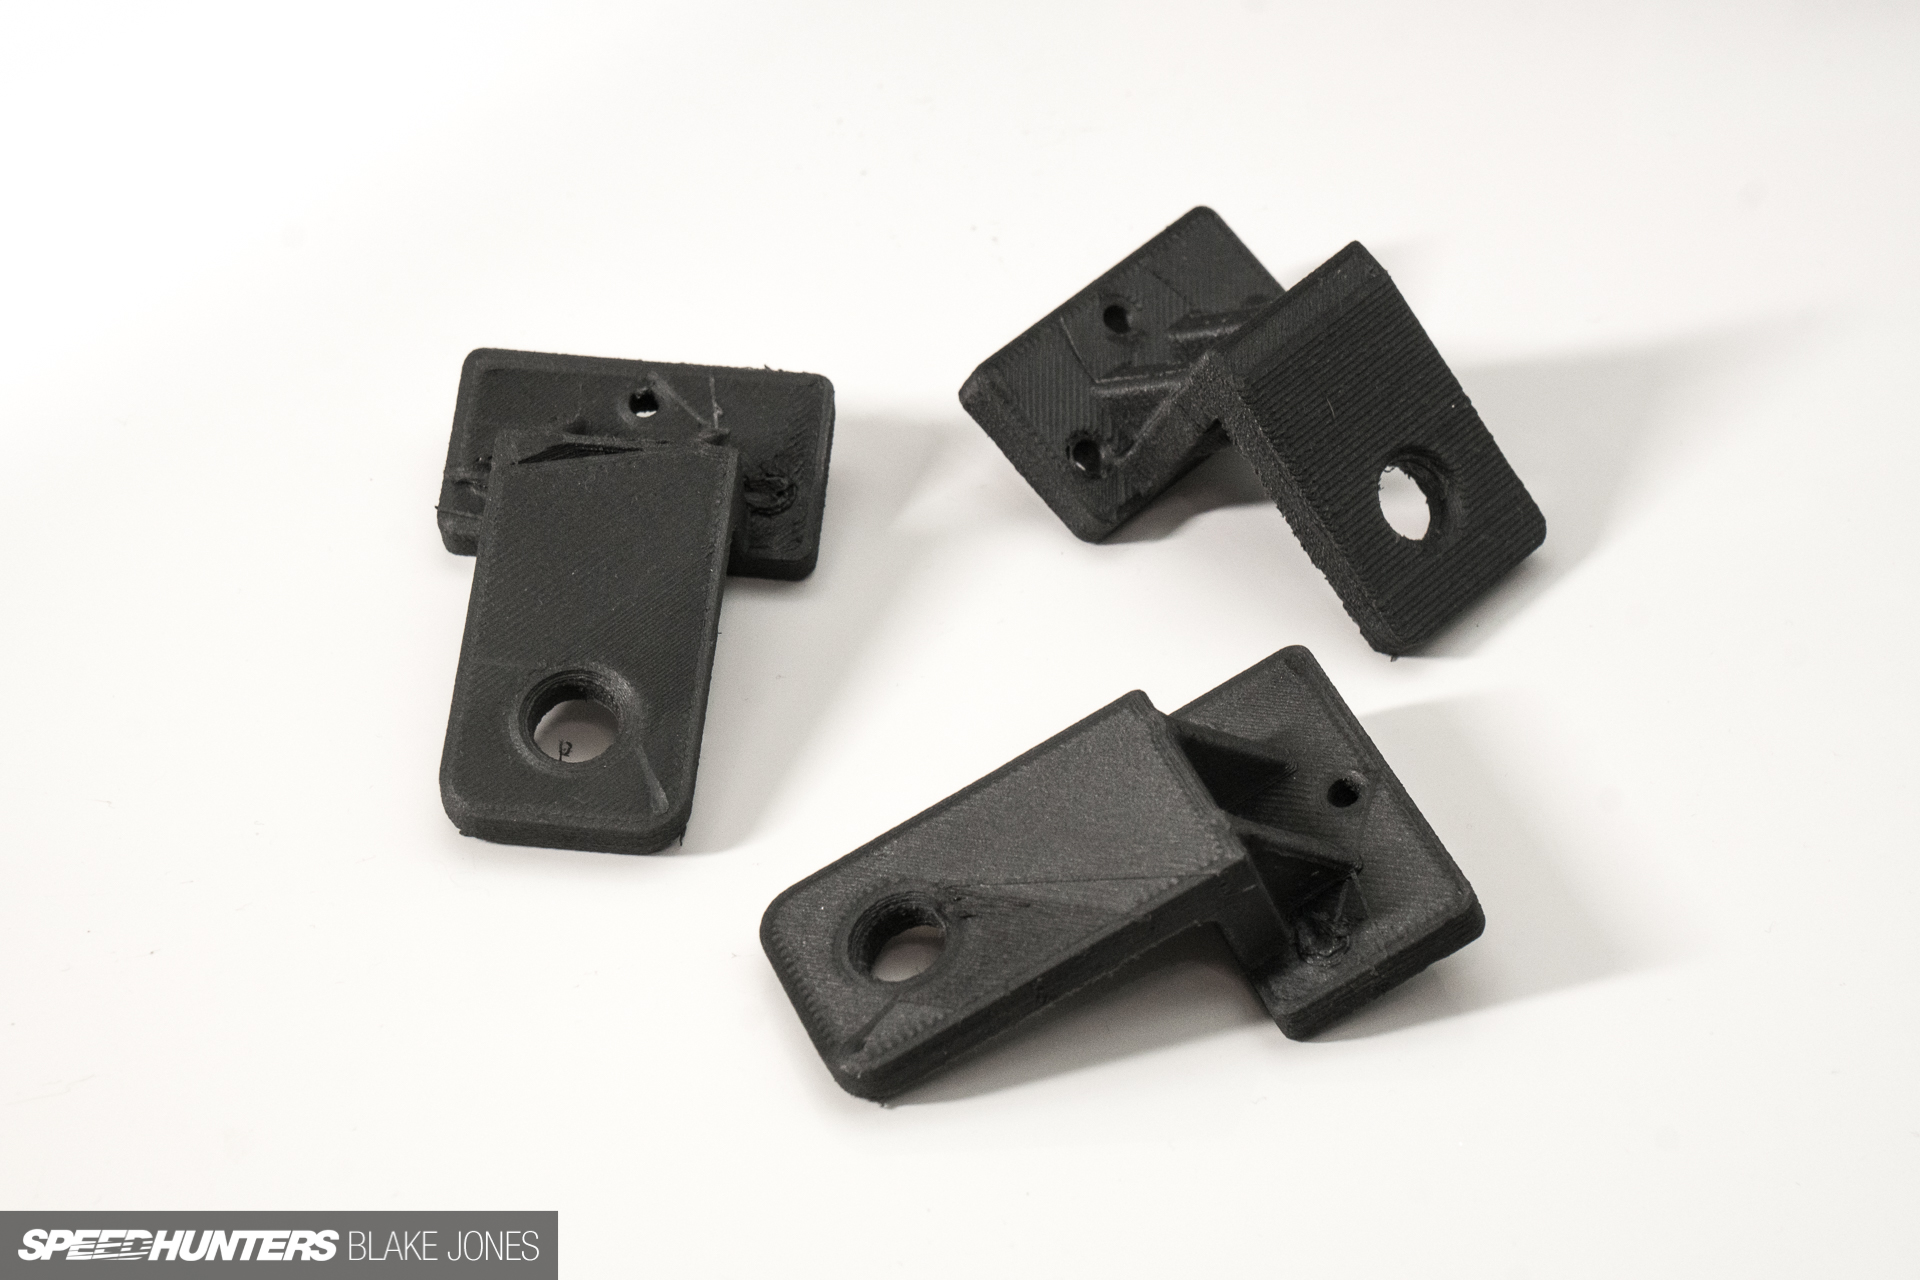
The compact waterproof casing of the Elite 2500 has a much smaller footprint than the original ECU, so if I wanted to use the original mounting points on the firewall interior I’d need a bracket. With a pair of digital calipers and Fusion360 loaded up, I had a ‘copy’ of the factory ECU mounts tweaked to attach a carbon fibre sheet.
You can see how it compares to the stock ECU’s aluminium chassis here. I used three of the four available mounting points.

A few different angles comparing dimensions.

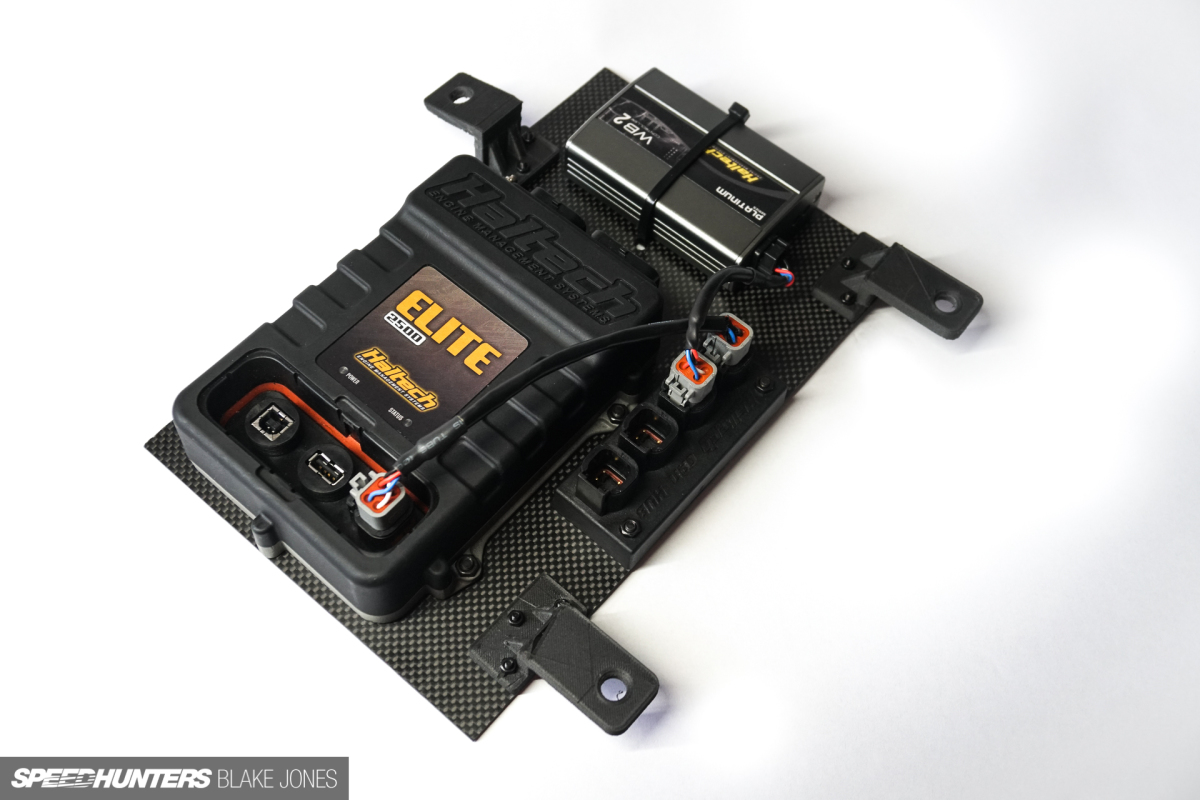
There was plenty of space remaining to mount the external wide-band controller unit and CAN Hub expansion module. I shortened and re-pinned the wiring to remove the excess length in the new configuration. The fit was perfect, and now it’s hidden back behind an interior panel to never be seen again. At least I feel better about doing the job properly.
With workshops starting to reopen as Melbourne maintained its ‘Donut’ status – zero new COVID community cases – it was time to book in to see tuner Trent Hewitson, and install the new RDX injectors. The car would be undriveable until being tuned, so I left this as late as possible to minimise downtime.

The RDX injector is a popular upgrade in the Honda world, but it was not a foregone conclusion for Project NSX. Fuel is one half of the combustion reaction and the way it is delivered is very important to outcomes of efficiency (and power) – especially in naturally aspirated engines. I needed an injector which would supply more fuel and ideally do a better job of atomising it to assist flame propagation (burning more of the fuel in a more stable manner). Considering the injector position and manifold would not be changing, other geometric variations needed to be minimised. Finding information about an injector’s delta angle and cone angle is not always easy, but it is necessary to ensure you are not installing something that physically fits but ends up drenching the port walls instead of hitting its target – the intake valve port.

The RDX injector nailed the brief, perhaps an indicator of Honda’s intake manifold geometry remaining fairly similar over the 20-odd years between the C-series and K-series engines. As an added bonus, the RDX injector features a split cone spray pattern, better targeting the two intake valves compared to the single-cone original.

Old on top, new on bottom. The blue RDX injectors require a top hat extension and spacer to fit the stock NSX fuel rail and manifold. I had the stock injector seats slightly drilled to ensure a proper seal and ideal injector placement, for those considering this upgrade, the ‘OLDMNSX’ RDX Injector Fitment Improvement kit comes highly recommended.
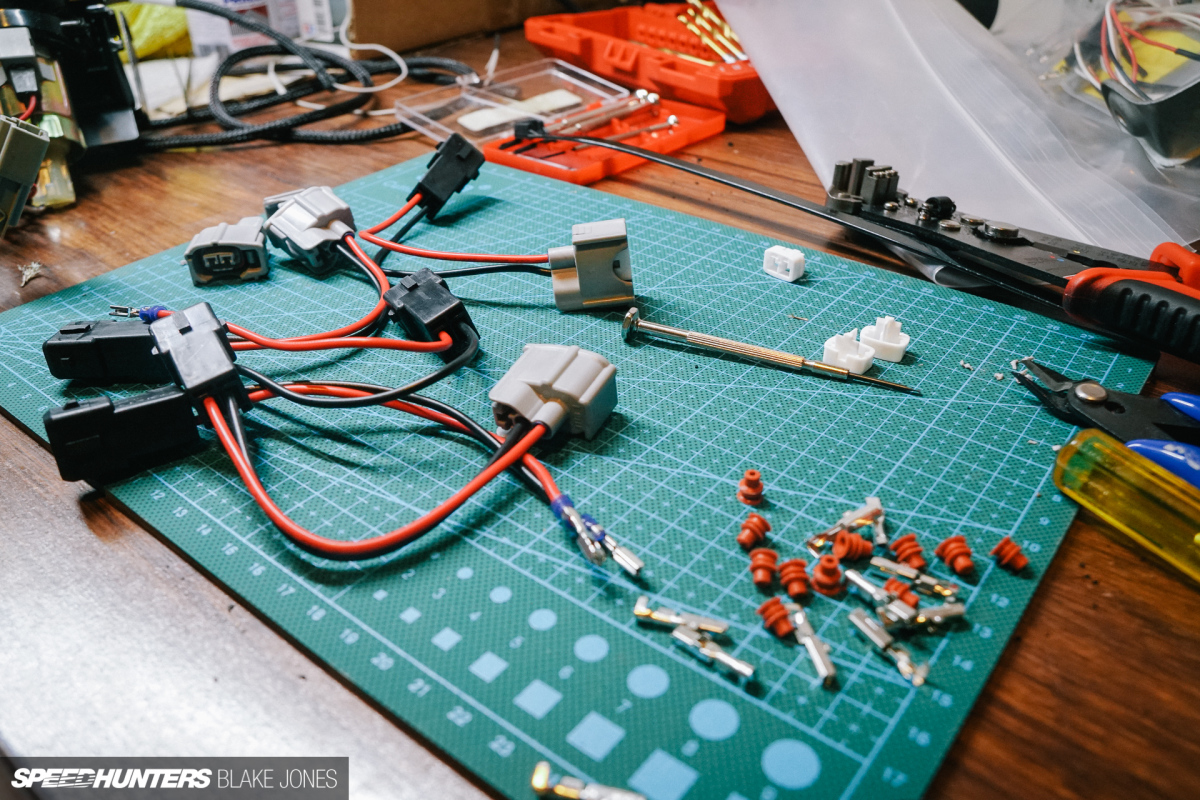
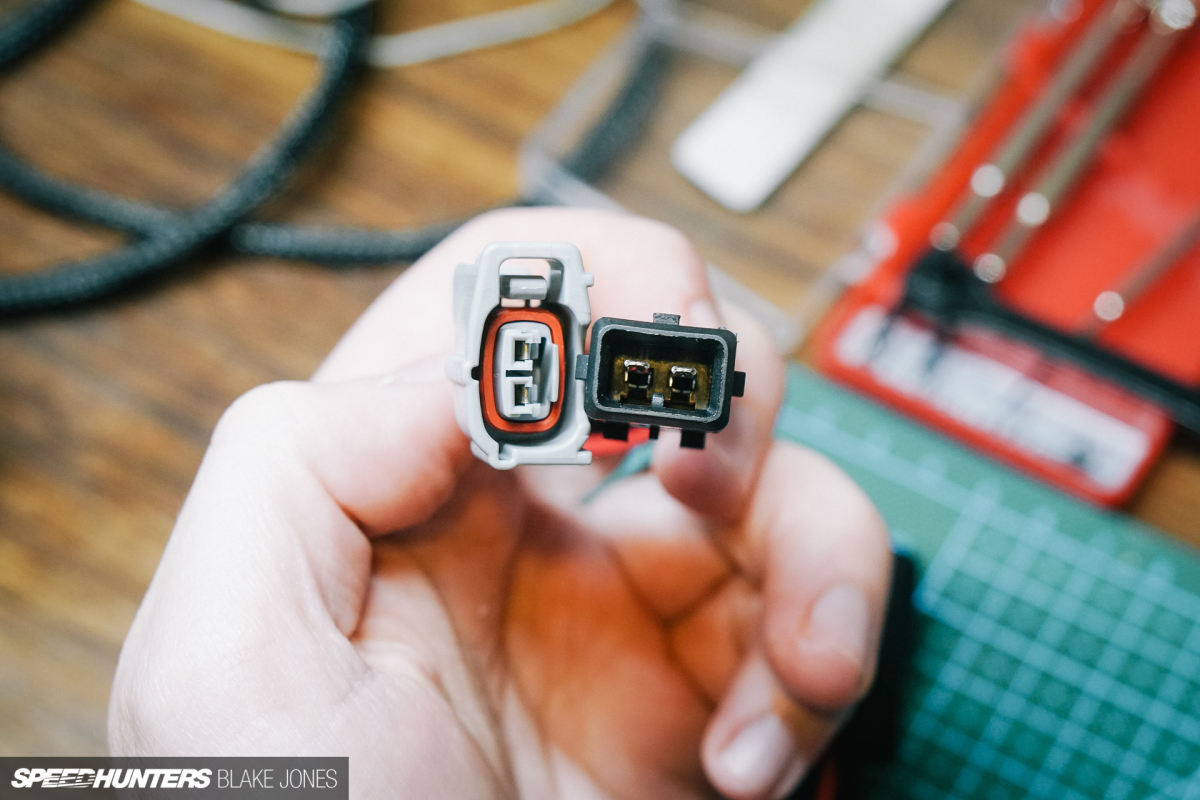
I struggled to find an off-the-shelf adaptor for the standard plug (Honda OBD1) to RDX (‘Toyota-style’) so purchased the parts individually and made them up.
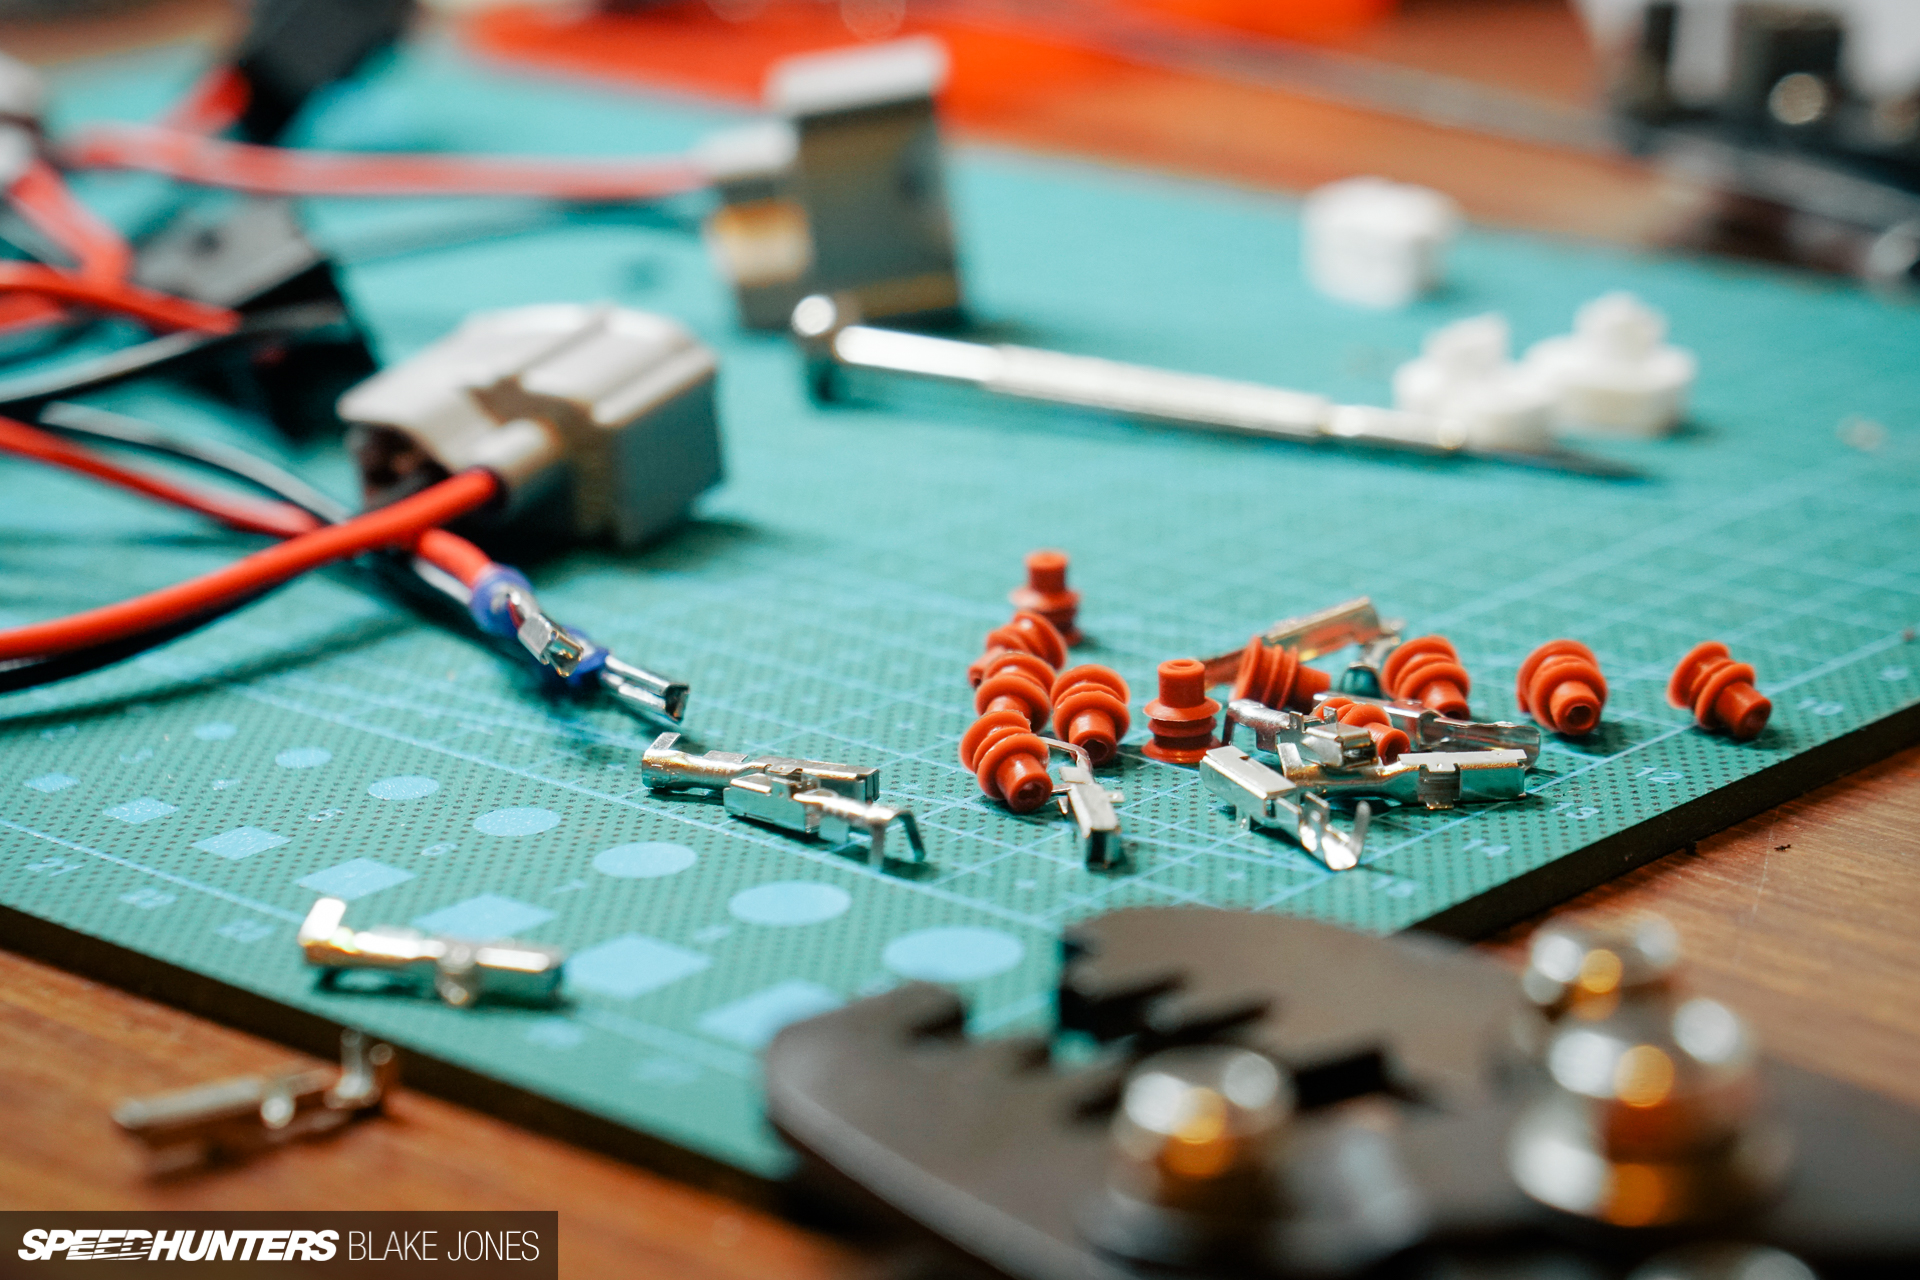
It was at this point I was starting to realise how little standardisation exists in automotive wiring. Plug, terminal and crimp style varies greatly, and there is no clear guide to determine what works with what, nor what crimping tool is required. Respect to the real wiring professionals out there!
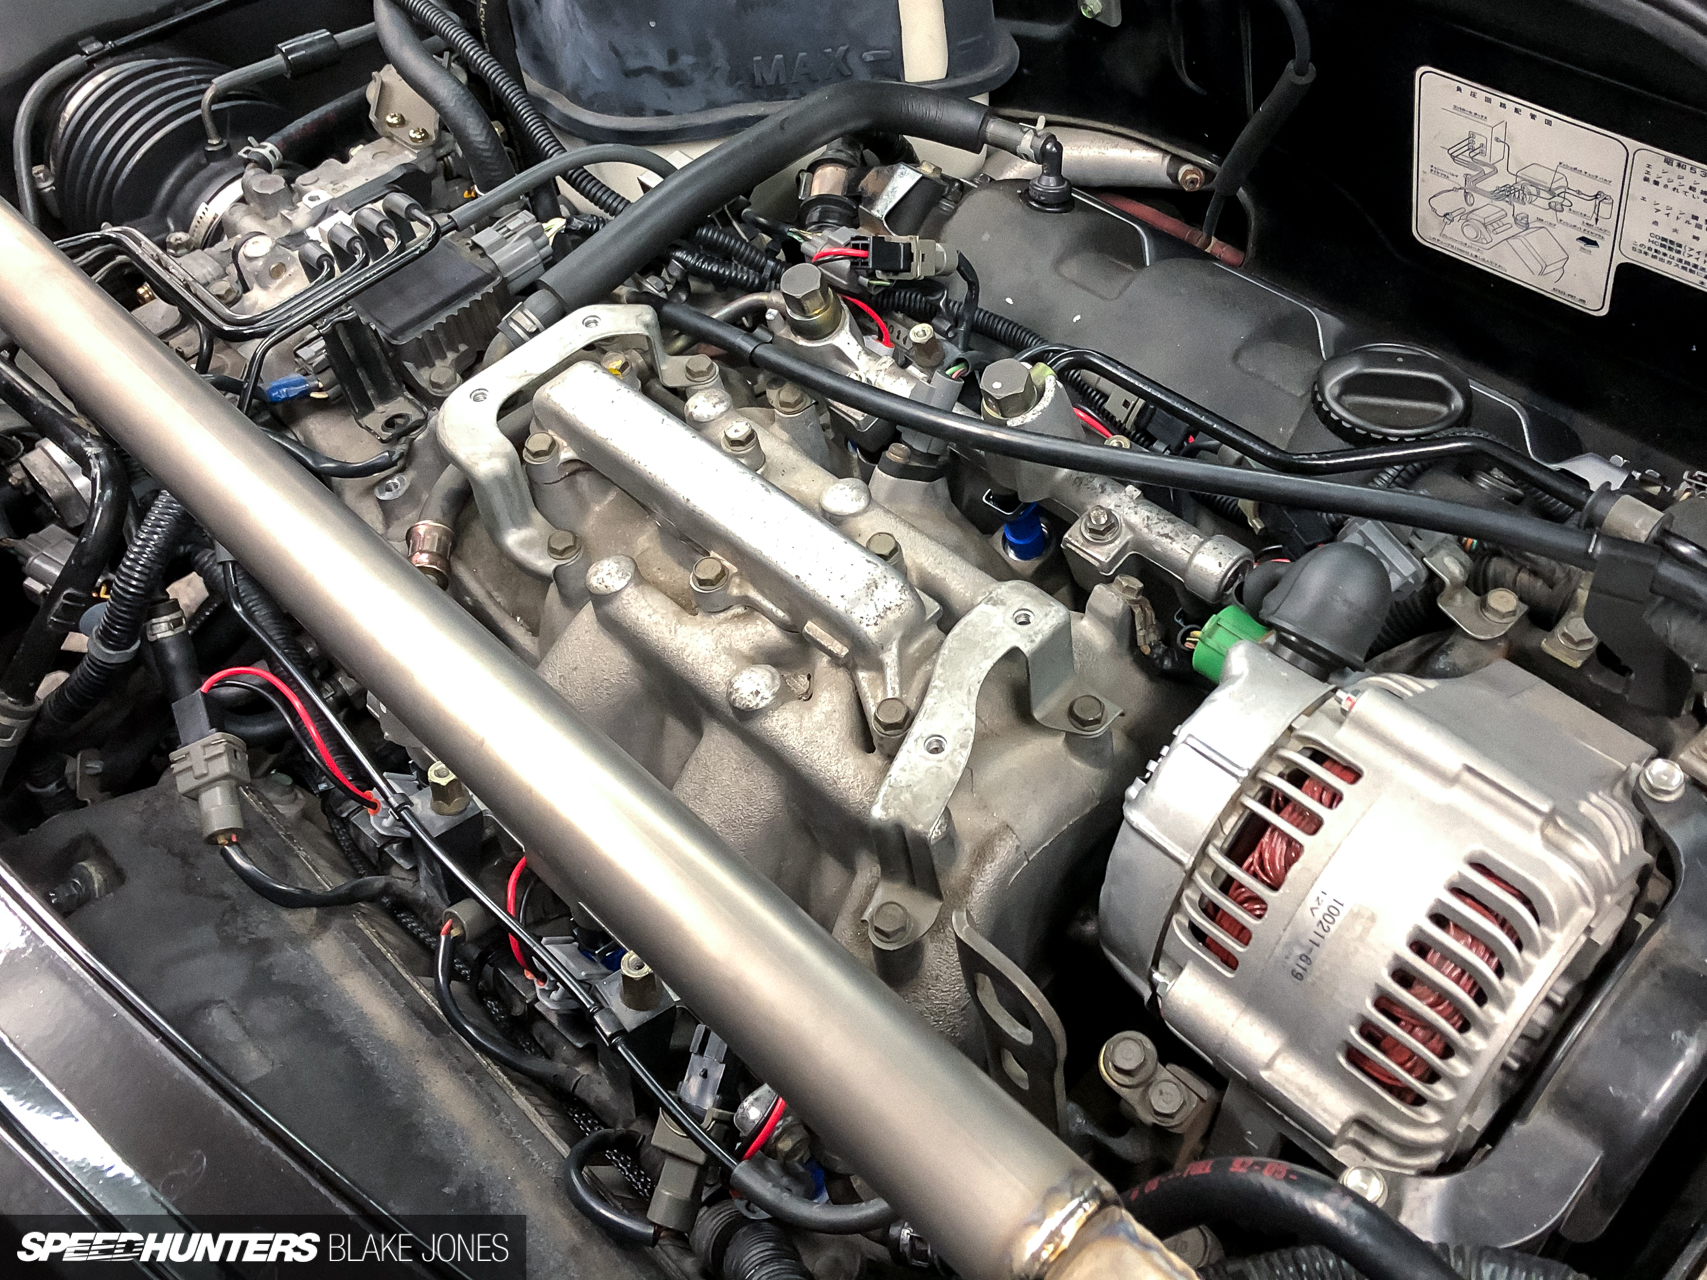
With all the hard work done, the six injectors were installed. I may eventually delete these adaptor harnesses and just re-pin the factory harness, but I wanted to have the new setup proven before making the modification even harder to reverse.
The RDX injectors are high-impedance (saturated) design favoured by modern OEM’s due to enhanced reliability at the cost of requiring a more sophisticated tune. At these flow rates (410cc), there’s no expected downside to high impedance as the Haltech has the capability to control either style. I removed the resistor box and installed a bypass plug.
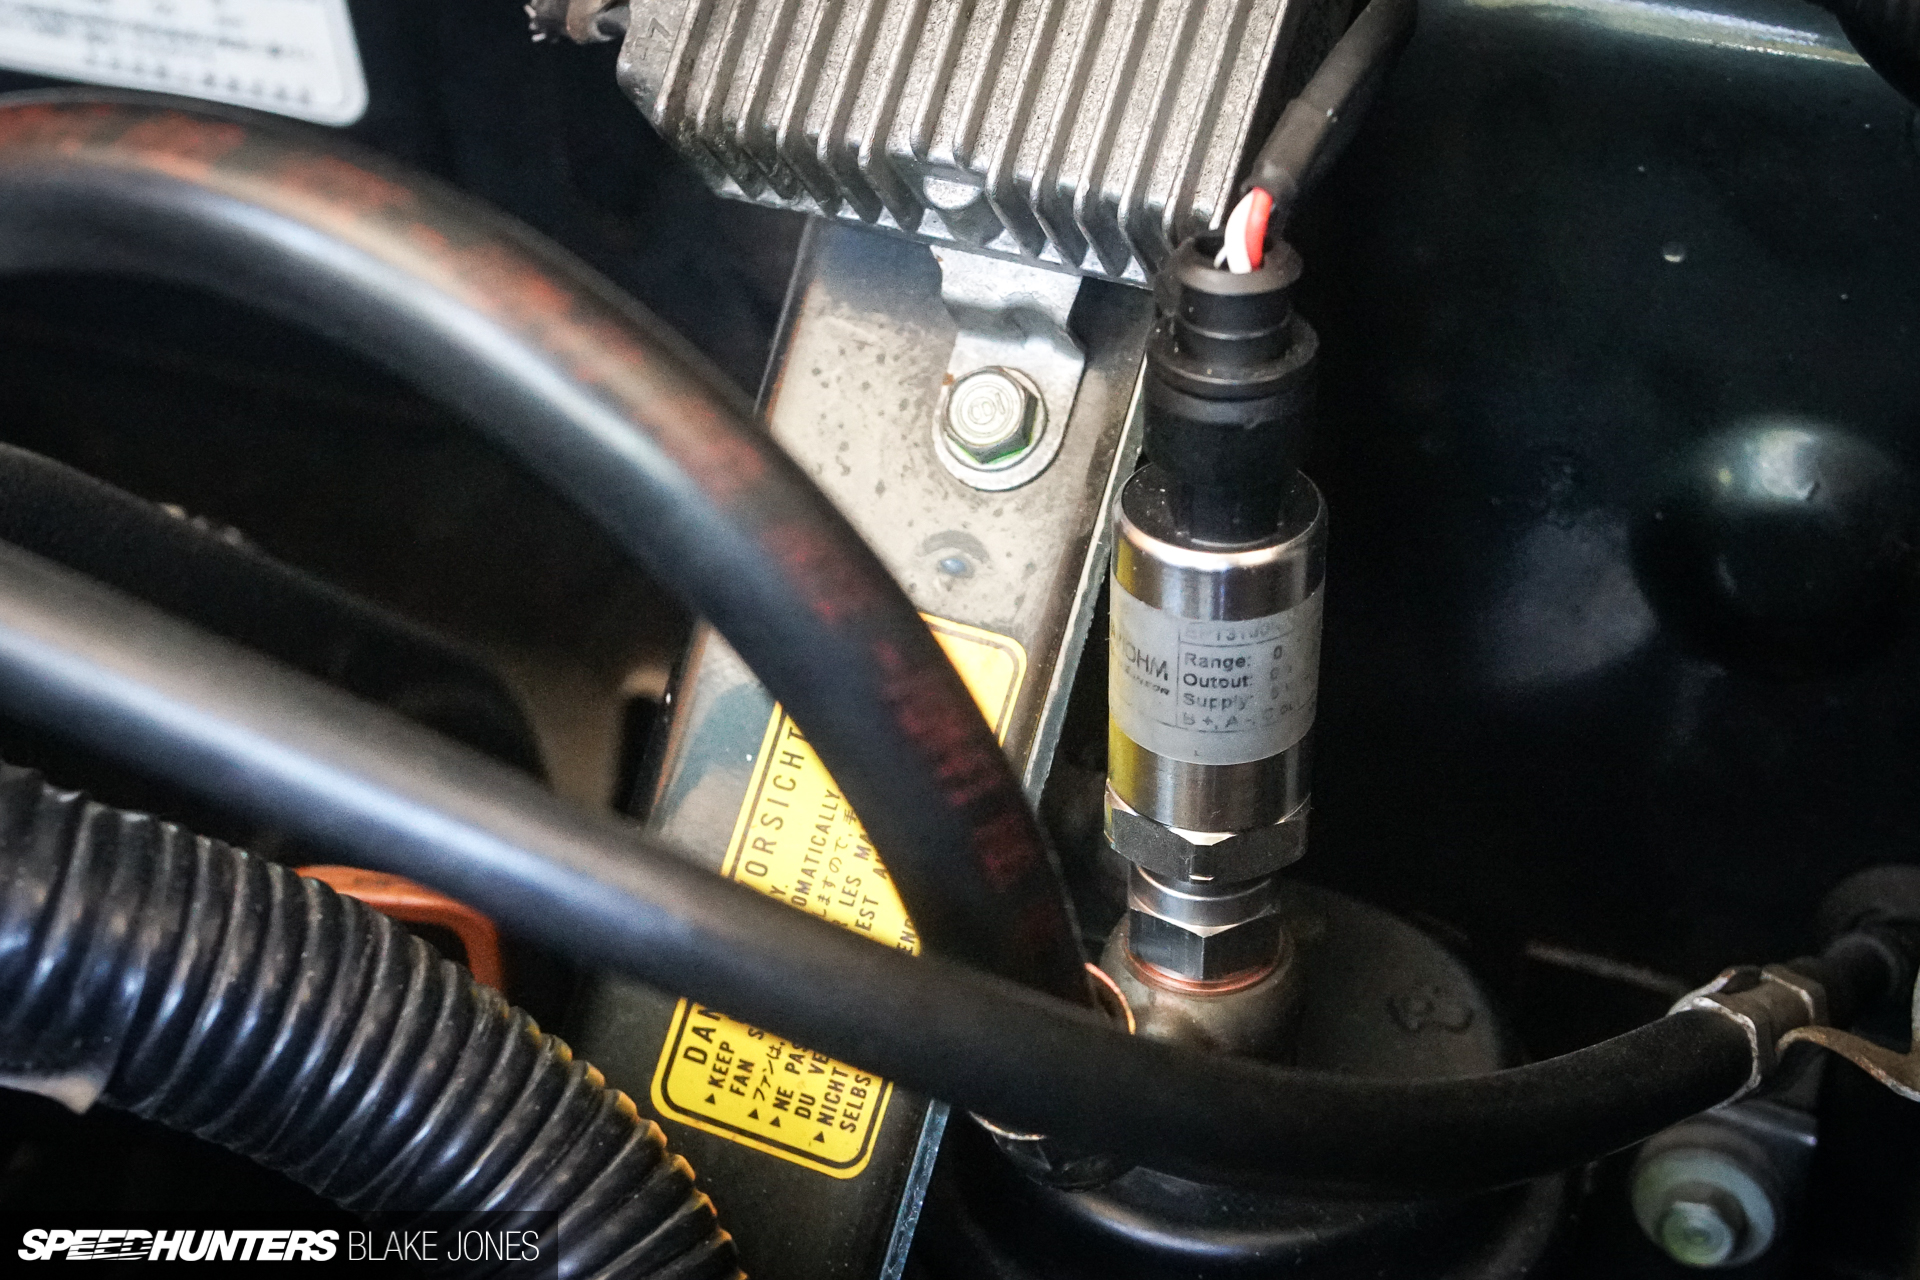
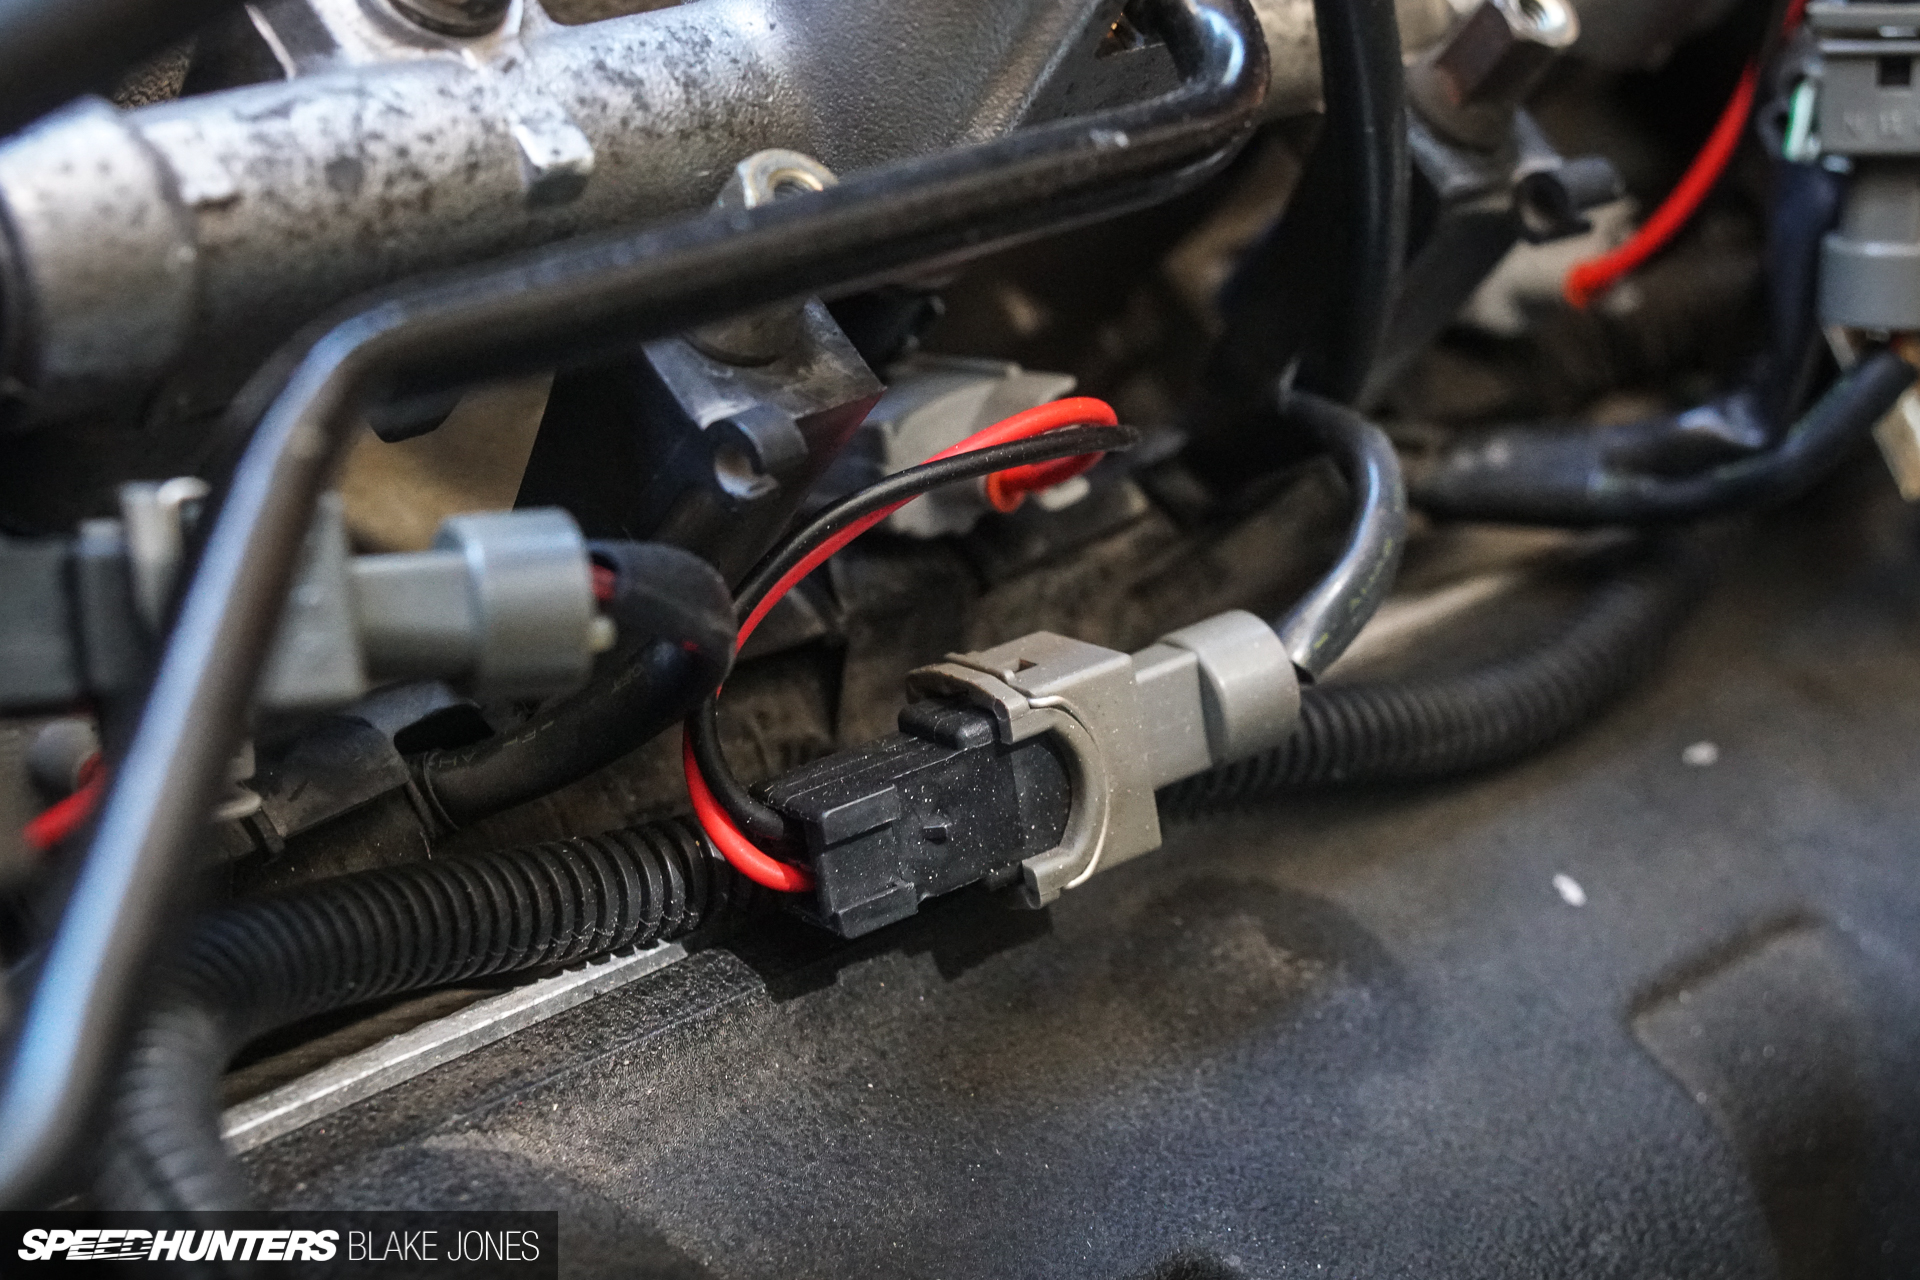
The fuel filter banjo bolt was also modified to accept a pressure sensor to provide an extra point of reference for Trent’s tune of the Haltech.
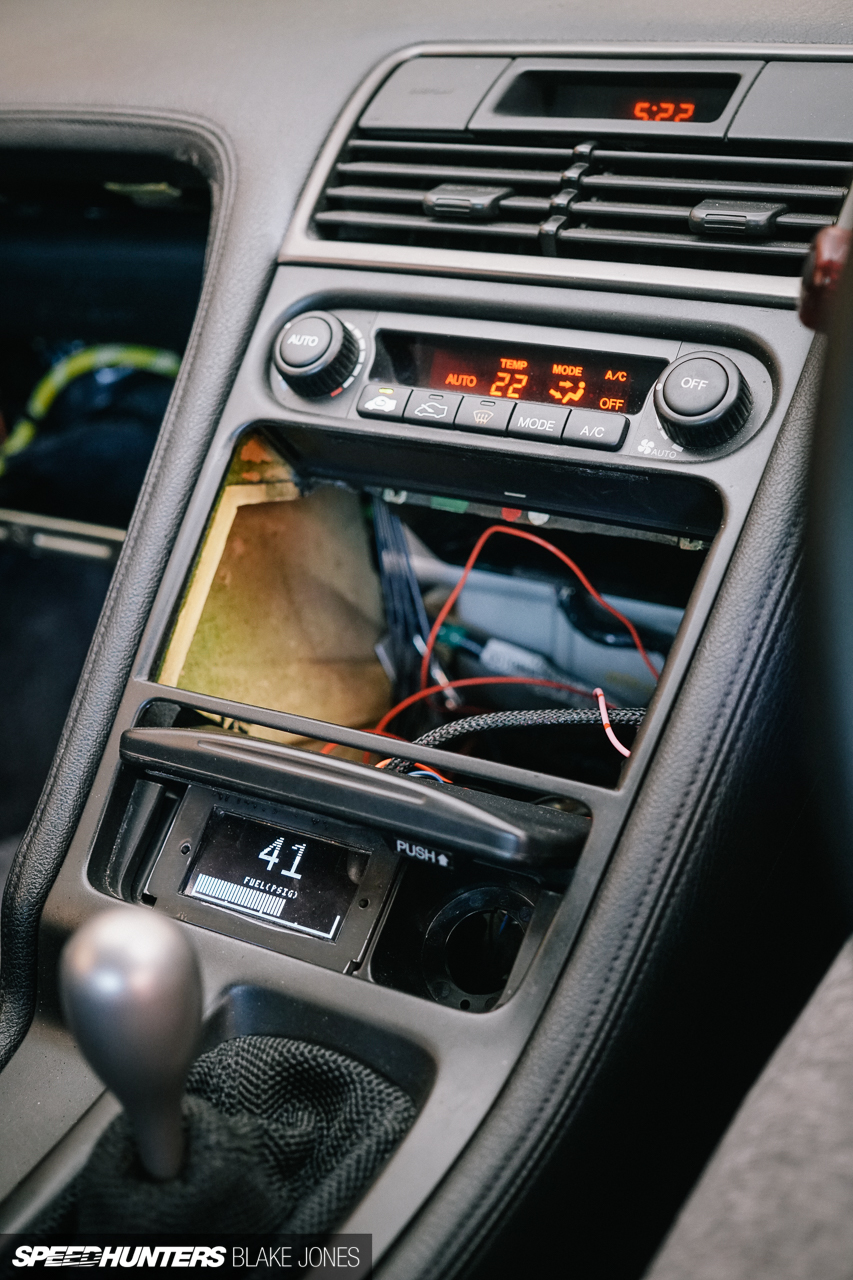
I’d now also be able to keep an eye on pressures from inside the car thanks to another electronics upgrade – installing the GaugeArt 2.4-inch display in the old ashtray location. This is just a test fit; as you can see, the 3D-printed fascia was not perfect, so I’ll be redesigning it for a V2 in the coming weeks. The GaugeArt connects directly to the Haltech CAN Hub (meaning it is literally plug-and-play) and can display a ton of different parameters on customisable pages.
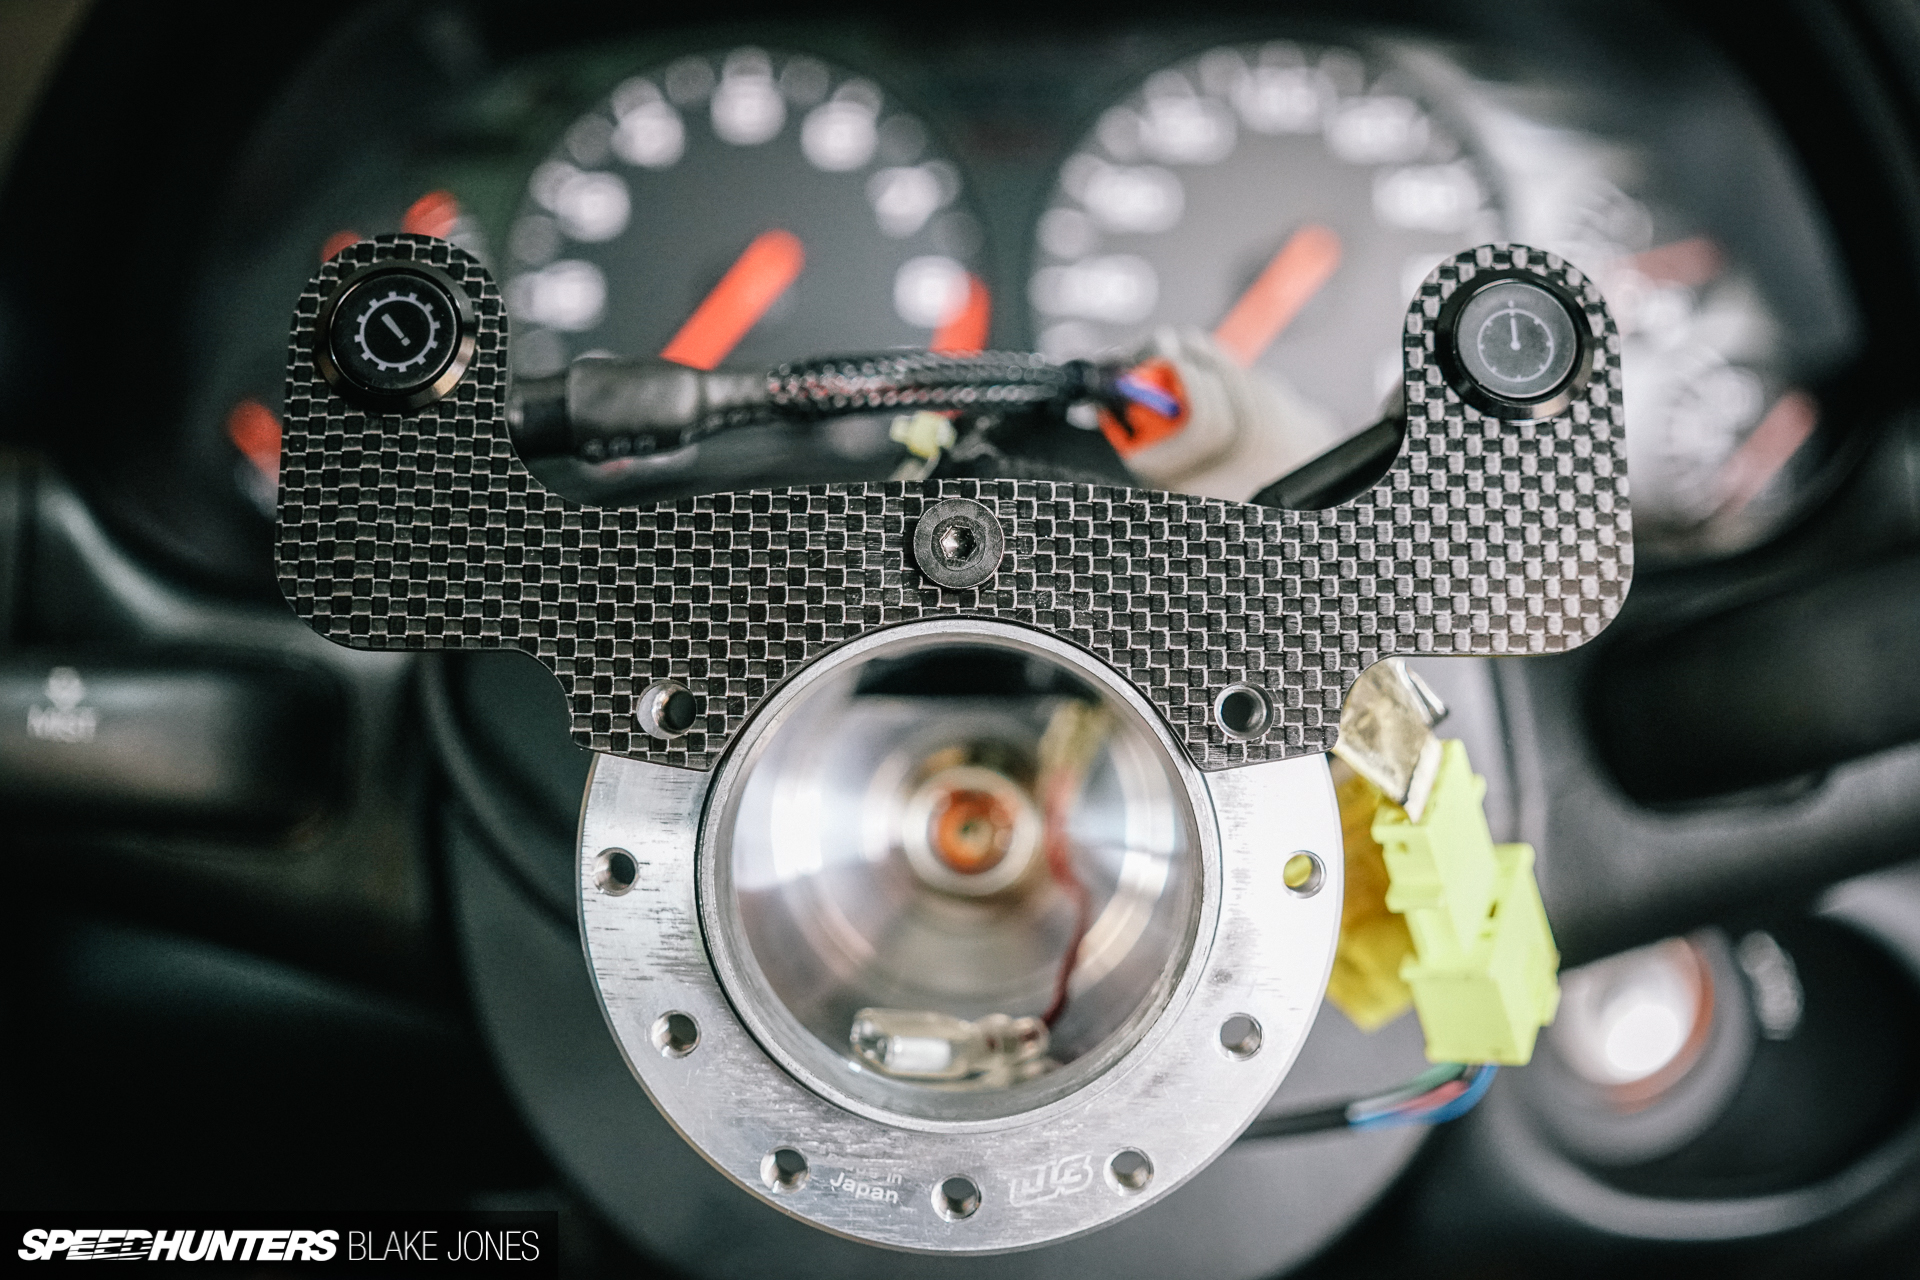
Getting a bit more confident with my wiring abilities I decided the best way to allow me to tab through pages on the display without removing my hands from the wheel would be to mount some buttons to it. The ‘carbon fibre’ mount panel and customised buttons were both from AliExpress and cost me less than a pub lunch.
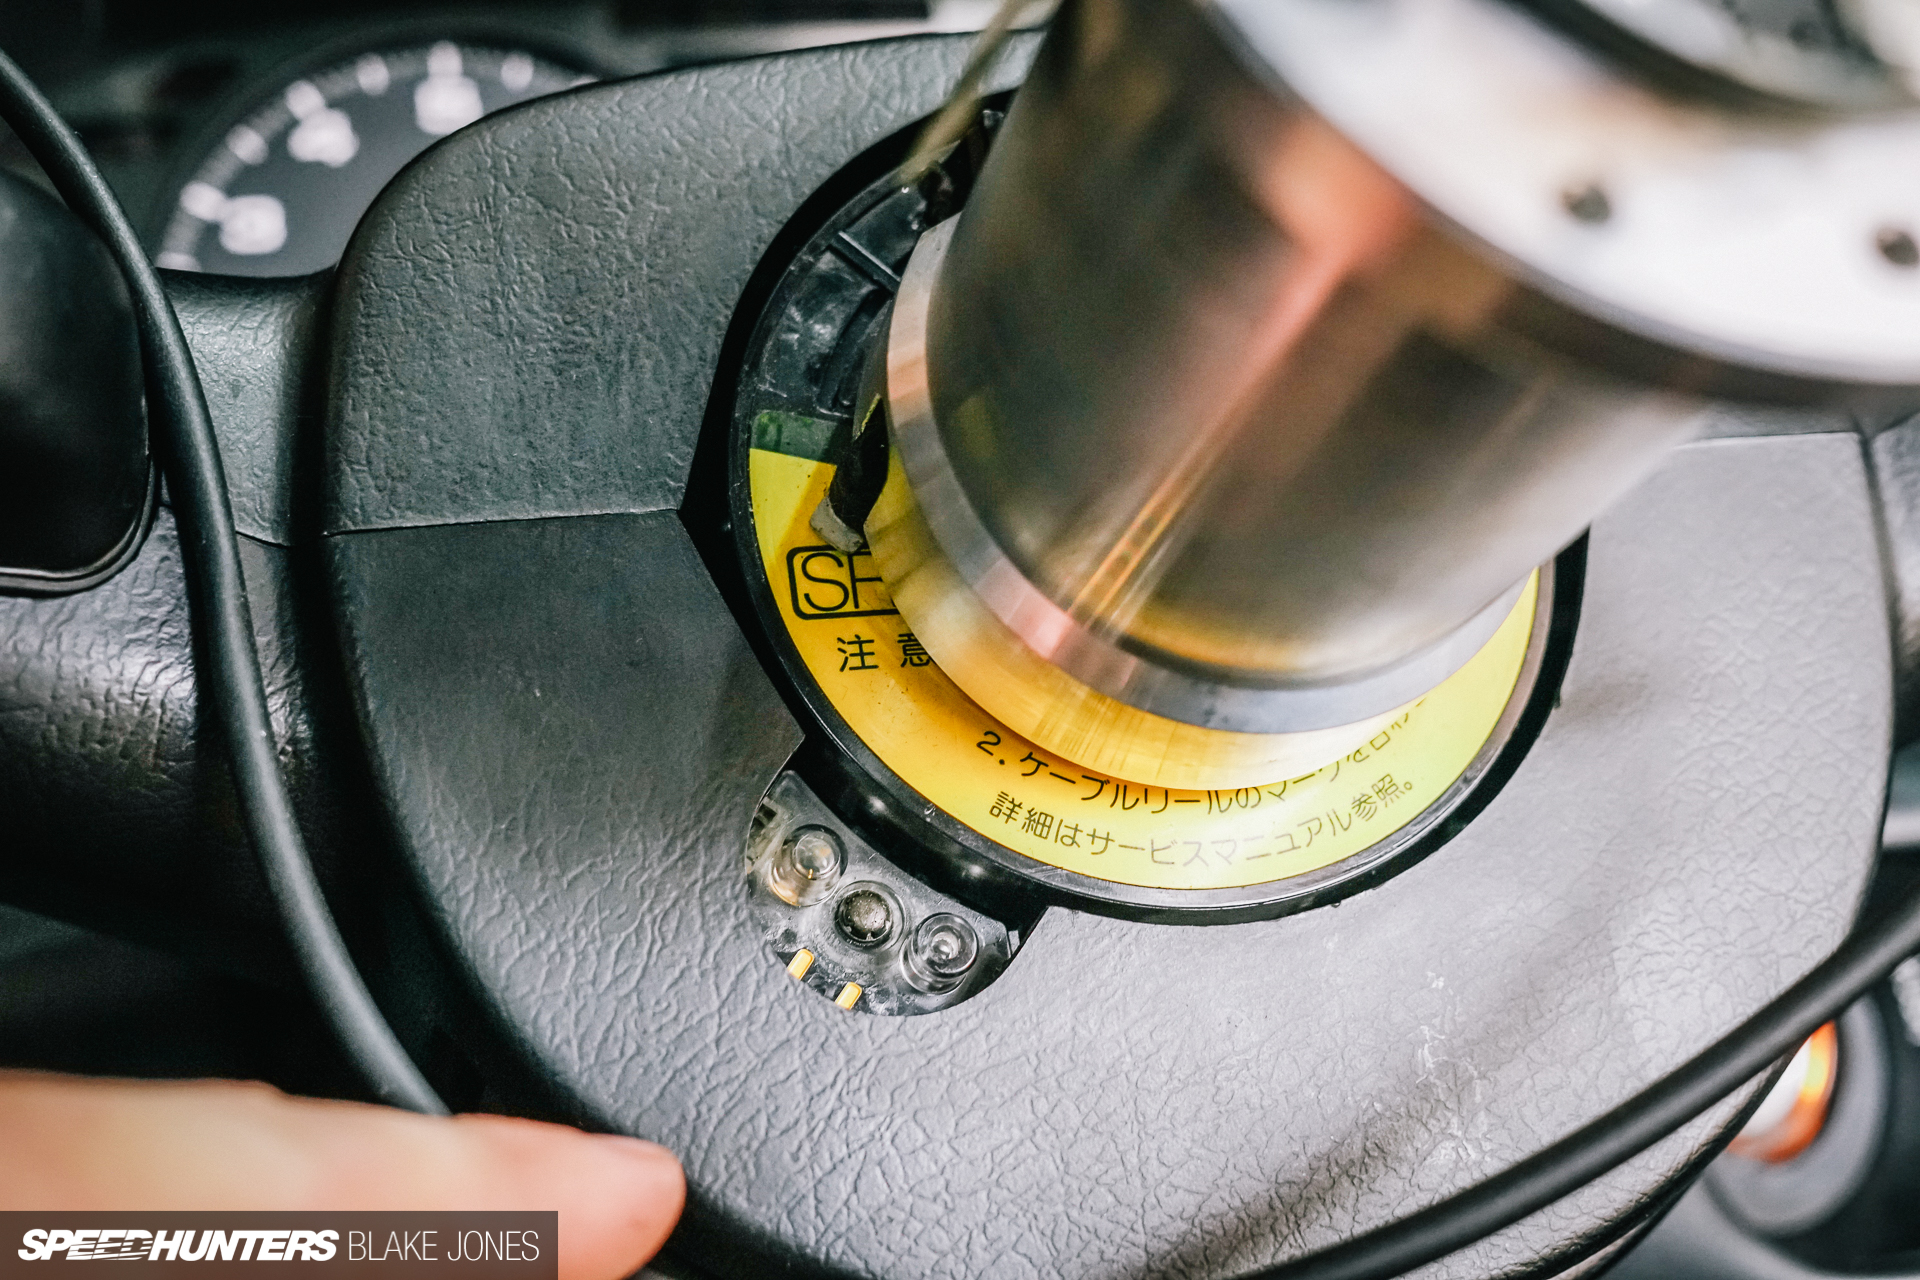
Any cabling that runs to something that rotates is bound to be a pain in the ass since the wiring will need to wrap around the central point (steering column in this case). My first solution was a length of rally-style ‘curly cable’, but it wanted to jam into this gap between the plastic trim and SRS airbag harness. Cutting the trim was looking like the only option before I realised the solution was literally staring me in the face.
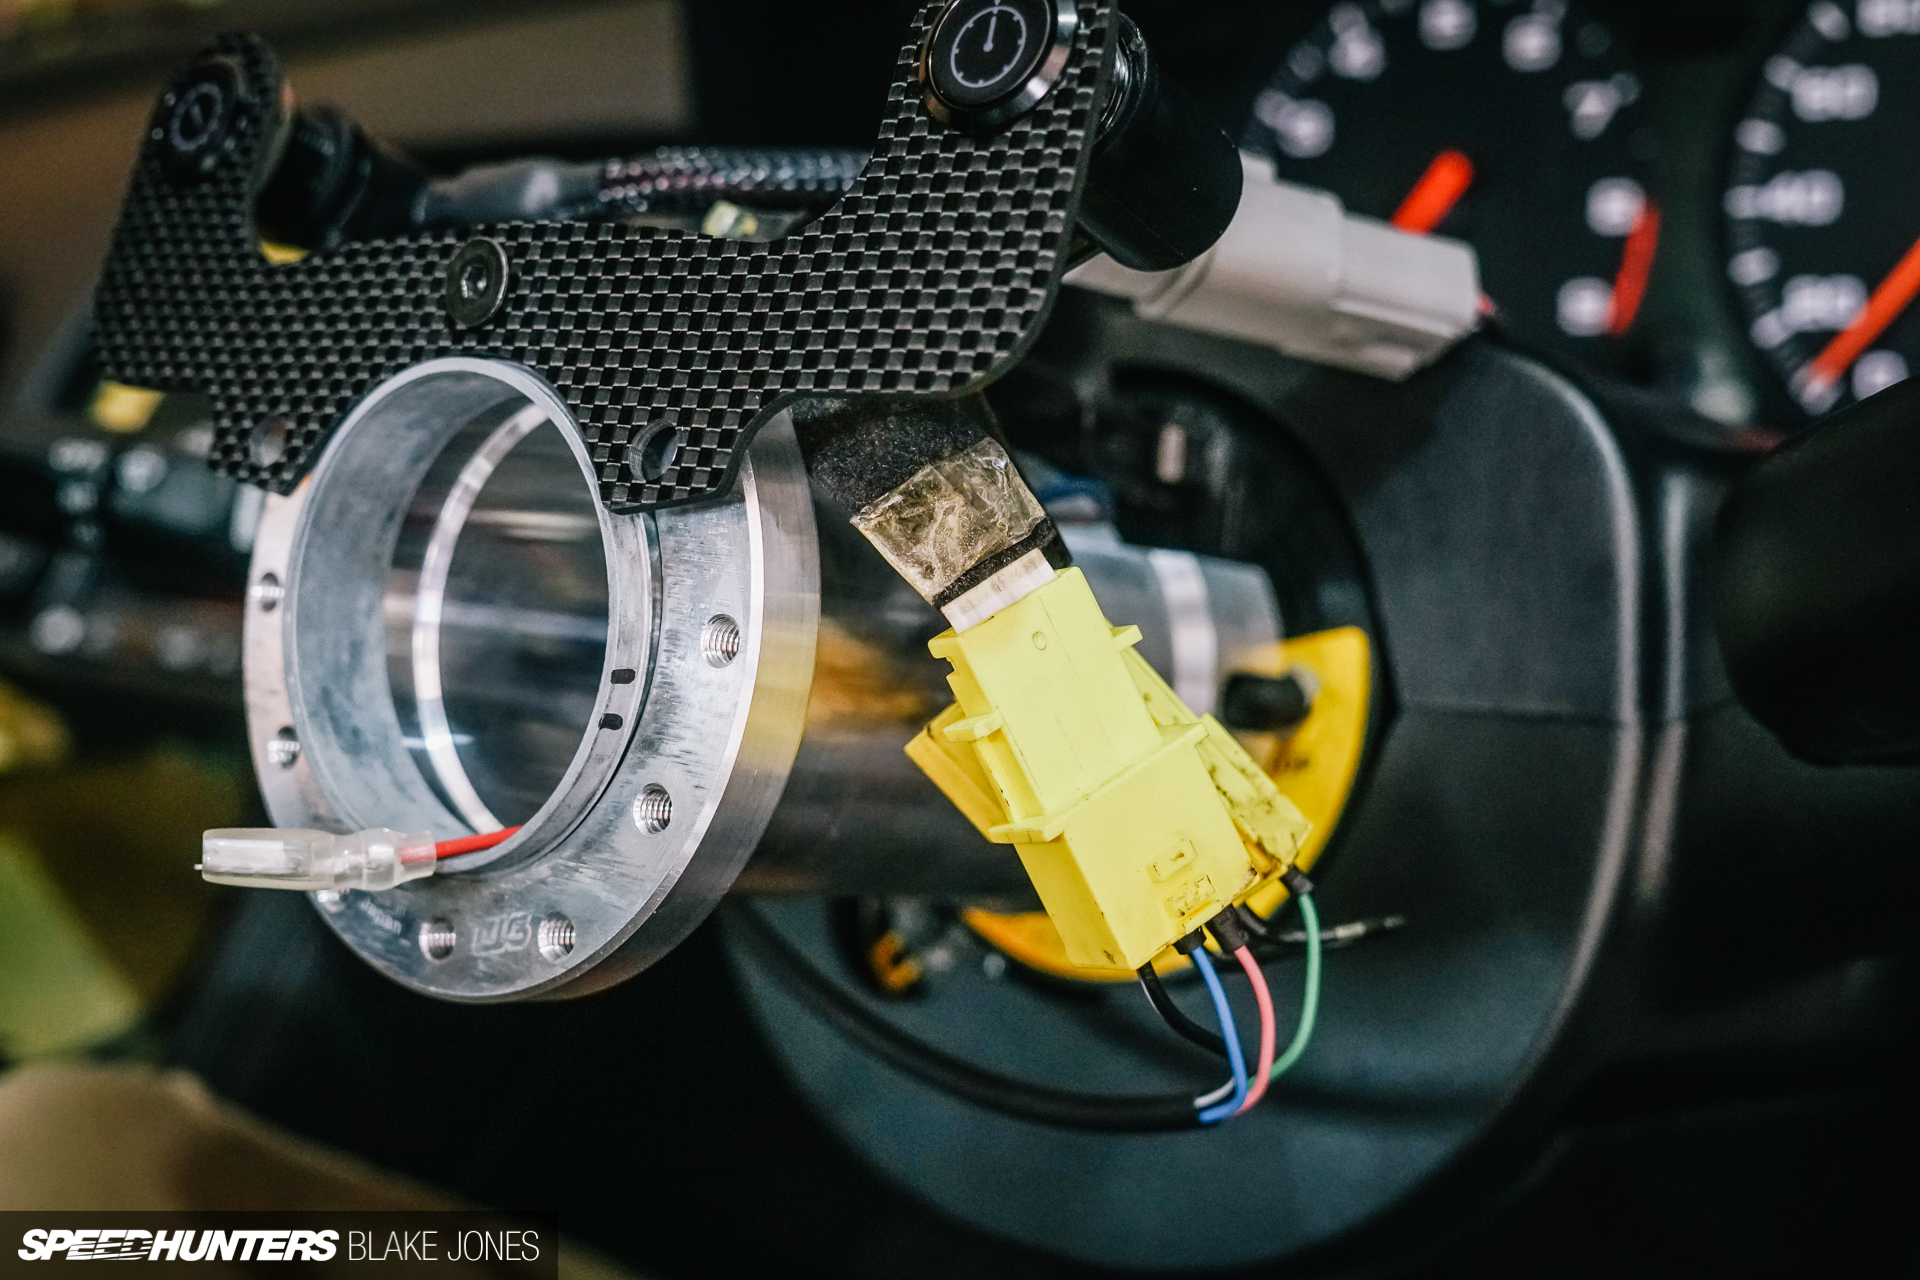
OEMs solved the wheel button problem with the ‘clockspring’, a cassette which holds a wrapped coil of wires in a way which allows them to rotate with the wheel. Since the cruise control buttons of the stock wheel are long gone I was able to hijack the factory clockspring to connect my GaugeArt button. Success!
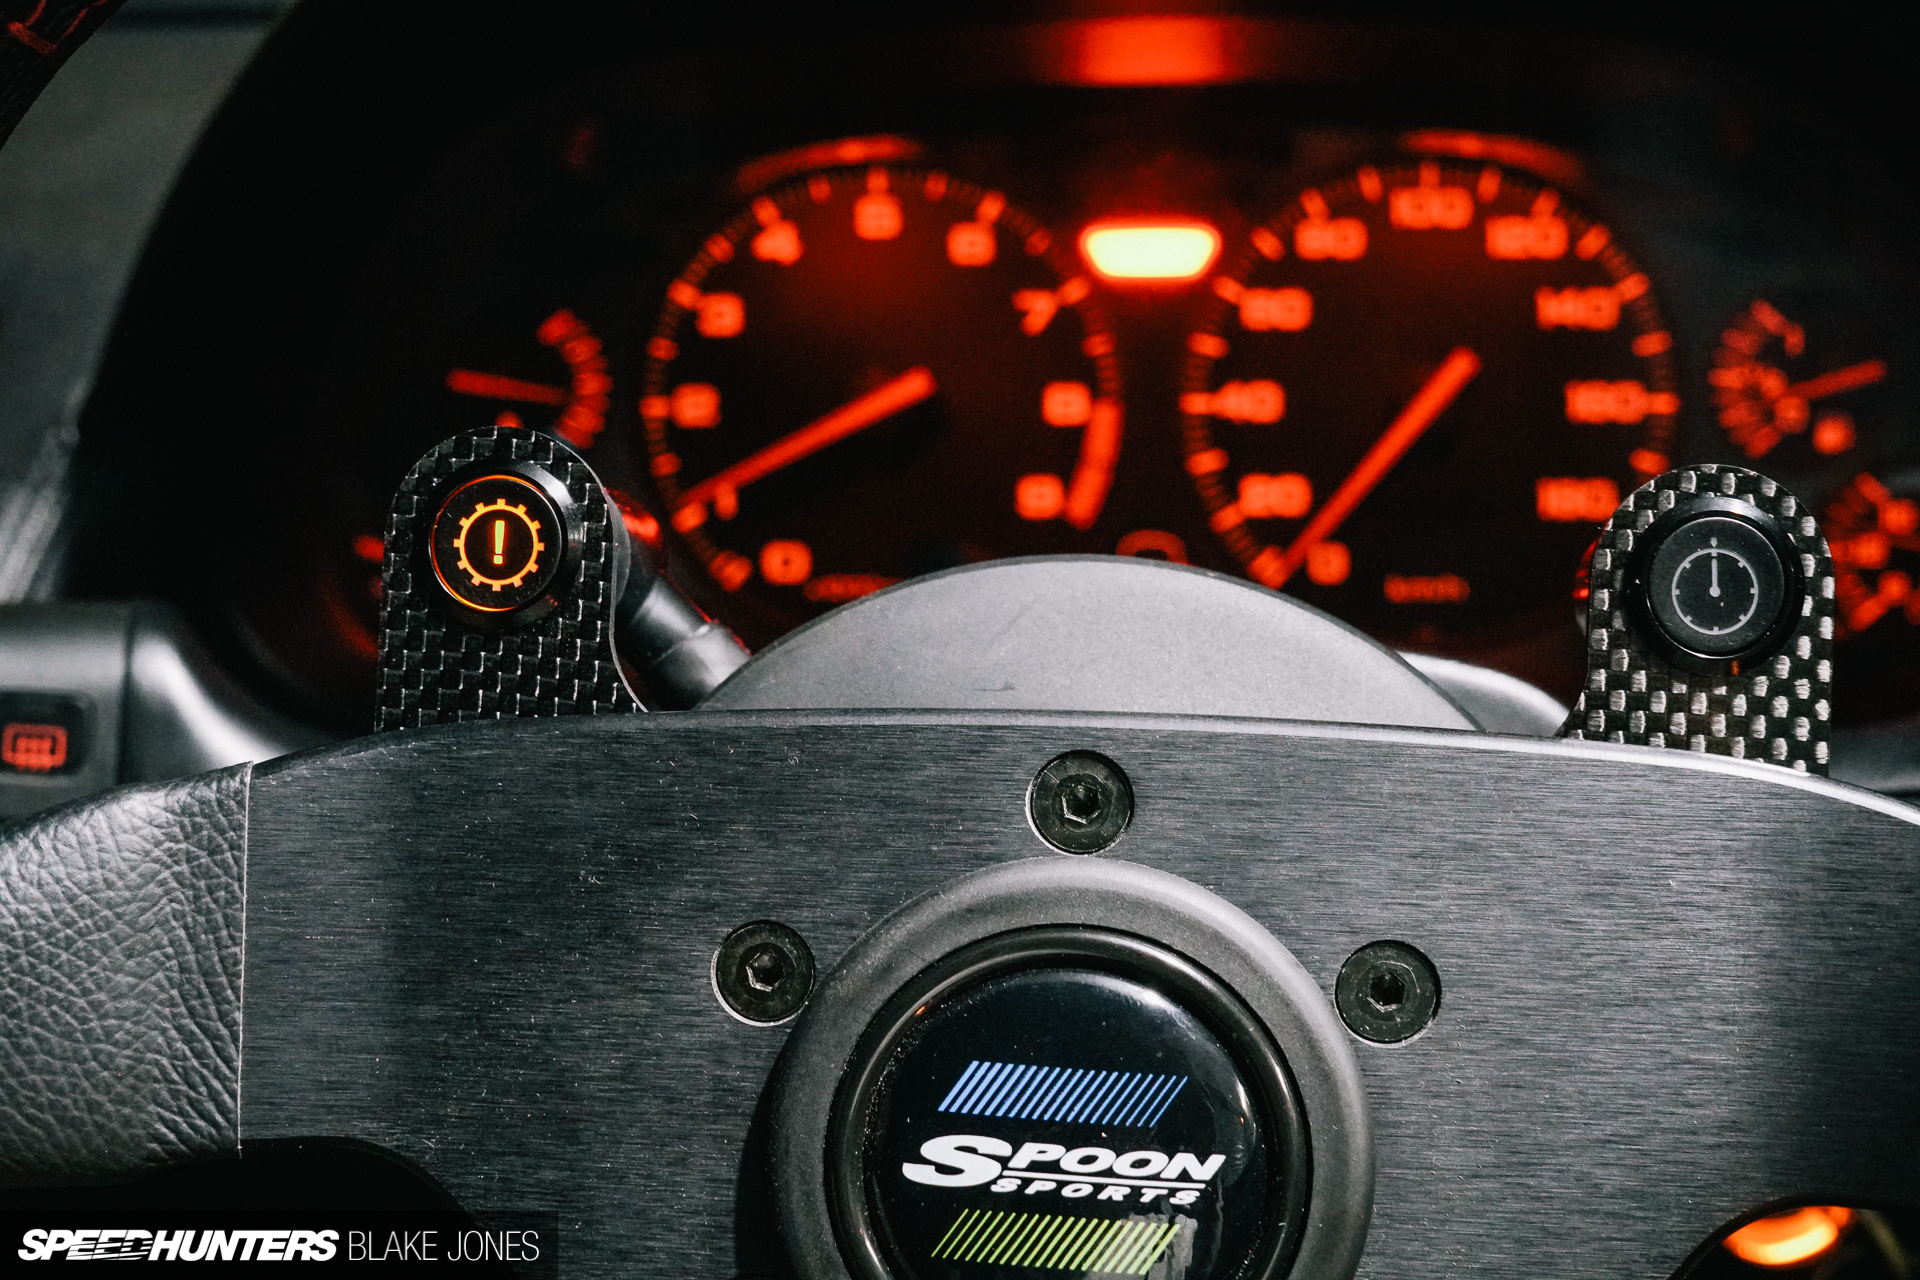
My bargain button was even customised by the diligent AliExpress seller to illuminate in a colour matching the stock NSX gauges at my request, and will glow whenever a user-determined max value is exceeded on the GaugeArt, so it effectively operates as a catch-all idiot light for fuel pressure drops, max oil temps and so on. Admittedly it’s not super bright so I’m unsure how effective it is in the heat of battle. The right button is currently unused, but the plan is to eventually restore cruise control functionality.
Tuning By Trent
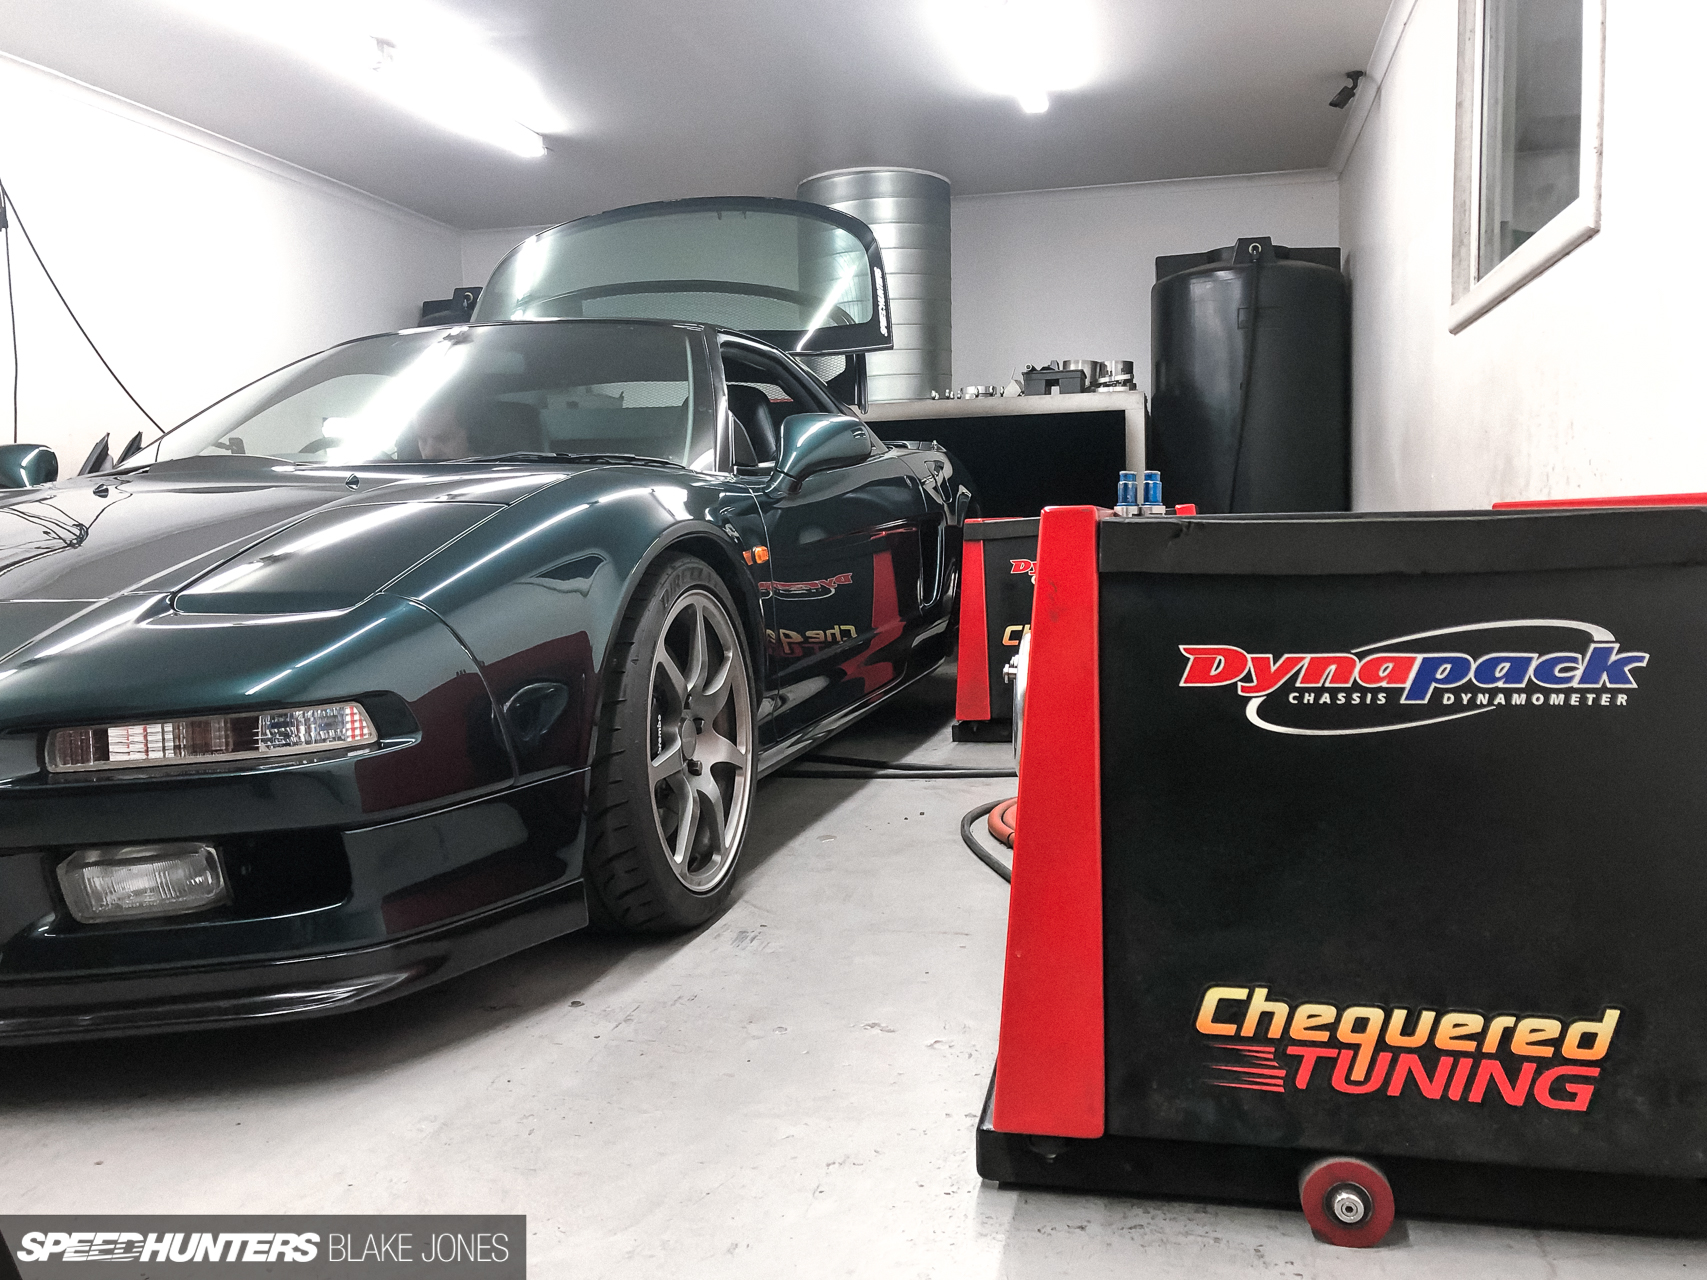
Anyway, I’d finished messing around with electronics and it was off to Chequered Tuning to see Trent. The workshop is extremely discreet (who needs signage when your reputation speaks this loudly), but a couple of big-power Japanese rides are always a giveaway.
Trent got straight into it, kindly refraining to comment about the state of the interior when I’d brought the car in. Before he started the injector retune he set up the fuel pressure sensor and upgraded the Haltech software to the latest version which would enable a few extra goodies. He also programmed in a few extra safeguards (prompts to pull ignition timing) to protect the engine at my request.
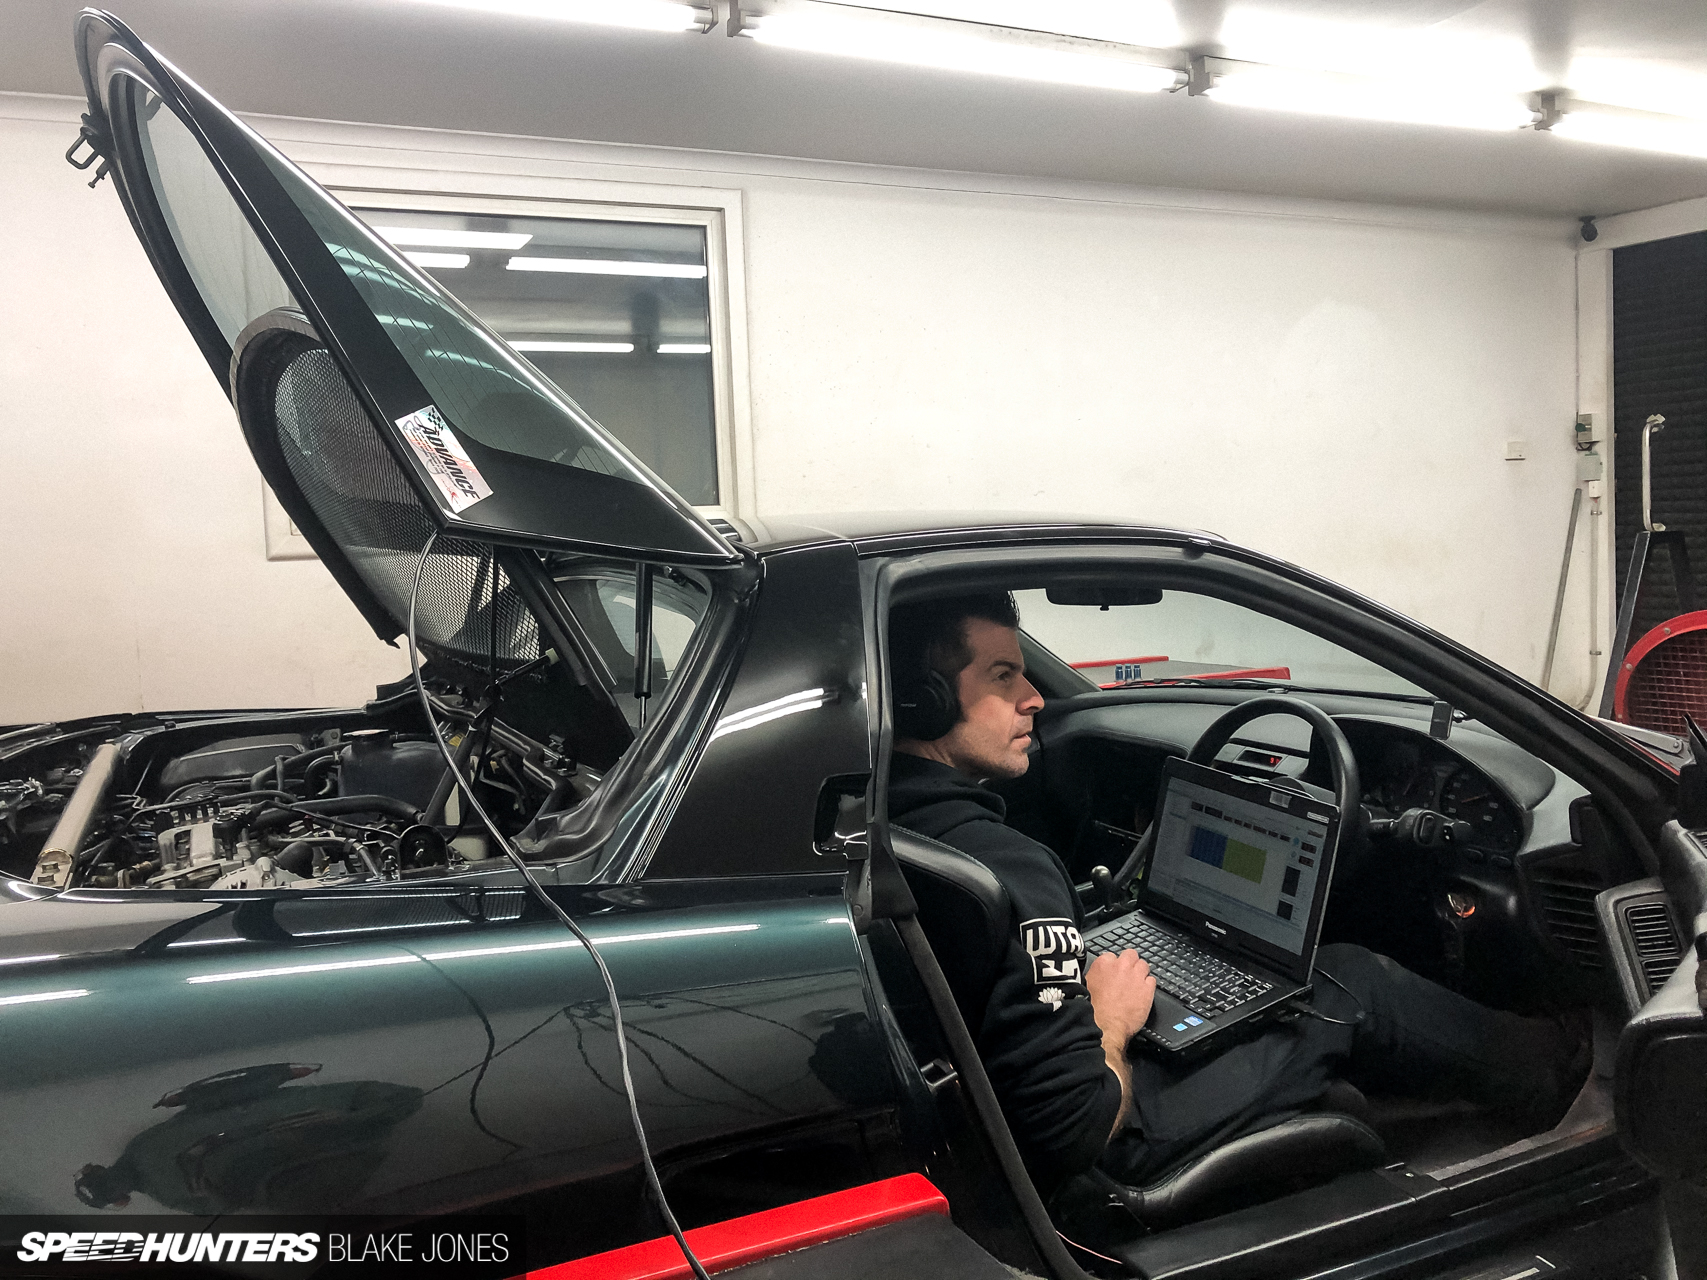
The major downside to choosing an OEM injector over something from the aftermarket is the lack of data available. I was able to scrounge together some third party reports on the RDX injector before my visit, but it wasn’t required; Trent had already tuned plenty of cars running the RDX units and had his own calibrations. I let the man work his magic and retreated from the sound-deadened dyno room as he started to ramp up the RPM for some power pulls.
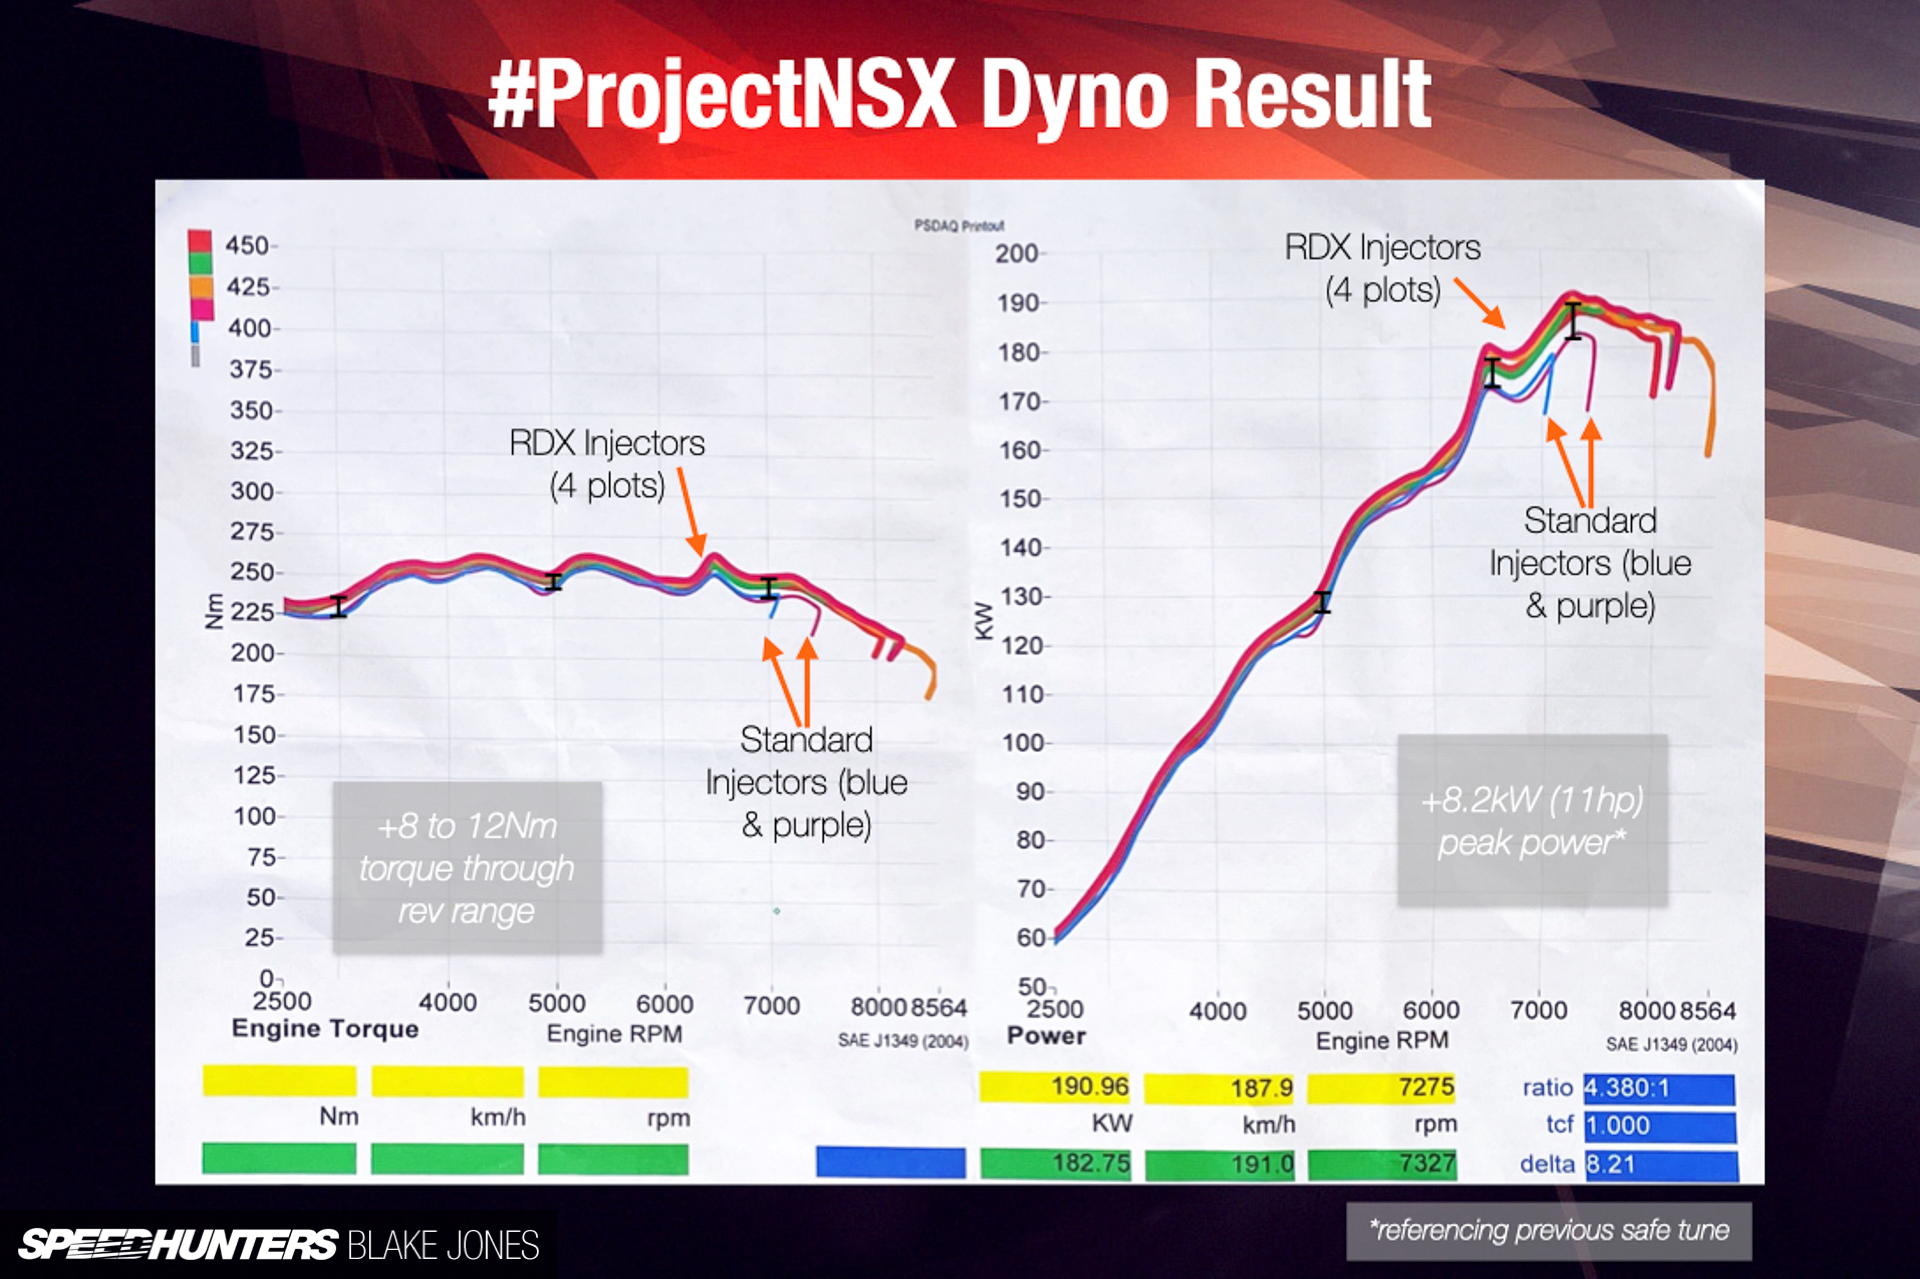
We were rewarded with some solid results indicating consistently higher torque at any RPM (ranging from an 8-12Nm increase) and a corresponding bump in power. Some particular points of interest: A torque dip around 3,000rpm was smoothed out (fantastic for street driving) and power was better sustained during the VVIS opening from 4,600-4,900rpm. Off VTEC power gain was consistent but low – less than 5hp – but once the high cam kicked in the gains jumped to a peak increase of 8.2kW (11hp). It’s worth noting this peak figure is referencing the ‘safe’ tune Trent dialled in last time due to the maxed-out stock injectors, and compared to the highest output from a lean run in 2019 the gain was about 4kW (5.4hp) at the hubs.
As we were finishing up in the Chequered Tuning dyno room, Trent posed a big question: “So… what’s next?” Obviously it would be nice to squeeze more kilowatts from the engine, but I’ve picked most of the low-hanging fruit growing on the tree of power.
Most of the well-designed stock intake system is still in place on Project NSX, but it’s a possible bottleneck for flow at high RPM. The throttle body measures a meagre 64mm internal diameter, so that might be the best place to start. US-based NSX tuner Carl Hernandez has recently seen MAP data logs on a similarly-specced C30A which suggest a restriction in either the intake manifold or air box at high RPM.
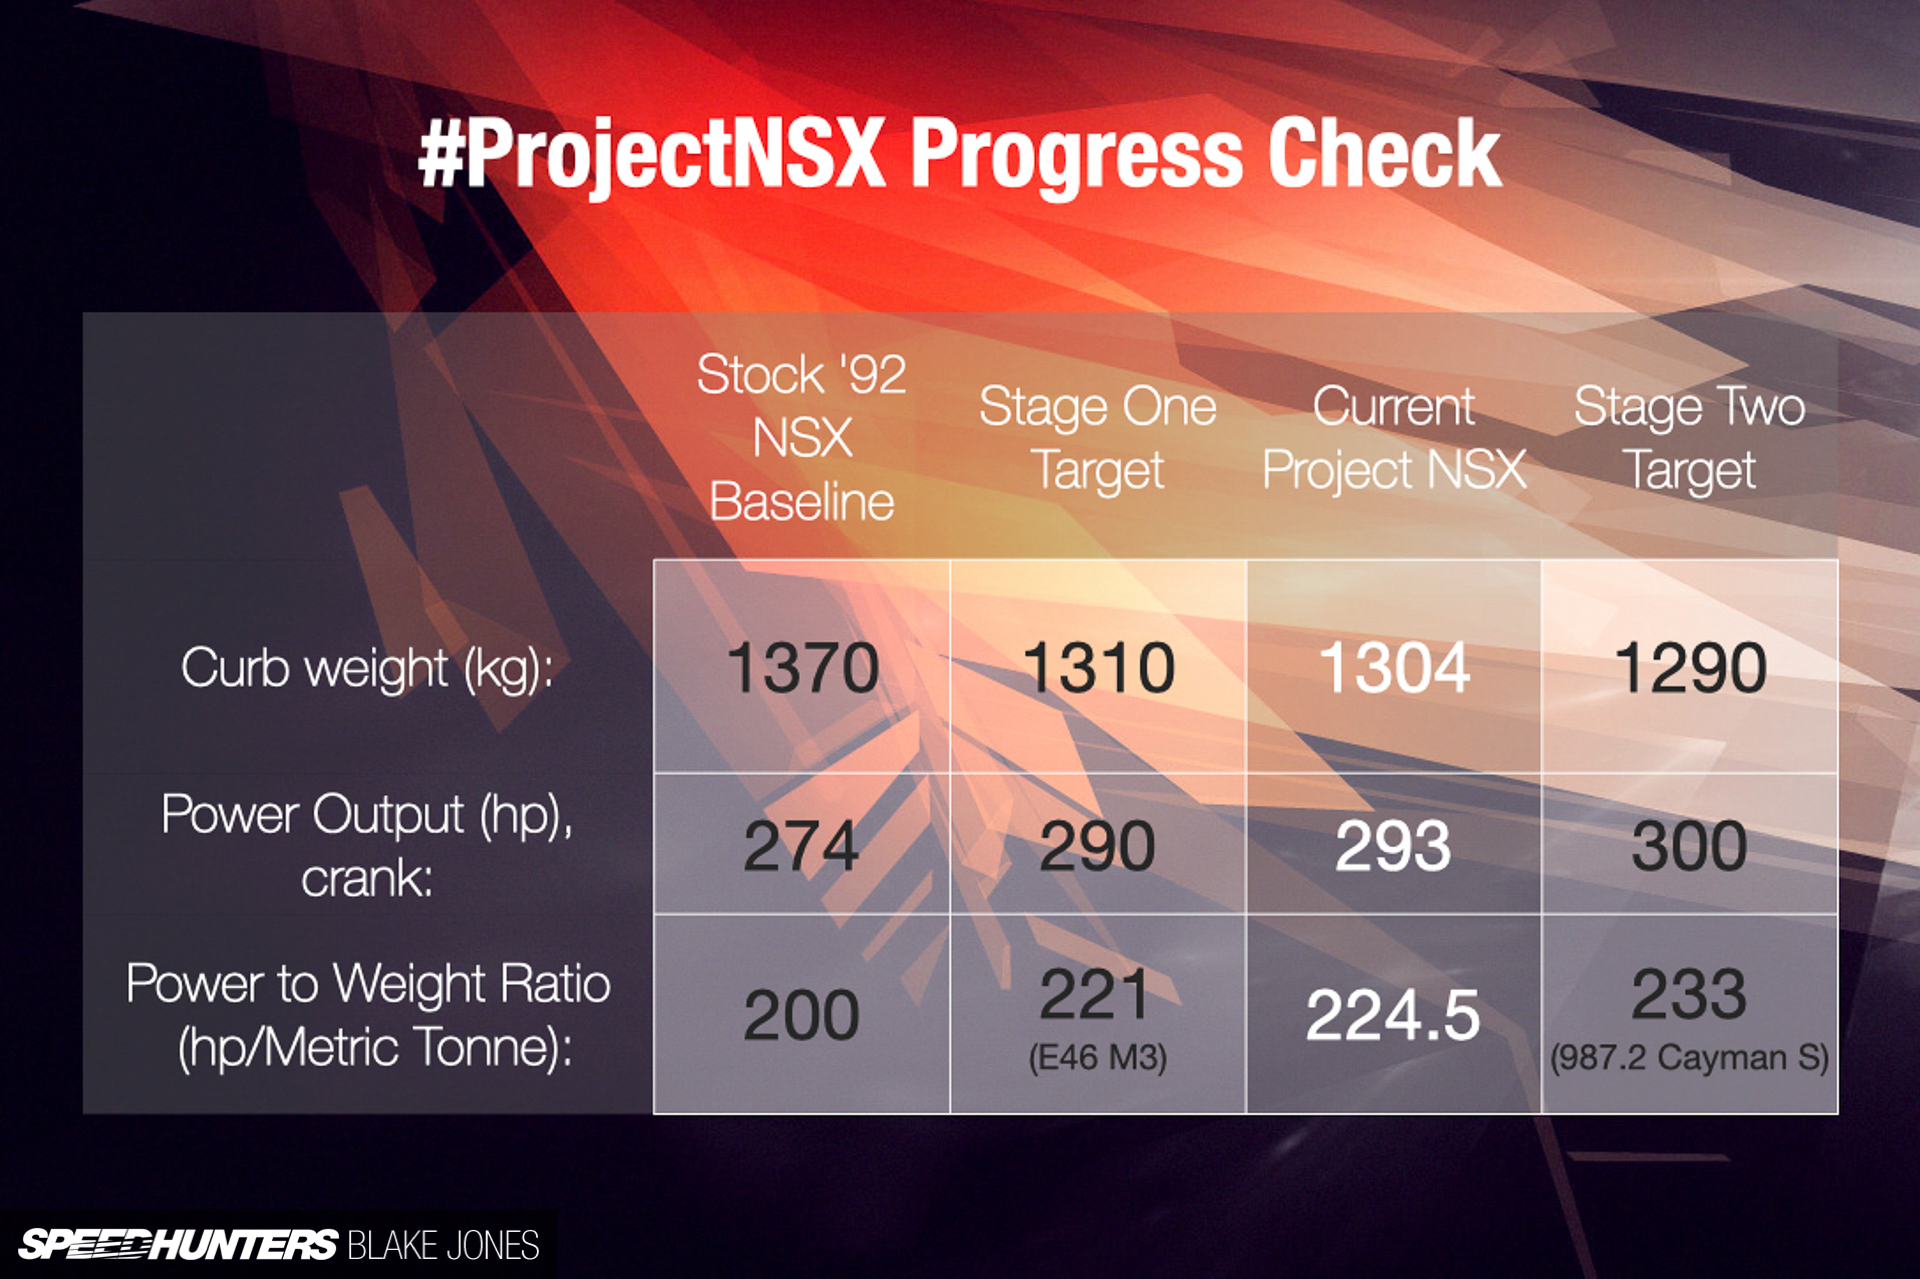
The extra 5hp we found up top with the injectors and tune have contributed to a milestone – the ‘Stage One’ goal I set of surpassing the power-to-weight ratio of the BMW E46 M3 has been achieved. I’d like to take this opportunity to thank God (Sochiro Honda), and my close support network (credit cards and Australia Post) for getting us this far. I won’t celebrate too hard – the Stage Two target of the 987.2 Cayman S is within striking distance, so it’s time to get back into the workshop!
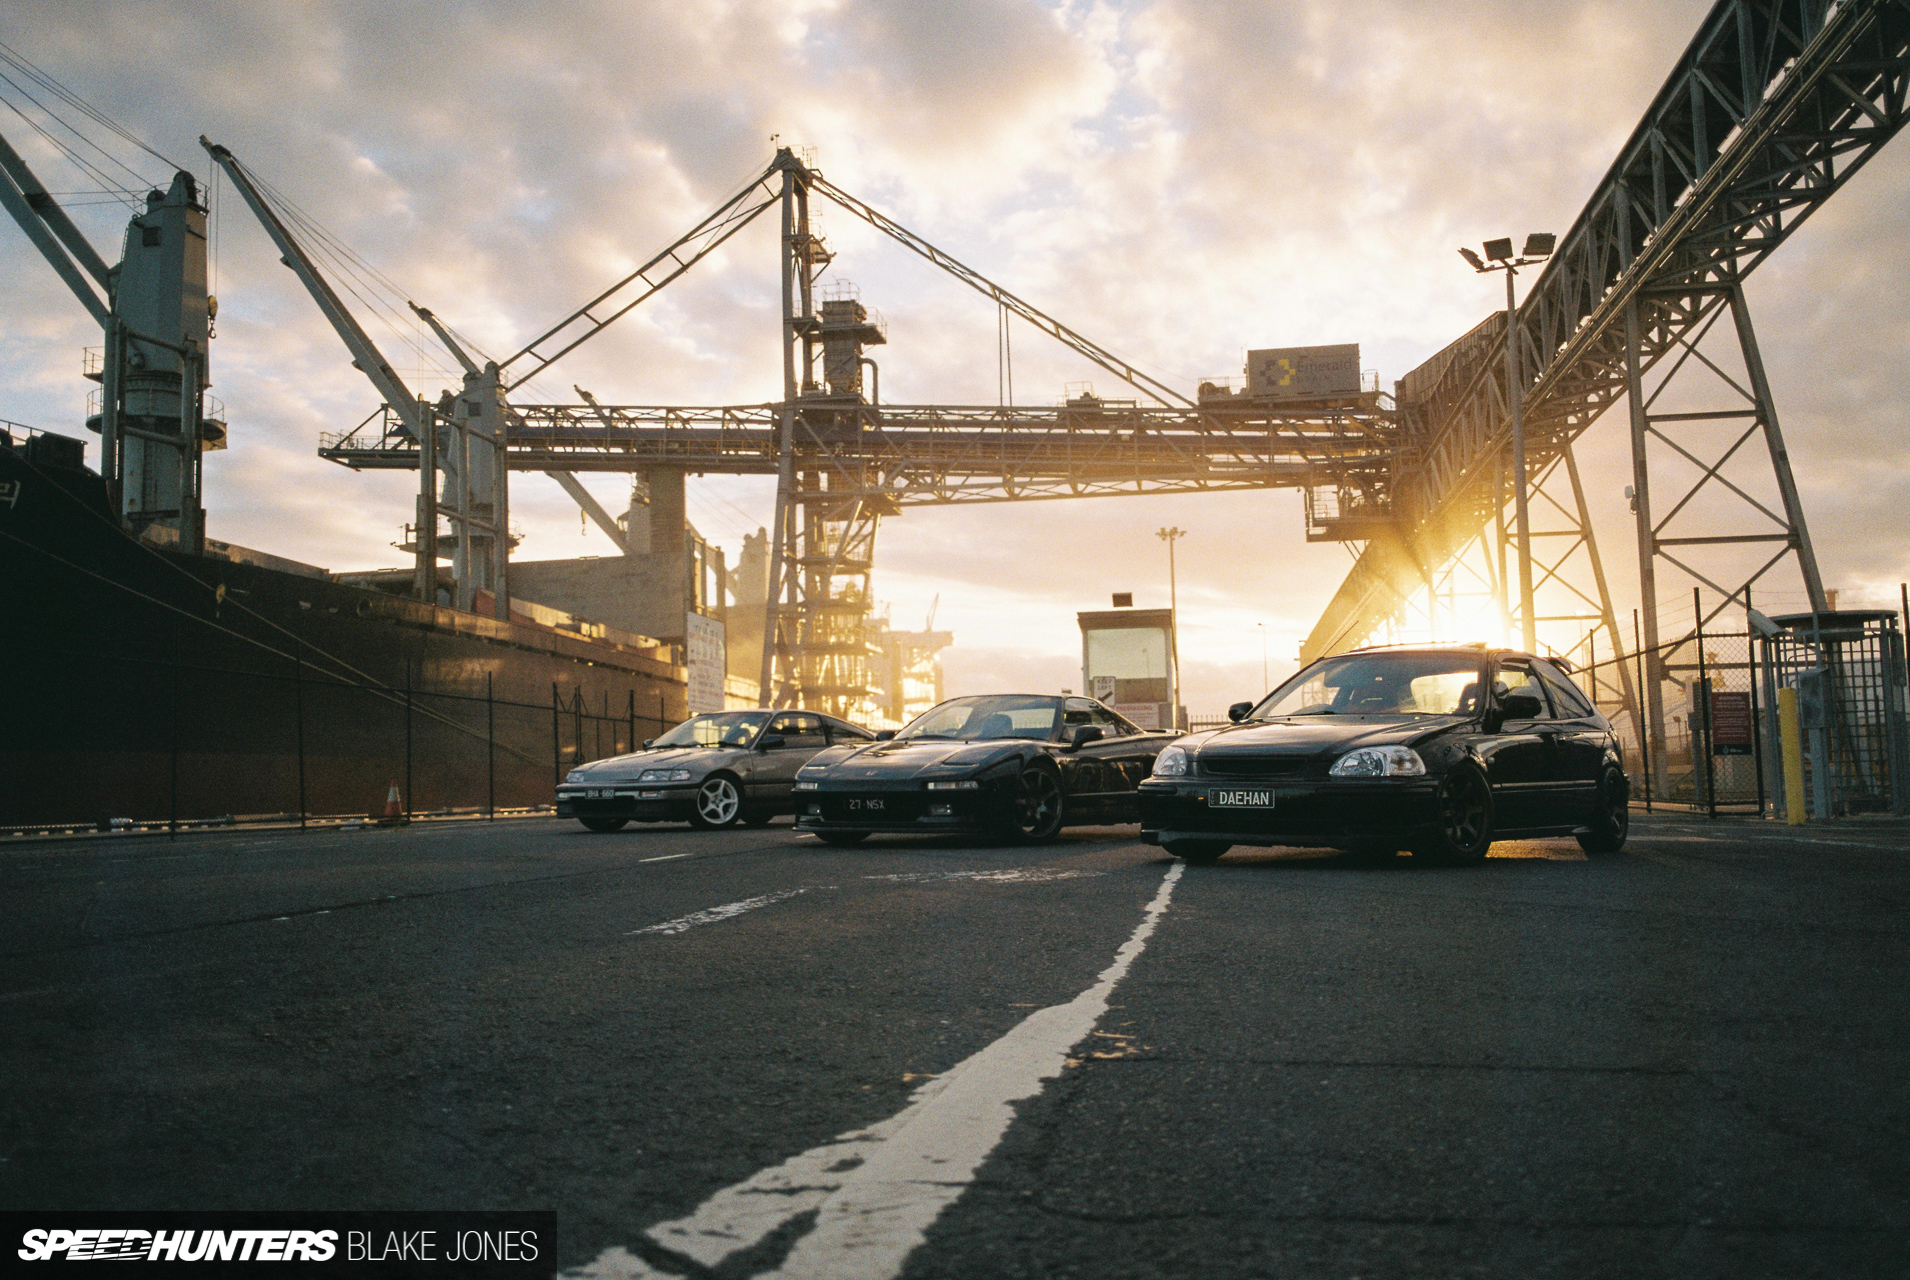
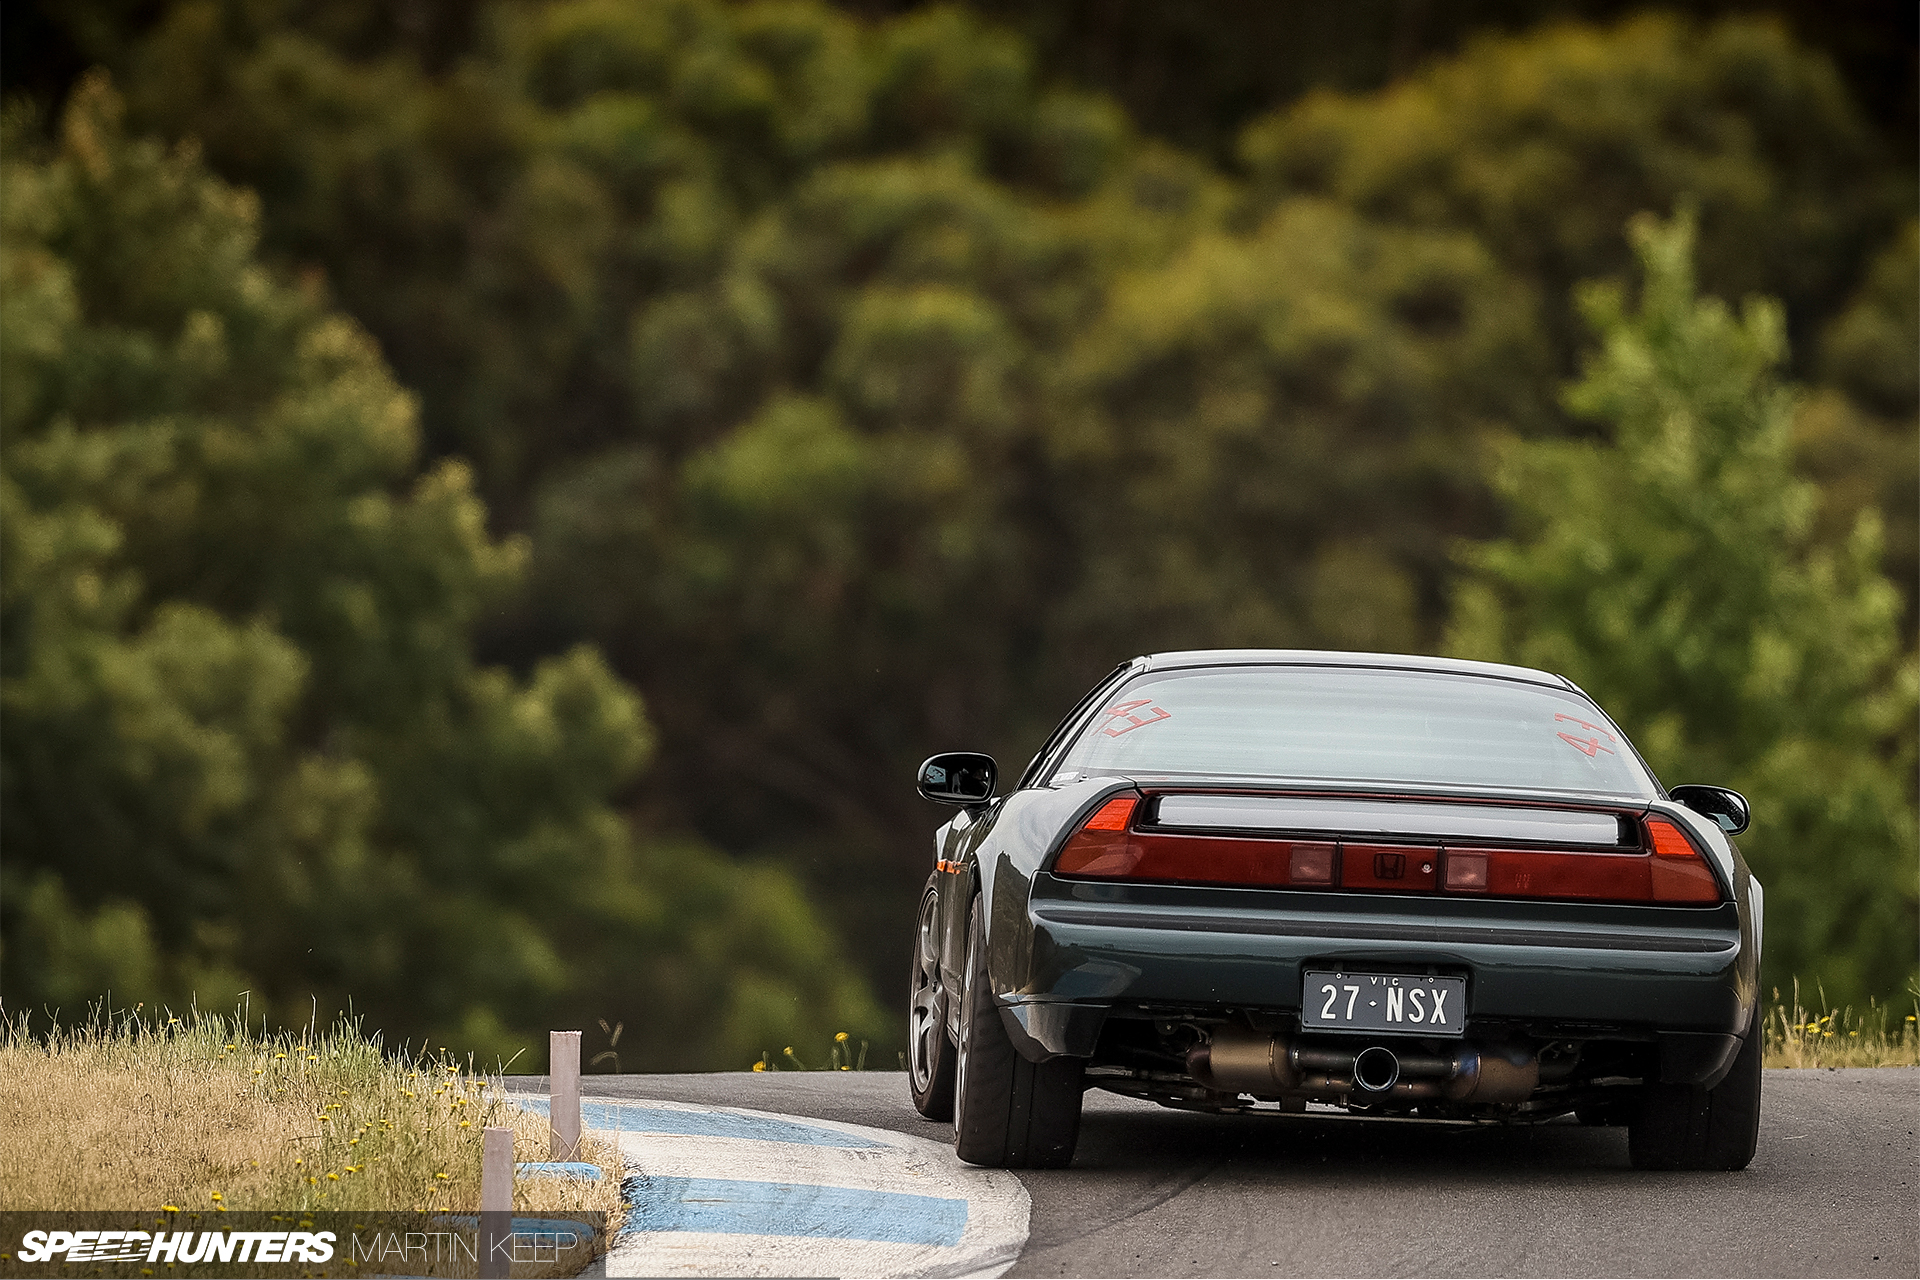
Back On TrackAfter a long and hardcore lockdown here in Melbourne, track days were finally back on the menu. Fellow Honda-nut Rhys and myself booked into the first available track day at Winton to blow out the cobwebs. There were no real intentions of setting PBs, but I was keen to see how the new ABS and uncorked engine would perform. This was followed up with a cheeky session out at Bryant Park Hillclimb as part of Nugget Nationals (which deserves a story in its own right), at which local snapper Martin Keep captured us in action.

The C30A is pulling strongly, and as in-car footage shows I could rely on the mid-range torque to pull me out of corners as opposed to using lower gears to keep the engine in VTEC. The latter might ultimately be faster, but would require more rapid-fire downshifting which frankly I need more practice to balance with brake modulation.
The upgraded ABS was the real revelation, however. Clearly the old accumulator-based system wasn’t in tip-top shape, but even if it were it would be embarrassingly slow-witted and clumsy compared to the updated electronically-controlled pump. Dare I say it, this might be my favourite modification to Project NSX yet. It’s so rare that a modification has absolutely no negative trade-off for the increased performance.

Future improvements? The GaugeArt screen made me aware of some relatively high temperatures for both coolant (110°C/230°F) and intake air temp (65°C/149°F), nothing worth pulling into pit lane for, but performance and peace-of-mind would certainly be enhanced by bringing those down a little. I’d also like to add oil pressure and temperature sensors to keep an eye on those. Otherwise the car is driving like a dream and I’m almost starting to think I should slow down the mods, lest I accidentally let the magic out. We’ll see how long that lasts…
Blake Jones
Instagram: blaketjones
blake@speedhunters.com
Additional Photos by Martin Keep
Instagram: @martinkeep
OFFICIAL SPEEDHUNTERS SUPPLIERS


Thanks for the update on my favorite project car! As someone who just did an injector upgrade recently as well, it was fun to see the diagrams and well thought out plan. Keep it up!
Thanks for the Support, Andrew!
I really like the injector spray schematic that you used! Might use it in my dissertation! Keep up the detailed updates really enjoy going through them.
The best part of this update: the title. It's the most difficult part of any project not only cars.
Hope you reach stage 2 without big compromises. Good luck.
@ Blake Jones:
The throttlebody is almost always never the place to start: a 32mm restrictor is goed for about 350 BHP (at the crank). It forms a restriction above that power figure. So 64mm is no restriction on your engine whatsoever. You can achieve fairly close to 4 digit horsepower figures using that throttle body. My best guess is the intake manifold and the intake itself is where you will find a bottleneck. You need to source a propper intake manifold first and then source the parts for the intake after you found one.
I don't know if there is anything remotely available, but since a 3d printer is your friend: straight runners, single large plenum in top of them. In the plemum some injectorrails (you can reuse the ones you have) with the injectors above the ports ( instead of inside them). Closed plenum with a fairly central position for the throttle body. The position of the injectors (farther away from the valves, so they can actively cool the intake charge and help atomization), with the straight runners ( helping with atomization en creating less turbulence), and the larger plenum (making for a better response and better scaviging effect inside the manyfold), should do the trick. But you have to look out for clearance issues though. Thats why the GT500 cars used that scoop. In essence its a pannel filter inside a large plenum ditching the intake trackt altogether.
Hope it helps, and if done right should net you a figure above stage 2.
That would be my educated guess.
I really appreciate the insight Kevski. The VVIS system is a useful torque booster but others have suggested may be a restriction to higher output engines. I'll investigate the intake system you've described further, there's nothing like that on the market - closest option currently is ITB with a custom plenum on top.
Don't try 3d printing an intake unless you plan on rebuilding your engine soon, there isn't any readily available material that can withstand the intake pulses (at least for a hobbiest). I've personally designed and printed some which I will then cast in aluminum . Look up lost pla casting if you are interested.
Yep, would only be printing for fitment/ prototype purposes, not a permanent solution. Will look into casting, an interesting alternative to machining or simply printing in aluminium (via a 3rd party).
@ Blake Jones:

Intake manifolds don't really crack on the intake pulses, unless badly designed in plastic. The material may not be sexy, but it is good for the application:
-It's more elastic preventing cracking during thermal cycles.
-It's has thermal insulation capability's that leaves any metal in the dust.
The main concern is the material used for the application: It need to be shatter proof, so around the 35% fireglass reinforced would be the ticket. And metal inserts and such.
That being said I'm not sure that you can print those types of materials?
But then again: You don't have to: Just use plugs for the injector holes, and move the injectors inside the plenum right above the runners. See my comment somewhere on junuary 7th. If it doesn't fit inside just build a spacer of fairly simple material to enlarge the plenum, or move the rails on top of the plenum and seal the injectors using a plastic sleave to hold the injectors in place.
It really can be as simple as that. It's one of the joys of not having to stick to a rulebook
Depends on material and how it’s built. 3D printed intakes typically have short life spans, cast (whether plastic or alloy) is a different story.
Vvis isn't so much a restriction, as it merely enlarges the plenum using 6 butterfly's. It merely a form of resonance tuning which is vacuum operated.
 ) of 15 degrees celsius. Every 2 degrees drop nets 1 horsepower. You do the math.... My actual guess would be that it nets you a 25 degree drop.
What you can do freely is remove the butterfly plate and leave the rest as is. Your inlet manyfold should be 3 piece, and the butterfly's should be the middle piece. When your at it remove casting ridges en make transitionsas rounded of as possible. You can get at everything fairly easily. Once there, try measuring if the injectors wil fit Inside the manifold with the fuel rail attached. If not use a 3d printer to make a spacer for the manifold until they fit. Intake temps will drop by a safe estimate (read: Im lowballing it
Try looking up f1 intake manifolds to see what i mean with injector placement?
As an added bonus: Would it be possible for your ecu to trigger an extra signal? As in: Close, open? If so, could that signal be coupled to your tps sensor? Im asking this as you could make the intake switchable. And if so, you could switch it on multiple points in the rev range. F1 cars in the NA era used the intake as follows: Small, large, small, large, small. You could actually get small gains of power throughout the whole rev range that way if you map it on a dyno. Electronics wherent advanced enough at that time, and variable intakes now are deamed to costly nowadays.
Mods won't cost you that much, but it wil need a dyno session because of the fueling. And some more if you go for the added bonus.
Surprised to hear the intake temperatures can drop so significantly from simply repositioning the injectors, I will investigate further, thanks!
The Haltech currently controls VVIS opening RPM so in theory it could be opened and closed at different RPM. The next time I'm on the dyno, I'll ask Trent to do a full run with it closed v. open to see if there's an advantage to be found at different RPM.
Repositioning the injectors: Its why carburettors can still make more absolute power on top. The relative length upstream fuel is added to the engine. Closer to the engine is less cooling time for the fuel. Higher fuel pressure is more heat, and closer to the engine is more heat.
Resonance: If you run it fully open and fully closed overlay the 2 plots. Note where the one line jumps the other and where it dips. Switch at every dip and run in again. Long vs short isnt really the case: Its a way to modulate a reversion pulse, first second, third, fourth etc. Thats way switching multiple times helps. But on word of advice: It does tend to sound weird if it switches. Just some getting used to i suppose?
In essence its the fuel that cools the intake charge. Not so much the temp of the air itself.
Man loved seeing this at Classic Japan. My sleeper pick really apart from the C130 Laurel. Hopefully it gets to another meet sometime this year.
Thanks Dan, as soon as the shows are back we'll be out there again.
Great quality update as per usual! Might I ask, is there another secret round of modifications in the works that explains why the glovebox and dash is apart?
Thanks for the kind words Joel - glovebox has been out since the ABS upgrade, have been considering updating the audio but yet to make up my mind!
It never stops! Even if you think you've stopped, it will start again! It will control your life and infest your brain, more than Corona Chan infests your lungs! :p :p :p
The Denso UC380 injectors in the RDX are very popular, and for a good reason. I never hear too many people talk about the keihin injectors in the 2012-13 Pilot, though. They are larger than the KN60s that came in most of the J-series engines in North America, but still not quite as big as the UC380. I have no idea how prices compare.
I think the NSX is one of the few cars that I would say is perfect
Yes there are other good cars out there but some can be quite flawed
Hah! I was right about the GaugeArt display being in the cubby hole below the audio head unit!
It's about time we get an update on Project NSX though. Love to see things moving along nicely, especially that steering column button mount. That's really brilliant!
Yeah there was no hiding it from you Jay
Hi Blake. It’s really been good to read about your journey with your car, from Japan to Australia. It’s nice to see you’ve finally gotten to a point where you have possibly made the most out of your NSX, whilst keeping everything tasteful and practical. I hope you enjoy your car for many more years to come! Looking forward to the next update. Tom
Thanks for following the journey Tom!
You are a nerd. I like you.
lmao
Nerds stick together!
Best project in here! It may be more difficult to find those power gains but N/A is and always will be the best way
RE: 3D printed brackets, heat set brass inserts will make custom bracket projects look OEM clean.
Damn, just put some TE-37's on it already lol
Enjoyed reading the update.
Regarding keeping the intake temps down : have you considered covering the air box in heat reflective foil?
That is what I did when i had the engine of my car tuned. After a long drive the air box is still cool to the touch, before you could barely touch it.
Another small mod might be a lower temperature thermostat. It makes the engine less sensitive to knock.
It can lower your coolant temperatures a bit. Perhaps a vented hood like the Type R will the air flow through the radiator.
In my case I also added HKS Superfire spark plugs, according to the tuner those helped a bit for the mapping.
Another small item might be insulating gaskets on the intake manifold, like Hondata sells for the S2000. And removing the coolant line to the intake /throttle body if the NSX has those. Australia is hot anyway;-)
Does the stock NSX have a cold air feed? If not you could consider this intake scoop. It sure sounds fruity.
https://www.youtube.com/watch?v=gimN4dFhMcU
Those are small affordable things that won't make a lot of power, but you only need 7 horses to make that goal.
All good suggestions! Regarding heat management, the film is a good idea as are the thermal gaskets - they do exist, just unsure if the cost is worth the benefit. I should also ceramic coat the headers, they snake underneath the engine and would be radiating a lot of heat up into the bay. I have that exact air intake, which simplifies and enlarges the factory cold-air scoop.
I had my headers coated by Zircotec, when they were ordered. I don't know if they have an agent in Australia.
The info can be found here :
https://www.zircotec.com/performance-white/
That intake sounds awesome;-)
Great to see the NSX back in action, I was almost starting to get worried. I appreciate the engineering aspect of your post, it's nice to see that side of the coin as well.