
With COVID-19 lockdowns varying from the draconian to how we’ve had it here in Japan (being politely asked to close certain non-essential businesses and refrain from going outside) many people have found new ways to pass the time under quarantine.
For me, it was a brilliant opportunity to continue working on my composite skills.

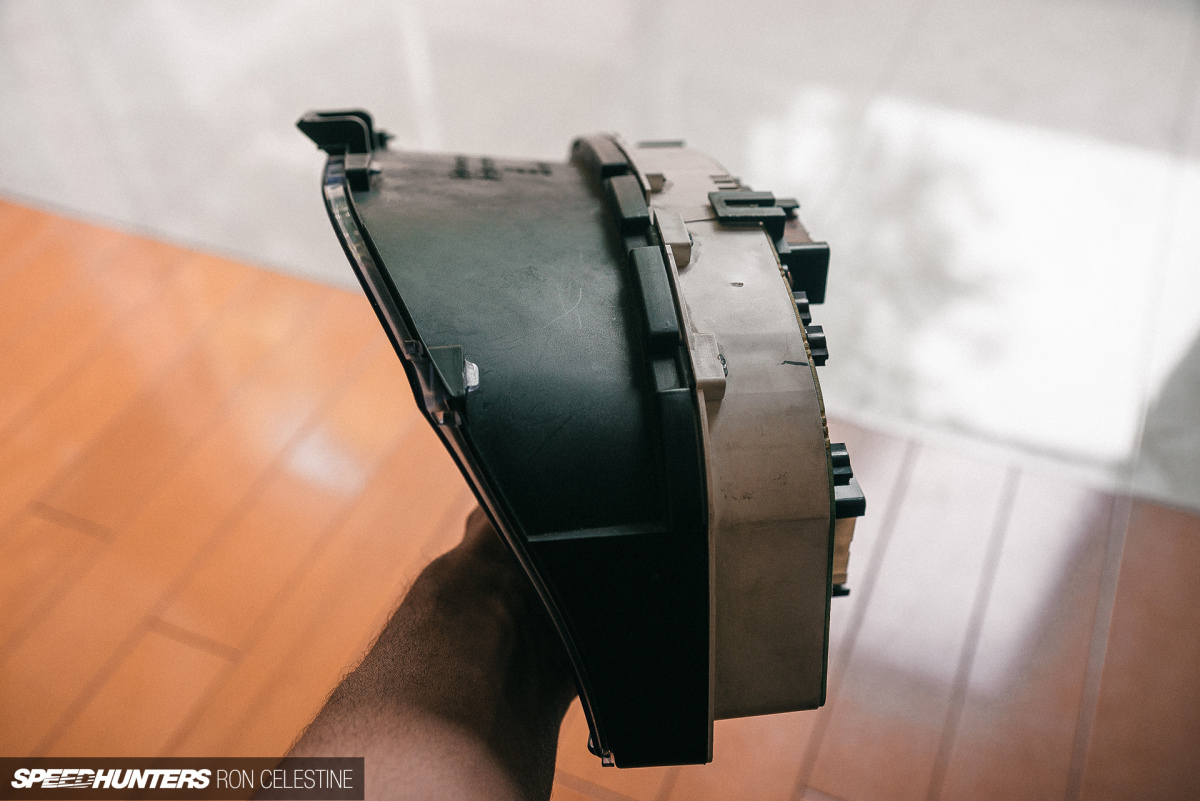
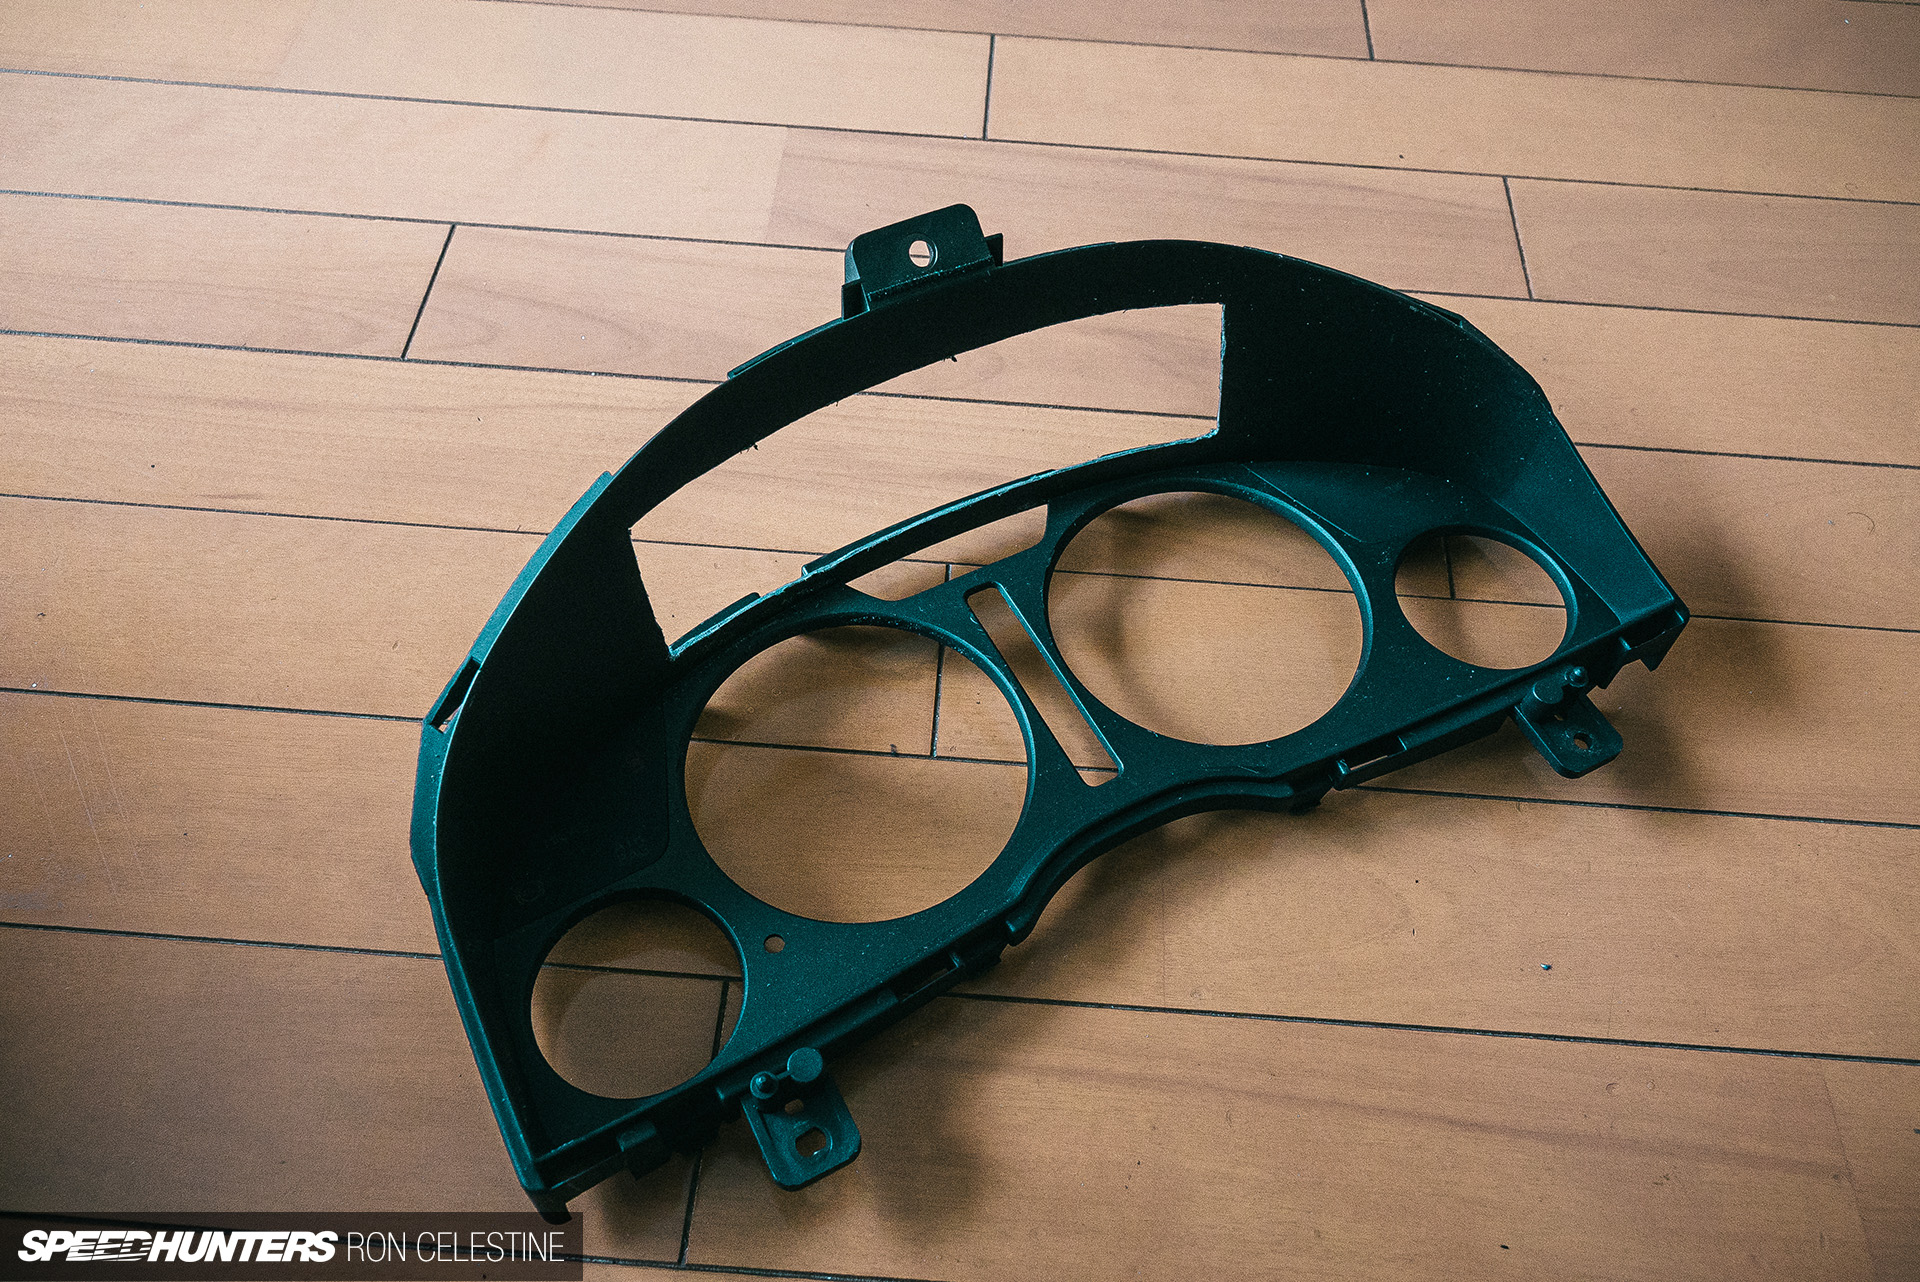
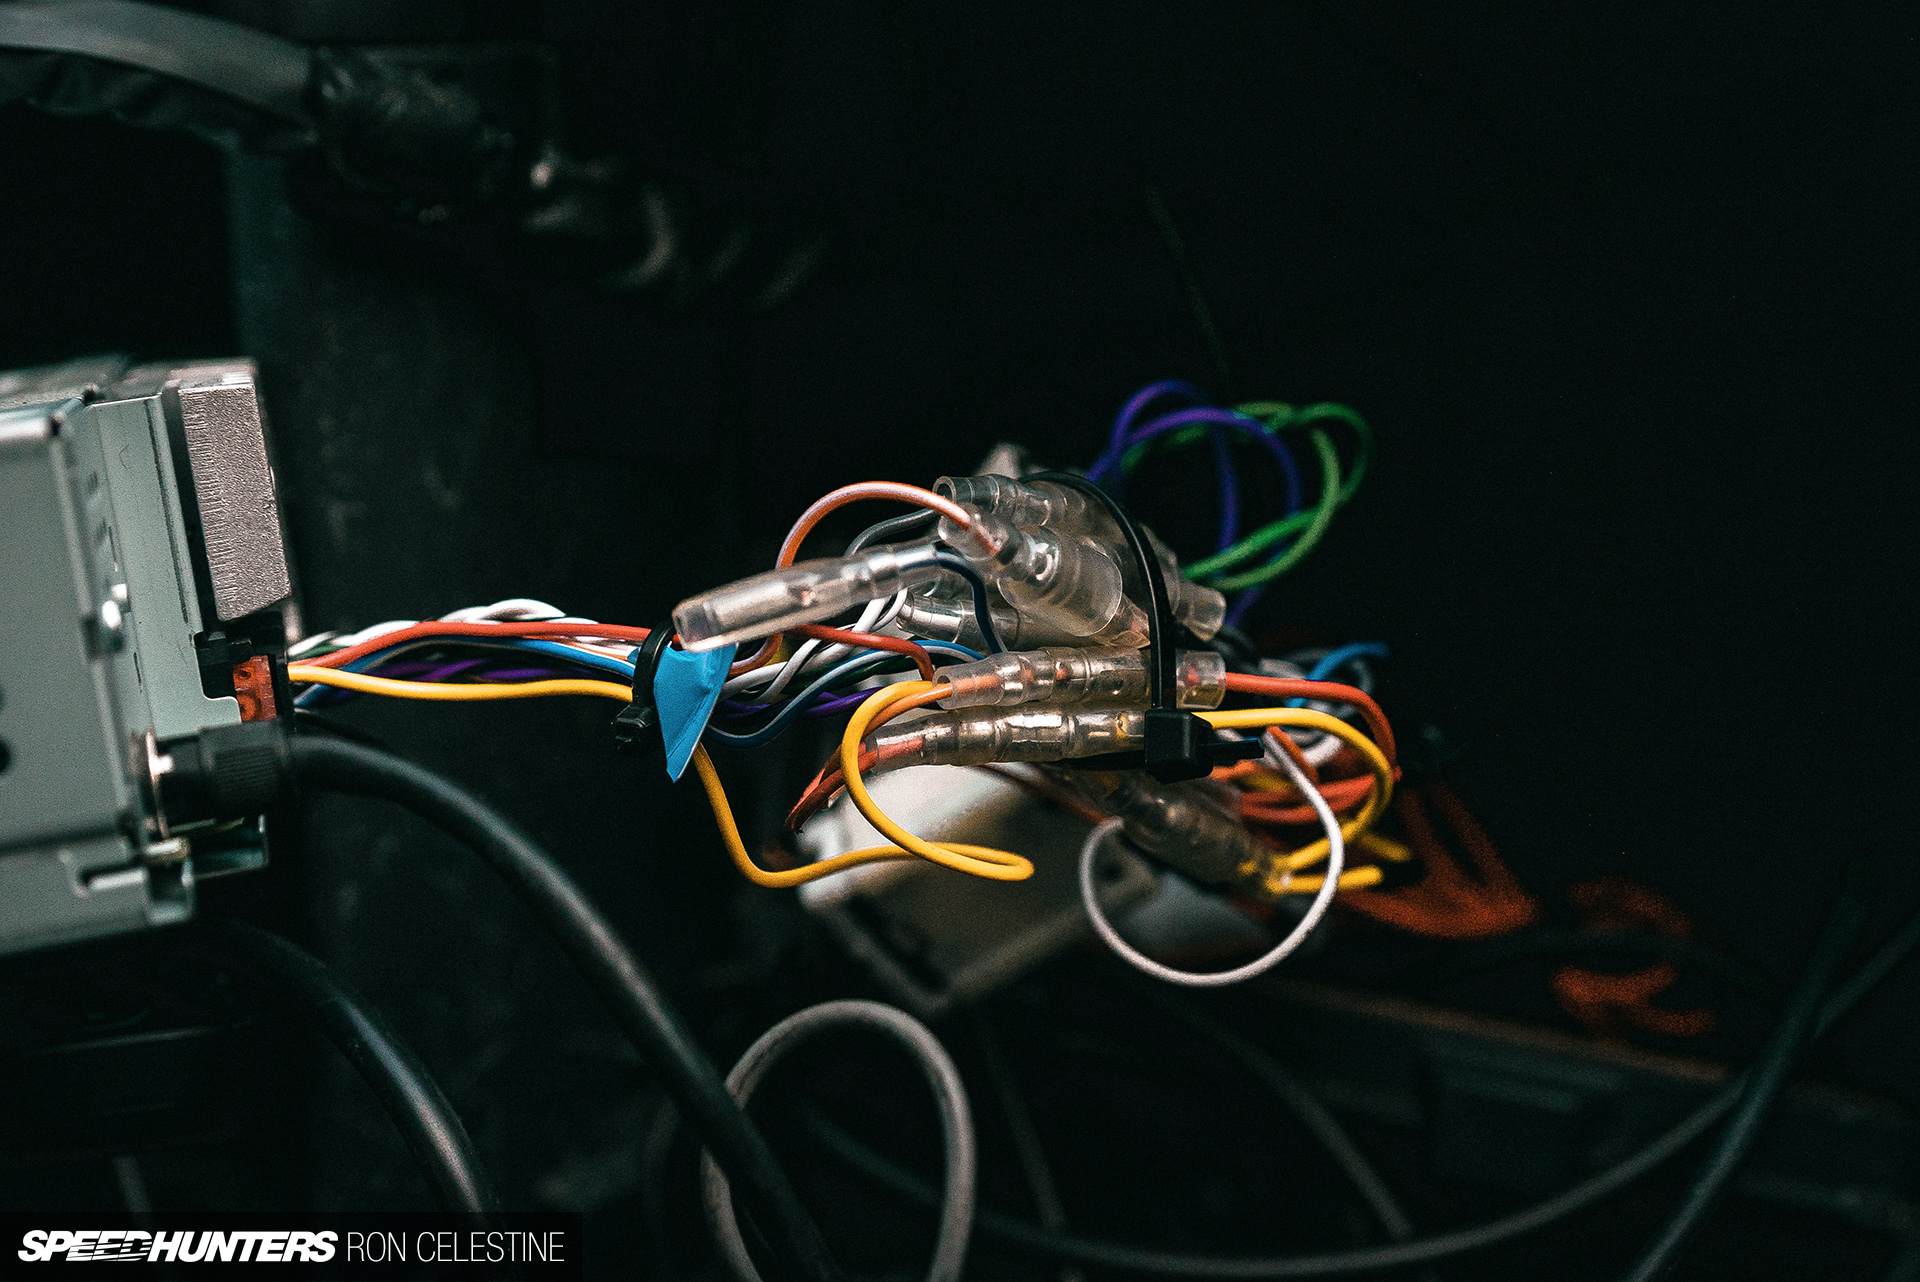
Shortly before Japan’s lockdown of sorts was announced, Project Rough developed an interesting electrical problem. All at once, the speedometer, tachometer, fuel gauge, and dome light stopped working, pretty much making the car undriveable. I could manage without the speedo and tach, but not knowing how much fuel I had remaining (especially seeing that the fuel economy should be rated in smiles-per-liter rather than an actual number) was a bit of a problem. I had thought that a sensor may have broken causing the gauges to stop working, but the fact that the dome light was also not working only added to the confusion.
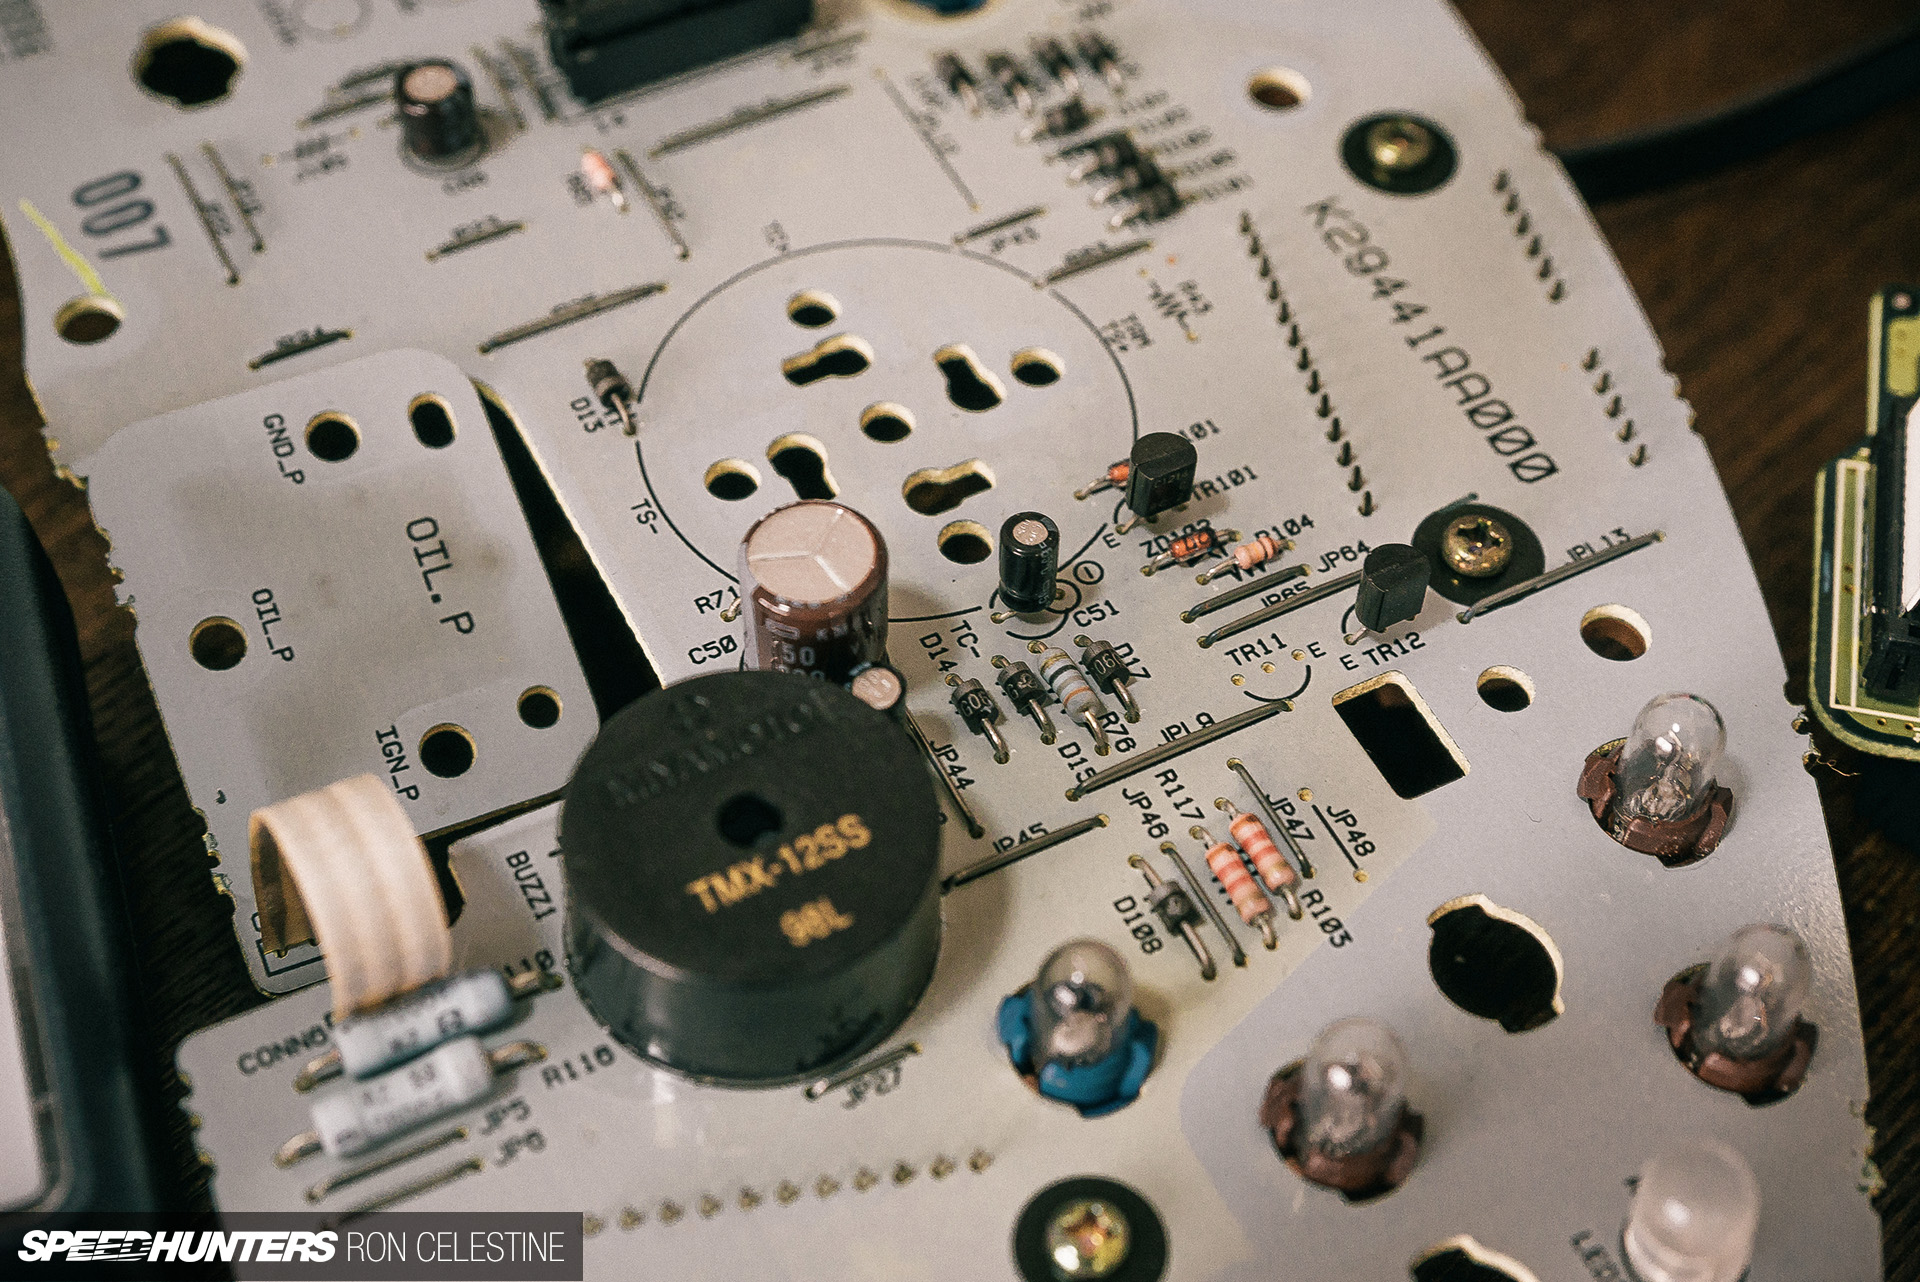
After asking Kano-san at Veruza and searching online for a few hours, I discovered that the combination meter controlled a lot of the electronics inside the cabin. I also checked all the fuses, and although some had seen better days, none of them were blown, meaning that something inside the meter was likely broken.
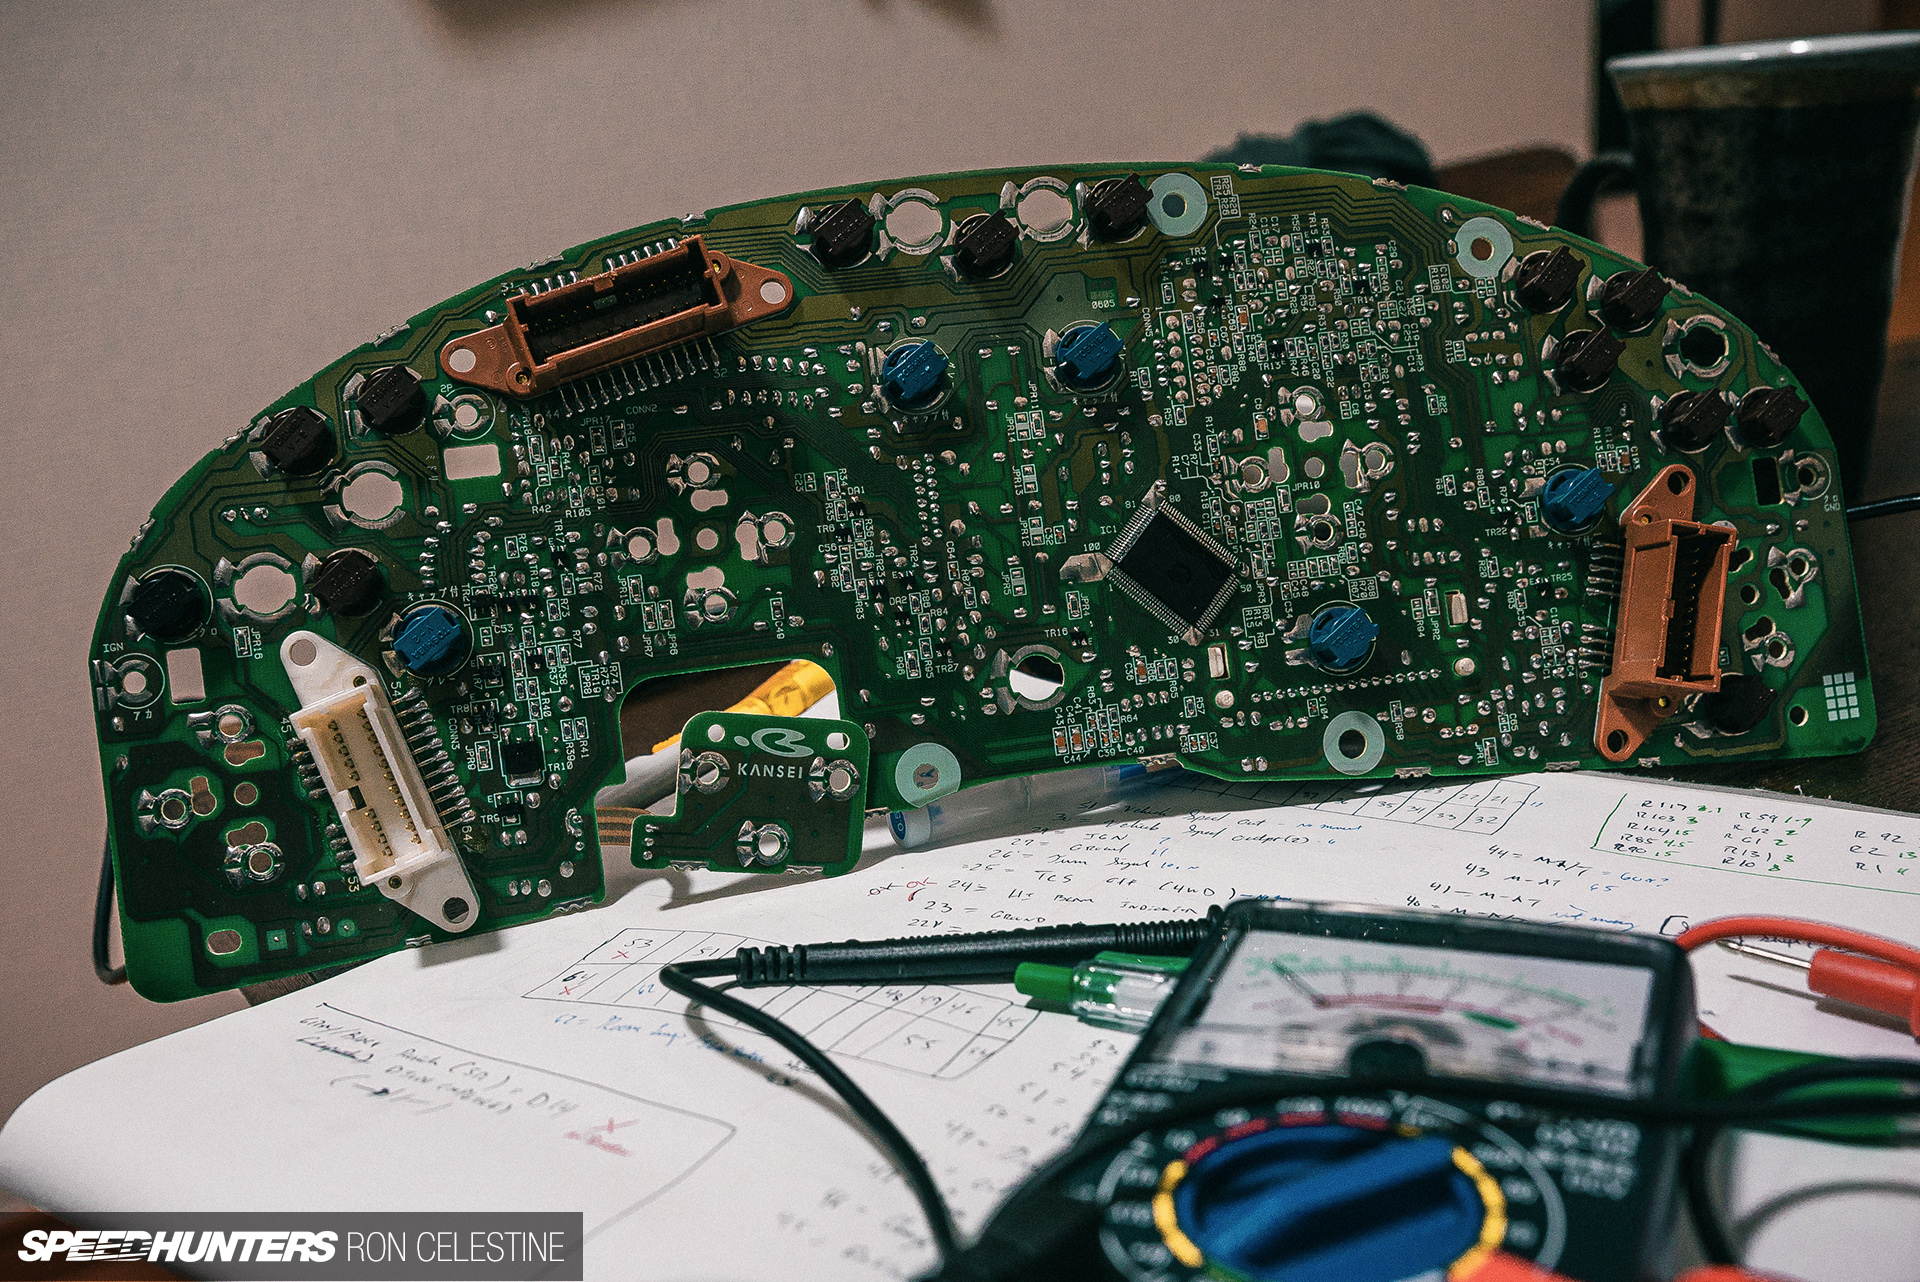


Out came the multimeter, and I checked all the pins and components throughout the meter in search of the culprit.
Around the same time this was happening, Dino published a story about an NA1 NSX that had been brought back to life, and one of the images in that post sparked an idea in my head.
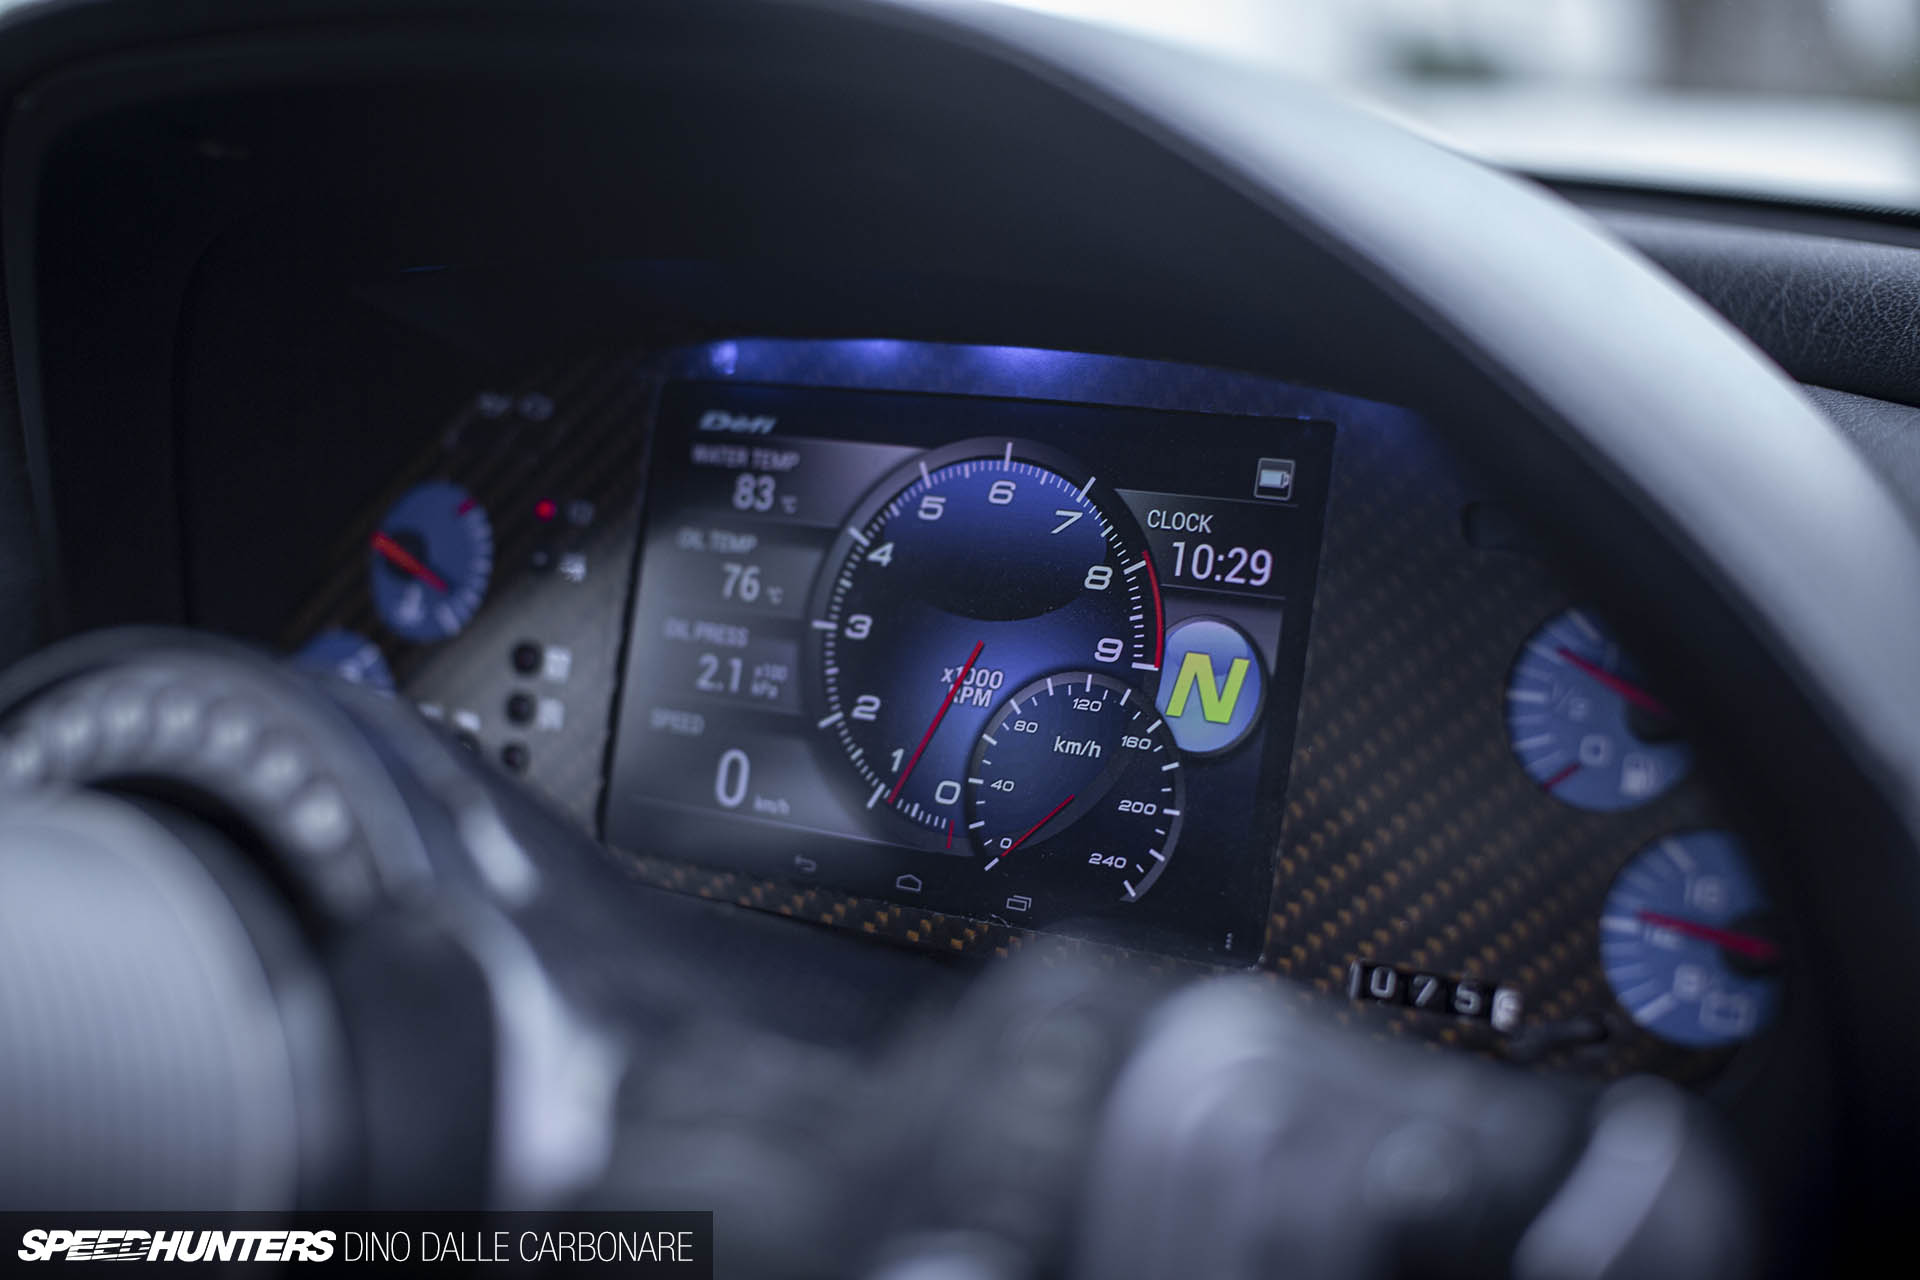
The image was of Jun’s custom dash setup, featuring a Google Nexus tablet running a Defi Smart Meter application, surrounded by a carbon fiber binnacle.

Since my meter was already out of the car and in a million pieces, I thought why not try and bring a little 21st century technology to Project Rough?
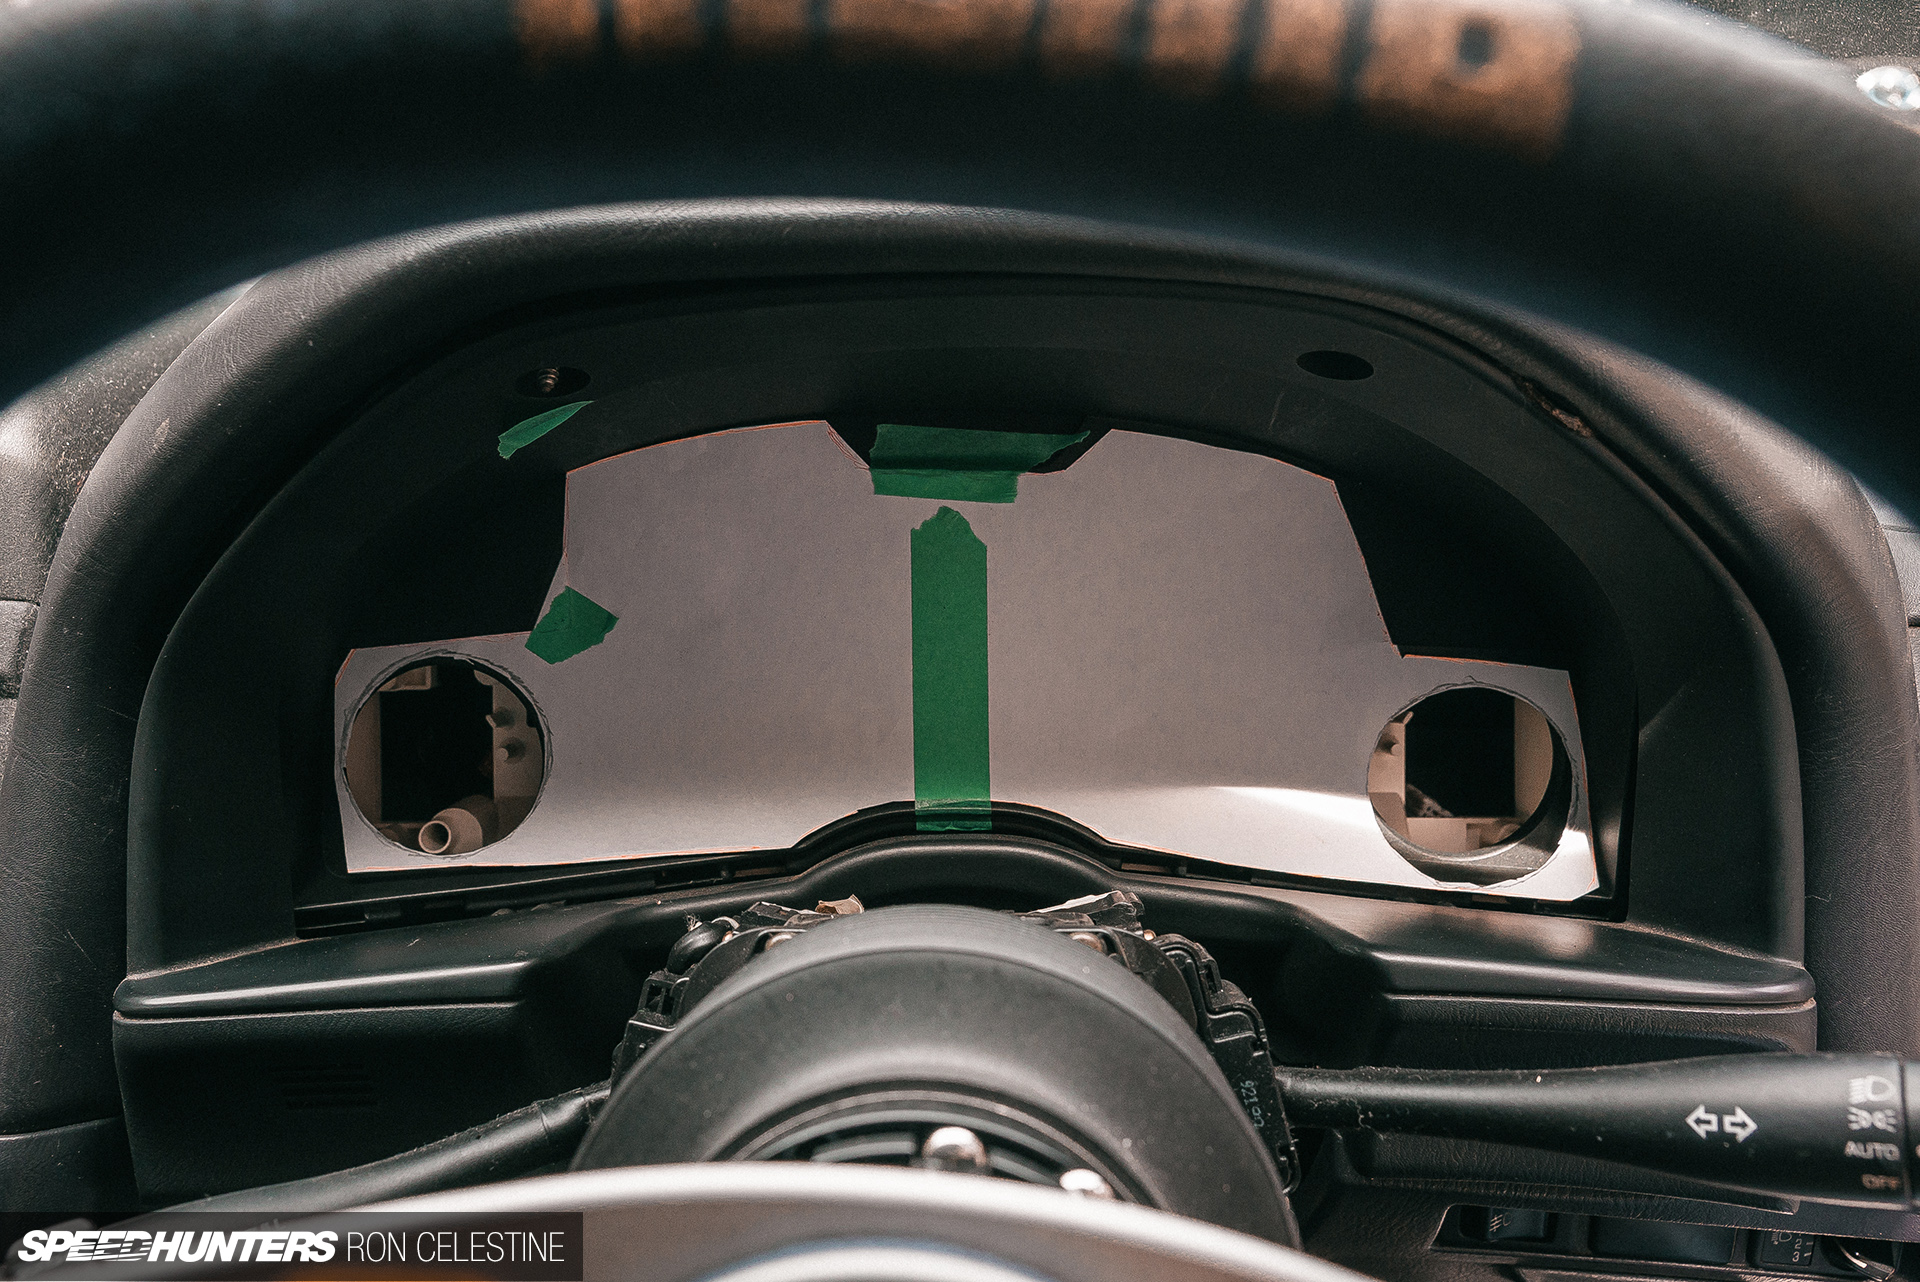
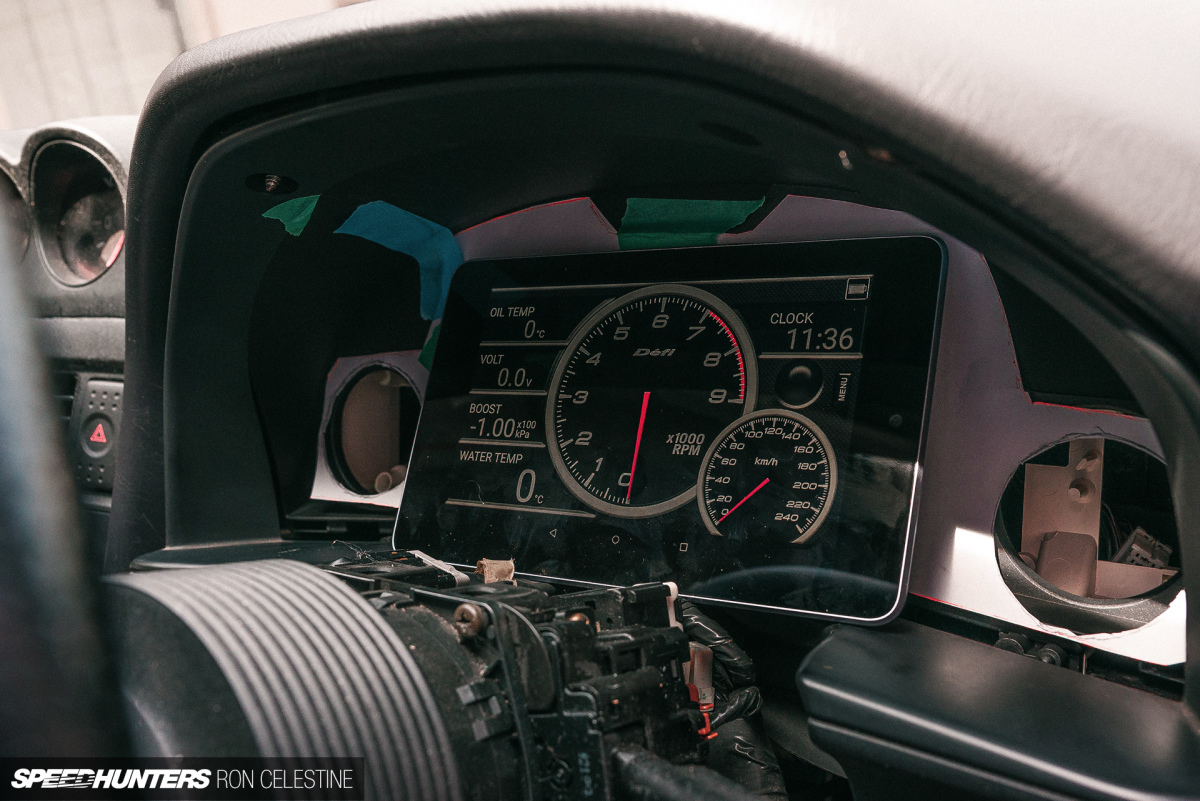
The plan would be a simple one (or so I told myself): Build a custom cover out of carbon fiber to mount a tablet in the Skyline’s dash. I wanted to make it a bit more interesting and decided that the cover would be three-dimensional and bring the tablet forward, allowing the R34’s two outside analog gauges to remain in the background.
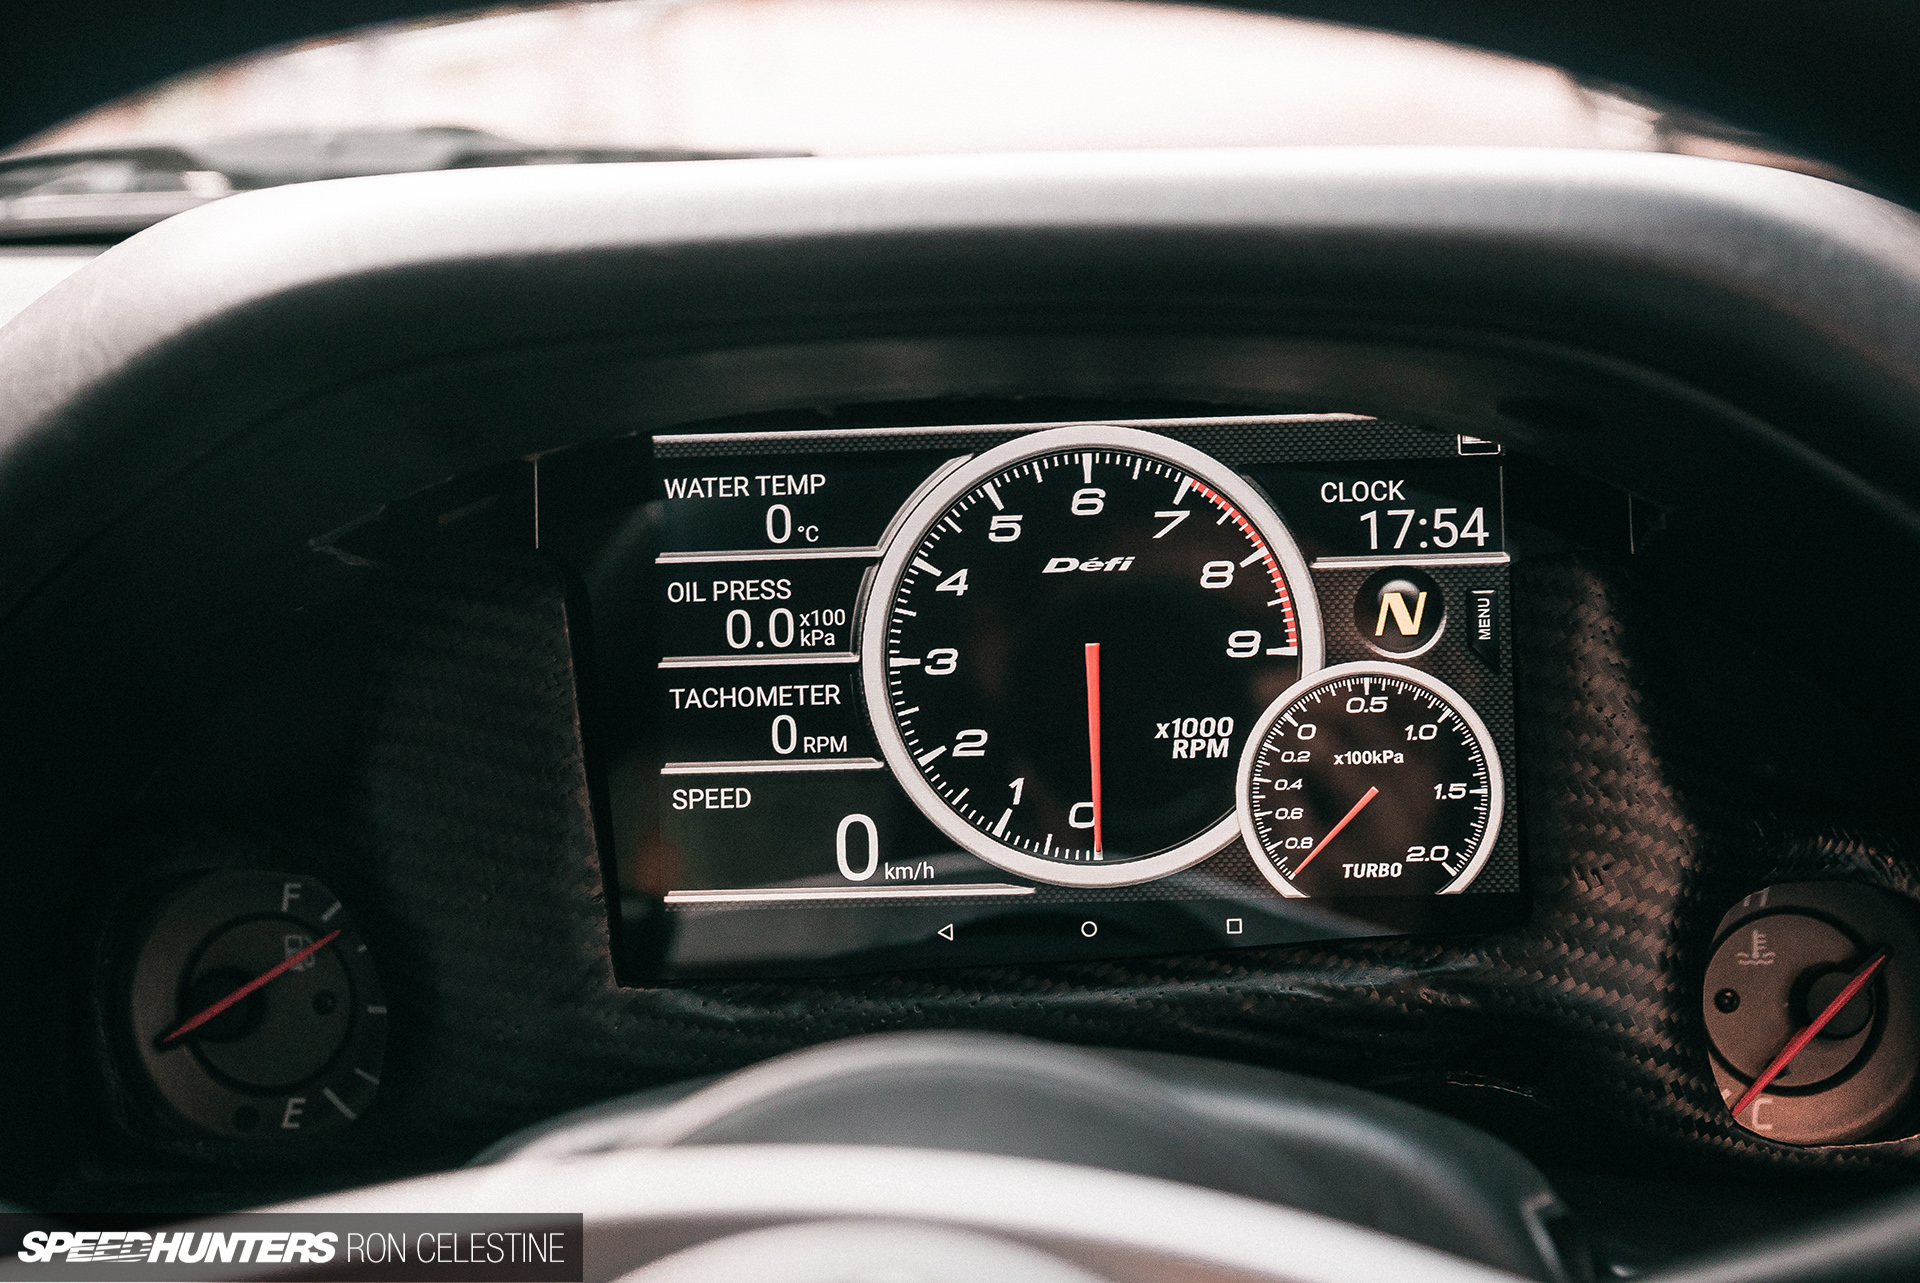
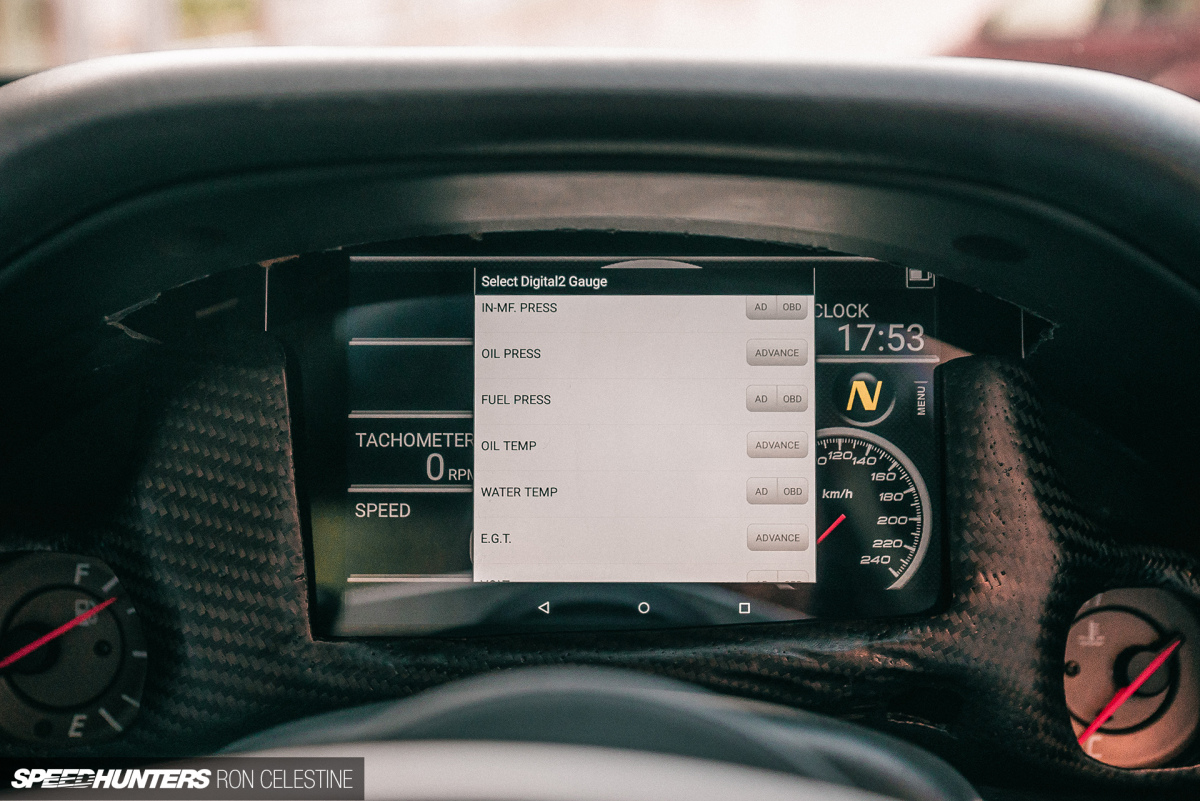
The reason why I went with the Defi setup – besides that fact that I really like the design and layout of the interface – is because R34s (and many other pre-2002 Japanese vehicles not shipped to the US) never came with OBD2 ports. The cars manufactured for the Japanese market were not required to have them, and thus many manufacturers never bothered, opting for their own unique connector port designs. For example, Nissan cars of the era have 14-pin Consult I connectors. This makes it rather difficult for owners to simply use an OBD2 Bluetooth sender and application.

The Defi system reads the data from the ECU, translates it into Defi’s own language and sends it out. In my case (and Jun’s), a Defi Smart Adapter does this via Bluetooth to the tablet, but I’ll discuss that a bit more later on.


Before I continue, let me address a few points. The reason why I decided to retain the analog factory fuel and water gauges was simply for design balance. I didn’t want to have just one cutout for the fuel gauge as that would drive me up a wall. The second is why I decided to make a cover, versus fully integrating the tablet into the meter cluster. The available real estate in an R34’s meter housing isn’t a lot, and for shaken purposes you would need to have a rather small device (let’s say at most five inches) for it to be 100% legal. Because the cover would sit on top of the stock gauges, I can simply remove it at will and are able to use a much larger tablet, hence why I designed it around these parameters.

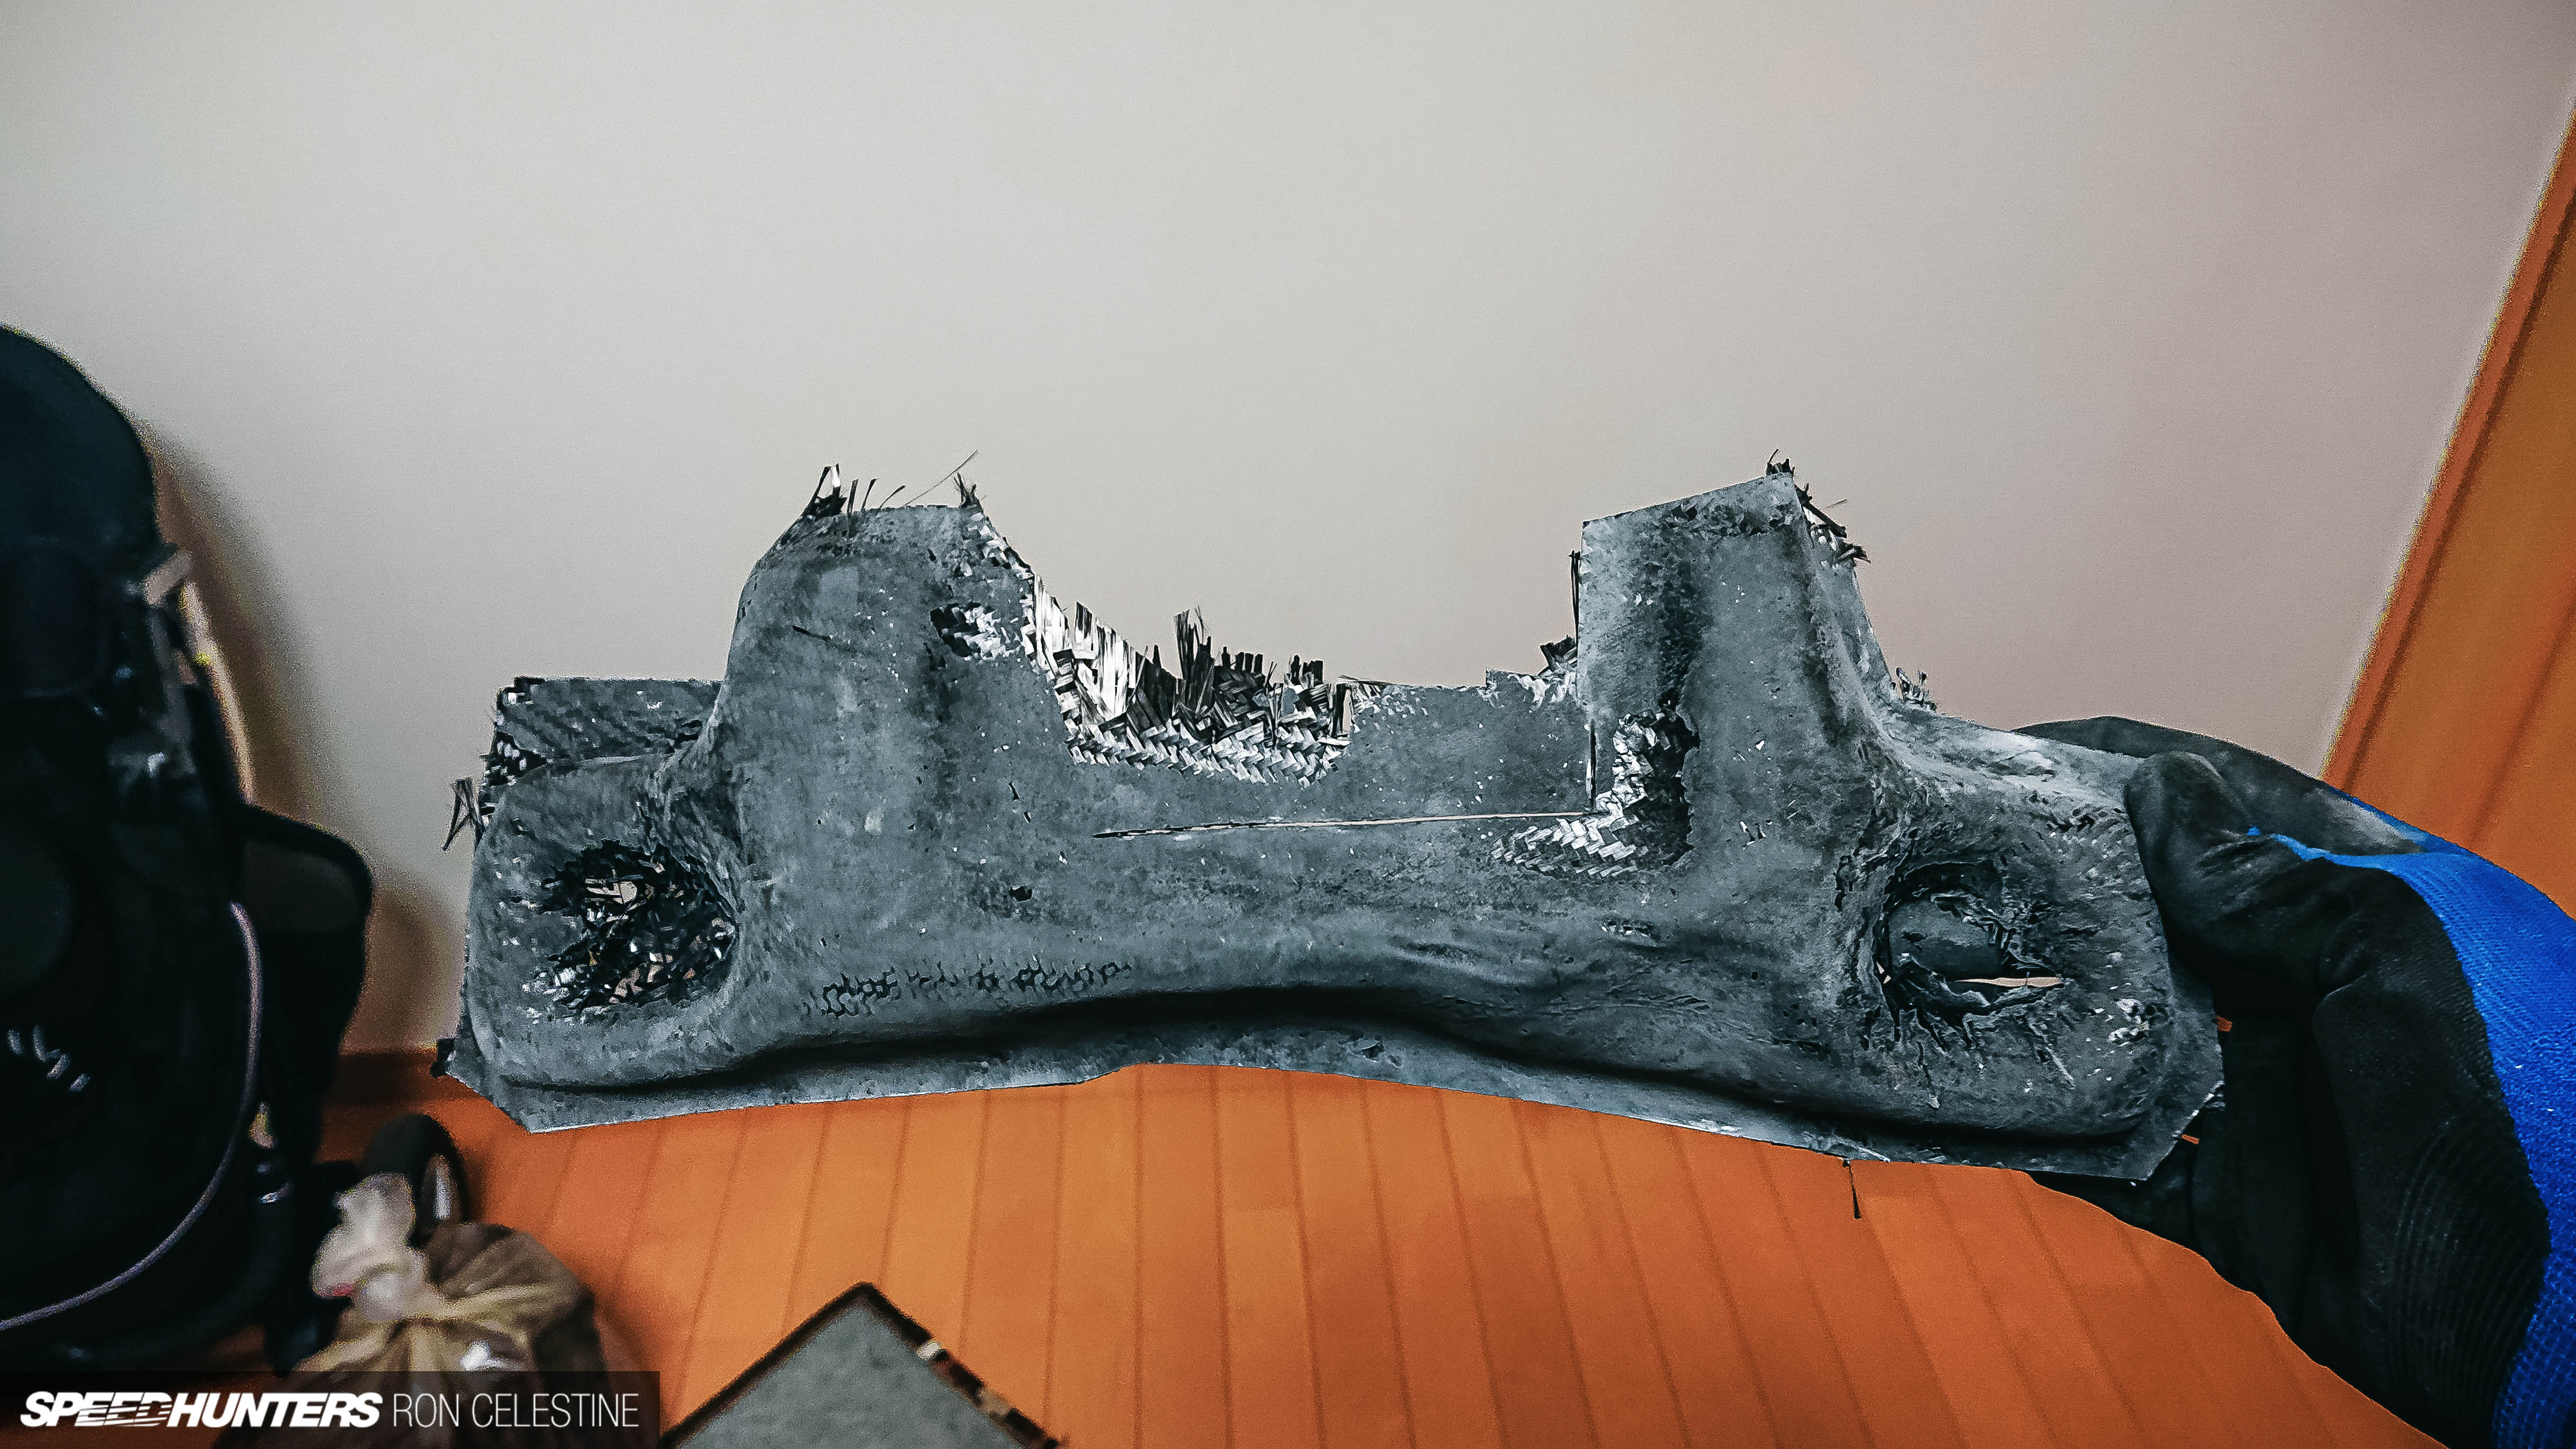
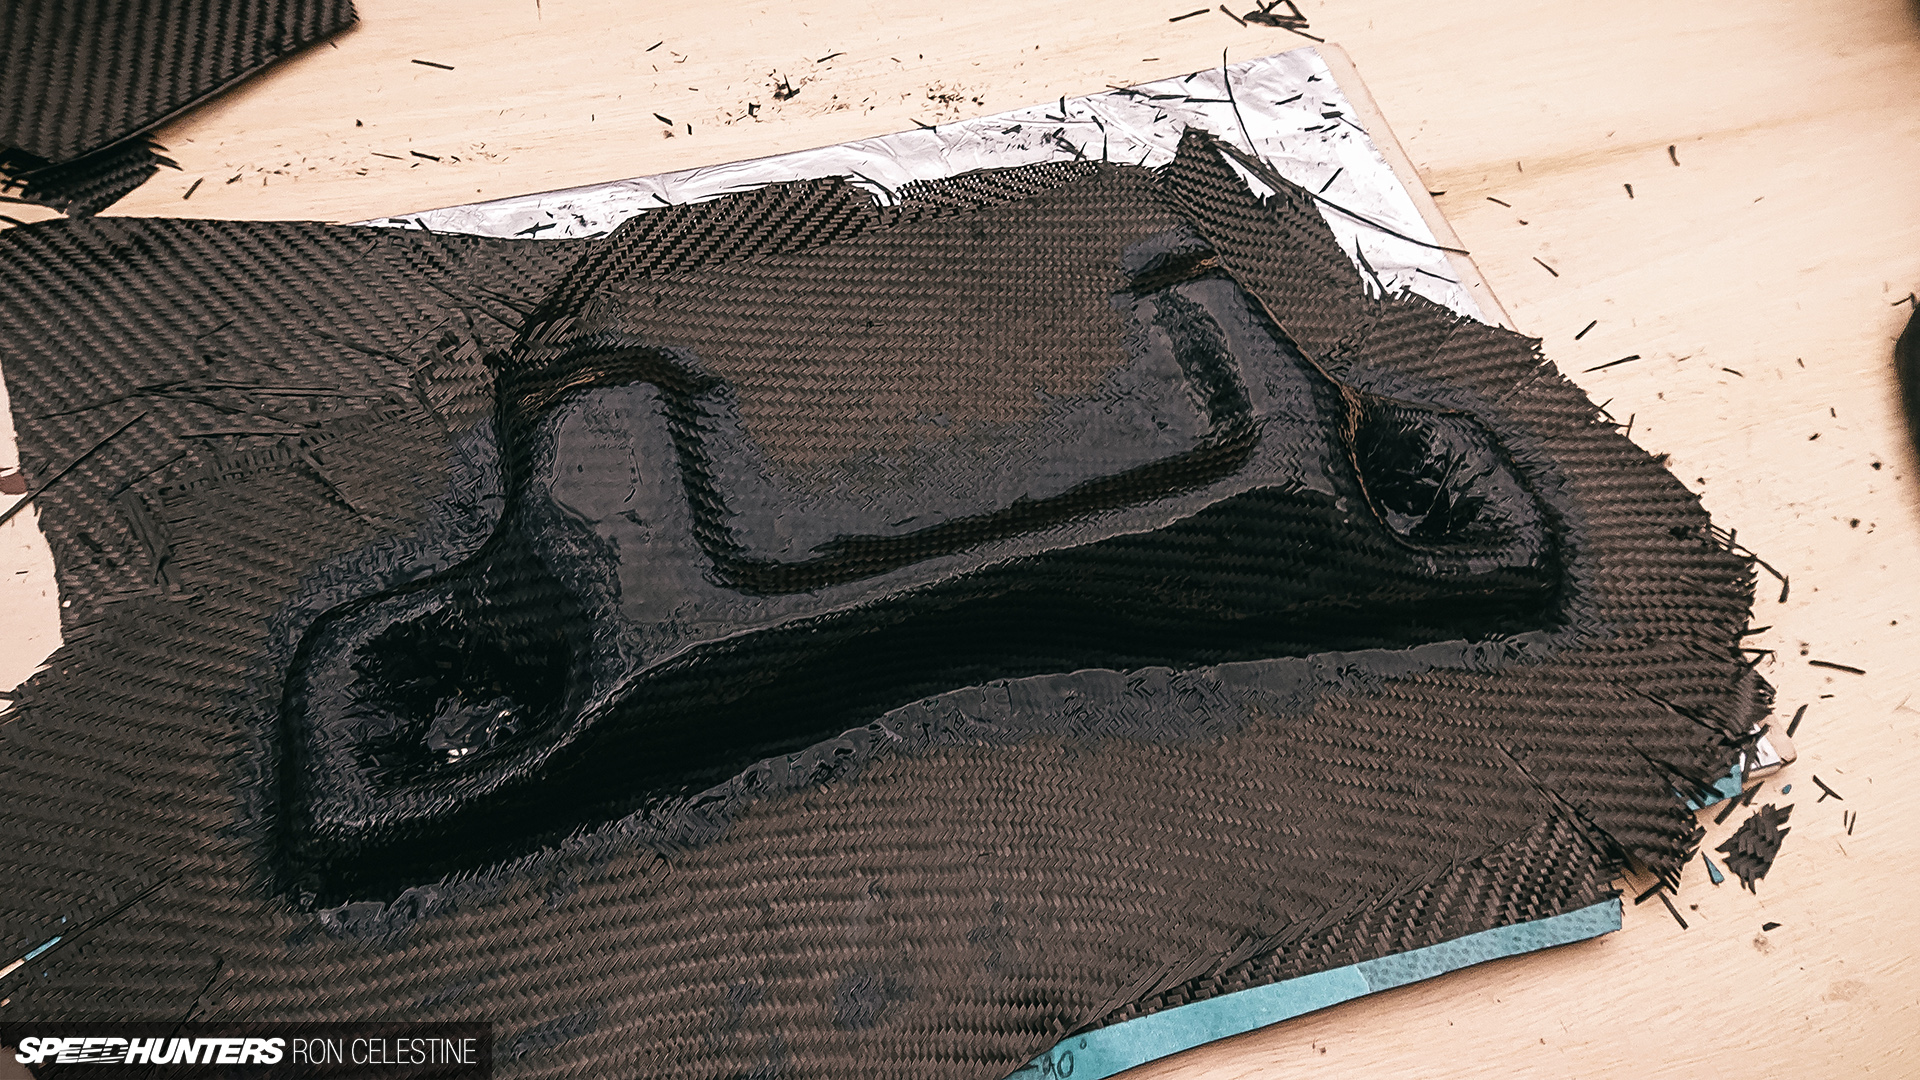
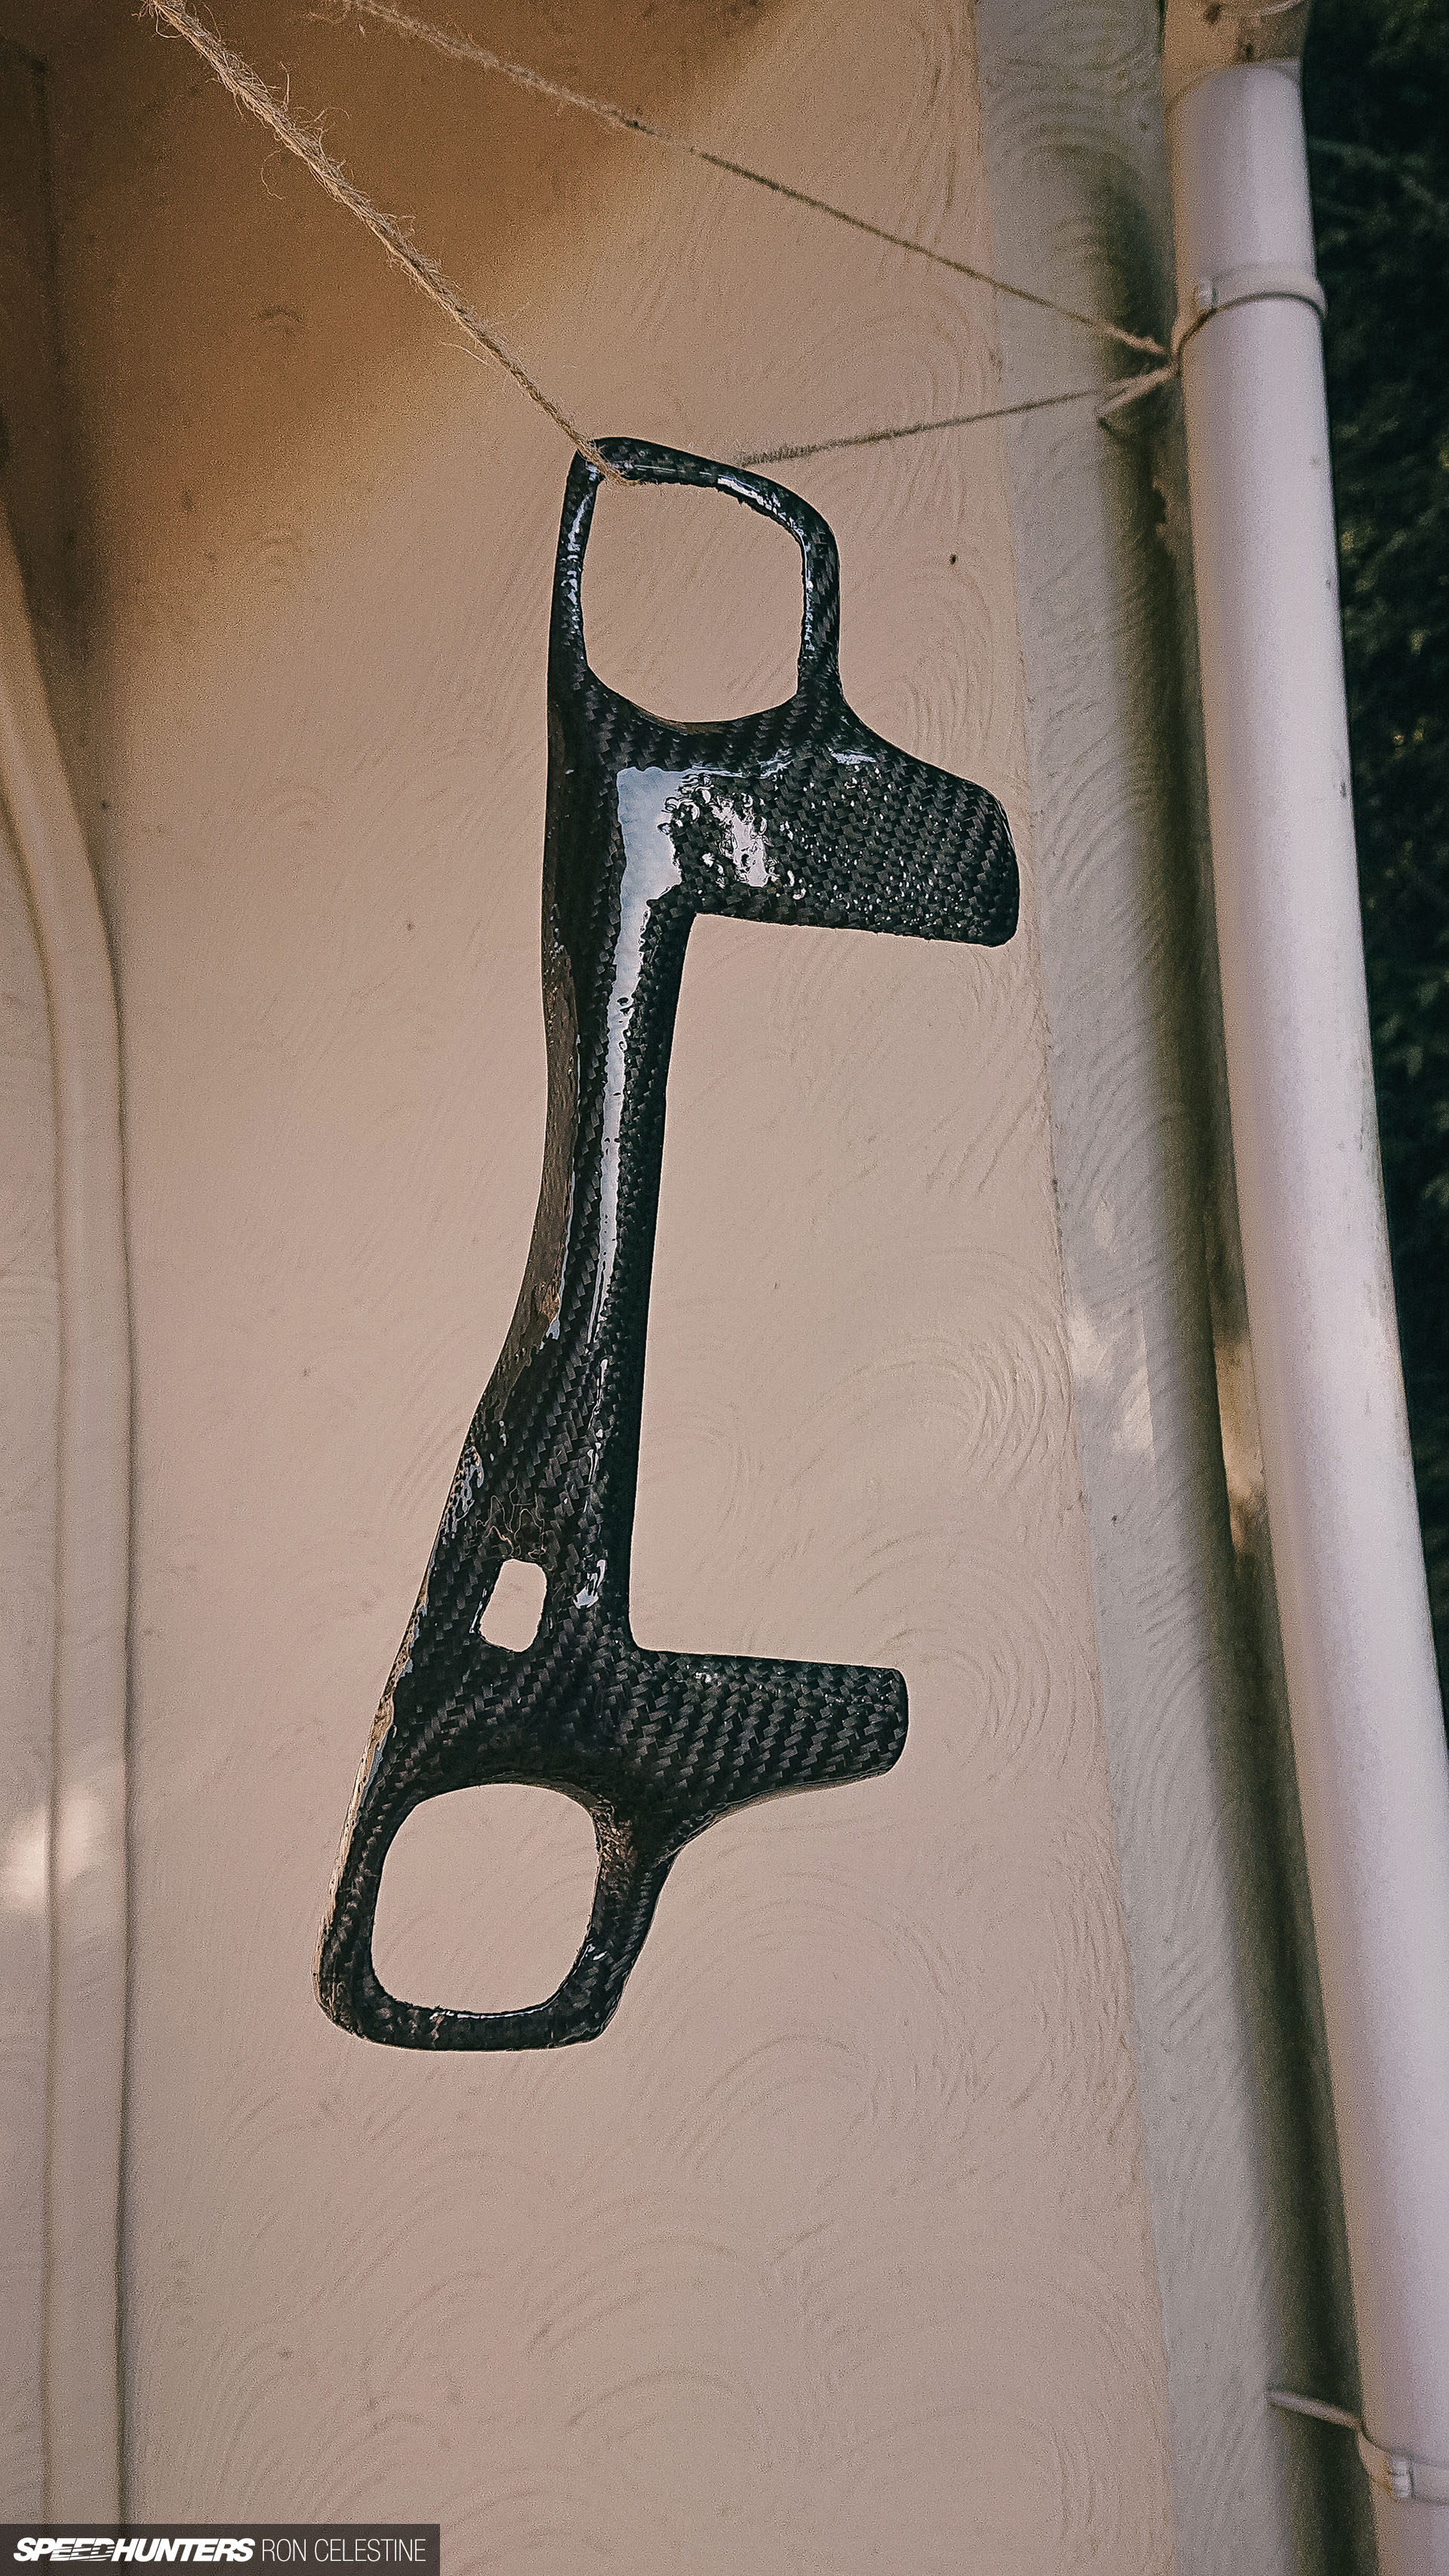
This time around, instead of simply skinning carbon over a fiberglass part, I wanted to try and use vacuum forming to make the part 100% carbon fiber. I’d never done this before, and would be attempting to do so in the most DIY of ways. This prototype would serve as a monumental learning project, and I definitely didn’t get it right with this version. For a bit of added fun, I’ll discuss how much I spent invested in the project in case you’re interested in setting something similar up for yourself.
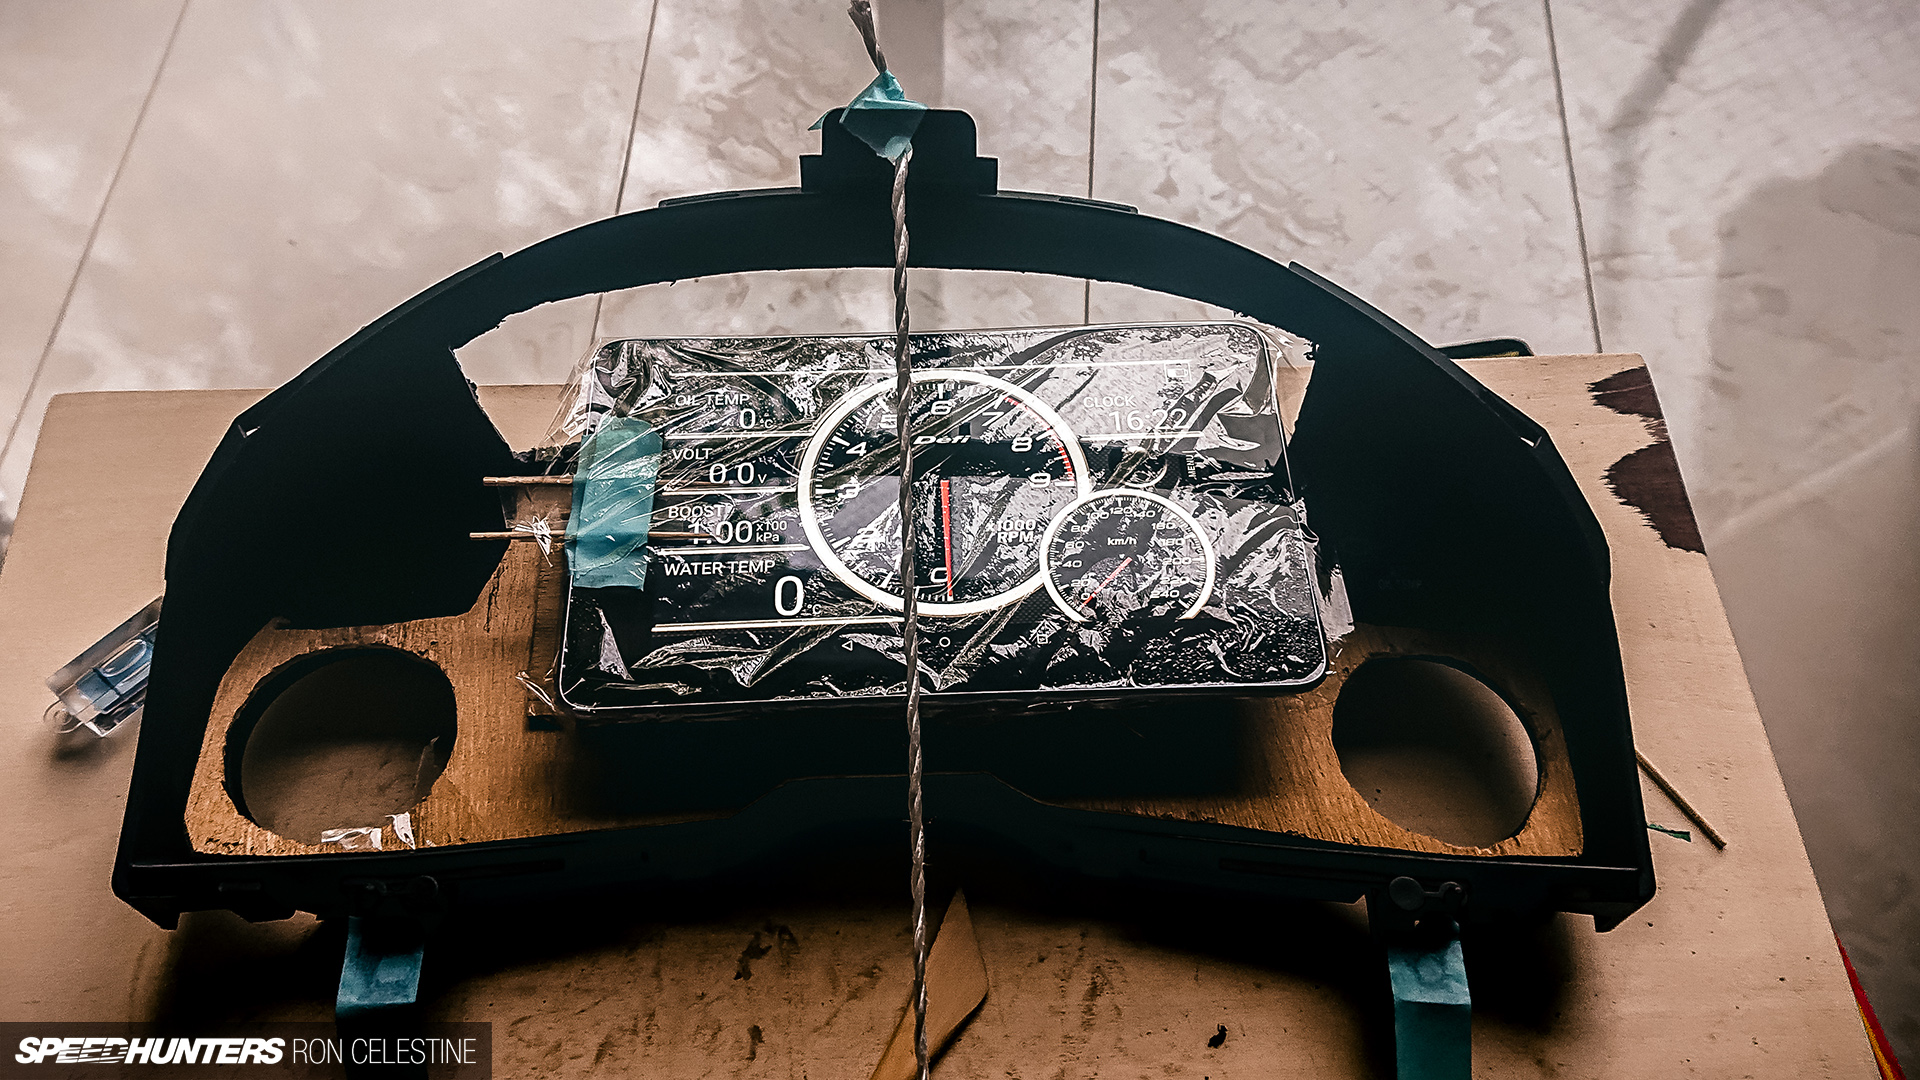
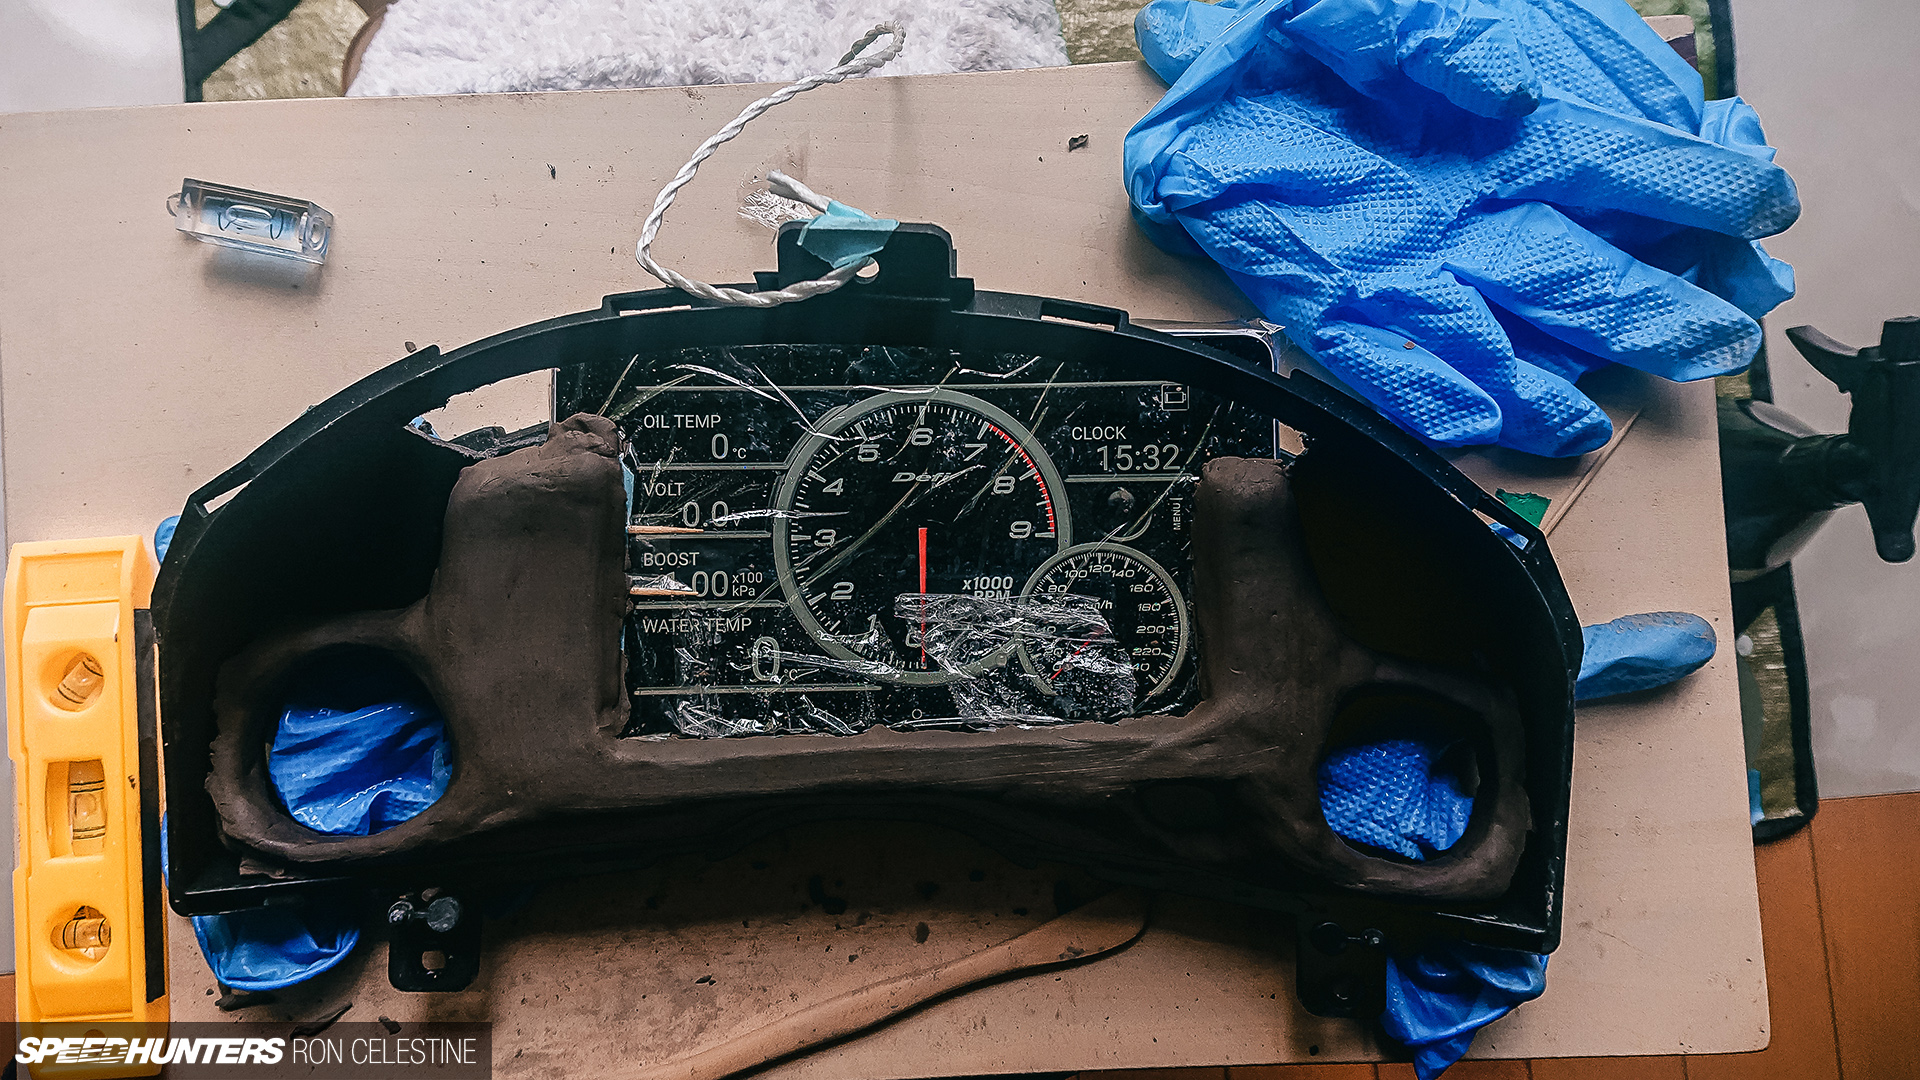
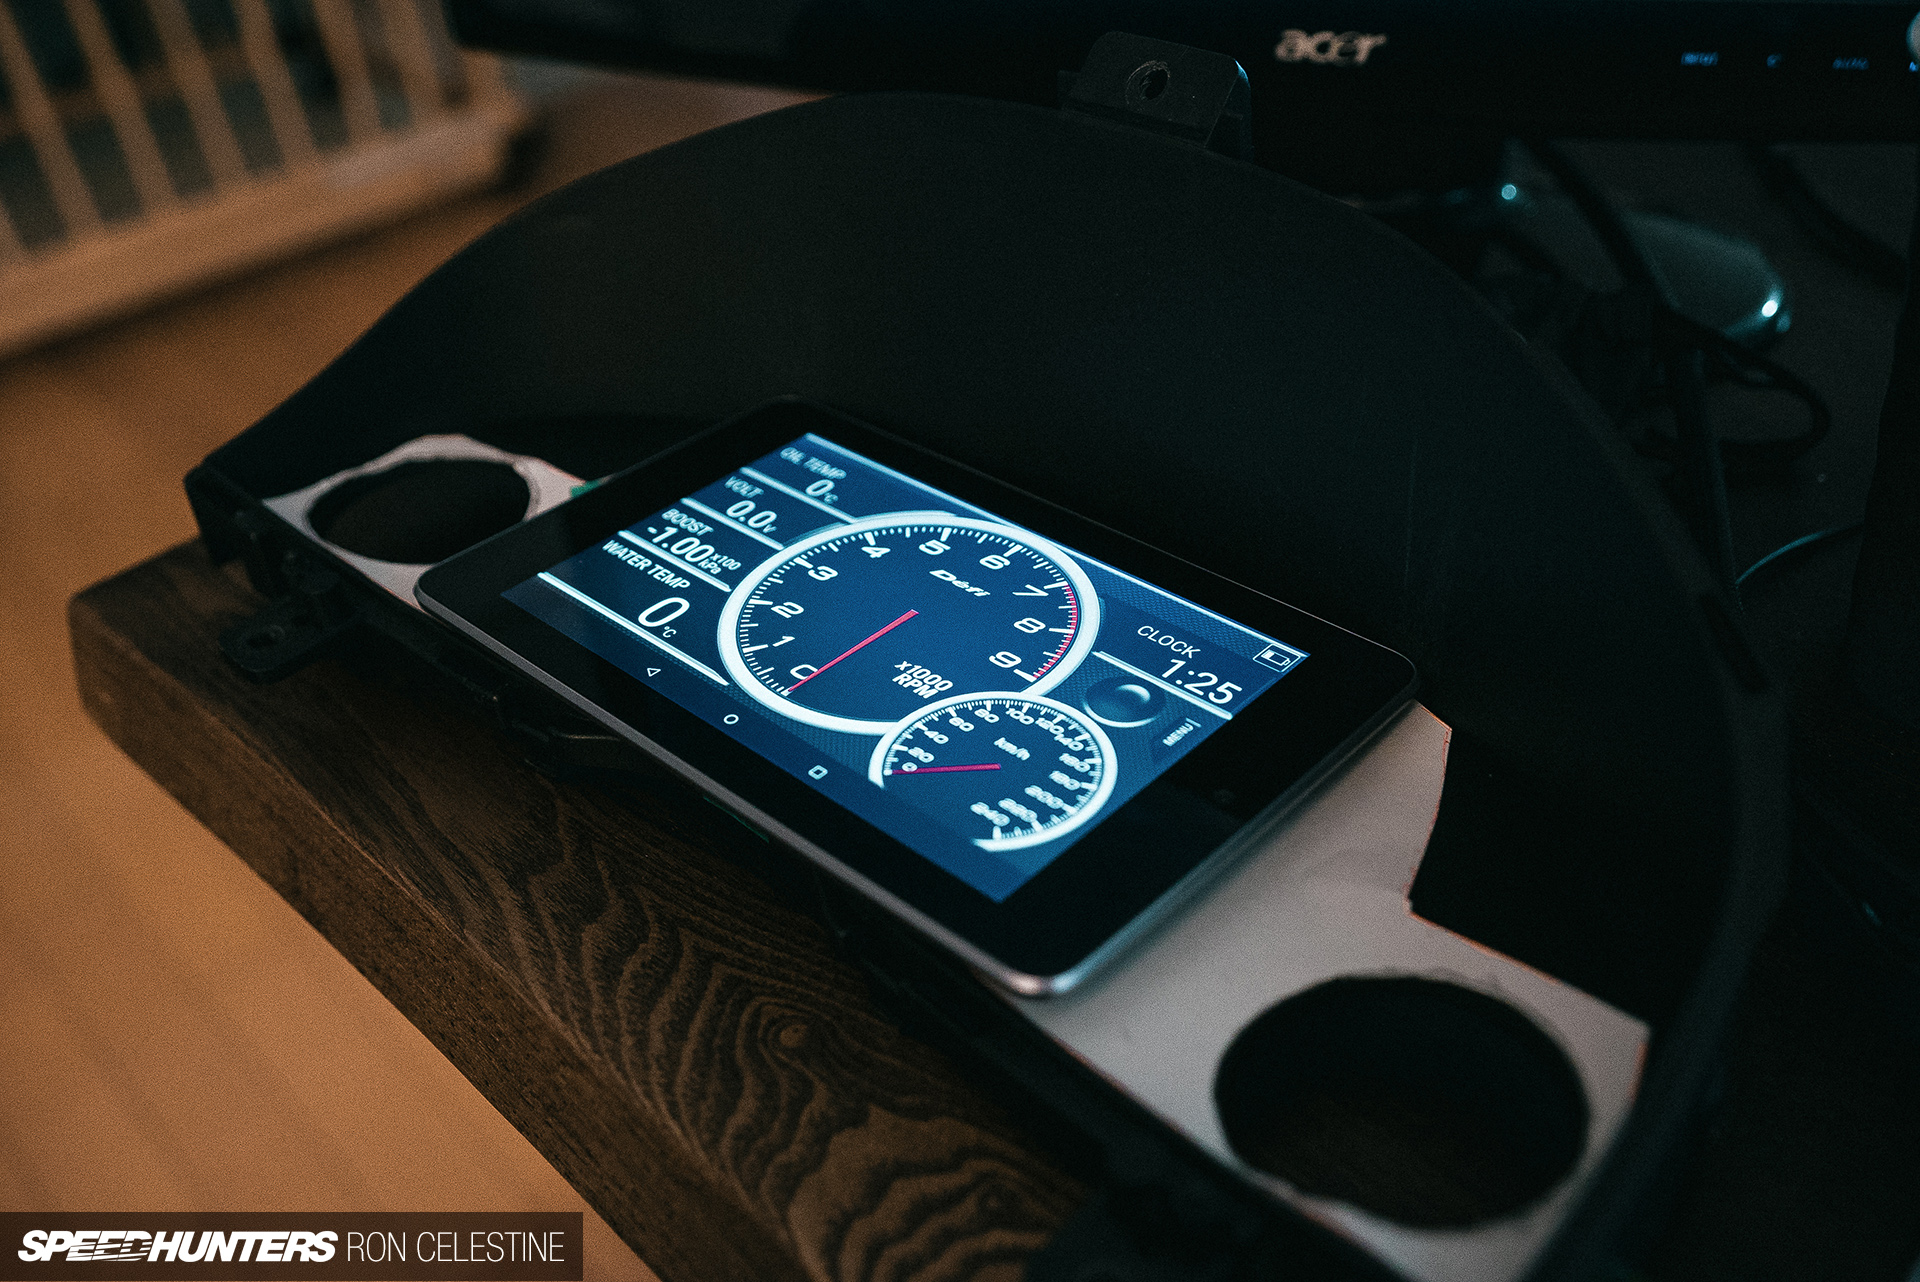
As with my other projects, I started off by positioning the tablet where I thought would be best, and then began clay modeling, making an extra space for a charging cable to snake behind without being visible. In hindsight, I should have positioned the tablet exactly where I needed it to be before cutting (measure many times, cut once…) for a cleaner look. I also shouldn’t have skimped on buying a used 2012 Nexus 7 Tablet (a mere ¥3,000 or US$28 at the secondhand shop) and bought a used 2013 version (¥7,000-¥9,000 or USD$65-$85) for its wireless charging feature. The clay is simple potters type that I paid ¥2,000 (USD$18) for 20kg at a home center last year.
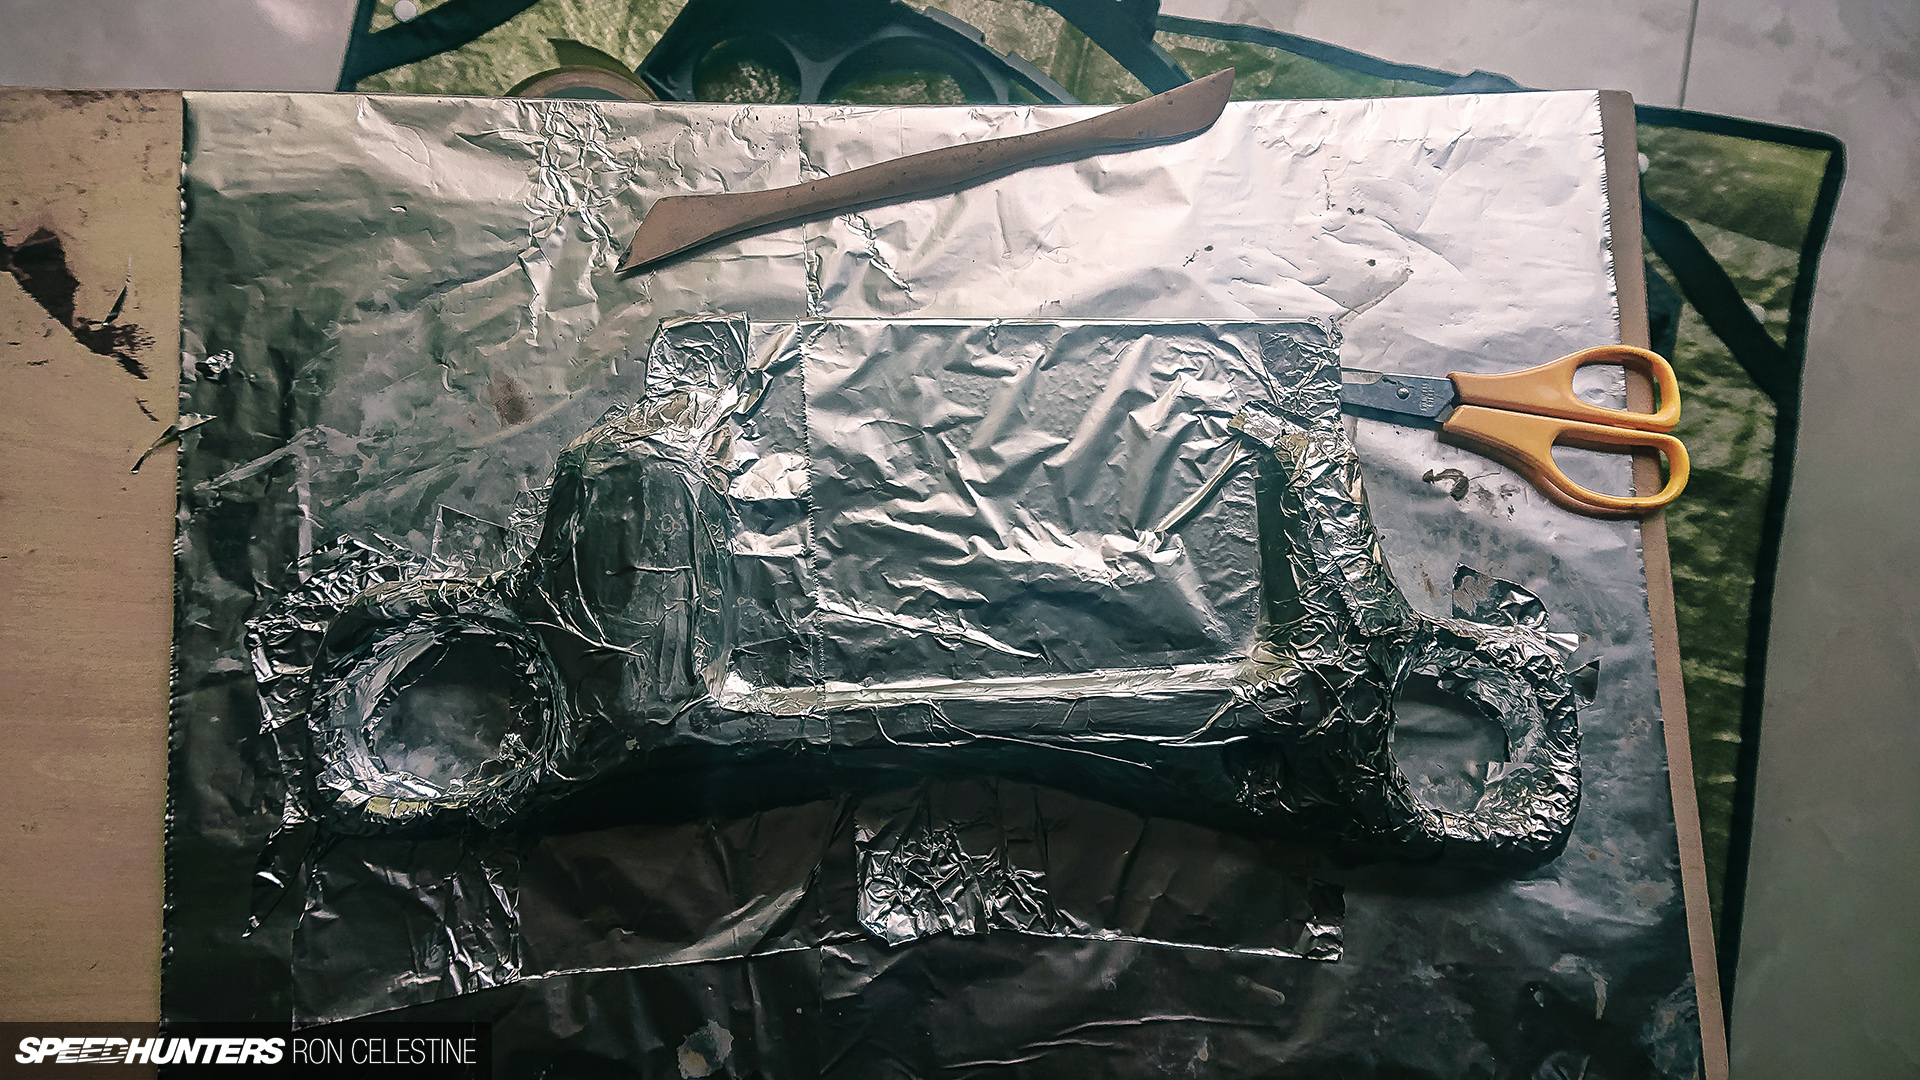
After the clay model was complete, I readied it for the carbon. These days you can get pretty much anything online, and that also goes for carbon fiber. I picked up one square meter of 3K carbon fiber material for a little under ¥7,000 (USD$65). Using only a male mold is a lot quicker and cheaper as you are saving all the time and effort required to make a female mold, but the trade off is a lot of backend work trying to massage and get everything right – which almost never happens.
When I make version two, I’ll spend the extra money and time making a proper female mold to try and get as close as possible to perfection. But for proving a concept – as I was doing here – the male mold is just fine.
A proper setup for vacuum forming can get rather costly, and for someone who really doesn’t know what they are doing – like me – DIY was the way to go.


For bagging, a one-way valve futon storage bag (¥500 or less than USD$5) is big enough for small parts, and the resin won’t stick to the plastic. For pulling the vacuum, I bought a used Dyson vacuum cleaner at the local secondhand shop for ¥2,500 (USD$23) and modified it so that it could only draw in air from its hose. This means that when the vacuum cannot suck in anymore air, it will automatically shut off due to the nature in which vacuum cleaners work, but thanks to the one-way valve of the bag, it’s not a problem. It should be noted that this method is not going to pull a complete vacuum like a pump would, but it will still give you mechanical leverage in compressing the fibers within the bag.
Best of all, it’s a very inexpensive way to practice and learn your way into the process if you’re a bit cash-strapped and can’t afford to buy professional equipment.
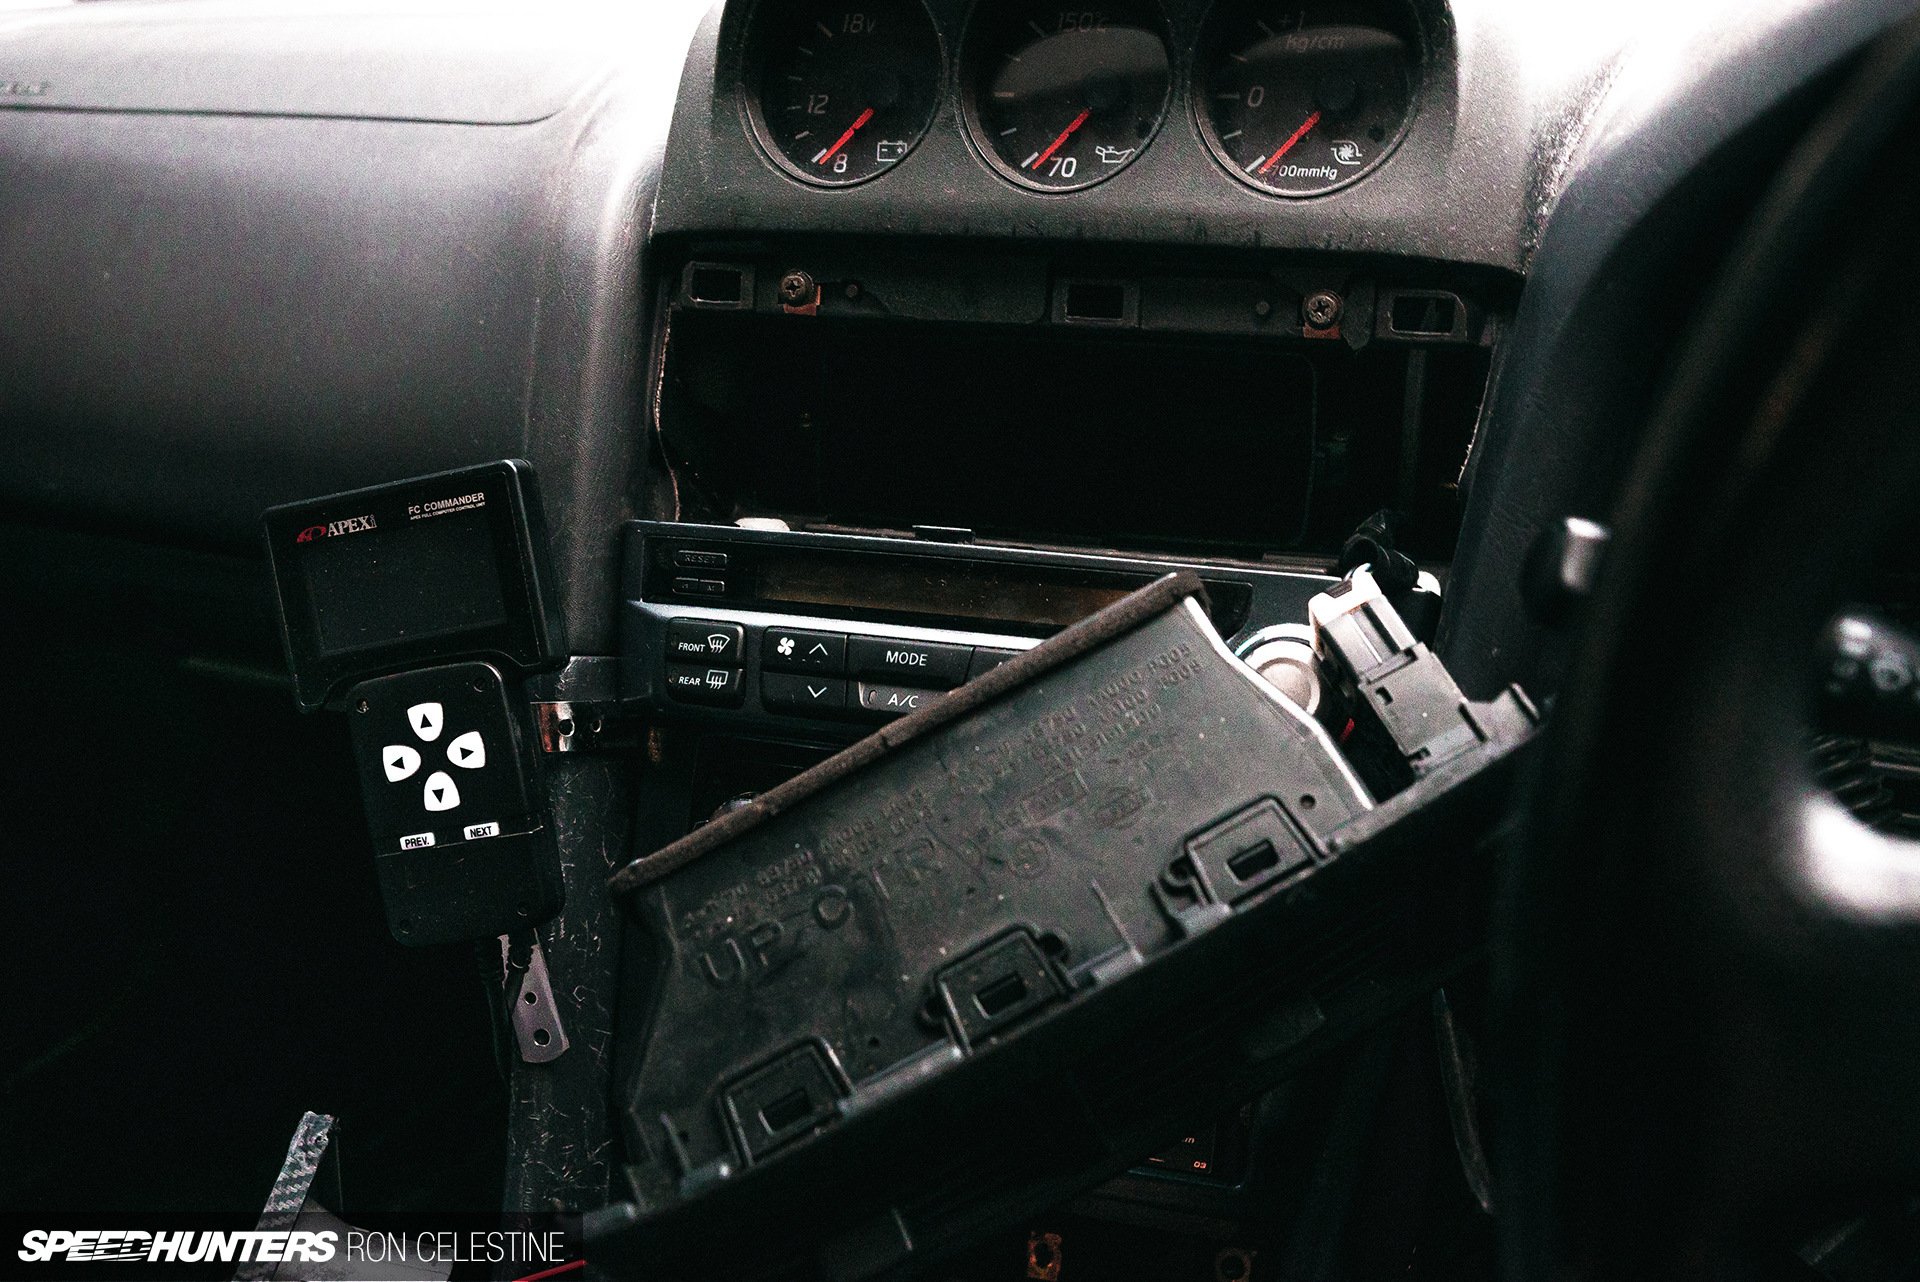
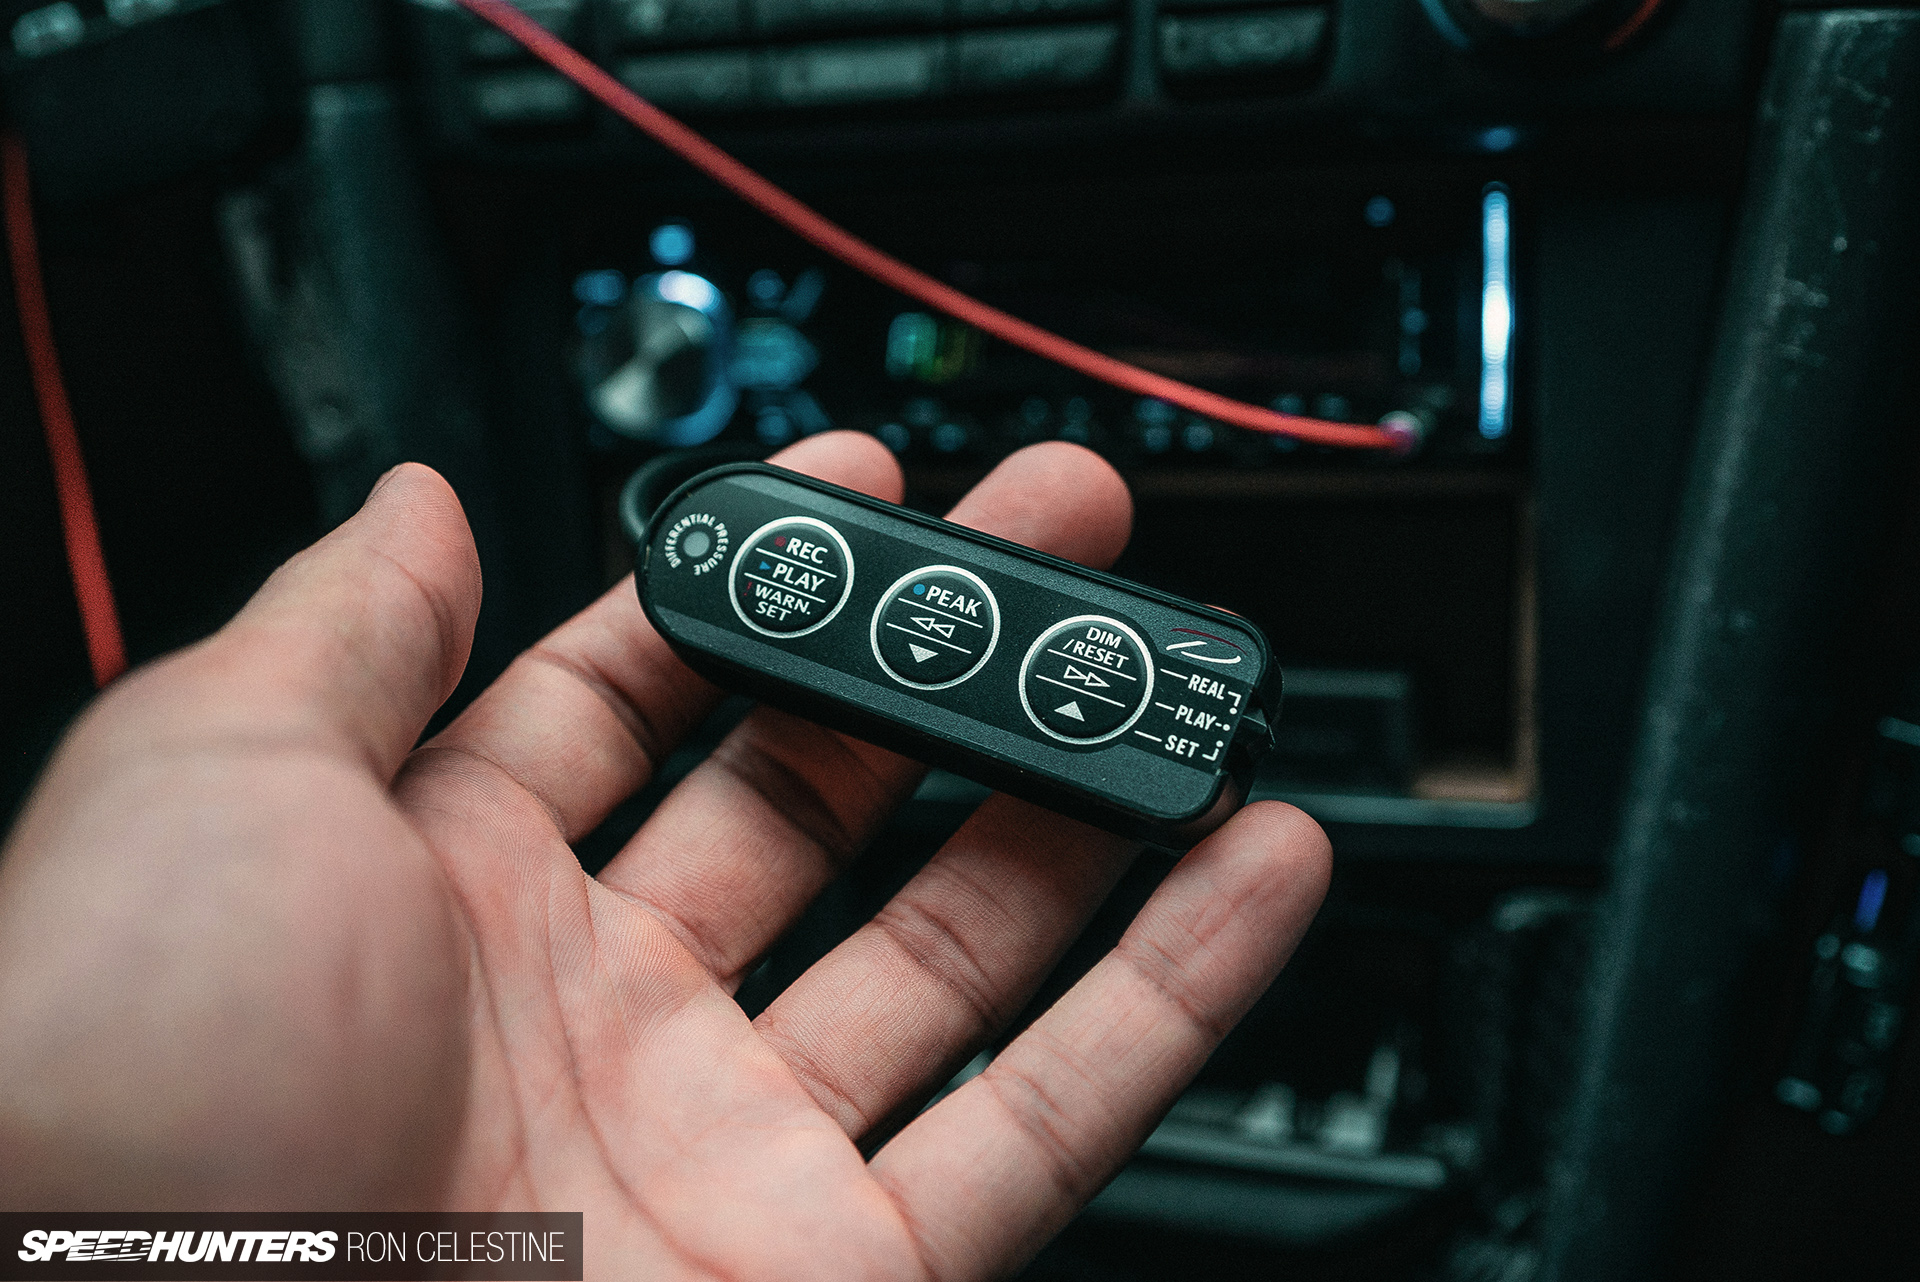
Once my cover was complete, it was time to work on the integration of the Defi system and programming the tablet itself. The Defi app is free to download from any app store, but the Advance Controller and Smart Adapter come in at ¥20,000 (US$185) for both.
Once again, thanks to the power of the internet (and Up Garage), I was able to get both for around ¥15,000 (USD$140). The integration is somewhat straightforward. Since I had already figured out what pin translated to what during my initial teardown of the meter, I simply tapped into the speedo and tachometer cables and connected them to the controller with Defi’s speedo and tacho cable (¥1,500 or USD$14).
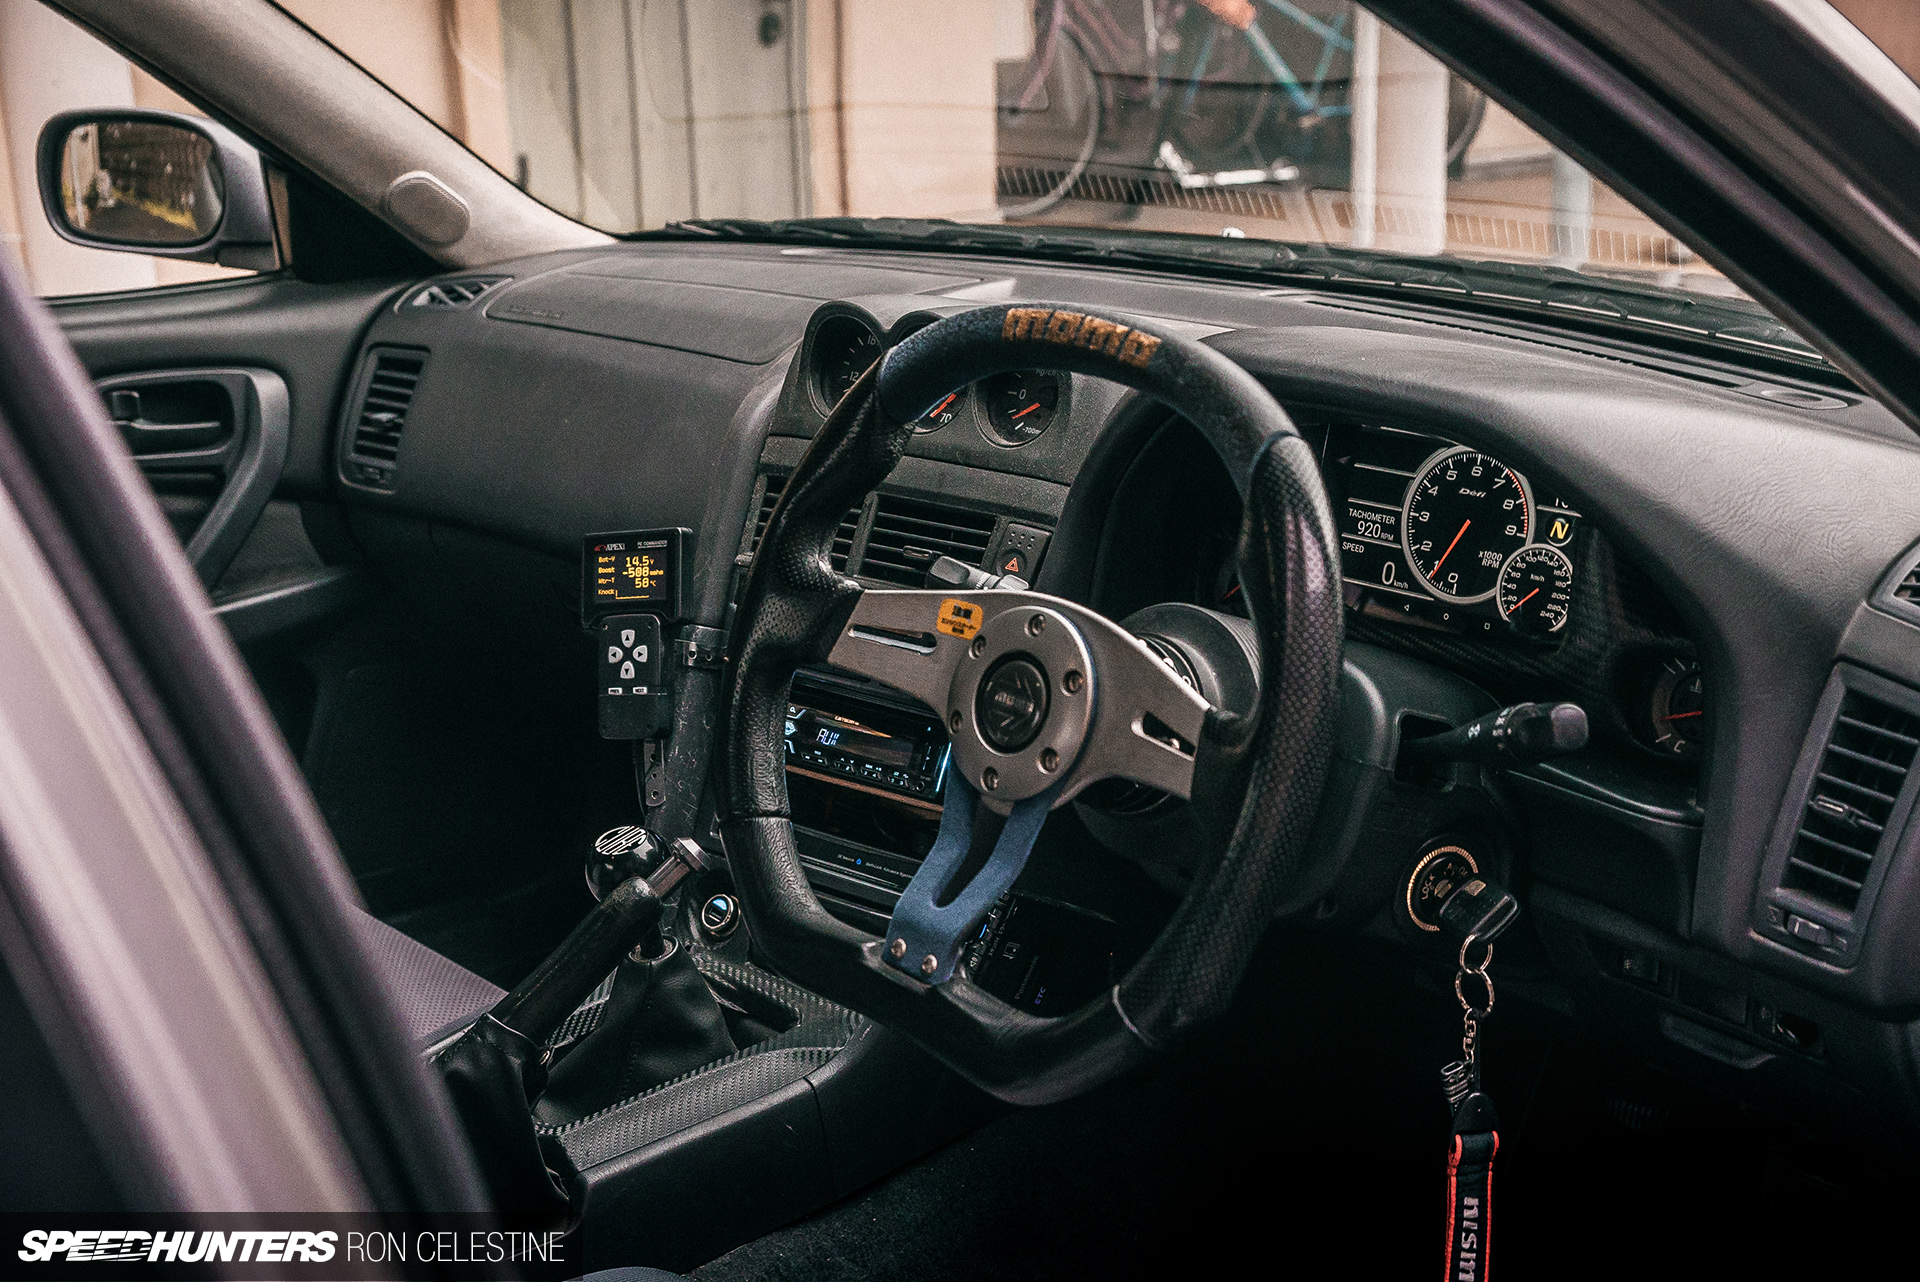

As I was aiming for a ‘modified stock’ appearance without any clutter, I hid the Bluetooth sender in the armrest compartment and made a wooden box to house the controller underneath the radio as the stock plastic opening isn’t wide enough. I’ll make a carbon version of this later on in version two of the cover.
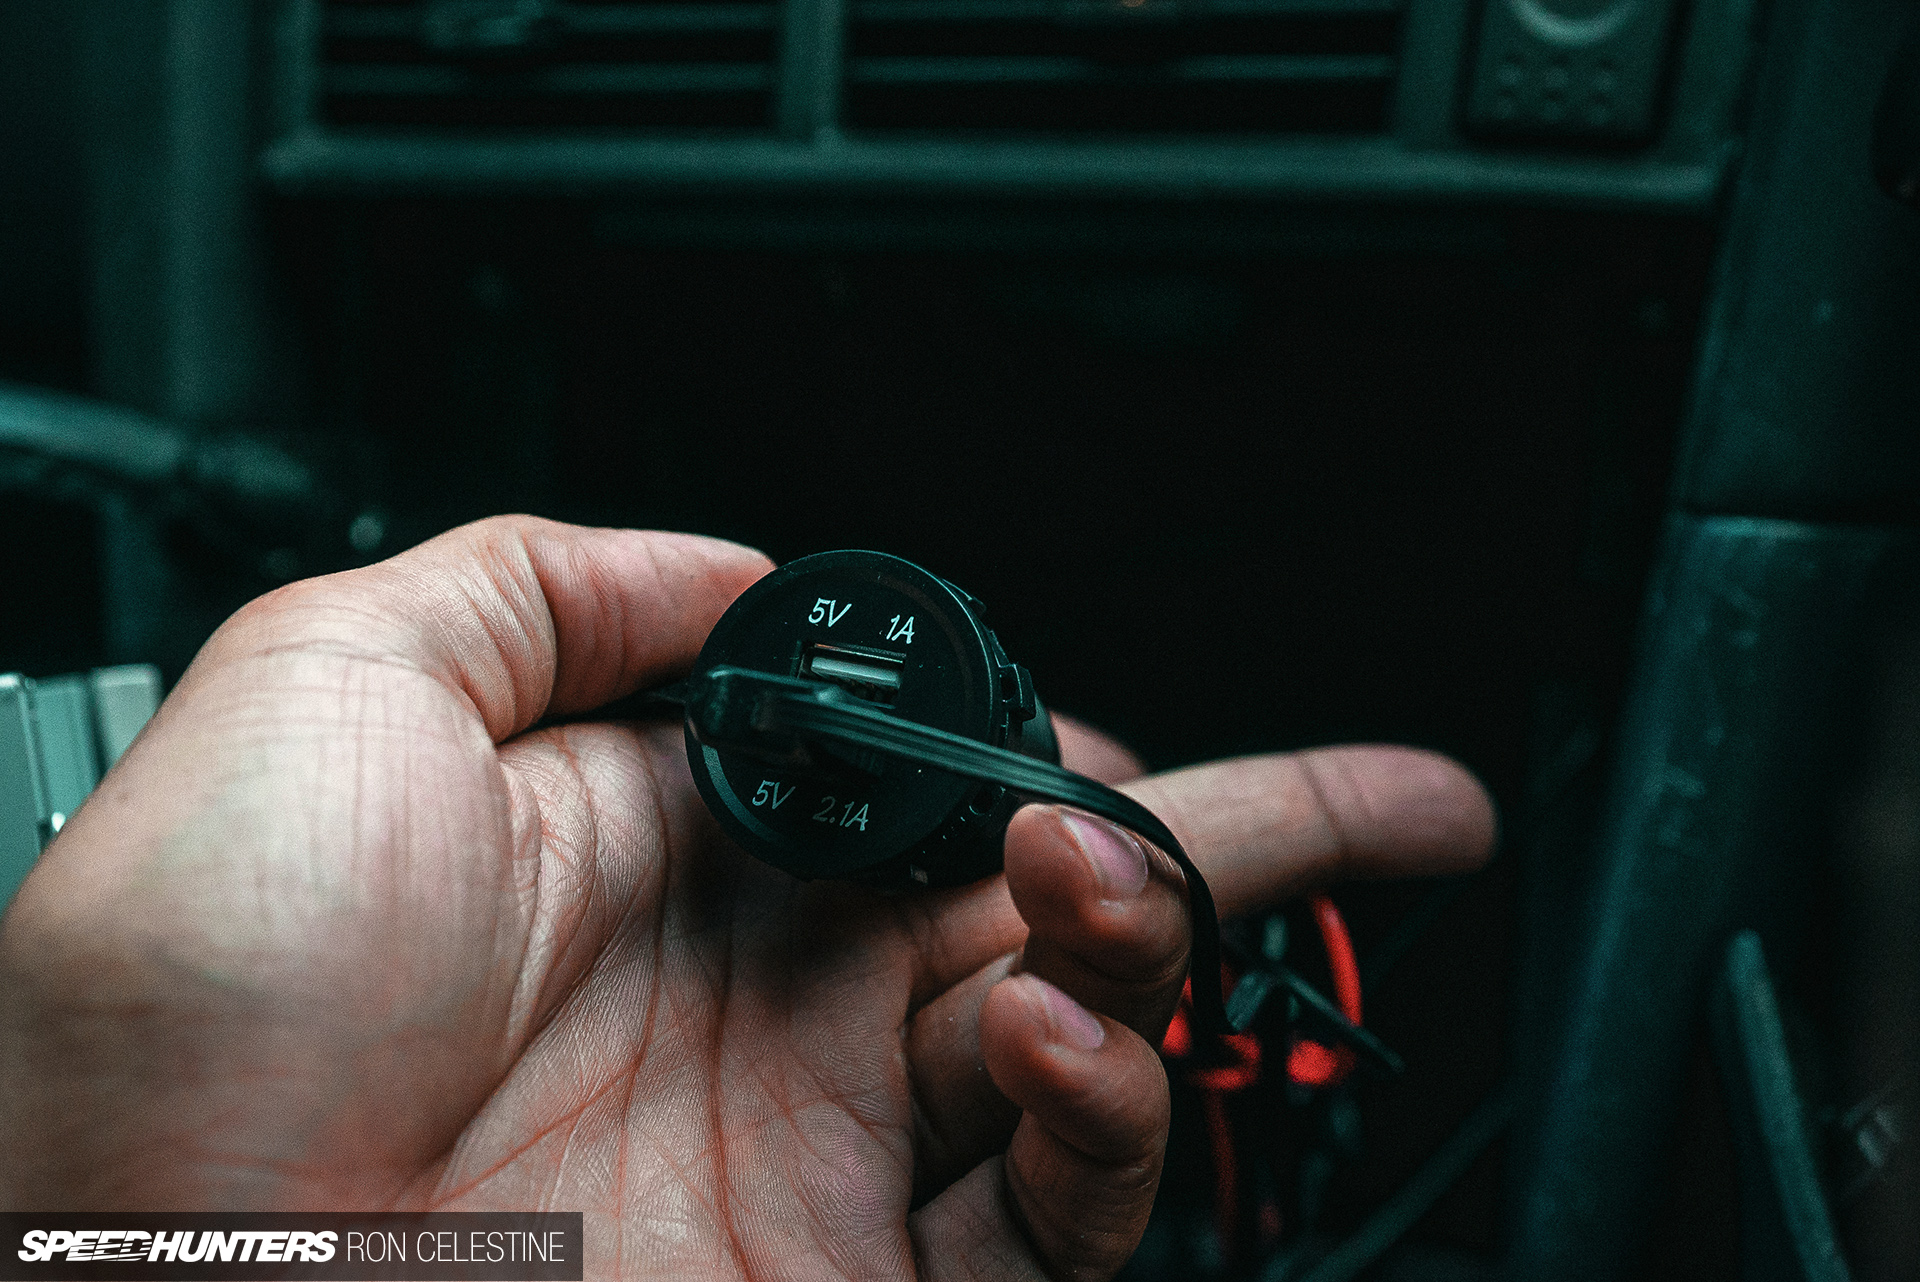
To power the tablet, I wired in another USB port (¥1,200 or US$11), and hid it behind the wooden box so I can simply plug the charging cable directly and not bother with splicing USB cables.
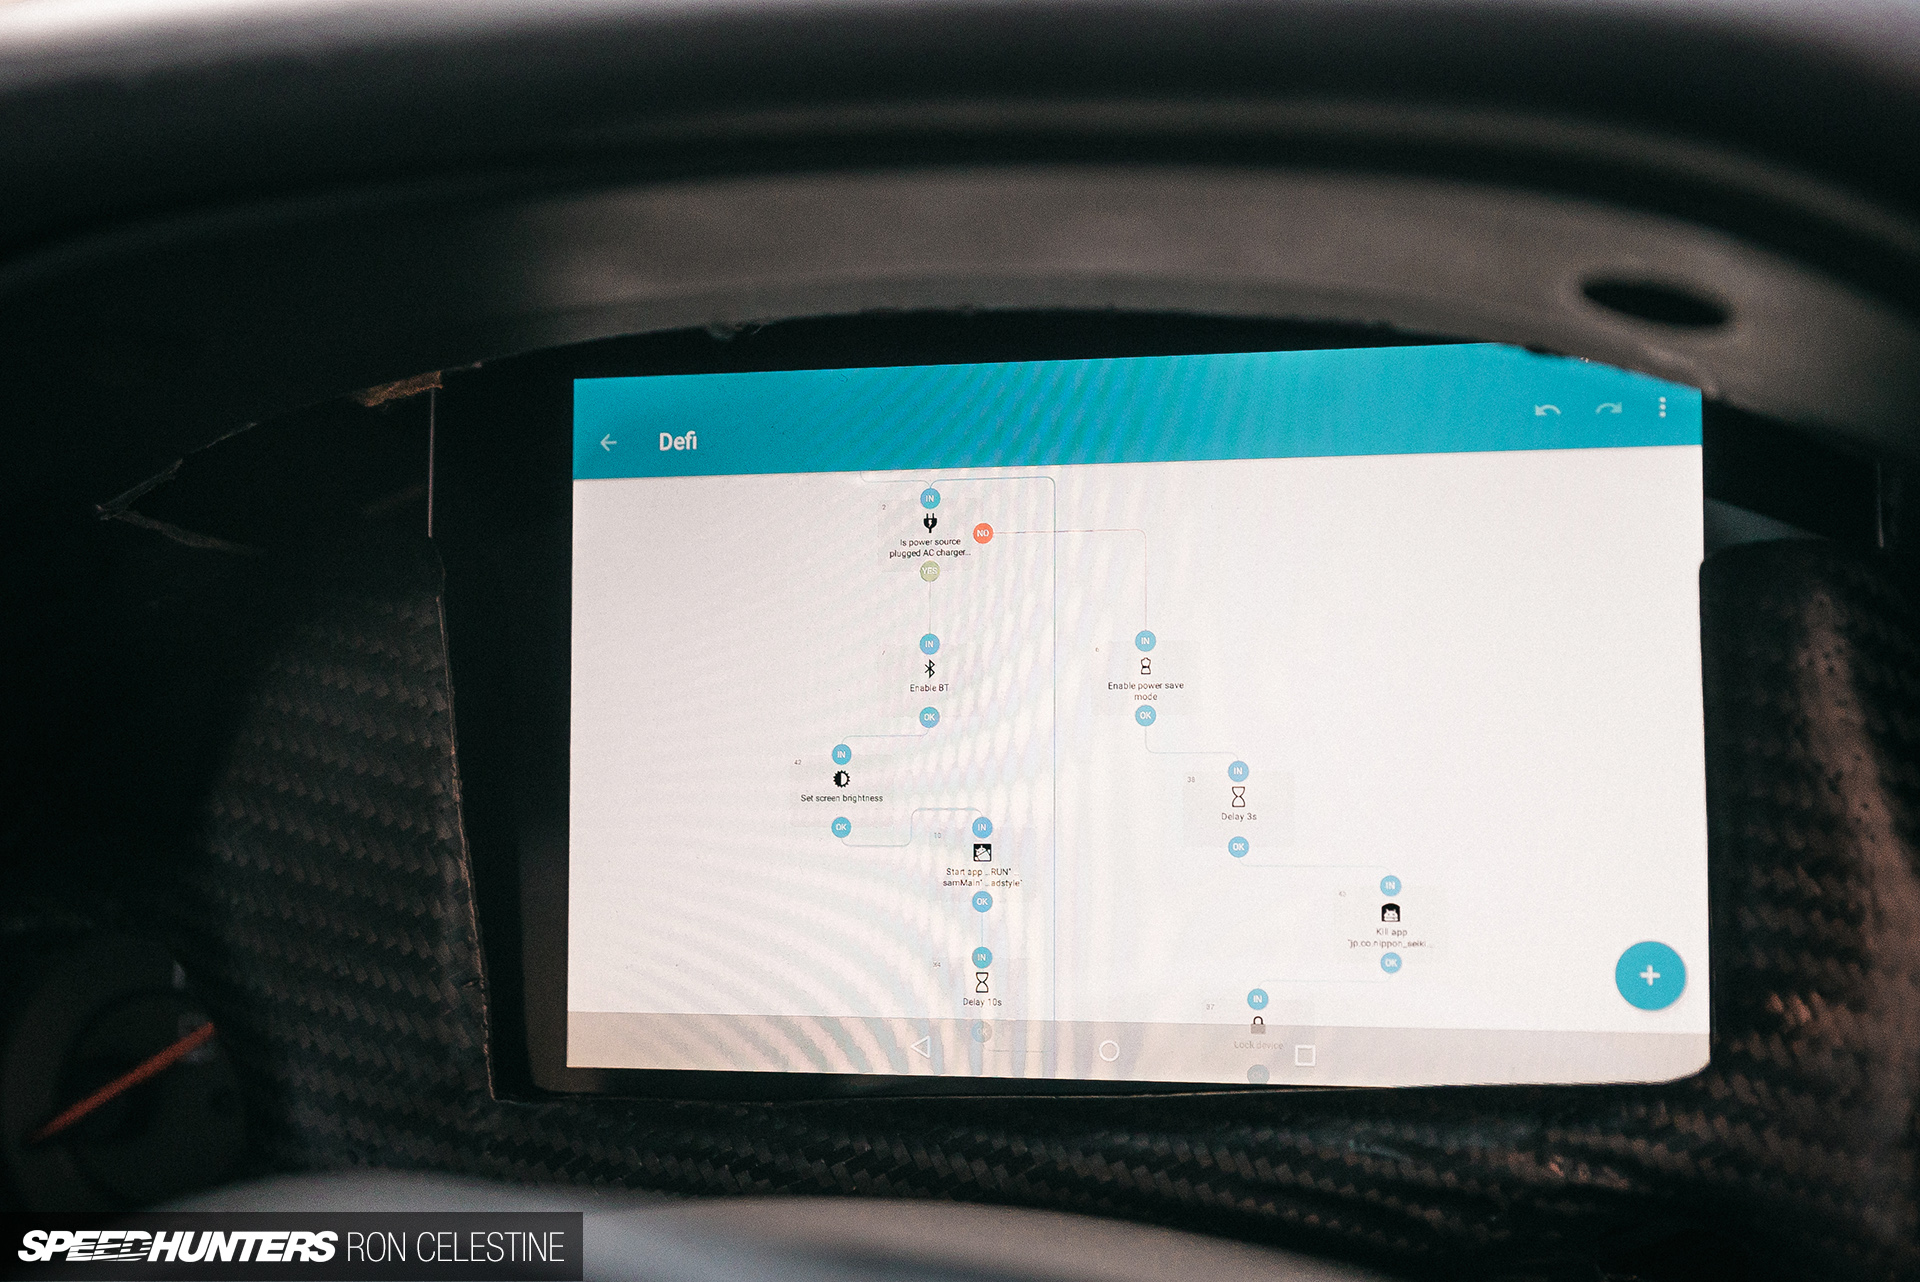
Perhaps the most tedious part of all of this was programming the tablet to turn off and on with the ignition. Of course, you could just press the power button, but where’s the challenge in that? Using a free program called Automate, I created a loop program that runs in the background of the tablet. If it senses that the tablet is being charged (turned on), it turns on the Bluetooth and opens up the Defi app. When the loop senses the tablet isn’t being charged anymore (i.e when it’s turned off), the program quits the Defi app, puts the tablet in power-save mode, and turns the screen off.

For the most part, everything is pretty much plug-and-play, however you do you have to set parameters into the controller to match your specific vehicle. The number of cylinders, speed pulse, and a few others things to ensure that the data being pulled from the ECU can be translated as accurately as possible to your device.
I’m still working on making it as efficient as possible, and with my current iteration of the program you could leave the tablet in over a week without charging and still be OK. The problem, which would be solved using a newer tablet, is the fact that when the car is on and the tablet is charging, the battery life remains at its current charge instead of charging. The Defi app doesn’t consume that much power and I’m not running any others, so there’s nothing else to drain the battery. I’m pretty confident a newer tablet would be able to run the app and charge at the same time, but for now, when the battery gets too low sitting, I charge the tablet overnight with an external battery.

And that is my prototype Defi Meter system. Hopefully this encourages you to go out and work on a little project. What else would you be interested in seeing made for Project Rough? I have tons of silly ideas on paper, but I’m always looking for inspiration, so let me know in the comments.
Ron Celestine
Instagram: celestinephotography
OFFICIAL SPEEDHUNTERS SUPPLIERS


Looking forward to seeing version 2.
Cheers ! Me too hahaha
I need to do this to my FD3S.
@ron Awesome write up! Could you share your Automate app settings? Would love to do this on my car.
Sure thing. What would be the best way to do so? The current version now you have to swipe to unlock the screen but it boots the app and no issues with Bluetooth connection ^^ and thank you!
If you are willing to root your Nexus device (not that difficult, it is probably the best supported tablet around, check the XDA developers forums), that would open up a lot more options. Including special android versions for in-car use.
That's exactly what I had to do with my Nexus. I didn't check out the developer form tho so I'll take a look at that!
Awesome work with the compo. moulding. It can always be a hassle for the first few times, great work tho
Thank you! Yah it's been whipping my ass the first few plays with frp and carbon but it's a lot of fun !
Awesome Ron, cool DIY stuff right there!
Appreciate it!!
thanks for sharing this im looking to do the same in my lancia big help , keep up the good work
No problem! Glad I could help!
Excellent work mate, looks great
Hey Ron,

Thanks for the article, as always! I am trying to find if this system is compatible with my cars but I am having trouble finding this information. This is quite a technical question but I am having trouble finding this information.
My old Japanese car uses an OBD protocol called ISO-9141, much like your skyline however your ECU is no longer the stock Nissan ECU; as you mentioned in a previous post it was upgraded to a ’PEXi Power FC.
I know Defi’s website says the device compatible with ISO-CAN standardisations however there are many variants of this protocol. I would like to know if the pre can protocol ISO-9141 which most Japanese cars used until the mid-2000’s works with this system. In addition I would like to know if the CAN compatible standard KWP2000 developed by VAG to be compatible with both ISO-9141 and CAN work.
I have looked on the Defi website however I can't find any information that relates to compatible protocols. As you must have checked your own compatibility can you advise how you were able to verify the system would work on your ECU and possibly if the protocols listed above are compatible?
Stay frosty
Thanks!! Ooohh that is pretty technical questions and I'm honestly not sure the specific. I can ask around and see if I can get an answer within Defi perhaps but unfortunately I can't make any promises I'll get anything
Thanks Ron, if you have a contact at Defi then it would definitely help. Just ask them if their product is CAN BUS only or if it supports K-line. That will give me the verification I need.
Where can I learn to make things out of carbon fiber? This sounds like a great hobby to learn during the winter.
Not that related to automotive stuff, but I would check out Mike Pateys youtube channel. He is making a borderline rediculous plane with carbon everything.
Very educational as he brings you trough the complete process of mold making, laying the layers and vacuuming it.
Was going to say this as well haha. There are tons of videos online of people going in depth with their processes. Also, unless you're doing it indoors, resins don't really like cold weather as it can have a dramatic effect on the chemical reaction between the expoy and hardener.
If u can handle some device repair, remove the battery from the tablet. As a guy that repairs devices, the battery can get really bloated under the sun/heat/whatever. If u wanna retain the battery, maybe stick a heatsink on the back of the tablet, even better run a small fan blowing directly to the back of it.
Ya I was wondering about that part my self as a few people asked me about the heat in being in the car. Both a heat sink / removing the battery is a good idea. As of now, I only have it elevated a little so air can circulate but how much air is really getting there I haven't a clue
I really enjoyed this - I've been looking at digital dashes lately and this looks a really interesting/far less arm-and-a-leggy than a stand-alone unit.
WOW this is awesome.
My project Sentra B13 also has no working Speedometer. It would be a miracle if I get to pull out and run this kind of set up on that but It would be a very nice upgrade. Thou a greddy external rpm gauge will be enough for me. hhahaha
Mako Motorsport sells custom bolt in dash moulds fyi. I wasn't keen on making one to suit to suit my Haltech IC7. Looks mint
In the days before carbon fiber (or at least when the cost was prohibitive,) we used to do similar projects using vacuum form machines. My school had a large enough one that we could form templates from wood to make splitters and lips, radio bezels and gauge pods. Turned out great!
Ron, I love your work! this is so inspiring to see you jumping in and making improvements to every asepct of your car!
Really motivating me to jump in and start pushing the boundaries of my skill vs imagination! Looking forward to seeing the next installment
1 A is not enough to run and charge your tablet, try 2.1 A.
Great work!...now you can't run this setup in Australia is this correct?
Guys, you are serious? Carbon, defi not budget solutions and this ?!
I'm not much of a R34 guy, but project rough really connects with me. You're living my DIY, JDM dream. Lookin' forward to keepin' up with this!
ver más en fontaneros urgentes en sevilla https://haquiestoy.com
looking great! I've had thoughts about doing something like this as well. I have to ask though, did this require 20kg of clay? Seems like an awful lot.