When you’re making good progress, building a project car can be very rewarding. But for every quick job that gives instant gratification, there many more painfully slow ones that often leave you feeling like you’re getting nowhere. It’s probably the reason why many extensive builds are abandoned by their owners long before they’re finished. Although I’ve been moving forward with my AE86 project, over the last few weeks I’ve felt like I was going backwards, but it didn’t bother me. In fact, it felt good.

Regardless of whether you start with a car that cost you a few hundred bucks, or one that ran into the tens of thousands, ground-up rebuilds are rarely cheap exercises. I went into this ‘modified restoration’ with a ‘do it once, do it right’ mantra, and although I could have spent a whole lot more money than I have, I know that I’m going to be satisfied with the ultimate outcome. And even more so now, knowing that every last square centimeter of the bodywork has been seen to.

I never really planned to do anything with the underside of the Trueno, except to give it a waterblast and replace anything that needed it or could be improved with a performance part – within road car reason of course. But the more I peered beneath it, the more it became apparent that I had to do something about it. I’m not talking about a mirror-worthy show finish here, but a simple tidy up in keeping with the rest of the build.

Although I knew the underside was in good structural condition and not in need of any repairs, the surface rust on the diff/axle housing and suspension components, and dried mud everywhere else wasn’t a nice look. Cleaning it up quickly became a must.

Armed with Scotch-Brite and an air-gun I spent many hours in uncomfortable positions eating dust and grit, but it soon became apparent that if I wanted to get everywhere I needed to drop the rear end right out. With the shocks already removed, it was a pretty straightforward procedure – four bolts per side for the upper and lower trailing arms (the four-link), two bolts for the sway bar, and one bolt for the panhard/lateral rod. Plus one brake line clip.

It’s going to be so much nicer putting this back in once it’s all cleaned up and painted.

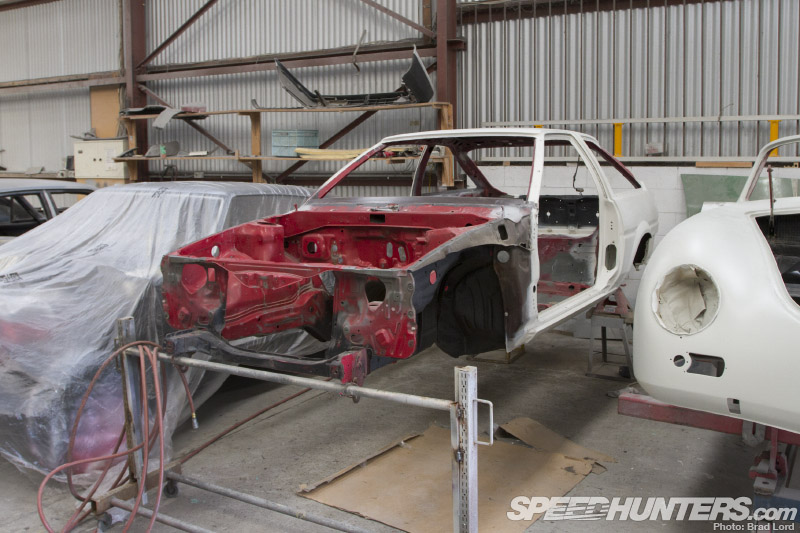
The front crossmember and suspension assembly was removed just as quickly too, and at his point the project officially became a nut and bolt rebuild. I’m quite happy about that, because now there can be absolutely no question marks hanging over any part of the bodywork – outside, inside or underneath.

The next job on the list was to get both front and rear assemblies stripped down so I could clean it all up properly.

As you can see here, being GT Apex spec the Trueno was originally fitted with power steering, although prior to me purchasing the car the greater system had been removed and the hose fittings in the rack plugged up with a couple of bolts. Since I have a complete kit somewhere in my garage, I initially thought about refitting a factory system, but I’ve been convinced otherwise. We’ll retain the power steering knuckles (which are shorter than their equivalents from an AE86 with manual steering), and combine those with a manual rack for a more performance orientated set-up. More on that modification during the rebuild stage.

Although I originally bought the car sight unseen, I was told by the previous owner that the steering and suspension had urethane bushes fitted throughout. Technically yes, but I don’t think bushes that look like this will help the cause much! These will all need to be replaced, of course.

Spanners and sockets pretty much took care of everything, except for the tie-rods which were quickly dealt with thanks to the aid of a splitter.

The two engine mounts visually appeared to be in good condition, but while there’s no engine in the way I think I’ll upgrade these to aftermarket Cusco mounts. They’re manufactured from a firmer rubber and are also a little shorter in height, so the 4A-GE will sit slighter lower in the bay.

Pretty soon the front end was reduced to individual parts.

The same went for the rear end, which I then dragged outside and hit with the water blaster. I had thought that a clean and a quick rub with Scotch-Brite would be all that it would need to prepare all the metal parts going back under the car for paint.

But after the mud came off everything actually looked worse. To save me a bit of time I’ve decided to send it all to the sandblaster so that the surfaces can be taken care of properly. When it all comes back we’ll spray all these parts with a smooth black epoxy, which should protect them for many years to come – not to mention look a whole lot better.

Some of the parts I pulled out won’t be going back in, though. The panhard rod/lateral bar is one of them. As the car is being lowered the rear axle will need to be re-centred, which is where an adjustable unit like the RS-R bar comes in. The spherical rod ends (aka rose joints) will allow us to adjust the bar’s length and square up the rear end perfectly. An easy fix!

A couple of days later I returned to the shop and was pleasantly surprised to find that I wouldn’t need to spend a couple more hours lying on the cold concrete floor and spraying on underseal – it had already been done for me! The are a few schools of thought when it comes to underbody protection and pros and cons for each, but in the end we settled on a bitumen/rubber coating that has good corrosion and stone chip resistance, and will also provide a layer of much-needed sound deadening.

I just like the fact that it’s providing a nice, clean surface to work under for when I’m bolting everything back up. There’s still some epoxy primer to spray on the underside of the roof and around the interior, but with the exterior panels now just one final block-down away from being ready to paint, we’re so close to turning a big corner with this project – and it can’t come soon enough.

There aren’t too many more parts I need to buy for the Trueno, but scouring Yahoo Auctions Japan always turns up something. Although there was nothing really wrong with the original headlights, since every other lens is being replaced with a new item, it seemed wrong not to update those too. The glass Raybrig ‘Hyper Halogen’ units that recently turned up are a bit bluer than I thought they would be, but I think they’ll look alright.

While I was digging through some of my interior stuff I found something I had long forgotten about. When Keiichi Tsuchiya visited New Zealand back in 2006 I got him to sign this glove box lid for me. This will definitely be going in, and will hopefully take some of the attention away from the gaudy-cool burnt red/brown dashboard, door panels and trim. Ah, the ’80s!

Before I wrap this post up I’m going to ask for your opinion – if you have one – on wheel size for the AE86. In the back of my mind I had always thought I’d fit 15-inch wheels to the Trueno, but I can’t help but think that 14-inch is a much better visual fit. I’ve always had the latter on previous Levins, and although you are far more limited in tyre size – especially with wider rims – the smaller diameter seems much more appropriate given the age of the car. Let’s not forget that the TRD N2 race cars ran on 13s! I won’t be using either of the wheels pictured above on this car, but if it was up to you what would be your choice for size, and make/model too for that matter?
Brad Lord
brad@speedhunters.com
Project AE86 on Speedhunters
More project car stories on Speedhunters


how about 14's up front and 15's in the rear?
I run 14's on my ae86, the fatter rubber just suits it so nice, especially on watanabe wheels, which is what I hope you are going to use
Well, whatever yo'ure doing, you have to start from somewhere and not everybody can be expected to be packing expert refurbishments on their first job! As long as you're moving in the right direction and you stay dedicated, it'll pay off in the end!