
Hello Speedhunters! It’s been a little while since our late update of the DMac86 but we have been very busy re-engineering the chassis for improved performance in 2012. So let’s get straight to it …
As I touched on in the previous post we have a new bulkhead and transmission tunnel installed this year due to a change in the Prodrift rule book, and our new Saenz sequential gearbox. In the image above, you can see an opening on the right hand side for the dry sump oil lines to run into the car and the placement for the brake and clutch fluid reservoirs for the OBP Motorsport floor mounted pedalbox. One more detail is the hole for the steering column which was a bit of a challenge to keep as simple as possible, without too many UV joints and to also clear the turbo and wastegate placement. We recessed the opening and the UV joint now runs inside the tube welded to the bulkhead.
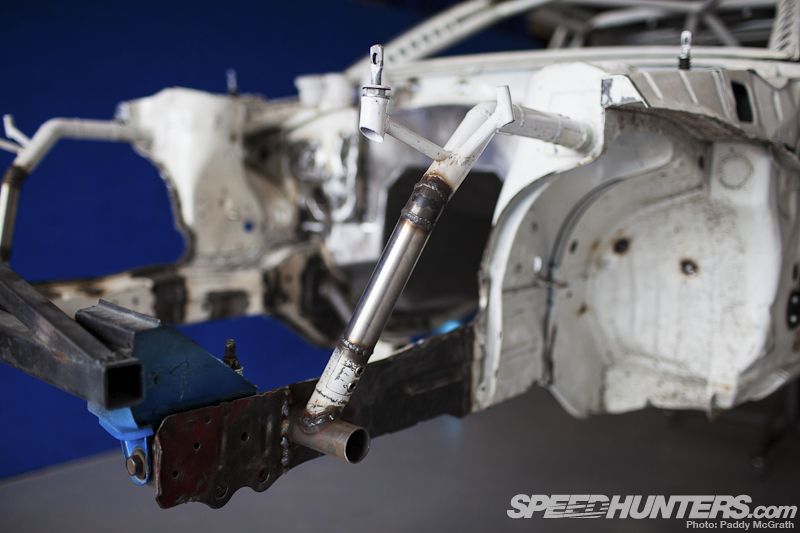
Another change we had to make for the new Prodrift rule book was to add the two front frame rails or chassis legs. You may remember we had tubed the front of the car last year as it was the easiest solution for us (I had previously damaged the front of the car) but it needed two rails to be legal again.
The stock radiator support has not been used and we simply slid a tube through both rails and welded it in, this tube now mounts the tension rod brackets. Our radiator is in the rear so it made things a little easier for us.
We also had to modify the tubes that hold the front fenders and the hood pins. Once the car comes off our spit we will chop the front of the rails off and make things a little neater
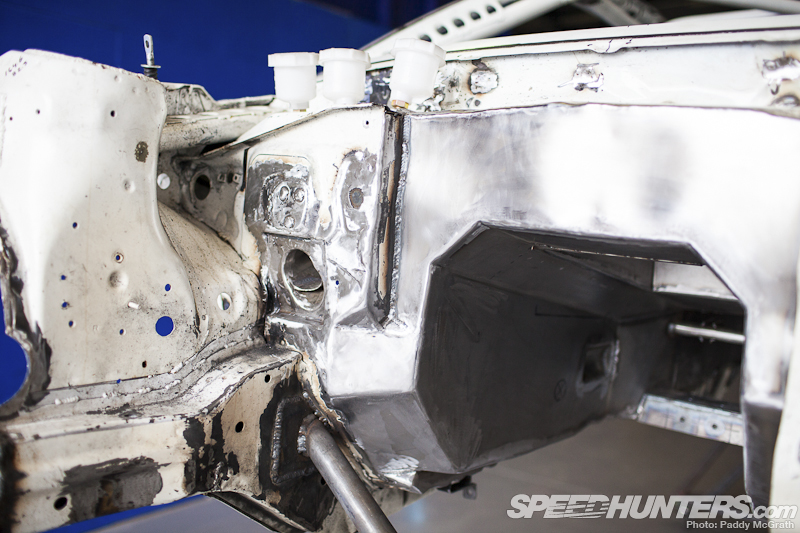
We have had a little more time this year to spend on the fabrication so we have blended a lot of the welds to make things look nicer. Paddy’s amazing camera makes it look like we have chromed everything!
You can see down along the tunnel in this picture, and the crossmember that the gearbox bolts to is now part of the chassis and runs from sill to sill (rocker). You can also see a one inch tube welded across the tunnel which is used as the pivot for the sequential gear lever. We’ll take a look at these later in more detail…
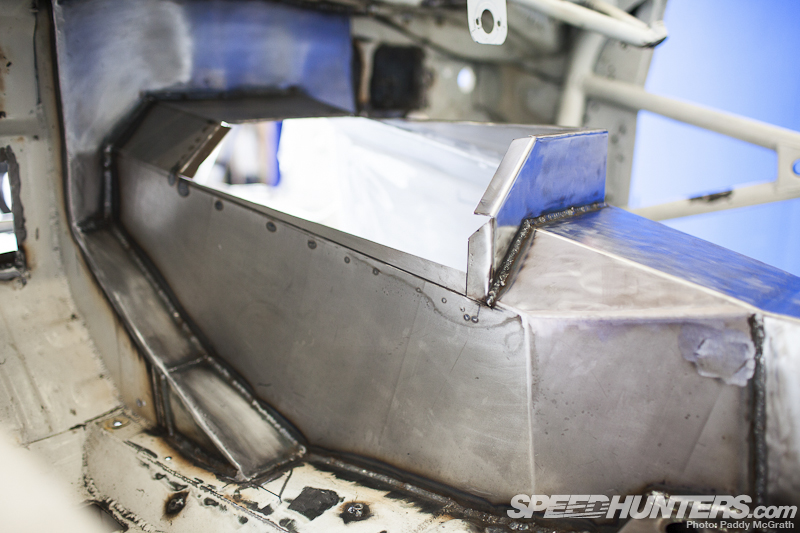
Because the engine and gearbox are solid mounted in this car, and as far back as possible, removing the gearbox requires removal of the engine so we decided to make a removable cover for the Saenz Sequential selector which sits on top of the gearbox. This should allow for quick and easy adjustment and inspection.
The rod from the gear lever to the selector will run through the rear facing panel, all will become clearer in the next update.
The old exhaust tunnel on the passenger side (RHD) is now being used for the revised coolant lines that run both through the cockpit and under the car.
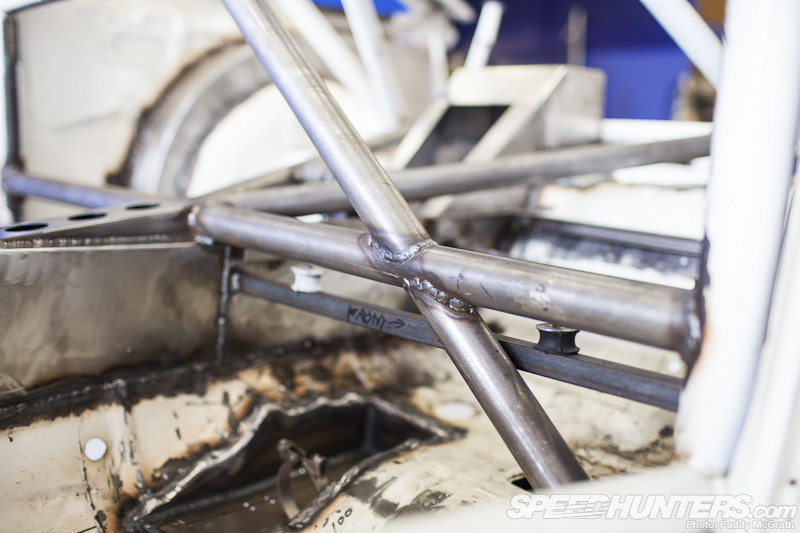
A lot of tube work has gone into the interior of the car. We have completely revised the third link mount and added a diagonal bar to the main hoop as well as the new driveshaft tunnel and diff tunnel. The fuel cell has had some modifications and has been placed lower in the car.
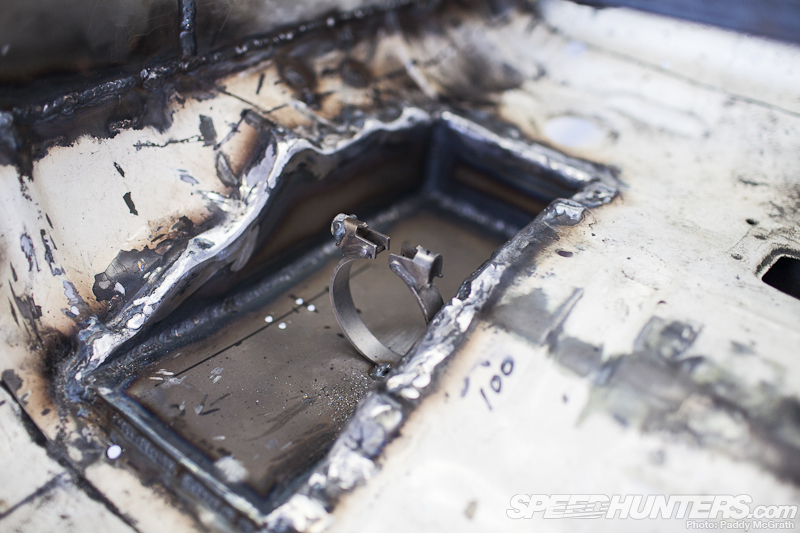
We have boxed the floor under the fuel cell which allows for the in tank swirl pot to protrude from the bottom of the tank and provide the pick up for the filter and pump which also mount in here, the clamp here is for the fuel pump.
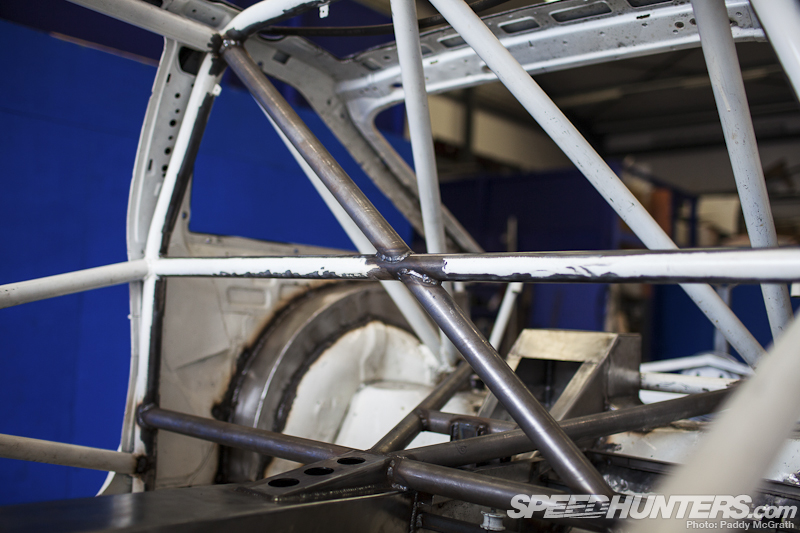
Here’s a better look at the added tubes to the roll cage and the new third link mounting arrangement. You can also see the “top hat” as i like to call it over the diff which allows the third link axle mount to move inside the body of the car
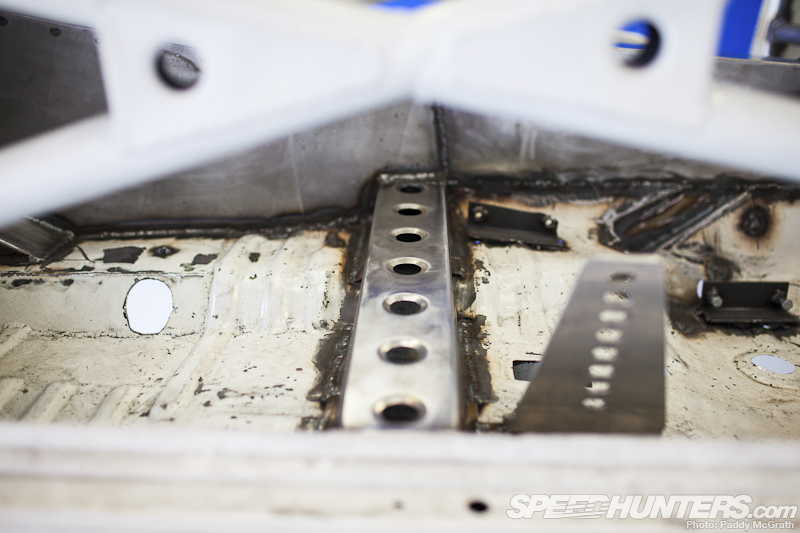
Here’s a closer look at the new seat crossmembers that now form a full channel across the chassis along with the added gearbox member
The recess at an angle on the right hand side is where one of the coolant pipes re-enters the interior and the hole in the floor on the left is where the second coolant pipe exits the interior. The coolant pipes have been separated this year to prevent heat soak.
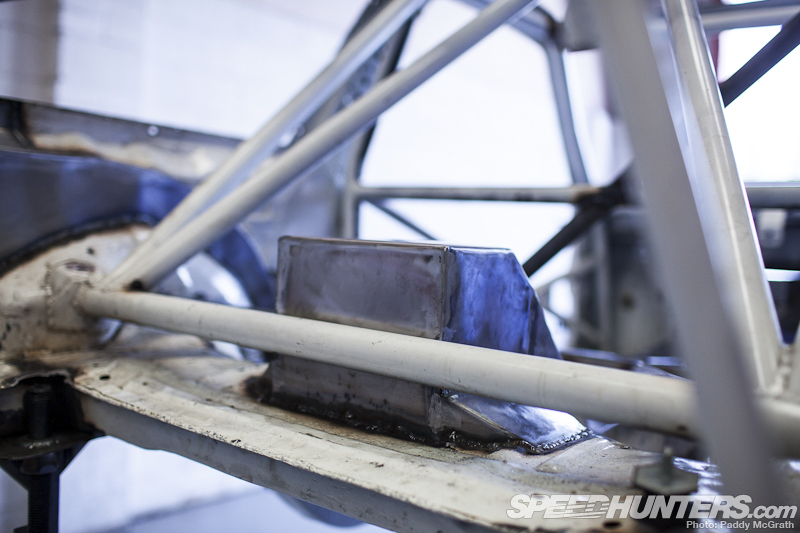
Here is a better look at the rear “top hat” for the third link axle mount. We were in the middle of blending it when Paddy arrived. I was a little tired of all the lumps of Falken Tire ending up inside in the rear section of the car last year as well as dust and dirt. The rear of the car is not very accessible with the rear mounted rad so cleaning it is a pain. The revised tunnelling for 2012 should keep a lot more debris out and keep our lovely ’86 nice and clean.
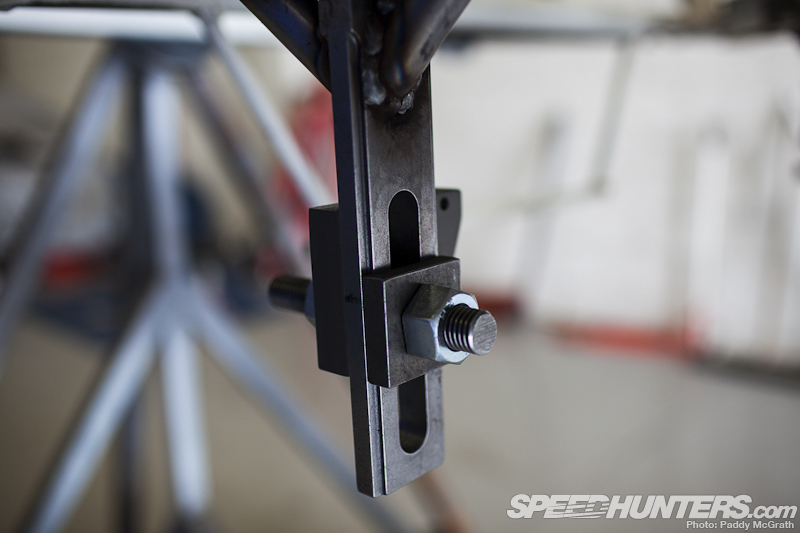
On one of my trips to North Carolina, I picked up these NASCAR adjustable track bar mounts. I’m sure you all have seen the NASCAR guys during the pit stops winding a wrench at the rear window, well this is what they are turning some of the time. This will allow me to adjust my rear roll centre easily. More will become clear on this in our next update.
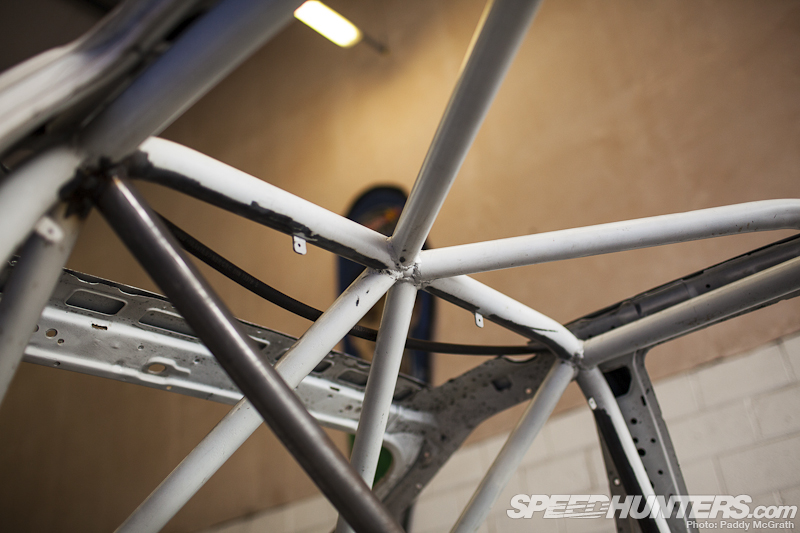
The car is heading for paint this week. Paint is always a big milestone in any build as the reassembly starts after paint, so it’s a real turning point. All this will be getting a fresh coat and won’t be white this time…
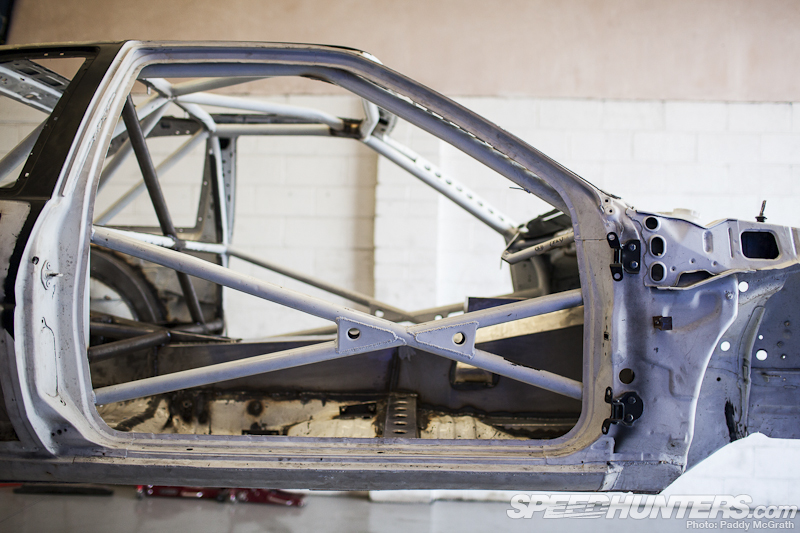
I’m really happy with the car this time around. At the moment there is nothing I would change with the chassis, everything is how I want it and I expect the performance to really increase because of it. To say I’m excited to drive this once again is an understatement!
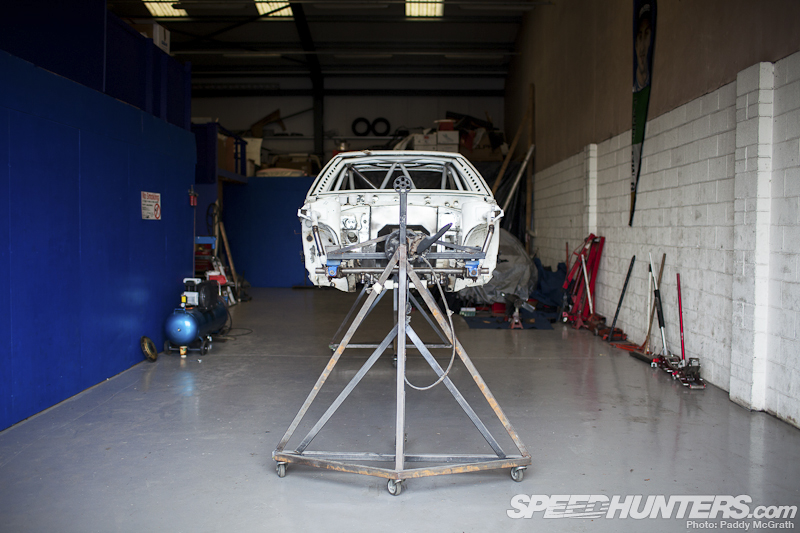
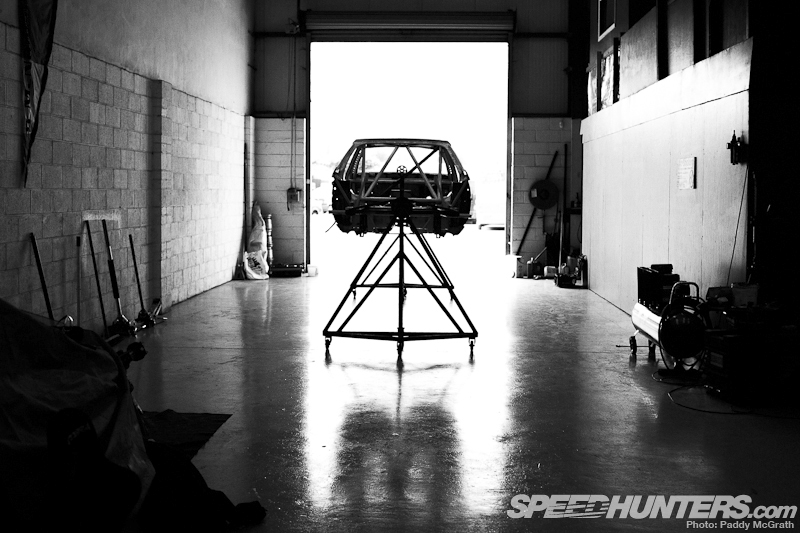
Here you can see my homemade spit that me and a friend made a few years ago. We welded on brakes from a Toyota Starlet and an e-brake so we could hold the chassis at any position. I’s not pretty but it does the job perfectly and building a chassis without it would be impossible. Its had some pretty awesome AE86s on it here at MCNSPORT.
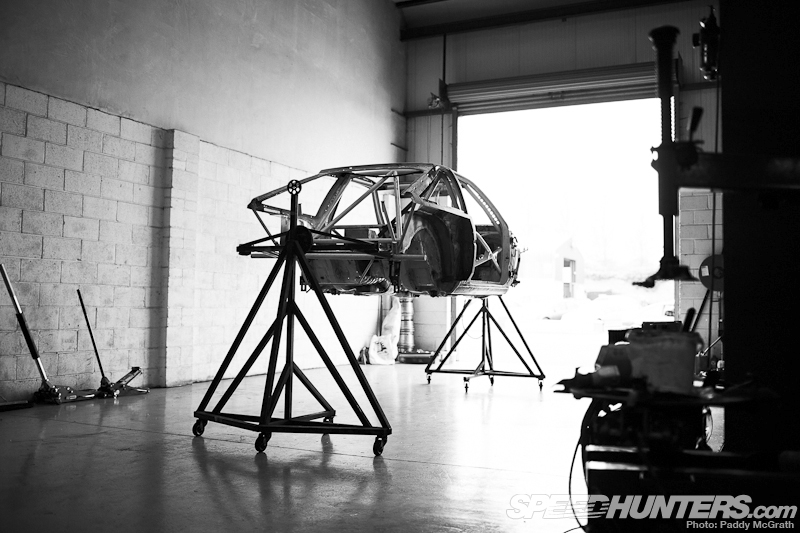
I love this shot, it reminds me of one of the walkers from Star Wars!
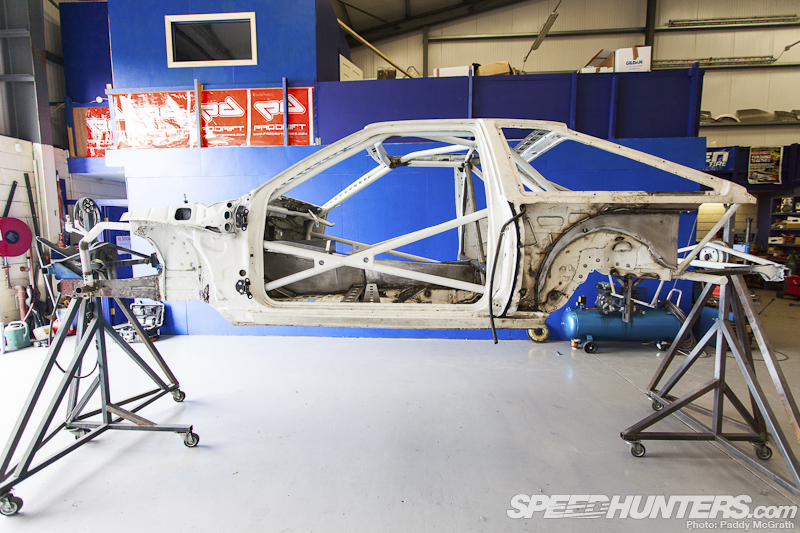
In this photo you can see the rear wheel wells have been enlarged and re-designed as a semi circle instead of full circle. This will allow the Falken Tire smoke to exit the rear of the car easier and will direct it behind the radiator and the fans should help push it out from there. We have also planned ahead and the larger rear wells will allow for fitting of 18 inch wheels if we decide to increase power with a 3 or 4 rotor…
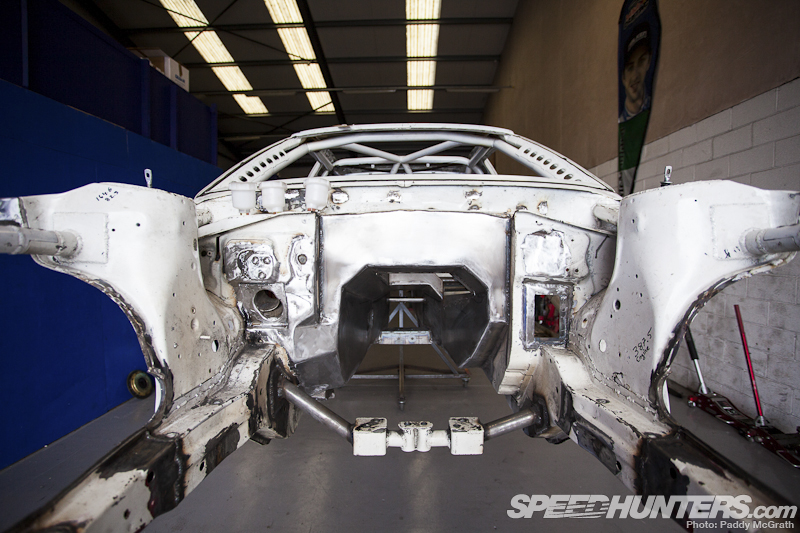
A more complete view of the front, I can’t wait to see this all freshly painted in the new colour.
It’s been crazy busy here at MCNSPORT in Ireland. The DMac86 will be testing our new range of AE86 suspension arms, steering angle kit and anti-roll bars. Once completed, I’m very excited to push on with other suspension products we have in the works for Nissan S-bodies. It’s going to be a very big year for us.
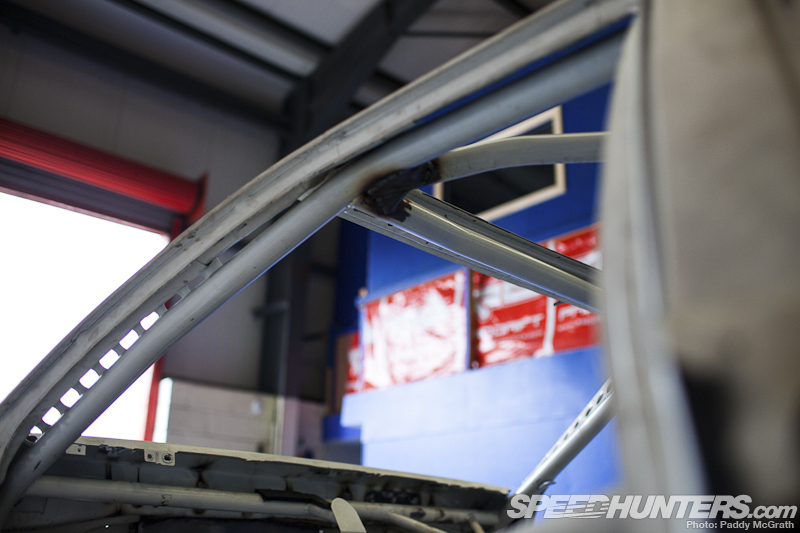
Some extra gusseting has been added to the cage before paint
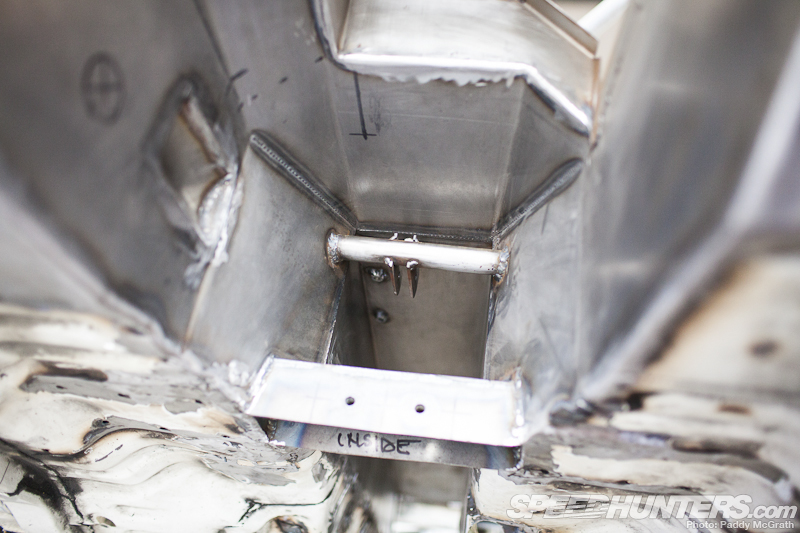
Here is a closer look at the aforementioned sequential gear lever and gearbox mount. We have moved the engine and gearbox towards the passenger side of the car for better weight distribution and clearance for the tail of the gearbox and driveshaft is at a minimum but should look very tidy once everything is installed
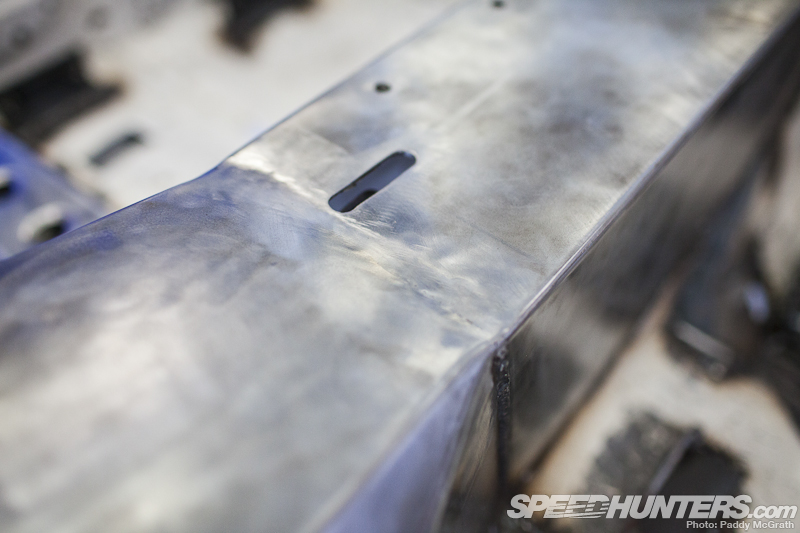
Here is the slot in the cockpit side of the tunnel where the gear lever travels.
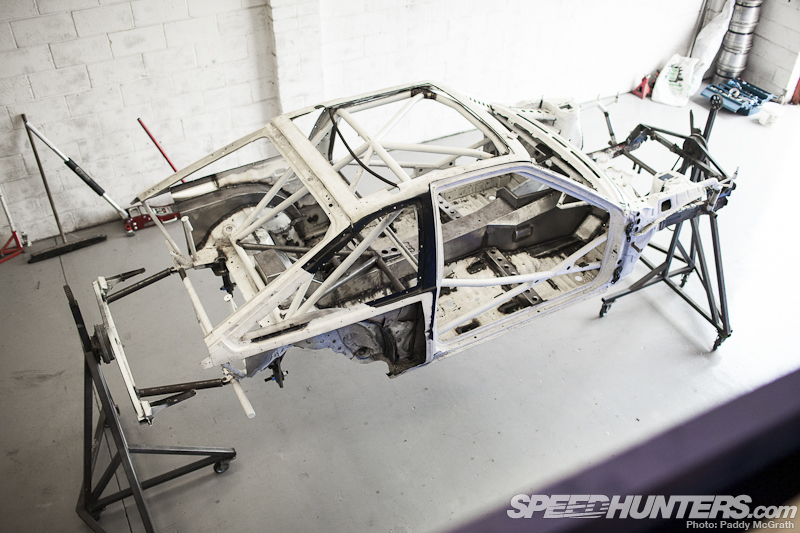
Great shot from upstairs at MCNSPORT. This has to be one of, if not the most insane AE86s ever. I have both built and owned purist AE86s with 4A-GE power and SR20 swaps which I love and are a lot of fun, but there is a lot to be said for a no compromise all out race car. Driving one is an amazing experience.
I hope you guys enjoyed our update. From now on the updates will come very quickly as we hope to have the car completely finished in 4 weeks time and ready to head to Norway for Gatebil to meet up with the rest of the Speedhunters crew.
In the next update, the car should be back from paint and we will have the rear axle modified ready to be installed along with a host of other suspension and engine goodies.
–
Darren ‘D-Mac’ McNamara
Photos by Paddy McGrath


It's lovely to see works like this one.
The fabrication that it involves, the love and care for each particulary part and modification...
All and all, great work...
Keep pushing forward
Chears, Padno from Portugal.
always love seeing a car in bareshell/cage form...
always love seeing a car in bareshell/cage form...
always love seeing a car in bareshell/cage form...
always love seeing a car in bareshell/cage form...
As always, awesome car DMAC! Is the 13b back at Hayward again?
As always, awesome car DMAC! Is the 13b back at Hayward again?
As always, awesome car DMAC! Is the 13b back at Hayward again?
As always, awesome car DMAC! Is the 13b back at Hayward again?
Thanks for the comments guys. No the Hayward 13B is here ready to be installed
Thanks for the comments guys. No the Hayward 13B is here ready to be installed
Thanks for the comments guys. No the Hayward 13B is here ready to be installed
Thanks for the comments guys. No the Hayward 13B is here ready to be installed
Awesome, Darren. Really great stuff.
Would you, or someone, be able to explain what heat soak is?
Awesome, Darren. Really great stuff.
Would you, or someone, be able to explain what heat soak is?
Awesome, Darren. Really great stuff.
Would you, or someone, be able to explain what heat soak is?
Awesome, Darren. Really great stuff.
Would you, or someone, be able to explain what heat soak is?
Darren,
I love how you keep the ae86 spirit alive!
Darren,
I love how you keep the ae86 spirit alive!
Darren,
I love how you keep the ae86 spirit alive!
Darren,
I love how you keep the ae86 spirit alive!
Bad ass!
Bad ass!
Bad ass!
Bad ass!
Bad ass!
Thanks guys. Heat soak is where something hot transfers heat onto something that is positioned close to it that in many cases you want to keep cool
Thanks guys. Heat soak is where something hot transfers heat onto something that is positioned close to it that in many cases you want to keep cool
Thanks guys. Heat soak is where something hot transfers heat onto something that is positioned close to it that in many cases you want to keep cool
ya the 2 coolant tubes (one flaming hot, the other ice cold) shouldn't be together. Great improvements, and I for one, am stoked on the NASCAR tech! as well as the car stand w/ brake! gonna keep that one in mind.
& the suspense is killing on the color! my guess is that Arctic Cat green from the McnSport logo!
I could only imagine the countless man-hours it took just to get to this point. Great work!
When I saw the first shot all I could think was: "please baby jesus do not put an LS1 in there. pleeeease baby jesus"!
I'm a fan! Can I help push out tire smoke? Haha it's a bummer you're getting rid of the black and white paint job, this car was super panda. great work, cant wait to see it at gatebil.
Those welds on that cage look sketchy............
4 rotor? Winnar.
It's insane to watch this AE86 go through so many changes in it's lifetime! My guess on the colour, would be something to tribute the original blue you once had on it?
The outside colour of black and white is not being changed. Its just the colour of the chassis that we are changing
The outside colour of black and white is not being changed. Its just the colour of the chassis that we are changing