


First off, thanks guys for all your comments and advice from my first post. Here is the second part of my Skyline Super Silhouette model build.
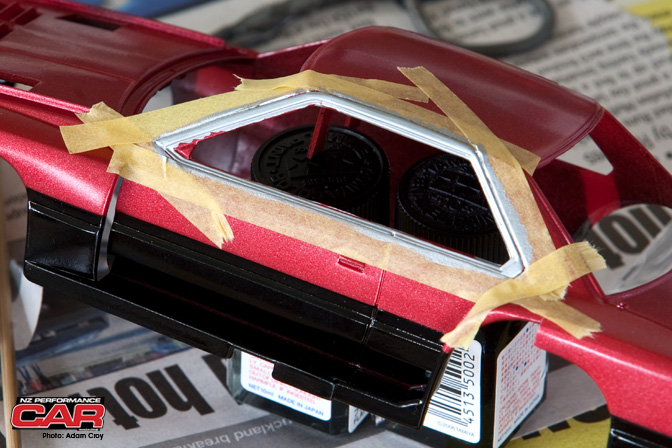
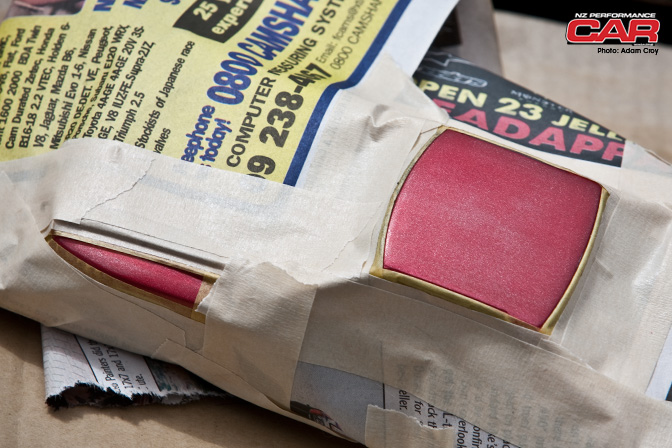
Picking up from where I left off a few days ago. Above you can see the black two tone paint is now finished and I have masked up the windows for the trim work. I tried a couple of different ways of masking and found the most effective to be covering the area in tape and then cutting out the area you want to paint rather than trying to work the tape around the details.
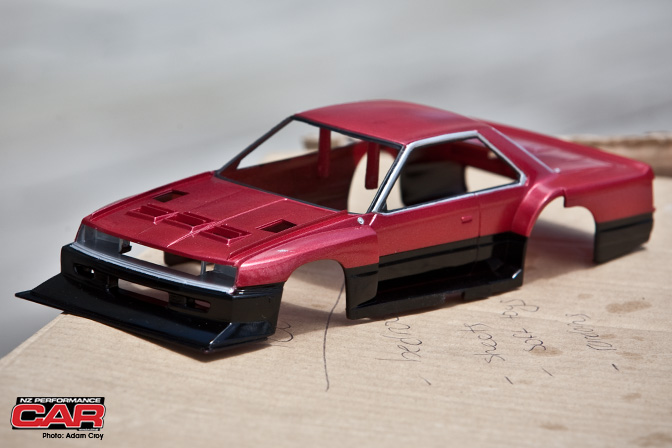
Main Body piece finished, waiting for the vents and wing to go on.

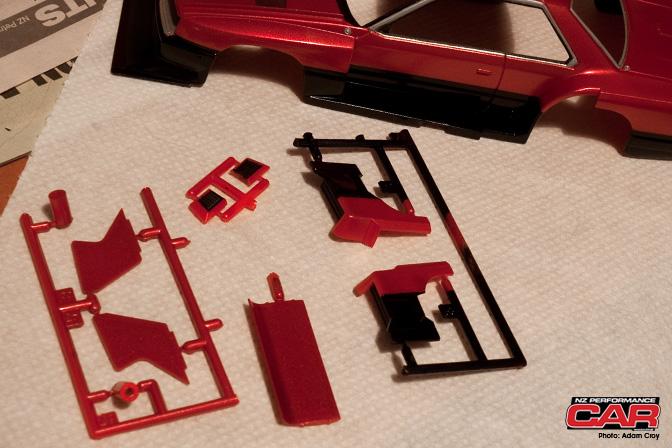
At this point with the paint all but done, I turned my attention to the construction. For what its worth, my advice for this part is as follows. Get hold of a very sharp knife and always cut the pieces off the sprue. Twisting can cause rips.
Use glue sparingly. It will melt the paint if you get it on anything and touch ups can be difficult. Especially if you have spent time weathering an area. Also for gluing the windows, lights and other clear bits of plastic, you can get a special type of glue. It dries clear and doesn't cause the plastic to discolour.

This model didn't have any but if you have to glue pieces that have come out of the box chromed, make sure you scrape the chrome off the places where you are going to apply the glue. The glue works by melting the plastic and it won't be able adhere properly otherwise.
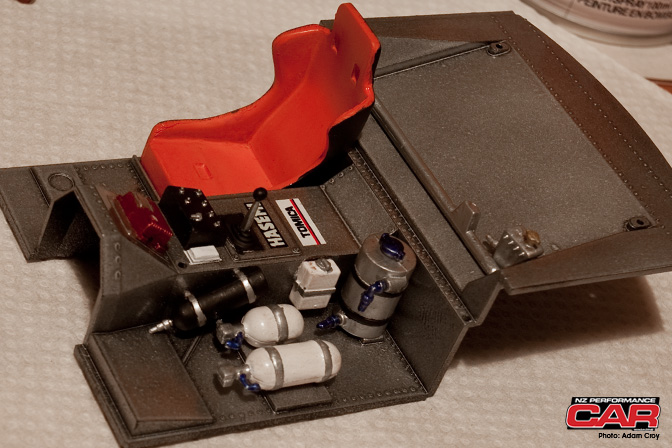
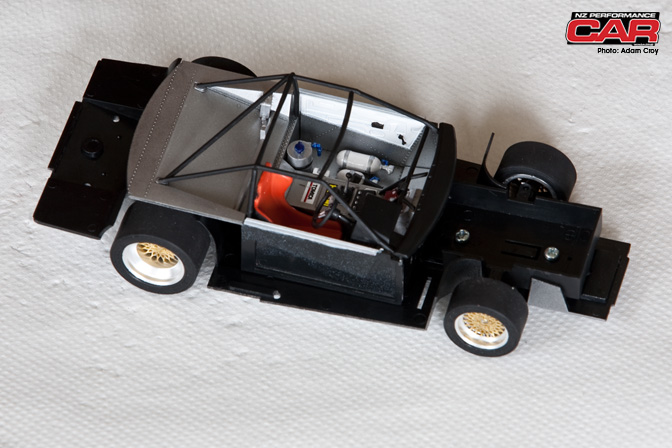
This is the beginning of the interior. If you want to get really carried away, head down to your local hobby shop and get your hands on some thin copper wire and tubing. With a bit of skill you can run some lines through the interior or engine bay for that extra bit of realism.
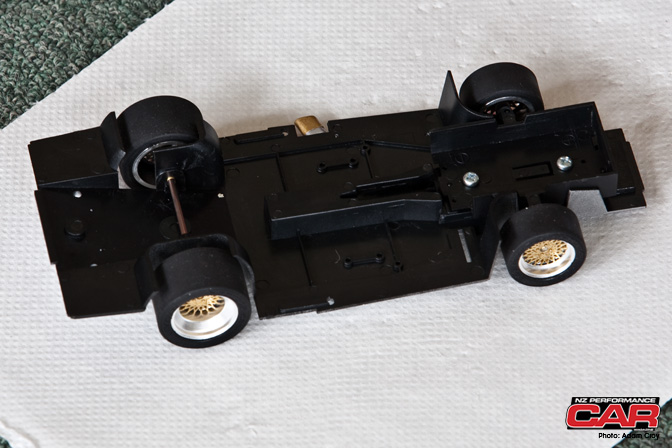
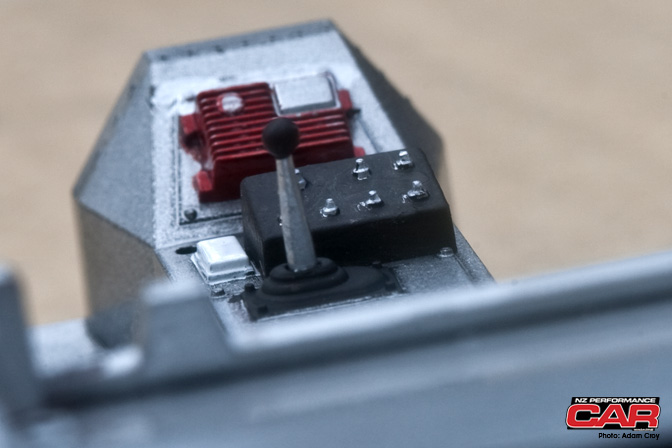
The chassis part of this model was lacking. However when I was putting it together I noticed there was a place for batteries to go. I assume that means you can put an engine in it. Any ideas?
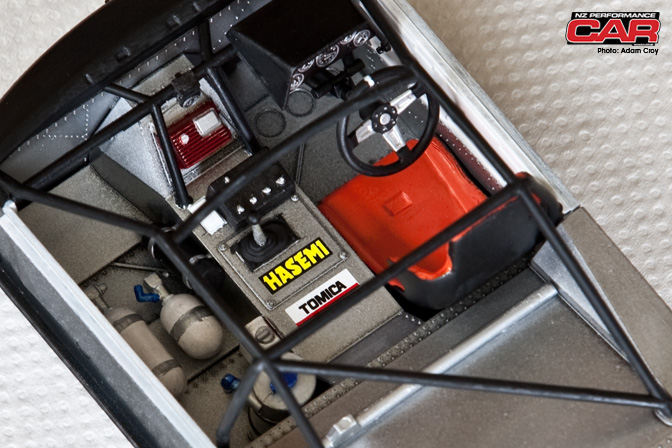
The finished interior. Its a shame that a lot of this detail is going to be lost once the body goes on!
Another thing I found out the hard way is that the paint will start to come off if you handle the parts too much. I got around this by wearing gloves. It might look funny but will save you a huge amount of time in retouching.
I was unhappy with the finish of a few spots on the body, so as you would with a full scale car, I masked only the areas I wanted to repaint and went through the same sand and paint process from earlier.
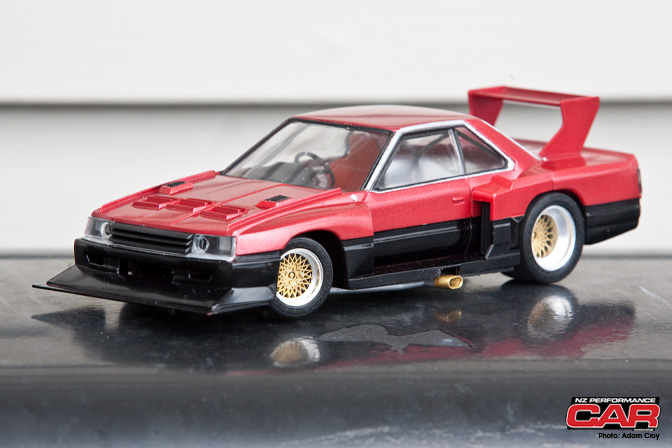
The last few pieces to be put together were the body details. Once you have cut the parts off the sprue, grab a nail file and clean up the edges and joins. Always dummy fit the parts as well before gluing. The wing on this model was never going to fit as it came out of the box and required a lot of filing to get right.
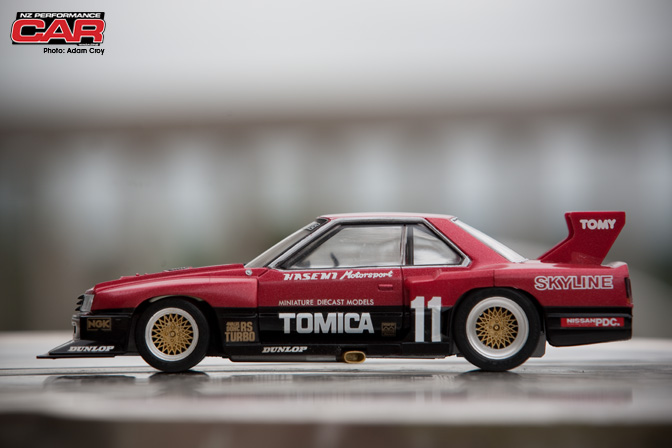
All done except for the bit I was looking forward to least: the decals. Unfortunately it's the part that really makes it what it is.
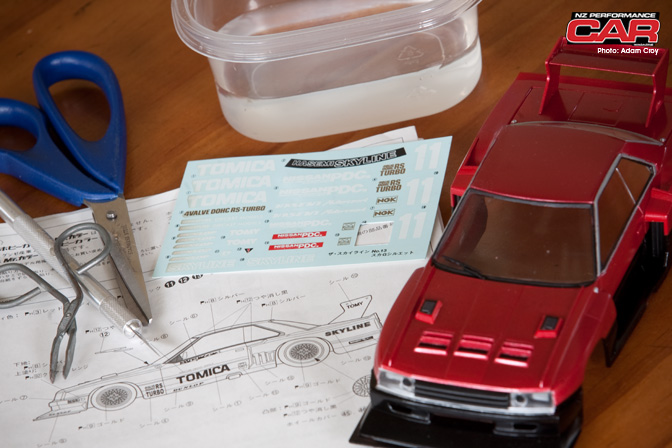
For this part you really do need to have patience. Decals can be very temperamental and will rip in the blink of an eye. If you are having trouble getting them in the right place try putting a small amount of liquid soap in the water you are soaking them in. It will allow a little bit more mobility when placing them, but will also increase the drying time.

Finished and I'm pretty happy with it!
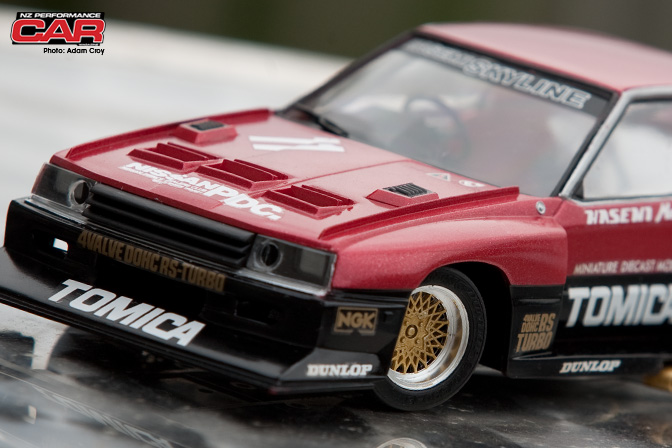
It's the little details that really made this model for me.
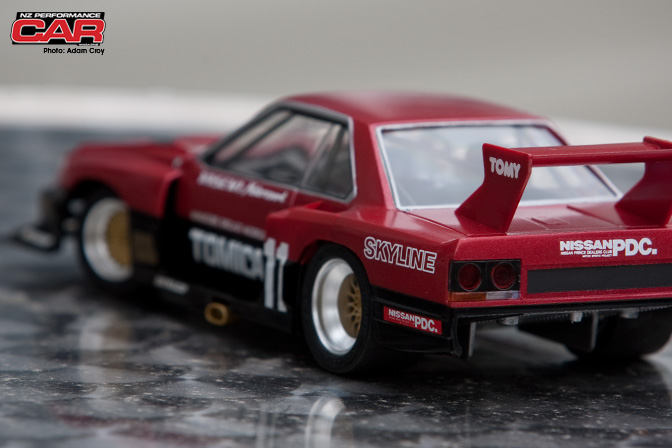
I always prefer the way a car looks from the rear.
So I hope this has been of interest. It was a hell of a lot of fun to put it together! Again if you have any other tips you can share then please post them in the comments section.
- Adam Croy


Nice job! Great to see some interest in models again
that looks awesome! is this your first time? thats amazing, how did you do the detailing? i remember i used to do those but they always looked sooo bad. ahhaha
Nice job Adam, Such an awesome build! Its a great shame the majority of the detail is hidden. I've been building scale models since I was a kid, now years later while working in motorsport im still into them. More builds please?? ...
Nice built! This Aoshima kit is great! I have little tip for the lights, if you paint the edges with black marker or brush the edges of the light would be darker and thus add depth to those lights and enhance final look

Also paint wheel nuts with a toothpick into the silver or black color is a great tip
good work!
LOOK HELLA SICK
did you put on a clear coat after the decals?
Very nice R30...
Happy 2011 !!
Great turn out! This model inspired me to buy my first kit ever
Your part one build has inspired me to build a model, and while unfortunately i couldnt get my hands on such a prestigous car like that, i went with a simple Mercedes SL63 AMG for my first attempt. Got the sand paper and everything
i have a timiya sard gt supra that i have starte many years ago and didnt finish meaybe i will try again
Nice job. A lot of kits- especially Japanese - from the 70s to early 80s were designed to be motorised. But since nobody does that anymore or even wants that anyway, and giving the very high cost of the molds in the first place, the manufacturers just ditched the motor and maybe added a new sprue for the interior if needed. Many modelers also strip the chrome off any chromed sprues and paint them using the equivalent metallic colour, more realistic that the shiny, toy like chrome that comes in the box. I forget what to use to do that, but Google should be able to bring up something.
this should be a regular series.
Also to add to what Ian_M said, Easy off oven cleaner works perfect for stripping chrome parts.
Also to add to what Ian_M said, Easy off oven cleaner works perfect for stripping chrome parts.
The battery box could be used to wire up lights, so your car can race Fuji at night.
Nice work!
thats a great result
"The battery box could be used to wire up lights, so your car can race Fuji at night." Nice comment lol. Polishing and waxing your car now and even adding a clear coat on top will vastly improve the shine on the body. Sweet work anyways. I mean, the pro guys attack the paintjob like you would on a real car! That's dedication.
i was about to ask the same thing as "der."

 gosh I'm so Jealous
it looks like you didn't clear-coated it, the decals with time will get yellow..
But still loved the build loved the pictures loved the environment attached to this build
Love all this
Cut out the decals to the edge of the printed section. They will look a little better now and the decal edges sometimes discolor over time, especially on light colored cars.
Please post more of these even when this month's theme is over, its really interesting to read through these. I'm an avid model builder too and love your work!
Please post more of these even when this month's theme is over, its really interesting to read through these. I'm an avid model builder too and love your work!
You should never cut the pieces off the sprue with a knife. Always use a nipper to cut them off, and cut far from the main piece. Then you use an x-acto knife of hobby blade and start cutting away the little plastic piece left (be careful not to overcut and start digging into the part).
Nice tutorial man, it has just enough tips for a new modeler without getting to complex. I've been building models for years and yours turned out awesome. Another tip for doing the window trim is to use a black (or silver) Sharpie, the fine point makes it very easy to be precise.
great job yours came out way better than mine. i got a 05 sti model and it looks like crap. im about to redo the paint and see if that helps
Nice, very nice! I'm sure you will gain more experience with these cars if you keep working like this.
The paint is a little glittery for my taste, but the car looks great overall.
NICE, I always imagined race cars looking fresher without the liveries and decals, I guess that's not always the case!
I got the Tamiya Martini 935 and I saw the battery symbols as well. I went down to my local model shop to ask about it, and I guess you can put lights and a small electric engine in Tamiya models if you are feeling adventurous
thats pretty ugly i thought lol
In pic 3, it look's like he is inhaling something else.......
Beautiful, I hope see more of this here.
super sick model you made there i just finishend my first vw t1 samba en bought a lot more vw/audi models
Make the body removable if you want to show off the interior.
what a nice job, great!!! Just one thing, maybe you forgot the mirror?
I just picked up a model because of you, thanks for inspiring me!
Unless silver was what you were actually going for, Bare Metal Foil would've done the trim more accurately, and more easily than masking and painting. It would look like real chrome.
Otherwise, excellent build!
Very nice articles. I built the Hasemi S12 Silvia Super Silhouette by Aoshima and it was a very easy build. The Skyline appears to share many of the chassis/interior parts with the Silvia. Although I am a bit skeptical on some paint choices you made, I have to say, the end result is very nice.
Two tips from me. 1) To bring out the panel lines (around the doors, hood, etc.) go out and buy some flat black acrylic craft paint that comes in the tall plastic bottle (Wal-Mart has it cheapest) put a little bit of the paint in a paper cup, and add 2x more water than there is paint. You should end up with a very thin watery black liquid. Take a small (-ish) brush and dip it in, then follow the brush along the panel lines. The thin viscosity of the liquid should cause it to settle into the lines, which will increase realism. Let the paint dry for a half an hour to one hour, then, if there is any paint left on the body panel itself, quickly dip a soft cloth or paper towel in water and ring it out, you only want it to be damp. Go over the excess paint applying moderate pressure, and the paint will come off. This is a very quick way of adding realistic detail to any model. I recommend acrylics because there is a chance that enamels or laquers may react with your paint job. 2) Go out side and look at your exhaust tip. What color is the inside? That's right, it should be black. Take a toothpick or a small brush and use flat black to fill in the exhaust tip. If you get any paint outside of the tip, use a cloth or paper towel to wipe it off while it is still wet.
One final tip from me. If you can find this stuff, use it, not paint. It is called Bare Metal Foil, and it comes in a variety of colors. BMF is most famous for it's basic chrome color. The stuff is real metal, and is perfect for making chrome window trim. BMF is very thin, and has an adhesive backing. All you really need to apply it is a very sharp No.11 hobby knife, and a toothpick. Unless the real car had brushed aluminum window trim, BMF is the only way to go.
Great job! Please make more articles like these! I'd love to see some more model car builds.
Wow.. Really amazing models.. I like all these models..I always prefer the way a car looks from the rear... Thanks for this post..
This is simply amazing! Makes any attempt I ever made at building a model look like shit.