
After finishing the 90-day marathon that is the Scion Tuner Challenge, you might think that the last thing I’d want to do is turn a wrench on another FR-S. The truth is though, I couldn’t wait to get back to working on my own car.
I had collected a few parts for the FR-S before the STC began, but had to put my plans on hold for the impending SEMA Show deadline. I had two areas I wanted to address: maximizing the performance from my Innovate supercharger, and getting the car lower courtesy of Air Lift Performance.

Bill Knose of Delicious Tuning has supported my personal FR-S project since day one. He also tuned our Cosworth-supercharged STC car, and we’ve collaborated on Airaid and HGMS projects in the past too. Bill is one of those guys who I can call a friend even though we’ve only spent a few hours talking in person. Since we’re in different states, our correspondence has been through countless emails and texts, but we finally got to meet up when he visited Arizona for the holidays.

Bill has tuned my car remotely several times, but I always wanted to see if he could get that last little bit of performance out of it in person, on a chassis dyno. Fortunately, my desk at Airaid is about 10-feet away from our in-house Mustang dynamometer.
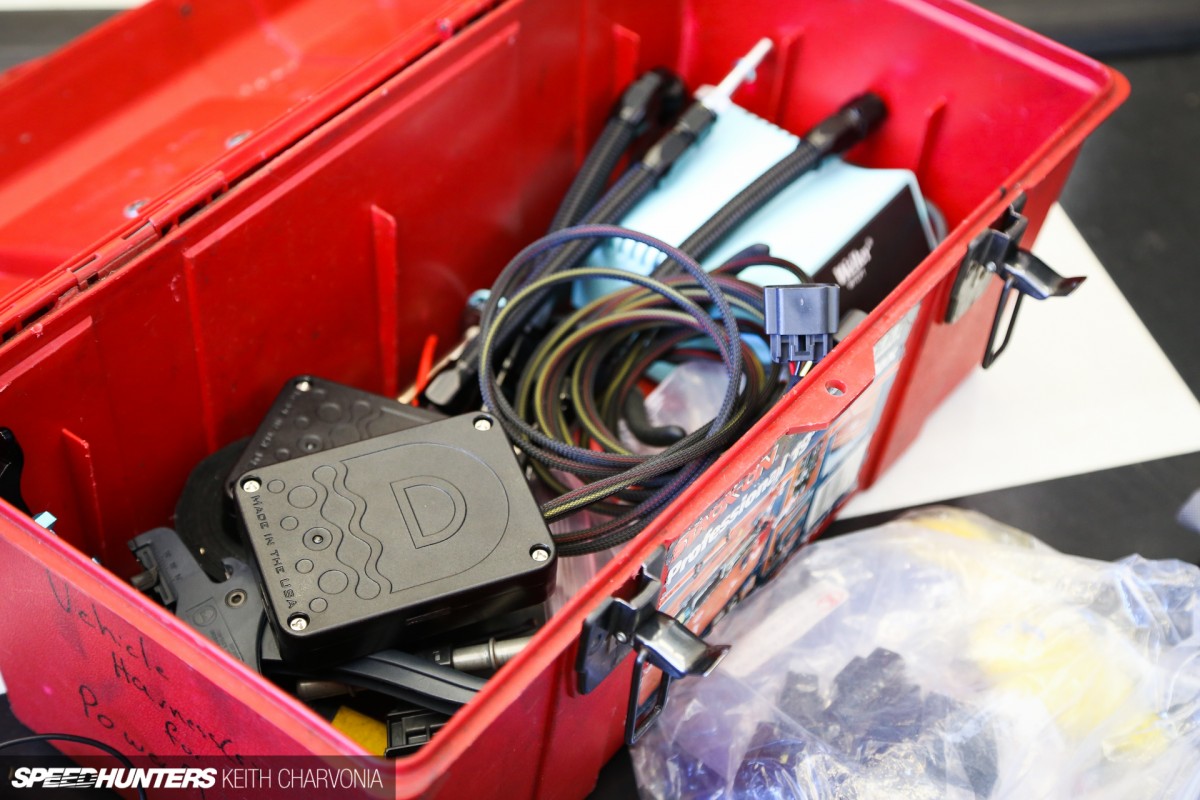
To further sweeten the deal, Delicious Tuning had just announced the availability of its own Flex Fuel kit, which enables the car to run on nearly any octane, once you have the accompanying tune flashed to the ECU of course.

The real beauty of this setup is the ability to pour E85 in the tank without busting out the test tube to check ethanol content at the pump and hoping you have the correct tune loaded to run the fuel. With this little fuel sensor the system can determine the octane rating and adjust on the fly using variable tables that are built into the tune. Got half a tank of 91? Go ahead, top it off with E85 and enjoy some extra power!

In case you’re not familiar, and thus not sure why I’m so excited about using E85 in my car, it basically has a higher octane rating and burns cooler, enabling a supercharged, high compression engine like mine to make significantly more power. The tuner can run more aggressive timing to take advantage of the properties of E85, and it’s not uncommon to see a 30 to 50 horsepower gain on a car like mine. Plus it smells weird.

I ran to the nearest E85 station to fill the gas cans while Bill kindly installed my Flex Fuel kit. He was more than happy to do the honors of pouring in the first can of corn juice too.

Less than 30 minutes later we were ready to do our first dyno pull.
It’s kind of funny, I walk past the dyno every day, but haven’t strapped my own car down since we developed the Airaid intake for the FR-S.

With a few tweaks the car gained over 40 horsepower! That’s power you can feel, and it’s enough to test the limits of the stock clutch too. I think I’ll be installing a performance unit soon.
Just A Few More Things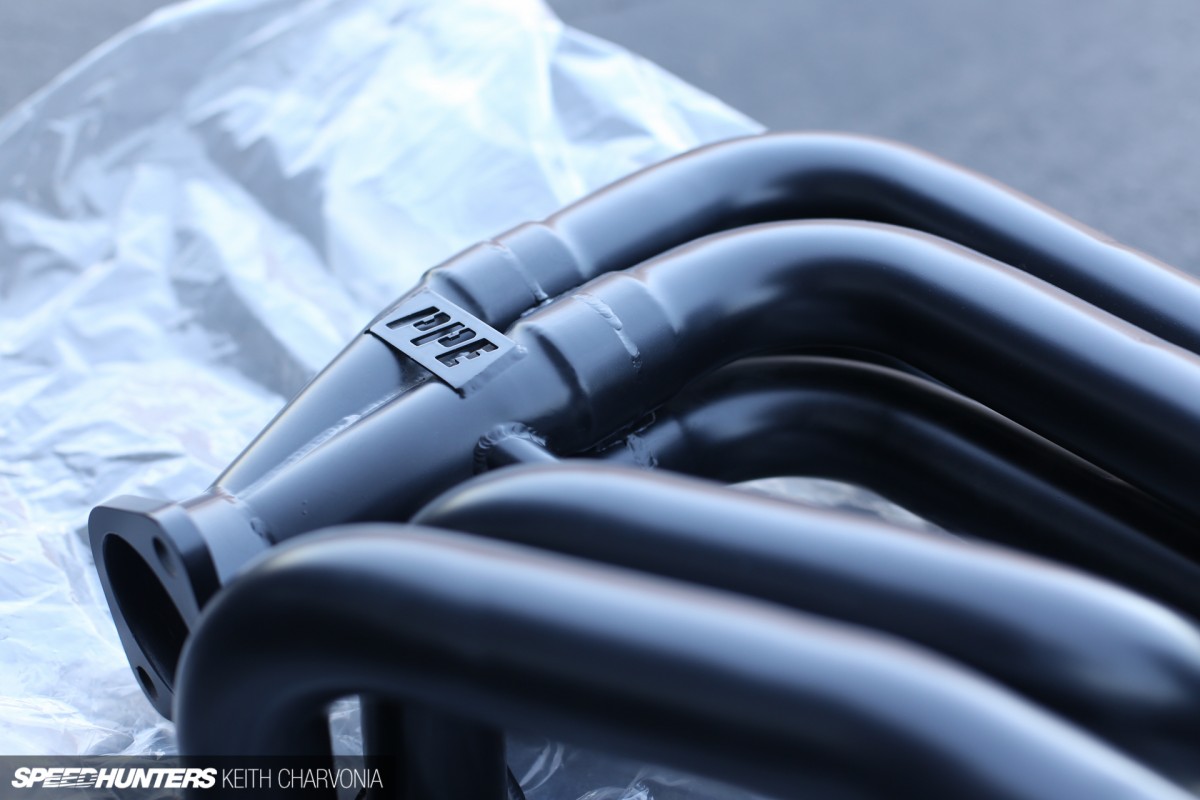
Bill mentioned that my specific combination of parts seemed to work really well with a PPE equal-length header. A few phone calls later and mine was on order, even though I hated to lose the boxer rumble of my unequal-length header.

Paul Prentiss of PPE personally installed the header for me, complete with thick flanges, beautiful TIG welds and a nice black ceramic coating.

Since the front O2 connector was being used by the Delicious Tuning Flex Fuel kit anyways, I ordered a plug and removed the O2 sensor altogether.

PPE also fabricated and installed a 2.5-inch front pipe with a high-flow cat for me. This really opened things up, but made it a lot louder too. To finish things off, Paul will be prototyping a custom ‘dual mode’ muffler on my car that’s switchable on the fly between loud and quiet.

In my haste to install my new RAYS Volk Racing ZE40s a few months ago, I used the lug nuts I had on-hand. It always bothered me how they sat out past the spacers, so I forked over a bit of cash when I came across these low profile equivalents.

It also bugged me that the adapters were silver and stuck out like a sore thumb, well to me anyway.

While they were off the car I sprayed a little black paint to make them disappear.
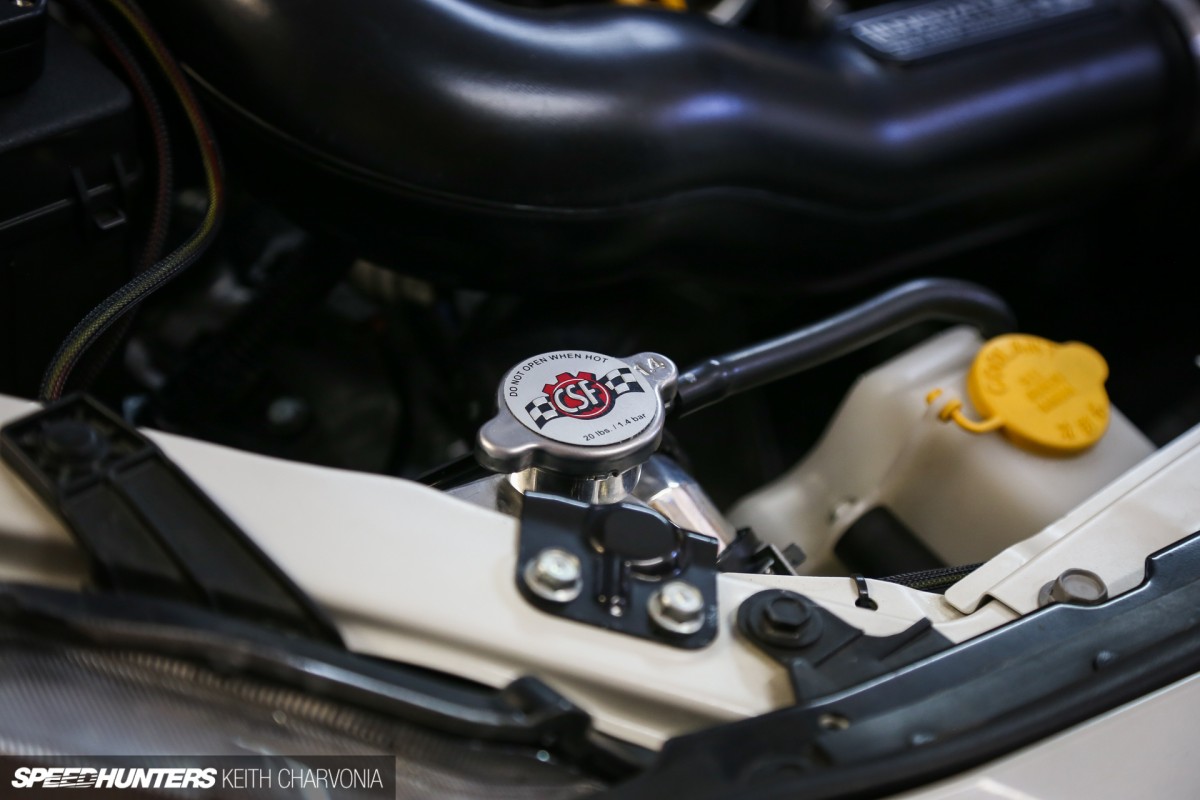
I also took a few minutes to install the new all-aluminum CSF radiator filler neck. Some day all those plastic factory fill necks are going to start breaking and everyone will buy this aluminum one!

Speaking of aluminum parts, you might remember the lightweight crash beam we made for the Scion Tuner Challenge FR-S. I’ve been considering putting this part into production so I had another one made and test fitted it on my car while it was on the lift one day.

The lightweight version weighs 5lbs instead of 15lbs, but obviously is not rated for a crash either. I would never recommend to run it on the street, in fact I won’t even run it on my own car, but it could be useful for a track car.

It also buys tons of room for intercooler piping, and some of the cut-up crash beams I’ve seen are practically useless anyway.
AutoPilot Enabled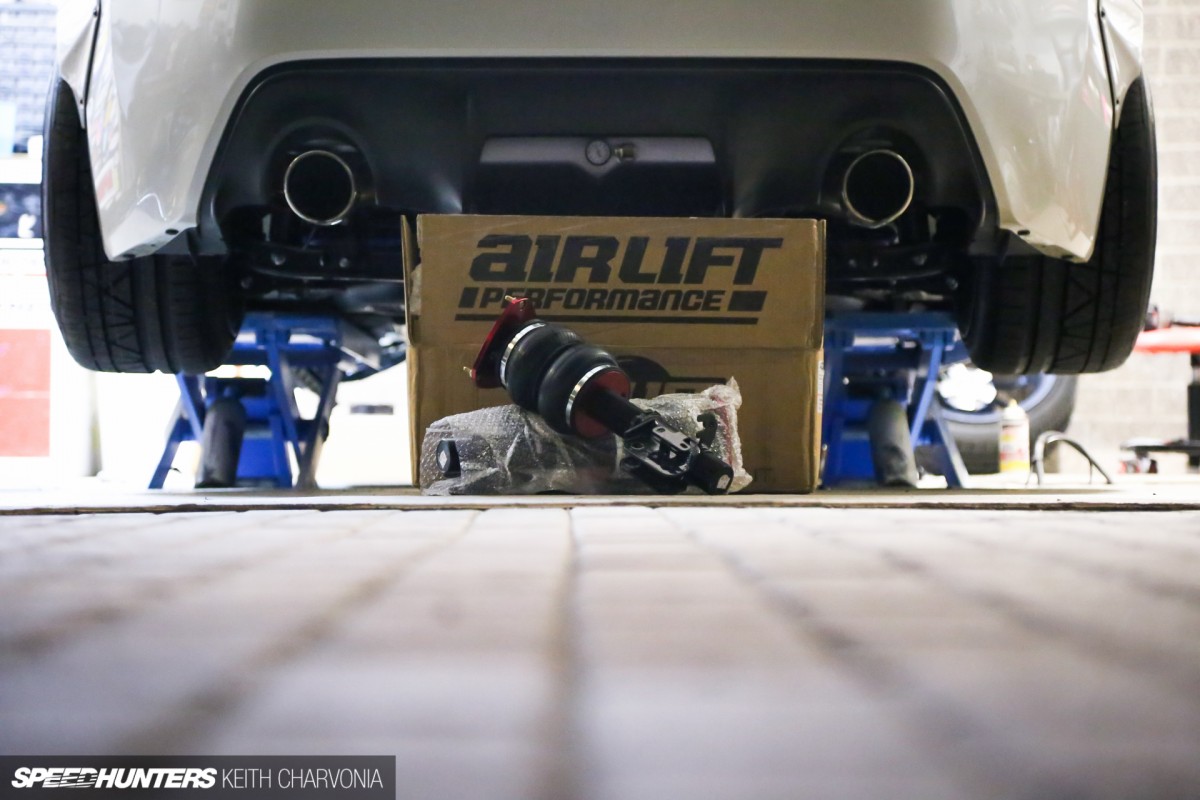
Ever since I cut my fenders for the KM4SH kit I’ve wished my car was lower. I maxed out my coilovers and shaved my bump stops, but the car just didn’t sit low enough for me. I was unwilling to accept a harsh-riding suspension so I set the coilovers as low as possible while still maintaining a comfortable ride for a daily driver, but was still bothered by that last bit of fender gap.

I have experienced the new wave of suspension kits coming out of the Air Lift factory, and I’ve walked away impressed. Impressed enough that I wanted to put one in my own daily. Unfortunately the kit arrived just before I started building the STC FR-S, and had to sit waiting for nearly four months until I had time to install it. Speedhunters problems…
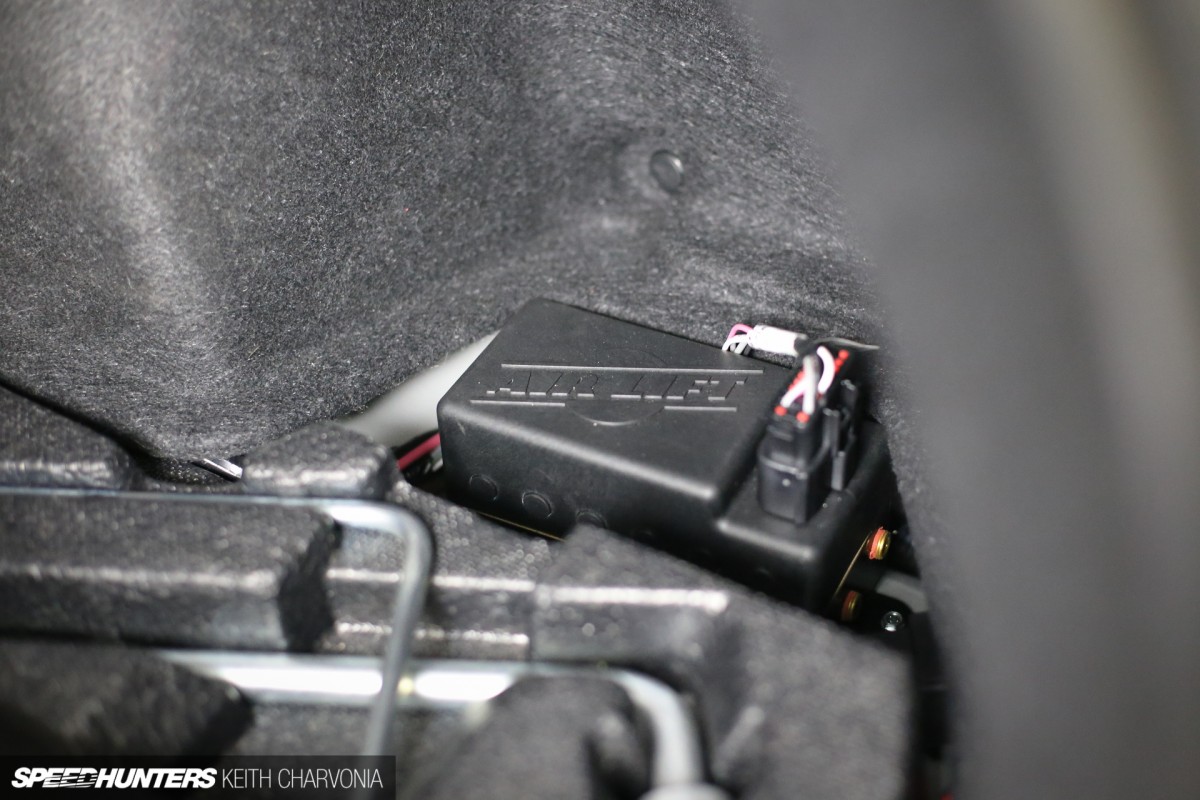
I’ve installed plenty of air suspension kits over the years, and one thing I’ve learned is to install the complete air management system before ripping out the coils. This way you can still drive around if it takes longer than planned (doesn’t it always), and you aren’t forced to rig something up to get to work. I found a nice little home for the Air Lift AutoPilot V2 manifold in the corner of the trunk that was out of the way but still easily accessible.

While a trick, hard-lined installation in the trunk crossed my mind, this little ZN6 is my daily driver and I use whatever utility it offers to the fullest. I couldn’t give up my spare tire or any space in the trunk, so I took off the rear bumper and looked for places to put things. Fortunately there’s a nice spot on either side behind the rear wheels.
I was about to hang the Viair compressor upside down when something inside me said I’d better check the directions. And sure enough, you can’t mount them that way. Come to think of it, the last compressor I hung upside down blew the head right off! I found this mounting bracket online and postponed my installation once again.

I had a small aluminum air tank left over from the Double Down RTR installation and it looked like it might tuck in perfectly behind the rear bumper.

With some creative use of my jigsaw, I made it fit.
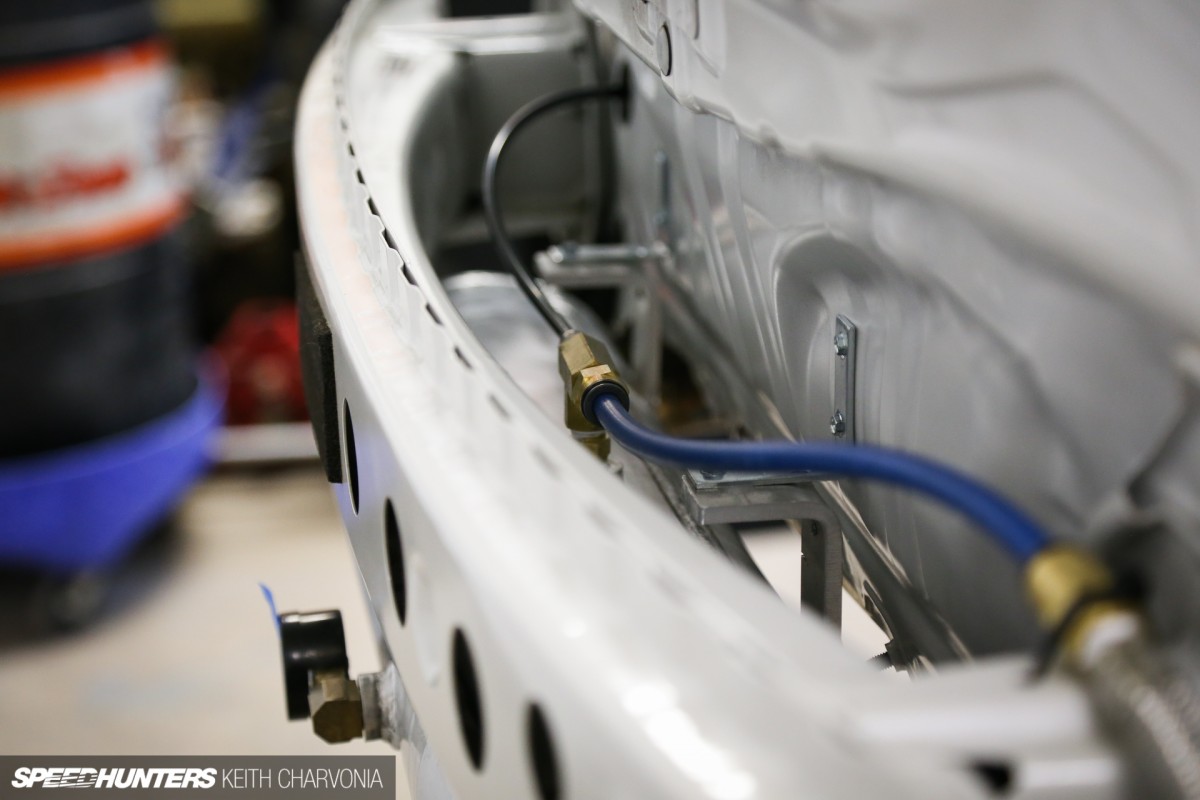
The plumbing was simple and clean, with just one line from the compressor and one line to the V2 AutoPilot manifold. Minimal weight, and less potential for air leaks down the road too.
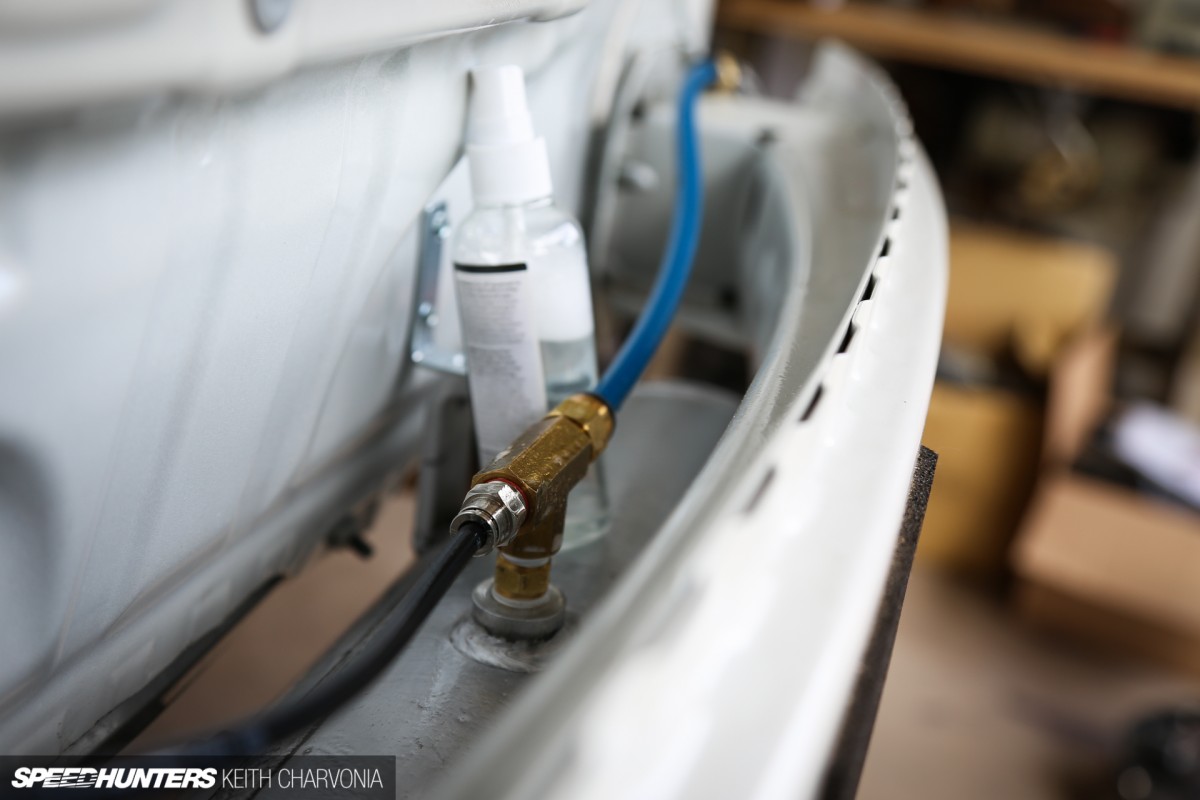
This should be obvious, but I didn’t put it into practice until I installed the Double Down RTR’s suspension with Air Lift engineer Brian Vinson. As I assembled each part of the system, I pressurized it using shop air and a ball valve, then sprayed the connection with soapy water to check for leaks. It’s much easier to fix a leak while the car is still apart.

I also used masking tape to mark the tank’s pressure gauge and checked it the next day for leak-down. None found.

When I went to reattach the rear bumper I realized the stock reverse light was no longer going to fit with the air tank mounted in its new location. Removing the light, I realized the tank would be visible through the hole, but there was also a threaded port that could be seen. I assembled a couple of fittings to an air gauge I had laying around and came up with this.
It’s been a polarizing mod for sure: Some people hate it, but it seemed everyone at Severed In The Southwest loved it. I personally like Easter eggs like this, because someone who knows about air suspension will get it right away. I’ve since ordered some nice black fittings and I have my eye on a nice gauge on eBay too. What do you think?
Drop It With Air Lift
With the air management installed and working flawlessly, I was finally able to move on to the actual suspension installation. Since I was happy with the way the car got down the road as it was, the first thing I did was record my current alignment settings using my SPC Fastrax alignment gauge. It’s always good to have a baseline.

There’s a bit of bench assembly that needs to happen before you bolt in the air struts.

Since the front struts turn with the wheels, Air Lift provides a tough, braided leader hose that must be installed.
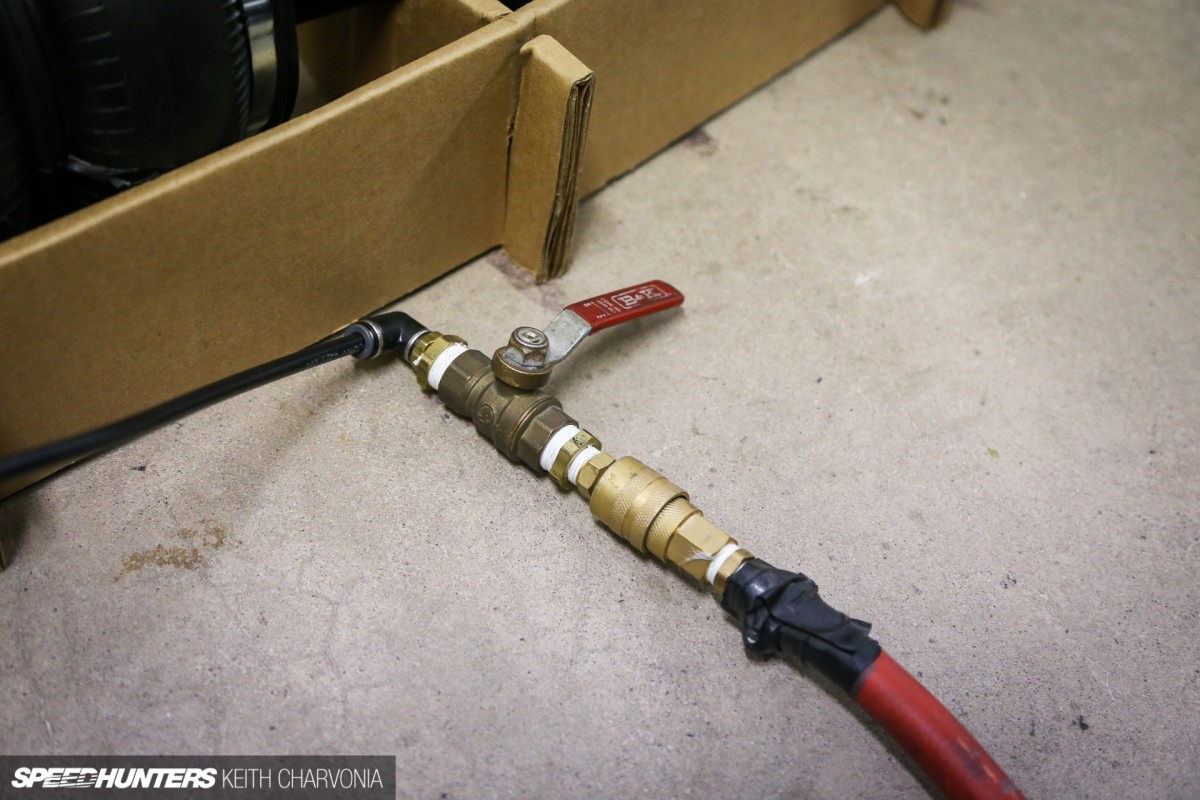
Again, the connection was pressurized and leak-tested off the car before installation.

We’ve all heard the merits of modern air suspension, so I won’t go into here. I’ll just point out that this system uses a threaded-body, machined aluminum shock, an adjustable camber plate and has 30 clicks of adjustment. This ain’t your granddad’s helper spring.

The front assemblies bolt right in, plus they weigh less than the stock coilovers.

I’ve long praised the modification friendliness of the ZN6 chassis, and here’s another reason. Pull up the sill plate and you’ll find a channel with extra room in it, perfect for a 1/4-inch air line.

With the line routed to the trunk, I could tether it all down using rubber lined clamps. I made sure to leave a loop near the strut to allow for movement during suspension travel and turning. It’s a good idea to cycle everything and keep a close eye on the air line.
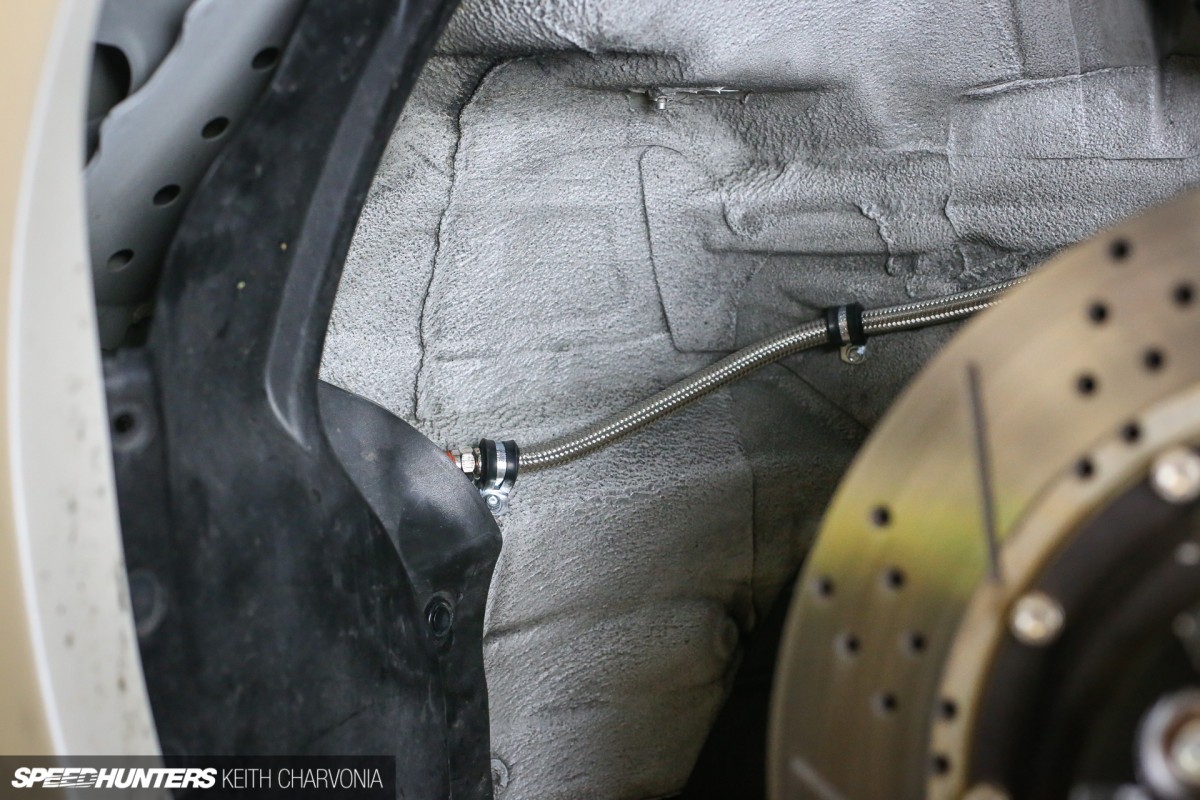
I was on the fence about reinstalling the factory fender liners, but once I saw how they covered and protected the air line connection I was convinced.

I grabbed a chunk of my son’s Play-Doh to check the clearance from the front tire to the chassis, and found that there was room to spare. Must… go… lower!
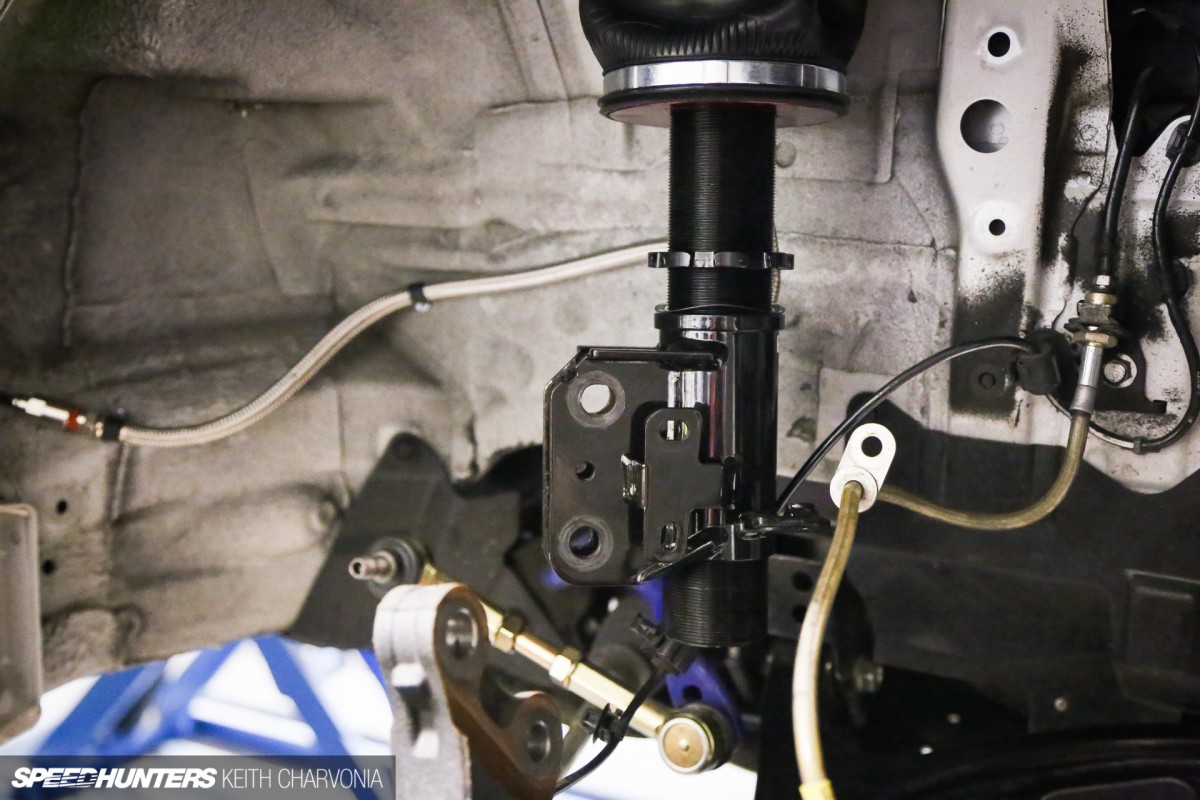
This is where the threaded shock body comes into play. I unbolted the two camber bolts and spun the lower mount up the threaded body until I found my desired ride height.

Now I understood why Air Lift included adjustable swaybar end links too.
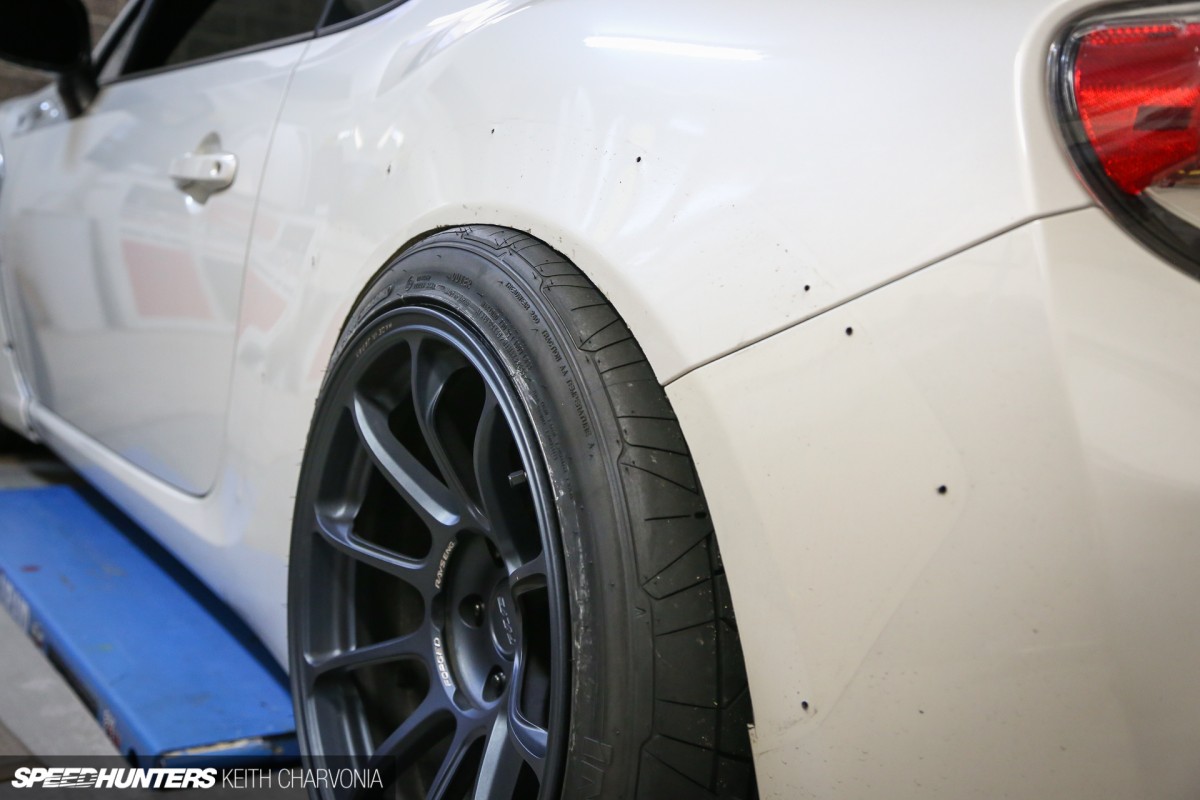
The rear installation was straightforward with just a few nuts and bolts. Setting the car on the ground, I saw that more trimming was going to be needed for the rear fenders.

I started with a rough cut so I could see how much cutting was required.
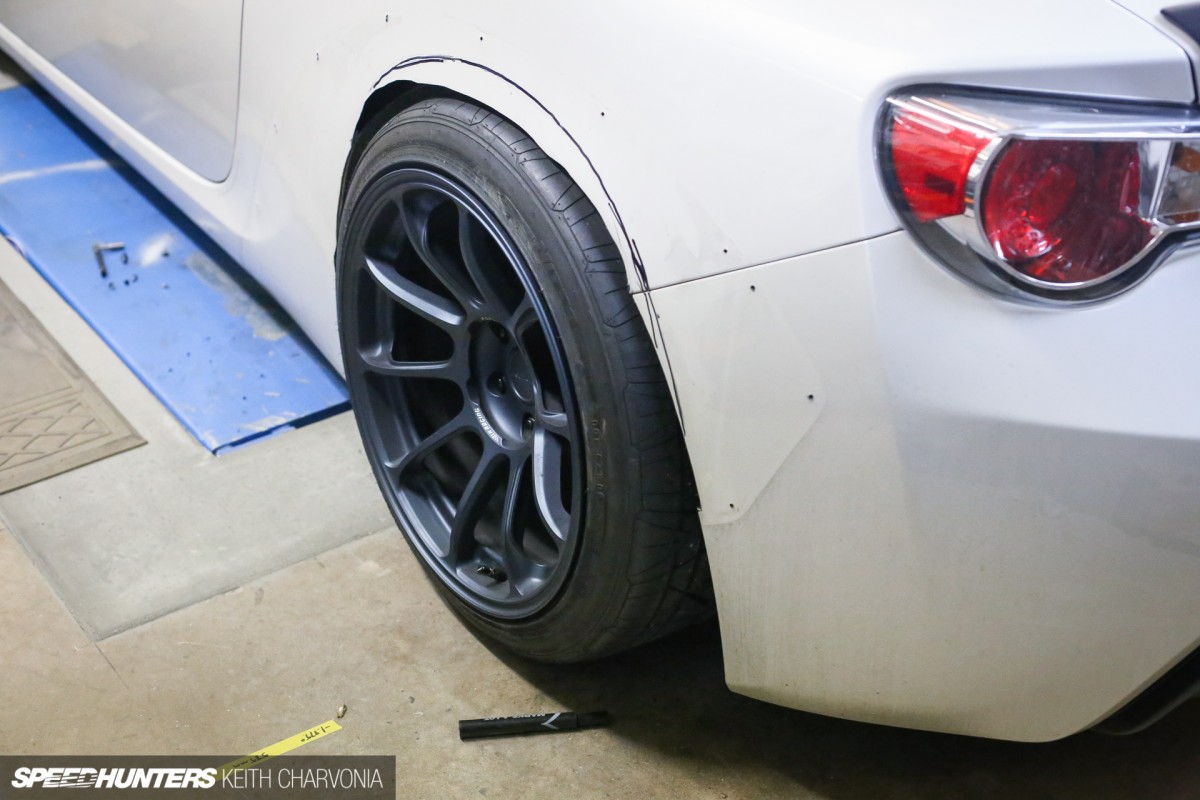
To me there’s nothing worse than a bagged car or truck that rubs tires. I wanted the fender to be well clear of the tire when the car was set all the way down.
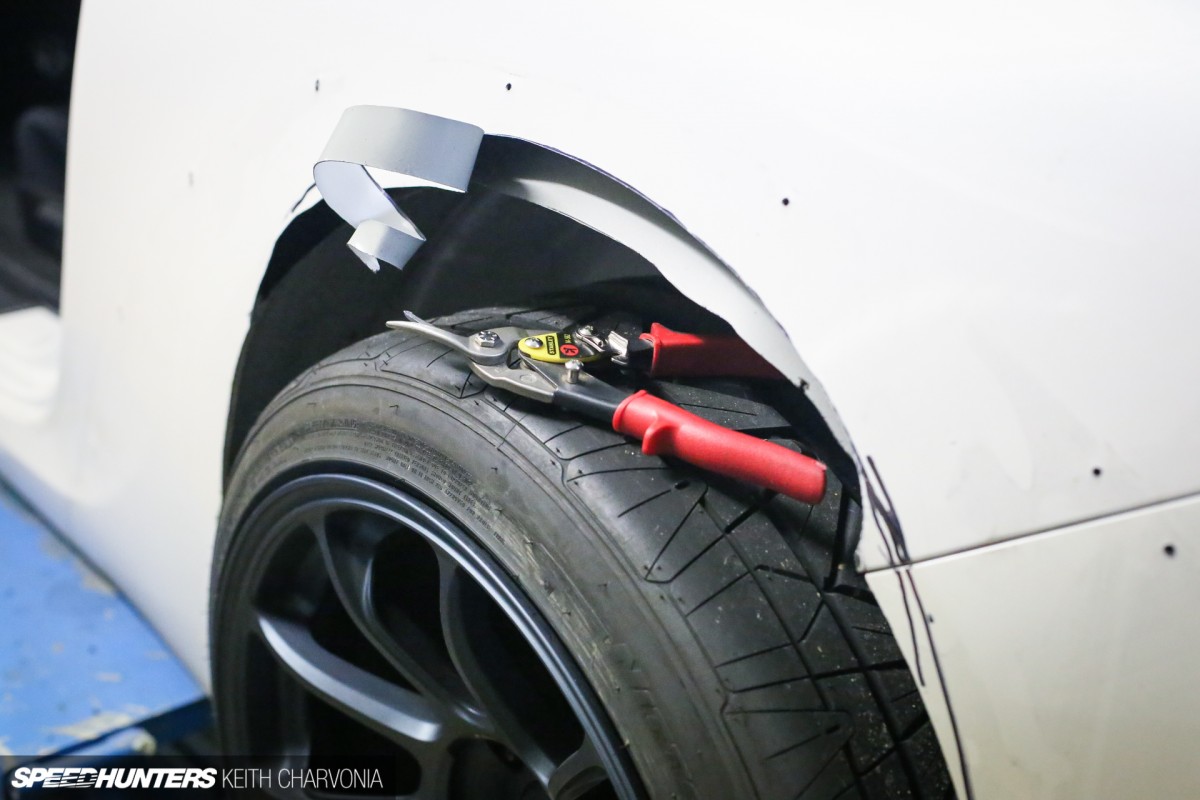
Left and right-handed tin snips did a nice job cutting the metal into the final radius.

I used duct tape to make a template for the sheetmetal filler panel.

Then I cut it out on my Eastwood Throatless Shear. It’s much easiest, faster and straighter than using handheld tin snips.

In order to avoid warping the thin factory sheetmetal, I ground away the paint every couple of inches and placed one tack weld in each spot.
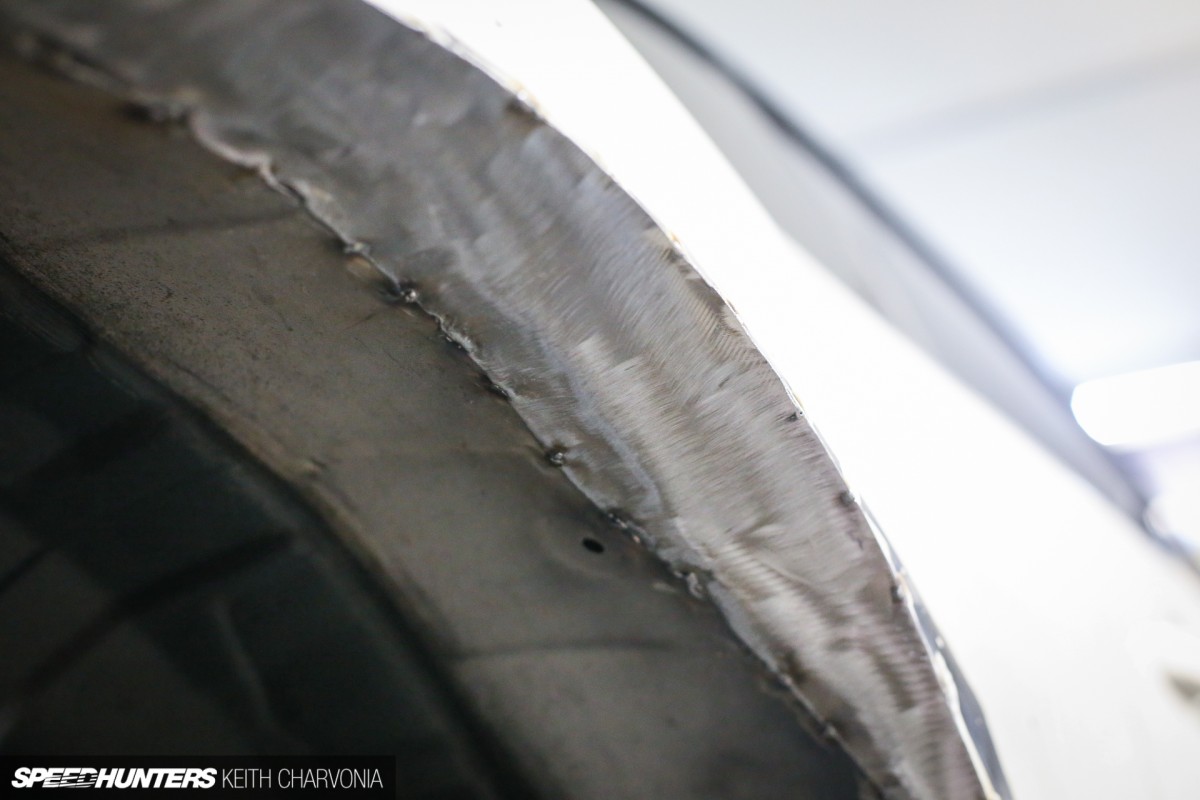
This would be enough to hold the sheetmetal in place and create a strong repair without adding too much heat to the panel and causing damage.

To finish off the job I used 3M Seam Sealer, which is very tough stuff. I always keep a tube on hand for jobs like this.

Some rattlecan truck bed liner sealed it all in, and I went ahead and sprayed the whole wheelwell to match.

At last I could lay the car out and see how low it would go. I finished the installation the morning of the Severed In The Southwest minitruck show, and the car fit right in with the new air suspension, even winning first place in the Scion class.

Another benefit of air suspension is the ability to lift even higher than stock to clear speedbumps and curbs. I won’t be driving the car in either of these stances though.

My goal is actually to have a completely hands-off experience with this suspension. This is entirely possible thanks to a ‘rise on start’ feature that always ensures the car is at your chosen ride height when you turn the key.

The second setting that ensures I never need to adjust anything unless I want to is the ‘preset maintain’ feature. The V2 ECU monitors air pressure and maintains the requested settings at all times. If I wanted to, I could literally hide the controller and throw you the keys and you would never even know the car is on air.

With the installation of the Air Lift suspension system, I now have the ability to infinitely adjust ride height to my liking, fine tune compression and rebound at each corner, and best of all, enjoy a nice smooth ride for my daily driver. There’s no reason to cringe when approaching a pothole, and if I want to slam the car at a show, I can do that too.
Keith Charvonia
Instagram: SpeedhuntersKeith
keith@Speedhunters.com
The Speedhunters Scion Tuner Challenge build
More Scion-related stories on Speedhunters


very nice, id probably get a different gauge and maybe paint the tank as well but I do like seeing it. Its just not quite clean enough as is.
This build keeps getting better and better! I think the exposed tank/gauge is pretty cool, definitely would look cool with sharper housing and gauge that match. Can't go wrong with spray in bed liner! I use that stuff everywhere...
Thanks for the Friday read Keith, this thing looks so good low down with the fender tuck!
The visible tank is cool, good engineering
I was thinking if the air-tank would fit behind the bumper and lo and behold, that's where you mounted it - very cool and will look badass when you get the other gauge in for sure.
I will have to remember the playdough trick though...
I feel really, really, really dumb for not having thought to pressurize the system like Brian showed you.
Tank behind the bumper is a great touch, I'd probably spray it white myself. My only worry would be some kid trying to steal the gauge or something.
Your sir, are an expert craftsman of the automobile.
Why the different wheel/tire on the rears for the dyno?
At the medium driving setting does it feel too soft? Since the spring isn't fully compressed with air I would think the suspension would be soft and bounce a lotj
Front Lip off for repairs?
I actually had a sidewall puncture so put my old wheels on temporarily. It did save some tread anyways. The knurled roller on the dyno eats up tires.
Not at all, it rides great with the bag partially inflated. Its much worse when fully inflated actually, it's way too stiff to drive on.
Haha it does seems bit vulnerable there.
I thought I would get bunch of hate mail for the air tank. Glad you guys dig it too!
2GR-FSE or 3GR-FSR are the perfect engine swap for these FR-Ss. Twin turbo instead.
Love the engine setup, exhaust and the sound.
Really love the fenders, but not big on the air ride or the placement of the tank.
Overall awesome build.
So whats the go with that air management sysyem? Sounds like they straight up copied accuairs e-level system ideology but made it look half as good?
Feel free to throw me the keys!
It's a 'sweet' looking ride!
A true hard parker
Keith first of all great article , but i've a question : how do you widen the track i know there are spacers but i see some widebody builds that make a car 10 to 20 cm wider how do they do it?
Intrested to hear how you like the air ride at the track . Car looks great
@BBB E-level is height sensor based, Autopilot is pressure based.
Different beasts.
KeithCharvonia My main concern is it is vulnerable in a rear-end collision. DaveT was actually on the same air system when he was rear ended, but with the tank in the trunk the system maintained its pressure perfectly.
In a write-off situation you don't really care whether you can drive home or not; but in a fender bender I'd be worried about the tank's vulnerability. Lose all your air and its tough to get the car towed without inflicting further damage.
Keith your car looks amazing!
I really like that you can see the air tank. It makes the car feel a lot more unique and handcrafted.
I think that's a great place for your tank... if you want it blow in a fender bender.
JustinOdijk Very wide wheels, wider hubs, massive spacer(I've seen 50mm spacers used on the rears of a Porsche)
It's below the crash beam and the car is lowered. It won't get hit unless a go cart rear ends me.
Thanks!
Wheel offset mostly. I have thin adapters that also add to the track width.
A true daily driver.
Car looks awesome bruh. Not a fan of air suspension but I guess when you want to go low it has its advantages. I am a fan of the super charger. =)
Nice article, great technicle aspect and love reading the way everything is developed and problems overcome.
Personally not a fan of such a low ride height or air suspension but hey not my car.
Otherwise, looks good.
I heard engines running E85 have shorter lifespans than 91-100 RON. Is that true?
Keith, love both the suspension and supercharger.
For the tank gauge, I would suggest finding a nice black water filled gauge to match the black fittings and somehow hide the Teflon. I also wouldn't worry about someone stealing the gauge if the gauge/fitting assembly can't be rotated once the bumper is in place, unless the stock diffuser can be moved that far to allow rotation then you can ignore this.
Amazing work - keep it up and looking forward to the next update!
more power, more low...more awesome!
rook56 The biggest issues are in the fuel system. E85 is really tough on plastics and rubbers. Modern fuels are generally E10 though, so newer car fuel lines are built to handle the abuse.
rook56 Haha I hope not! I run it sparingly anyways since my clutch can't handle it at the moment, plus the stations is out of the way for me to fill up with E85.
Your 'easter egg' is a wonderful one! It would have been perfect to sit the fittings and gauge perpendicular though, but I understand the initial plan was to reinstall the reverse light. Very cool nonetheless.
Steve Hayward KeithCharvonia DaveT It's something I've often thought about too, but there are plenty of manufacturers who install the tanks in what some might consider dubious locations without issues. It would take a lot of force to break a tank open, I'd imagine the mounts would give way first?
Love this, Keith, and love the detail in the write up. Always learn a thing or two!
Paddy McGrath Steve Hayward KeithCharvonia DaveT
Actually Steve in my situation the tank legs bent (as Paddy describes) pushing the tank into my compressor and breaking the fitting which resulted in a loss of tank pressure.
However because of the way the autopilot works my ride height stayed the same and I didn't run into any issues with towing and the like.
Wasn't able to raise the car though which kinda bugged the tow truck driver.
SRT FTW Thanks!
Paddy McGrath Thanks Paddy! Are you going to bag your car now??
DaveT Paddy McGrath Steve Hayward KeithCharvonia Yeah I think the fittings, especially the brass ones, would be most susceptible to damage. An aluminum tank would likely just deform.

Can we stop tempting fate now??
DaveT Remember the old valves that released the air when they didn't have pressure behind them? Fortunately the new stuff doesn't work that way.
I still want to, just can't afford it / justify the cost at the minute. It's not as if I'm rolling around on poverty suspension either!
KeithCharvonia DaveT
Yeah. As much as people don't want to admit it air has come quite a long way!
love the fact there is no tirebomb on your rear tires...
KeithCharvonia Great job on you ride! And thanks for doing a great job describing the install of our air suspension. You took what we give and made it your own. Keep us posted on how you like living with your creation as a daily. It seems some people on here have not had the opportunity to experience just how well a properly designed air suspension rides and handles! And how having the ability to raise a car up to clear obstacles changes the game when it comes to lowered cars. I hope you get the chance to make some of these guys believers...
And I want a ride in that thing the next time I'm in town!
While your crash bar is light and impressive in 2015, what about this crash bar that Toyota used to use in 1991? It's all aluminum, super strong and super light. So, where exactly is the progress here? Yes, it's a Soarer.
greenroadster you do realize that he changes the actual crash "towers" that absorb and take the hit? That's why you shouldn't drive it on the road and that's also where a lot of the weight savings are. The actual crash bar is quite thin if it's made from steel. And many many cars have used Aluminium for the crash bar not just the Soarer, it all depends on how the rest of the front is designed to handle impact
Wow nice work. I enjoyed this read. Very cool stuff!
jdmRob Ha, that's the tire I replaced due to a sidewall puncture.
AirLift_Brian KeithCharvonia You got it! Thanks for your support, as always.
true colors are chic http://friv4schoolonline.net/
linken200 greenroadster My B5 Audi A4 has an aluminium crash bar integrated into the front bumper, but the fancy part I noticed was the crash towers are actually filled with compressed silicon or something. Heavy as heck and I'm pretty sure I ruined them when I drilled into them for an intercooler mount and all this white stuff came shooting out haha.
I always thought it was neat how the crash bar on the Audi is attached to the bumper cover and only two bolts hold the whole bumper assembly to the crash towers. Makes it real easy to pull the entire front end for timing belt service