
Holy crap! I flipped my car and I haven't even gotten out of my garage! Don't worry, no Mazda's were hurt in the making of this picture. I apologize in advance for this post, as there is nothing glitzy or glamorous here, just straight up elbow grease and hard work. And I also apologize, a few of the pictures were taken with my iPhone, and probably when it was covered in metal shavings which doesn't help.

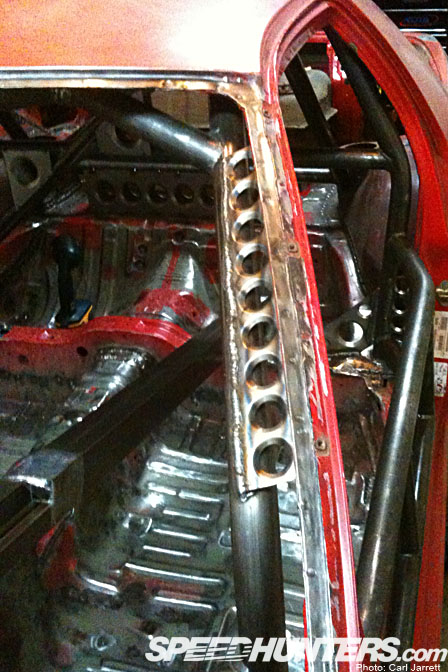
I picked up some dimple dies from a company in Texas that sells them on eBay, great purchase IMO. They are bolt through design so no need to use them in a press, of which I don't have. I took some pictures of one of the first gussets I've made since I'm such a geek for new tools. I spent a good solid day cutting up sheet steel and making parts that look like they are straight out of a B52 bomber. I also picked up a 12" Milwaukee chop/mitre saw the other day which I'm geeking out about right now.
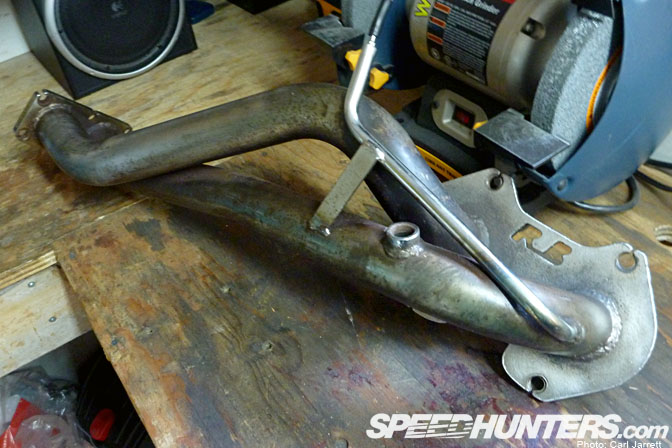
I've also started getting some parts I'll need for the build. The header is from Racing Beat, its thier race version with equal length 2" OD header tubes. I've also picked up some Turbo II driveline parts. A TII clutch type LSD, driveshaft, axles, and last but not least, a JDM TII transmission from a low mileage car. The JDM trannies are great for the track since they have closer ratios than the North American spec transmissions. I've purchased a 12lb Racing Beat aluminum flywheel as well which will work nicely once I figure out which clutch to run. I'm also in the process of ordering the suspension and body parts I'll need for the build, so things are progressing along on that front.
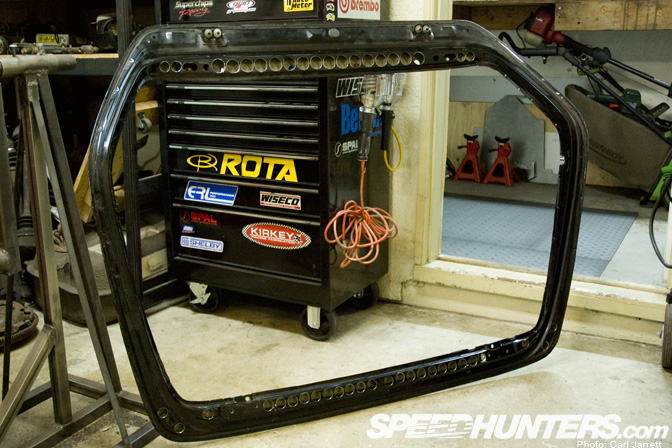
I spent a bit of time making a mess in the garage, smashed the rear glass out of the hatch, wow that glass is heavy! I've managed to get the rear hatch down to 13lbs, so once I add the lexan it should be around 18-19lbs complete. I'll be securing it with pins rather than the stock latches since they are heavier and more complex. At some point I'd like to make a mold of this and produce a carbon version but its not a big priority yet.
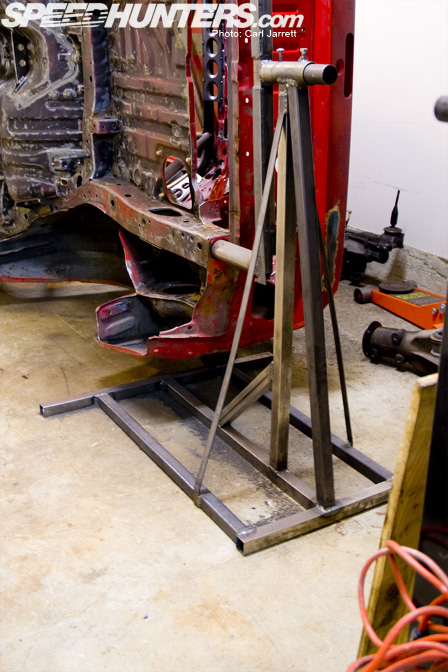
My buddy Dave came over and helped me create these ghetto rotisserie stands! Our first attempt was a bit too flexible… trust me, it didn't look safe. After adding some triangulation they are very stiff, and hold the 5-600lb frame with ease. All said and done I spent about $100 on the steel and it took us the afternoon to make the 2 stands, not as fancy as a $1000+ rotisserie, but also not $1000+! Also for the amount of time I'll need these, I just couldn't justify the cost. I did manage to get the car onto the stands on my own, while the rest of my house slept, I only almost dropped it once.

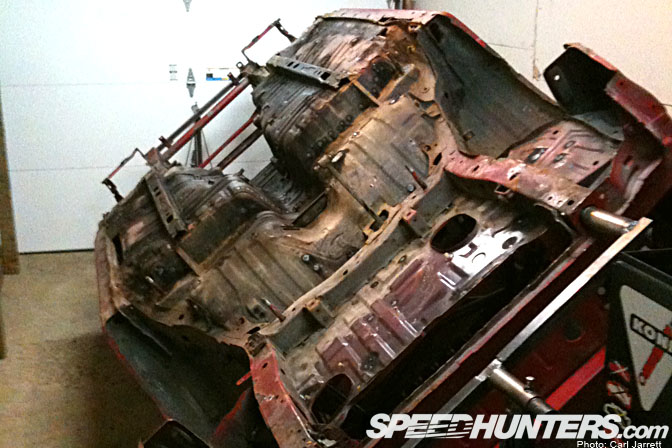
If you notice the first pic of this post, there is about 400,000kms of oil, mud, crud, and rotten undercoating stuck to the underside of the car. I wanted to do this the right way, the first time, but instead, I cheaped out, I decided to just use various wire wheels, and angle grinder, and a LOT of time to clean up the underside. My next project will definitely be media blasted or acid dipped (by the way, anyone have an original Fiat 500 that needs restoring they want to sell to me?)
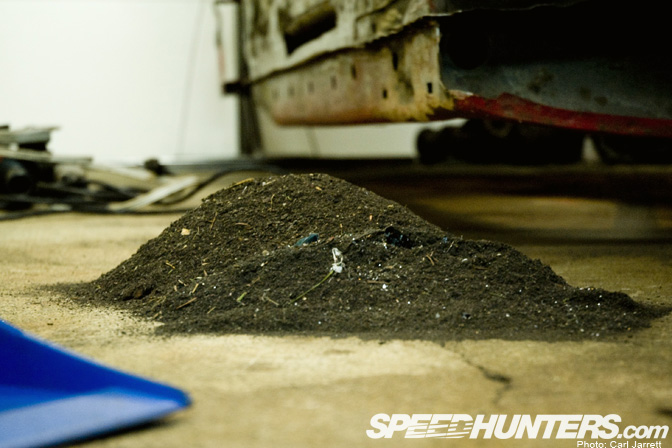
I went through 3 twisted wire brushes in a matter of a few days. The end result? A pretty clean underside, and a pile of crud that weighed close to 10lbs, no joke.
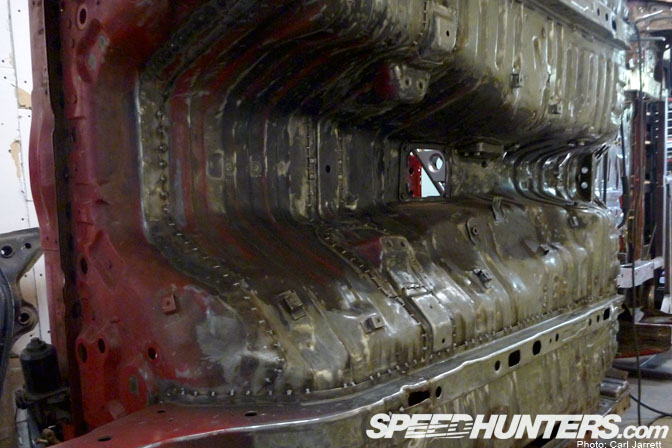
Once I got all that crap off, I spent the last few days stitch welding the underside of the car. Just finished it last night, just in time too, as I ran out of welding gas right at the end. You can still see some paint on the bottom, but I'm not too concerned with that as there is no chance of rust or anything underneath.

After creating all the gussets I needed for the cage, I started welding them in. That's where I'm at now and will finish all the welding in the next couple of days for the gussets with the car still up on the rotisserie.
I've tied the cage to the chassis in another 10+ spots on the car which will help with a car of this age. Next step is to find a racing seat that fits and fab up the seat mounts and a back brace if I need it. I've had a tough time finding a seat tall enough for my long torso, being 6'4" and a 33" waist is tough when shopping for seats, as the bigger seats are made for wider waists. I may end up getting a regular seat and taking the bottom cushioning out so that the top/rear harness slots are high enough to get the proper angle going over my shoulders. Can anyone recommend a good race seat that might fit my frame?
I also need to spend a bit of time with the last few welds under the car, once that is done (hopefully this weekend), I can start to paint the chassis. I've decided to go with an epoxy primer and a Mazda white for color. Once that is done I can begin to re-assemble the car, which is where it starts getting exciting, no longer pulling things apart, but starting to get them back together!
I lost some motivation in the last few months, having to clean up the car and all the work needed for the chassis, but I've got all that back and more, so hopefully I'll be updating more often in the coming weeks. You can also follow me on Twitter @jarrettracing
- Carl
OFFICIAL SPEEDHUNTERS SUPPLIERS


??? ?????)) ?? ???? ?????? ?????????. ??? ????? ?? ????? ? ?????????????. ????? ??????)) ?? ??????? ??????????? ???????!
Good read! Thank you for sharing your project/build.
Alex Mann: I don´t agree with you
i ? speedhunters
Carl,
I'm a professional race fabricator and i can say that there is room for improvement on the fab side of this project. But dammit, i'm glad to see regular guys jumping in and doing hardcore car builds. Really man, i know guys that work in the industry that don't have the guts to do this sort of work without someone there guiding them. Keep at it man.
ambitious build. cant wait to see the end result.
Hey mate.. love following the build, am doing up an old FC as well. In regards to seats, hit up Racetech (http://www.racetech.co.nz/) they make seats for all shapes and sizes!
It looks like budget is a big concern to you but sometimes saving money and cheaper is not always better. Your definitely showing a lot of effort but just don't try to cut so many corners.
That's a big project! For the seat, you might think about getting one that's correct for your height, then pouring a foam insert to bring it in to your size. That's how endurance racing teams with multiple drivers handle it. Good luck, and thanks for sharing!
Thanks Matt, yes I definitely agree. If I did the cage over again, I could definitely do a better job, and there are certain things I just don't care enough about, like what a patch looks like or how tidy my welds are. You're right though, its daunting diving into this stuff, but no better way to learn than trying! I have no qualms asking for help or questions on something I don't know how to do, as everyone at some point didn't know how to do something before they got good at it. Have any of your builds you can show to us? Love to see anything.
Cheers,
hats off mate, good on ya. nothing like doing it yourself and having the pride at the end because no matter what it looks like you built it. keep up the posts.
Sweet!
Looks great so far. Those dimple dies look like they make some clean cuts, I think I might have to pick up a set.
Nice Inspiration for DIYers that own FC
Good work!
you should look into Kirkey for your seat. they're aluminum so if you need to adjust it to fit your frame you can always modify the seat to get it to work
Good job.
nice carl!
pre-kudos to your project mate
the "shaving" scraps reminds me of a car that's been rebuild in my home country
visit here for more info:
http://www.zerotohundred.com/newforums/honda/301187-restoration-progress-of-soichiro-hondas-gem-1965-honda-s600.html
cheers
I had forgotten about this project. Glad to see it back and moving along. Gonna be sweet!
I'm 6'4 with a 34 waist and I run a kirkey intermediate road race seat. The seats come in multiple sizes and laybacks. They have a measurement guild on there website.
Looking great man, keep up the good work. That first reply by Alex is awesome. Foreign keyboards kick all sorts of ass.
Nice, I can't wait to see some more of your work
Love reading stuff like this!
Best of luck in the build! Keep us posted!
Bride Gias w/ Low Max
Best post I've seen in a long while.
Looking for a seat?? Thought of a custom?? Heard of Butlerbuilt??
http://www.butlerbuilt.net/products_construction.html
It has been a long time since the last update and I am happy to see the project is still going forward. Love the ghetto rotisserie!!!
Revelj Motorsport
he says what he and friends build in Ekatirinburg(Russia) car for time attack like this rx7
@MATT: I have seen alot worse fab work on a nascar chassis. I have alot of confidence in what I see.
CARL!!!! "I did manage to get the car onto the stands on my own, while the rest of my house slept, I only almost dropped it once." I have been there way too many times. hahahahah
Q: do you have gusset tie-ins for the Upper B pillars?
Try , http://www.kirkeyracing.com for seats!
use some aircraft stripper next time u need to take off some undercoat...just apply and watch the magic happen!! (make sure u use protection, lol!!) great build,keep up the good work!!
Great stuff Carl! I can't wait to see the final product, but it's definitely inspiring to read your progress!
.
i'm not too sure about racing seats since i only really know about mine, but i run a Sparco Evo and when i take the bottom cusion out it's still semi-comfortable and it drops me like two inches, putting the seatbelt holes *just* a bit too high for my taste, but maybe perfect for you? for the record i'm 6'0" and about a 32 waist so it's comparable i'd say, unless you've already checked out Sparco options
Looks good! By time you finish the body Mazda may be producing the DI rotary blocks patented last year. That would be hot fire.
great project! Can we got more BUILDS on Speedhunters?
Sparco Ultra has huge belt holes, I'm 6,2" and it has more room than i need for belts and fits my 34" waist. Its also FIA approved if your looking for that
Swerv, yes I do have some tie ins on the roof bars front and rear, b-pillars upper and lower, and the rear cross brace. Quite a few, some small, some big.
Thanks all for the seat options. Im going to try to check out some Sparco's and the Bride as a couple of people have suggested that. Im also contemplating the Kirkey or a full custom seat. I like the idea of a custom seat, but it might just end up being a huge load of work.
I'd love to try the aircraft stripper, I might be doing another project next year so will keep that in mind.
Will update more often from now on, project is gaining momentum.
No need to apologize for anything , best of luck in the build , can't wait to see it finished.
Lookin good bud! keep on rockin man! your already off to an especially stiffer chassis than mine! hopefully 2.0 can keep up with your ride!
im bout the same height and had similar problem finding a seat, if you can get hold a racetech seat they have tall versions which should do the trick
Hi Carl! Love the build, and it's great to see someone just jumping in at the deep end. That gives us other mortals some inspiration and motivation, that we might be able to do the same
As for seat choice, if you can find a Sabelt dealer, their Taurus seat all have 940mm total height, compared to most full buckets 860 - 880mm (Sparco among others). It comes in M, L and XL sizes, where the only big difference, is in the lower area, ranging from 380mm for the M up to 410mm - 480mm on the XL.
I have a graph of the Sabelt lineup if you need it?
Great build there !
Have you tried the Bride Low max seats? it should be low and fit !
Carl, if your after an FIA approved seat thats custom made to fit you try Motordrive in the UK, their website is http://www.motordrive.com/acatalog/catalogbody.html, i'm sure they can ship almost anywhere.
uhhh... na?

great job otherwise!